Showing 2378 items matching "students work"
-
 Ithacan Historical Society
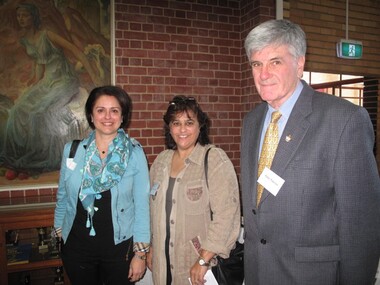
Photograph, Honouring Loula Rodopoulos, 2015
... . Loula was a former student at MGHS. She worked tirelessly... Rodopoulos. Loula was a former student at MGHS. She worked tirelessly ...Vicki Kapourlakos, Kristalenia Collins and Peter Paxinos were some of the members of the Ithacan community that attended a function held at MacRobertson Girls High School (MGHS) to honour the work and contribution to community of the late Loula Rodopoulos. Loula was a former student at MGHS. She worked tirelessly for community and was a founding trustee and member of the Victorian Women's Trust. Her parents, Panoyiannis and Evgenia Raftopoulos, were Ithacan Greeks.A coloured photograph of two women and a man standing in front of a painting at a function. -
 Bendigo Historical Society Inc.
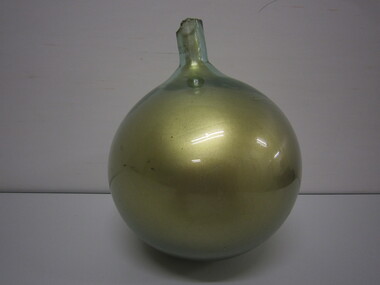
Decorative object - GLASS BALL (GOLD COLOURED) BENDIGO GLASS WORKS 1920 CASSIDY, KOONDROOK, EDNA PEACOCK, 1920
... the connection between Jannaya McKenzie (work experience student... between Jannaya McKenzie (work experience student) and the bowl ...Bowl previously owned by donor's mother and father Mr and Mrs Cassidy of Koondrook. Mr and Mrs Cassidy (aged 25 and 22 respectively) were honeymooning in Bendigo on 18th March 1920 and obtained the bowl from the Bendigo Glassworks. This was passed on to their daughter Edna Peacock. Associated with the bowl is an article written by Jim Evans for the Bendigo Advertiser December 13th 2012 in his 'History Lives' column. The article illustrates the connection between Jannaya McKenzie (work experience student) and the bowl that was obtained by her ancestors. Green glass Ball made by Bendigo Glassworks 1920. Approx. 20cm diameter with narrow neck (broken) Interior is hollow and painted with what is purported to be gold dust. koondrook. edna peacock., cassidy, artwork -
 University of Melbourne, Burnley Campus Archives
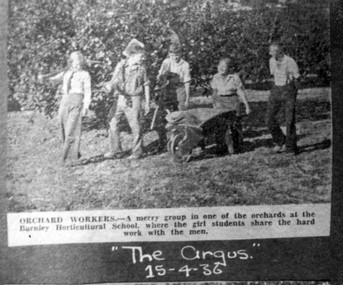
Photograph - Black and white prints, A.P. Winzenried, Orchard Workers and Tall and Short, 1936-1990
... students share the hard work with the men." 4 female students... School, where the girl students share the hard work with the men ...Photographs taken by A.P. Winzenried to be considered as a possible illustration in, "Green Grows Our Garden."2 copies black and white photographs. Copy of photographs in, "The Argus." Top 1., 15-4-36, "Orchard Workers - A merry group in one of the orchards at the Burnley Horticultural School, where the girl students share the hard work with the men." 4 female students and a male instructor in the Orchard, carrying tools and wheeling a wooden wheelbarrow. Bottom 2. -4-36, "Tall and Short - Brook Gipps (left) aged 19 years, height 6ft 1 ⅟₂in., and Graham Grant, aged 17 years, height 4ft., in the orchard at the Burnley Horticultural School." 2 male students holding spades in the Orchard.a.p. winzenried, green grows our garden, female students, brook gipps, graham grant, orchard, students working outside, tools, wheelbarrow, male students -
 Federation University Historical Collection
Booklet, J.A. Hoskin & Son, Ballarat School of Mines Students' Magazine, 1954, 1954
... , Eureka Stockade, Two ex-students tell of their work... Stockade, Two ex-students tell of their work and conditions in East ...Editorial, Principal's Page, Prominent Personalities, Eureka Stockade, Two ex-students tell of their work and conditions in East Africa and Canada, The Art School, Literary Society, Boys Sport, Football, Cricket, Baseball, Athletics, Tennis, Chris Sanos - another ex-student describes his recent trip to Greece, Junior School, Ballarat wins Final - Football Premiers 1954, Some Impressions of London, House Notes, School Council. Members of Staff, Roll Call Diploma Students, Junior Technical School Boys' and Girls' Students ListingGray soft covered magazine with red and brown titlesballarat school of mines, magazine, j. collier, john skuja, janice wilton, murray gillan, neil andrews, ellen freemantle, alan johnson, graeme willey, diana mainwaring, b. v. mcdougall, margaret little, lance matthews, philip davis, john barnes, cliff restarick, philip kempe, barry jones, harold everett, j. jenkin, r. howard, d. lavery, j. williams, j. barnes, j. murray, j. wolfe, j. clelland, t. gallagher, w. maxwell, n. andrews, b. bellingham, f. shearer, n. spears, i. schunke, d. schmidt, g. willey, r. furlong, g. rasdell, b. tozer, l. matthews, w. saggers, b. taylor, j. watts, a. johnson, b. matthews, r. dunlop, b. mclennan, g. ditchfield, m. gillin, j. cleelland, b. singleton, d. overall, g. crawford, chris sanos, nancy rimmington, janice tonkin, herbert "andy" andrews, leonard (a.p.c) doull, harold m. everett, murray "gilligan" gillin, alan "johno" johnson, khoo teng seong, douglas "myxo" lockhead, lancelot "willey" matthews, bruce "frugal" mcdougall, "aal" pitzen, john "cheesy" skuja, brian francis "tailspin" taylor, john "tucks" watts, lola andrich, j. spencer, r. cutter, p. collier, g. paddle, n. richards, i. pike, b. cushion, b. knight, g. van berkel, d. stevens, n. stevens, b. stevens, l. major, l. copeman, k. norman, n. hodder, l. johns, l. curtis, h. hay, l. furlong, g. new, j. hamilton, r. day, a. clarke, b. parker, p. agrums, l. dean, w. swan, r. carlson, t. white, m. walsh, r. gilbert, w. edmends, b. vurlow, d. wakeling, a. haywood, d. sarah, k. rogers, l. cook, j. mcleod, p. hatton, p. fisher, r. lambert, j. vincent, t. lugg, g. matthews, w. etty, n. twaits, m. o'brien, w. davidson, i. lightfoot, p. cahill, n. slocum, d. martin, j. leckie, marjorie garner, r. hall, i. beaumont, barbara o'connell, b. duthie, l. boyd, i. kinnane, d. baldock, p. nunn, j. strickland, d. robertson, n. everett, b. whittle, w. widdop, j. richards, b. tresize, k. buchanan, m wunhym, j. caddy, g. kerr, j. collins, r. sansom, i. gitsham, k. weightman, g. gilmer, e. waller, r. mcbride, j. jardine, lynette reynolds, marion ritchie, p. mchenry, h. cromb, c. veal, j. van buerghel, g. templeton, k. page, e. tozer, b. wilson, g. minehan, g. smith, j. bennett, n. pike, l. reynolds, m. ritchie, m. wunhym, l. willis, m. nolan, j. rogers, e. kinnane, g. cody, j. mills, j. cunningham, m. eggleton, n. rimmington, m. marshall, n. gay, e. hosking, v. jolly, j. mchenry, rosalie hall, brian duthie, m. lesins, l. hotchin, g. hill, e. richards, l. jardine, m. roberts, i. siver, d. mclennon, k. warhurst, r. rowse, e. snowball, g. jill, n. bromley -
 Federation University Historical Collection
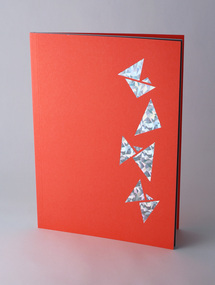
Book - Catalogue, GDMM 2014, Bachelor of Visual Arts, Graphic Design & Multimedia, Federation University, Ballarat, 2014
... became Federation University Australia. This is the work... University Australia. This is the work of students at the Camp Street ...In 2014 the University of Ballarat took control of the former Monash University campus in Churchill Gippsland, and UB became Federation University Australia. This is the work of students at the Camp Street Campus, Ballarat. Lecturers listed as Ben Mangan and Chrissie Smith. Student list: Fiona Appledore, Kellie Beatty, Ella Byworth, Leah Cushion, James Daniel, Chris Drummond, Peter Gaulke, Ashlen Gloury, Harley Hollow, Celina Mulgrew, Katrina Organ, Lucinda Pendock, Jeremy Pietsch, Heidi Rixon, James Robertson, Jayde Romey, Stevi Thomas, Melissa Thompson. Final page includes list of sponsors.40pp full colour book plus cover 4pp perfect bound cover, bright watermelon-orange card with holographic foil.university of ballarat, federation university, graphic design, multimedia, bachelor, degree, camp street campus, arts academy, fiona appledore, kellie beatty, ella byworth, leah cushion, james daniel, chris drummond, peter gaulke, ashlen gloury, harley hollow, celina mulgrew, katrina organ, lucinda pendock, jeremy pietsch, heidi rixon, james robertson, jayde romey, stevi thomas, melissa thompson -
 Melbourne Legacy
Document, Our Children and Anzac Day, 1937
... A history of the beginnings of the Legacy Anzac Student... A history of the beginnings of the Legacy Anzac Student ...A history of the beginnings of the Legacy Anzac Student Commemoration service. It mentioned that Legacy was delegated the job of providing speakers in schools to discuss Anzac Day with the students. The volume of work was immense and after consultation with the Director of Education, Mr Frank Tate, it was decided to hold a student only Anzac Observance ceremony in 1930. In 1931 Legacy took over the event and organised a radio broadcast to schools through 3LO. It was estimated the broadcast reached between 200,000 and 300,000 students. The bulk of the document is a recount by Legatee E W Mylrea in 1937, about the development of the service. He was a Past President of the RSS&AILA (Vic) and one of Victoria's most distinguished head-masters. Was in a binder of documents that is passed from an outgoing President to the incoming President. It is primarily from the 1930s to 1990s. Most documents are being catalogued separately.A record of the beginnings of the Anzac Commemoration for StudentsWhite foolscap paper x 2 pages with black type about the first Legacy Student Commemoration services.anzac commemoration for students -
 Broadmeadows Historical Society & Museum
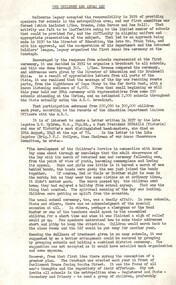
Booklet - School Yearbook, Salesian College, Rupertswood, "Certantes in Vita" 1977, 1977
... by a strong sense of identity and tradition, as students and staff... by a strong sense of identity and tradition, as students and staff ...School yearbook, presenting details of the events and students of Salesian College, Rupertswood, Sunbury.A stapled, card-covered, sixty-four-page book with loose card cover.non-fictionSchool yearbook, presenting details of the events and students of Salesian College, Rupertswood, Sunbury.salesian college, rupertswood, sunbury, yearbook, "certantes in vita", 1977 -
 Ringwood and District Historical Society
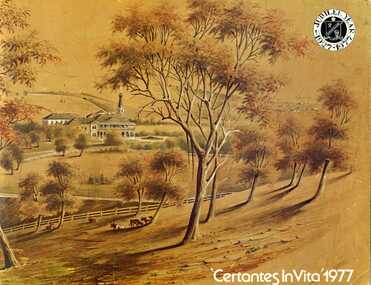
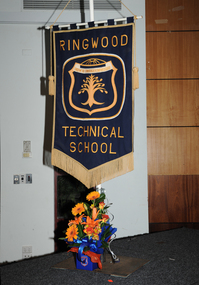
Photograph - Collection, Ringwood Technical School 2010 Reunion Photographs - Record 1 of 6
... , helped by several other past students. Joan worked exceptionally... was organised by Joan Pickford, helped by several other past students ...Photographs from Ringwood Technical School Reunion. Note: If anyone in these photographs does not want their image to be visible on the Victorian Collections public website, please email [email protected] with a request to remove that photo. This Reunion was held at York on Lilydale, Lilydale, Victoria on March 27 2010, to commemorate the 50th anniversary of the school commencing in February 1960 in the newly-completed building as a co-educational campus. Prior to that it had operated on two separate, temporary campuses until the new school was ready: - at Ferntree Gully Technical School in 1958 for 100 Form 1 boys, then the following year in spare rooms at Lilydale State School for 200 Form 1 and 2 boys - at Box Hill Girls' Technical School in 1959 for 100 Form 1 girls The Reunion was organised by Joan Pickford, helped by several other past students. Joan worked exceptionally hard to organise the reunion and the materials displayed on the night. The beautiful RTS banner that we all walked past in the school's main corridor all those years ago, was there in all its glory - the only RTS relic that wasn't showing its age on the night. It was a great event and well-attended. The noise of people chatting and swapping stories was deafening. Some of the 1958-59 original students, and teachers from the1960s onwards were there. People brought along their photos and memorabilia. Some wore their ties and badges which still fitted after all those years. One former prefect wore his old blazer, which must have shrunk in the wardrobe but reminded many of us of those carefree times at school.. Best of all was the re-kindling of memories, and renewing and consolidation of friendships started at the school all those years ago. (This background provided by Liz Seaton, September 2022) This record contains 10 of the 57 photographs taken at the RTS Reunion 27 March 2010. Records 21009-1 to -6 contain the full collection. The photographs were copied from a CD provided by Photographer Belinda Dinami. rts, ringwood tech -
 Ringwood and District Historical Society
Photograph - Collection, Ringwood Technical School 2010 Reunion Photographs - Record 2 of 6
... , helped by several other past students. Joan worked exceptionally... was organised by Joan Pickford, helped by several other past students ...Photographs from Ringwood Technical School Reunion. Note: If anyone in these photographs does not want their image to be visible on the Victorian Collections public website, please email [email protected] with a request to remove that photo. This Reunion was held at York on Lilydale, Lilydale, Victoria on March 27 2010, to commemorate the 50th anniversary of the school commencing in February 1960 in the newly-completed building as a co-educational campus. Prior to that it had operated on two separate, temporary campuses until the new school was ready: - at Ferntree Gully Technical School in 1958 for 100 Form 1 boys, then the following year in spare rooms at Lilydale State School for 200 Form 1 and 2 boys - at Box Hill Girls' Technical School in 1959 for 100 Form 1 girls The Reunion was organised by Joan Pickford, helped by several other past students. Joan worked exceptionally hard to organise the reunion and the materials displayed on the night. The beautiful RTS banner that we all walked past in the school's main corridor all those years ago, was there in all its glory - the only RTS relic that wasn't showing its age on the night. It was a great event and well-attended. The noise of people chatting and swapping stories was deafening. Some of the 1958-59 original students, and teachers from the1960s onwards were there. People brought along their photos and memorabilia. Some wore their ties and badges which still fitted after all those years. One former prefect wore his old blazer, which must have shrunk in the wardrobe but reminded many of us of those carefree times at school.. Best of all was the re-kindling of memories, and renewing and consolidation of friendships started at the school all those years ago. (This background provided by Liz Seaton, September 2022) This record contains 10 of the 57 photographs taken at the RTS Reunion 27 March 2010. Records 21009-1 to -6 contain the full collection. The photographs were copied from a CD provided by Photographer Belinda Dinami. rts, ringwood tech -
 Ringwood and District Historical Society
Photograph - Collection, Ringwood Technical School 2010 Reunion Photographs - Record 3 of 6
... , helped by several other past students. Joan worked exceptionally... was organised by Joan Pickford, helped by several other past students ...Photographs from Ringwood Technical School Reunion. Note: If anyone in these photographs does not want their image to be visible on the Victorian Collections public website, please email [email protected] with a request to remove that photo. This Reunion was held at York on Lilydale, Lilydale, Victoria on March 27 2010, to commemorate the 50th anniversary of the school commencing in February 1960 in the newly-completed building as a co-educational campus. Prior to that it had operated on two separate, temporary campuses until the new school was ready: - at Ferntree Gully Technical School in 1958 for 100 Form 1 boys, then the following year in spare rooms at Lilydale State School for 200 Form 1 and 2 boys - at Box Hill Girls' Technical School in 1959 for 100 Form 1 girls The Reunion was organised by Joan Pickford, helped by several other past students. Joan worked exceptionally hard to organise the reunion and the materials displayed on the night. The beautiful RTS banner that we all walked past in the school's main corridor all those years ago, was there in all its glory - the only RTS relic that wasn't showing its age on the night. It was a great event and well-attended. The noise of people chatting and swapping stories was deafening. Some of the 1958-59 original students, and teachers from the1960s onwards were there. People brought along their photos and memorabilia. Some wore their ties and badges which still fitted after all those years. One former prefect wore his old blazer, which must have shrunk in the wardrobe but reminded many of us of those carefree times at school.. Best of all was the re-kindling of memories, and renewing and consolidation of friendships started at the school all those years ago. (This background provided by Liz Seaton, September 2022) This record contains 10 of the 57 photographs taken at the RTS Reunion 27 March 2010. Records 21009-1 to -6 contain the full collection. The photographs were copied from a CD provided by Photographer Belinda Dinami. rts, ringwood tech -
 Ringwood and District Historical Society
Photograph - Collection, Ringwood Technical School 2010 Reunion Photographs - Record 4 of 6
... , helped by several other past students. Joan worked exceptionally... was organised by Joan Pickford, helped by several other past students ...Photographs from Ringwood Technical School Reunion. Note: If anyone in these photographs does not want their image to be visible on the Victorian Collections public website, please email [email protected] with a request to remove that photo. This Reunion was held at York on Lilydale, Lilydale, Victoria on March 27 2010, to commemorate the 50th anniversary of the school commencing in February 1960 in the newly-completed building as a co-educational campus. Prior to that it had operated on two separate, temporary campuses until the new school was ready: - at Ferntree Gully Technical School in 1958 for 100 Form 1 boys, then the following year in spare rooms at Lilydale State School for 200 Form 1 and 2 boys - at Box Hill Girls' Technical School in 1959 for 100 Form 1 girls The Reunion was organised by Joan Pickford, helped by several other past students. Joan worked exceptionally hard to organise the reunion and the materials displayed on the night. The beautiful RTS banner that we all walked past in the school's main corridor all those years ago, was there in all its glory - the only RTS relic that wasn't showing its age on the night. It was a great event and well-attended. The noise of people chatting and swapping stories was deafening. Some of the 1958-59 original students, and teachers from the1960s onwards were there. People brought along their photos and memorabilia. Some wore their ties and badges which still fitted after all those years. One former prefect wore his old blazer, which must have shrunk in the wardrobe but reminded many of us of those carefree times at school.. Best of all was the re-kindling of memories, and renewing and consolidation of friendships started at the school all those years ago. (This background provided by Liz Seaton, September 2022) This record contains 10 of the 57 photographs taken at the RTS Reunion 27 March 2010. Records 21009-1 to -6 contain the full collection. The photographs were copied from a CD provided by Photographer Belinda Dinami. rts, ringwood tech -
 Ringwood and District Historical Society
Photograph - Collection, Ringwood Technical School 2010 Reunion Photographs - Record 5 of 6
... , helped by several other past students. Joan worked exceptionally... was organised by Joan Pickford, helped by several other past students ...Photographs from Ringwood Technical School Reunion. Note: If anyone in these photographs does not want their image to be visible on the Victorian Collections public website, please email [email protected] with a request to remove that photo. This Reunion was held at York on Lilydale, Lilydale, Victoria on March 27 2010, to commemorate the 50th anniversary of the school commencing in February 1960 in the newly-completed building as a co-educational campus. Prior to that it had operated on two separate, temporary campuses until the new school was ready: - at Ferntree Gully Technical School in 1958 for 100 Form 1 boys, then the following year in spare rooms at Lilydale State School for 200 Form 1 and 2 boys - at Box Hill Girls' Technical School in 1959 for 100 Form 1 girls The Reunion was organised by Joan Pickford, helped by several other past students. Joan worked exceptionally hard to organise the reunion and the materials displayed on the night. The beautiful RTS banner that we all walked past in the school's main corridor all those years ago, was there in all its glory - the only RTS relic that wasn't showing its age on the night. It was a great event and well-attended. The noise of people chatting and swapping stories was deafening. Some of the 1958-59 original students, and teachers from the1960s onwards were there. People brought along their photos and memorabilia. Some wore their ties and badges which still fitted after all those years. One former prefect wore his old blazer, which must have shrunk in the wardrobe but reminded many of us of those carefree times at school.. Best of all was the re-kindling of memories, and renewing and consolidation of friendships started at the school all those years ago. (This background provided by Liz Seaton, September 2022) This record contains 10 of the 57 photographs taken at the RTS Reunion 27 March 2010. Records 21009-1 to -6 contain the full collection. The photographs were copied from a CD provided by Photographer Belinda Dinami. rts, ringwood tech -
 Ringwood and District Historical Society
Photograph - Collection, Ringwood Technical School 2010 Reunion Photographs - Record 6 of 6
... , helped by several other past students. Joan worked exceptionally... was organised by Joan Pickford, helped by several other past students ...Photographs from Ringwood Technical School Reunion. Note: If anyone in these photographs does not want their image to be visible on the Victorian Collections public website, please email [email protected] with a request to remove that photo. This Reunion was held at York on Lilydale, Lilydale, Victoria on March 27 2010, to commemorate the 50th anniversary of the school commencing in February 1960 in the newly-completed building as a co-educational campus. Prior to that it had operated on two separate, temporary campuses until the new school was ready: - at Ferntree Gully Technical School in 1958 for 100 Form 1 boys, then the following year in spare rooms at Lilydale State School for 200 Form 1 and 2 boys - at Box Hill Girls' Technical School in 1959 for 100 Form 1 girls The Reunion was organised by Joan Pickford, helped by several other past students. Joan worked exceptionally hard to organise the reunion and the materials displayed on the night. The beautiful RTS banner that we all walked past in the school's main corridor all those years ago, was there in all its glory - the only RTS relic that wasn't showing its age on the night. It was a great event and well-attended. The noise of people chatting and swapping stories was deafening. Some of the 1958-59 original students, and teachers from the1960s onwards were there. People brought along their photos and memorabilia. Some wore their ties and badges which still fitted after all those years. One former prefect wore his old blazer, which must have shrunk in the wardrobe but reminded many of us of those carefree times at school.. Best of all was the re-kindling of memories, and renewing and consolidation of friendships started at the school all those years ago. (This background provided by Liz Seaton, September 2022) This record contains the last 7 of the 57 photographs taken at the RTS Reunion 27 March 2010. Records 21009-1 to -6 contain the full collection. The photographs were copied from a CD provided by Photographer Belinda Dinami. rts, ringwood tech -
 Broadmeadows Historical Society & Museum
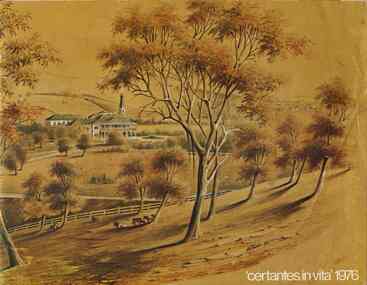
Booklet - School Yearbook, Salesian College, Rupertswood, "Certantes in Vita" 1976, 1976
... of every student. This year was distinguished by a deepening sense... of every student. This year was distinguished by a deepening sense ...School yearbook, presenting details of the events and students of Salesian College, Rupertswood, Sunbury.A stapled, card-covered, forty-eight-page book with loose card cover.non-fictionSchool yearbook, presenting details of the events and students of Salesian College, Rupertswood, Sunbury.salesian college, rupertswood, sunbury, yearbook, "certantes in vita", 1976 -
 Vision Australia
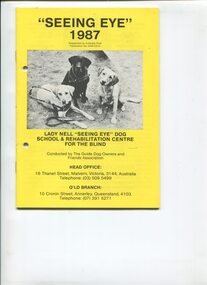
Administrative record - Text, "Seeing Eye" 1987 Lady Nell "Seeing Eye" Dog School & Rehabilitation Centre for the Blind, 1987
... you to work experience students, welcome to Ray Owens... you to work experience students, welcome to Ray Owens ...President's overview of the year including: completion of reception room which joins 16 and 18 Thanet Street, thoughts on the success of the school, attendance at International Dog Guide Conference in London, over 27 years the school has trained over 800 dogs, deaths of Jack Franks and Thelma McKenniariey, assisted actor Robert Menzies portray a blind character in the movie 'Cactus', difficulties in running the hostel and day centre with few qualified people to fill vacancies for the former and lack of volunteer drivers for the latter, decision to close Cairns shop, resignation of Kevin O'Mahoney and difficulties in replacing him, long cane training in Queensland, demand for guest speakers, thank you to work experience students, welcome to Ray Owens, presentation of Anzac Award by Lt Governor at Government House, beginning of in-house breeding program - rather that rely on donations of suitable puppies - with Roz McNaught, Alf Krummel and Dawn Robinson providing and housing these dogs.1 volume with text and illustrationsannual reports, lady nell seeing eye dog school, phyllis gration -
 Federation University Art Collection
Work on paper - Printmaking -Aquatint etching, Elephant Man, 1995
... & Newton International Travelling Bursary, National Students Art..., National Students Art Prize) Worked in private studios in Gaucin ...GEOFFREY RICARDO )1964- ) Born Melbourne, Australia 1984-86 Bachelor of Arts (Fine Art), Printmaking, Chisholm Institute of Technology, Melbourne 1987-89 Printing Assistant at Bill Young Studios, Editioning intaglio prints, King Valley, VIC 1988 Full-time Studio Technician at Printmaking Department, Chisholm Institute of Technology, Melbourne 1989-90 Graduate Diploma (Fine Art), Printmaking, Monash University, Melbourne 1991 Traveled to England, France, Spain and USA (Winsor & Newton International Travelling Bursary, National Students Art Prize) Worked in private studios in Gaucin, Spain and New York, USA 1994-95 Master of Fine Arts, Monash University, Melbourne 1995 Guest Lecturer, Victorian College of the Arts, Melbourne Traveled to Europe and America 1996 Guest Lecturer, Royal Melbourne Institute of Technology, Melbourne 1990-98 Sessional Lecturer, Monash University, Melbourne 1998 Traveled to America and Mexico 2001-05 Sessional Lecturer, The Victorian College of the Arts, Melbourne 2003-10 Printmaking Workshops, Warrnambool TAFE, Warrnambool, VIC 2004 Traveled to Europe, Mexico and Cuba 2005 Lecturer, National Art School (Summer School), Sydney Sessional Lecturer, Monash University, Melbourne Lecturer, Institution of Koorie Education, Deakin University, Geelong, VIC Framed acquatint atchingart, artwork, geoffrey ricardo, ricardo, printmaking, etching, aquatint -
 Federation University Art Collection
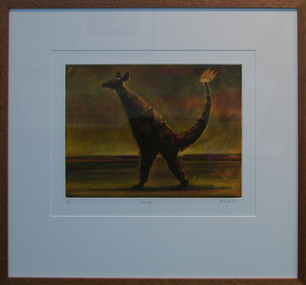
Work on paper - Artwork - Printmaking, 'Homage' by Geoffrey Ricardo, 2005
... & Newton International Travelling Bursary, National Students Art..., National Students Art Prize) Worked in private studios in Gaucin ...GEOFFREY RICARDO (1964- ) Born Melbourne, Australia 1984-86 Bachelor of Arts (Fine Art), Printmaking, Chisholm Institute of Technology, Melbourne 1987-89 Printing Assistant at Bill Young Studios, Editioning intaglio prints, King Valley, VIC 1988 Full-time Studio Technician at Printmaking Department, Chisholm Institute of Technology, Melbourne 1989-90 Graduate Diploma (Fine Art), Printmaking, Monash University, Melbourne 1991 Traveled to England, France, Spain and USA (Winsor & Newton International Travelling Bursary, National Students Art Prize) Worked in private studios in Gaucin, Spain and New York, USA 1994-95 Master of Fine Arts, Monash University, Melbourne 1995 Guest Lecturer, Victorian College of the Arts, Melbourne Traveled to Europe and America 1996 Guest Lecturer, Royal Melbourne Institute of Technology, Melbourne 1990-98 Sessional Lecturer, Monash University, Melbourne 1998 Traveled to America and Mexico 2001-05 Sessional Lecturer, The Victorian College of the Arts, Melbourne 2003-10 Printmaking Workshops, Warrnambool TAFE, Warrnambool, VIC 2004 Traveled to Europe, Mexico and Cuba 2005 Lecturer, National Art School (Summer School), Sydney Sessional Lecturer, Monash University, Melbourne Lecturer, Institution of Koorie Education, Deakin University, Geelong, VIC This aquatint is one of a limited edition of 30 and was printed by Gunnell/Leighfield at Chrysalis Publishing. This item is part of the Federation University Art Collection. The Art Collection features over 2000 works and was listed as a 'Ballarat Treasure' in 2007.artwork, geoffrey ricardo, kangaroo, aquatint, printmaking, etching -
 Federation University Art Collection
Work on paper - Artwork - Printmaking, Ricardo, Geoffrey, 'A Daily Double' by Geoffrey Ricardo, 1990
... & Newton International Travelling Bursary, National Students Art..., National Students Art Prize) Worked in private studios in Gaucin ...GEOFFREY RICARDO (1964- ) Born Melbourne, Australia 1984-86 Bachelor of Arts (Fine Art), Printmaking, Chisholm Institute of Technology, Melbourne 1987-89 Printing Assistant at Bill Young Studios, Editioning intaglio prints, King Valley, VIC 1988 Full-time Studio Technician at Printmaking Department, Chisholm Institute of Technology, Melbourne 1989-90 Graduate Diploma (Fine Art), Printmaking, Monash University, Melbourne 1991 Travelled to England, France, Spain and USA (Winsor & Newton International Travelling Bursary, National Students Art Prize) Worked in private studios in Gaucin, Spain and New York, USA 1994-95 Master of Fine Arts, Monash University, Melbourne 1995 Guest Lecturer, Victorian College of the Arts, Melbourne Traveled to Europe and America 1996 Guest Lecturer, Royal Melbourne Institute of Technology, Melbourne 1990-98 Sessional Lecturer, Monash University, Melbourne 1998 Traveled to America and Mexico 2001-05 Sessional Lecturer, The Victorian College of the Arts, Melbourne 2003-10 Printmaking Workshops, Warrnambool TAFE, Warrnambool, VIC 2004 Traveled to Europe, Mexico and Cuba 2005 Lecturer, National Art School (Summer School), Sydney Sessional Lecturer, Monash University, Melbourne Lecturer, Institution of Koorie Education, Deakin University, Geelong, VIC Framed limited edition print of two running horses being ridden by numerous people. Donated through the Australian Goverment's Cultural Gifts Prorgram by Katherine Littlewood. geoffrey ricardo, available, horses, animals, horse racing -
 Federation University Art Collection
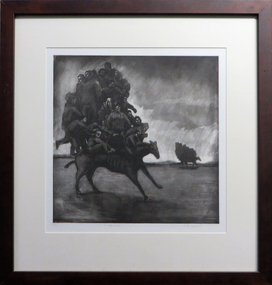
Work on paper - Printmaking, 'Bonfire' by Geoffrey Ricardo, 1992
... & Newton International Travelling Bursary, National Students Art..., National Students Art Prize) Worked in private studios in Gaucin ...GEOFFREY RICARDO (1964- ) Born Melbourne, Australia 1984-86 Bachelor of Arts (Fine Art), Printmaking, Chisholm Institute of Technology, Melbourne 1987-89 Printing Assistant at Bill Young Studios, Editioning intaglio prints, King Valley, VIC 1988 Full-time Studio Technician at Printmaking Department, Chisholm Institute of Technology, Melbourne 1989-90 Graduate Diploma (Fine Art), Printmaking, Monash University, Melbourne 1991 Traveled to England, France, Spain and USA (Winsor & Newton International Travelling Bursary, National Students Art Prize) Worked in private studios in Gaucin, Spain and New York, USA 1994-95 Master of Fine Arts, Monash University, Melbourne 1995 Guest Lecturer, Victorian College of the Arts, Melbourne Traveled to Europe and America 1996 Guest Lecturer, Royal Melbourne Institute of Technology, Melbourne 1990-98 Sessional Lecturer, Monash University, Melbourne 1998 Traveled to America and Mexico 2001-05 Sessional Lecturer, The Victorian College of the Arts, Melbourne 2003-10 Printmaking Workshops, Warrnambool TAFE, Warrnambool, VIC 2004 Traveled to Europe, Mexico and Cuba 2005 Lecturer, National Art School (Summer School), Sydney Sessional Lecturer, Monash University, Melbourne Lecturer, Institution of Koorie Education, Deakin University, Geelong, VICFramed etching with aquatint depicting a silhouette of man in front of a bonfire. Donated through the Australian Government's Cultural Gifts Programme by Katherine Littlewood.LowerLHS 'State AP' Lower RHS 'Ricardo'geoffrey ricardo, bonfire, printmaking, available -
 Federation University Historical Collection
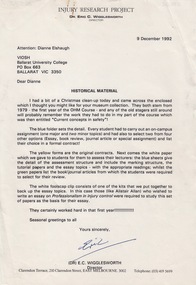
Document - Document - Course Outline, VIOSH: Ballarat College of Advanced Education; Occupational Hazard Management - Current Concepts in Safety
... and knowledge. Document outlines the work students had to do as part... and knowledge. Document outlines the work students had to do as part ...Victorian Institute of Occupational Safety and Health (VIOSH) Australia is the Asia-Pacific centre for teaching and research in occupational health and safety (OHS) and is known as one of Australia's leaders on the field. VIOSH has a global reputation for its innovative approach within the field of OHS management. VIOSH had its first intake of students in 1979. At that time the Institution was known as the Ballarat College of Advanced Education. In 1990 it became known as Ballarat University College, then in 1994 as University of Ballarat. It was 2014 that it became Federation University. VIOSH Australia students are safety managers, senior advisors and experienced OHS professionals. They come from all over Australia and industry. Students are taught active research and enquiry; rather than textbook learning and a one-size fits all approach. VIOSH accepts people into the Graduate Diploma of Occupational Hazard Management who have no undergraduate degree - on the basis of extensive work experience and knowledge. Document outlines the work students had to do as part of the course which was then titled "Current concepts in Safety" in 1979. This was covered by Dr Eric Wiggleswortjh, who was the Director of Injury Research Project. He was also instrumental in the development of VIOSH. Students had to complete an Assessment Contract covering various aspects of the course material. Extensive list of reading material was provided to select from. This Assessment Contract was to be signed by the student and approved by Eric Wigglesworth. There was a timetable for their tutorial presentation. As Eric states in his letter, "They certainly worked hard in that first year!!!!!!!!!!"Blue-grey folder with loose pages held together with metal slide clip. Cover letter explaining contents. Separate section of papers - bull-dog clip holding them together.Letterhead "Injury Research Project - Dr Eric C Wigglesworth, Director". Signature "Eric"viosh, victorian institute of occupational safety and health, dr eric wigglesworth, director, injury reseach project, occupational hazard management, essay topics, assessment contract, course assessment form -
 Federation University Historical Collection
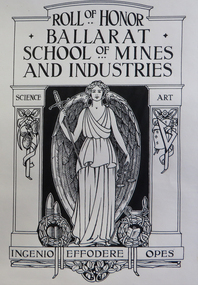
Book - Roll of Honor, Ballarat School of Mines Honor Book, c1920
... , director of Education, recognising the students' work..., director of Education, recognising the students' work ...The Ballarat Technical Art School made many honour boards for schools and organisation in Victoria and interstate. Their own was made, but the names were not listed. The Ballarat School of Mines Annual Report for 1921 states: 'It has been decided, for the present, to record the names of our students who served in the warm, in an Honor Book, and to defer the erectin of an Honor Board until we can feel ssured that the Roll is complete. the wide spread occupations of our students has rendered it very difficult for us to secure detailed information of their service. A handsome Honor Book and Case has been designed and executed by the staff ad students of the technical Art School, and the engrossing of the names and military records will be proceeded with as soon as possible. The Technical Art School was quite busy with commissions. The SMB Annual Report of 1918 states: 'under the direction of the Art principal (Mr H.H. Smith), the work of the Art School continues to receive wide public recognition. Handsome Honor Boars have been designed and executed for the Sydney Sports' Club, the St Arnaud High School, the Birregurra State School, the Wendouree State School and the Ballarat Old Colonists' Club. The School also designed the certificates for the Young Workers' Patriotic Guild, the 'Herald" Shield for perpetual competition at the technical Schools' athletic meetings, the "Hansen" Shield for competition among the Northern District High Schools, two metal tablets for the Castlemaine high School, and a certificate for the Grampians Secondary Schools' Association. Numerous Honor Books and Mural cases have also been designed for State Schools.' Over 400 former students and staff of the Ballarat School of Mines served during World War One. The 1920 SMb Students' Magazine said' 'Many students left Australia with the first Contingent, and since then, the School has been represented on every field where Australians have fought, from the first landing at Gallipoli to the decisive victory on the 8 August 1918.' The influence of the school was appropriately shown in the fact that at least 13 of its students were officers in the Australian Mining Corps. The title page has the initials 'D.J.' which most probably stands for Donald I. Johnston, a teacher with the Ballarat Technical Art school from 1920 to 1949. The Ballarat School of Mines World War 1 Honor Book remained uncompleted for more than 90 years. The names of over 400 SMB staff and students who served their country were not inscribed until 2012, despite names, ranks and service records being compiled. A restoration project was instigated as part of the 140th anniversary of the Ballarat School of Mines in 2010. Names were inscribed into the book by Calligrapher Lyn Forrester. The University of Ballarat believed this project is important not only to SMB's history, but the families and descendants of those who served while studying or teaching at SMB. The restoration project involved names being hand written in calligraphy into the Honor Book and was funded with the assistance of the 'Restoring Community War Memorial Grant'. The memorial was designed and made by the staff and students of the Ballarat School of Mines Technical Art School under the direction of Principal Herbert H. Smith. In 1921 the Ballarat School of Mines Annual Report recorded: "It has been decided, for the present, to record the names of our students who served in the war, in an Honor Book, and to defer the erection of an Honor Board until we can feel assured that the roll is complete. The wide spread occupations of our students has rended it very difficult for us to secure detailed information of their service. A handsome Honor Book and case has been designed and executed by the staff and students of the Technical Art School, and the engrossing of the names and miliatary records will proceed with as soon as possible. The Ballarat Technical Art School and was involved with the design and manufacture of numerous WW1 memorials. When it came time to complete their own memorial, the Principal died, and the Honor Roll must have been overlooked in the confusion that ensued. There have been numerous theories about why the Honor Roll was never completed, one being that it was because the SMB Principal, Maurice Copland, literally worked himself to death organising repatriation classes for ex-soldiers who attended SMB. The Courier of 18 November 1922 said of Maurice Copland: “He put his very best into the work for the welfare of the soldiers; in fact, he did too much for the good of his physique, for he wore himself out in the services of the returned men. If ever there was a war victim the late Mr Copland was one. But for the stress of work entailed by those repatriation classes and the amount of general war work which he performed Mr Copland would probably have been with them today." Understandably, SMB was thrown into some disarray by their Principal's death and the Honor Book was not completed. The University of Ballarat would like to finally honor its SMB war veterans by completing the Honor Book and as a further mark of respect, dedicate the project to Maurice Copland. The Ballarat Technical Art School undertook many honor boards. The Ballarat School of Mines Annual Report 1918 states: "Under the direction of the Art Principal (Mr H.H. Smith), the work of the Art School continues to receive a wide public recognition. handsome Honor Boards have been designed and executed for the Sydney Sports' Club, the St Arnaud High School, the Birregurra State School, the wendouree State School and the Ballarat Old Colonists' Club. The School also designed certificates for the Young Workers' patriotic Guild, the "Herald" Shield for perpetual Competition at the Technical schools athletics meetings, the "Hansen" Shield for competition in the northern District High Schools, two metal tablets for the Castlemaine High School, and a certificate for the Grampians Secondary Schools' Association. Numerous Honor Gooks and mural cases have also been designed for State Schools." The 1920 Ballarat School of Mines Annual Report stated: Public appreciation of the High standard of design and artistic craft work produced by the students of the Art School, under the direction of the Principal (Mr Herbert H. Smith), continues to be demonstrated by the lage number of important commissions entrusted to the school, not only by the public bodies and business firms by the Education Department and public bodies all over the State." "Amongst the important local commissions received during the year was the designing and supplying of the Municipal Council's Address of Welcome Casket for presentation to His Royal Highness the Prince of Wales, the designing and supervising of a large four-light stained glass window for the Lydiard Street Methodist Church, ... and supply numerous honor books, honor boards, etc., for public institutions and school." "The School has been honored by, and has acceded to the request of the Education Department to supply designs for the title page, chapter headings and initial letters for the War Service Book which it is about to publish, Mr F. Tate, director of Education, recognising the students' work in this direction by an appreciative letter of thanks. The Education Department has also been instrumental in directing to the School applications from all parts of the State, including Melbourne, for the School to supply competitive sports shields, honor boards, books and designs for certificates, and various decorative objects. The School has therefor been responsible for much work coming to local Ballarat firms which would otherwise have found its way to Melbourne or other centres. In 2011, as the result of a 'Restoring Community War Memorials Grant' calligrapher Lynton Forrester was commissioned to record over 400 names into the honor book. A red leatherbound Ballarat School of Mines Honor Book. The book includes a title page relating to the Ballarat School of Mines and Industries. The Ballarat School of Mines Honor Book was not finally inscribed with names until 2011-2012. world war one, ww1, ballarat school of mines, world war 1, world war i, honour roll, calligraphy, don johnston, honor book, honor roll, copeland, maurice copeland, honour book, roll of honour, percy coltman, arthur e. tandy, leslie coulter -
 Federation University Historical Collection
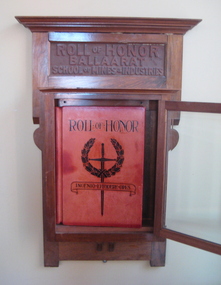
Book - Honour Board (hanging bookcase), Ballarat School of Mines Honor Book and Bookcase, c1920
... , director of Education, recognising the students' work..., director of Education, recognising the students' work ...The Ballarat Technical Art School made many honour boards for schools and organisation in Victoria and interstate. Their own was made, but the names were not listed. The Ballarat School of Mines Annual Report for 1921 states: 'It has been decided, for the present, to record the names of our students who served in the warm, in an Honor Book, and to defer the erection of an Honor Board until we can feel assured that the Roll is complete. the wide spread occupations of our students has rendered it very difficult for us to secure detailed information of their service. A handsome Honor Book and Case has been designed and executed by the staff and students of the Technical Art School, and the engrossing of the names and military records will be proceeded with as soon as possible. The Technical Art School was quite busy with commissions. The SMB Annual Report of 1918 states: 'under the direction of the Art principal (Mr H.H. Smith), the work of the Art School continues to receive wide public recognition. Handsome Honor Boars have been designed and executed for the Sydney Sports' Club, the St Arnaud High School, the Birregurra State School, the Wendouree State School and the Ballarat Old Colonists' Club. The School also designed the certificates for the Young Workers' Patriotic Guild, the 'Herald" Shield for perpetual competition at the technical Schools' athletic meetings, the "Hansen" Shield for competition among the Northern District High Schools, two metal tablets for the Castlemaine high School, and a certificate for the Grampians Secondary Schools' Association. Numerous Honor Books and Mural cases have also been designed for State Schools.' Over 400 former students and staff of the Ballarat School of Mines served during World War One. The 1920 SMb Students' Magazine said' 'Many students left Australia with the first Contingent, and since then, the School has been represented on every field where Australians have fought, from the first landing at Gallipoli to the decisive victory on the 8 August 1918.' The influence of the school was appropriately shown in the fact that at least 13 of its students were officers in the Australian Mining Corps. The title page has the initials 'D.J.' which most probably stands for Donald I. Johnston, a teacher with the Ballarat Technical Art school from 1920 to 1949. The Ballarat School of Mines World War 1 Honor Book remained uncompleted for more than 90 years. The names of over 400 SMB staff and students who served their country were not inscribed until 2012, despite names, ranks and service records being compiled. A restoration project was instigated as part of the 140th anniversary of the Ballarat School of Mines in 2010. Names were inscribed into the book by Calligrapher Lyn Forrester. The University of Ballarat believed this project is important not only to SMB's history, but the families and descendants of those who served while studying or teaching at SMB. The restoration project involved names being hand written in calligraphy into the Honor Book and was funded with the assistance of the 'Restoring Community War Memorial Grant'. The memorial was designed and made by the staff and students of the Ballarat School of Mines Technical Art School under the direction of Principal Herbert H. Smith. In 1921 the Ballarat School of Mines Annual Report recorded: "It has been decided, for the present, to record the names of our students who served in the war, in an Honor Book, and to defer the erection of an Honor Board until we can feel assured that the roll is complete. The wide spread occupations of our students has rended it very difficult for us to secure detailed information of their service. A handsome Honor Book and case has been designed and executed by the staff and students of the Technical Art School, and the engrossing of the names and miliatary records will proceed with as soon as possible. The Ballarat Technical Art School and was involved with the design and manufacture of numerous WW1 memorials. When it came time to complete their own memorial, the Principal died, and the Honor Roll must have been overlooked in the confusion that ensued. There have been numerous theories about why the Honor Roll was never completed, one being that it was because the SMB Principal, Maurice Copland, literally worked himself to death organising repatriation classes for ex-soldiers who attended SMB. The Courier of 18 November 1922 said of Maurice Copland: “He put his very best into the work for the welfare of the soldiers; in fact, he did too much for the good of his physique, for he wore himself out in the services of the returned men. If ever there was a war victim the late Mr Copland was one. But for the stress of work entailed by those repatriation classes and the amount of general war work which he performed Mr Copland would probably have been with them today." Understandably, SMB was thrown into some disarray by their Principal's death and the Honor Book was not completed. The University of Ballarat would like to finally honor its SMB war veterans by completing the Honor Book and as a further mark of respect, dedicate the project to Maurice Copland. The Ballarat Technical Art School undertook many honor boards. The Ballarat School of Mines Annual Report 1918 states: "Under the direction of the Art Principal (Mr H.H. Smith), the work of the Art School continues to receive a wide public recognition. handsome Honor Boards have been designed and executed for the Sydney Sports' Club, the St Arnaud High School, the Birregurra State School, the wendouree State School and the Ballarat Old Colonists' Club. The School also designed certificates for the Young Workers' patriotic Guild, the "Herald" Shield for perpetual Competition at the Technical schools athletics meetings, the "Hansen" Shield for competition in the northern District High Schools, two metal tablets for the Castlemaine High School, and a certificate for the Grampians Secondary Schools' Association. Numerous Honor Gooks and mural cases have also been designed for State Schools." The 1920 Ballarat School of Mines Annual Report stated: Public appreciation of the High standard of design and artistic craft work produced by the students of the Art School, under the direction of the Principal (Mr Herbert H. Smith), continues to be demonstrated by the lage number of important commissions entrusted to the school, not only by the public bodies and business firms by the Education Department and public bodies all over the State." "Amongst the important local commissions received during the year was the designing and supplying of the Municipal Council's Address of Welcome Casket for presentation to His Royal Highness the Prince of Wales, the designing and supervising of a large four-light stained glass window for the Lydiard Street Methodist Church, ... and supply numerous honor books, honor boards, etc., for public institutions and school." "The School has been honored by, and has acceded to the request of the Education Department to supply designs for the title page, chapter headings and initial letters for the War Service Book which it is about to publish, Mr F. Tate, director of Education, recognising the students' work in this direction by an appreciative letter of thanks. The Education Department has also been instrumental in directing to the School applications from all parts of the State, including Melbourne, for the School to supply competitive sports shields, honor boards, books and designs for certificates, and various decorative objects. The School has therefor been responsible for much work coming to local Ballarat firms which would otherwise have found its way to Melbourne or other centres. In 2011, as the result of a 'Restoring Community War Memorials Grant' calligrapher Lynton Forrester was commissioned to record over 400 names into the honor book. A Victorian Blackwood World War I Honor Board holds a red leatherbound Ballarat School of Mines Honor Book. The book includes a title page relating to the Ballarat School of Mines and Industries. The Ballarat School of Mines Honor Book and case was not finally inscribed with names until 2012. world war one, ww1, ballarat school of mines, world war 1, world war i, honour roll, calligraphy, don johnston, honor book, honor roll, copeland, maurice copeland, honour book, roll of honour, percy coltman, arthur e. tandy, leslie coulter -
 Flagstaff Hill Maritime Museum and Village
Domestic object - Bowl, Late 19th or early 20th Century
... will be in the student finished work shelves. Remember to pay for it before you...! After firing your work will be in the student finished work ...The Process of Making Pottery Decorating, Firing, Glazing, Making, Technical There is a rhythm and flow to clay. It can’t be done all at once! Even the making process! It can take weeks to get everything done, especially if you can only work on your pottery once a week! Even though we have three hour classes, it’s often just not enough time! Here is an overview of some of the processes so you have a bit more grasp on some of the technical stuff! Step One – Design There are SO many ideas out there for making stuff in clay! From delicate porcelain jewellery, through to heavy sculptural work and everything in between. Deciding your direction is sometimes not that easy – when you first start, try everything, you will naturally gravitate to the style that you enjoy! The options and variations are endless and can get a wee bit overwhelming too! Check in with me before you start to ensure your ideas will work, what order you might do things, how you could achieve the look you are seeking and any other technical data required! Step Two – Making Clay is thixotropic. This means that as you work with it, the clay first gets sloppier and wetter, before is begins to dry in the atmosphere. For most things, you simply can’t do all parts of the project at once. An example of work order might look like: Get last weeks work out from the shelves Prepare clay for today’s work – roll your clay, prepare balls for throwing, make the first stage of a pinch pot) Clean up last week’s work and put it on the shelf for bisque firing Check that you have any glazing to do – and do enough of it that you will have time to finish your main project Do the next step of your next project – there might be a further step that can’t be complete immediately, in that case, wrap your work well and put onto the shelves. Letting your work rest for a while can really help keep your work clean and professional looking. Many things require bagging under plastic to keep it ready for work the next week – put your name on the outside of the bag so you can find your work easily. We have stickers and markers. Consider how you want to decorate your work – coloured slip can be applied at a fairly wet stage (remembering that it will make your work even wetter!). Trying to apply slip to dry clay won’t work! If you want to do sgraffito – you will need to keep the work leather hard (a state of dryness where you can still work the clay with a little effort and a little water and care). Step Three – Drying Most of the time your work can go into the rack uncovered to let it dry out for the following week. If you want to continue forming or shaping you will need to double bag your work – put your work on a suitable sized bat and put the bat in a bag so the base of the bag is under the bat, then put another bag over the top of the work and tuck the top of the bag under the bat. If you want to trim (or turn) your thrown work the following week, it should also be double bagged. If your work is large, delicate, or of uneven thicknesses, you should lightly cover your work for drying. When considering the drying process, bare in mind the weather, humidity and wind! The hotter and dryer, the faster things dry and work can dry unevenly in the shelves – this can lead to cracking – another time to lightly cover your work for drying. Step Four – Trimming and Cleaning Up Your work is dry! It is called greenware now and it is at it’s most fragile! Handle everything with two hands. I often refer to soft hands – keep everything gentle and with your fingers spread as much as possible. Try to not pick up things like plates too much, and always with both hands! Before your work can be bisque fired it should be “cleaned up”. You work won’t go into the kiln if it has sharp edges – when glazed, sharp edges turn into razor blades! Use a piece of fly wire to rub the work all over – this will scratch a little so be light handed. Use a knife or metal kidney to scrape any areas that require a bit more dynamic treatment than the fly wire offers! Finally, a very light wipe over with a slightly damp sponge can help soften and soothe all of your edges and dags! Trimming thrown work: If you are planning to trim (or turn) your thrown work (and you should be), make sure you bag it well – your work should be leather hard to almost dry for easiest trimming. Use this step to finish the work completely – use a metal kidney to polish the surface, or a slightly damp sponge to give a freshly thrown look. Wipe the sponge around the rim after trimming, and check the inside of the pot for dags! Trimming slip cast work: Usually I will trim the rims of your work on the wheel the following day to make that stage easier, however you will still need to check your work for lumps and bumps. Last but not least – check that your name is still clearly on the bottom of your work. Step Five – Bisque Firing When the work is completely dry it can go into the bisque kiln. The bisque kiln is fired to 1000°C. This process burns off the water in the clay as well as some of the chemically bound water. The structure of the clay is not altered that much at this temperature. Inside the bisque kiln, the work is stacked a little, small bowl inside a larger bowl and onto a heavy plate. Smaller items like decorations or drink coasters might get stacked several high. Consideration is paid to the weight of the stack and shape of the work. A bisque kiln can fire about one and a half times the amount of work that the glaze kiln can fire. The firing takes about 10 hours to complete the cycle and about two days to cool down. Once it has been emptied the work is placed in the glaze room ready for you to decorate! Step Six – Glazing Decorating your work with colour can be a lot of fun – and time consuming! There are three main options for surface treatment at this stage: Oxide Washes Underglazes Glazes Washes and underglazes do not “glaze” the work – It will still need a layer of glaze to fully seal the clay (washes don’t need glaze on surfaces not designed for food or liquid as they can gloss up a little on their own). Underglazes are stable colourants that turn out pretty much how they look in the jar. They can be mixed with each other to form other colours and can be used like water colours to paint onto your work. Mostly they should have a clear glaze on top to seal them. Oxides are a different species – the pink oxide (cobalt) wash turns out bright blue for instance. They don’t always need a glaze on top, and some glazes can change the colour of the wash! The glazes need no other “glaze” on top! Be careful of unknown glaze interactions – you can put any combination of glaze in a bowl or on a plate, but only a single glaze on the outside of any vertical surface! Glazes are a chemical reaction under heat. We don’t know the exact chemicals in the Mayco glazes we use. I can guess by the way they interact with each other, however, on the whole, you need to test every idea you have, and not run the test on a vertical surface! Simply put, glaze is a layer of glass like substance that bonds with the clay underneath. Clay is made of silica, alumina and water. Glaze is made of mostly silica. Silica has a melting point of 1700°C and we fire to 1240°C. The silica requires a “flux” to help it melt at the lower temperature. Fluxes can be all sorts of chemicals – a common one is calcium – calcium has a melting point of 2500°C, however, together they both melt at a much lower temperature! Colourants are metal oxides like cobalt (blue), chrome (green through black), copper (green, blue, even red!), manganese (black, purple and pink) iron (red brown), etc. Different chemicals in the glaze can have dramatic effects. for example, barium carbonate (which we don’t use) turns manganese bright pink! Other elements can turn manganese dioxide brown, blue, purple and reddish brown. Manganese dioxide is a flux in and of itself as well. So, glazes that get their black and purple colours, often interact with other glazes and RUN! Our mirror black is a good example – it mixes really well with many glazes because it fluxes them – causes them to melt faster. It will also bring out many beautiful colours in the glazes because it’s black colouring most definitely comes from manganese dioxide! Glaze chemistry is a whole subject on it’s own! We use commercial Mayco glazes on purpose – for their huge range of colour possibilities, stability, cool interactions, artistic freedom with the ability to easily brush the glazes on and ease of use. We currently have almost 50 glazes on hand! A major project is to test the interactions of all glazes with each other. That is 2,500 test tiles!!!! I’m going to make the wall behind the wheels the feature wall of pretty colours! Step Seven – Glaze (Gloss or sometimes called “Glost”) Firing Most of the time this is the final stage of making your creation (but not always!) The glaze kiln goes to 1240°C. This is called cone 6, or midrange. It is the low end of stoneware temperatures. Stoneware clays and glazes are typically fired at cone 8 – 10, that is 1260 – 1290°C. The energy requirement to go from 1240°C to 1280°C is almost a 30% more! Our clay is formulated to vitrify (mature, turn “glass-like”) at 1240°, as are our glazes. A glaze kiln take around 12 hours to reach temperature and two to three days to cool down. Sometimes a third firing process is required – this is for decoration that is added to work after the glaze firing. For example – adding precious metals and lustres. this firing temperature is usually around 600 – 800°C depending upon the techniques being used. There are many students interested in gold and silver trims – we will be doing this third type of firing soon! After firing your work will be in the student finished work shelves. Remember to pay for it before you head out the door! There is a small extra charge for using porcelain clay (it’s more than twice the price of regular clay), and for any third firing process! Once your work has been fired it can not turn back into clay for millennia – so don’t fire it if you don’t like it! Put it in the bucket for recycling. https://firebirdstudios.com.au/the-process-of-making-pottery/ The bowl is an example of kitchenware used in the 19th century and still in use today.Bowl white ceramic. Crack on side. Badly stained.Backstamp very faint and unable to be read.flagstaff hill, warrnambool, shipwrecked-coast, flagstaff-hill, flagstaff-hill-maritime-museum, maritime-museum, shipwreck-coast, flagstaff-hill-maritime-village, mixing bowl, food preparation, kitchen equipment, ceramic -
 Flagstaff Hill Maritime Museum and Village
Domestic object - Bowl
... will be in the student finished work shelves. Remember to pay for it before you...! After firing your work will be in the student finished work ...The Process of Making Pottery Decorating, Firing, Glazing, Making, Technical There is a rhythm and flow to clay. It can’t be done all at once! Even the making process! It can take weeks to get everything done, especially if you can only work on your pottery once a week! Even though we have three hour classes, it’s often just not enough time! Here is an overview of some of the processes so you have a bit more grasp on some of the technical stuff! Step One – Design There are SO many ideas out there for making stuff in clay! From delicate porcelain jewellery, through to heavy sculptural work and everything in between. Deciding your direction is sometimes not that easy – when you first start, try everything, you will naturally gravitate to the style that you enjoy! The options and variations are endless and can get a wee bit overwhelming too! Check in with me before you start to ensure your ideas will work, what order you might do things, how you could achieve the look you are seeking and any other technical data required! Step Two – Making Clay is thixotropic. This means that as you work with it, the clay first gets sloppier and wetter, before is begins to dry in the atmosphere. For most things, you simply can’t do all parts of the project at once. An example of work order might look like: Get last weeks work out from the shelves Prepare clay for today’s work – roll your clay, prepare balls for throwing, make the first stage of a pinch pot) Clean up last week’s work and put it on the shelf for bisque firing Check that you have any glazing to do – and do enough of it that you will have time to finish your main project Do the next step of your next project – there might be a further step that can’t be complete immediately, in that case, wrap your work well and put onto the shelves. Letting your work rest for a while can really help keep your work clean and professional looking. Many things require bagging under plastic to keep it ready for work the next week – put your name on the outside of the bag so you can find your work easily. We have stickers and markers. Consider how you want to decorate your work – coloured slip can be applied at a fairly wet stage (remembering that it will make your work even wetter!). Trying to apply slip to dry clay won’t work! If you want to do sgraffito – you will need to keep the work leather hard (a state of dryness where you can still work the clay with a little effort and a little water and care). Step Three – Drying Most of the time your work can go into the rack uncovered to let it dry out for the following week. If you want to continue forming or shaping you will need to double bag your work – put your work on a suitable sized bat and put the bat in a bag so the base of the bag is under the bat, then put another bag over the top of the work and tuck the top of the bag under the bat. If you want to trim (or turn) your thrown work the following week, it should also be double bagged. If your work is large, delicate, or of uneven thicknesses, you should lightly cover your work for drying. When considering the drying process, bare in mind the weather, humidity and wind! The hotter and dryer, the faster things dry and work can dry unevenly in the shelves – this can lead to cracking – another time to lightly cover your work for drying. Step Four – Trimming and Cleaning Up Your work is dry! It is called greenware now and it is at it’s most fragile! Handle everything with two hands. I often refer to soft hands – keep everything gentle and with your fingers spread as much as possible. Try to not pick up things like plates too much, and always with both hands! Before your work can be bisque fired it should be “cleaned up”. You work won’t go into the kiln if it has sharp edges – when glazed, sharp edges turn into razor blades! Use a piece of fly wire to rub the work all over – this will scratch a little so be light handed. Use a knife or metal kidney to scrape any areas that require a bit more dynamic treatment than the fly wire offers! Finally, a very light wipe over with a slightly damp sponge can help soften and soothe all of your edges and dags! Trimming thrown work: If you are planning to trim (or turn) your thrown work (and you should be), make sure you bag it well – your work should be leather hard to almost dry for easiest trimming. Use this step to finish the work completely – use a metal kidney to polish the surface, or a slightly damp sponge to give a freshly thrown look. Wipe the sponge around the rim after trimming, and check the inside of the pot for dags! Trimming slip cast work: Usually I will trim the rims of your work on the wheel the following day to make that stage easier, however you will still need to check your work for lumps and bumps. Last but not least – check that your name is still clearly on the bottom of your work. Step Five – Bisque Firing When the work is completely dry it can go into the bisque kiln. The bisque kiln is fired to 1000°C. This process burns off the water in the clay as well as some of the chemically bound water. The structure of the clay is not altered that much at this temperature. Inside the bisque kiln, the work is stacked a little, small bowl inside a larger bowl and onto a heavy plate. Smaller items like decorations or drink coasters might get stacked several high. Consideration is paid to the weight of the stack and shape of the work. A bisque kiln can fire about one and a half times the amount of work that the glaze kiln can fire. The firing takes about 10 hours to complete the cycle and about two days to cool down. Once it has been emptied the work is placed in the glaze room ready for you to decorate! Step Six – Glazing Decorating your work with colour can be a lot of fun – and time consuming! There are three main options for surface treatment at this stage: Oxide Washes Underglazes Glazes Washes and underglazes do not “glaze” the work – It will still need a layer of glaze to fully seal the clay (washes don’t need glaze on surfaces not designed for food or liquid as they can gloss up a little on their own). Underglazes are stable colourants that turn out pretty much how they look in the jar. They can be mixed with each other to form other colours and can be used like water colours to paint onto your work. Mostly they should have a clear glaze on top to seal them. Oxides are a different species – the pink oxide (cobalt) wash turns out bright blue for instance. They don’t always need a glaze on top, and some glazes can change the colour of the wash! The glazes need no other “glaze” on top! Be careful of unknown glaze interactions – you can put any combination of glaze in a bowl or on a plate, but only a single glaze on the outside of any vertical surface! Glazes are a chemical reaction under heat. We don’t know the exact chemicals in the Mayco glazes we use. I can guess by the way they interact with each other, however, on the whole, you need to test every idea you have, and not run the test on a vertical surface! Simply put, glaze is a layer of glass like substance that bonds with the clay underneath. Clay is made of silica, alumina and water. Glaze is made of mostly silica. Silica has a melting point of 1700°C and we fire to 1240°C. The silica requires a “flux” to help it melt at the lower temperature. Fluxes can be all sorts of chemicals – a common one is calcium – calcium has a melting point of 2500°C, however, together they both melt at a much lower temperature! Colourants are metal oxides like cobalt (blue), chrome (green through black), copper (green, blue, even red!), manganese (black, purple and pink) iron (red brown), etc. Different chemicals in the glaze can have dramatic effects. for example, barium carbonate (which we don’t use) turns manganese bright pink! Other elements can turn manganese dioxide brown, blue, purple and reddish brown. Manganese dioxide is a flux in and of itself as well. So, glazes that get their black and purple colours, often interact with other glazes and RUN! Our mirror black is a good example – it mixes really well with many glazes because it fluxes them – causes them to melt faster. It will also bring out many beautiful colours in the glazes because it’s black colouring most definitely comes from manganese dioxide! Glaze chemistry is a whole subject on it’s own! We use commercial Mayco glazes on purpose – for their huge range of colour possibilities, stability, cool interactions, artistic freedom with the ability to easily brush the glazes on and ease of use. We currently have almost 50 glazes on hand! A major project is to test the interactions of all glazes with each other. That is 2,500 test tiles!!!! I’m going to make the wall behind the wheels the feature wall of pretty colours! Step Seven – Glaze (Gloss or sometimes called “Glost”) Firing Most of the time this is the final stage of making your creation (but not always!) The glaze kiln goes to 1240°C. This is called cone 6, or midrange. It is the low end of stoneware temperatures. Stoneware clays and glazes are typically fired at cone 8 – 10, that is 1260 – 1290°C. The energy requirement to go from 1240°C to 1280°C is almost a 30% more! Our clay is formulated to vitrify (mature, turn “glass-like”) at 1240°, as are our glazes. A glaze kiln take around 12 hours to reach temperature and two to three days to cool down. Sometimes a third firing process is required – this is for decoration that is added to work after the glaze firing. For example – adding precious metals and lustres. this firing temperature is usually around 600 – 800°C depending upon the techniques being used. There are many students interested in gold and silver trims – we will be doing this third type of firing soon! After firing your work will be in the student finished work shelves. Remember to pay for it before you head out the door! There is a small extra charge for using porcelain clay (it’s more than twice the price of regular clay), and for any third firing process! Once your work has been fired it can not turn back into clay for millennia – so don’t fire it if you don’t like it! Put it in the bucket for recycling. https://firebirdstudios.com.au/the-process-of-making-pottery/ This bowl is an example of kitchenware used in the 19th century and still in use today.Bowl white ceramic plain that has two sets of edging around lip. Inside bowl has plaster designed to look like cooking mixture.flagstaff hill, warrnambool, shipwrecked-coast, flagstaff-hill, flagstaff-hill-maritime-museum, maritime-museum, shipwreck-coast, flagstaff-hill-maritime-village, kitchen equipment, ceramic -
 Flagstaff Hill Maritime Museum and Village
Domestic object - Bowl, J & G Meakin, Late 19th or early 20th Century
... will be in the student finished work shelves. Remember to pay for it before you...! After firing your work will be in the student finished work ...The Process of Making Pottery Decorating, Firing, Glazing, Making, Technical There is a rhythm and flow to clay. It can’t be done all at once! Even the making process! It can take weeks to get everything done, especially if you can only work on your pottery once a week! Even though we have three hour classes, it’s often just not enough time! Here is an overview of some of the processes so you have a bit more grasp on some of the technical stuff! Step One – Design There are SO many ideas out there for making stuff in clay! From delicate porcelain jewellery, through to heavy sculptural work and everything in between. Deciding your direction is sometimes not that easy – when you first start, try everything, you will naturally gravitate to the style that you enjoy! The options and variations are endless and can get a wee bit overwhelming too! Check in with me before you start to ensure your ideas will work, what order you might do things, how you could achieve the look you are seeking and any other technical data required! Step Two – Making Clay is thixotropic. This means that as you work with it, the clay first gets sloppier and wetter, before is begins to dry in the atmosphere. For most things, you simply can’t do all parts of the project at once. An example of work order might look like: Get last weeks work out from the shelves Prepare clay for today’s work – roll your clay, prepare balls for throwing, make the first stage of a pinch pot) Clean up last week’s work and put it on the shelf for bisque firing Check that you have any glazing to do – and do enough of it that you will have time to finish your main project Do the next step of your next project – there might be a further step that can’t be complete immediately, in that case, wrap your work well and put onto the shelves. Letting your work rest for a while can really help keep your work clean and professional looking. Many things require bagging under plastic to keep it ready for work the next week – put your name on the outside of the bag so you can find your work easily. We have stickers and markers. Consider how you want to decorate your work – coloured slip can be applied at a fairly wet stage (remembering that it will make your work even wetter!). Trying to apply slip to dry clay won’t work! If you want to do sgraffito – you will need to keep the work leather hard (a state of dryness where you can still work the clay with a little effort and a little water and care). Step Three – Drying Most of the time your work can go into the rack uncovered to let it dry out for the following week. If you want to continue forming or shaping you will need to double bag your work – put your work on a suitable sized bat and put the bat in a bag so the base of the bag is under the bat, then put another bag over the top of the work and tuck the top of the bag under the bat. If you want to trim (or turn) your thrown work the following week, it should also be double bagged. If your work is large, delicate, or of uneven thicknesses, you should lightly cover your work for drying. When considering the drying process, bare in mind the weather, humidity and wind! The hotter and dryer, the faster things dry and work can dry unevenly in the shelves – this can lead to cracking – another time to lightly cover your work for drying. Step Four – Trimming and Cleaning Up Your work is dry! It is called greenware now and it is at it’s most fragile! Handle everything with two hands. I often refer to soft hands – keep everything gentle and with your fingers spread as much as possible. Try to not pick up things like plates too much, and always with both hands! Before your work can be bisque fired it should be “cleaned up”. You work won’t go into the kiln if it has sharp edges – when glazed, sharp edges turn into razor blades! Use a piece of fly wire to rub the work all over – this will scratch a little so be light handed. Use a knife or metal kidney to scrape any areas that require a bit more dynamic treatment than the fly wire offers! Finally, a very light wipe over with a slightly damp sponge can help soften and soothe all of your edges and dags! Trimming thrown work: If you are planning to trim (or turn) your thrown work (and you should be), make sure you bag it well – your work should be leather hard to almost dry for easiest trimming. Use this step to finish the work completely – use a metal kidney to polish the surface, or a slightly damp sponge to give a freshly thrown look. Wipe the sponge around the rim after trimming, and check the inside of the pot for dags! Trimming slip cast work: Usually I will trim the rims of your work on the wheel the following day to make that stage easier, however you will still need to check your work for lumps and bumps. Last but not least – check that your name is still clearly on the bottom of your work. Step Five – Bisque Firing When the work is completely dry it can go into the bisque kiln. The bisque kiln is fired to 1000°C. This process burns off the water in the clay as well as some of the chemically bound water. The structure of the clay is not altered that much at this temperature. Inside the bisque kiln, the work is stacked a little, small bowl inside a larger bowl and onto a heavy plate. Smaller items like decorations or drink coasters might get stacked several high. Consideration is paid to the weight of the stack and shape of the work. A bisque kiln can fire about one and a half times the amount of work that the glaze kiln can fire. The firing takes about 10 hours to complete the cycle and about two days to cool down. Once it has been emptied the work is placed in the glaze room ready for you to decorate! Step Six – Glazing Decorating your work with colour can be a lot of fun – and time consuming! There are three main options for surface treatment at this stage: Oxide Washes Underglazes Glazes Washes and underglazes do not “glaze” the work – It will still need a layer of glaze to fully seal the clay (washes don’t need glaze on surfaces not designed for food or liquid as they can gloss up a little on their own). Underglazes are stable colourants that turn out pretty much how they look in the jar. They can be mixed with each other to form other colours and can be used like water colours to paint onto your work. Mostly they should have a clear glaze on top to seal them. Oxides are a different species – the pink oxide (cobalt) wash turns out bright blue for instance. They don’t always need a glaze on top, and some glazes can change the colour of the wash! The glazes need no other “glaze” on top! Be careful of unknown glaze interactions – you can put any combination of glaze in a bowl or on a plate, but only a single glaze on the outside of any vertical surface! Glazes are a chemical reaction under heat. We don’t know the exact chemicals in the Mayco glazes we use. I can guess by the way they interact with each other, however, on the whole, you need to test every idea you have, and not run the test on a vertical surface! Simply put, glaze is a layer of glass like substance that bonds with the clay underneath. Clay is made of silica, alumina and water. Glaze is made of mostly silica. Silica has a melting point of 1700°C and we fire to 1240°C. The silica requires a “flux” to help it melt at the lower temperature. Fluxes can be all sorts of chemicals – a common one is calcium – calcium has a melting point of 2500°C, however, together they both melt at a much lower temperature! Colourants are metal oxides like cobalt (blue), chrome (green through black), copper (green, blue, even red!), manganese (black, purple and pink) iron (red brown), etc. Different chemicals in the glaze can have dramatic effects. for example, barium carbonate (which we don’t use) turns manganese bright pink! Other elements can turn manganese dioxide brown, blue, purple and reddish brown. Manganese dioxide is a flux in and of itself as well. So, glazes that get their black and purple colours, often interact with other glazes and RUN! Our mirror black is a good example – it mixes really well with many glazes because it fluxes them – causes them to melt faster. It will also bring out many beautiful colours in the glazes because it’s black colouring most definitely comes from manganese dioxide! Glaze chemistry is a whole subject on it’s own! We use commercial Mayco glazes on purpose – for their huge range of colour possibilities, stability, cool interactions, artistic freedom with the ability to easily brush the glazes on and ease of use. We currently have almost 50 glazes on hand! A major project is to test the interactions of all glazes with each other. That is 2,500 test tiles!!!! I’m going to make the wall behind the wheels the feature wall of pretty colours! Step Seven – Glaze (Gloss or sometimes called “Glost”) Firing Most of the time this is the final stage of making your creation (but not always!) The glaze kiln goes to 1240°C. This is called cone 6, or midrange. It is the low end of stoneware temperatures. Stoneware clays and glazes are typically fired at cone 8 – 10, that is 1260 – 1290°C. The energy requirement to go from 1240°C to 1280°C is almost a 30% more! Our clay is formulated to vitrify (mature, turn “glass-like”) at 1240°, as are our glazes. A glaze kiln take around 12 hours to reach temperature and two to three days to cool down. Sometimes a third firing process is required – this is for decoration that is added to work after the glaze firing. For example – adding precious metals and lustres. this firing temperature is usually around 600 – 800°C depending upon the techniques being used. There are many students interested in gold and silver trims – we will be doing this third type of firing soon! After firing your work will be in the student finished work shelves. Remember to pay for it before you head out the door! There is a small extra charge for using porcelain clay (it’s more than twice the price of regular clay), and for any third firing process! Once your work has been fired it can not turn back into clay for millennia – so don’t fire it if you don’t like it! Put it in the bucket for recycling. https://firebirdstudios.com.au/the-process-of-making-pottery/This bowl was made by renowned pottery company J & G Meakin of England. The firm was established in the mid-1800's. The bowl is an example of kitchenware used in the 19th century and still in use today.Bowl; white ceramic, round and tapering inwards towards base. Made by J and G Meakin England.On base, 'Ironstone China Reg SOL 391413' with symbolflagstaff hill, flagstaff hill maritime museum and village, warrnambool, maritime museum, maritime village, great ocean road, shipwreck coast, mixing bowl, food preparation, j & g meakin, pottery, stoke-on-trent, kitchen equipment, ceramic -
 Flagstaff Hill Maritime Museum and Village
Domestic object - Plate
... will be in the student finished work shelves. Remember to pay for it before you...! After firing your work will be in the student finished work ...The Process of Making Pottery Decorating, Firing, Glazing, Making, Technical There is a rhythm and flow to clay. It can’t be done all at once! Even the making process! It can take weeks to get everything done, especially if you can only work on your pottery once a week! Even though we have three hour classes, it’s often just not enough time! Here is an overview of some of the processes so you have a bit more grasp on some of the technical stuff! Step One – Design There are SO many ideas out there for making stuff in clay! From delicate porcelain jewellery, through to heavy sculptural work and everything in between. Deciding your direction is sometimes not that easy – when you first start, try everything, you will naturally gravitate to the style that you enjoy! The options and variations are endless and can get a wee bit overwhelming too! Check in with me before you start to ensure your ideas will work, what order you might do things, how you could achieve the look you are seeking and any other technical data required! Step Two – Making Clay is thixotropic. This means that as you work with it, the clay first gets sloppier and wetter, before is begins to dry in the atmosphere. For most things, you simply can’t do all parts of the project at once. An example of work order might look like: Get last weeks work out from the shelves Prepare clay for today’s work – roll your clay, prepare balls for throwing, make the first stage of a pinch pot) Clean up last week’s work and put it on the shelf for bisque firing Check that you have any glazing to do – and do enough of it that you will have time to finish your main project Do the next step of your next project – there might be a further step that can’t be complete immediately, in that case, wrap your work well and put onto the shelves. Letting your work rest for a while can really help keep your work clean and professional looking. Many things require bagging under plastic to keep it ready for work the next week – put your name on the outside of the bag so you can find your work easily. We have stickers and markers. Consider how you want to decorate your work – coloured slip can be applied at a fairly wet stage (remembering that it will make your work even wetter!). Trying to apply slip to dry clay won’t work! If you want to do sgraffito – you will need to keep the work leather hard (a state of dryness where you can still work the clay with a little effort and a little water and care). Step Three – Drying Most of the time your work can go into the rack uncovered to let it dry out for the following week. If you want to continue forming or shaping you will need to double bag your work – put your work on a suitable sized bat and put the bat in a bag so the base of the bag is under the bat, then put another bag over the top of the work and tuck the top of the bag under the bat. If you want to trim (or turn) your thrown work the following week, it should also be double bagged. If your work is large, delicate, or of uneven thicknesses, you should lightly cover your work for drying. When considering the drying process, bare in mind the weather, humidity and wind! The hotter and dryer, the faster things dry and work can dry unevenly in the shelves – this can lead to cracking – another time to lightly cover your work for drying. Step Four – Trimming and Cleaning Up Your work is dry! It is called greenware now and it is at it’s most fragile! Handle everything with two hands. I often refer to soft hands – keep everything gentle and with your fingers spread as much as possible. Try to not pick up things like plates too much, and always with both hands! Before your work can be bisque fired it should be “cleaned up”. You work won’t go into the kiln if it has sharp edges – when glazed, sharp edges turn into razor blades! Use a piece of fly wire to rub the work all over – this will scratch a little so be light handed. Use a knife or metal kidney to scrape any areas that require a bit more dynamic treatment than the fly wire offers! Finally, a very light wipe over with a slightly damp sponge can help soften and soothe all of your edges and dags! Trimming thrown work: If you are planning to trim (or turn) your thrown work (and you should be), make sure you bag it well – your work should be leather hard to almost dry for easiest trimming. Use this step to finish the work completely – use a metal kidney to polish the surface, or a slightly damp sponge to give a freshly thrown look. Wipe the sponge around the rim after trimming, and check the inside of the pot for dags! Trimming slip cast work: Usually I will trim the rims of your work on the wheel the following day to make that stage easier, however you will still need to check your work for lumps and bumps. Last but not least – check that your name is still clearly on the bottom of your work. Step Five – Bisque Firing When the work is completely dry it can go into the bisque kiln. The bisque kiln is fired to 1000°C. This process burns off the water in the clay as well as some of the chemically bound water. The structure of the clay is not altered that much at this temperature. Inside the bisque kiln, the work is stacked a little, small bowl inside a larger bowl and onto a heavy plate. Smaller items like decorations or drink coasters might get stacked several high. Consideration is paid to the weight of the stack and shape of the work. A bisque kiln can fire about one and a half times the amount of work that the glaze kiln can fire. The firing takes about 10 hours to complete the cycle and about two days to cool down. Once it has been emptied the work is placed in the glaze room ready for you to decorate! Step Six – Glazing Decorating your work with colour can be a lot of fun – and time consuming! There are three main options for surface treatment at this stage: Oxide Washes Underglazes Glazes Washes and underglazes do not “glaze” the work – It will still need a layer of glaze to fully seal the clay (washes don’t need glaze on surfaces not designed for food or liquid as they can gloss up a little on their own). Underglazes are stable colourants that turn out pretty much how they look in the jar. They can be mixed with each other to form other colours and can be used like water colours to paint onto your work. Mostly they should have a clear glaze on top to seal them. Oxides are a different species – the pink oxide (cobalt) wash turns out bright blue for instance. They don’t always need a glaze on top, and some glazes can change the colour of the wash! The glazes need no other “glaze” on top! Be careful of unknown glaze interactions – you can put any combination of glaze in a bowl or on a plate, but only a single glaze on the outside of any vertical surface! Glazes are a chemical reaction under heat. We don’t know the exact chemicals in the Mayco glazes we use. I can guess by the way they interact with each other, however, on the whole, you need to test every idea you have, and not run the test on a vertical surface! Simply put, glaze is a layer of glass like substance that bonds with the clay underneath. Clay is made of silica, alumina and water. Glaze is made of mostly silica. Silica has a melting point of 1700°C and we fire to 1240°C. The silica requires a “flux” to help it melt at the lower temperature. Fluxes can be all sorts of chemicals – a common one is calcium – calcium has a melting point of 2500°C, however, together they both melt at a much lower temperature! Colourants are metal oxides like cobalt (blue), chrome (green through black), copper (green, blue, even red!), manganese (black, purple and pink) iron (red brown), etc. Different chemicals in the glaze can have dramatic effects. for example, barium carbonate (which we don’t use) turns manganese bright pink! Other elements can turn manganese dioxide brown, blue, purple and reddish brown. Manganese dioxide is a flux in and of itself as well. So, glazes that get their black and purple colours, often interact with other glazes and RUN! Our mirror black is a good example – it mixes really well with many glazes because it fluxes them – causes them to melt faster. It will also bring out many beautiful colours in the glazes because it’s black colouring most definitely comes from manganese dioxide! Glaze chemistry is a whole subject on it’s own! We use commercial Mayco glazes on purpose – for their huge range of colour possibilities, stability, cool interactions, artistic freedom with the ability to easily brush the glazes on and ease of use. We currently have almost 50 glazes on hand! A major project is to test the interactions of all glazes with each other. That is 2,500 test tiles!!!! I’m going to make the wall behind the wheels the feature wall of pretty colours! Step Seven – Glaze (Gloss or sometimes called “Glost”) Firing Most of the time this is the final stage of making your creation (but not always!) The glaze kiln goes to 1240°C. This is called cone 6, or midrange. It is the low end of stoneware temperatures. Stoneware clays and glazes are typically fired at cone 8 – 10, that is 1260 – 1290°C. The energy requirement to go from 1240°C to 1280°C is almost a 30% more! Our clay is formulated to vitrify (mature, turn “glass-like”) at 1240°, as are our glazes. A glaze kiln take around 12 hours to reach temperature and two to three days to cool down. Sometimes a third firing process is required – this is for decoration that is added to work after the glaze firing. For example – adding precious metals and lustres. this firing temperature is usually around 600 – 800°C depending upon the techniques being used. There are many students interested in gold and silver trims – we will be doing this third type of firing soon! After firing your work will be in the student finished work shelves. Remember to pay for it before you head out the door! There is a small extra charge for using porcelain clay (it’s more than twice the price of regular clay), and for any third firing process! Once your work has been fired it can not turn back into clay for millennia – so don’t fire it if you don’t like it! Put it in the bucket for recycling. https://firebirdstudios.com.au/the-process-of-making-pottery/Ceramics have evolved over thousands of years.White earthenware dinner plate. Crazing evident all over.Backstamped ‘Made in England S LTD’flagstaff hill, warrnambool, shipwrecked-coast, flagstaff-hill, flagstaff-hill-maritime-museum, maritime-museum, shipwreck-coast, flagstaff-hill-maritime-village, ceramics, tableware -
 Flagstaff Hill Maritime Museum and Village
Domestic object - Plate, Johnson Bros
... will be in the student finished work shelves. Remember to pay for it before you...! After firing your work will be in the student finished work ...The Process of Making Pottery Decorating, Firing, Glazing, Making, Technical There is a rhythm and flow to clay. It can’t be done all at once! Even the making process! It can take weeks to get everything done, especially if you can only work on your pottery once a week! Even though we have three hour classes, it’s often just not enough time! Here is an overview of some of the processes so you have a bit more grasp on some of the technical stuff! Step One – Design There are SO many ideas out there for making stuff in clay! From delicate porcelain jewellery, through to heavy sculptural work and everything in between. Deciding your direction is sometimes not that easy – when you first start, try everything, you will naturally gravitate to the style that you enjoy! The options and variations are endless and can get a wee bit overwhelming too! Check in with me before you start to ensure your ideas will work, what order you might do things, how you could achieve the look you are seeking and any other technical data required! Step Two – Making Clay is thixotropic. This means that as you work with it, the clay first gets sloppier and wetter, before is begins to dry in the atmosphere. For most things, you simply can’t do all parts of the project at once. An example of work order might look like: Get last weeks work out from the shelves Prepare clay for today’s work – roll your clay, prepare balls for throwing, make the first stage of a pinch pot) Clean up last week’s work and put it on the shelf for bisque firing Check that you have any glazing to do – and do enough of it that you will have time to finish your main project Do the next step of your next project – there might be a further step that can’t be complete immediately, in that case, wrap your work well and put onto the shelves. Letting your work rest for a while can really help keep your work clean and professional looking. Many things require bagging under plastic to keep it ready for work the next week – put your name on the outside of the bag so you can find your work easily. We have stickers and markers. Consider how you want to decorate your work – coloured slip can be applied at a fairly wet stage (remembering that it will make your work even wetter!). Trying to apply slip to dry clay won’t work! If you want to do sgraffito – you will need to keep the work leather hard (a state of dryness where you can still work the clay with a little effort and a little water and care). Step Three – Drying Most of the time your work can go into the rack uncovered to let it dry out for the following week. If you want to continue forming or shaping you will need to double bag your work – put your work on a suitable sized bat and put the bat in a bag so the base of the bag is under the bat, then put another bag over the top of the work and tuck the top of the bag under the bat. If you want to trim (or turn) your thrown work the following week, it should also be double bagged. If your work is large, delicate, or of uneven thicknesses, you should lightly cover your work for drying. When considering the drying process, bare in mind the weather, humidity and wind! The hotter and dryer, the faster things dry and work can dry unevenly in the shelves – this can lead to cracking – another time to lightly cover your work for drying. Step Four – Trimming and Cleaning Up Your work is dry! It is called greenware now and it is at it’s most fragile! Handle everything with two hands. I often refer to soft hands – keep everything gentle and with your fingers spread as much as possible. Try to not pick up things like plates too much, and always with both hands! Before your work can be bisque fired it should be “cleaned up”. You work won’t go into the kiln if it has sharp edges – when glazed, sharp edges turn into razor blades! Use a piece of fly wire to rub the work all over – this will scratch a little so be light handed. Use a knife or metal kidney to scrape any areas that require a bit more dynamic treatment than the fly wire offers! Finally, a very light wipe over with a slightly damp sponge can help soften and soothe all of your edges and dags! Trimming thrown work: If you are planning to trim (or turn) your thrown work (and you should be), make sure you bag it well – your work should be leather hard to almost dry for easiest trimming. Use this step to finish the work completely – use a metal kidney to polish the surface, or a slightly damp sponge to give a freshly thrown look. Wipe the sponge around the rim after trimming, and check the inside of the pot for dags! Trimming slip cast work: Usually I will trim the rims of your work on the wheel the following day to make that stage easier, however you will still need to check your work for lumps and bumps. Last but not least – check that your name is still clearly on the bottom of your work. Step Five – Bisque Firing When the work is completely dry it can go into the bisque kiln. The bisque kiln is fired to 1000°C. This process burns off the water in the clay as well as some of the chemically bound water. The structure of the clay is not altered that much at this temperature. Inside the bisque kiln, the work is stacked a little, small bowl inside a larger bowl and onto a heavy plate. Smaller items like decorations or drink coasters might get stacked several high. Consideration is paid to the weight of the stack and shape of the work. A bisque kiln can fire about one and a half times the amount of work that the glaze kiln can fire. The firing takes about 10 hours to complete the cycle and about two days to cool down. Once it has been emptied the work is placed in the glaze room ready for you to decorate! Step Six – Glazing Decorating your work with colour can be a lot of fun – and time consuming! There are three main options for surface treatment at this stage: Oxide Washes Underglazes Glazes Washes and underglazes do not “glaze” the work – It will still need a layer of glaze to fully seal the clay (washes don’t need glaze on surfaces not designed for food or liquid as they can gloss up a little on their own). Underglazes are stable colourants that turn out pretty much how they look in the jar. They can be mixed with each other to form other colours and can be used like water colours to paint onto your work. Mostly they should have a clear glaze on top to seal them. Oxides are a different species – the pink oxide (cobalt) wash turns out bright blue for instance. They don’t always need a glaze on top, and some glazes can change the colour of the wash! The glazes need no other “glaze” on top! Be careful of unknown glaze interactions – you can put any combination of glaze in a bowl or on a plate, but only a single glaze on the outside of any vertical surface! Glazes are a chemical reaction under heat. We don’t know the exact chemicals in the Mayco glazes we use. I can guess by the way they interact with each other, however, on the whole, you need to test every idea you have, and not run the test on a vertical surface! Simply put, glaze is a layer of glass like substance that bonds with the clay underneath. Clay is made of silica, alumina and water. Glaze is made of mostly silica. Silica has a melting point of 1700°C and we fire to 1240°C. The silica requires a “flux” to help it melt at the lower temperature. Fluxes can be all sorts of chemicals – a common one is calcium – calcium has a melting point of 2500°C, however, together they both melt at a much lower temperature! Colourants are metal oxides like cobalt (blue), chrome (green through black), copper (green, blue, even red!), manganese (black, purple and pink) iron (red brown), etc. Different chemicals in the glaze can have dramatic effects. for example, barium carbonate (which we don’t use) turns manganese bright pink! Other elements can turn manganese dioxide brown, blue, purple and reddish brown. Manganese dioxide is a flux in and of itself as well. So, glazes that get their black and purple colours, often interact with other glazes and RUN! Our mirror black is a good example – it mixes really well with many glazes because it fluxes them – causes them to melt faster. It will also bring out many beautiful colours in the glazes because it’s black colouring most definitely comes from manganese dioxide! Glaze chemistry is a whole subject on it’s own! We use commercial Mayco glazes on purpose – for their huge range of colour possibilities, stability, cool interactions, artistic freedom with the ability to easily brush the glazes on and ease of use. We currently have almost 50 glazes on hand! A major project is to test the interactions of all glazes with each other. That is 2,500 test tiles!!!! I’m going to make the wall behind the wheels the feature wall of pretty colours! Step Seven – Glaze (Gloss or sometimes called “Glost”) Firing Most of the time this is the final stage of making your creation (but not always!) The glaze kiln goes to 1240°C. This is called cone 6, or midrange. It is the low end of stoneware temperatures. Stoneware clays and glazes are typically fired at cone 8 – 10, that is 1260 – 1290°C. The energy requirement to go from 1240°C to 1280°C is almost a 30% more! Our clay is formulated to vitrify (mature, turn “glass-like”) at 1240°, as are our glazes. A glaze kiln take around 12 hours to reach temperature and two to three days to cool down. Sometimes a third firing process is required – this is for decoration that is added to work after the glaze firing. For example – adding precious metals and lustres. this firing temperature is usually around 600 – 800°C depending upon the techniques being used. There are many students interested in gold and silver trims – we will be doing this third type of firing soon! After firing your work will be in the student finished work shelves. Remember to pay for it before you head out the door! There is a small extra charge for using porcelain clay (it’s more than twice the price of regular clay), and for any third firing process! Once your work has been fired it can not turn back into clay for millennia – so don’t fire it if you don’t like it! Put it in the bucket for recycling. https://firebirdstudios.com.au/the-process-of-making-pottery/Ceramics have evolved over thousands of years.A white earthenware side plate with a gadroon edge. Has water marks and chips on front.‘Johnson Bros England Reg No 15587’flagstaff hill, warrnambool, shipwrecked-coast, flagstaff-hill, flagstaff-hill-maritime-museum, maritime-museum, shipwreck-coast, flagstaff-hill-maritime-village, johnson bros, ceramics, tableware -
 Flagstaff Hill Maritime Museum and Village
Domestic object - Plate, Alfred Meakin
... will be in the student finished work shelves. Remember to pay for it before you...! After firing your work will be in the student finished work ...The Process of Making Pottery Decorating, Firing, Glazing, Making, Technical There is a rhythm and flow to clay. It can’t be done all at once! Even the making process! It can take weeks to get everything done, especially if you can only work on your pottery once a week! Even though we have three hour classes, it’s often just not enough time! Here is an overview of some of the processes so you have a bit more grasp on some of the technical stuff! Step One – Design There are SO many ideas out there for making stuff in clay! From delicate porcelain jewellery, through to heavy sculptural work and everything in between. Deciding your direction is sometimes not that easy – when you first start, try everything, you will naturally gravitate to the style that you enjoy! The options and variations are endless and can get a wee bit overwhelming too! Check in with me before you start to ensure your ideas will work, what order you might do things, how you could achieve the look you are seeking and any other technical data required! Step Two – Making Clay is thixotropic. This means that as you work with it, the clay first gets sloppier and wetter, before is begins to dry in the atmosphere. For most things, you simply can’t do all parts of the project at once. An example of work order might look like: Get last weeks work out from the shelves Prepare clay for today’s work – roll your clay, prepare balls for throwing, make the first stage of a pinch pot) Clean up last week’s work and put it on the shelf for bisque firing Check that you have any glazing to do – and do enough of it that you will have time to finish your main project Do the next step of your next project – there might be a further step that can’t be complete immediately, in that case, wrap your work well and put onto the shelves. Letting your work rest for a while can really help keep your work clean and professional looking. Many things require bagging under plastic to keep it ready for work the next week – put your name on the outside of the bag so you can find your work easily. We have stickers and markers. Consider how you want to decorate your work – coloured slip can be applied at a fairly wet stage (remembering that it will make your work even wetter!). Trying to apply slip to dry clay won’t work! If you want to do sgraffito – you will need to keep the work leather hard (a state of dryness where you can still work the clay with a little effort and a little water and care). Step Three – Drying Most of the time your work can go into the rack uncovered to let it dry out for the following week. If you want to continue forming or shaping you will need to double bag your work – put your work on a suitable sized bat and put the bat in a bag so the base of the bag is under the bat, then put another bag over the top of the work and tuck the top of the bag under the bat. If you want to trim (or turn) your thrown work the following week, it should also be double bagged. If your work is large, delicate, or of uneven thicknesses, you should lightly cover your work for drying. When considering the drying process, bare in mind the weather, humidity and wind! The hotter and dryer, the faster things dry and work can dry unevenly in the shelves – this can lead to cracking – another time to lightly cover your work for drying. Step Four – Trimming and Cleaning Up Your work is dry! It is called greenware now and it is at it’s most fragile! Handle everything with two hands. I often refer to soft hands – keep everything gentle and with your fingers spread as much as possible. Try to not pick up things like plates too much, and always with both hands! Before your work can be bisque fired it should be “cleaned up”. You work won’t go into the kiln if it has sharp edges – when glazed, sharp edges turn into razor blades! Use a piece of fly wire to rub the work all over – this will scratch a little so be light handed. Use a knife or metal kidney to scrape any areas that require a bit more dynamic treatment than the fly wire offers! Finally, a very light wipe over with a slightly damp sponge can help soften and soothe all of your edges and dags! Trimming thrown work: If you are planning to trim (or turn) your thrown work (and you should be), make sure you bag it well – your work should be leather hard to almost dry for easiest trimming. Use this step to finish the work completely – use a metal kidney to polish the surface, or a slightly damp sponge to give a freshly thrown look. Wipe the sponge around the rim after trimming, and check the inside of the pot for dags! Trimming slip cast work: Usually I will trim the rims of your work on the wheel the following day to make that stage easier, however you will still need to check your work for lumps and bumps. Last but not least – check that your name is still clearly on the bottom of your work. Step Five – Bisque Firing When the work is completely dry it can go into the bisque kiln. The bisque kiln is fired to 1000°C. This process burns off the water in the clay as well as some of the chemically bound water. The structure of the clay is not altered that much at this temperature. Inside the bisque kiln, the work is stacked a little, small bowl inside a larger bowl and onto a heavy plate. Smaller items like decorations or drink coasters might get stacked several high. Consideration is paid to the weight of the stack and shape of the work. A bisque kiln can fire about one and a half times the amount of work that the glaze kiln can fire. The firing takes about 10 hours to complete the cycle and about two days to cool down. Once it has been emptied the work is placed in the glaze room ready for you to decorate! Step Six – Glazing Decorating your work with colour can be a lot of fun – and time consuming! There are three main options for surface treatment at this stage: Oxide Washes Underglazes Glazes Washes and underglazes do not “glaze” the work – It will still need a layer of glaze to fully seal the clay (washes don’t need glaze on surfaces not designed for food or liquid as they can gloss up a little on their own). Underglazes are stable colourants that turn out pretty much how they look in the jar. They can be mixed with each other to form other colours and can be used like water colours to paint onto your work. Mostly they should have a clear glaze on top to seal them. Oxides are a different species – the pink oxide (cobalt) wash turns out bright blue for instance. They don’t always need a glaze on top, and some glazes can change the colour of the wash! The glazes need no other “glaze” on top! Be careful of unknown glaze interactions – you can put any combination of glaze in a bowl or on a plate, but only a single glaze on the outside of any vertical surface! Glazes are a chemical reaction under heat. We don’t know the exact chemicals in the Mayco glazes we use. I can guess by the way they interact with each other, however, on the whole, you need to test every idea you have, and not run the test on a vertical surface! Simply put, glaze is a layer of glass like substance that bonds with the clay underneath. Clay is made of silica, alumina and water. Glaze is made of mostly silica. Silica has a melting point of 1700°C and we fire to 1240°C. The silica requires a “flux” to help it melt at the lower temperature. Fluxes can be all sorts of chemicals – a common one is calcium – calcium has a melting point of 2500°C, however, together they both melt at a much lower temperature! Colourants are metal oxides like cobalt (blue), chrome (green through black), copper (green, blue, even red!), manganese (black, purple and pink) iron (red brown), etc. Different chemicals in the glaze can have dramatic effects. for example, barium carbonate (which we don’t use) turns manganese bright pink! Other elements can turn manganese dioxide brown, blue, purple and reddish brown. Manganese dioxide is a flux in and of itself as well. So, glazes that get their black and purple colours, often interact with other glazes and RUN! Our mirror black is a good example – it mixes really well with many glazes because it fluxes them – causes them to melt faster. It will also bring out many beautiful colours in the glazes because it’s black colouring most definitely comes from manganese dioxide! Glaze chemistry is a whole subject on it’s own! We use commercial Mayco glazes on purpose – for their huge range of colour possibilities, stability, cool interactions, artistic freedom with the ability to easily brush the glazes on and ease of use. We currently have almost 50 glazes on hand! A major project is to test the interactions of all glazes with each other. That is 2,500 test tiles!!!! I’m going to make the wall behind the wheels the feature wall of pretty colours! Step Seven – Glaze (Gloss or sometimes called “Glost”) Firing Most of the time this is the final stage of making your creation (but not always!) The glaze kiln goes to 1240°C. This is called cone 6, or midrange. It is the low end of stoneware temperatures. Stoneware clays and glazes are typically fired at cone 8 – 10, that is 1260 – 1290°C. The energy requirement to go from 1240°C to 1280°C is almost a 30% more! Our clay is formulated to vitrify (mature, turn “glass-like”) at 1240°, as are our glazes. A glaze kiln take around 12 hours to reach temperature and two to three days to cool down. Sometimes a third firing process is required – this is for decoration that is added to work after the glaze firing. For example – adding precious metals and lustres. this firing temperature is usually around 600 – 800°C depending upon the techniques being used. There are many students interested in gold and silver trims – we will be doing this third type of firing soon! After firing your work will be in the student finished work shelves. Remember to pay for it before you head out the door! There is a small extra charge for using porcelain clay (it’s more than twice the price of regular clay), and for any third firing process! Once your work has been fired it can not turn back into clay for millennia – so don’t fire it if you don’t like it! Put it in the bucket for recycling. https://firebirdstudios.com.au/the-process-of-making-pottery/Ceramics have evolved over thousands of years.Earthenware dessert plate, cream colour. Made by Alfred Meakin, England. Backstamped ‘Alfred Meakin England’. flagstaff hill, warrnambool, shipwrecked-coast, flagstaff-hill, flagstaff-hill-maritime-museum, maritime-museum, shipwreck-coast, flagstaff-hill-maritime-village, alfred meakin, ceramics, earthenware, kitchenware -
 Flagstaff Hill Maritime Museum and Village
Domestic object - Jug
... will be in the student finished work shelves. Remember to pay for it before you...! After firing your work will be in the student finished work ...The Process of Making Pottery Decorating, Firing, Glazing, Making, Technical There is a rhythm and flow to clay. It can’t be done all at once! Even the making process! It can take weeks to get everything done, especially if you can only work on your pottery once a week! Even though we have three hour classes, it’s often just not enough time! Here is an overview of some of the processes so you have a bit more grasp on some of the technical stuff! Step One – Design There are SO many ideas out there for making stuff in clay! From delicate porcelain jewellery, through to heavy sculptural work and everything in between. Deciding your direction is sometimes not that easy – when you first start, try everything, you will naturally gravitate to the style that you enjoy! The options and variations are endless and can get a wee bit overwhelming too! Check in with me before you start to ensure your ideas will work, what order you might do things, how you could achieve the look you are seeking and any other technical data required! Step Two – Making Clay is thixotropic. This means that as you work with it, the clay first gets sloppier and wetter, before is begins to dry in the atmosphere. For most things, you simply can’t do all parts of the project at once. An example of work order might look like: Get last weeks work out from the shelves Prepare clay for today’s work – roll your clay, prepare balls for throwing, make the first stage of a pinch pot) Clean up last week’s work and put it on the shelf for bisque firing Check that you have any glazing to do – and do enough of it that you will have time to finish your main project Do the next step of your next project – there might be a further step that can’t be complete immediately, in that case, wrap your work well and put onto the shelves. Letting your work rest for a while can really help keep your work clean and professional looking. Many things require bagging under plastic to keep it ready for work the next week – put your name on the outside of the bag so you can find your work easily. We have stickers and markers. Consider how you want to decorate your work – coloured slip can be applied at a fairly wet stage (remembering that it will make your work even wetter!). Trying to apply slip to dry clay won’t work! If you want to do sgraffito – you will need to keep the work leather hard (a state of dryness where you can still work the clay with a little effort and a little water and care). Step Three – Drying Most of the time your work can go into the rack uncovered to let it dry out for the following week. If you want to continue forming or shaping you will need to double bag your work – put your work on a suitable sized bat and put the bat in a bag so the base of the bag is under the bat, then put another bag over the top of the work and tuck the top of the bag under the bat. If you want to trim (or turn) your thrown work the following week, it should also be double bagged. If your work is large, delicate, or of uneven thicknesses, you should lightly cover your work for drying. When considering the drying process, bare in mind the weather, humidity and wind! The hotter and dryer, the faster things dry and work can dry unevenly in the shelves – this can lead to cracking – another time to lightly cover your work for drying. Step Four – Trimming and Cleaning Up Your work is dry! It is called greenware now and it is at it’s most fragile! Handle everything with two hands. I often refer to soft hands – keep everything gentle and with your fingers spread as much as possible. Try to not pick up things like plates too much, and always with both hands! Before your work can be bisque fired it should be “cleaned up”. You work won’t go into the kiln if it has sharp edges – when glazed, sharp edges turn into razor blades! Use a piece of fly wire to rub the work all over – this will scratch a little so be light handed. Use a knife or metal kidney to scrape any areas that require a bit more dynamic treatment than the fly wire offers! Finally, a very light wipe over with a slightly damp sponge can help soften and soothe all of your edges and dags! Trimming thrown work: If you are planning to trim (or turn) your thrown work (and you should be), make sure you bag it well – your work should be leather hard to almost dry for easiest trimming. Use this step to finish the work completely – use a metal kidney to polish the surface, or a slightly damp sponge to give a freshly thrown look. Wipe the sponge around the rim after trimming, and check the inside of the pot for dags! Trimming slip cast work: Usually I will trim the rims of your work on the wheel the following day to make that stage easier, however you will still need to check your work for lumps and bumps. Last but not least – check that your name is still clearly on the bottom of your work. Step Five – Bisque Firing When the work is completely dry it can go into the bisque kiln. The bisque kiln is fired to 1000°C. This process burns off the water in the clay as well as some of the chemically bound water. The structure of the clay is not altered that much at this temperature. Inside the bisque kiln, the work is stacked a little, small bowl inside a larger bowl and onto a heavy plate. Smaller items like decorations or drink coasters might get stacked several high. Consideration is paid to the weight of the stack and shape of the work. A bisque kiln can fire about one and a half times the amount of work that the glaze kiln can fire. The firing takes about 10 hours to complete the cycle and about two days to cool down. Once it has been emptied the work is placed in the glaze room ready for you to decorate! Step Six – Glazing Decorating your work with colour can be a lot of fun – and time consuming! There are three main options for surface treatment at this stage: Oxide Washes Underglazes Glazes Washes and underglazes do not “glaze” the work – It will still need a layer of glaze to fully seal the clay (washes don’t need glaze on surfaces not designed for food or liquid as they can gloss up a little on their own). Underglazes are stable colourants that turn out pretty much how they look in the jar. They can be mixed with each other to form other colours and can be used like water colours to paint onto your work. Mostly they should have a clear glaze on top to seal them. Oxides are a different species – the pink oxide (cobalt) wash turns out bright blue for instance. They don’t always need a glaze on top, and some glazes can change the colour of the wash! The glazes need no other “glaze” on top! Be careful of unknown glaze interactions – you can put any combination of glaze in a bowl or on a plate, but only a single glaze on the outside of any vertical surface! Glazes are a chemical reaction under heat. We don’t know the exact chemicals in the Mayco glazes we use. I can guess by the way they interact with each other, however, on the whole, you need to test every idea you have, and not run the test on a vertical surface! Simply put, glaze is a layer of glass like substance that bonds with the clay underneath. Clay is made of silica, alumina and water. Glaze is made of mostly silica. Silica has a melting point of 1700°C and we fire to 1240°C. The silica requires a “flux” to help it melt at the lower temperature. Fluxes can be all sorts of chemicals – a common one is calcium – calcium has a melting point of 2500°C, however, together they both melt at a much lower temperature! Colourants are metal oxides like cobalt (blue), chrome (green through black), copper (green, blue, even red!), manganese (black, purple and pink) iron (red brown), etc. Different chemicals in the glaze can have dramatic effects. for example, barium carbonate (which we don’t use) turns manganese bright pink! Other elements can turn manganese dioxide brown, blue, purple and reddish brown. Manganese dioxide is a flux in and of itself as well. So, glazes that get their black and purple colours, often interact with other glazes and RUN! Our mirror black is a good example – it mixes really well with many glazes because it fluxes them – causes them to melt faster. It will also bring out many beautiful colours in the glazes because it’s black colouring most definitely comes from manganese dioxide! Glaze chemistry is a whole subject on it’s own! We use commercial Mayco glazes on purpose – for their huge range of colour possibilities, stability, cool interactions, artistic freedom with the ability to easily brush the glazes on and ease of use. We currently have almost 50 glazes on hand! A major project is to test the interactions of all glazes with each other. That is 2,500 test tiles!!!! I’m going to make the wall behind the wheels the feature wall of pretty colours! Step Seven – Glaze (Gloss or sometimes called “Glost”) Firing Most of the time this is the final stage of making your creation (but not always!) The glaze kiln goes to 1240°C. This is called cone 6, or midrange. It is the low end of stoneware temperatures. Stoneware clays and glazes are typically fired at cone 8 – 10, that is 1260 – 1290°C. The energy requirement to go from 1240°C to 1280°C is almost a 30% more! Our clay is formulated to vitrify (mature, turn “glass-like”) at 1240°, as are our glazes. A glaze kiln take around 12 hours to reach temperature and two to three days to cool down. Sometimes a third firing process is required – this is for decoration that is added to work after the glaze firing. For example – adding precious metals and lustres. this firing temperature is usually around 600 – 800°C depending upon the techniques being used. There are many students interested in gold and silver trims – we will be doing this third type of firing soon! After firing your work will be in the student finished work shelves. Remember to pay for it before you head out the door! There is a small extra charge for using porcelain clay (it’s more than twice the price of regular clay), and for any third firing process! Once your work has been fired it can not turn back into clay for millennia – so don’t fire it if you don’t like it! Put it in the bucket for recycling. https://firebirdstudios.com.au/the-process-of-making-pottery/The form of the jug has been in use for many centuries.Stoneware jug. Two tone brown glaze with pierced lip behind spout. Spout chipped.None.flagstaff hill, warrnambool, shipwrecked-coast, flagstaff-hill, flagstaff-hill-maritime-museum, maritime-museum, shipwreck-coast, flagstaff-hill-maritime-village, jug, ceramic jug -
 Eltham District Historical Society Inc
Photograph - Digital Photograph, Alan King, Great Hall, Montsalvat, 8 January 2008
... and students from his Queen Street studio. They set to work, first... and students from his Queen Street studio. They set to work, first ...Great Hall at Montsalvat built 1938-52, designed by Justus Jorgensen Covered under National Estate, National Trust of Australia (Victoria) State Significance, Victorian Heritage and Heritage Overlay, Nillumbik Planning Scheme. Published: Nillumbik Now and Then / Marguerite Marshall 2008; photographs Alan King with Marguerite Marshall.; p129 At first glance, Montsalvat, the artists’ community at Hillcrest Avenue, Eltham, could belong to another time and place. The French provincial Gothic-style buildings blend picturesquely with the introduced and native trees and farm animals on the five hectare property. But Montsalvat belongs very much to today’s Eltham, having inspired much of its creative activity and style. The use of mud-brick and recycled building materials, for which Eltham is so well-known, was largely popularised by Montsalvat. Montsalvat – unique in Victoria and probably in Australia – is registered by the National Trust and National Estate.1 Montsalvat, named after the castle of the Knights of the Holy Grail, has attracted artists and intellectuals since it was founded in 1934. For years at weekends, artists, lawyers, philosophers, politicians and others, who shared a love for what Montsalvat stood for, gathered for a meal and stimulating discussion. The focus for this gathering of talent was Justus Jörgensen, an eccentric man with vision and charisma. It was Jörgensen’s foresight that saw the creation of Montsalvat, which in 1975 was formed into a trust to benefit the Victorian people. The property was then valued at about three million dollars. It is now visited by thousands of people annually. Born in 1894 and brought up a Catholic, Jörgensen had trained as an architect. He later studied painting at the National Gallery School under artist, Frederick McCubbin, then joined the studio of artist Max Meldrum. In 1924, Jörgensen married medical student Lillian Smith, and with artist friends they travelled to Europe to study the great masters. In London Jörgensen exhibited in several major galleries. One of his still life paintings was included in the book The Art of Still Life by Herbert Furst, which featured 100 of the greatest ever still life paintings.2 In 1929, Jörgensen returned to Melbourne where Lil, now qualified, worked as an anaesthetist at St Vincent’s Hospital. They bought a small house in Brighton and Jörgensen rented a large building in Queen Street for his studio until the Royal Automobile Club of Victoria bought it in 1955. While designing and overseeing the building of a studio for his friend the famous cartoonist Percy Leason, in Lavender Park Road, Jörgensen decided to buy land for a country retreat in Eltham. So the building of Montsalvat began. Jörgensen gathered around a dozen of his friends and students from his Queen Street studio. They set to work, first at weekends then some decided to live permanently on the site. Jörgensen had seen mud-brick buildings in Spain and recognised that Eltham’s clay soil was ideal for mud-bricks and although labour intensive, it was a very cheap way of building. Jörgensen’s students and friends worked under his direction with the help of local tradesmen, including carpenter, Len Jarrold and later stone mason, Horrie Judd. In return Jörgensen would give the students a painting lesson or two. It was the Great Depression when many were out of work. Jörgensen also inspired people to give generously of money and materials. With their help Jörgensen found second-hand materials for building. Friends donated slate for roofing, discarded firebricks were used for flooring and windows and doors and a cast-iron circular staircase came from a wrecker. The students’ day started at 7am with building and domestic chores, shared equally between the sexes. The first building was used by his friends at weekends and then became a home for his wife Lil. It consisted of three rooms and an attic under a high-pitched roof. Jörgensen then built a similar structure with the same high-pitched roof as a more permanent home for his students. The two buildings were joined together with a tower and a studio for Jörgensen. While excavating for the studio a reef of yellow mud-stone was found and then used in construction. The next building was the Great Hall, to be used for dining, exhibitions and meetings and completed in 1958, after a halt during the war. Whelan the Wrecker donated the stone-framed windows from the building that housed the Victorian Insurance Co. in Collins Street, which had been demolished in the 1930s. The swimming pool was donated and cubicles were built for the students with their initials marked in tiles on each doorstep.1 One of Jörgensen’s great abilities was to recognise how to use material which harmonised. He would comb through wreckers’ yards for what he needed. Regarding his buildings as sculptural pieces, his first consideration was for the aesthetic quality of a building and only then for its functionality.2 At Montsalvat, Jörgensen found he was able to put his ideas into practice without compromise and those who worked with him had to conform to his ideas. With the Jörgensens, the colony’s original nucleus consisted of the Skipper family – Mervyn and wife Lena, daughters Helen and Sonia and son Matcham,who was to become an eminent jeweller and sculptor represented in National Gallery collections throughout Australia and in European museums.3 Other members were Arthur Munday, Lesley Sinclair, Helen Lempriere, Ian Robertson, John Smith, George Chalmers, John Busst and Sue Van der Kellan; also Jörgensen’s three sons – Max, Sebastian and Sigmund – and Saskia, Sonia Skipper and Arthur Munday’s daughter. Montsalvat went through some hard times when local gossips spread rumours of sexual shenanigans at Montsalvat. However Montsalvat also had many local supporters – especially amongst the local tradespeople. The colony was certainly unconventional – with Jörgensen’s wife Lil (and son Max) and life-time partner Helen Skipper, (mother of Sebastian and Sigmund) living at Montsalvat. Sonia Skipper says in her biography that the group were ‘very conscious of their responsibilities to each other and a desire to make their relationships work’.4 By World War Two many buildings around the Great Hall were completed. Jörgensen was a pacifist, as were most of his students. Some of the Montsalvat community enlisted while others engaged in essential services like dairy farming and market gardening for the war effort. It was then that Jörgensen constructed farm buildings. After the war many well-known personalities such as Clifton Pugh, landscape gardener Gordon Ford, and builder Alistair Knox, were drawn to Montsalvat. They learnt that building was not a ‘sacred cow’ only for professionals, but that anyone who was willing to get their hands dirty could do it. The post-war shortage of materials also encouraged builders to follow Montsalvat’s lead in reusing materials. When Jörgensen died in 1975, his influence did not – thanks largely to the vigilance of his son, Sigmund, who became its administrator. The weekend dinners have gone, but in 2008 about 14 artists still work at Montsalvat – some living there – including a couple who have been there since its early days. Under Sigmund’s direction Montsalvat further expanded its activities which included festivals, art exhibitions, concerts and weddings. Sigmund completed the Chapel, then the Long Gallery next to the pool, After the barn burnt down, he replaced it in 1999 (the builder was Hamish Knox, Alistair’s son) with a new gallery and entrance and added a restaurant. Sigmund has been careful that any new building blends in with the character of Montsalvat. In 2006 Montsalvat was restructured for its continued financial viability and with the help of Arts Victoria a new executive officer was appointed. A representative board from the wider community was established, which includes members from the former Montsalvat Trust including Sigmund Jörgensen – who is now the heritage and arts adviser to the new company Montsalvat Ltd.5 Today, visiting Montsalvat one still sees artists, students and visitors enjoying the unique and beautiful surroundings.This collection of almost 130 photos about places and people within the Shire of Nillumbik, an urban and rural municipality in Melbourne's north, contributes to an understanding of the history of the Shire. Published in 2008 immediately prior to the Black Saturday bushfires of February 7, 2009, it documents sites that were impacted, and in some cases destroyed by the fires. It includes photographs taken especially for the publication, creating a unique time capsule representing the Shire in the early 21st century. It remains the most recent comprehenesive publication devoted to the Shire's history connecting local residents to the past. nillumbik now and then (marshall-king) collection, eltham, great hall, montsalvat