Showing 3489 items
matching forces
-
 Federation University Historical Collection
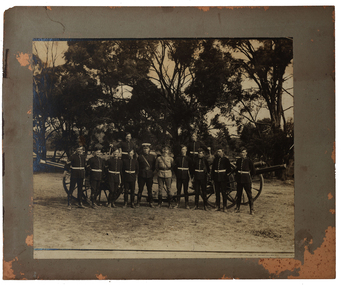
Photograph - black and white, Volunteer Force in a paddock, c1910
Twelve members of a volunteer artillery pose with two guns on wheels in a paddock.volunteer artillery, volunteer forces, armed forced, military, artillery -
 Federation University Historical Collection
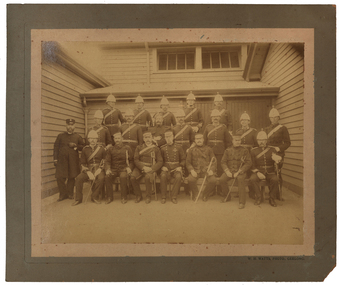
Photograph - Black and White, W.H. Watts, Volunteer Military Force, Fort Queenscliff, c1909
Mounted photograph of 20 men in uniform posing in front of a weatherboard building (probably at Fort Queenscliff)volunteer forces, military, armed forces, geelong, w.h. watts, fort queenscliff -
 Federation University Historical Collection
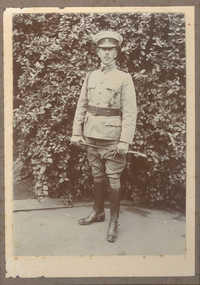
Photograph - Photograph - Black and White, Member of the Geelong Volunteer Rifle Corps, c1910
Uniformed male - a member of the Geelong Volunteer Rifle Corpsgeelong volunteer rifle corps, volunteer rifle corps, rifle corps, geelong, armed forces, military, volunteer rifles -
 Flagstaff Hill Maritime Museum and Village
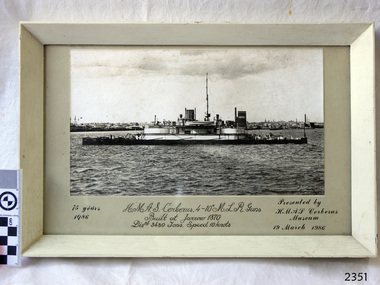
Photograph - Commemorative, Royal Australian Navy (RAN), H.M.A.S. Cerberus. 4-10" M.L.R. Guns, 1986
The ship HMAS Cerberus was Built at Jarrow, Newcastle upon Tyne, England, in 1870, specifically for the colony of Victoria (Australia) and originally named HMVS Cerberus. It had a displacement of 3480 tons and could travel at the speed of 10 knots. The ship carried 4x 10 inch M.L.R. guns. The ship was renamed HMAS Cerberus in 1911 when the navy became the Royal Australian Navy. The photograph was mounted by members of HMAS Cerberus at Crib Point, Western Port Bay, Victoria in 1986. It was presented to Flagstaff Hill Maritime Village by the HMAS Cerberus Museum in 1986 to commemorate the ship's 75 years of service for the Royal Australian Navy. The photograph is significant for its connection with the colony of Victoria before Federation. It is also significant for its connection with the Royal Australian Navy and its service and training of Australian defence forces. Photograph behind glass, in timber frame. Black and white photograph of vessel HMAS Cerberus anchored , with city in the background. Frame is painted white. Photograph was taken to commemorate 75 years of the ship's service in the Royal Australian Navy. It was framed and presented to Flagstaff Hill by the HMAS Cerberus Museum on 19 March 1986. Details are hand written below the photograph.Original script writing in centre "H.M.A.S. Cerberus. 4-10 M.L.R. Guns / Built at Jarrow 1870 / Displ 3480 tons. Speed 10 knots. More recent text "75 years / 1986" "Presented by / HMAS Cerberus / Museum/ 19 March 1986"flagstaff hill, warrnambool, shipwrecked-coast, flagstaff-hill, flagstaff-hill-maritime-museum, maritime-museum, shipwreck-coast, flagstaff-hill-maritime-village, photograph, hmas cerberus, 75 year commemoration, 1876, 1911, royal australian navy, navy training base, point crib, ran, cerberus, commemorative photograph, western port bay, hmvs cerberus -
 Flagstaff Hill Maritime Museum and Village
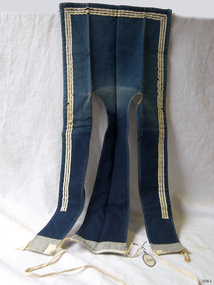
Uniform - Sailor's Collar, Early to mid-20th century
This sailor's collar is part of a naval uniform. It once belonged to R S Wallace, who served in the RAN (Royal Australian Navy). From January 1857 the Australian Navy uniform was formally established. The uniform, referred to as a 'sailor's suit', includes a blue flap collar such as this one. Sailors in the Royal Australian Navy wore collars of this design from the early 20th century. The rating personnel of the Royal Canadian Navy were issued with a very similar collar from 1910 to the 1950s. The blue denim collars were buttoned or died inside their tops with the back and the striped portion of the front flaps showing.The navy flap collar represents the uniform of a rating sailor in the Royal Australian Navy in the early to mid-20th century, connecting it to the maritime history of Australia and the evolution of the uniform of the navy. The collar is the only one in this museum's collection.Sailor's collar; a flap collar of blue fabric with three white stripes around the outside edges, apart from the centre flap that has no stripes. The collar is a rectangle with half divided into three flaps or strips. It has an inscription. The underside is lined with blue striped white fabric and there are tapes attached for fastening it. The Royal Australian Navy collar once belonged to R S Wallace."R.S. Wallace"flagstaff hill, flagstaff hill maritime museum and village, warrnambool, maritime museum, maritime village, great ocean road, shipwreck coast, sailor’s collar, sailor’s uniform, uniform, military, navy, ran, royal australian navy, r s wallace, seamen's collar, australian defence forces, naval force, sailor's sit, sailor's rig, flap collar, naval collar -
 Flagstaff Hill Maritime Museum and Village
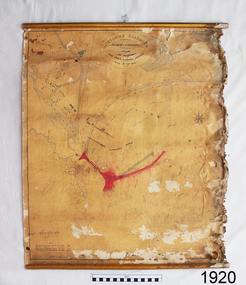
Document - Plan, Victorian Harbours Warrnambool, Victorian Harbours, Warrnambool, Plan to Accompany Sir John Coode's Report, 28-02-1879
This plan is of great significance to the local history of Warrnambool, in particular the Breakwater and its impact on Warrnambool's maritime and trade history. The plan shows the existing jetties at the Port of Warrnambool, plus the partially erected Breakwater and proposed works to the Breakwater by both the Borough of Warrnambool Surveyor and Sir John Coode. The plan was signed 28th February 1879 by Sir John Coode. The legend at the bottom left describes the existing works and the proposed works. The Warrnambool Breakwater Sir John Coode was a British harbour engineer. He was brought to Melbourne by the Melbourne Harbour Trust to advise on works to improve the Port of Melbourne. The Victorian Government commissioned him to present a plan to complete the Warrnambool Breakwater. His original plan was too expensive so he prepared a revised plan for a shorter structure. The work was completed in 1890. The construction proved to be too short to protect adequately from the weather and didn't allow enough depth for larger vessels to come into port. The decreasing trade was further affected by siltation in the bay due to the breakwater, and the completion of the railway line. The situation of the harbour became a real problem that, by 1910, required continuous dredging. In 1914 the Breakwater was extended but proved to be a failure because the work began to subside and by 1920 about two thirds of the harbour was silted up. Alterations made in the 1920's increased the silting problem and by the 1940's the harbour was no longer used. More alterations were made in the 1950's and 1960's. The Warrnambool Breakwater is registered as a place of significance on the Victorian Heritage Database. This plan of the proposed works for the existing Warrnambool Breakwater is of great significance to the local history of Warrnambool, in particular the Breakwater and its impact on Warrnambool's maritime and trade history. The Warrnambool Breakwater is registered as a place of significance on the Victorian Heritage Database (VHR H2024). It is historically significant to Victoria as one of the most important maritime engineering projects in Victoria in the late 19th century. The Warrnambool Breakwater is of historical significance as one of the most important maritime engineering projects in Victoria in the late nineteenth century. It is evidence of Victoria's nineteenth century investment in regional port infrastructure and the development of Victorian coastal shipping. It is of significance for its association with the English civil engineer Sir John Coode, the most distinguished harbour engineer of the nineteenth century, who was brought to Victoria to advise on works to improve the Port of Melbourne, but was retained by the Government to advise on improvements to the harbours at Portland, Geelong, Port Fairy, and Lakes Entrance, as well as Warrnambool. His projects for Melbourne, Lakes Entrance and Warrnambool were major engineering projects of the nineteenth century. The breakwater is historically significant as a reminder of Warrnambool's early maritime history as a Western District port, and as one of Victoria's major 'outer ports'. While the Warrnambool Breakwater is a demonstration of the engineering skills of the nineteenth century, it also demonstrates the limitations of knowledge relating to sedimentology at the time and the confidence apparent in a number of nineteenth century plans which assumed that natural forces could be overcome or contained by engineering.Plan of Warrnambool Harbour, Port of Warrnambool, dated 28 Feb 1879. Plan shows existing Breakwater and work proposed by both Warrnambool Borough Surveyor and Sir John Coode. Plan has gold coloured quarter-dowel rods top and bottom and a metal ring at the top. Stamped with title. Signed by Sir John Coode.Stamped "VICTORIAN HARBOURS / WARRNAMBOOL / PLAN / to accompany / SIR JOHN GOODE'S REPORT / DATED 28 FEB 1879" Signature "John Coode"flagstaff hill, warrnambool, maritime museum, shipwreck coast, great ocean road, sir john coode, borough of warrnambool surveyor, plan of warrnambool, victorian harbours, warrnambool harbour, warrnambool breakwater, port of warrnambool, vhd vhr h2024, flagstaff hill maritime museum & village, maritime village, map, chart, plan, lady bay, breakwater, jetty, pier, vhr h2024, proposed works, 1879 -
 Federation University Historical Collection
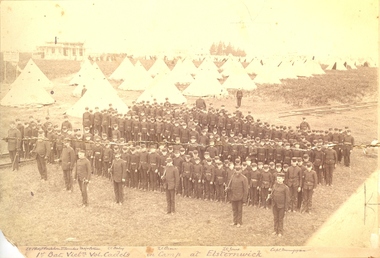
Photograph - Photograph - Sepia, First Battalion of Victorian Volunteer Cadets in Camp at Elsternwick
The donor, Warren Perry, wrote the book on the history of the School of Mines. At the time of the donation, he was 100 years old and living in a Nursing Home. He also donated a number of books to the U3 Library.Number of young cadets in formation on the parade ground. Military encampment in Elsternwick in the background1st Bat. Vict'n Vol. Cadets in camp at Elsternwickwarren perry, dr perry, victorian volunteer forces, victorian volenteer cadets, elsternwick, 1st battallion victorian volunteer cadets, volunteer forces -
 Federation University Historical Collection
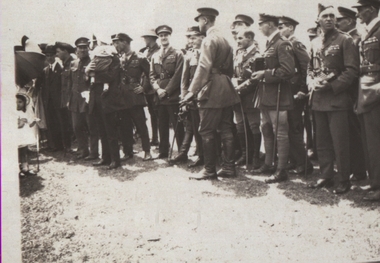
Photograph - Black and White, Chatham-Holmes Collection: Landing of plane
Copies of original photographsWritten on back: .1 At the landing .2 Another group .3 One view of the landingchatham-holmes collection, plane landing, armed forces -
 Australian Commando Association - Victoria
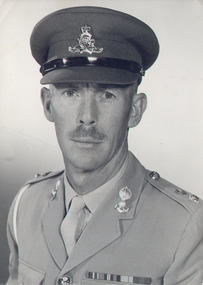
Photograph, Major Peter Seddon, circa 1950s
Major Peter Seddon was the founding Officer Commanding of 2 Commando Company when it was first raised in Melbourne in 1955.I and 2 Commando Companies, in Sydney and Melbourne, were the first of the post-WW2 Commando and Special Forces units raised in Australia since the disbanding of the WW2 Commando units. Rectangular black and white glossy head and shoulders photograph of subject."Peter Seddon" Donated by Peter Seddon.The first Officer Commanding 2 Commando Company.major peter seddon - founding officer commanding - 2 commando company - post-ww2 commando - special forces units -
 Australian Commando Association - Victoria
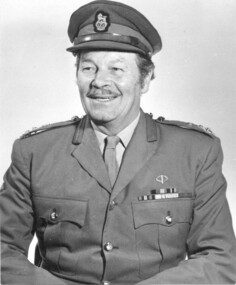
Photograph - Photograph of Major WH 'Mac' Grant
Major WH 'Mac' Grant was the founding Officer Commanding of 1 Commando Company when it was first raised in Sydney in 1955.1 and 2 Commando Companies, in Sydney and Melbourne, were the first of the post-WW2 Commando and Special Forces units raised in Australia since the disbanding of the WW2 Commando units. Major Grant served as a Commando in WW2.Rectangular black and white glossy head and shoulders portrait print of 'Mac' Grant.From Mac Grant.major wh mac grant - founding officer commanding - 1 commando company - post-ww2 commandos -
 Australian Commando Association - Victoria
Vehicle - Folboat Restored On loan to Special Forces HQ SYDNEY
-
 Australian Commando Association - Victoria
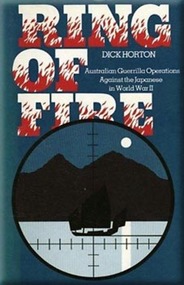
Book, Ring of Fire: Australian Guerrrilla Operations Against Japan in World War II
Dick Horton, as a Lieutenant RNVR. was a member of the Special Forces with which this book is concerned and was awarded the DSC and the American Silver Star for his services. He writes from first-hand knowledge and pays fitting tribute to his brothers-in-arms. He describes the magnificent series of operations of the Independent Companies against the crack 5th and 48th Divisions of the Japanese Army on Timor and the achievements of HMAS KRAIT a converted Japanese fishing boat. He goes on to describe the revolt of the population in Borneo which was engineered by a handful of men. mostly Australians from Z Special Unit, and which materially assisted the Allied Forces when they invaded and re-took it. Apart from its unquestionable value to students of military history, "Ring of Fire" is an exciting account of a variety of imaginativenon-fiction Dick Horton, as a Lieutenant RNVR. was a member of the Special Forces with which this book is concerned and was awarded the DSC and the American Silver Star for his services. He writes from first-hand knowledge and pays fitting tribute to his brothers-in-arms. He describes the magnificent series of operations of the Independent Companies against the crack 5th and 48th Divisions of the Japanese Army on Timor and the achievements of HMAS KRAIT a converted Japanese fishing boat. He goes on to describe the revolt of the population in Borneo which was engineered by a handful of men. mostly Australians from Z Special Unit, and which materially assisted the Allied Forces when they invaded and re-took it. Apart from its unquestionable value to students of military history, "Ring of Fire" is an exciting account of a variety of imaginative -
 Australian Commando Association - Victoria
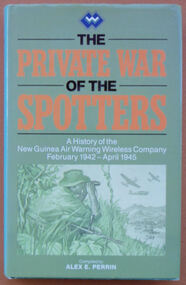
Book, The Private War of the Spotters: A history of the New Guinea Air Warning Wireless Company, February 1942-April 1945
The history of the New Guinea Air Warning Wireless Company. This reprinted version contains a map of the dispositions of Spotting Stations August 1943, additional MID awards listed and some additions to the nominal roll. The New Guinea Air Warning Wireless Company was formed in Port Moresby in late January 1942 and was granted “Separate Independent Establishment” status in October 1943. The company’s “founding father” was Major Don Small, who had witnessed Japanese air raids on Rabaul and realised that having lacked an effective early-warning system around New Britain meant that the defenders were taken by surprise. At the time, gaps had also appeared in the coast-watching communications network because the territory administration ordered the withdrawal of civilian wireless operators when Japan entered the war. The first influx of men into the company consisted largely of volunteers from the 39th Infantry Battalion, which was stationed at Port Moresby. Initial training was rudimentary, hasty, and was sometimes even carried out on en route to a new station. The first party of company personnel, or “spotters”, left Port Moresby as early as 1 February 1942, bound for the strategically important Samarai area, at the tip of Papua. In the first month of the company’s existence 16 spotter stations were established on the coast of Papua and in the mountains around Port Moresby. At the end of 1942 there were 61 operational stations being run by 180 men. The company’s high-water mark was in late 1944, by which time over 150 stations had been set up in Papua and New Guinea behind enemy lines. On 3 February 1942 the company issued its first air warning in Papua, when spotters at Tufi saw Japanese aircraft about to attack Port Moresby for the first time. The following month the company was responsible for the first Japanese killed in action in Papua by Australian ground forces, when spotters from Gona engaged the crew of a downed Japanese bomber. And in July 1942 the station at Buna signalled Port Moresby with news of the Japanese landings in Papua, marking the beginning of the Kokoda campaign. The dangers involved in the company’s work had also been made clear by this time. In July 1942 a party of spotters attempting to set up a station at Misima Island, off Milne Bay, was intercepted by a Japanese destroyer, resulting in the company’s first operational losses. Anticipating the direction of the campaign as a whole, the company’s focus moved north and north-west over the three years of its existence. In May 1942 a network was set up in the Wau area in association with the activities of Kanga Force. As part of the Wau network, spotter Ross Kirkwood audaciously constructed an observation post overlooking the Japanese airstrip at Salamaua. Kirkwood’s position was photographed by Damian Parer on the understanding that the pictures would not be published. They nevertheless appeared in a Sydney newspaper. The day after the publication of the photographs the observation post was attacked by the Japanese and Kirkwood was lucky to escape. In June 1944 the company’s headquarters were moved to Nadzab. By that time, spotter stations existed behind Japanese lines, as far north as Hollandia, and the company began to train Americans to perform similar work in the Philippines. In early 1945 the company moved to Balcombe, Victoria, where its members were posted to other units of the Australian Corps of Signals.gray plasticnon-fictionThe history of the New Guinea Air Warning Wireless Company. This reprinted version contains a map of the dispositions of Spotting Stations August 1943, additional MID awards listed and some additions to the nominal roll. The New Guinea Air Warning Wireless Company was formed in Port Moresby in late January 1942 and was granted “Separate Independent Establishment” status in October 1943. The company’s “founding father” was Major Don Small, who had witnessed Japanese air raids on Rabaul and realised that having lacked an effective early-warning system around New Britain meant that the defenders were taken by surprise. At the time, gaps had also appeared in the coast-watching communications network because the territory administration ordered the withdrawal of civilian wireless operators when Japan entered the war. The first influx of men into the company consisted largely of volunteers from the 39th Infantry Battalion, which was stationed at Port Moresby. Initial training was rudimentary, hasty, and was sometimes even carried out on en route to a new station. The first party of company personnel, or “spotters”, left Port Moresby as early as 1 February 1942, bound for the strategically important Samarai area, at the tip of Papua. In the first month of the company’s existence 16 spotter stations were established on the coast of Papua and in the mountains around Port Moresby. At the end of 1942 there were 61 operational stations being run by 180 men. The company’s high-water mark was in late 1944, by which time over 150 stations had been set up in Papua and New Guinea behind enemy lines. On 3 February 1942 the company issued its first air warning in Papua, when spotters at Tufi saw Japanese aircraft about to attack Port Moresby for the first time. The following month the company was responsible for the first Japanese killed in action in Papua by Australian ground forces, when spotters from Gona engaged the crew of a downed Japanese bomber. And in July 1942 the station at Buna signalled Port Moresby with news of the Japanese landings in Papua, marking the beginning of the Kokoda campaign. The dangers involved in the company’s work had also been made clear by this time. In July 1942 a party of spotters attempting to set up a station at Misima Island, off Milne Bay, was intercepted by a Japanese destroyer, resulting in the company’s first operational losses. Anticipating the direction of the campaign as a whole, the company’s focus moved north and north-west over the three years of its existence. In May 1942 a network was set up in the Wau area in association with the activities of Kanga Force. As part of the Wau network, spotter Ross Kirkwood audaciously constructed an observation post overlooking the Japanese airstrip at Salamaua. Kirkwood’s position was photographed by Damian Parer on the understanding that the pictures would not be published. They nevertheless appeared in a Sydney newspaper. The day after the publication of the photographs the observation post was attacked by the Japanese and Kirkwood was lucky to escape. In June 1944 the company’s headquarters were moved to Nadzab. By that time, spotter stations existed behind Japanese lines, as far north as Hollandia, and the company began to train Americans to perform similar work in the Philippines. In early 1945 the company moved to Balcombe, Victoria, where its members were posted to other units of the Australian Corps of Signals.world war ii, special operations, new guinea, new guinea air warning wireless company -
 Australian Commando Association - Victoria
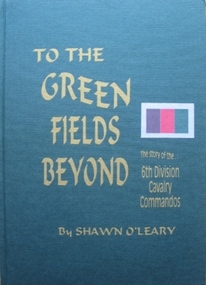
Book - 6th Div, Shawn OLeary, To The Green Fields Beyond:The story of the 6th Division Cavalry Commandos
The comprehensive history of the 6th Australian Division Cavalry Commandos – a (now out of print) reprint of one of the rarer Armoured unit history books. This is the story of one of Australia’s most famous fighting regiments during World War II. As an armoured cavalry unit it fought the Italians and Germans in the sands of the African desert and the Vichy French in the mountains of Syria. Later as a dismounted commando unit it fought the Japanese in the terrifying jungles of New Guinea. The heroism of the men in its ranks and the actions in which they engaged are portrayed in a way which makes battle deeds leap realistically from the pages. “To The Green Fields Beyond” is a documented and detailed book which is of value to everyone who is interested in Australia’s story. Seldom before has such a contribution been made to record of our national history. The book has been approved and sponsored by the Australian War Memorial. The 6th Division Cavalry Regiment was formed in November 1939 and, just two months later, was sent overseas to the Middle East in January 1940. Arriving in Egypt, the regiment immediately went to Palestine, where it joined the rest of the 6th Division and trained using machine-gun carriers and, from October, six old Vickers light tanks. At the end of the year the regiment moved into the Western Desert, where it joined British forces ready for the major offensive to commence on 9 December. Two days later the regiment became the first unit of the 2nd Australian Imperial Force (AIF) to go into action when one of its squadron fought a sharp action against the Italians holding Garn el Grein and Fort Maddalina on 11 and 12 December. By 21 December British forces had captured Sidi Barrrani and the desert was now open for the 6th Division’s advance along the Libyan coast. On 3 January 1941 the division attacked and captured the Italian fort of Bardia. The regiment’s A Squadron, under the command of Major Denzil Macarthur-Onslow, who went on to command the 4th Armoured Brigade, supported the attack. Tobruk was the next Italian fort to be captured, with the regiment again in support and covering the 19th Brigade’s advance. The regiment, though, was under-equipped and without its full compliment of vehicles, using only machine gun carriers. To compensate for this, A Squadron was parity re-equipped with captured Italian light tanks, which had large kangaroos painted on the hulls and turrets to distinguish them from enemy vehicles. After Tobruk, the regiment was used as part of the advance guard in the capture of Derna and then Benghazi. In April the unit moved to Helwan, where it was equipped with Vickers light tanks and machine-gun carriers, and operated with British troops in capturing Sollum. Towards the end of May the regiment moved to Palestine, where it came under the command of the 7th Division for the imminent invasion of Syria. The regiment experienced its heaviest fighting during the Syrian campaign, which began on 7 June. A Squadron was attached to the 21st Brigade and advanced along the coast, where the rugged hills made it difficult to manoeuvre the tanks and carriers. The squadron was relieved by one of the 9th Division Cavalry Regiment’s squadrons on 13 and 14 June. C Squadron, meanwhile, was with the 25th Brigade, and advanced along the Rosh Pinna road, engaging strong enemy defences at Fort Khirbe. C Squadron was relieved by B Squadron, which was later attacked by Vichy French tanks that were supported by heavy artillery and machine-gun fire, which forced the Australians to withdrawal. Always willing or needing to improvise during the campaign, A and B Squadrons both operated three captured French R35 Renault light tanks, while C Squadron provided personnel for a horse troop, quickly nicknamed the “Kelly Gang”, to patrol the high, rugged hills near the Mardjayoun–Banis Road. The regiment remained in Syria as part of the occupation force and returned to Australia in March 1942. It was sent to the Adelaide River, in the Northern Territory, and then later to Murgon, in Queensland. In 1943 and 1944 divisional cavalry regiments were reorganised into cavalry (commando) regiments. In January 1944 the 6th Division Cavalry Regiment became the 2/6th Cavalry (Commando) Regiment. The regiment lost its vehicles and became the administrative headquarters for the 2/7th, 2/9th, and 2/10th Commando Squadrons. The regiment remained with the 6th Division and participated in the Aitpae–Wewak campaign, in New Guinea, during 1945. Includes Nominal Rollnon-fictionThe comprehensive history of the 6th Australian Division Cavalry Commandos – a (now out of print) reprint of one of the rarer Armoured unit history books. This is the story of one of Australia’s most famous fighting regiments during World War II. As an armoured cavalry unit it fought the Italians and Germans in the sands of the African desert and the Vichy French in the mountains of Syria. Later as a dismounted commando unit it fought the Japanese in the terrifying jungles of New Guinea. The heroism of the men in its ranks and the actions in which they engaged are portrayed in a way which makes battle deeds leap realistically from the pages. “To The Green Fields Beyond” is a documented and detailed book which is of value to everyone who is interested in Australia’s story. Seldom before has such a contribution been made to record of our national history. The book has been approved and sponsored by the Australian War Memorial. The 6th Division Cavalry Regiment was formed in November 1939 and, just two months later, was sent overseas to the Middle East in January 1940. Arriving in Egypt, the regiment immediately went to Palestine, where it joined the rest of the 6th Division and trained using machine-gun carriers and, from October, six old Vickers light tanks. At the end of the year the regiment moved into the Western Desert, where it joined British forces ready for the major offensive to commence on 9 December. Two days later the regiment became the first unit of the 2nd Australian Imperial Force (AIF) to go into action when one of its squadron fought a sharp action against the Italians holding Garn el Grein and Fort Maddalina on 11 and 12 December. By 21 December British forces had captured Sidi Barrrani and the desert was now open for the 6th Division’s advance along the Libyan coast. On 3 January 1941 the division attacked and captured the Italian fort of Bardia. The regiment’s A Squadron, under the command of Major Denzil Macarthur-Onslow, who went on to command the 4th Armoured Brigade, supported the attack. Tobruk was the next Italian fort to be captured, with the regiment again in support and covering the 19th Brigade’s advance. The regiment, though, was under-equipped and without its full compliment of vehicles, using only machine gun carriers. To compensate for this, A Squadron was parity re-equipped with captured Italian light tanks, which had large kangaroos painted on the hulls and turrets to distinguish them from enemy vehicles. After Tobruk, the regiment was used as part of the advance guard in the capture of Derna and then Benghazi. In April the unit moved to Helwan, where it was equipped with Vickers light tanks and machine-gun carriers, and operated with British troops in capturing Sollum. Towards the end of May the regiment moved to Palestine, where it came under the command of the 7th Division for the imminent invasion of Syria. The regiment experienced its heaviest fighting during the Syrian campaign, which began on 7 June. A Squadron was attached to the 21st Brigade and advanced along the coast, where the rugged hills made it difficult to manoeuvre the tanks and carriers. The squadron was relieved by one of the 9th Division Cavalry Regiment’s squadrons on 13 and 14 June. C Squadron, meanwhile, was with the 25th Brigade, and advanced along the Rosh Pinna road, engaging strong enemy defences at Fort Khirbe. C Squadron was relieved by B Squadron, which was later attacked by Vichy French tanks that were supported by heavy artillery and machine-gun fire, which forced the Australians to withdrawal. Always willing or needing to improvise during the campaign, A and B Squadrons both operated three captured French R35 Renault light tanks, while C Squadron provided personnel for a horse troop, quickly nicknamed the “Kelly Gang”, to patrol the high, rugged hills near the Mardjayoun–Banis Road. The regiment remained in Syria as part of the occupation force and returned to Australia in March 1942. It was sent to the Adelaide River, in the Northern Territory, and then later to Murgon, in Queensland. In 1943 and 1944 divisional cavalry regiments were reorganised into cavalry (commando) regiments. In January 1944 the 6th Division Cavalry Regiment became the 2/6th Cavalry (Commando) Regiment. The regiment lost its vehicles and became the administrative headquarters for the 2/7th, 2/9th, and 2/10th Commando Squadrons. The regiment remained with the 6th Division and participated in the Aitpae–Wewak campaign, in New Guinea, during 1945. Includes Nominal Rollww2, australian commandos, australian special forces, world war 2 -
 Australian Commando Association - Victoria
Book, A.B.Feure, Australian Commando: Their Secret War against the Japanese in World War II
non-fictionww2, australian commandos, australian special operations, australian special forces, world war ii -
 Australian Commando Association - Victoria
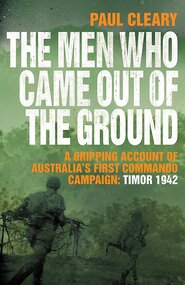
Book, Paul Cleary, The Men Who Came Out of the Gground. Gripping account of Australia's first commando campaign: Timor 1942
The gripping story of a small force of Australian Special Forces commandos that launched relentless hit and run raids on far superior Japanese forces in East Timor for most of 1942. These Australians were the men of the 2/2nd Australian Independent Company – a special commando unit. Initially stranded without radio contact to Australia, the Japanese declared these beared warriors ‘outlaws’ and warned they would be executed immediately if captured. The Australians drawn mainly from the bush, were chosen for their ability to operate independently and survive in hostile territory. As film-maker Damien Parer said after visiting in Timor in late 1942, ‘these men are writing an epic of guerrilla warfare’. Expertly researched by Paul Cleary, who is fluent in Tetum, the main language of the indigenous group of East Timor, it contains black and white photos.non-fictionThe gripping story of a small force of Australian Special Forces commandos that launched relentless hit and run raids on far superior Japanese forces in East Timor for most of 1942. These Australians were the men of the 2/2nd Australian Independent Company – a special commando unit. Initially stranded without radio contact to Australia, the Japanese declared these beared warriors ‘outlaws’ and warned they would be executed immediately if captured. The Australians drawn mainly from the bush, were chosen for their ability to operate independently and survive in hostile territory. As film-maker Damien Parer said after visiting in Timor in late 1942, ‘these men are writing an epic of guerrilla warfare’. Expertly researched by Paul Cleary, who is fluent in Tetum, the main language of the indigenous group of East Timor, it contains black and white photos.ww2, independent company, timor, world war ii, australian commando -
 City of Moorabbin Historical Society (Operating the Box Cottage Museum)
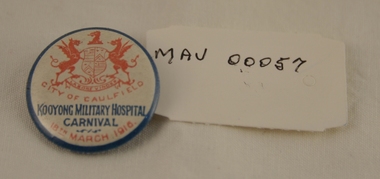
Badge - World War 1914 - 1918, Badge fund-raising, c1916
The Kooyong Military Hospital in Kooyong Road, Caulfield was established for the care and rehabilitation of soldiers injured in World War 1. Many events like carnivals were held by the Red Cross to raise funds for the war effort and entertain the patients.This badge is a reminder of the Community support for injured soldiers when they returned from WW1 conflict and were hospitalized at Kooyong Military Hospital Caulfield 1914 - 1948 This badge was displayed at the GECC 'Wounded Soldier WW1 1914-1918 Exhibition" 2016 at Glen Eira Town Hall Caulfield A small tin button, with pin attachment at the back. The button was produced and sold as a fund-raiser for the Kooyong Military Hospital during the World War1, 1914-18, at that organisation's Carnival held on March 18th 1916. The front of the button is white with a blue perimeter. A copy of the City of Caulfield's Coat-of- Arms and the words, City of Caulfield, is written on the front of the button, as is the date 18th March 1916. Both the above are written in red. Kooyong Military Hospital is written in blue. ww1, 1914-18, kooyong military hospital, war casualties, caulfield, moorabbin, bentleigh, carnivals, fundraising, patriotism, anzac, australian commonwealth military forces -
 City of Moorabbin Historical Society (Operating the Box Cottage Museum)
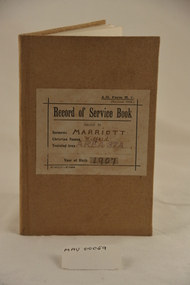
Booklet - Armed Forces, Australian Service book 1921, 1919
'Instructions " This book serves as proof of the fact that the bearer has performed the services required to fit him for the defence of his country, as prescribed by the (Defence) Act 1903-1918." 'Wilfred Marriott was from a family of early settlers in Moorabbin Shire. Wilfred (Willie) died at the age of 14 on 31 July 1921.The 'Record of Service Book' of Wilfred Marriott, b. 30/4/1907, of Jasper Road, Bentleigh, issued on 3/2/1921 in Area 37A Caulfield AM Form M7 / (revised 1919) / Record of Service Book / issued to / Surname MARRIOTT / Christian Names Wilfred / Training Area AREA 37A / Year of Birth 1907marriott wilfred, marriott geoff, australian military forces, defence act 1903, militia forces, record of service, caulfield, melbourne, moorabbin, bentleigh, world war 1914 -1918, world war 1939-1945 -
 City of Moorabbin Historical Society (Operating the Box Cottage Museum)
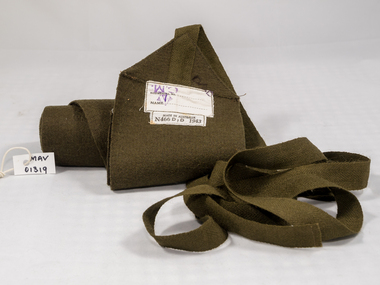
World War 2 Australian Army long woollen gaiters, 1943
A Gaiter or Puttee covers the lower leg and boot lacing and are a type of protective clothing for the ankles and legs below the knee.. These long woollen wrap around Gaiters were issued 1943 to a serving Australian Soldier in World War 2 1939-45 This pair of Australian Army Gaiters were issued in 1943 to one of the many young men from City of Moorabbin who volunteered to serve during WW2 1939-45 WW2 extra long wool wraps /gaiters / puttees Australian Army issue 1943 MADE IN AUSTRALIA / N466 D D / REGIMENTAL NO. ......./ NAME ... C.M / 1943australian army, world war 2 1939-45; gaiters, puttees, woollen goods, protective gear, uniforms, australian infantry forces, moorabbin, bentleigh , cheltenham -
 Bendigo Historical Society Inc.
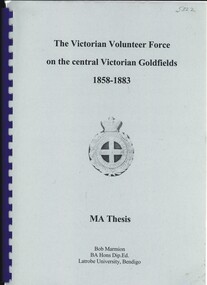
Book - THE VICTORIAN VOLUTEER FORCE ON THE CENTRAL VICTORIAN GOLDFIELDS 1858-1883
The Victorian Volunteer Force on the central Victorian Goldfields 1858-1883, MA Thesis. Publisher: Latrobe University, Bendigo. Produced post 2003. Imperial and Colonial defence, Volunteers of Victoria's defences, British army's role, social structure, changing of the guard on the goldfields. Photographs, illustrations & graphs. 144 pages.Bob Marmiongold, goldfields, volunteer force, victoria, history victoria goldfields, victorian volunteer force, victorian defence forces, bendigo and district history -
 Ballaarat Mechanics' Institute (BMI Ballarat)
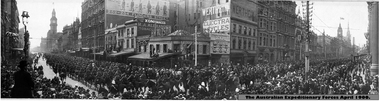
Imperial australian contingent Melbourne 1900
This photograph is from the Max Harris Collection held by the Ballaraat Mechanics' Institute. Please contact BMI for all print and usage inquiries.ballarat, melbourne, soldiers, 1901, expeditionary forces -
National Vietnam Veterans Museum (NVVM)
Film - Film, DVD, Donald Bergman's home movies. 2 Commando Coy CMF
Coloured footage of men in the CMF.citizens military forces (cmf), vietnam war, 1961 - 1975, personal narratives - australian -
National Vietnam Veterans Museum (NVVM)
Manual, British Army: Field engineering and mine warfare: pamphlet no.7: booby traps, Parts 1 and 2 (all arms), 1972
british armed forces - service manuals -
National Vietnam Veterans Museum (NVVM)
Booklet, Australian Army: Field engineering pamphlet no.4 (Aust):mine mechanisms, parts 1 and 2 (all arms), 1973
australia - armed forces - service manuals -
 National Vietnam Veterans Museum (NVVM)
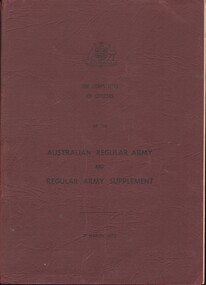
Manual, Australian Army, The Corps Lists Of Officers of the Australian regular Army and Regular Army Supplement - 31 March 1975, 1975
A maroon coloured cover with black writing. The Australian Insignia with the Kangaroo and Emu are near the top of the page.australia - armed forces - service manuals, officers -
National Vietnam Veterans Museum (NVVM)
Manual, Australian Army: Army dress manual, 1979
australia - armed forces - service manuals -
National Vietnam Veterans Museum (NVVM)
Manual, Australian Army: ceremonial manual, 1977
australia - armed forces - service manuals -
National Vietnam Veterans Museum (NVVM)
Manual, Australian Army: Regimental standing orders for the Royal Australian Regiment, 1983
australia - armed forces - service manuals -
National Vietnam Veterans Museum (NVVM)
Booklet, Engineering support Booklet: Howitzer, light, towed: 105mm soft recoil, XM204, 1974
howitzers, united states - armed forces - service manuals -
National Vietnam Veterans Museum (NVVM)
Manual, United States Army: organisational maintenance manual, radio sets AN/PRC-8, -8A, -9, -9A, -10,-10A AND -28, 1961
united states - armed forces - service manuals