Showing 320 items
matching west geelong
-
 Ballarat Tramway Museum
Negative, Wal Jack, mid 1940's
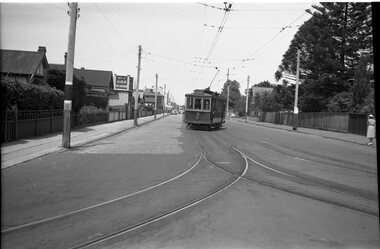
Negative and Digital images of the Wal Jack Geelong Negative file of Geelong No. 3 at the junction between Aberdeen St and Pakington St. The tram has the destination of West. The conductress is standing in the doorway. In the background is the store of "Wm F Orr Decorator" Photo mid 1940's. trams, tramways, geelong, aberdeen st, pakington st, west, tram 3 -
 Queenscliffe Maritime Museum
Photograph - Photograph of two Queenscliff fishermen
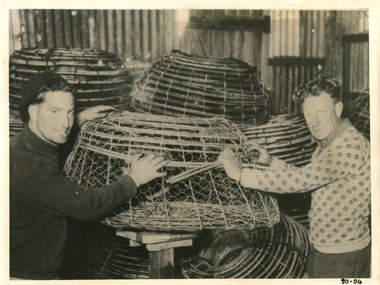
William Withers and Edward Ryan drowned near Point Lonsdale on 19 October 1954 when they tried to enter the Rip at Port Phillip Heads against an ebb tide with a strong south-west wind blowing. They were sailing a large crayfishing boat, the 'Robert John', returning with a load of crayfish from King Island.Photograph shows William (Bill) Withers and Edward Ryan who worked in the local Queenscliff and Victorian fishing industry. The commercial fishing industry developed in Queenscliff from the 1860s, with early fishing developing around the couta boat and barracouta fishing. Crayfishing and shark fishing also became important, especially as the supplies and popularity of barracouta as a commercial species waned. Local Queenscliff fishermen often fished outside Port Phillip into Bass Strait and had to navigate the dangerous entry to Port Phillip, known as 'The Rip', with its turbulent and variable water and weather conditions. This added to the everyday dangers of sailing faced by fishermen in their industry. The local fishermen often had the local knowledge of these waters, but the fishing community in Queenscliff also lived with the threat or fear that the Rip could rob them of one of their own. The entrance to Port Phillip with this Rip is the scene of many shipwrecks,often resulting in tragic loss of life or injuries, including passenger and cargo ships travelling to/from Melbourne and Geelong as well as accidents to local Queenscliff and Port Phillip sailors such as the fishermen or sea pilots. A B/W photograph of two Queenscliff fishermen, William (Bill) Withers and Edward Ryaninformation about photo and donation handwrittten on backfishermen, queenscliff fishermen, withers, william withers, ryan, edward ryan, robert john crayfish boat, shipwreck, port phillip -
 Queenscliffe Maritime Museum
Photograph - One original photograph and one framed and mounted copy of the United States Atlantic Fleet entering Port Phillip Bay in 1908, United States Fleet entering Port Phillip
On 29 August 1908 Melbourne gaped in wonder as 16 white-hulled battleships of the United States Atlantic Fleet, carrying 14,000 naval personnel, steamed into Port Phillip Bay. The ‘Great White Fleet’ was circumnavigating the globe on a tour launched by President Theodore Roosevelt. The cruise was a display of naval power and practical exercise, testing the battle-readiness of the US Navy and demonstrating its ability to patrol and protect the west coast and American interests in the Pacific including Australia.An original unframed photograph of the United States Altantic Fleet entering Port Phillip Bay in 1908 and a copy framed and mounted under glass.Port Phillip Bay 1908; United States Atlantic Fleetthe great white fleet, us atlantic fleet, 1908, port phillip bay -
 Queenscliffe Maritime Museum
Map - Chart of Geelong Harbour, Geelong Harbour
When Hamilton Hume and William Hovell arrived at the bay in 1824 they met with the local Wautharong people who referred to the bay as "Jillong" and the surround land "Corayo", but by the time the area was surveyed in the late 1830s the Aboriginal names had been swapped. The names "Corayo" and "Jillong" had since been Anglicised to "Corio" and "Geelong".Corio Bay is an important harbour and leisure location in the West and continues to attract development such as the new Tasmania Ferry Terminal.An Admiralty Chart of Geelong Harbour revised in 1954Geelong Harbour Map Ref: 2731geelong, corio, admiralty charts -
 Queenscliffe Maritime Museum
Domestic object - Teapot
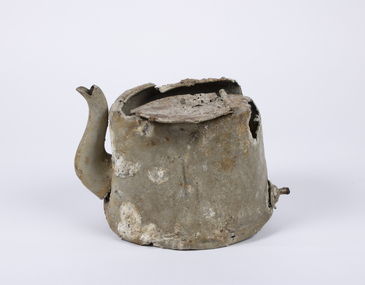
In 1940, German minefields were laid in east and west Bass Strait which quickly claimed merchant ships Cambridge (British) and the City of Rayville (American). HMAS Goorangai had finished mine sweeping duties and after resupply was crossing from Queenscliff to Point Nepean to seek better anchorage due to impending bad weather. At around 20:30 on the 20th of November 1940 the 10,400-ton MV Duntroon was transiting the South Channel on her way to Sydney from Perth via Melbourne carrying 65 passengers and general and perishable cargo. It struck HMAS Goorangai forward of the funnel on the port side and cut her in two. At about 20:45 HMAS Goorangai sank in less than a minute resulting in the loss of her whole ship’s company, a complement of 24 officers and sailors.HMAS Goorangai was the first Royal Australian Navy (RAN) ship lost in WWII, the first RAN surface ship lost in wartime, and the first RAN surface ship lost with all hands. A memorial cairn was erected at Queenscliff in 1981 and a service of commemoration is held there every year.A severely damaged and corroded aluminium teapot recovered from the wreck of HMAS Goorangaihmas goorangai, wwii, collision at sea -
 Queenscliffe Maritime Museum
Map - Survey Charts, Port Phillip West Channel
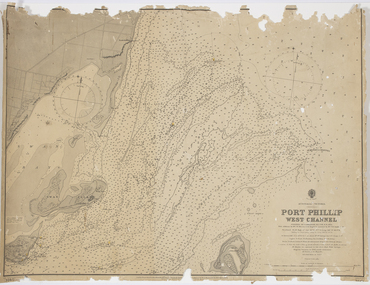
These charts show changes to the depth levels surrounding Queenscliff. Earlier chart does not show the cut which can be seen in the later chart. The creation of the cut and subsequebt dredging of it has changed the shoreline due to shifting sand.Two charts of the Port Phillip West Channel, reference number 309. One was engraved in 1903, the other a new 1935 edition last revised in 1961.Port Phillip West Channelport phillip, queencliff channel, charts, soundings -
 Queenscliffe Maritime Museum
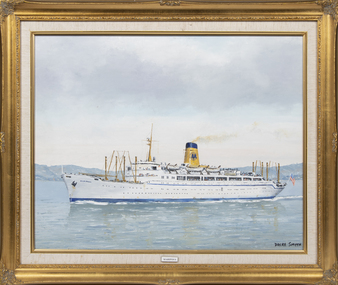
Painting - Mariposa, Dacre Smyth, SS Mariposa
SS Mariposa was a luxury ocean liner launched in 1931, one of four ships in the Matson Lines "White Fleet", which included SS Monterey, SS Malolo, and SS Lurline. She was later renamed SS Homeric. Mariposa was designed for service in the Pacific Ocean, including regular stops in ports along the West Coast of the United States, Hawaii, Samoa, Fiji, New Zealand, and Australia. On the 12th January 1942 the Mariposa left San Francisco in the "Australian — Suva" convoy escorted by two destroyers and the light cruiser and with two other troopships (destined for Suva). This was the first large convoy to Australia after Pearl Harbor with Mariposa transporting Army personnel, ammunition and fifty P-40 fighters intended for the Philippines and Java.Mrs B SmythAn oil painting of the SS Mariposa in an ornate gold frame. Mariposamigrant ships, ss mariposa, wwii -
 8th/13th Victorian Mounted Rifles Regimental Collection
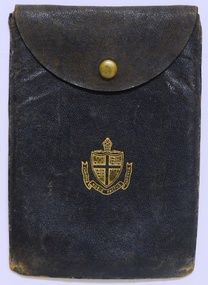
Wallet, 1941 circa
Geoffrey R Fink volunteered for military service in early 1940. He served initially with 3rd Division A.A.S.C. but was discharged as being in a reserved occupation at the Aircraft Production Commission. He resigned from the Commission and joined the AIF on 28 July 1941 and was allotted to 2/8th Armoured Regiment. He served with the regiment in New Guinea and on return to Australia was transferred to No 41 Landing Craft Company serving out the war in the South Pacific. The 2/8th Armoured Regiment was raised in June 1941 under the command of Lieutenant Colonel W G Hopkins with officers and men selected from the wider AIF in Victoria. The regiment trained in newly arrived M3 General Grant tanks at Puckapunyal before moving north to Singleton, then the Wee Waa plains. The regiment sailed for New Guinea in April 1943 and carried out mobile defence to airfields at Port Moresby, Milne Bay, Dobadura and Popondetta. The regiment returned to Australia in February 1944 and disbanded as an armoured regiment and retrained as Nos 41, 42 and 43 Landing Craft Companies. They returned to the South West pacific serving at Bougainville, Balikpapan, Lae and Wewak.Representative of gifts made to old boys serving in WWII (1939-45) by a school association. Forms part of a comprehensive collection relating to one soldier.Leather pay book cover presented by Old Geelong Grammarians to VX 60307 Trooper Geoffrey Fink, 2/8th Armoured Regiment together with presentation certificate.Signatures on presentation certificate " Leigh Falkiner, J.S.Cook" and third signature unreadable.2/8th armoured regiment, 41 landing craft company, fink geoffrey r mr, old geelong grammarians -
 National Wool Museum
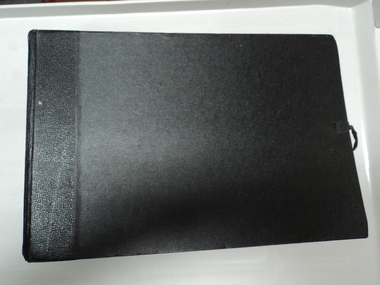
Book - Wool sample book
Book was given to Mr Robert 'Bob' Edward Mitchell in 1938. Mr Mitchell trained as a wool classer in the 1930's and was awarded this book as the senior prize. Mr. Mitchell grew up on the Moorabinda sheep property and is on the honour roll as a past student who served in World War II from Wharparilla West State School.Large black bound book containing 12 double-sided pages, each with several wool samples mounted to a blue paper with the name of sheep breed which the wool came from. Each page also has a loose sheet of wax paper over the wool. Book can be closed and secured with a length of black material which can be tied up. -
 National Wool Museum
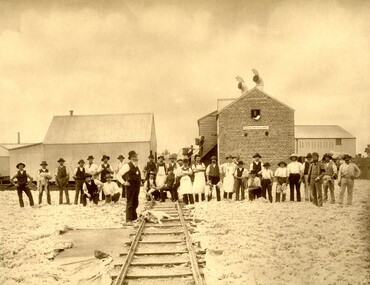
Photograph - Geelong Victoria, 1889
Image was donated by Mr. Peter JM Bell of West Yorkshire, UK in 2009. Mr. Bell worked for Robert Jowitt & Sons between 1999 and 2006 when the company ceased operations. Mr. Bell discovered this photo and decided to donate it to the National Wool Museum. Jowitt & Sons was established in 1775 and became a limited company in 1919. They were wool merchants and had buying branches in Australia - Fremantle, Melbourne, Sydney and Adelaide.Photo of approximately 30 men standing on and perpendicular to a railway track. Behind the group are four buildings, two on the left, two on the right. A dog is resting on the railway track. The ground has been covered in wool and a sign on the right-hand building reads 'ROBERT JOWITT & SONS".Wording: Geelong- Victoria/ 1889;Method: printed;Location: bottom centrewool, railway, dog, jowitt & sons -
 National Wool Museum
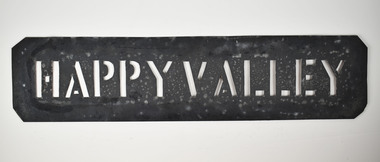
Stencil - HAPPY VALLEY
This stencil was used as a location stamp for the transportation of wool bales. Happy Valley is a town located in Golden Plains Shire, south-west of Ballarat, Victoria. Wool bales marked HAPPY VALLEY would have been transported to or from Happy Valley.Wool bale stencil - HAPPY VALLEY HAPPY VALLEY wool sales, wool transportation, wool export -
 Friends of Ballarat Botanical Gardens History Group
Work on paper - An Extract Concerning Nurseryman, A.F. Ronalds, Letter, 10/11/1982 sent from Geelong, 10/11/1982
The extract included in this letter comes from the Geelong Historical Society publication, the Investigator, November, 1970. The article was written by A.F.Ronalds, "George", the author of the letter and "Ina", the recipient are unknown.Alfred Ronalds purchased land at Lake Wendouree and contributed to the initial planting of the Ballarat Botanical GardensOne page with 1/2 of typing on thin paper. Address in top righthand corner.Signed "George", in blue biro.doctor john garner, ballarat botanical gardens, friends of the ballarat botanical gardens, alfred ronalds, nurseryman, lake wendouree, donation of plants to the ballarat botanical gardens, john garner collection, gardens, ballarat -
 City of Greater Geelong
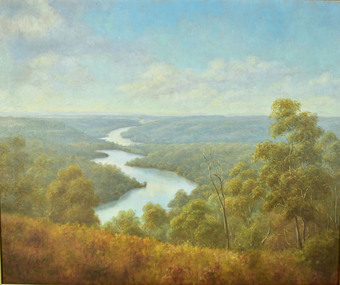
Oil, Wykeham Perry, West of the Divide
-
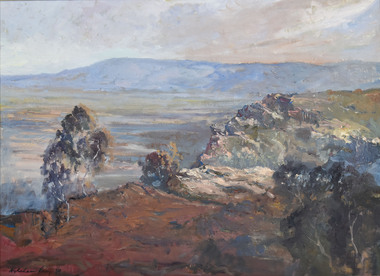
 City of Greater Geelong
Oil, Alison Shaw, West Barwon Dam
-
 City of Greater Geelong
Painting - Tempera, Robert Ingpen, Geelong Character Mural, c.1960
Robert Ingpen, illustrator, designer, writer and consultant, was born in Geelong in 1936. He was educated in Geelong before studying art and illustration under Harold Freedman at the Royal Melbourne Institute of Technology, 1955-58. Early in his career he specialised in relating design to scientific research, and this included work as a graphic design artist for the CSIRO, 1958-67, commissions for designing pamphlets on fisheries for the United Nations in Mexico and Peru, and involvement in a number of Australian conservation and environmental projects. He launched into freelance work in 1968. Ingpen's work has focused on environmental and heritage issues and his exploration of fantasy and imagination. He is best known as an illustrator, and as an author of children's books, and historical books and pamphlets for adults. He has painted murals on public buildings, designed the flag and coat of arms for the Northern Territory, and designed postage stamps, including stamps for the Captain Cook Bicentenary and the 50th anniversary of CSIRO. He has been involved in a number of conservation and environmental projects, including the establishment of the Swan Hill Pioneer Settlement as consultant/designer. He was one of the founders of the Australian Conservation Foundation. Ingpen rose to prominence with his illustrations for Colin Thiele's classic children's story Storm Boy, winning for him the first Visual Arts Board award for children's book illustration. He won the international Hans Christian Anderson Medal for children's literature in 1986, and the Dromkeen Medal in 1989.Robert Ingpen, celebrated Geelong artist, was commissioned to paint a mural to be located above the entrance of the new west wing. The mural was designed to represent the objects and systems that characterise Geelong and its district and that played a major role in the city’s growth and development. The three systems comprise: the natural (producing) system; the man-made or technological system, and the natural (trading) system.ingpen, mural, city hall geelong, james harrison -
 Carlton Football Club
Scrap Book, 1995 Grand Final Scrap Book, 1995
A Scrap Book dedicated to Carlton's 1995 GF Triumph defeating Geelong A almost complete record of Newspaper Articles dedicated to Carlton's GF win over Geelong in 1995. It was Carlton's 16th Premiership after 16 wins in a row and became known as "sweet sixteen" In 1995 the AFL would admit the 16th team to the competion, the Fremantle Dockers. This would continue the expansion of the traditional VFL, after the West Coast Eagles and Brisbane Bears had been admitted in 1987 and the Adelaide Crows had been admitted in 1991. Carlton won their 16th Premiership in 1995 by defeating Geelong by 61 points in front of over 90,000 fans at the MCG. Over the season, the Blues would set a new benchmark for dominance in a single season with only 2 losses relatively early in the season, to lowly placed St Kilda and Sydney, with a string of 16 successive wins to take their 16th premiership. The season itself was just brilliant to watch as a fan, with stars in defence (Silvagni, Dean, Sexton), midfield (Williams, Bradley, Ratten) and attack (Kernahan, Pearce and Spalding), and all led by Captain Stephen Kernahan. There was a great blend of seasoned veterans (Silvagni, Kernahan and Williams) to young up & comers, including the brilliant Anthony Koutoufides who would have a breakout year at the start of a stellar career. By season's end, Carlton would be 4 games clear of the next best team, Geelong, demonstrating how far above the rest of the competition we were. Throughout the year, our only losses were to Bottom 8 teams, St Kilda and Sydney, and we did not drop a game to any team that played in the finals. In the finals, we defeated Brisbane, the Kangaroos and Geelong, with the Brisbane game being the tightest as the young Bears gave their all. If anything, the 1995 Finals campaign was a testament to Stephen Silvagni who would give up only 1 goal in the 3 games, keeping Darryl White (Brisbane), Wayne Carey (Kangaroos) and Gary Ablett (Geelong) well held. On the day itself, the Blues were supreme as they pounded the Cats into submission. Greg Williams would win the Norm Smith Medal for his 32 possessions and 5 goals, to add to his two Brownlow medals and now Premiership Medal. It was a fantastic year to be a Carlton fan. Come season's end, Coach David Parkin went on record to say that to maintain our success changes would be required. Troy Bond, Ben Harrison and James Cook, each having played games in 1995 but not making it for the Grand Final, would be traded (plus some draft picks) in return for Adrian Hickmott, Justin Murphy, Craig Devonport and Ben Sexton. A4 Scrap Book -
 Carlton Football Club
Scrap Book, Dedicated to Carlton Player John Goold
John Goold double Premiership PlayerA scrap Book dedicated to twice Premiership Player 1968 - 1970 John Goold Career : 1963 - 1970 Debut : Round 7, 1963 vs Footscray, aged 21 years, 338 days Carlton Player No. 754 Games : 108 Goals : 3 Last Game : Grand Final, 1970 vs Collingwood, aged 29 years, 90 days Guernsey No. 11 Height : 184 cm (6 ft ½ in.) Weight : 76 kg (12 stone, 0 lbs.) DOB : June 27, 1941 Premiership Player 1968, 1970 Carlton Hall of Fame All Australian 1966 A brilliant, flamboyant, two-time Premiership player for Carlton during the Barassi years in the ‘swingin’ sixties,’ John William Crosbie Goold became almost as famous for his dapper appearance off the field, as for his exploits on it. At the height of his football career, he was also a prominent ladies fashion designer – which led to him being dubbed ‘Mr Elegance’ by leading football commentator Lou Richards. Supporters and team-mates however, called him ‘Rags’ or ‘Ragsy,’ because of his involvement in the clothing, or ‘rag’ trade. Goold first came under notice as an outstanding junior athlete at Melbourne Grammar School. A true all-round sportsman, he shone at tennis, athletics, football and cricket. He was also a keen horseman who loved the game of polo and the rough and tumble of fox hunting. While at school he was a fervent Melbourne supporter, but strangely, never had much confidence in his football ability. “If I thought I was good enough, I would certainly have gone to Melbourne,” he said many years later. “But I honestly didn’t think I would ever amount to anything in this game. Cricket and tennis were the games that really interested me.’ However, after graduating from MGS, Goold went home to Healesville to star in the Bloods’ 1962 Yarra Valley Football Association Premiership team – an achievement that brought tempting offers from more than one VFL club. “Incentives were offered elsewhere,” he recalled, “but I gravitated to Carlton – partly because the deep blue of their guernsey attracted me, but mostly because of the good advice I got from people who even then were longsighted enough to predict that big things were ahead for this club.” The Blues were confident enough in Goold’s potential to offer him the guernsey number 11 previously worn with distinction by the likes of Jack Hale, Jim Knight, Ron Hines and Laurie Kerr, and his first senior game came in round 7, 1963 against Footscray at the Western Oval. He played on a half-forward flank alongside Brownlow Medallists Gordon Collis and John James on that Saturday afternoon, and kicked his first career goal in an 8-point win. Little did he know though, that it would be another six seasons before he would again experience the thrill of sending a football spinning between the big posts, because his future lay in defence. By his own admission, Goold struggled to find his feet in VFL football during his first two seasons, until the shock appointment of Ron Barassi as captain-coach of Carlton in 1965 began steering his career back on track. “I think you could say that 1965 was my first year of League football,” he said, “That’s the way I felt - that’s the way I reacted to Barassi.” Under Barassi, Goold rapidly developed into a superb running half-back flanker. Tenacious, and an often freakish high mark, he was unmistakable on the field thanks to his mane of dark hair, his loping running style and somewhat awkward kicking action. Furthermore, he had boundless courage. There is no doubt that he would have played many more games had he not been regularly pole-axed under the high ball – a fact he later freely admitted. “I was always getting knocked out,” he said, “and spent half my bloody time in hospital.” In the second half of 1965, an injury to centre half-back Gordon Collis forced Barassi to use Goold in the key defensive post. While it curtailed his rebounding instincts somewhat, ‘Ragsy’ rose to the challenge and rarely lowered his colours. Testament to his improvement, he finished third behind John Nicholls and Sergio Silvagni in Carlton’s 1965 Best and Fairest award, and followed up by being selected in the Victorian team for the 1966 Hobart Carnival. There, he had a superb series in which he was runner-up to West Australian Barry Cable in voting for the Tassie Medal, and capped it off by being named on a half-back flank in the All Australian team. Barassi’s influence at Carlton bore fruit in his third year, when the Blues returned to finals football at last. Richmond, Carlton, Geelong and Collingwood fought out the 1967 Premiership, and Ragsy Goold won the hearts of the Carlton faithful with two lion-hearted performances. Although Carlton was knocked out of contention by successive losses to Richmond and Geelong, Goold was tireless throughout both games, and it was obvious that he thrived on the added pressure of finals football. Precisely twelve months later, the bitter taste of those defeats was washed away when Barassi’s Blues edged out Essendon by 3 points in the 1968 Grand Final, and ended 21 years of despair at Princes Park. To win Carlton’s ninth VFL flag, the Blues had had to defeat the minor premier Bombers twice during the finals – and did so, thanks to a watertight defence led by Goold, and a dominant ruck division headed by John Nicholls. In round 5, 1969, Carlton hosted South Melbourne at Princes Park in a match significant for a number of reasons. As he regularly did, Ron Barassi swung his team around prior to the opening bounce, and Goold found himself in the unaccustomed role of ruck-rover. While the Blues set about establishing a good break on the scoreboard, Ragsy relished the freedom to kick two first half goals - his first majors for 78 games. Just before half-time however, he was flattened in a pack, concussed again, and replaced during the long break by Barry Gill. Alex Jesaulenko was substituted at the same time – by a shy, ambitious youngster named Bruce Doull, making his senior debut for Carlton in guernsey number 4. In September, 1969 the Navy Blues began their third straight finals campaign with an impressive 6-goal Semi Final win over Collingwood in front of more than 108,000 fans at the MCG. A fortnight later, Richmond stunned the flag favourites with a withering last quarter in the Grand Final, and knocked Carlton out of the Premiership race again at the last hurdle. Half-way through the year, Carlton's club doctor discovered that Goold had been playing with shin splints in both of his lower legs. The pain they caused was considerable, but Ragsy soldiered on and held down centre half-back throughout the season. John Goold’s VFL career at Carlton culminated in the fabled 1970 Grand Final triumph over Collingwood. What is not so well known is that Ragsy was only cleared to play in that game on the morning of the match. After narrowly losing to Collingwood in the second Semi Final, the Navy Blues destroyed St Kilda by 62 points in the Preliminary Final, and earned another shot at the Magpies in the decider. But one of Carlton’s problems was that Goold had been kicked on a shin against St Kilda, causing a burst blood vessel and serious swelling. Despite the best efforts of the club medical staff, Ragsy had only a slim chance of playing in the Grand Final right up until game day, when his worried coach reluctantly allowed him to take his place in the side. Later, Barassi justified his decision by saying that in his opinion, a less than fully fit Goold was still worth his place in the team. By half time in the Grand Final however, he was probably questioning that judgement - because Carlton had been totally outplayed, and trailed an impressive, cohesive Collingwood by 44 points. Therefore, Carlton’s magnificent comeback – orchestrated by Barassi, and sparked by the fairytale exploits of 19th man Ted Hopkins – is one of the greatest of all football stories. Against enormous odds, the Navy Blues fought their way back into the contest, and eventually, rolled over the top of the frantic Magpies to snatch victory by 10 points in the last few minutes of the match. Hopkins ended up with four goals, Barassi was hailed a genius, and Ragsy Goold was carted off to hospital immediately after the game to have further urgent treatment. While there, he decided that there was no better time to end his VFL career – especially because his burgeoning business interests were demanding more and more of his time. In the years after his football career ended, John Goold created a remarkably successful business empire. In 1971 he sold his fashion label and took up farming at Mortlake in western Victoria, where he coached the local football team for three seasons. Later, he formed a diversified pastoral company, and purchased a magnificent complex called Ballangeich Run at nearby Ellerslie. While his passion for farming and livestock grew, he began breeding top quality polo ponies, and represented Australia in international competition. During the 1997 and 1998 seasons, John's son Ed Goold played reserve grade football for Carlton. MEMORIES.... Ragsy Goold; the name stirs memories form my long ago childhood. Ragsy, with his unique kicking style, where he'd hold the ball (always a drop punt - in a time when the drop kick and the torpedo punt still reigned supreme) at the point of the ball, elbows bent and he'd lavishly drop the ball, his right arm then flinging back and up dramatically. That was the thing about Ragsy (so named because he worked in the clothing, or 'rag' trade), he was always dramatic. He always ensured his ankle guards and wrist guard were glowing white to match the great white CFC monogram he wore proudly on his chest, and with his long flowing locks, cut a dynamic figure through a young boy's mind. Ragsy was my idol. I loved his dashes from half back, his long accurate drop punts, most of all I loved his flair for the game. Ragsy played the game as an entertainer as well as a sportsman - he leapt high to punch or mark, and always seemed to have a bit of the thoroughbred about him - which is probably why after he retired, he took up fox chasing, polo, and riding his beloved thoroughbreds across the paddocks and over the fences of his property, I think he may have even represented Australia at the sport – really, that’s sort of how he played as a footballer. All sinewy muscle, long legs and famous leaps for the saving punch. Ragsy was part of the great backline that helped revive Carlton's fortunes. Legendary players Wes Lofts, Ian Collins, Kevin 'Racehorse' Hall, Vinnie Waite among them. All great teams have a great defence and the defence that Ragsy was an integral part of was no different. Where others provided the biffo, the muscle or the defensive pressure, Ragsy provided the dash, the flair, the sense of adventure that all great backlines must have. AND MORE.... I have had many favourite players while following the Blues, but there will always be a special spot for Ragsy Goold - running the lines, all long hair and flashing white guards. As a young man I moved to Carlton and began acting in a place called one-c-one. One night after a play, I was walking home. It was winter, and I was wearing my favouritte overcoat, a genuine ankle length tweed affair I had picked up in an Op Shop in Oakleigh for three dollars. As I strutted across Lygon Street, a deep male voice behind me called, 'hey laddie, how much for the overcoat?' I turned, and there was my childhood idol, Ragsy Goold, two beautiful women in tow, smiling and waiting for my answer. I loved that coat too much to part with it, even to Ragsy, so I shook my head - and he smiled, then walked off. I stood for a moment in the middle of the street shaking my head in disbelief. Ragsy bloody Goold had just offered to buy my overcoat! I knew at that point, as a young man of about twenty three, that life was going to be full of surprises and very entertaining - a bit like John ‘Ragsy’ Goold. ONE MORE.... A cold, wet day in the mid 1960's at the MCG and Victoria were playing South Australia (?) The ball that day was like a piece of soap, with players finding it impossible to mark. Just before half time a long kick sailed toward the mud heap that was the centre of the ground, and the pack rose to meet it. From this group of players an arm shot straight up, and the ball instantly came to a dead stop. The footy stuck in the player's palm as if the hand was coated in Tarzan's Grip. After all these years, it's the only recollection I have of that match, and that player was 'Mr. Elegance' John Goold. HUMOROUS HUNGRY.... Former opponent Richmond's Kevin Bartlett on Radio SEN in 2012 received a phone call from John. After the call Kevin told his listeners how "Mr Elegance" would always be dressed in a nice suit, shirt-tie and highly polished shoes. He then cracked a joke saying something like; "You know, John was so 'posh' that he used to play football wearing a cravat!" Milestones 50 Games: Round 15, 1967 vs Melbourne 100 Games: Round 13, 1970 vs Geelong Career Highlights 1965 - Percy Bentley Trophy - 3rd Best & Fairest 1966 - 5th Best & Fairest 1967 - Maurie Sankey Memorial Trophy - 4th Best & Fairest (on count back) 1968 - Premiership Player 1970 - 7th Best & Fairest 1970 - Premiership PlayerFoolscap Scrap Book -
 Melton City Libraries
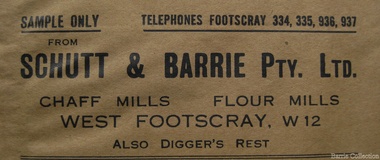
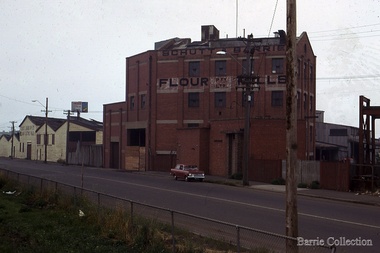
Document, 'Schutt and Barrie Flour Mill envelope, Unknown
SUMMARY - Schutt & Barrie Chaff Mills Partnership West Footscray, Parwan and Diggers Rest. Mary nee Barrie Robinson (1907 –1999) writes c1980 about her father Charles Ernest Barrie of Darlingsford Melton (1871 – 1931) Extract copied from her handwritten story - My father was born in Ballarat in 1871. … commenced his working life with a team of bullocks and a chaffcutter in the St Arnaud district, a work the he became most success at and would continue in to the end of his life. He eventually became the owner of a chaff mill at Melton station with an access line to the railway. [1900] The Schutt & Barrie partnership ….Dad later became involved in a Chaff mill at West Footscray run by John Ralph Schutt who when he met Dad was a very sick man and had begged Dad to come into the business and help him. That began a very happy association, the business was put on its feet. An empty quarry across Geelong Road opposite the mill was purchased, the chaffcutters were set up in the quarry and that was the start of a very busy and prosperous period. A branch line was run into the mill. Dad spent some afternoons at the mill going by train, and spending some hours there at night, at the same time running the farm with full time help. Two full 8 horse teams were used to work the land, which meant early rising for the horses to be fed and harnessed ready for the men to commence the days work. Charlie Lowe and Murdock Davey were two of the men who worked for Dad in those years. The firm purchased a mill at Parwan and Dad spent a lot of time and energy getting it running to their satisfaction. Monday was the day he spent time there also round the district of Parwan and Balliang. He came to know many of the their names were well known in our household for many years. [1920] Later a flour mill was built beside the Chaff mill at West Footscray but it never thrived like the mill. The chaff mill had many loyal and good men employed there and there was never any trouble between men and management. Willie Walters and Miss Renyolds were some I remember, other names me, Joyce would be able to name them. [Sister of Mary born 1920] Sample envelope from the businesslocal identities -
 Friends of Ballarat Botanical Gardens History Group
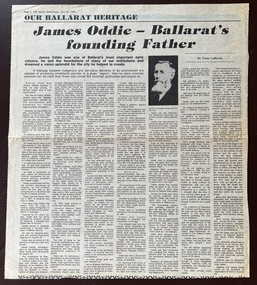
Work on paper - Our Ballarat Heritage, James Oddie, Ballarat's founding Father. The News, April 20, 1983, 1983
James Oddie is an archetypal example of the young men of British origin who came to the Ballarat diggings hoping to make their fortune during the Gold Rush and stayed on to establish the foundations of the regional centre that became the modern city of today.James Oddie witnessed the Eureka Stockade and played a significant role in the formative years of Ballarat's development.Part of a single newspaper sheet, folded, yellow with age.Nonechartists, eureka stockade, geelong, buninyong, doctor lang, foundry business, storeman, licences, estate agent, benefactor, ballarat benevolent asylum, rachel riding, female refuge, ballarat bank, mount pleasant observatory, electric light, trams, ballarat botanical gardens, railways, ballarat art gallery, john garner collection, gardens, ballarat -
Friends of Ballarat Botanical Gardens History Group
Work on paper - A Traveller's Notes, James Herbert Veitch, A Tour Through Parts of Asia, the Australian Colonies and New Zealand 1891-1893, 1896
It is interesting to read of Veitch's description and views of Ballarat in 1891-1893 and other places and gardens visited in Australia.These pages selected from James Veitch's work add to an understanding of the development of Ballarat's Gardens and history.11 pages selected and a brief note on City of Ballarat notepaper.Note in the righthand margin of the 3rd page and some underlining of the 4th page. With this extract, there is a note in biro Philip Clingin, the Town Clerk to Roy Mosman, member of the Friends' History Group.john garner, doctor, john garner collection, james herbert veitch, traveller's notes, royal exotic nursery chelsea, ballarat botanical gardens, melbourne botanic gardens, geelong gardens, broken hill, botanist -
 Melton City Libraries
Photograph, Ian and Wendy with Grandma Barrie, c.1943
Jessie May born on 30th November 1883, Jessie, known as Ma Barrie to her grandchildren, was the daughter of schoolteacher, Thomas John Lang and Mary Elizabeth Coates. In 1896 Thomas and Mary Elizabeth moved to Melton. Mr Lang’s previous school was Coliban SS No 1920. Mr Lang was the Head Teacher at Melton until 1917. In 1910 he was a Committee Member Melton Mechanics Institute and Public Library at its establishment. He was a Life Member of the Melton Mechanics Institute Jessie lived in various locations around Central Victoria, particularly Pastoria and Melton. When her father was Head Teacher at Melton State School no 430, she met her future husband, Charles Ernest Barrie. The couple were married at the Methodist Church Melton on the 23rd August in 1906. They lived in the newly built house beside the Chaff Mill on the corner of Station and Brooklyn Road Melton South. Their eldest child was Mary Ena was born on the 7th of October 1907. IN 1909, Ernest Wesley (Bonnie) was born 29th April (Ascot Vale). In 1910 the family moved to a farm in Trundle NSW. The Chaff Mill was sold to Glover Onians – HSK Ward. Later the original mill was burnt and replaced, and in 1977 a fire destroyed it again and it was not rebuilt. In 1911, the family returned to Melton buying the “Darlingsford” farm in May. The weather was too at Trundle for Jessie. Their address was Elizabeth Street Moonee Ponds. William Cecil was born on the 23rd of February 1912 and Charles Edgar was born on 1st June 1913. In 1916 they lived in Moonee Ponds where the children attend Bank Street School, Ascot Vale. The children developed diphtheria Mary and Bon were transferred to Fairfield Hospital. March 1919 the family returned to live at Melton at the time of the outbreak of the Spanish influenza. Mary, Bon, and Edgar returned to Melton School. Following the death of CEB in a car accident in 1931 she was left to bring up her children on her own; the youngest Jim, aged 9 and eldest Mary, aged 24. Jessie left ‘Darlingsford’ in 1946 when her sons had safely returned from WW II. She stayed at Yarram for a time where her married twin daughters lived when more grandchildren were born and spent the remainder of her life living with various family members. SUMMARY - Dr Ian Robinson OAM Born 26th June 1931 Parents – Keith John Robinson of “Creighton” Melton Mary nee Barrie of “Darlingsford” Melton The family lived at “Heatherdale” Toolern Vale. Their 3 children, Ian the first followed by daughters, Ena May and Mary Elizabeth (Beth) Ian and Ena attended Toolern Vale State School. No 946 The family later moved to Columban Ave Strathmore. During 1942 the children stayed their grandmother’s house at “Darlingsford” Melton. They enrolled at Melton State School No 430 on the 13/3/42 after attending State School No 483 Raleigh Street Essendon. They left Melton School on the 31/7/42 returning to Essendon. Ian attended Geelong College as a boarder after completing his schooling he entered University to study Medicine. His early General Practice was in Melbourne. In 1972 he joined the Royal Flying Doctor at Mount Isa, North West Region of Queensland. The region covered an area larger than the British Isles. He was on call 24 hours for emergencies. He spent three weeks away with calls and in the fourth week attended Aboriginal Reserves. Ian took two Queensland Governors and their wives to spend three nights at the Clinic. Sir Colin and Lady Hannah are still their friends. Area Co-ordinator Ian was awarded the Royal Humane Society Medal along with his pilot when they risked their lives landing on flooded land to save a patient. Ian remained a loyal contributor to the Royal Flying Doctor Service until 1997 He met Queen Elizabeth 2nd in Cairns, and also met Prince Phillip and Prince Andrew in Brisbane. Townsville – Locum Beenleigh – General Practice Open 7 Days 198? -2002 Aspects of his work covered the following – Police Work State Commonwealth Medical Officer TEYS COMPANY Q FEVER. Q Fever presents with flu like symptoms. The 1st Test always came back Negative BUT 2nd Test always positive. Ian lectured other Medicos re Q Fever Council Immunization in schools Covered boxing bouts Large Practice In 2002 Ian retired but continued house calls for older patients. Information from Anne to Beth received by Wendy October 2013 Wendy Elizabeth Barrie Jessie May Lang [Barrie] and Ian Keith Robinson standing in front of a carlocal identities -
 Melton City Libraries
Photograph, Schutt and Barrie Pty Ltd Chaff Cutting Mills, Unknown
Mary nee Barrie Robinson (1907 –1999) writes c1980 about her father Charles Ernest Barrie of Darlingsford Melton (1871 – 1931) Extract copied from her handwritten story - My father was born in Ballarat in 1871. … commenced his working life with a team of bullocks and a chaffcutter in the St Arnaud district, a work the he became most success at and would continue in to the end of his life. He eventually became the owner of a chaff mill at Melton station with an access line to the railway. [1900] The Schutt & Barrie partnership Dad later became involved in a Chaff mill at West Footscray run by John Ralph Schutt who when he met Dad was a very sick man and had begged Dad to come into the business and help him. That began a very happy association, the business was put on its feet. An empty quarry across Geelong Road opposite the mill was purchased, the chaffcutters were set up in the quarry and that was the start of a very busy and prosperous period. A branch line was run into the mill. Dad spent some afternoons at the mill going by train, and spending some hours there at night, at the same time running the farm with full time help. Two full 8 horse teams were used to work the land, which meant early rising for the horses to be fed and harnessed ready for the men to commence the days work. Charlie Lowe and Murdock Davey were two of the men who worked for Dad in those years. The firm purchased a mill at Parwan and Dad spent a lot of time and energy getting it running to their satisfaction. Monday was the day he spent time there also round the district of Parwan and Balliang. He came to know many of the their names were well known in our household for many years. [1920] Later a flour mill was built beside the Chaff mill at West Footscray but it never thrived like the mill. The chaff mill had many loyal and good men employed there and there was never any trouble between men and management. Willie Walters and Miss Renyolds were some I remember, other names me, Joyce would be able to name them. [Sister of Mary born 1920] Schutt and Barrie Pty Ltd Chaff Cutting Mills Melton South sitelocal architecture, local identities, agriculture -
 Melton City Libraries
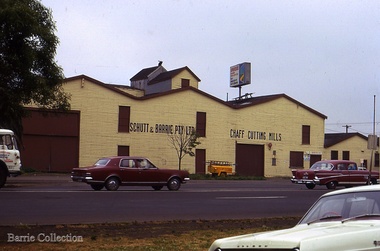
Photograph, Schutt and Barrie Flour Mills, 1969
... a chaff mill at the corner of Williamstown and Geelong Roads... a chaff mill at the corner of Williamstown and Geelong Roads ...Arthur Henry Schutt. Born 18th July 1912 at Spotswood He was the third child of John Ralph and Mary Jane Schutt. His grandfather was the first librarian of the Victorian Law Courts and his uncle, William Schutt, was a lawyer who later became the Chief Justice Sir William Schutt. His mother was born a Clutha House, stony Creek Yarraville, a was one of ten children. John Schutt opened a chaff mill at the corner of Williamstown and Geelong Roads at West Footscray. The mill was placed on in an old quarry below the ground which saved much of the backbreaking labour of heaving sheaves of hay up into the machinery, the below ground location enable the hay to be fed directly into the railway trucks into the cutters. An elevator then carried the chaff up from the ground directly into the waiting transport, at a great saving in manpower. The chaff mill became on of the largest in Victoria employing more than forty men, and later moved into flour milling.Schutt and Barrie Flour Mills, Melton South site. Opposite this Mill was a Public Weighbridge. A rail siding crossed Brooklyn road to serve chaff mill. The rail line crossed west of the Methodist Churchlocal identities, agriculture -
 Bendigo Historical Society Inc.
Document - Arthur T. Pattinson, 1962
10570 South African (Boer) War Memorial Bendigo. The monument commemorates those who died in service or were killed in action while serving in the South African (Boer) War. It is a bronze statue of a soldier on a granite base. Leader (Melbourne), 19 November 1904. “There was a large assemblage on the afternoon of 11th November, when the ceremony of unveiling the soldiers' memorial statue was performed by Brigadier-General Gordon in the presence of a muster of branches of the defence forces. The statue, which is in bronze, is mounted on a massive granite base, on the foot of which is the following inscription: — "Bendigo's tribute to the memory of the Australian soldiers who, in the South African war of 1899 - 1902 gave their lives for Queen and Empire. The statue was modelled by Mr. J. Walker, a young Bendigonian, who has been studying for two or three years under Mr. A. T. Woodward art instructor at the local school of mines.“ Ola Cohn recalled in her autobiography meeting John Walker as a sculpture student at the Bendigo School of Mines and that he had later received the commission for the Boer War Memorial although she neglects to mention its location. John Walker was born in Bendigo and first studied sculpture at the Bendigo School of Art. Walker, then went to England to study at the Royal College of Art London, and in Paris at the Académie Colarossi and Julian Academy. John Walker worked as a sculptor in both Bendigo and West Brunswick before turning to chicken farming in the Bendigo suburb of White Hills. The photo of A. T. Pattinson was taken by George Leake Massingham, a professional photographer, who had seven children, one of whom died at birth. After arriving in Australia from England, he established himself as a travelling photographer, an occupation he continued after his marriage. He travelled throughout country Queensland, Victoria and New South Wales, setting up studios along the way. The family ended up moving with him, travelling to Sydney, Narrandera, Bendigo, Newtown, Geelong and Deniliquin. Correspondence re Boer War Memorial Bendigo Boer War Memorial Bendigo. Letters and photo from and to Mrs Wilson, eldest daughter of Mr Arthur T. Pattinson who was a model for the Boer War sculpture. 10570a A black and white photo of Trooper Arthur T. Pattinson restored by BHS Volunteers. 10570b The original photo as sent by Mrs Wilson to Harold Curnow (Bendigo Historical Society) in 1962. The photo is mounted on heavy brown cardboard and has an old catalogue number of "P680" inscribed on it. The cardboard is torn and held together with sticky tape. On the front in italics is printed G.L. Massingham, Bendigo. 10570c Notes on the rear of the photo from Mrs Wilson state that "the photo is of Arthur T. Pattinson (Rusty), an Australian Light Horse trooper who served in the Boer War. The Boer War Memorial in Pall Mall Bendigo represents a trooper on guard. The sculptor was Jack Walker who used Pattinson as a model, and it is regarded as an excellent likeness." 10570d A letter from Harold Curnow back to Mrs Wilson on Jan 4th, 1963, acknowledging receipt of the photo and a letter received, noting the significance of the historical information. 10570e Handwritten letter 29/11/1962 from Mrs Wilson to Mr Curnow introducing herself as Mr. Pattinson's eldest daughter and answering the letter he wrote to her father. She mentions the bad health of her parents. Arthur modelled for the statue at least two to three times per week in a studio on the top floor of a building in Bull St. He was the original model to the best of her knowledge. Another model possibly Mr P. Handmear may have sat as a model for renovations (*). The rifle was a light horse rifle issued to Pattinson as he was still serving in 1904. Arthur and Handmear were boys together and very close. * Note - the plaster model was repaired prior to casting in metal. 10570f An obituary notice: 18/11/64 "On Nov. 17 at Frankston, Emma, wife of the late A. T. Pattinson (Rusty), late of Bendigo. 10570g Letter Nov. 20th, 1962, from Harold Curnow to Mr Arthur T. Pattinson, Kent St., Mornington, Vic. "Dear Mr Pattinson, Last week your brother, Brit., whom I have known for many years, supplied the Bendigo Advertiser with some interesting information regarding your role as the model for the late Jack Walker when he was making the statue for the Boer War Memorial here. Yesterday however, another claimant to the distinction of being the model was advanced in the Bendigo Advertiser by Mr Richard Marshall, of Moran Street, Bendigo who said that the soldier's model was Phillip Handmear. I understand that your brother has sent the newspaper cuttings on to you. When he called to see me yesterday, he suggested that I write to you for further particulars. Can you recall the discussion you had with Jack Walker when he approached you about acting as the model and do you remember how many times you posed for him, and whether the work was done in the house, in the yard, or in one of the outbuildings at Moran Street? In short, any details at all. At this point in time we are considering an interesting facet in Bendigo's history, so any seemingly unimportant incidents could really be useful if we knew about them. Have you any old newspaper cuttings mentioning your name in connection with the memorial? Do you remember any remarks that passed between you and Jack Walker during the long sessions you must have put in on this work? This could be very important. And do you recall where the rifle came from? Did you or Jack Walker borrow it from the military authorities? Back in 1934 Jack Walker recalled having had to pull the plaster model down and remake it when he discovered it was slightly off-balance and was slowly toppling forward. He told me he had to get his model to pose again. Do you know anything about this? Could it have been that he got Mr. Handmear in for the final stage of the work? That, of course, would apply only if you were not available. Incidentally, I never heard of Mr Handmear until I saw his name in yesterday's "Advertiser". In any case I intended contacting your brother or you to enquire whether any member of your family has an old photograph of you in your Boer War uniform, that is, one taken about the time of or just after the Boer War. I am sure that members of the Bendigo Branch of the Royal Historical Society would be most interested to see it. I hope you will have the time and inclination to consider the many points I have raised in this letter because the subject has aroused a lot of interest in Bendigo. Hoping you are well and quite as active as you wish, I remain, with all good wishes, Yours sincerely, Harold Curnow". john walker, jack walker, boer war memorial bendigo, arthur pattinson, soldiers' memorial bendigo -
 Ballarat Tramway Museum
Photograph - Geelong Tramway Tower Trailer, Melbourne Electric Supply Co. (MESCo), c1926
The MESCo's tower trailer, photographed in Corio Tce. The building in the background is Blakiston's, immediately west of the tram depot. Smoke from the power station chimney is in the top left of the photo. The trailer was used for tramway overhead, shown in action in photos 9272 and 9273. Early 1910s.Yields information about the Geelong MESCo tower trailer c1926Black and white print on paper.Plate number 2-2 in ink on back of photographtramways, geelong, mesco, power station -
 Ballarat Tramway Museum
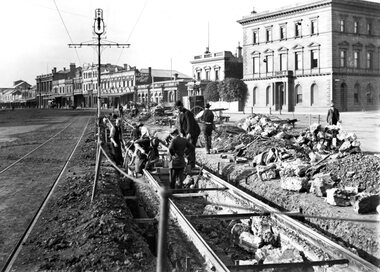
Photograph - Geelong Tramway relaying stringer constructed track
Relaying stringer constructed track in Mercer St., just west of the Gheringhap St. intersection opposite Johnstone Park, looking east towards Malop Street. The southern track has subsided and the original concrete stringers dug out, with them lying beside the track. According to the local papers, wider stringers are to be used. August 1914.Black and white print on paper.GSR710/25/1/5, 25-5, and the no. 3 inside a circle, written in pencil on the reverse. The letter A, and the no. 1 in a circle are written in ink on the reverse.geelong tramway relaying tracks, geelong streetscape c. 1914 -
 Ballarat Tramway Museum
Photograph - Geelong Tramways new tracks on South line
Tram tracks being laid for the South line up the Moorabool St., hill across the intersection of Ryrie St. Photo looks to the SE, curves in the foreground are the completed tracks into Ryrie St., heading towards the West and Newtown termini. The large building at left is the Geelong Theatre.Black and white print on paper.The no., 1 inside a circle written in ink on the reverse. GRS710/25/1/3 and 25-3, written in pencil on the reverse.geelong tramway- new tracks, geelong theatre -
 Flagstaff Hill Maritime Museum and Village
Document - Poster, Warrnambool Steam Navigation Co, ca.1938
This poster is typical of posters displayed by steam packet companies of the mid-19th to early 20th centuries. It advertises the passage and freight available on a local coastal trader. The steamships operated between the major ports along the western coast of Victoria between Melbourne and Portland. The traveller was not guaranteed the passage times due to possible weather changes. Discounts were offered for return trips within a month of the ticket's issue. The price of freight included 'lighterage', which was the service of a smaller vessel called a 'lighter' expressly designed to transport goods between ship and shore. This particular poster has been recreated; it advertises the services of the screw steamer SS Edina. The information on the poster applies to the years between 1871 and 1873. During that period the Master of the Edina was Captain John Thompson, the Edina was owned by the Warrnambool Steam Navigation Company and the secretary of the firm was Thos. Mackay. The passenger fares are in line with fares from that period, as seen in a display advertisement published in the Hamilton Spectator on January 17th, 1872. The 1853 Glasgow-built Screw Ship Edina had a long life. The ship served in both the Crimean War and the American Civil War. The Edina also traded in UK and European waters. The Henty family of Portland, Victoria, purchased Edina in 1863 for use as a coastal trader. The Edina had several owners and spent many years of service along the South West Coast of Victoria between Melbourne and Portland. The vessel transported passengers and freight in Port Phillip Bay, between Melbourne and Geelong, between 1880 and 1938. After 84 years of service, the Edina was renamed ‘Dinah’ and was stripped down for use as a lighter. The vessel was broken up in 1957 at Footscray, Melbourne. The remains of Edina’s hull can be found in the Maribyrnong River, Port Phillip Bay. The poster was owned by the donor's grandfather, Bruce Duff (1922-2003) who was an avid sailor and a lover of nautical history. He and his wife Mona (1924-2014) were buried in Portarlington Cemetery, Victoria. Duff would have been about 13 years old when the Edina was finally retired from service in 1938. His interest in the Edina could have come from a trip on the vessel or from watching it in operation in the ports along the coast. Duff has collected this poster as a memento of the Edina and is likely to have preserved it at a much later date when the lamination process was readily available. [Flagstaff Hill's collection includes a photograph of the Edina at the Moorabool Street Wharf, Geelong, which was in Duff's locality. The References for this poster include a link to Museum Victoria's photograph of two boys watching the Edina from a jetty.] Flagstaff Hill's Village has its own 'Examiner' Office where volunteers demonstrate the historic printing press in that building. They use original letter-type to create posters, print labels onto lolly bags and designs on fabrics. One of the volunteer printers has produced a poster closely resembling the donated poster. His replication includes a woodcut of the ship, which he skilfully crafted himself.This poster advertises the sailing of the steamer SS Edina and the information has local and State significance for its association with the trading ports of the Edina, and the associated names on the poster; Warrnambool Steam Navigation Company, Captain John Thompson and Thos. Mackay. This poster's message has a strong connection to the history of the businesses and community of Warrnambool and the people of Port Phillip Bay, where it was a passenger ferry for many years. The poster is an example of advertising used by shipping agents in the mid-19th to early 20th centuries. Its information includes the accurate costs to passengers and freighters and the type of timetable the vessels were likely to follow. The poster's connection with the Screw Steamship Edina is historically significant, as the vessel was the longest serving screw steamer in the world. The ship spent its first nine years overseas then arrived in Melbourne. The vessel's work included running the essential service of transporting cargo and passengers between Melbourne and the western Victoria ports of Warrnambool, Port Fairy and Portland. The Edina is listed on the Victorian Heritage Database VHR S199. Poster, A3 size, brown text on cream paper, laminated. Re-created poster of the Warrnambool Steam Navigation Company (Limited) advertising passage and freight on its Screw Steamship, SS Edina. It states days, times and fees for passage and freight from Warrnambool to Melbourne, and return. It names the ship's Master, Captain John Thompson and the Company's Secretary, Tho. Mackay. It displays a line drawing of a 3-masted ship with full sails.Printed image [side profile of a 3 masted vessel, bow facing left] Printed text includes "The Warrnambool Steam Navigation Company (Limited). The Company's Steam Ship "EDINA", Captain John Thompson, Will leave Melbourne for Warrnambool on Tuesdays, returning from Warrnambool every Thursday, At Five o'clock p.m. (weather permitting). FARES: Saloon £2 0 0 Steerage £1 0 0 Saloon return £3 0 0 Saloon return £1 10 00 - Children under 13 years half fares - Refreshments supplied onboard at a moderate scale of charge. Freight, including lighterage, - From Melbourne to Warrnambool - 12s per ton; from Warrnambool to Melbourne, 15s per ton. Passengers are requested to obtain their tickets at the offers, and shippers to make early application for space. Return tickets available for one month from date of issue. - THO. MACKAY, secretary. "warrnambool, shipwreck coast, flagstaff hill, flagstaff hill maritime museum, maritime museum, fair maid of judea, steam navigation, pleasure steamer, ss edina a, trade 19th century, travel 19th century, warrnambool to melbourne, warrnambool to geelong, warrnambool to port fairy, warrnambool to portland, screw steamer, coastal trader, crimean war, american civil war, gold export, h r h duke of edinburgh, warrnambool steam packet company, stephen henty, captain john thompson, chief engineer john davies, lady bay, lighter edina, port phillip bay steamers, vhr s199, dinah, warrnambool steam navigation company, advertising poster, shipping agent, flier, maritime village, flagstaff hill maritime museum & village, great ocean road, block printing, woodblock printing, relief printing, moorabool st wharf, western steam navigation company, tho. mackay, re-created poster -
 Ballarat Tramway Museum
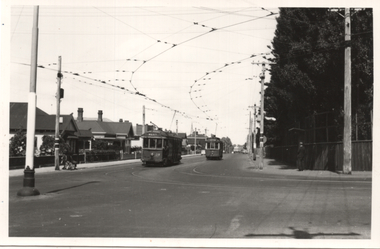
Photograph - Geelong - Aberdeen and Pakington Streets, Keith Kings, 17/12/1955
... Geelong Aberdeen St Chilwell West tram 38 tram 16 See Context ...Photograph shows the intersection of Aberdeen St (looking east) at Pakington St Geelong with No. 38 running "bang road" to turn to West route; and No. 16 to Chilwell. Note the trolley wire arrangement. Photo by Keith Kings, 17/12/1955, Photo No. Q(m)(6)Yields information about the intersection of Aberdeen and Pakington Streets Geelong and tram operations.Black and White photograph with photographers notes on the rear.See Contexttrams, tramways, geelong, aberdeen st, chilwell, west, tram 38, tram 16 -
 Linton and District Historical Society Inc
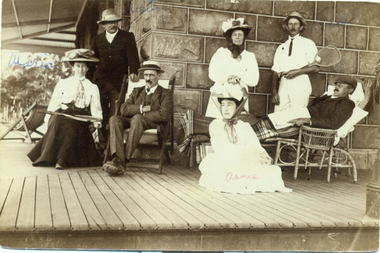
Photograph, Children of John and Eliza Browne
Children of John and Eliza Browne, with spouses, at Narada West, the family property which is located near Anakie in the Geelong Region.Photocopy of original sepia photograph showing four men and three ladies lounging on a verandah of a bluestone Homestead. Some are dressed in tennis clothes with two racquets.marion, monty, tom, frances, will, john, annie, narada west, john browne, eliza browne (nee linton), moppianamum