Showing 5054 items matching "crown"
-
 Tatura Irrigation & Wartime Camps Museum
Kit - Medical
Emergency medical kit for aid crew.Metal container with lid attached and 2 holes. 2 ampoule syringes - Directions for use attached around black covering. 2 card labels with instructions for using ampoule syringe with reinforced ring at one end. Piece of wadding used as protective cover for ampoules."Crown" AM. Tubunic ampoules. On container - 2 syringes "monoject" trademark "ampoule syringe morphine hydrochloride GR 1/2 burroughs wellcome and co (the welcome foundation ltd) London 99005/5/44 Poison a setcot containermedical kit, medical, raaf -
 Kew Historical Society Inc
Plan - Subdivision Plan, J R Mathers & McMillan, Myrtle Hill Estate, East Kew, circa 1949, c.1949
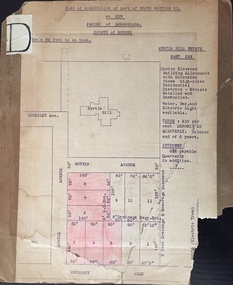
The Kew Historical Society's map collection includes a substantial number of real estate subdivision plans, mainly of Kew but also of surrounding suburbs in Melbourne. Most of the subdivision plans date from the 1920s and 1930s when the districts old homes and local farmland were being split up to accommodate residential growth in the postwar period. These early plans were assembled by a local firm, Jas R Mather & McMillan, which had an office in Cotham Road. Many of the plans, and sometimes photos, were annotated by the agents.Subdivision plans are historically important documents used as evidence for the growth of suburbs in Australia. They frequently provide information about when the land was sold as well as evidence relating to surveyors and real estate and financial agents. The numerous subdivision plans in the Kew Historical Society's collection represent working documents, ranging from the initial sketches made in planning a subdivision to printed plans on which auctioneers or agents listed the prices for which individual lots were sold. In a number of cases, the reverse of a subdivision plan in the collection includes a photograph of a house that was also for sale by the agent. These photographs provide significant heritage information relating house design and decoration, fencing and household gardens.The photograph may also be aesthetically significant depending on the importance of the photographic atelier.Myrtle Hill, at 14 Vista Avenue, Kew, is of local historical and architectural significance as a good example of a large and imposing single-storey Italianate house of the early 1870s surviving in Kew. Originally sited on a large allotment overlooking Normanby Road, the setting of the house has been dramatically altered through extensive subdivision and development. The subdivision plan of the ‘Myrtle Hill Estate’ indicates that in one such subdivision, 11 allotments were created fronting Bowyer Avenue, Myrtle Avenue, and Normanby Road. The outline and building profile of Myrtle Hill is shown on the west side of Bowyer Avenue.The full (typed) title of this subdivision plan is :"Plan of SUBDIVISION of part of CROWN PORTION 83. / at KEW / PARISH OF BOROONDARA. / COUNTY OF BOURKE". / "MYRTLE HILL ESTATE / EAST KEW" In addition to the Title and subtitle, the plan also lists the advantages of the subdivision. -
 Mont De Lancey
Embroidery pattern
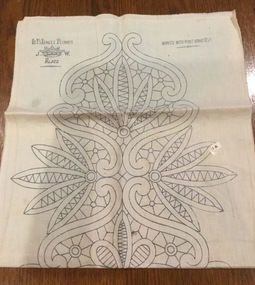
Calico embroidery pattern for table runner, intended for Renaissance work, or Point Lace. The blue printed pattern depicts leaves and flowers the whole length of the runner." L.B. Lacet Runner. J.W. with a crown in between the two letters, No. 4322" in top left hand corner of the runner and "Worked with Point Braid No. 261" in the top right hande corner. The same inscriptions are found repeated at the other end of the runner.household textiles., tableware, textileworking patterns -
 Warrnambool and District Historical Society Inc.
Document - Diary of 3403 Cpl W D McDonald August 1916 to December 1917, His Majesty’s Stationary Office (HMSO), C 1916
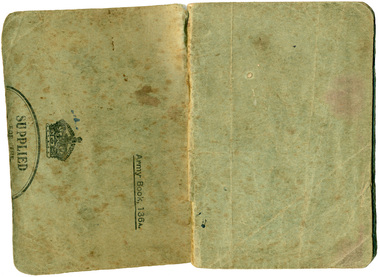
This diary was written by Cpl William Donald McDonald 3403 who served from July 1915 to November 1918. The diary covers the period August 5th 1916 to December 31st 1917.William McDonald was stationed in England mostly at the Salisbury Plain for the entire period. This item was mistakenly identified as as the J A G Brass diary, with 11Lieut J A G Brass being written inside the front cover of the diary. However J A G Brass was a distant cousin of W McDonald who still lived in Scotland and along with other names inside the front cover were contacts for the writer. Among the names are A W Hardy, J W Jolly, I J Windsor, Pte H A Jessop. The book itself is a modified British Service notebook, having been cut down by the author to make it a more manageable size. William McDonald was 35 years of age when he enlisted and was a tailor before enlistingThis diary has historic significance as it records daily life during the first world war. It relates daily life in the army ranks. It also has strong links to local families.Modified Service notebook of the type issued for use in the British Army of World War 1. It would have originally measured 5” x 7”, but has been cut down by nearly removing the fly end of the pages to reduce them about 3.5”. The author, who was a painstakingly neat and fastidious man, has also re-rounded the corners, to prevent them ‘dog-earing’. The aim of the modifications is likely to have been to make the item easy to slip in or out of a tunic pocket. Heavy light grey green card with rounded corners bound with two staples. 96 pages, each with 8 faint, light blue, vertical lines. Handwriting in ink and indelible pencil is across the lines.The front cover of the Notebook (now the back cover of the diary) is annotated as ‘Army Book 136A’, effaced with an imperial crown of the ‘St James’? Pattern with a title inscribed in an ellipse, which would once have read - SUPPLIED FOR THE USE OF OFFICERS AND NCOS.warrnambool, ww1 diary, mcdonald 3403, william donald mcdonald, william mcdonald, j a g brass, world war one -
 Flagstaff Hill Maritime Museum and Village
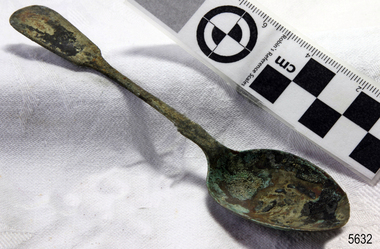
Domestic object - Spoon, c.1878
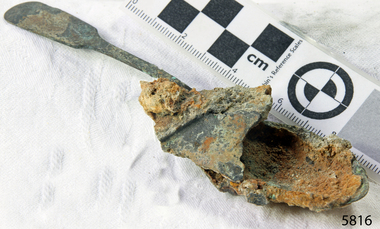
This tea spoon is from the wreck of the LOCH ARD, a Loch Line ship of 1,693 tons which sailed from Gravesend, London, on 2 March 1878 with 17 passengers and a crew of 36 under Captain George Gibbs. “The intention was to discharge cargo in Melbourne, before returning to London via the Horn with wool and wheat”. Instead, on 1 June 1878, after 90 days at sea, she struck the sandstone cliffs of Mutton Bird Island on the south west coast of Victoria, and sank with the loss of 52 lives and all her cargo. The manifest of the LOCH ARD listed an array of manufactured goods and bulk metals being exported to the Colony of Victoria, with a declared value of £53,700. (202 bills of lading show an actual invoice value of £68, 456, with insurance underwriting to £30,000 of all cargo). Included in the manifest is the item of “Tin hardware & cutlery £7,530”. This teaspoon is one of 482 similar items of electro-plated cutlery from the LOCH ARD site, comprising spoons and forks of various sizes but all sharing the same general shape or design and metallic composition. 49 of these pieces display a legible makers’ mark — the initials “W” and “P” placed within a raised diamond outline, which is in turn contained within a sunken crown shape — identifying the manufacturer as William Page & Co of Birmingham. An electroplater’s makers’ marks, unlike sterling silver hallmarks, are not consistent identifiers of quality or date and place of manufacture. A similar line of five impressions was usually made to impress the consumer with an implication of industry standards, but what each one actually signified was not regulated and so they varied according to the whim of the individual foundry. In this case, the maker’s marks are often obscured by sedimentary accretion or removed by corrosion after a century of submersion in the ocean. However sufficient detail has survived to indicate that these samples of electro-plated cutlery probably originated from the same consignment in the LOCH ARD’s cargo. The following descriptions of maker’s marks are drawn from 255 tea spoons, 125 dessert spoons, and 99 table forks. These marks are clearly visible in 66 instances, while the same sequence of general outlines, or depression shapes, is discernible in another 166 examples. 1. A recessed Crown containing a raised Diamond outline and the initials “W” and “P” (the recognised trademark of William Page & Co) 2. An impressed Ellipse containing a raised, pivoted, Triangle in its lower part and bearing a Resurrection Cross on its upper section (a possible dissenting church symbol reflecting religious affiliation); OR a rounded Square impression containing a raised, ‘lazy’, letter “B” (possibly mimicking sterling silver hallmark signifying city of manufacture i.e. Birmingham) 3. An impressed rounded Square filled with a raised Maltese Cross (the base metal composite of nickel silver was also known as ‘German silver’ after its Berlin inventors in 1823) 4. A recessed Circle containing a Crab or Scarab Beetle image; OR a recessed Circle containing a rotated ‘fleur de lys’ or ‘fasces’ design 5. A depressed Diamond shape enclosing a large raised letter “R” and a small raised letter “D” (mimicking the U.K. Patent Office stamp which abbreviated the term ‘registered’ to “RD”, but also included date and class of patent) Suggested trade names for William Page & Co’s particular blend of brass plating are ‘roman silver’ or ‘silverite’. This copper alloy polishes to a lustrous gold when new, discolouring to a murky grey with greenish hue when neglected. HISTORY OF THE LOCH ARD The LOCH ARD belonged to the famous Loch Line which sailed many ships from England to Australia. Built in Glasgow by Barclay, Curdle and Co. in 1873, the LOCH ARD was a three-masted square rigged iron sailing ship. The ship measured 262ft 7" (79.87m) in length, 38ft (11.58m) in width, 23ft (7m) in depth and had a gross tonnage of 1693 tons. The LOCH ARD's main mast measured a massive 150ft (45.7m) in height. LOCH ARD made three trips to Australia and one trip to Calcutta before its final voyage. LOCH ARD left England on March 2, 1878, under the command of Captain Gibbs, a newly married, 29 year old. She was bound for Melbourne with a crew of 37, plus 17 passengers and a load of cargo. The general cargo reflected the affluence of Melbourne at the time. On board were straw hats, umbrella, perfumes, clay pipes, pianos, clocks, confectionary, linen and candles, as well as a heavier load of railway irons, cement, lead and copper. There were items included that intended for display in the Melbourne International Exhibition in 1880. The voyage to Port Phillip was long but uneventful. At 3am on June 1, 1878, Captain Gibbs was expecting to see land and the passengers were becoming excited as they prepared to view their new homeland in the early morning. But LOCH ARD was running into a fog which greatly reduced visibility. Captain Gibbs was becoming anxious as there was no sign of land or the Cape Otway lighthouse. At 4am the fog lifted. A man aloft announced that he could see breakers. The sheer cliffs of Victoria's west coast came into view, and Captain Gibbs realised that the ship was much closer to them than expected. He ordered as much sail to be set as time would permit and then attempted to steer the vessel out to sea. On coming head on into the wind, the ship lost momentum, the sails fell limp and LOCH ARD's bow swung back. Gibbs then ordered the anchors to be released in an attempt to hold its position. The anchors sank some 50 fathoms - but did not hold. By this time LOCH ARD was among the breakers and the tall cliffs of Mutton Bird Island rose behind the ship. Just half a mile from the coast, the ship's bow was suddenly pulled around by the anchor. The captain tried to tack out to sea, but the ship struck a reef at the base of Mutton Bird Island, near Port Campbell. Waves broke over the ship and the top deck was loosened from the hull. The masts and rigging came crashing down knocking passengers and crew overboard. When a lifeboat was finally launched, it crashed into the side of LOCH ARD and capsized. Tom Pearce, who had launched the boat, managed to cling to its overturned hull and shelter beneath it. He drifted out to sea and then on the flood tide came into what is now known as LOCH ARD Gorge. He swam to shore, bruised and dazed, and found a cave in which to shelter. Some of the crew stayed below deck to shelter from the falling rigging but drowned when the ship slipped off the reef into deeper water. Eva Carmichael had raced onto deck to find out what was happening only to be confronted by towering cliffs looming above the stricken ship. In all the chaos, Captain Gibbs grabbed Eva and said, "If you are saved Eva, let my dear wife know that I died like a sailor". That was the last Eva Carmichael saw of the captain. She was swept off the ship by a huge wave. Eva saw Tom Pearce on a small rocky beach and yelled to attract his attention. He dived in and swam to the exhausted woman and dragged her to shore. He took her to the cave and broke open case of brandy which had washed up on the beach. He opened a bottle to revive the unconscious woman. A few hours later Tom scaled a cliff in search of help. He followed hoof prints and came by chance upon two men from nearby Glenample Station three and a half miles away. In a state of exhaustion, he told the men of the tragedy. Tom returned to the gorge while the two men rode back to the station to get help. By the time they reached LOCH ARD Gorge, it was cold and dark. The two shipwreck survivors were taken to Glenample Station to recover. Eva stayed at the station for six weeks before returning to Ireland, this time by steamship. In Melbourne, Tom Pearce received a hero's welcome. He was presented with the first gold medal of the Royal Humane Society of Victoria and a £1000 cheque from the Victorian Government. Concerts were performed to honour the young man's bravery and to raise money for those who lost family in the LOCH ARD disaster. Of the 54 crew members and passengers on board, only two survived: the apprentice, Tom Pearce and the young woman passenger, Eva Carmichael, who lost all of her family in the tragedy. Ten days after the LOCH ARD tragedy, salvage rights to the wreck were sold at auction for £2,120. Cargo valued at £3,000 was salvaged and placed on the beach, but most washed back into the sea when another storm developed. The wreck of LOCH ARD still lies at the base of Mutton Bird Island. Much of the cargo has now been salvaged and some was washed up into what is now known as LOCH ARD Gorge. Cargo and artefacts have also been illegally salvaged over many years before protective legislation was introduced. One of the most unlikely pieces of cargo to have survived the shipwreck was a Minton porcelain peacock - one of only seven in the world. The peacock was destined for the Melbourne International Exhibition in 1880. It had been well packed, which gave it adequate protection during the violent storm. Today, the Minton peacock can be seen at the Flagstaff Hill Maritime Museum in Warrnambool. From Australia's most dramatic shipwreck it has now become Australia's most valuable shipwreck artefact and is one of very few 'objects' on the Victorian State Heritage Register. The LOCH ARD shipwreck is of State significance – Victorian Heritage Register S 417. Flagstaff Hill’s collection of artefacts from LOCH ARD is significant for being one of the largest collections of artefacts from this shipwreck in Victoria. It is significant for its association with the shipwreck, which is on the Victorian Heritage Register (VHR S417). The collection is significant because of the relationship between the objects, as together they have a high potential to interpret the story of the LOCH ARD. The LOCH ARD collection is archaeologically significant as the remains of a large international passenger and cargo ship. The LOCH ARD collection is historically significant for representing aspects of Victoria’s shipping history and its potential to interpret sub-theme 1.5 of Victoria’s Framework of Historical Themes (living with natural processes). The collection is also historically significant for its association with the LOCH ARD, which was one of the worst and best known shipwrecks in Victoria’s history. Unrestored tea spoon from the wreck of the LOCH ARD. The spoon design has a flattened fiddle-back handle, with a thin stem or shank, flared collar, and elongated bowl. The spoons metallic composition is a thin layer of brass alloy which has partially corroded back to a nickel-silver base metal. 60% of spoon surface area (bowl, stem) bears sedimentary encrustation. Outlines of five makers marks are visible on lower rear of handle: Crown, Circle, Circle, Circle, Diamond.flagstaff hill maritime museum, shipwreck coast, great ocean road, loch line, loch ard, mutton bird island, loch ard gorge, electroplated cutlery, loch ard shipwreck, nickel silver, william page & co, birmingham brass plating, makers marks, william page & co -
 Flagstaff Hill Maritime Museum and Village
Spoon, circa 1878
This tea spoon is from the wreck of the LOCH ARD, a Loch Line ship of 1,693 tons which sailed from Gravesend, London, on 2 March 1878 with 17 passengers and a crew of 36 under Captain George Gibbs. “The intention was to discharge cargo in Melbourne, before returning to London via the Horn with wool and wheat”. Instead, on 1 June 1878, after 90 days at sea, she struck the sandstone cliffs of Mutton Bird Island on the south west coast of Victoria, and sank with the loss of 52 lives and all her cargo. The manifest of the LOCH ARD listed an array of manufactured goods and bulk metals being exported to the Colony of Victoria, with a declared value of £53,700. (202 bills of lading show an actual invoice value of £68, 456, with insurance underwriting to £30,000 of all cargo). Included in the manifest is the item of “Tin hardware & cutlery £7,530”. This teaspoon is one of 482 similar items of electro-plated cutlery from the LOCH ARD site, comprising spoons and forks of various sizes but all sharing the same general shape or design and metallic composition. 49 of these pieces display a legible makers’ mark — the initials “W” and “P” placed within a raised diamond outline, which is in turn contained within a sunken crown shape — identifying the manufacturer as William Page & Co of Birmingham. An electroplater’s makers’ marks, unlike sterling silver hallmarks, are not consistent identifiers of quality or date and place of manufacture. A similar line of five impressions was usually made to impress the consumer with an implication of industry standards, but what each one actually signified was not regulated and so they varied according to the whim of the individual foundry. In this case, the maker’s marks are often obscured by sedimentary accretion or removed by corrosion after a century of submersion in the ocean. However sufficient detail has survived to indicate that these samples of electro-plated cutlery probably originated from the same consignment in the LOCH ARD’s cargo. The following descriptions of maker’s marks are drawn from 255 tea spoons, 125 dessert spoons, and 99 table forks. These marks are clearly visible in 66 instances, while the same sequence of general outlines, or depression shapes, is discernible in another 166 examples. 1. A recessed Crown containing a raised Diamond outline and the initials “W” and “P” (the recognised trademark of William Page & Co) 2. An impressed Ellipse containing a raised, pivoted, Triangle in its lower part and bearing a Resurrection Cross on its upper section (a possible dissenting church symbol reflecting religious affiliation); OR a rounded Square impression containing a raised, ‘lazy’, letter “B” (possibly mimicking sterling silver hallmark signifying city of manufacture i.e. Birmingham) 3. An impressed rounded Square filled with a raised Maltese Cross (the base metal composite of nickel silver was also known as ‘German silver’ after its Berlin inventors in 1823) 4. A recessed Circle containing a Crab or Scarab Beetle image; OR a recessed Circle containing a rotated ‘fleur de lys’ or ‘fasces’ design 5. A depressed Diamond shape enclosing a large raised letter “R” and a small raised letter “D” (mimicking the U.K. Patent Office stamp which abbreviated the term ‘registered’ to “RD”, but also included date and class of patent) Suggested trade names for William Page & Co’s particular blend of brass plating are ‘roman silver’ or ‘silverite’. This copper alloy polishes to a lustrous gold when new, discolouring to a murky grey with greenish hue when neglected. HISTORY OF THE LOCH ARD The LOCH ARD belonged to the famous Loch Line which sailed many ships from England to Australia. Built in Glasgow by Barclay, Curdle and Co. in 1873, the LOCH ARD was a three-masted square rigged iron sailing ship. The ship measured 262ft 7" (79.87m) in length, 38ft (11.58m) in width, 23ft (7m) in depth and had a gross tonnage of 1693 tons. The LOCH ARD's main mast measured a massive 150ft (45.7m) in height. LOCH ARD made three trips to Australia and one trip to Calcutta before its final voyage. LOCH ARD left England on March 2, 1878, under the command of Captain Gibbs, a newly married, 29 year old. She was bound for Melbourne with a crew of 37, plus 17 passengers and a load of cargo. The general cargo reflected the affluence of Melbourne at the time. On board were straw hats, umbrella, perfumes, clay pipes, pianos, clocks, confectionary, linen and candles, as well as a heavier load of railway irons, cement, lead and copper. There were items included that intended for display in the Melbourne International Exhibition in 1880. The voyage to Port Phillip was long but uneventful. At 3am on June 1, 1878, Captain Gibbs was expecting to see land and the passengers were becoming excited as they prepared to view their new homeland in the early morning. But LOCH ARD was running into a fog which greatly reduced visibility. Captain Gibbs was becoming anxious as there was no sign of land or the Cape Otway lighthouse. At 4am the fog lifted. A man aloft announced that he could see breakers. The sheer cliffs of Victoria's west coast came into view, and Captain Gibbs realised that the ship was much closer to them than expected. He ordered as much sail to be set as time would permit and then attempted to steer the vessel out to sea. On coming head on into the wind, the ship lost momentum, the sails fell limp and LOCH ARD's bow swung back. Gibbs then ordered the anchors to be released in an attempt to hold its position. The anchors sank some 50 fathoms - but did not hold. By this time LOCH ARD was among the breakers and the tall cliffs of Mutton Bird Island rose behind the ship. Just half a mile from the coast, the ship's bow was suddenly pulled around by the anchor. The captain tried to tack out to sea, but the ship struck a reef at the base of Mutton Bird Island, near Port Campbell. Waves broke over the ship and the top deck was loosened from the hull. The masts and rigging came crashing down knocking passengers and crew overboard. When a lifeboat was finally launched, it crashed into the side of LOCH ARD and capsized. Tom Pearce, who had launched the boat, managed to cling to its overturned hull and shelter beneath it. He drifted out to sea and then on the flood tide came into what is now known as LOCH ARD Gorge. He swam to shore, bruised and dazed, and found a cave in which to shelter. Some of the crew stayed below deck to shelter from the falling rigging but drowned when the ship slipped off the reef into deeper water. Eva Carmichael had raced onto deck to find out what was happening only to be confronted by towering cliffs looming above the stricken ship. In all the chaos, Captain Gibbs grabbed Eva and said, "If you are saved Eva, let my dear wife know that I died like a sailor". That was the last Eva Carmichael saw of the captain. She was swept off the ship by a huge wave. Eva saw Tom Pearce on a small rocky beach and yelled to attract his attention. He dived in and swam to the exhausted woman and dragged her to shore. He took her to the cave and broke open case of brandy which had washed up on the beach. He opened a bottle to revive the unconscious woman. A few hours later Tom scaled a cliff in search of help. He followed hoof prints and came by chance upon two men from nearby Glenample Station three and a half miles away. In a state of exhaustion, he told the men of the tragedy. Tom returned to the gorge while the two men rode back to the station to get help. By the time they reached LOCH ARD Gorge, it was cold and dark. The two shipwreck survivors were taken to Glenample Station to recover. Eva stayed at the station for six weeks before returning to Ireland, this time by steamship. In Melbourne, Tom Pearce received a hero's welcome. He was presented with the first gold medal of the Royal Humane Society of Victoria and a £1000 cheque from the Victorian Government. Concerts were performed to honour the young man's bravery and to raise money for those who lost family in the LOCH ARD disaster. Of the 54 crew members and passengers on board, only two survived: the apprentice, Tom Pearce and the young woman passenger, Eva Carmichael, who lost all of her family in the tragedy. Ten days after the LOCH ARD tragedy, salvage rights to the wreck were sold at auction for £2,120. Cargo valued at £3,000 was salvaged and placed on the beach, but most washed back into the sea when another storm developed. The wreck of LOCH ARD still lies at the base of Mutton Bird Island. Much of the cargo has now been salvaged and some was washed up into what is now known as LOCH ARD Gorge. Cargo and artefacts have also been illegally salvaged over many years before protective legislation was introduced. One of the most unlikely pieces of cargo to have survived the shipwreck was a Minton porcelain peacock - one of only nine in the world. The peacock was destined for the Melbourne International Exhibition in 1880. It had been well packed, which gave it adequate protection during the violent storm. Today, the Minton peacock can be seen at the Flagstaff Hill Maritime Museum in Warrnambool. From Australia's most dramatic shipwreck it has now become Australia's most valuable shipwreck artefact and is one of very few 'objects' on the Victorian State Heritage Register The LOCH ARD shipwreck is of State significance – Victorian Heritage Register S 417. Flagstaff Hill’s collection of artefacts from LOCH ARD is significant for being one of the largest collections of artefacts from this shipwreck in Victoria. It is significant for its association with the shipwreck, which is on the Victorian Heritage Register (VHR S417). The collection is significant because of the relationship between the objects, as together they have a high potential to interpret the story of the LOCH ARD. The LOCH ARD collection is archaeologically significant as the remains of a large international passenger and cargo ship. The LOCH ARD collection is historically significant for representing aspects of Victoria’s shipping history and its potential to interpret sub-theme 1.5 of Victoria’s Framework of Historical Themes (living with natural processes). The collection is also historically significant for its association with the LOCH ARD, which was one of the worst and best known shipwrecks in Victoria’s history. Unrestored tea spoon from the wreck of the LOCH ARD. The spoon design has a flattened fiddle-back handle, with a thin stem or shank, flared collar, and elongated bowl. The spoons metallic composition is a thin layer of brass alloy which has partially corroded back to a nickel-silver base metal. Only 15% of plate remains with 10% acqua-marine verdigris. Outlines of five makers marks are visible (Crown, Ellipse, Rounded Square, Circle, Diamond). There is splitting on the edge of the bowl.flagstaff hill, warrnambool, shipwrecked coast, flagstaff hill maritime museum, maritime museum, shipwreck coast, flagstaff hill maritime village, great ocean road, loch line, loch ard, captain gibbs, eva carmichael, tom pearce, glenample station, mutton bird island, loch ard gorge, electroplated cutlery, loch ard shipwreck, nickel silver, william page & co, birmingham, brass plating, makers marks -
 Greensborough Historical Society
Folder, Peter Simmenauer, Partington land, edited by Peter Simmenauer, 1850-1950
Folder of documents relates to ownership of Crown Portion 13, Parish of Nillimbuk, County of Evelyn, purchased by John Alison in 1840 and sold to various people including Charles Partington Snr in 1878. It includes Certificates of Title recording transfers to Charles' children, and details of the land retained by Charles Jnr and Joseph Partington until their deaths in 1932 and 1943 respectively. A list of sales of allotments in the "Greenhills Estate" is also included.Folder of documents including Certificates of Title and other land documentsjohn alison, charles partington, charles partington junior, joseph partington, greenhills, partington family, greensborough, willis vale -
 Whitehorse Historical Society Inc.
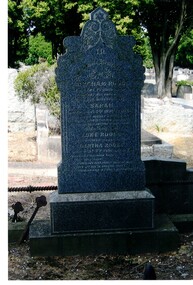
Photograph, Tombstone - Rooks family
The Rooks family emigrated from England in 1857. Abraham Rooks came to Forest Hill in 1862 and leased 79 acres. After 10 years of successful farming he owned the land. Abraham Rooks held the first church meetings in his home and in 1865 was one of the trustees to receive a crown grant to erect a chapel. In 1970 a school was attached to the chapel. Rooks Road is named after him.Coloured photo of the Rooks family tombstone - grave 226, Methodist section|Rooks, Abraham died 1 September 1889, aged 65 years|Rooks, Sarah died 2 January 1898, aged 66 yearsrooks, abraham, rooks, sarah, tombstones, rooks road, vermont -
 Hume City Civic Collection
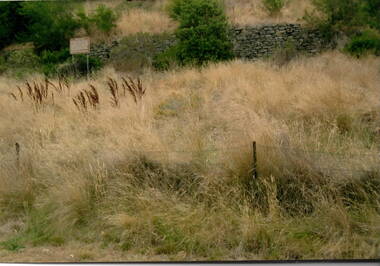
Photograph, The Terraces, 1980s
The stone wall is part of the terraces that were built into the hillside at the winery at Goonawarra. They were constructed in the early days when the vineyard was established to terrace the hillside for growing vines. The winery was originally established by Joh Goodall Francis, a former member of the Victorian Legislative Assembly. He acquired a parcel of crown land and proceeded to develop it as a vineyard. The terraces were built by vignerons, who were employed to work on the property. Goonawarra Winery was one of a number of vineyards that were established in the Sunbury area in the 1800s. The volcanic soil and temperate climate were ideal for grape growing.A coloured photograph of a stone wall with a notice to the left of the wall and long dried grassland in the front. A barbed wire fence is in the foreground.terraces, vineyards, goonawarra, james goodall francis -
 Ringwood and District Historical Society
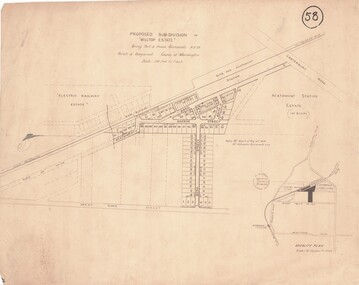
Map, Proposed Subdivision - Hilltop Estate, Heathmont, Victoria - circa 1925
Plan of Part of Crown Allotments 16 & 18, Parish of Ringwood, County of Mornington. Subdivision includes Site for Heathmont Station, Heathmont Road, George Street, Lilian Street, Edith Street, Edna Street, Great Ryrie Street. Inset locality plan also shows nearby Electric Railway Estate and Heathmont Station Estate. L.H. Webber, Licensed Surveyor, 440 Little Collins Street, Melbourne. -
 Bendigo Military Museum
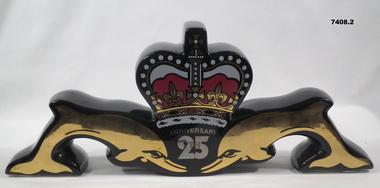
Souvenir - PORT CONTAINER WITH LID, Made for 25th Anniversary RAN Submarine Squadron
Rear of container - information. RAN SUBMARINE SQUADRON 25TH ANNIVERSARY. NUMBER NAME LAID DOWN LAUNCHED FIRST COM'D 57 OXLEY 2/7/64 24/9/65 27/3/67 59 OTWAY 29/6/65 29/11/66 22/4/68 70 OVENS 17/6/66 4/12/67 18/4/69 60 ONSLOW 26/5/67 3/12/67 22/12/69 61 ORION 6/10/72 16/9/74 15/6/77 62 OTAMA 28/5/73 3/12/75 27/4/781. & 2. Unusual shaped ceramic container to be used for Port. Black glossy glaze with illustration. 1. Front - 2 gold dolphins and decoration in gold, white and red with inscription in silver "ANNIVERSARY/ 25th" Back - list of RAN Submarine Squadron vessels. 2. Back - in shape of crown with - list of RAN Submarine Squadron vessels.Information print in white on container. See Context Historical.souvenirs, anniversary, ran, submarines -
 Bendigo Military Museum
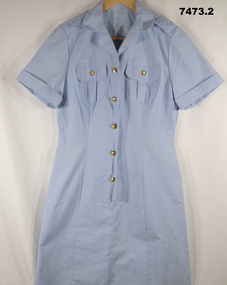
Uniform - DRESS, RAAF CADET, ADI Clothing Factory, 1991
1. This is a light blue full length dress, made from polyester and cotton. It has epaulettes. It has 2 breast pockets - held shut with brass buttons, It is held shut with 5 brass buttons. the brass buttons are round with a motif of a crown and an eagle. 2. Light blue belt. It is cotton polyester. Uses a brass buckle.Inside shirt, written on label = W326143 B. Williams.raaf, cadets, female uniform -
 Bendigo Military Museum
Badge - BADGE, COLLAR, ARMY, Swan & Hudson
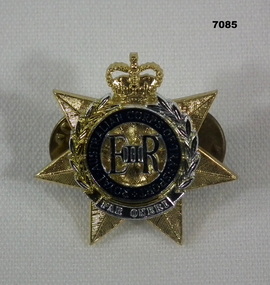
Part of the Kevin John Herdman, No. 397661, Collection. See Catalogue No. 5942P for details of his service record.RACT officer's collar badge. Badge is constructed of gold and silver plastic. Silver coloured laurel wreath is mounted on a gold coloured seven-pointed star. A Queen's Crown is located at the top of the star. Laurel wreath encloses a Royal Cypher and blue garter featuring silver lettering. Two metal pins on back for fastening to a collar.Printed on blue garter: ' ROYAL AUSTRALIAN CORPS OF TRANSPORT'. At bottom of wreath: 'PAR ONERI' Stamped on back: 'SWAN & HUDSON'.badge, uniform, royal australian corps of transport, kevin john herdman -
 Christ Church Anglican Parish of Warrnambool
Memorial Window: Susan FLEETWOOD, "Saint Mary"
The inscription tells of the person, Susan Fleetwood. That Susan Fleetwood was the daughter of William Rutledge, and the wife of Thomas Falkner Fleetwood places her with two men of historical importance in Warrnambool and district.Stained glass lancet window, west wall, north nave, second light from the left in the group of five lights, Depicting the Blessed Virgin Mary facing towards the central light of the Crucifixion, the predominant colours are blues and purple/magenta. Towards the top of the design is an angel holding the Alpha symbol. At the peak of the design is a golden crown. To the Glory of God, and in loving memory of/ Susan, daughter of William and Eliza Rutledge/ of Farnham Park Dennington, and wife of/Thomas Falkner Fleetwood/ born at Port Fairy, July 9th 1848, Entered into rest April 18th 1932./ By her devoted affection to her family and friends, and/ her generous help to all who were in need and distress/ she won the love and gratitude of many./ "Then are they glad because they are at rest, and so/ He bringeth them into the haven where they would be."/ This window is erected by her Son and Daughter.rutledge, fleetwood, st mary -
 Warrnambool and District Historical Society Inc.
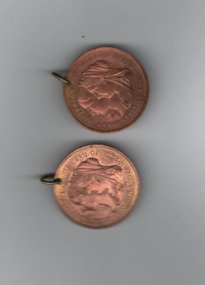
Medallions, Town of Warrnambool Queen Victoria 60yrs, 1897
These medals were issued by the Town of Warrnambool in 1897 to commemorate the 60th anniversary of the reign of Queen Victoria of England. Walter John Hickford, the Mayor Warrnambool at that time, has his name on the medal. Walter Hickford (1855-1928) was a Warrnambool businessman, setting up a shop in Liebig Street in 1880, supplying the paint materials for householders, contactors, painters and artists. He also carried out decorative work in private homes, businesses and churches. Hickford was active in civic life in Warrnambool, serving as a Councillor from 1890 to 1903 and he was Mayor from 1895 to 1897.These medals are of considerable importance as they were produced for the Town of Warrnambool in 1897 to celebrate Queen Victoria’s Jubilee. They have both a local and a wider national significance.,1These two circular bronze medals have profiles of Queen Victoria as a young woman and as a crowned monarch on the reverse and the Warrnambool Coat of Arms on the obverse. Both have a punched hole with a metal ring on the top. .2 As above .3 These five circular medals, four of which are bronze and one brass are identical with those described above..1Queen Victoria 60th year of reign 1837 to 1897 obverse Town of Warrnambool W. J. Hickford Mayor .BY THESE WE FLOURISH Reverse .2 As above .3 As for .3 above Note one of the bronze ones has a fabric cord attached through a hole at the top.medals, queen victoria 60th anniversarry, warrnambool, mayor john hickford -
 Bendigo Military Museum
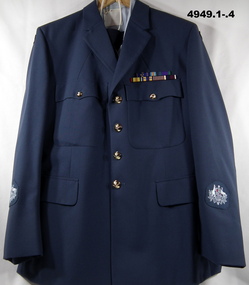
Uniform - DRESS UNIFORM, RAAF
E, HAYWARD OAM1. Jacket - Polyester, Blue, Yellow metal buttons. Service insignia, embroidered Coat of Arms on lower sleeves. 2. Trousers, polyester, Blue. 3. Shirt - polyester, light blue. 4. Tie - polyester, Navy blue. 5. Cap - Polyester, blue, black band, Badge - red crown over Eagle and Ferns."Australia" embroidered flash badge on upper shoulders. Coat of Arms on lower sleeves.uniform, hat -
 Bendigo Military Museum
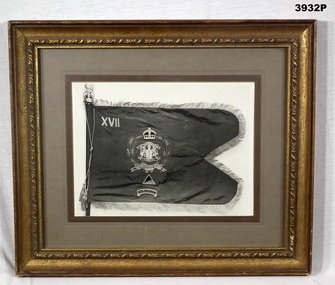
Photograph - PHOTOGRAPH BANNER, FRAMED, Possibly post WW1
Black / white photo of the 17th Bendigo Light Horse Regiment banner. Banner is fitted to support pole with crown on top & decorative cord hanging LHS. Regimental emblem in centre with colour patch underneath - South Africa 1899 - 1902 - at bottom. White background with fawn border, gold wooden frame, glass front & ply backing.banner, photograph, light horse, 17th -
 Bendigo Military Museum
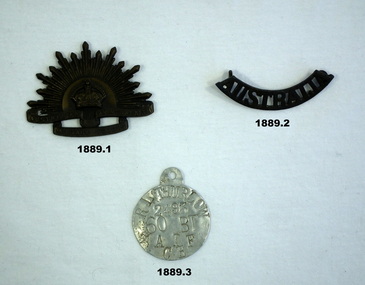
Accessory - BADGES, IDENTITY DISCS, 1916
Roy Leslie Thurlow enlisted 25.5.16 No 2493 in the 60th Batt A.I.F. K.I.A 25.10.17. Refer Cat No 1890P for service history also 649P..1) Badge "Rising Sun" hat badge, pressed blackened metal "rising sun depiction, crown centre, scroll under with "Australian Commonwealth military forces" .2) Badge "Australia" shoulder, curved shape blackened metal with 2 lugs on rear. .3) identity disc, round, aliminium with stamped details re R.Thurlow..3) " R. Thurlow, 2493, 60 BT, A.I.F CE."numismatics - badges -military, military history, identity discs -
 Bendigo Military Museum
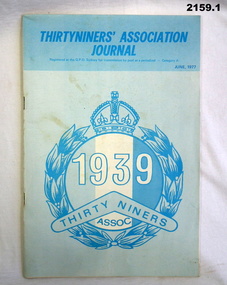
Literary work - JOURNAL, NEWSPAPER, 1) June 1977, .2) 1933
Items belonged to Arthur George Holley No 13556 RAN, HMAS Hobart. Refer 2134 for service history also 2135.3, 2137, 2147..1) "Thirty Niners Association Journal" cardboard covers, centre has circular laurel arrangement, crown at top, in centre 1939, boomerang with Thirty Niners, under Assoc, colours are white, light and dark blue. .2) Newspaper cutting re "Trafalgar Day Preparations" parade of Naval personnel, inspection by Rear Admiral R.C Dalgliesh.newspapers, journals, history -
 Bendigo Military Museum
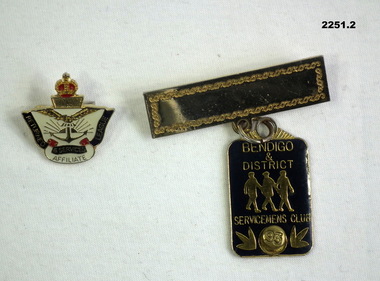
Badge - BADGES, AFFILIATTE, SERVICEMENS CLUB, Post 1989 - 2000
Bendigo & District Servicemens Club was pre it becoming Bendigo District RSL..1) Badge, metal, RSL affiliate membership. Crown at top over wings, rising sun anchor, scrolls under with "Returned and Services League Affiliate". .2) Badge, metal "Bendigo and District Servicemens Club". Gold Top with place for name, bottom is blue with 3 figures in centre, pin clip at bottom with "95" for membership 1995..1) "V31733 not transferable property of the league. .2) "1822"membership, servicemens, affiliatte, rsl -
Glenelg Shire Council Cultural Collection
Souvenir - Serviette, Royal Visit Souvenir Serviette, 1954
Commemorating the Royal visit to Australia in 1954.Paper serviette, souvenir of Royal Visit to Australia, 1954. White, border of red lions rampant separated by Union Jacks, Australian flags. Four corners: emu, kangaroo, lion rampant, unicorn, red, white and blue shield shape, yellow border. Also in corners in yellow, 'ROYAL VISIT 1954' above yellow crownroyal visit, queen elizabeth ii -
 Montmorency–Eltham RSL Sub Branch
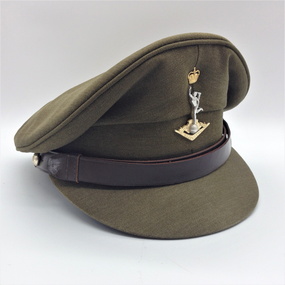
Cap, Peaked, Royal Australian Signals, 1988, 1988
Standard issue peaked cap for 1988.Peaked khaki cloth cap with brown 18mm leather chin strap with two 13mm AMF gilt buttons (crown and map only). Khaki cloth covered peak. Royal Aust. Signals cap badge. Brown leather sweat band. Plastic covered, grey cloth liner with black stamped manufacturer's, etc. details. Australian Government Clothing Factory and logo Size /|\ 56 VIC 1988 (Note - no personal markings) headgear, cap -
 Warrnambool RSL Sub Branch
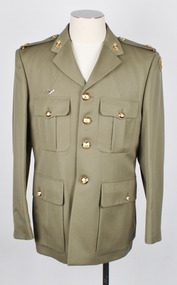
Army Uniform, jacket, Fletcher Jones & Staff, 1998
This uniform was worn by Bernie Farley, present secretary of Warrnambool RSL (2019). The uniform was made by Fletcher Jones & Staff, Warrnambool in 1998.Jacket with four pockets each with metal button fasteners. Four front metal button fasteners. One inside pocket . Regimental badges on lapels, Badge over right pocket. Epaulets with metal buttons, a crown and Australia. All metal buttons engraved with army insignia. Front metal button fasteners secured with safety pinsTag inside (left) FLETCHER JONES VICTORIA 1998 Arrow signifying govt. NAME. SERVICE NUMBER. 70% Wool, 30% Polyester, DRY CLEAN ONLY (A) Warm Iron ZC804B AR0003army uniform, military uniform, warrnambool ex service -
 Sir Reginald Ansett Transport Museum
Headwear - Hat, Pillbox, 1969-1972
Part of hostess/stewardess uniform designed for Ansett Airlines of Australia 1969 to 1972. Donated to Sir Reginald Ansett Transport Museum. Complements the collection of air flight crew attire 1969 to 1972.Beige pillbox hat, with a flat crown and straight, upright sides.Turned brim, featuring peaked detail on one side. Piped edging. Heavy duty cotton fabric with reinforcing stitches. Fawn grosgrain ribbon interfacing inside. Cream Bem silk lining. Gold coloured badge features 1968-1981 Ansett logo: A Delta"Nivek Headware Reg. Melb" on label inside. Blue ink numeral 21 handwritten on label. Possibly size 21 inch hat.hostess, 1970's, flight attendants, ansett airlines of australia, stewardess, pillbox, 1969-1972, beige, nivek headwear -
 Sir Reginald Ansett Transport Museum
Headwear - Hat, Pillbox, 1972 - 1977
Donated by Shirley Boles, to Sir Reginald Ansett Transport Museum. Part of hostess/stewardess uniform designed for Ansett Airlines of Australia 1969 to 1972.Complements the collection of air flight crew attire 1969 to 1972.Beige pillbox hat, with a flat crown and straight, upright sides.Turned brim, featuring peaked detail on one side. Piped edging. Heavy duty poly-cotton fabric with reinforcing stitches. Fawn grosgrain ribbon interfacing inside. Cream Bem silk lining. Gold coloured badge features 1968-1981 Ansett logo: A Delta." by Nivek Headwear Reg. Melb" on label inside. Red ink numeral 21 handwritten on label. Possibly size 21 inch hat. Handwritten initial "SB" in red ink on manufacturer's label. Commercial name tag, labelled Shirley Boles hand sewn to Grosgrain ribbon.beige, hostess, 1970's, flight attendants, ansett airlines of australia, stewardess, pillbox, shirley boles, 1969-1972 -
 Sir Reginald Ansett Transport Museum
Headwear - Hat, Pillbox, 1969-1972
This hat complements the stewardess uniform designed for Ansett Airlines of Australia between 1969 to 1972. It was donated by Shirley Boles, to Sir Reginald Ansett Transport Museum. Shirley Boles was an air hostess with ANA in the early days of Ansett. Shirley has made a considerable contribution of items to the Sir Reginald Ansett Transport Museum. She was a popular staff member who worked for many years with the company.Beige pillbox hat, with a flat crown and straight, upright sides.Turned up brim, featuring peaked detail on one side. Piped edging. Heavy duty cotton fabric with reinforcing stitches. Fawn grosgrain ribbon interfacing inside. Cream Bem silk lining. Gold coloured badge features 1968-1981 Ansett logo: A Delta" by Nivek Headwear Reg. Melb" on label inside. Red ink numeral 21 & 1/2 handwritten on label. Possibly size 21 inch hat. beige, hostess, 1970's, flight attendants, ansett airlines of australia, stewardess, pillbox, shirley boles, 1969-1972 -
 Orbost & District Historical Society
coin, 1918
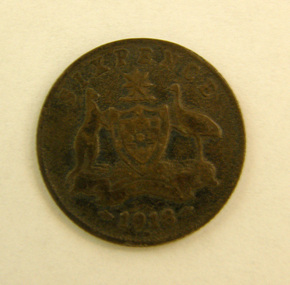
Australia’s first silver sixpences were struck in sterling silver (92.5% silver, 7.5% copper) dated 1910 from the London Mint and don’t feature a mintmark. From 1916 to 1926, the Melbourne and Sydney mints were striking sixpences with dates between 1916-1920. From the estate of Elsie Cooke. Elsie Cooke lived all her life in Gippsland,. She was born at Brodribb in 1895 and died in 1970, Elsie Cooke lived at Bruthen for a short time and, in 1937, moved to live with her aunt, Miss Jean Munro. Miss Cooke was Librarian at the Mechanics Institute for many years. Kindness and consideration for other were Miss Cooke’s attributes and she endeared herself to all who knew her. She was a loyal member of the Presbyterian Church and a stalwart of the Ladies’ Guild, an energetic worker for the Municipal Auxiliary and a member of the Red Cross. (ref. Mary Gilbert) This is an early example of a pre-decimal coin.This 1918 Australian sixpence obverse has the robed and crowned bust of King George V facing left, with the legend: 'GEORGIVS V D.G.BRITT:OMN:REX F.D.IND:IMP:' and a dot below. The reverse shows the word 'SIXPENCE' and the Australian Coat of Arms. A kangaroo and an emu hold a shield, with a star above. Below this is a scroll with the words 'ADVANCE AUSTRALIA'. Underneath that is 1918.Obverse: 'GEORGIVS V D.G.BRITT:OMN:REX F.D.IND:IMP:' and a dot below. Reverse: 'SIXPENCE' and the Australian Coat of Arms. A kangaroo and an emu hold a shield, with a star above. Below this is a scroll with the words 'ADVANCE AUSTRALIA'. Underneath that is 1918.coin sixpence-1918 cooke-elsie -
 Federation University Historical Collection
Plan, Ballarat Railway Plan, 1860, 29/05/1860
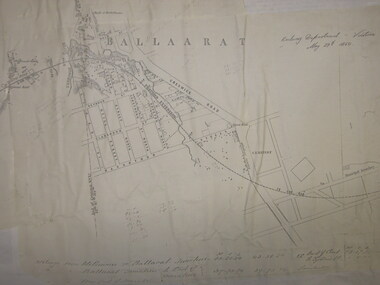
This plan was created by the Railway Department, Victoria.Photocopy of the Melbourne to Ballarat via Geelong Railway plan. The section is the area adjoining Bakery Hill, Ballarat. The plan shows the Yarrowee River, central Ballarat, Government Camp, Imperial Hotel, Union Hotel, Crown hotel, electric Telegraph line, Eureka Lead, Black Hill Lead, Ballaarat Old Cemetery., Bank of Australasia.ballarat railway, ballarat -
 Bendigo Historical Society Inc.
Document - CURNOW COLLECTION: LETTERS/DOCUMENTION RE DEPUTY CORONER, a.1913; b. 1913 c. 1911
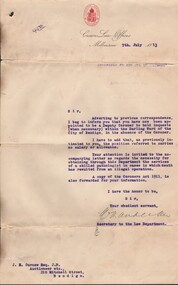
a. Letter to J. H. Curnow from ec. Of the Crown Law Department re appointment as Deputy Coroner; b. Letter to J. H. Curnow from Sec. to the Law Department re procedure for Deputy Coroner when death has occurred; c. (attached to b.) Act No. 2343 - An Act to consolidate and amend the law relating to coroners.person, individual, curnow collection -
 Bendigo Historical Society Inc.
Photograph - MILITARY
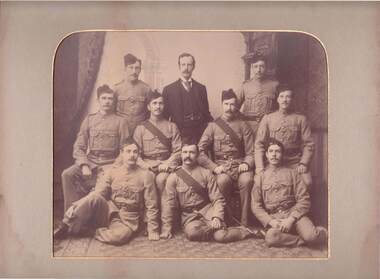
Sepia photograph. Group of Military men (possibly the Rifle Corp) with one civilian. Back row: Three men centre row: Four men. Front row: Three men. Three men sashes, all men have caps except the civilian. Some uniforms have crossed rifles on one sleeve, some with a crown.organization, military, military