Showing 125 items matching "british infantry"
-
 National Vietnam Veterans Museum (NVVM)
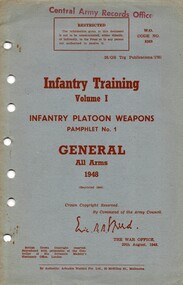
Booklet, British Army, British Army: Infantry Training, Volume 1, Infantry Platoon Weapons, Pamphlet No. 1: General All arms, 1948, 1948
... British Army: Infantry Training, Volume 1, Infantry Platoon Weapons, Pamphlet No. 1: General All arms, 1948...British Army...Infantry...National Vietnam Veterans Museum (NVVM) 25 Veterans Drive Newhaven phillip-island-and-the-bass-coast British Army Infantry Training Infantry Platoon Weapons Booklet A grey coloured cardboard covr with red information on the front. ...A grey coloured cardboard covr with red information on the front. Top of the cover reads Cental Army Records Office and nearby reads W.O. Code No: 8369. There are seven punch holes down the left hand side and two metal staples along the spine.british army, infantry training, infantry platoon weapons, booklet -
 National Vietnam Veterans Museum (NVVM)
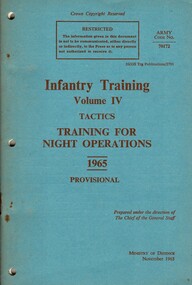
Booklet, British Army, British Army: Infantry Training, Volume IV: Tactics: Training ForNnight Operations, 1965 Provisional, 1965
... British Army: Infantry Training, Volume IV: Tactics: Training ForNnight Operations, 1965 Provisional...British Army...Infantry...National Vietnam Veterans Museum (NVVM) 25 Veterans Drive Newhaven phillip-island-and-the-bass-coast British Army Infantry Training Training for Night Operations A blue coloured cardboard cover with red information on the front. ...A blue coloured cardboard cover with red information on the front. Near the top right hand corner reads ARMY Code No. 70172. There are three punch holes down the left hand side and twomrusty metal staples down the spine.british army, infantry training, training for night operations -
 National Vietnam Veterans Museum (NVVM)
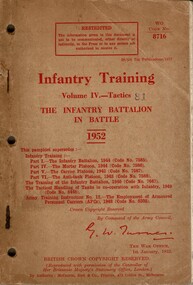
Booklet, British Army: Infantry Training, Volume IV 4 - Tactics: The Infantry Battalion in Battle, 1952, 1952
... British Army: Infantry Training, Volume IV 4 - Tactics: The Infantry Battalion in Battle, 1952...British Army...Booklet...Infantry...National Vietnam Veterans Museum (NVVM) 25 Veterans Drive Newhaven phillip-island-and-the-bass-coast British Army Booklet Infantry Training The Infantry Battalion in Battle A brownish stained cardboard cover with red information on the front. ...A brownish stained cardboard cover with red information on the front. Top right hand corner reads WO Code No. 8716. Beside the word Tactics is the number 81. There are three punch holes and two rusty metal staples on the left hand side.british army, booklet, infantry training, the infantry battalion in battle -
 National Vietnam Veterans Museum (NVVM)
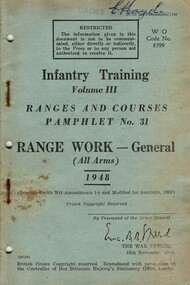
Booklet, British Army, British Army: Infantry Training, Volume III Ranges and Courses Pamphlet No. 31: range Work - General (All Arms), 1948, 1965
... British Army: Infantry Training, Volume III Ranges and Courses Pamphlet No. 31: range Work - General (All Arms), 1948...British Army...Booklet...Infantry...National Vietnam Veterans Museum (NVVM) 25 Veterans Drive Newhaven phillip-island-and-the-bass-coast British Army Booklet Infantry Training Ranges and Courses Range Work A blue/green coloured cardboard cover with black information on the front. ...A blue/green coloured cardboard cover with black information on the front. Top right hand corner handwritten is E. Hayden and under this reads WO Code No. 8399 and the details of the booklet are under the box with the Restricted information in it. There are three punch holes and two rusty metal staples down the left hand side.british army, booklet, infantry training, ranges and courses, range work -
 Magnet Galleries Melbourne Inc
turkish prisoners, mountjoy085.tif
... ...british infantry...Turkish prisoners covered in dust and grime being held by British infantry....Magnet Galleries Melbourne Inc 2/640 Bourke Street 3000 Melbourne melbourne Turkish prisoners covered in dust and grime being held by British infantry. turkish prisoners pow prisoner of war turkish british infantry ww1 world war 1 mountjoy085.tif turkish prisoners ...Turkish prisoners covered in dust and grime being held by British infantry.turkish prisoners, pow, prisoner of war, turkish, british infantry, ww1, world war 1 -
 Bendigo Military Museum
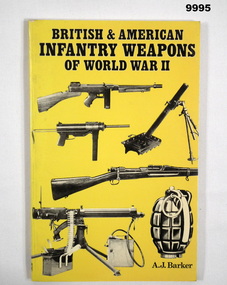
Book - INFANTRY WEAPONS, WW2, A.J. BARKER, "BRITISH & AMERICAN INFANTRY WEAPONS OF WORLD WAR 2", 1969
... "BRITISH & AMERICAN INFANTRY WEAPONS OF WORLD WAR 2"...Infantry Weapons WW2 Reference Handwritten details - grey lead pencil " $5.25". Soft cover book. Cover - cardboard, black colour print front and back. Illustrated front to back, black and white photographs of weapons, yellow colour background. 77 pages - cut, plain, white colour paper. Illustrated black and white photographs and diagrams. Front end paper - handwritten details. "BRITISH ...Soft cover book. Cover - cardboard, black colour print front and back. Illustrated front to back, black and white photographs of weapons, yellow colour background. 77 pages - cut, plain, white colour paper. Illustrated black and white photographs and diagrams. Front end paper - handwritten details.Handwritten details - grey lead pencil " $5.25".publications, books, infantry weapons, ww2, reference -
 National Vietnam Veterans Museum (NVVM)
Booklet, British Army, British Army: Infantry Training, Volume 1, Infantry Platoon Weapons, Pamphlet No. 3B: The 7.62 mm Self Loading Rifle And Bayonet (All Arms) 1959, 1959
... British Army: Infantry Training, Volume 1, Infantry Platoon Weapons, Pamphlet No. 3B: The 7.62 mm Self Loading Rifle And Bayonet (All Arms) 1959...Infantry Platoon Weapons 7.62mm Self Loading Rifle and Bayonet. A stained blue coloured cardboard cover with red informaion on the front of the cover. There is a code near the top right hand corner which reads WO Code No.9516. There are three punch holes and two metal staples down the left hand side of the booklet. The booklet is covred with a plastic cover. British ...A stained blue coloured cardboard cover with red informaion on the front of the cover. There is a code near the top right hand corner which reads WO Code No.9516. There are three punch holes and two metal staples down the left hand side of the booklet. The booklet is covred with a plastic cover.australia - armed forces - service manuals, infantry training, infantry platoon weapons, 7.62mm self loading rifle and bayonet. -
 Running Rabbits Military Museum operated by the Upwey Belgrave RSL Sub Branch
Model
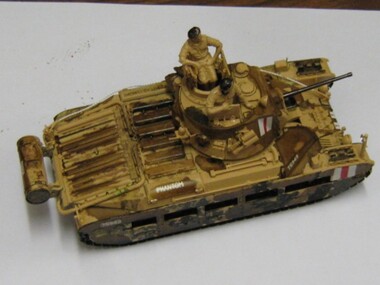
... Matilda Mk.III - IV British Infantry Tank...Running Rabbits Military Museum operated by the Upwey Belgrave RSL Sub Branch 1 Mast Gully Road Upwey melbourne Model WW2 Army Matilda Mk.III - IV British Infantry Tank Model ...Matilda Mk.III - IV British Infantry Tankmodel, ww2, army -
 Bendigo Military Museum
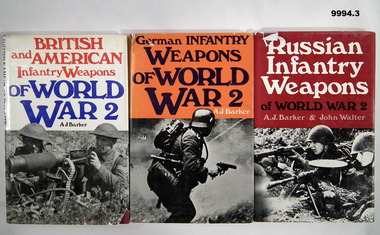
Book - INFANTRY WEAPONS, WW2, A.J. BARKER et al, 1. "BRITISH AND AMERICAN INFANTRY WEAPONS OF WORLD WAR 2". 2. "GERMAN INFANTRY WEAPONS OF WORLD WAR 2". 3. "RUSSIAN INFANTRY WEAPONS OF WORLD WAR 2, 1969 - 1971
... 1. "BRITISH AND AMERICAN INFANTRY WEAPONS OF WORLD WAR 2". 2. ...Front endpapers - handwritten details and stamp. 1. "BRITISH AND AMERICAN INFANTRY WEAPONS OF WORLD WAR 2". 2. ...1.2.3. Hardcover books with dust covers. Hardcover - cardboard, dark red colour buckram with gold colour print on spine. Dust covers - 1. Red, blue and black print on front, spine and back. Illustrated - black and white photograph of two soldiers with machine gun. 2, Dark blue and black print on front, spine and back. Illustrated - black and white photograph of a soldier with hand gun. 3. White and black photograph of two soldiers with machine guns. 2. & 3. Front 76-79 pages - cut, plain, white colour paper. Illustrated black and white photographs and diagrams. 2.3. Front endpapers - handwritten details and stamp. 2. Handwritten details - grey lead pencil "4.90". Stamp - purple ink "TECHNICAL BOOK & MAGAZINE CO/ 289-299 Swanston Street/ 323951-52 MELBOURNE" 3. Handwritten details - grey lead pencil "4-95".publications, books, infantry weapons, ww2, reference -
 Red Cliffs Military Museum
Collage, Collage of WW1 photos, Post WW1
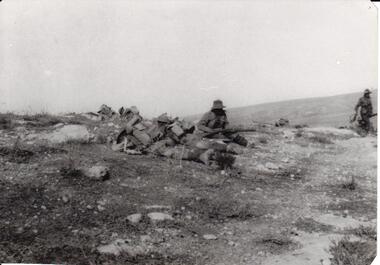
... british...photos...infantry...Top Left to right. ( .1) British Infantry practicing an attack. (.2) Australians parading for the Trenches. (.3) 'Tommy' at home in German duggouts. ...Red Cliffs Military Museum Jamieson Ave Red Cliffs the-murray There is no information with this collage other than what is on the photos, it is unknown who put it together, who owned it, or who donated it. france ww1 british photos infantry north collage lancashire regiments Top Left to right. ( .1) British Infantry practicing an attack. (.2) Australians parading for the Trenches. (.3) 'Tommy' at home in German duggouts. ...There is no information with this collage other than what is on the photos, it is unknown who put it together, who owned it, or who donated it.An old black wooden frame containing 12 WW1 photos which have been beautifully displayed in the frame, surrounded by hand made wooden lattice and leaves decor. Typed on the bottom of each photo is a description of the photo.Top Left to right. ( .1) British Infantry practicing an attack. (.2) Australians parading for the Trenches. (.3) 'Tommy' at home in German duggouts. Next Rowe Left to Right. (.4) London Scottish going to their trenches. (.5) Happy 'Tommys' wearing Hun Helmets. (.6) A galant Rescue under fire - This man saved 20 lives like this. Next rowe down, Left to right: (.7) Firing a heavy Howitzer in France. (.8) Loyal North Lancs Regiment cheering when ordered to the trenches. (.9) Thirsty German prisoners in their barbed wire cage. Bottom rowe Left to right (.10) Highlanders Pipe themselves back from the trenches. (.11) Decorating a Canandian on the Field of Battle. (.12) A 'Fag' after a fight.france, ww1, british, photos, infantry, north, collage, lancashire, regiments -
 8th/13th Victorian Mounted Rifles Regimental Collection
Photograph - 8th LH outpost, 1918 circa
... They are near three figures wearing helmets lying on the ground, possibly men of the Imperial Camel Corps or British infantry. ...They are near three figures wearing helmets lying on the ground, possibly men of the Imperial Camel Corps or British infantry. Photograph 8th LH outpost ...The 8th Light Horse Regiment was engaged in the battle to capture Turkish defences at Tel El Khuweifle 16 Kilometres north of Beersheba from 1 to 6 November 1917. Other units were drawn from Imperial Camel Corps, British Yeomanry Division, New Zealand Mounted Rifles and 53 Welsh Division. The 8th Light Horse Regiment AIF was raised at Broadmeadows Victoria in September 1914 under the command of Lieutenant Colonel Alexander White and formed part of the 3rd Light Horse Brigade. The regiment served at Gallipoli where in a courageous but ill-fated charge at the Nek on 7 August 1915 it suffered horrendous casualties including Lieutenant Colonel White. Rebuilt in Egypt under the command of Lieutenant Colonel Leslie Maygar VC the regiment went on the serve throughout the Middle East Campaign. Colonel Maygar died of wounds at Beersheba when the regiment was attacked by enemy aircraft while waiting to follow up the successful charge of the 4th LH Brigade on 30 October 1917. The 8th Light Horse AIF was disbanded in 1919, but soon after re-raised as the 8th (Indi) Light Horse in the Citizen Military Forces, superseding 16th (Indi) Light Horse.Part of a rare collection of photographs of 8th Light Horse Regiment AIF during WWI (1914-1918).Black and white photograph of two soldiers of the 8th Light Horse Regiment AIF wearing slouch hats and armed with rifles. They are near three figures wearing helmets lying on the ground, possibly men of the Imperial Camel Corps or British infantry. Below photograph "Stony desert landscape known as Khuweilfe ( Thirsty Ridge ), 8 miles north of Beersheba. Only had a little water hence the name",tel el khuweifle, 8th, light horse, world war one, wwi -
 National Vietnam Veterans Museum (NVVM)
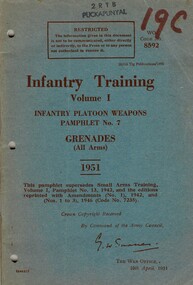
Booklet, British Army, Infantry training, Vol. 1: Infantry Platoon Weapons, Pamphlet No. 7: Grenades (all arms), 1951, 1951
... British Army...Infantry...National Vietnam Veterans Museum (NVVM) 25 Veterans Drive Newhaven phillip-island-and-the-bass-coast British Army Infantry Training Infantry Platoon Weapons Grenades A faded blue coloured carboard cover with red information on the front. ...A faded blue coloured carboard cover with red information on the front. Top of the booklet there is a stamp saying 2 R.T.B. Puckapunyal and beside this in red texta 19c. Near this reads WO Code No: 8592. There are three punch holes down and left hand side and two metal staples down the spine of the booklet.british army, infantry training, infantry platoon weapons, grenades -
 National Vietnam Veterans Museum (NVVM)
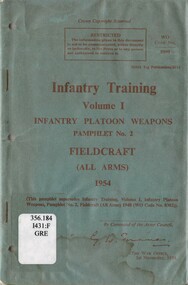
Booklet, British Army, Infantry Training, Volume 1, Infantry Platoon Weapons, Pamphlet No. 2: Fieldcraft (All arms), 1954, 1954
... British Army...Booklet...Infantry...National Vietnam Veterans Museum (NVVM) 25 Veterans Drive Newhaven phillip-island-and-the-bass-coast British Army Booklet Infantry Training Infantry Platoon Weapons Fieldcraft A bluish coloured cardboad cover with red information on the front. ...A bluish coloured cardboad cover with red information on the front. Near the top right hand corner reads WO Code No 8390. There is a whote label with 356.184 1431:F GRE tpyed on it. There are signs of water damage at the bottom of the booklet. There ae three punch holes and two metal staples down the left hand side. The booklet is covered with a plastic cover.british army, booklet, infantry training, infantry platoon weapons, fieldcraft -
 8th/13th Victorian Mounted Rifles Regimental Collection
Weapon - Sword
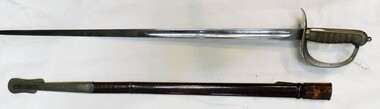
... British pattern 1897 Infantry officers sword, chromeplated and leather scabbard with steel end...8th/13th Victorian Mounted Rifles Regimental Collection 4/19 Prince of Wales's Light Horse Simpson Barracks McLeod melbourne General display potential military weapon infantry officer On blade scroll work with Crown and Coat of Arms. Handguard Scroll with " GR " British pattern 1897 Infantry officers sword, chromeplated and leather scabbard with steel end Weapon Sword ...General display potentialBritish pattern 1897 Infantry officers sword, chromeplated and leather scabbard with steel endOn blade scroll work with Crown and Coat of Arms. Handguard Scroll with " GR "military, weapon, infantry, officer -
 Moorabbin Air Museum
Coin (item) - Medallion D-Day Gold Beach-50th Northumbrian
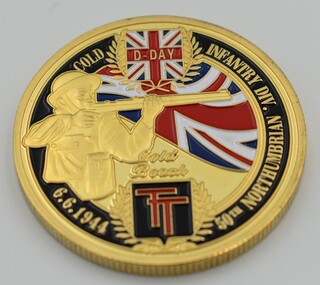
... LETTERING Sword Beach D.Day 6.6.1944 British Infantry...LETTERING Sword Beach D.Day 6.6.1944 British Infantry Medallion D-Day Gold Beach-50th Northumbrian. ...Obverse Standing British Soldier of the 50th Infantry Division shouldering his rifle with the United Kingdom flag as background. LETTERING Gold D-Day Infantry Div Gold Beach TT 6.6.1944 50th Northumbrian Reverse British soldiers, arms in hand , with their flag in the background. LETTERING Sword Beach D.Day 6.6.1944 British Infantry -
 Running Rabbits Military Museum operated by the Upwey Belgrave RSL Sub Branch
Badge
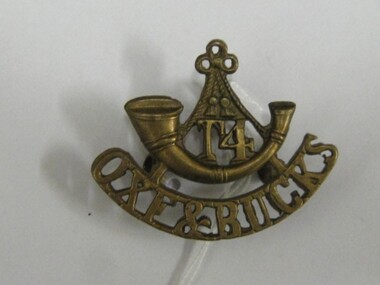
... British. Oxfordshire & Buckinghamshire Light Infantry 4th Territorial Battalion....Running Rabbits Military Museum operated by the Upwey Belgrave RSL Sub Branch 1 Mast Gully Road Upwey melbourne Badge/Buttons WW1 Army British. Oxfordshire & Buckinghamshire Light Infantry 4th Territorial Battalion. ...British. Oxfordshire & Buckinghamshire Light Infantry 4th Territorial Battalion.badge/buttons, ww1, army -
 Wangaratta RSL Sub Branch
Photograph - Framed photograph, NE Framing Studio, Paul Kirby
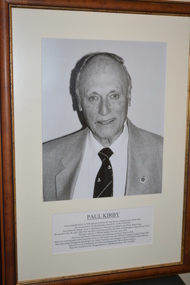
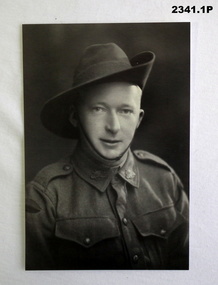
... He was commissioned into the Duke of Wellingtons Regt and served in Palestine with the 1st British Infantry Division until 1948. Paul was discharge at Royal Park in Melbourne in 1948. ...He was commissioned into the Duke of Wellingtons Regt and served in Palestine with the 1st British Infantry Division until 1948. Paul was discharge at Royal Park in Melbourne in 1948. ...Paul Kirby joined the British Army in Melbourne in 1944 and was posted to the Black Watch Regt. He served in the UK until 1946. He was commissioned into the Duke of Wellingtons Regt and served in Palestine with the 1st British Infantry Division until 1948. Paul was discharge at Royal Park in Melbourne in 1948. He joined the R.S.L in 1948 and received his 50 year Service Award in 1998. He was awarded Life Membership in 2001.Timber framed photograph of male in suit.PAUL KIRBY1991-2000paul kirby, palestine, life membership, rsl -
 8th/13th Victorian Mounted Rifles Regimental Collection
Weapon - Bayonet
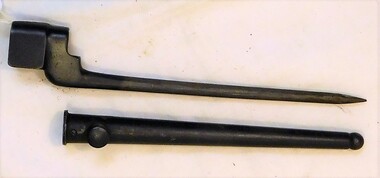
... Used with British No.4 MK1 Infantry rifle. Issued to British soldiers in World War Two (WWII)...8th/13th Victorian Mounted Rifles Regimental Collection 4/19 Prince of Wales's Light Horse Simpson Barracks McLeod melbourne Used with British No.4 MK1 Infantry rifle. Issued to British soldiers in World War Two (WWII) World War Two WWII bayonet British British No.4 MK 2 bayonet with scabbard. ...Used with British No.4 MK1 Infantry rifle. Issued to British soldiers in World War Two (WWII)British No.4 MK 2 bayonet with scabbard. The No. 4 Mk. II was a simplified version of the No. 4 Mk. I which had a distinctive cruciform blade. The Mk 2 bayonet did not require the milling cuts required to create the cruciform blade flutes. Blade length 203mm. The plain spike gave rise to the nickname 'pig-sticker'.world war two, wwii, bayonet, british -
 4th/19th Prince of Wales's Light Horse Regiment Unit History Room
Weapon - Bayonet, Scabbard and Pattern 1892 Bayonet Frog, Bayonet, Scabbard and Pattern 1892 Bayonet Frog on Sam Brown Belt on Jack's mannequin
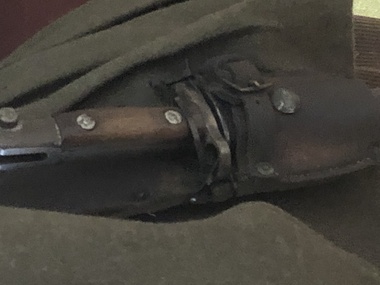
... This type of bayonet was used by infantry Rifle Regiments of the British Army and by Infantry Battalions of the Australian State Defence Forces in the 1890's; then by some infantry battalions of the Australian Army especially in a ceremonial role...4th/19th Prince of Wales's Light Horse Regiment Unit History Room 4/19 PWLH Regiment, Building 78 Simpson Barracks Macleod melbourne This type of bayonet was used by infantry Rifle Regiments of the British Army and by Infantry Battalions of the Australian State Defence Forces in the 1890's; then by some infantry battalions of the Australian Army especially in a ceremonial role There is no record found of this type bayonet frog in use by 4th/17th/19th Light Horse Regiments. ...This type of bayonet was used by infantry Rifle Regiments of the British Army and by Infantry Battalions of the Australian State Defence Forces in the 1890's; then by some infantry battalions of the Australian Army especially in a ceremonial roleThere is no record found of this type bayonet frog in use by 4th/17th/19th Light Horse Regiments. Use by VMR (the colonial predecessor to 4th/17th/19th Light Horse Regiments) is unlikely. Bayonet, Scabbard and Pattern 1892 Bayonet Frog on Sam Brown Belt on Jack's mannequin. Bayonet frog made of 'buff' leather, and stained brown on the front. Hand stitched with reinforcing tin plated copper rivetsold hand writing illegiblebayonet frog 1892 1888 buff leather, bayonet and scabbard of usual materials, -
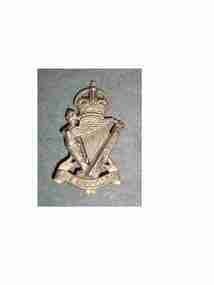 Red Cliffs Military Museum
Hat Badge, Hat Badge Royal Irish Rifles WW1, (estimated); around 1900
... The Royal Irish Rifles was a British Army Infantry Regiment. It dates back to the reign of King George 111. ...Red Cliffs Military Museum Jamieson Ave Red Cliffs the-murray The Royal Irish Rifles was a British Army Infantry Regiment. It dates back to the reign of King George 111. ...The Royal Irish Rifles was a British Army Infantry Regiment. It dates back to the reign of King George 111. In 1793 the British Army raised 2 new Regiments to meet the commitmentd of the war with the French First Republic. In 1881 under the Childers Reforms these 2 regiments were amalgamated to form the Royal Irish Rifles,it saw service in the Second Boer War, Great War. In 1921 it was renamed the Royal Ulster Rifles. Quis Separabit = "Who shall seperate us" (Latin) In 1968 under reforms of the army, was amalgamated with The Royal Inniskilling Fusiliers and the Royal Irish Fusiliers to form the Royal Irish Rangers. More information on this Regiment can be found on Wikipedia under Royal Ulster RiflesThis Royal Irish Rifles Hat badge appears to be a Pewter type alloy with brass clip. At top a Crown. Centre is harp shaped. Left side of harp has the figure of a siren her wings join to the right side of the harp which is a bar? adorned with raised decor. Bottom is a scroll with the lettering- Qius Separabit.Royal Crown Harp -Siren on left, wings joining to the right side with raised decor Scroll has - Quis Serarabithat, ww1, collection, royal, badge, a j, roddy, irish, rifles, pte2, james, ulster -
 Bendigo Historical Society Inc.
Clothing - MARONG MUNICIPAL BAND BLAZER, Mid 1900's - 2000
... Long sleeves are elaborately decorated with red felt and gold braid, and finished with three gold plastic buttons bearing the impression of a laurel wreath, and horn as a replica of the British Light Infantry. Two splits on back - one on each side of centre back. ...Long sleeves are elaborately decorated with red felt and gold braid, and finished with three gold plastic buttons bearing the impression of a laurel wreath, and horn as a replica of the British Light Infantry. Two splits on back - one on each side of centre back. ...Clothing. Navy blue, wool, fully lined blazer, presumably worn by a drum section member as the right sleeve has a cloth badge, embroidered with a drum. Long sleeves are elaborately decorated with red felt and gold braid, and finished with three gold plastic buttons bearing the impression of a laurel wreath, and horn as a replica of the British Light Infantry. Two splits on back - one on each side of centre back. Red felt with four peaked stripes of gold braid, on the lower right sleeve - possibly indicates rank of the drummer. Red felt epaulettes trimmed with gold braid and buttons (as above). Two false pocket flaps - one either side of front. Fully lined with a woven patterned taffeta. Sleeves lined with cream polyester (?) with a self stripe. A red felt tab on either side of front revere collar, bearing a metal Leidertafel badge on each tab. One inside pocket on right front. Double breasted.Back of buttons:Stokes & Sons,Melbourne. On internal pocket A.Hayman. Product by Europe Modes for Comfort. Style. Stamina. And an embroidered hand, holding a torch and flame.costume, male ceremonial, band blazer -
 Bendigo Historical Society Inc.
Clothing - MARONG MUNICIPAL BAND BLAZER, 1980's -2000
... Two breast pockets, rectangular with rounded lower corners and a shield shaped flap, closed with a 2 cm brass button impressed with a laurel wreath, and horn, suspended by a cord, and triple loop-a replica of British Light Infantry buttons. Two lower ''pockets'' are flaps only, giving the impression of a pocket only. ...Two breast pockets, rectangular with rounded lower corners and a shield shaped flap, closed with a 2 cm brass button impressed with a laurel wreath, and horn, suspended by a cord, and triple loop-a replica of British Light Infantry buttons. Two lower ''pockets'' are flaps only, giving the impression of a pocket only. ...Clothing. Pointed lapel collar, with underside of collar lined with felt. Two brass metal badges in a Leidertafel style - one on each side of collar. Cloth circular badges at the top of each sleeve are embroidered with a coat-of-arms, below which are two shields, one blue, and embroidered with a bunch of grapes, one red embroidered with a sheaf of wheat, a sheep, and perhaps a symbol of the landscape. Two breast pockets, rectangular with rounded lower corners and a shield shaped flap, closed with a 2 cm brass button impressed with a laurel wreath, and horn, suspended by a cord, and triple loop-a replica of British Light Infantry buttons. Two lower ''pockets'' are flaps only, giving the impression of a pocket only. Jacket lined with blue taffeta-like fabric-possibly polyester. One internal bound pocket inside right front. Four 2.5cm brass buttons (as on pockets) at centre front opening. All buttons have a metal back, and metal loop, which enables the buttons to be pinned to the garment, enabling removal for cleaning purposes.On inside breast pocket: A Quality Garment by Australian Government Clothing Factory. On back of buttons : Stokes Australia.costume, male ceremonial, marong municipal band blazer -
 Bendigo Historical Society Inc.
Clothing - MARONG MUNICIPAL BAND BLAZER, 1980's>
... All buttons have an impressed laural wreath and horn, (suspended by a three looped cord) - a replica of British Light Infantry buttons. Three brass like plastic buttons at centre front (4th one is missing). ...All buttons have an impressed laural wreath and horn, (suspended by a three looped cord) - a replica of British Light Infantry buttons. Three brass like plastic buttons at centre front (4th one is missing). ...Clothing. Navy blue wool (or polyester?) fabric. Pointed lapel collar, lined on the underside with felt. Two brass Leidertafel style badges-one either side of collar. Two rectangular shield-shaped breast pockets have rounded lower corners, and a shield-shaped flap closure, fastened with a 1.8 cm brass like plastic button. All buttons have an impressed laural wreath and horn, (suspended by a three looped cord) - a replica of British Light Infantry buttons. Three brass like plastic buttons at centre front (4th one is missing). All buttons are pinned onto the garment to enable easy removable for cleaning. Two inside breast pockets. Fully lined with blue taffeta-like fabric. On each upper sleeve, at shoulder level there is an 8 cm diameter circular cloth badge, embroidered in blue, red, and gold, displaying a Coat-of- Arms, and two shields - one blue embroidered with a bunch of grapes, and one red, embroidered with a sheaf of wheat and a sheep. These are probably symbols of the rural aspect of the town of Marong. Two lower ''pocket flaps'' are decorative, but not real pockets.Back of buttons: STOKES AUSTRALIA. On inside breast pocket: Embroidered label featuring Australian Coat-of Arms, and Quality Garment by Australian Government Clothing Factory.costume, male ceremonial, marong municipal band blazer -
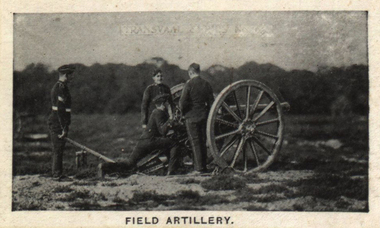 Federation University Historical Collection
Photograph (black & White), Field Artillery - South Africa
... The British had success when they ceased using artillery by itself and used it in conjunction with infantry. ...The British had success when they ceased using artillery by itself and used it in conjunction with infantry. ...The Second Boer War saw attempted application of bombardment as an alternative to the use of ground forces. In most battles fought during the conflict this was proved not to be possible. There was competition from the other side's ability to take evasive measures. The opponent was able to use cover to protect himself and hide his position. This was the tactic used against the British at the Battle of Magersfontein and the Battle of Colenso. The British had success when they ceased using artillery by itself and used it in conjunction with infantry. British General Buller linked the use of artillery and the movement of infantry in continuous interlocking assaults upon each hill south of Ladysmith. As soon as shelling had finished in a location the infantry moved. The front collapsed on the 27 February 1900 when use was made of a creeping curtain of shell fire sent over the heads of advancing infantry destroying everything 100 yards ahead of them. It was this tactic of the creeping barrage that has been described as "revolutionary'. Individual image from photographed poster of tobacco and cigarette cards.second boer war, ground forces, battle of magersfontein, battle of colenso, general buller, infantry, ladysmith, interlocking assaults -
 Bendigo Military Museum
Photograph - PHOTOGRAPHS WW2, c.1939-45
... First enlisted in the 38th Bn on 17.7.1940, transferred to the 2nd AIF 2.4.1943 age 27 years, embarked from Darwin for New Britain with 16th Australian Infantry Bn on 24.12.1944, disembark Jacquinot Bay 30.12.1944, discharged from the AIF on 10.1.1946 in 16th Aust INF Bn. ...First enlisted in the 38th Bn on 17.7.1940, transferred to the 2nd AIF 2.4.1943 age 27 years, embarked from Darwin for New Britain with 16th Australian Infantry Bn on 24.12.1944, disembark Jacquinot Bay 30.12.1944, discharged from the AIF on 10.1.1946 in 16th Aust INF Bn. ...Three Bendigo Brothers. William Francis Watts V59667 & VX138000. First enlisted in the 38th Bn on 17.7.1940, transferred to the 2nd AIF 2.4.1943 age 27 years, embarked from Darwin for New Britain with 16th Australian Infantry Bn on 24.12.1944, disembark Jacquinot Bay 30.12.1944, discharged from the AIF on 10.1.1946 in 16th Aust INF Bn. Ernest John Harold Watts VX62580 enlisted 27.8.1941 age 29 years, embark for the Middle East on 2.11.1941 with Aust Army Postal Unit, embark for Aust 7.2.1942, discharged from the AIF 31.10.1945 with the rank of Cpl in Aust Army Postal Unit. Charles Edward Watts VX58447 enlisted on 7.7.1941 age 31 years, embark for the Middle East 3.9.1941 with Australian Army Postal Unit, embark for Aust 4.2.1942, hospital aboard ship, Cardiac Neurosis, discharged from the AIF on 6.7.1942. Both Ernest and Charles were Postal Workers pre enlistment..1) Photo black & white, copy of original, portrait of William Francis Watts VX138000. .2) Photo black & white, copy of original, 2 soldiers outside a hut re Ernest John Harold WATTS (Jack) VX62580 & Charles Edward WATTS VX58447.photography-photographs, military history -
 Warrnambool and District Historical Society Inc.
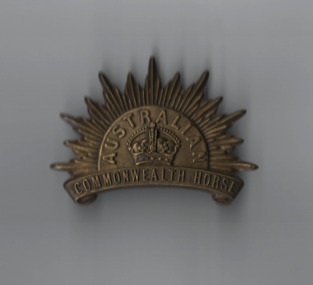
Badge, Australian Commonwealth Horse, C1902
... infantry unit of the Australian Army established during the Second Boer War in 1902. It was the first expeditionary force established by the Commonwealth of Australia following Federation in 1901 and the first to wear the Rising Sun Badge, a design chosen by the British Commander in Chief of the Australian Forces, Sir Edward Hutton. ...infantry unit of the Australian Army established during the Second Boer War in 1902. It was the first expeditionary force established by the Commonwealth of Australia following Federation in 1901 and the first to wear the Rising Sun Badge, a design chosen by the British Commander in Chief of the Australian Forces, Sir Edward Hutton. ...This is the badge of the Australian Commonwealth Horse which was a mounted infantry unit of the Australian Army established during the Second Boer War in 1902. It was the first expeditionary force established by the Commonwealth of Australia following Federation in 1901 and the first to wear the Rising Sun Badge, a design chosen by the British Commander in Chief of the Australian Forces, Sir Edward Hutton. This Rising Sun Badge was the second version of a military badge used by Australian soldiers in 1902.This badge is of great interest as the hat badge worn by the Australian Commonwealth Horse in the Boer War. It is not known if it has any local significance. Brass semi-circular badge in the shape of the rising sun with slightly curved bottom edge. There is text along the bottom edge with "Australia" in a semi-circle above a crown in low relief.two hooks on the back of the badge."Commonwealth Horse" in scroll alonf bottom of badge. "Australia " in semicircle below the rays of the sun.warrnambool, commonwealth horse badge, military badges of australia, australian commonwealth horse badge -
 Warrnambool and District Historical Society Inc.
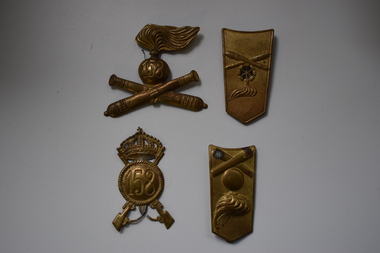
Insignia, Military Insignia, Early 20th century
... These badges or insignia are probably British and belong to artillery and infantry military units but no further information has been found regarding them. ...Warrnambool and District Historical Society Inc. 2 Gilles Street (south of Merri St) Warrnambool great-ocean-road These badges or insignia are probably British and belong to artillery and infantry military units but no further information has been found regarding them. ...These badges or insignia are probably British and belong to artillery and infantry military units but no further information has been found regarding them. They were probably attached to the shoulder pad or other part of the military uniform.These items have no known local provenance but are kept for display purposes..1 A metal badge or piece of insignia with two crossed cannons and a bursting bomb and the number 158 in the centre of the bomb. .2 A metal badge or piece of insignia in the shape of a shield with two crossed cannons, a wheel and flame. There are three metal rings at the back for affixing the item to part of a uniform. .3 A metal badge or piece of insignia with two crossed rifles, a circle with the number 158 and a crown atop. .4 A metal badge or piece of insignia in the form of a shield with two crossed cannons and a bursting bomb. There are three metal rings at the back for attachment to part of a uniform. 158military insignia, history of warrnambool, badges -
 Bendigo Military Museum
Photograph - APPEALS BRSL, Post 2005
... Norm enlisted in the CMF on 5.11.1941 No V245294 in the 38th Battalion, the unit later moved to WA by train 30.3.1942, he transferred to the AIF No VX88596 on 31.7.1942, they entrained back to Vic on 19.1.1943, then entrained again to the NT 0n 18.6.1943, transfer to the AIF No VX88596 on 8.8.1944 in the 11th Aust Infantry Battalion, embark for New Britain 25.11.1944, embark from Rabaul for Aust on 8.1.1946, discharged from the AIF on 5.2.1946....Norm enlisted in the CMF on 5.11.1941 No V245294 in the 38th Battalion, the unit later moved to WA by train 30.3.1942, he transferred to the AIF No VX88596 on 31.7.1942, they entrained back to Vic on 19.1.1943, then entrained again to the NT 0n 18.6.1943, transfer to the AIF No VX88596 on 8.8.1944 in the 11th Aust Infantry Battalion, embark for New Britain 25.11.1944, embark from Rabaul for Aust on 8.1.1946, discharged from the AIF on 5.2.1946. brsl smirsl photograph Appeals Norm On the name tag, "RSL Welfare Appeals - RSL unpaid collector", name hand written, "Norm Smart" .1) Photograph, gold timber frame with photo in a black inset showing a man in a hat with a Tray of poppies for sale, he is wearing a name tag and a red poppy. .2) Funeral card of "W.J.N. ...This photograph was taken on the Portico of the Soldiers Memeorial Institute Pall Mall Bendigo. The man in the photo is "William James Norman Smart" known by all as Norm. He was a legend in Bendigo RSL Appeals having raised near $250,000.00 over the years. His selling spot was Coles Central where he sat for up to a fortnight each Appeal, ANZAC and Poppy. He had a loyal clientele who only bought their tokens from Norm. On ANZAC day especially he would come into the kitchen at the Soldiers Memorial about 5.00am and sort his tray out while others there were making the Rum and Coffee. He would then go out and walk among the people before the Dawn Service selling tokens. Norm was still selling tokens after he turned 90 years. he retired from all Volunteer work in the Bendigo RSL in August 2015. Refer Cat No 8131.2P for Norms RSL history. Norm enlisted in the CMF on 5.11.1941 No V245294 in the 38th Battalion, the unit later moved to WA by train 30.3.1942, he transferred to the AIF No VX88596 on 31.7.1942, they entrained back to Vic on 19.1.1943, then entrained again to the NT 0n 18.6.1943, transfer to the AIF No VX88596 on 8.8.1944 in the 11th Aust Infantry Battalion, embark for New Britain 25.11.1944, embark from Rabaul for Aust on 8.1.1946, discharged from the AIF on 5.2.1946..1) Photograph, gold timber frame with photo in a black inset showing a man in a hat with a Tray of poppies for sale, he is wearing a name tag and a red poppy. .2) Funeral card of "W.J.N. Smart", double sided with a portrait one side and wedding photo the other.On the name tag, "RSL Welfare Appeals - RSL unpaid collector", name hand written, "Norm Smart"brsl, smirsl, photograph, appeals, norm -
 Bendigo Military Museum
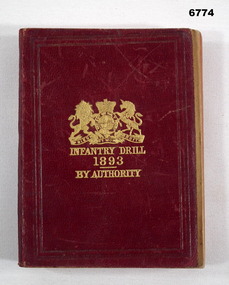
Manual - INFANTRY DRILL, Her Majesty (Queen Victoria), Harrison & Sons, 1893
... on the front cover, embossed in gold, is the crest of Great Britain, under that is the phrase, Infantry Drill 1893, By Authority. ...Passchendaele Barracks Trust Book 1893 Infantry Drills This is a pocket sized book. the cover is red buckram. on the front cover, embossed in gold, is the crest of Great Britain, under that is the phrase, Infantry Drill 1893, By Authority. ...Item in the collection re Colonel J. Swatton, refer Cat No 6719.2P for his service details.This is a pocket sized book. the cover is red buckram. on the front cover, embossed in gold, is the crest of Great Britain, under that is the phrase, Infantry Drill 1893, By Authority. It has 260 pages of written text, drawings and music (for bugle calls).passchendaele barracks trust, book, 1893, infantry drills -
 Bendigo Military Museum
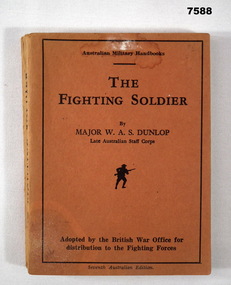
Book - AUSTRALIAN MILITARY HAND BOOK, Angus & Robertson Ltd, The Fighting Soldier, 1941
... Dunlop (late Australian Staff Corps) this book is noted as "Adopted by British War Office for distribution to the Fighting Forces". WW2 Infantry Training This is a pocket handbook. ...Written by Major W.A.S. Dunlop (late Australian Staff Corps) this book is noted as "Adopted by British War Office for distribution to the Fighting Forces". This is a pocket handbook. It has a thin cardboard cover, orange in colour. Black printing. In the centre is a silhouette of a charging soldier with bayonet. It has 202 pages of text.ww2, infantry training