
Showing 249 items matching "colonial life"
-
 Greensborough Historical Society
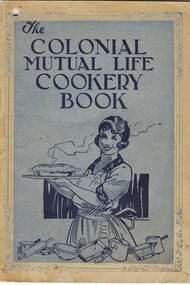
Book - Book - Digital Image, Colonial Mutual Life Assurance Co, Colonial Mutual Life Cookery Book, 1932_
... Colonial Mutual Life Cookery Book......colonial mutual life...Front cover of "Colonial Mutual Life Cookery Book". An example of 1930s advertising through cookery and homemaker books...Colonial Mutual Life Assurance Co....Front cover of "Colonial Mutual Life Cookery Book". An example of 1930s advertising through cookery and homemaker books An example of early 20th century advertising recipe books historic advertisements cookery books colonial mutual life Digital copy of front cover of a book Colonial Mutual Life Cookery Book Book Book - Digital Image Colonial Mutual Life Assurance Co. ...Front cover of "Colonial Mutual Life Cookery Book". An example of 1930s advertising through cookery and homemaker booksAn example of early 20th century advertisingDigital copy of front cover of a bookrecipe books, historic advertisements, cookery books, colonial mutual life -
 Greensborough Historical Society
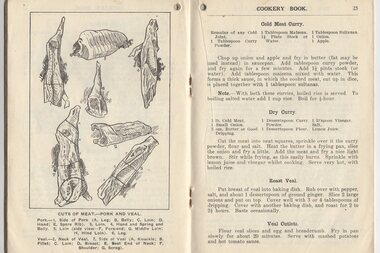
Photograph - Book - Digital Image, Colonial Mutual Life Assurance Co, Colonial Mutual Life Cookery Book: cuts of meat, 1932_
... Colonial Mutual Life Cookery Book: cuts of meat......colonial mutual life...A page from "Colonial Mutual Life Cookery Book". This page contains cuts of meat - pork and veal - and several curry recipes. ...Colonial Mutual Life Assurance Co....A page from "Colonial Mutual Life Cookery Book". This page contains cuts of meat - pork and veal - and several curry recipes. ...A page from "Colonial Mutual Life Cookery Book". This page contains cuts of meat - pork and veal - and several curry recipes. An example of 1930s advertising through cookery and homemaker booksAn example of early 20th century advertisingDigital copy of page of a bookrecipe books, historic advertisements, cookery books, colonial mutual life, meat cuts -
 Federation University Historical Collection
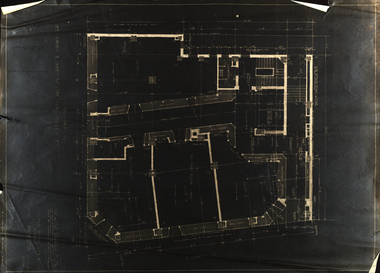
Plan, Plan for Colonial Mutual Life Assurance Society Limited, 316 Collins Street Melbourne
... Plan for Colonial Mutual Life Assurance Society Limited, 316 Collins Street Melbourne......colonial mutual life assurance society limited...Three plans for the Colonial Mutual Life Assurance Society Limited, 316 Collins Street Melbourne. ...architecture plans peters gilpin colonial mutual life assurance society limited Three plans for the Colonial Mutual Life Assurance Society Limited, 316 Collins Street Melbourne. ...Three plans for the Colonial Mutual Life Assurance Society Limited, 316 Collins Street Melbourne. It appears to have been used for refurbishment purposes and includes annotations. architecture, plans, peters, gilpin, colonial mutual life assurance society limited -
 St Vincent's Hospital Melbourne Archives
Pamphlet - Whooping Cough pamphlet published and distributed by Colonial Mutual Life Assurance Society Ltd for the benefit of its policyholders
... Whooping Cough pamphlet published and distributed by Colonial Mutual Life Assurance Society Ltd for the benefit of its policyholders....Colonial Mutual Life Assurance Society Limited...Pamphlet Whooping Cough pamphlet published and distributed by Colonial Mutual Life Assurance Society Ltd for the benefit of its policyholders. ...Published information about Whooping Cough is written over 3 pages, with headings Whooping Cough, Prevention, Symptoms and Treatment. Underlined is the statement reflecting infection control standards in the 1930's - "Whooping Cough is a highly contagious and dangerous disease". "Do not allow the patient to mix with other children" is underlined. The pamphlet would have been on display and available at doctors' surgeries and infant welfare centres. colonial mutual life assurance society limited, whooping cough, contagious disease -
 Robin Boyd Foundation
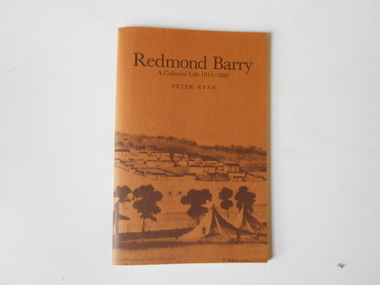
Book, Peter Ryan, Redmond Barry: A Colonial Life, 1980
... Redmond Barry: A Colonial Life...Australian biography Walsh St library Softcover Redmond Barry: A Colonial Life Book Peter Ryan Melbourne University Press ...Softcoveraustralian biography, walsh st library -
St Vincent's Hospital Melbourne Archives
Pamphlet - Facts about Measles published by Colonial and Mutual Life Assurance Society for the benefit of its policy holders and the general public
... Facts about Measles published by Colonial and Mutual Life Assurance Society for the benefit of its policy holders and the general public...Colonial and Mutual Life Assurance Society...Pamphlet Facts about Measles published by Colonial and Mutual Life Assurance Society for the benefit of its policy holders and the general public ...Information pamphlet for mothers stating that "Measles is a highly contagious and serious fever. Far too many people consider Measles to be a trifling kind of illness about which there is not much need to worry. This is a great mistake". Detailed are the headings "How one catches Measles, signs of Measles, how to take care of a child with Measles, after- effects and general remarks". "Send for the doctor at once" is highlighted in bold print. The information pamphlet may have been available at the reception desk at doctors’ surgeries or at infant welfare centres. The Measles Vaccine was not introduced in Australia until the 1960's. colonial and mutual life assurance society, measles, contagious disease -
 Ballarat Tramway Museum
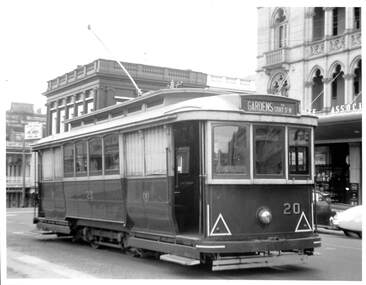
Photograph - Tram 20 on Sturt St, Circa mid 1950s
... ...Colonial Mutual Life...Background shows Commonwealth Bank (Sturt & Lydiard Sts branch) and Colonial Mutual Life building. Circa mid - late 1950s. ...Background shows Commonwealth Bank (Sturt & Lydiard Sts branch) and Colonial Mutual Life building. Circa mid - late 1950s. ...Photograph shows Tram 20 Westbound on Sturt St, just past Lydiard St. Destination is 'Gardens via Sturt St Nth'. Background shows Commonwealth Bank (Sturt & Lydiard Sts branch) and Colonial Mutual Life building. Circa mid - late 1950s. Tram 20 was severely damaged in a collision with a truck on 16/09/1970 at the intersection of Victoria & king Sts. All 3 people on board escaped with only minor injuries. No.20 was subsequently scrapped.Yields information about tram 20 in Sturt St.Black and white print on plain paper.tramcars, trams, secv, tram 20, sturt st, lydiard st, commonwealth bank, colonial mutual life -
 Bendigo Historical Society Inc.
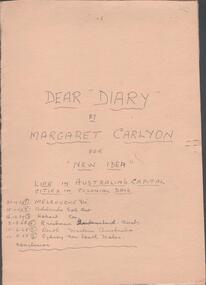
Newspaper - PRESS CUTTINGS - HISTORICAL ARTICLES, 1967,1968
... ... Colonial life...Life in Australia's capital cities in colonial days. Six 'Dear Diary' articles by Margaret Carlyon in 'New Idea' from Oct 1967 to Aug 1968. ...NEWSPAPER Margaret Carlyon Elgin Reid Anthony Hill Colonial life Arthur Fadden Occupations Details of articles handwritten in ink on the cover of each folder Press Cuttings. ...Press Cuttings. Three manila folders containing articles of historical interest: A. Life in Australia's capital cities in colonial days. Six 'Dear Diary' articles by Margaret Carlyon in 'New Idea' from Oct 1967 to Aug 1968. B. The Artie Fadden Story. A series of 12 newspaper articles told by Sir Arthur Fadden to Elgin Reid of the Melbourne Herald. July 1968. C. 'Men at Work' stories by Anthony Hill, artist Gerry Lants of the Melbourne Herald, Aug to Nov 1968. Fourteen articles on various occupations. The compiler of these 3 folders is not identified.Details of articles handwritten in ink on the cover of each foldernewspaper, margaret carlyon, elgin reid, anthony hill, colonial life, arthur fadden, occupations -
 Bendigo Historical Society Inc.
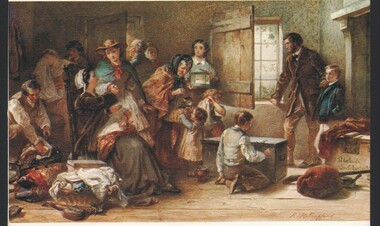
Card - WES HARRY COLLECTION: EMIGRANTS TO SOUTH AUSTRALIA, Mid 1800's
... ... early Colonial life. Emigrants...PRINT Watercolour australian landscape Watercolour Paintings early Colonial life. Emigrants South Australia Robert Alexander Hillingford A print from a water colour by Robert Alexander Hillingford called ' Emigrants to South Australia '. ...Robert Alexander Hillingford (!828-1904), was an English painter who specialised in historical pictures, often battle scenes. Hillingford was born in London on 28 January 1828, and studied at the Kunstakademie Düsseldorf for five years from 1841. He travelled to Munich, Rome, Florence and Naples, where worked for several years, producing paintings of Italian life. He returned to London in 1864 and first exhibited at the Royal Academy in 1866. It was at this time that he began to work on historical subjects, especially of the Napoleonic Wars. He was a regular exhibitor at the Royal Academy, British Institution and at other galleries. This artwork would have been painted in approx. the 1860s, when he had returned to London and when many form his country were travelling to Australia.A print from a water colour by Robert Alexander Hillingford called ' Emigrants to South Australia '. Original is from The Rex Nan Kivell collection, National Library of Australia.Robert Alexander Hillingfordprint, watercolour, australian landscape, watercolour paintings, early colonial life. emigrants, south australia -
 Narre Warren and District Family History Group
Book, Rachel Henning, Letters of Rachel Henning, 1986
... Colonial Life...Colonial Life Rachel Henning Letters From the comfort and culture of rural England with its ordered estates and "green lanes and fields", to the dusty heat of a rough, unfloored cabin in outback Queensland — that is just part of the journey Rachel Henning made and reports on in her letters. ...From the comfort and culture of rural England with its ordered estates and "green lanes and fields", to the dusty heat of a rough, unfloored cabin in outback Queensland — that is just part of the journey Rachel Henning made and reports on in her letters. Yet these reveal no sorry tale of struggle in adversity — amazingly they form a lively adventure story and a vivid family saga. Expertly edited by David Adams, a former editor of the Sydney Bulletin magazine, the collection reads like a novel — partly of courtships and romances, partly of the progress of a pioneering family, and partly of Rachel Henning's own progress towards acceptance of her new way of life. The letters were first published in the Bulletin in 1951 and were so well received that they were quickly presented in book form. Thereafter they have scarcely been out of print and the grace, liveliness and gossipy intimacy of Rachel's prose have earned them a unique place in Australian literature. This edition is illuminated with illustrations of the period - some believed to be by Rachel herself, others by members of her family and others by artists and sketchers who would have been Rachel's contemporaries. Wherever possible, the work of women has been included. Taken from sketchbooks and note pads, their often unfinished images give as intimate a view of life in Australia from the 1850s to the 1880s as do Rachel's letters. (Inside Cover)non-fictionFrom the comfort and culture of rural England with its ordered estates and "green lanes and fields", to the dusty heat of a rough, unfloored cabin in outback Queensland — that is just part of the journey Rachel Henning made and reports on in her letters. Yet these reveal no sorry tale of struggle in adversity — amazingly they form a lively adventure story and a vivid family saga. Expertly edited by David Adams, a former editor of the Sydney Bulletin magazine, the collection reads like a novel — partly of courtships and romances, partly of the progress of a pioneering family, and partly of Rachel Henning's own progress towards acceptance of her new way of life. The letters were first published in the Bulletin in 1951 and were so well received that they were quickly presented in book form. Thereafter they have scarcely been out of print and the grace, liveliness and gossipy intimacy of Rachel's prose have earned them a unique place in Australian literature. This edition is illuminated with illustrations of the period - some believed to be by Rachel herself, others by members of her family and others by artists and sketchers who would have been Rachel's contemporaries. Wherever possible, the work of women has been included. Taken from sketchbooks and note pads, their often unfinished images give as intimate a view of life in Australia from the 1850s to the 1880s as do Rachel's letters. (Inside Cover)colonial life, rachel henning, letters -
 Bendigo Historical Society Inc.
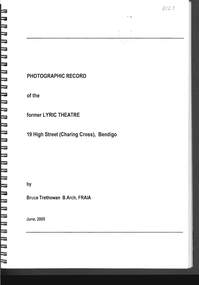
Document - PHOTOGRAPHIC RECORD OF THE FORMER LYRIC THEATRE
... ... Colonial Life Building...BUILDINGS Commercial former lyric theatre Photographic Record of the former Lyric Theatre Bruce Trethowan Gallagher Jeffs Consulting Gallagher Jeffs Pty Ltd Jim Evans Bendigo Bank Development Ted Gallagher Richard Hasseldine City of Greater Bendigo Planning Department Keogh & Austen State Savings Banks Sydney Smith and Ogg Godfrey and Spowers Colonial Life Building Johnson Morley Warehouse J G Austen MUIOOF Building Eaglehawk George Austen Backhaus Building Allawah William Cowling Taylor Soilleux Overend Plaza Theatre Backhaus Trust Princess Theatre The Annals of Bendigo Vol 8 p163 The Annals Vol 8 p180 Fernwood Women's Health Club Bendigo Real Estate Spring bound photographic record of the former Lyric Theatre, 19 High Street (Charing Cross), Bendigo, by Bruce Trethowan, B.arch, FRAIA, dated June, 2005. ...Spring bound photographic record of the former Lyric Theatre, 19 High Street (Charing Cross), Bendigo, by Bruce Trethowan, B.arch, FRAIA, dated June, 2005. A letter in the front of the document mentions as part of the Bendigo Bank Development, it was necessary to demolish the former Lyric Theatre. Before doing so, the Bank commissioned a heritage architect to produce a photographic record of the building. It is addressed to Mr Jim Evans, President, Bendigo Historical Society and dated 10 August 2005. The beginning has the Historical Background, Building Description and three pages of Plans and Elevations. There are sixty colour photographs of the building depicting the front outside of the building, other outside photos and a number of the interior.buildings, commercial, former lyric theatre, photographic record of the former lyric theatre, bruce trethowan, gallagher jeffs consulting, gallagher jeffs pty ltd, jim evans, bendigo bank development, ted gallagher, richard hasseldine, city of greater bendigo planning department, keogh & austen, state savings banks, sydney smith and ogg, godfrey and spowers, colonial life building, johnson morley warehouse, j g austen, muioof building eaglehawk, george austen, backhaus building, allawah, william cowling, taylor, soilleux, overend, plaza theatre, backhaus trust, princess theatre, the annals of bendigo vol 8 p163, the annals vol 8 p180, fernwood women's health club, bendigo real estate -
 Bendigo Historical Society Inc.
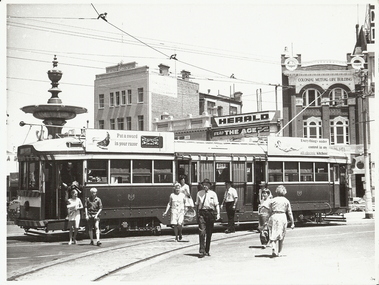
Photograph - TRAM, CHARING CROSS, c.1965
... Black and white photograph of tram at Charing Cross, Bendigo, Colonial Mutual Life Building in background, people (passengers) in foreground. ...Various advertisements plus 'Colonial Mutual Life Building'. Notes of James Lerk: (17/12/1999). ...Black and white photograph of tram at Charing Cross, Bendigo, Colonial Mutual Life Building in background, people (passengers) in foreground. Inscriptions: in photo. Various advertisements plus 'Colonial Mutual Life Building'. Notes of James Lerk: (17/12/1999). Maximum traction car No. 2 at Charing Cross, Bendigo. For details of this tram see 'Bendigo's Talking Trams' - Allan Doney, Photo c.1965Allan Doneyplace, streetscape, charing cross -
 Bendigo Historical Society Inc.
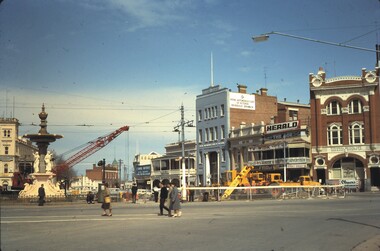
Slide - BENDIGO BUILDINGS, Oct 1964
... A red crane doing construction work at Charing Cross, between the fountain and cenotaph, with the City Family Hotel on the left, the View Point Hotel, RACV Building, Colonial Mutual Life Building on right....A red crane doing construction work at Charing Cross, between the fountain and cenotaph, with the City Family Hotel on the left, the View Point Hotel, RACV Building, Colonial Mutual Life Building on right. Slide BENDIGO BUILDINGS. ...Slide. Bendigo Buildings. A red crane doing construction work at Charing Cross, between the fountain and cenotaph, with the City Family Hotel on the left, the View Point Hotel, RACV Building, Colonial Mutual Life Building on right.slide, bendigo, bendigo buildings., bendigo buildings. -
 Bendigo Historical Society Inc.
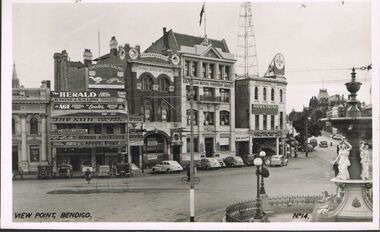
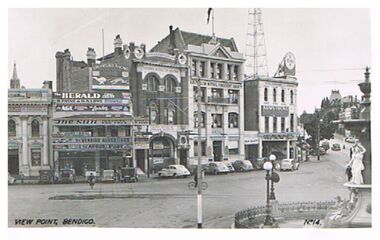
Photograph - VIEW POINT BENDIGO
... Also Australian Mutual Provident Society, Colonial Mutual Life Building and other buildings. ...Also Australian Mutual Provident Society, Colonial Mutual Life Building and other buildings. ...Photograph - black and white. Photo of View Point Bendigo. Fountain right hand side of photo. A large clock on top of Armstrong Tyre Service. Also Australian Mutual Provident Society, Colonial Mutual Life Building and other buildings. No.14 on right hand bottom of photo. Newsagent advertising The Herald, Age, The Sun, Argus.place, bendigo, view point, sandhurst, view point bendigo. -
 Bendigo Historical Society Inc.
Postcard - VIEW POINT, BENDIGO
... Alexandra Fountain on Rh side, View Street , Armstrong Tyre Service, Australian Mutual Provident Society, Colonial Mutual Life Building, Greyhound Racing buildings in streetscape. ...Alexandra Fountain on Rh side, View Street , Armstrong Tyre Service, Australian Mutual Provident Society, Colonial Mutual Life Building, Greyhound Racing buildings in streetscape. ...black and white photo: View Point, Bendigo. Alexandra Fountain on Rh side, View Street , Armstrong Tyre Service, Australian Mutual Provident Society, Colonial Mutual Life Building, Greyhound Racing buildings in streetscape. Cars parked along kerb. ? Late 1930's early 1940's. On bottom of photo: View Point, Bendigo. No. 14. On back ' Valentine's Post Card, sending you greetings, for address only.Valentine's Post Cardplace, streetscape, view point, view point, alexandra fountain, view street, armstrong tyre service -
 Melbourne Tram Museum
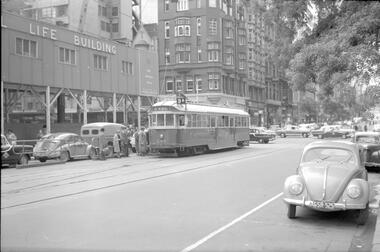
Negative, Travis Jeffrey, 28/09/1961 12:00:00 AM
... Construction site of the new Colonial Mutual Life (CML) building in foreground. ...Construction site of the new Colonial Mutual Life (CML) building in foreground. ...Negative of SW2 Class tram No 644 at tram stop in Collins Street at Elizabeth Street. Several buildings appear in the background in Elizabeth Street which are still there today. Construction site of the new Colonial Mutual Life (CML) building in foreground. Tram has destination East Preston - Bell Street and route 9A and is flying an Australian flag. Photo dates from 1961c due to no part of the new building being present in the photo.Paper folder that contained the negative had "NR53A" in red ink, "M8" in pencil, 43A in blue ink, date stamp "28 Sep 1961" on front, and on rear date stamps "26 Sep 1962" and "6 Oct 1962"trams, tramways, sw2 class, collins st, tram 644, cml building, route 9a, elizabeth st -
 Ballarat Tramway Museum
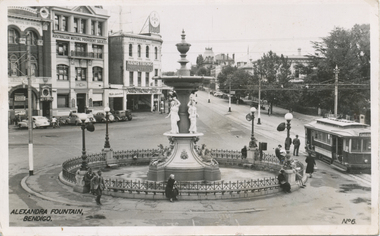
Postcard, Valentine & Sons Publishing Co, Valentines Series Postcard, No 6 of the Alexandra Fountain, Bendigo
... In the back ground is the Australian Mutual Provident Society Building, Colonial Mutual Life building and Armstrong tyre service building. ...In the back ground is the Australian Mutual Provident Society Building, Colonial Mutual Life building and Armstrong tyre service building. ...Black and White postcard contained within the Wal Jack Bendigo and Geelong Album, see Reg Item 5003 for more details. Valentines Series Postcard, No 6 of the Alexandra Fountain, Bendigo. Charing Cross. Has a single trucker in the photo with the destination of Eaglehawk. In the back ground is the Australian Mutual Provident Society Building, Colonial Mutual Life building and Armstrong tyre service building. On rear of card is Valentine's name with space for written notes and stamps. Has a handwritten message to Wal Jack from Roy Field of Sydney, dated 21-6-1949 and 1d and 1/2 stamps. trams, tramways, bendigo, charing cross, alexandra fountain, tram 22 -
 Ballarat Tramway Museum
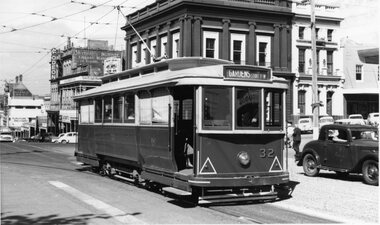
Photograph - Black & White Photograph/s, Doug Colquhoun, 24/03/1959 12:00:00 AM
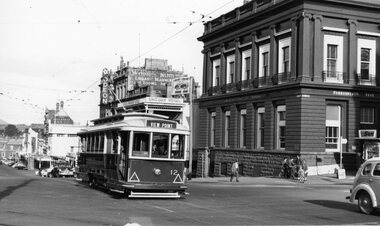
... Has the Commonwealth Bank, Odeon theatre, Mechanics Institute, Ballarat Gas Co, Unicorn Hotel, and Colonial Mutual Life buildings in the background, along with a number of motor vehicles. ...Has the Commonwealth Bank, Odeon theatre, Mechanics Institute, Ballarat Gas Co, Unicorn Hotel, and Colonial Mutual Life buildings in the background, along with a number of motor vehicles. ...Yields information about Ballarat's scrubber tram in early 1960's.Black and white print of Ballarat 32, crossing Lydiard St, in Sturt St with the destination of Gardens via Sturt St West. Has the Commonwealth Bank, Odeon theatre, Mechanics Institute, Ballarat Gas Co, Unicorn Hotel, and Colonial Mutual Life buildings in the background, along with a number of motor vehicles. Photo Doug Colquhoun 24/3/1959. Photo print courtesy of Port Dock Railway Museum, now the National Railway Museum. See worksheet 4311 for letter and details of prints sent to Bill Scott, 19/10/2001. Any photo credit to mention NRM Collection.On rear of copy "SEC Ballarat #32 / Sturt St @ Lydiard / 24/3/59 / Douglas A Colquhoun.trams, tramways, sturt st, lydiard st, tram 32 -
 Ballarat Tramway Museum
Photograph - Black & White Photograph/s, Doug Colquhoun, 23/03/1959 12:00:00 AM
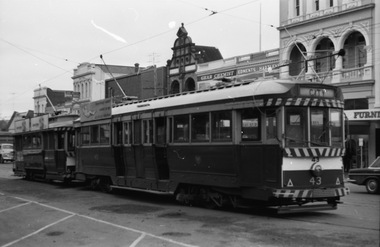
... Has the Commonwealth Bank, Odeon theatre, Mechanics Institute, Ballarat Gas Co, Unicorn Hotel, and Colonial Mutual Life buildings in the background. ...Has the Commonwealth Bank, Odeon theatre, Mechanics Institute, Ballarat Gas Co, Unicorn Hotel, and Colonial Mutual Life buildings in the background. A group of children with bicycles are on the corner and the newspaper seller stand. ...Yields information about the Eaglehawk terminus, tram 18 and the tram liveries in 1963.Black and white print of Ballarat 12, crossing Lydiard St, in Sturt St with the destination of Gardens via View Point. Has the Commonwealth Bank, Odeon theatre, Mechanics Institute, Ballarat Gas Co, Unicorn Hotel, and Colonial Mutual Life buildings in the background. A group of children with bicycles are on the corner and the newspaper seller stand. Photo Doug Colquhoun 23/3/1959. Photo print courtesy of Port Dock Railway Museum, now the National Railway Museum. See worksheet 4311 for letter and details of prints sent to Bill Scott, 19/10/2001. Any photo credit to mention NRM Collection.On rear of copy In top left hand corner "72) No . 71 withdrawn" a yellow label with "24" crossed out over a sticker "Photo No. Reduced to 82% 145x80 see photocopy for masking" and "22" crossed out in the top right hand corner. In the lower left hand corner "SEC Ballarat #12 / Sturt St @ Lydiard / 23/3/59 / Douglas A Colquhoun"trams, tramways, sturt st, lydiard st, tram 12 -
 Ballarat Tramway Museum
Photograph - B&W print of donated negative - set of 5, Graham Parry, 1971
... Has the National Mutual Building in the background, which has a CML (Colonial Mutual Life) sign on it. .3 - No.35 at the north side tram stop. ...Has the National Mutual Building in the background, which has a CML (Colonial Mutual Life) sign on it. .3 - No.35 at the north side tram stop. ...Yields information about the City Loop and tram operations in Sturt St, 1971Set of five black and white prints and associated negatives of trams in Ballarat during 1971 prior to closure of the system by Graham Parry. All images from the scanned negative. .1 - No. 43 and possibly 31 in the City Loop. Has various buildings in the background. .2 - No. 34 at the Sturt and Lydiard Sts tram stop. Has the National Mutual Building in the background, which has a CML (Colonial Mutual Life) sign on it. .3 - No.35 at the north side tram stop. Has a Briquettes roof advert. Tram has the destination of Lydiard St North. .4 - View looking from the top of the hill at the City Loop with 43 and other cars in the loop. Has the Dickens Food Store and Patersons in the view along with other buildings. .5 - as for .4, but from the south side footpath with trams 43, 31, 26 and another in the loop. All have SEC roof adverts.tramways, trams, sturt st, city loop, lydiard st nth, tram 43, tram 31, tram 34, tram 35, tram 26 -
 Orbost & District Historical Society
book, Australian Copy Book Fifth Grade, 1920's
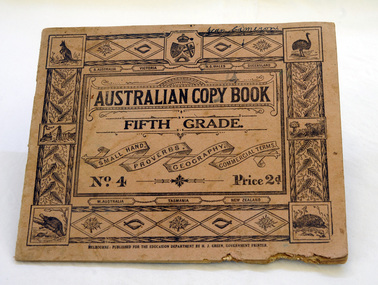
... Writing slates and slate pencils had been a commonplace item of everyday life in colonial Australia. Slates were generally only used by school children in the most junior grades By Class III, however, school children in Victoria had normally passed beyond the need for slates in shaping letters and used ink and copybooks instead. ...Writing slates and slate pencils had been a commonplace item of everyday life in colonial Australia. Slates were generally only used by school children in the most junior grades By Class III, however, school children in Victoria had normally passed beyond the need for slates in shaping letters and used ink and copybooks instead. ...This copy book is for the practice of copperplate handwriting and was used at the Orbost School. It was not until the mid-20th century that Australian schools were investigating the modern cursive styles being taught overseas. Writing slates and slate pencils had been a commonplace item of everyday life in colonial Australia. Slates were generally only used by school children in the most junior grades By Class III, however, school children in Victoria had normally passed beyond the need for slates in shaping letters and used ink and copybooks instead. Writing slates often continued to be used for arithmetic exercises. the use of slates was discontinued mainly because paper became cheaper and writing on paper was deemed to be more hygienic.This item is an example of a school text book commonly used for the practice of handwriting in most primary schools in Australia. It shows a style of handwriting not commonly used today. The Cameron family is significaant in the history of Orbost.A school handwriting copy book. It contains examples of copperplate writing for copying and practice. On the front cover there are drawings of a kangaroo, emu, platypus and echidna in each corner. The book is titled "AUSTRALIAN COPY BOOK FIFTH GRADE No. 4". It is designed for use in all states and New Zealand. Inside a banner is "small hand proverbs geography commercial terms". All print is black.on front cover: Jean Cameron Inside front cover: Jean Cameron 1924, J.M. Ralston 1924handwriting education cameron -
![Glimpses of Life in Victoria / [by] a 'Resident'](/media/collectors/550653872162f11fb04854aa/items/5ed05546dcf9cd08346c11f9/item-media/5ed055fedcf9cd08346c1974/item-fit-380x285.jpg?cb=6) Kew Historical Society Inc
Kew Historical Society IncBook, Melbourne University Press, Glimpses of Life in Victoria, 1996
... Glimpses of Life in Victoria is his story: an account of pioneering, bushrangers, gold-digging, land sales and swindles, the Aborigines, and colonial society. ...Glimpses of Life in Victoria is his story: an account of pioneering, bushrangers, gold-digging, land sales and swindles, the Aborigines, and colonial society. ...An account of pioneering, bushrangers, gold-digging, land sales and swindles, the aborigines, and colonial society.xxxii, 322 p. : illus. (some col.)An account of pioneering, bushrangers, gold-digging, land sales and swindles, the aborigines, and colonial society.melbourne (vic.) -- description and travel., victoria -- social life and customs -- 1834-1900. -
 Ballarat Tramway Museum
Slide - 35mm slide/s - set of 12, Noel Simons, 28 Feb. 1972
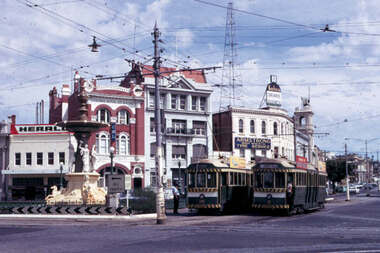
... Set of 12 transparencies taken on 28/2/1972 on Kodak mounts. 1207.1 - Bendigo 26 and 2 at Charing Cross. 26 en route for Eaglehawk, 2 for Quarry Hill. Has the Colonial Mutual Life, Armstrong Tyre Service, and Australian Mutual Provident Society buildings and a Cohns Drinks ad. ...Set of 12 transparencies taken on 28/2/1972 on Kodak mounts. 1207.1 - Bendigo 26 and 2 at Charing Cross. 26 en route for Eaglehawk, 2 for Quarry Hill. Has the Colonial Mutual Life, Armstrong Tyre Service, and Australian Mutual Provident Society buildings and a Cohns Drinks ad. in the background. 1207.2 - as for 1207.1 but with Alexandra fountain in the foreground. 1207.3 - No. 2 in Mitchell St. heading for Quarry Hill. ...Set of 12 transparencies taken on 28/2/1972 on Kodak mounts. 1207.1 - Bendigo 26 and 2 at Charing Cross. 26 en route for Eaglehawk, 2 for Quarry Hill. Has the Colonial Mutual Life, Armstrong Tyre Service, and Australian Mutual Provident Society buildings and a Cohns Drinks ad. in the background. 1207.2 - as for 1207.1 but with Alexandra fountain in the foreground. 1207.3 - No. 2 in Mitchell St. heading for Quarry Hill. Photo taken after tram has passed photographer. Has buildings on either side of Mitchell St. in the background, including the Plaza Theatre. 1207.4 - No. 6 en route for Golden Square departing Charing Cross. Has the RACV and ANZ bank in the background. 1207.5 - No. 2 crossing Pall Mall to enter Charing Cross ex Quarry Hill, with the Fountain Plaza in the background. 1207.6 - No. 6 arriving Charing Cross ex Golden Square with No. 21 alongside. No. 21 has the SEC ad. 'Everything's fine in my all electric kitchen.' Has the City Family Hotel and the Fountain Plaza shopping centre in the background. 1207.7 - No. 5 at Charing Cross en route for Quarry Hill with No. 2 behind. No. 2 has two SEC roof ads, 'Everything s fine in my all electric kitchen' and 'Electricity best for cooking'. RACV building in the background. Tram crews are discussing the day in the front of the tram. 1207. 8 - No. 21 in High St. Bendigo with the Cathedral in the background. No. 21 has two SEC roof ads, 'Everything's fine in my all electric kitchen' and 'Electricity best for cooking'. 1207.9 - No. 6 in High St. Bendigo with the Cathedral in the background. 1207.10 - No. 6 in High St. Bendigo, just past Wattle St. Photo taken after the tram has passed the photographer from within the Highway Car Sales yard. 1207.11 - No. 26 bound for Eaglehawk at the end of the double track in View St., note signal contactors, tram stop and section signs mounted on pole. 1207.12 - No. 26 turning from View St. into Barnard St.Information written on in blue ink and date stamped on purple ink. 1207. 1- "Nos. 26 and 2 at Charing Cross." 1207.2 - "Nos. 26 and 2 at Charing Cross." 1207.3 - "No. 2 in Mitchell St. just after leaving Charing Cross." 1207.4 - "No.6 leaving Charing Cross for Golden Square." 1207.5 - "No. 2 arriving at Charing Cross from Quarry Hill." 1207.6 - "No. 21 waits at Charing Cross as No. 6 arrives from Golden Square." 1207.7 - "No 5 at Charing Cross with No. 2 lurking behind." 1207.8 - "No. 21 in High St. at cnr of Wattle St." 1207.9 - "No. 6 in High St. at cnr of Wattle St." 1207.10 - "No. 6 in High St. between Wattle and Vine Sts." 1207.11 - "No. 26 at end of double track in View St. near Barnard. St. 1207.12 - "No. 26 seen at dusk turning from View St. into Barnard St."tramways, trams, bendigo, charing cross, high st, view st., tram 2, tram 5, tram 6, tram 21, tram 26 -
 Ballarat Tramway Museum
Photograph - Black & White Photograph/s set of 19, Mar. 1972
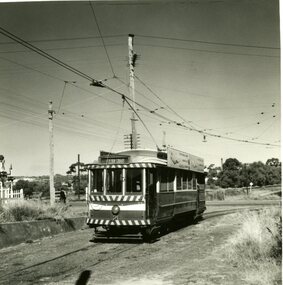
... Same as item 972. 981.10 - bogie tram at Charing Cross - has buildings in south west corner in background, including Colonial Mutual Life and an advertisement for the Herald newspaper. 981.11 - trams 25, 7 and two other trams at Charing Cross. 981.12 - trams 2 and 26 and three others at Charing Cross. 981.13 - tram 25 at Golden Square terminus, with Rodda's Golden Square Hotel in the background. ...Same as item 972. 981.10 - bogie tram at Charing Cross - has buildings in south west corner in background, including Colonial Mutual Life and an advertisement for the Herald newspaper. 981.11 - trams 25, 7 and two other trams at Charing Cross. 981.12 - trams 2 and 26 and three others at Charing Cross. 981.13 - tram 25 at Golden Square terminus, with Rodda's Golden Square Hotel in the background. ...Set of 19 black and white prints, all 89mm square of Bendigo trams, date machine printed on print is "Mar 1972". 981.1 - Tram 21 at North Bendigo terminus, with level crossing in background. Has destination "Golden Square" and two SEC roof ads. 981.2 - tram 2? at Eaglehawk, with destination "Depot", two SEC roof ads and "Leo A. Hughes Photographer" on side of building in background. 981.3 - tram 2? at Eaglehawk, side on view. 981.4 - tram 26 at Quarry Hill terminus looking back into city. 981.5 - tram 7 en route to North Bendigo at the site of the Bridge St. loop. Has a Peters Ice Cream truck and Sandhurst Fruit Juices truck on right side of photograph. 981.6 - tram 2 at Quarry Hill terminus. 981.7 - tram 2? at one of the loops on the Eaglehawk line, inbound? 981.8 - bogie tram at Charing Cross with fountain in background. Side on view looking south. 981.9 -trams 7 and 21 on Golden Square/North Bendigo line with bogie tram in background, at Charing Cross. Same as item 972. 981.10 - bogie tram at Charing Cross - has buildings in south west corner in background, including Colonial Mutual Life and an advertisement for the Herald newspaper. 981.11 - trams 25, 7 and two other trams at Charing Cross. 981.12 - trams 2 and 26 and three others at Charing Cross. 981.13 - tram 25 at Golden Square terminus, with Rodda's Golden Square Hotel in the background. Tram showing destination of "Nth Bendigo" 981.14 - tram 24, showing "Special" on depot access track. Has two Johnnie Walker roof ads on side. 981.15 - as above, but tram on bridge outside depot. 981.16 - trams 25 and 28 at depot 981.17 - tram 24 showing "Special" on depot access track with a single truck car in background. 981.18 - trams 2 and 26 at Charing Cross. Has advertisements for "Armstrong Tyre Service" and "Cohn's drinks" on buildings in background. 981.19 - Bendigo 2 at location?, about to enter a loop or double track section. Has hotel in background. On rear of each photo in the top left hand corner is a print number 1 to 19 in ink and location notes, generally "Bendigo"trams, tramways, charing cross, bendigo, golden square, quarry hill, tram 2, tram 21, tram 7, tram 24, tram 26 -
 Ballarat Tramway Museum
Slide - 35mm slide/s - set of 25, Noel Simons, 26/02/1972 12:00:00 AM
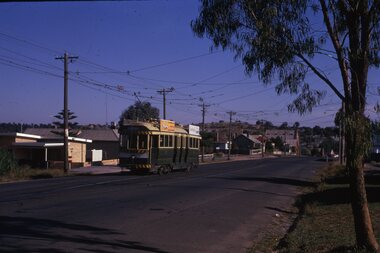
... Has RACV, Colonial Mutual Life buildings in the background and the planting areas around Charing Cross gardens in the foreground. 1204.19 - No. 21 en route to North Bendigo arrives at Charing Cross, with passengers waiting to board. ...Has RACV, Colonial Mutual Life buildings in the background and the planting areas around Charing Cross gardens in the foreground. 1204.19 - No. 21 en route to North Bendigo arrives at Charing Cross, with passengers waiting to board. ...Set of 25 transparencies taken on 26/2/1972 on Kodak mounts. 1204.1 - Bendigo No. 5 - just arrived at Manchester Loop near Havilah Road, Long Gully. Photo taken after tram has passed photographer. 1204.2 - No. 26 in Backhaus St. Long Gully passing William St, en route to Quarry Hill. Photo taken after tram has passed photographer. 1204.3 - No. 5 climbing the High St. Hill Eaglehawk, heading for Quarry Hill with the buildings on the West side of High St. in the background, including the Eaglehawk Town Hall. 1204.4 - as for 1204.3, but tram close up. 1204.5 - as for 1204.3, but after tram has passed photographer. 1204.6 - No. 5 at intersection of Mt Korong Road Ironbark and Calder Highway, with the AMPOL service 'station in the background. Photo taken after tram has passed photographer. 1204.7 - No. 26 en route to Quarry Hill shortly after leaving Needle Loop, passing William St., Long Gully. 1204.8 - No. 5 at California Gully Loop, picking up a passenger, with the shops at Long Gully in the background. Photo taken after tram has passed photographer. 1204.9 - No. 5 in Long Gully, en route to Quarry Hill. Photo taken after tram has passed photographer. 1204.10 - No. 2 at Eaglehawk terminus with the Eaglehawk Town Hall and Post Office in the background. Tram has two SEC roof ads. 1204.11 - No. 2 at Eaglehawk terminus, close up. 1204.12 - as for 1204.11, but through the park gates. 1204.13 - as for 1204.11, but with tram stop shelters in the foreground and buildings on the West side of High St in the background. 1204.14 - No. 2 in Mt. Korong Rd, midway between California Gully Loop and Needle Loop. Photo taken after tram has passed photographer. 1204.15 - No. 5 in Long Gully, en route to Quarry Hill. 1204.16 - as for 1204.15, but with trams departed loop. Has an ESSO service station in the background. 1204.17 - No. 26 leaves Charing Cross up View St.. Photo taken after tram has passed photographer. Has Armstrong Tyre Service, Cohns Drinks ad on a building and the T&G building in the background. Also Firestone ads on the tyre service building. 1204.18 - No. 5 waits at Charing Cross with the Alexandra Fountain in the background. Tram has two SEC roof ads, 'Everything s fine in my all electric kitchen' and 'Electricity Best for Cooking'. Has RACV, Colonial Mutual Life buildings in the background and the planting areas around Charing Cross gardens in the foreground. 1204.19 - No. 21 en route to North Bendigo arrives at Charing Cross, with passengers waiting to board. No. 5 in the background. In the background is the Fountain Gate Plaza building and the City Family Hotel. 1204.20 - as for 1204.19, but with No. 7 en route to Golden Square. 1204.21 - as for 1204.19, but closer up. 1204.22 - as for 1204.18 1204.23 - No. 25 in Nolan St. near the crossing of Bendigo Creek, running a special tram tour. 1204.24 - No. 25 on a special charter, in Weeroona Ave. at Cnr of Caledonia St. passing the Gas works. 1204.25 - Nos. 25 (showing Golden Square), 7 and 26 at Charing Cross. Has fountain in the background.Information written on in blue ink and date stamped on purple ink. 1204.1 - "No. 5 at Manchester Loop, near Havilah Rd. Long Gully." 1204.2 - "No. 26 in Backhaus St. Long Gully passing William St." 1204.3 - "No. 5 in High St. Eaglehawk." 1204.4 - "No. 5 in High St. Eaglehawk." 1204.5 - "No. 5 in High St. Eaglehawk." 1204.6 - "No. 5 in Mt. Korong Rd., Ironbark, passing Calder Highway Junctn." 1204.7 - "No. 26 shortly after leaving Needle Loop, passing William St., Long Gully. No. 5 cresting hill in distance." 1204.8 - "No. 5 at California Gully Loop." 1204.9 - "No. 5 in Long Gully" 1204.10 - "No. 2 at Eaglehawk terminus." 1204.11 - "No. 2 at Eaglehawk terminus." 1204.12 - "No. 2 at Eaglehawk terminus." 1204.13 - "No. 2 at Eaglehawk terminus." 1204.14 - "No. 2 in Mt. Korong Rd, midway between California Gully Loop and Needle Loop. 1204.15 - "Nos. 2 and 26 crossing at Long Gully." 1204.16 - "No. 26 leaves Long Gully loop for Eaglehawk as No. 2 pulls out of the far end towards Bendigo" 1204.17 - "No. 26 beginning the climb up View St. from Charing Cross." 1204.18 - "No. 5 at Charing Cross." 1204.19 - "No 21 arrives at Charing Cross from Golden Square while No. 5 awaits departure time for Eaglehawk." 1204.20 - "Nos. 7, 21, and 2 (behind which is No. 5) at Charing Cross." 1204.21 - "Nos. 7, 21, and 2 at Charing Cross." 1204.22 - "No. 5 at Charing Cross." 1204.23 - "No. 25 in Nolan St. near Bendigo creek crossing" 1204.24 - "No. 25 in Weeroona Ave. at cnr of Caledonia St." 1204.25 - "Nos. 25, 7, 26 and 2 (behind 26) at Charing Cross."tramways, trams, bendigo, eaglehawk, long gully, california gully, charing cross, north bendigo, tram 2, tram 5, tram 7, tram 21, tram 25, tram 26 -
 Ballarat Tramway Museum
Slide - 35mm slide/s - set of 32, Noel Simons, 25/02/1971 12:00:00 AM
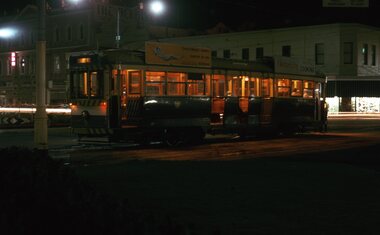
... Has Alexandra Fountain in the background, ANZ bank RACV building, and other buildings on the north side of Pall Mall or Nolan St. 1201.20 - No. 26 en route for Quarry Hill at Charing Cross, with crew standing by front door. Has Colonial Mutual life building, Armstrong Tyre Service (Firestone) and a sign for Cohns Drinks in the background. 1201.21 - as for 1201.20 but with No. 5 en route to Eaglehawk now in photograph. 1201.22 - No. 26 at Quarry Hill terminus. 1201.23 - No. 26 at Quarry Hill terminus, view of front portion of tram only from a gate at the Bendigo cemetery. 1201.24 - Track at the end of the Quarry Hill line showing the point blades of the former "Y" terminus and the overhead for this. 1201.25 - No. 2 at the Quarry Hill terminus, looking along the former Trackwork. 1201.26 - as for 1201.25 1201.27 - number not used. 1201.28 - Golden Square terminus from some distance from the actual terminus, showing the Warning sign "TRAM" for motorists from the south. ...Has Alexandra Fountain in the background, ANZ bank RACV building, and other buildings on the north side of Pall Mall or Nolan St. 1201.20 - No. 26 en route for Quarry Hill at Charing Cross, with crew standing by front door. Has Colonial Mutual life building, Armstrong Tyre Service (Firestone) and a sign for Cohns Drinks in the background. 1201.21 - as for 1201.20 but with No. 5 en route to Eaglehawk now in photograph. 1201.22 - No. 26 at Quarry Hill terminus. 1201.23 - No. 26 at Quarry Hill terminus, view of front portion of tram only from a gate at the Bendigo cemetery. 1201.24 - Track at the end of the Quarry Hill line showing the point blades of the former "Y" terminus and the overhead for this. 1201.25 - No. 2 at the Quarry Hill terminus, looking along the former Trackwork. 1201.26 - as for 1201.25 1201.27 - number not used. 1201.28 - Golden Square terminus from some distance from the actual terminus, showing the Warning sign "TRAM" for motorists from the south. ...Set of 31 transparencies taken on 25/2/1972 on Kodak mounts. 1201.1 - Bendigo No. 26 in Bond St. just after leaving Long Gully en route for Quarry Hill. Has Norris Supermarket in background. Has two SEC roof ads. 1201.2 - No. 26 climbing View St. from Charing Cross en route to Eaglehawk. Has ANZ bank and AMOCO service station in background. 1201.3 - as for 1201.3, but after tram has passed photographer. Has buildings west of Mackenzie St. in photograph. 1201.4 - Tram stop and centre of the road pole with two "CARS STOP BY REQUEST" signs mounted on pole at the corner of Mackenzie St. 1201.5 - same position as for 1201.3, but with No. 5 descending the street. 1201.6 - same position as for 1201.2, but with No. 5 descending the street. Photo taken after tram has passed photographer. 1201.7 - No. 7 in Nolan St. from across the park at Lake Weeroona. 1201.8 - No. 7 entering McCrae St from Nolan St. - distant view. Note "TRAM "sign on left hand side under tree and overhead in McCrae St. from former track that once was in this street. 1201.9 - No. 7 in High St. with Cathedral in background. Tram en route to North Bendigo. Note scaffolding around Cathedral main spire area. 1201.10 - No. 7 crossing Bendigo Creek bridge in High St. near Golden Square. Has a Caltex Service station in the background. 1201.11 - No. 7 at Golden Square terminus with Sunburst Fruit Juices and a Peters Ice cream delivery vans alongside. 1201.12 - as for 1201.11 but photo taken from behind tram, with the end of the rails in the photograph. 1201.13 - No. 7 and 21 in Pall Mall at Charing Cross with No. 5 in the background. Taken some distance away from the location. 1201.14 - No. 7 at Golden Square terminus, taken a short distance from the tram terminus. Shows Milk Bar on right hand side and the hotel on the left hand side. Taken from the south side of the roadway. 1201.15 - as from 1201.14 but taken from the north side of the roadway. 1201.16 - No 5 waiting at California Gully loop. Distant photo showing surrounds 1201.17 - No. 5 en route for Quarry Hill crossing No. 26 at California Gully. 1201.18 - No. 26 at Eaglehawk terminus with Eaglehawk Town Hall and Post Office in background. 1201.19 - No. 21 arriving at Charing Cross en route to North Bendigo. Has Alexandra Fountain in the background, ANZ bank RACV building, and other buildings on the north side of Pall Mall or Nolan St. 1201.20 - No. 26 en route for Quarry Hill at Charing Cross, with crew standing by front door. Has Colonial Mutual life building, Armstrong Tyre Service (Firestone) and a sign for Cohns Drinks in the background. 1201.21 - as for 1201.20 but with No. 5 en route to Eaglehawk now in photograph. 1201.22 - No. 26 at Quarry Hill terminus. 1201.23 - No. 26 at Quarry Hill terminus, view of front portion of tram only from a gate at the Bendigo cemetery. 1201.24 - Track at the end of the Quarry Hill line showing the point blades of the former "Y" terminus and the overhead for this. 1201.25 - No. 2 at the Quarry Hill terminus, looking along the former Trackwork. 1201.26 - as for 1201.25 1201.27 - number not used. 1201.28 - Golden Square terminus from some distance from the actual terminus, showing the Warning sign "TRAM" for motorists from the south. No. 7 at the terminus. 1201.29 - No. 7 passing through the Golden Square shopping centre. Numerous cars and pedestrians. Tram en route for North Bendigo. 1201.30 - No. 7 in High St. Golden Square, en route for North Bendigo. Photo taken after tram has passed photographer. 1201.31 - No. 7 in High St. just past Wattle St. with the Cathedral in the background. Tram has two SEC roof ads good side on photo, 'Everything's fine in my all electric kitchen' and 'Electrical cooking - clean, quick, economical'. 1201.32 - No. 7 in High St. nearing Wattle St. Has Cathedral in the background. Photo taken after tram has passed photographer.Information written on in black ink and date stamped on purple ink. 1201.1 - "No. 26 in Bond St just after leaving Long Gully" 1201.2 - "No. 26 climbing View St. from Charing Cross" 1201.3 - "No. 26 ascending View St. from Charing Cross (At Mackenzie St.)" 1201.4 - "View St. & Mackenzie St." 1201.5 - "No. 5 in View St. near Mackenzie St." 1201.6 - "No. 5 in View St. nearing Charing Cross." 1201.7 - "No. 7 in Nolan St. seen from Lake Weeroona Park." 1201.8 - "No. 7 entering McRae St. from Nolan St. Note "TRAM" warning sign on left. 1201.9 - "No. 7 in High St. passing Short St." 1201.10 - "No. 7 crossing Bendigo Creek bridge in High St. near Golden Square." 1201.11 - "No. 7 at Golden Square terminus" 1201.12 - "No. 7 at Golden Square terminus" 1201.13 - "No 7, 21 and 5 at Charing Cross" 1201.14 - "No. 7 at Golden Square terminus" 1201.15 - "No. 7 at Golden Square terminus" 1201.16 - "No 5 waiting at California Gully loop." 1201.17 - "Nos. 5 and 26 crossing at California Gully loop" 1201.18 - "No. 26 at Eaglehawk terminus" 1201.19 - "No. 21 arriving at Charing Cross from Golden Square" 1201.20 - "No. 26 at Charing Cross" 1201.21 - "Nos. 5 and 26 at Charing Cross." 1201.22 - "No. 26 at Quarry Hill terminus" 1201.23 - "No. 26 at Quarry Hill terminus seen through the gates of the Bendigo Cemetery." 1201.24 - "Quarry Hill terminus showing remains for former double track layout abandoned before 1964." 1201.25 - "No. 2 at Quarry Hill terminus" 1201.26 - "No. 2 at Quarry Hill terminus" 1201.28 - "The Southern approach to Golden Square with No. 7 standing at the terminus, "TRAM" warning sign on the left. 1201.29 - "No. 7 passing through Golden Square Shopping Centre" 1201.30 - "No. 7 in High St. Golden Square" 1201.31 - "No. 7 in High St. passing Wattle St." 1201.32 - "No. 7 in High St. nearing Wattle St."tramways, trams, bendigo, bond st., view st., nolan st., high st., eaglehawk, california gully, charing cross, quarry hill, trackwork, tram 2, tram 5, tram 7, tram 21, tram 26 -
 Flagstaff Hill Maritime Museum and Village
Record Book, before 1897
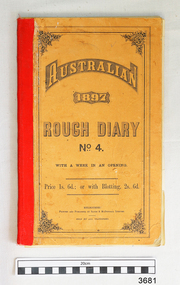
... This Record Book was printed and published in Melbourne by Sands & McDougall Limited and distributed to be sold by stationers for 1s. 6d (1 shilling and 6 pence) or with Blottings (blotting paper to soak up excess wet ink) for 2s. 6d..The back cover has advertising from the Colonial Mutual Life Assurance Society Limited, an insurance company based in Collins Street Melbourne.Inside the front cover is a Calendar for the year 1897 and a table with dates for Eclipses of the Sun and Phases of the Moon for that year. ...This Record Book was printed and published in Melbourne by Sands & McDougall Limited and distributed to be sold by stationers for 1s. 6d (1 shilling and 6 pence) or with Blottings (blotting paper to soak up excess wet ink) for 2s. 6d..The back cover has advertising from the Colonial Mutual Life Assurance Society Limited, an insurance company based in Collins Street Melbourne.Inside the front cover is a Calendar for the year 1897 and a table with dates for Eclipses of the Sun and Phases of the Moon for that year. ...This Record Book was printed and published in Melbourne by Sands & McDougall Limited and distributed to be sold by stationers for 1s. 6d (1 shilling and 6 pence) or with Blottings (blotting paper to soak up excess wet ink) for 2s. 6d..The back cover has advertising from the Colonial Mutual Life Assurance Society Limited, an insurance company based in Collins Street Melbourne.Inside the front cover is a Calendar for the year 1897 and a table with dates for Eclipses of the Sun and Phases of the Moon for that year. Contained within the diary is a loose page listing products and an order form for Sands & McDougall. There is also a section titled "Miscellaneous Information" that includes Weights and Measures, Postal Tarriffs, Holidays, Population of various towns and states, education and a Ready Reckoner for Hourly Wages. In UK in early 1800's the word 'mechanic' was applied to a broader range of skills such as working man, tradesman or artisan. Mechanics' Institutes were formed originally for voluntary, self-funded organisations, to improve the education of working men and to instruct them on their various trades. The germ of the idea came from a class formed in 1799 by Professor George Birbeck in Glasgow, Scotland, for journeymen mechanics (apprentice trade workers), with the first Institutes being organised in London and Manchester in the 1820's. By then the original aim had broadened and the Mechanics' Institutes were established as popular agencies of adult education. The Mechanics' Institutes were run by committees that provided facilities for a meeting room, hall suitable for lectures, and a library. Funding was raised locally and often supplemented by grants from government agencies for the purchase of books and other resources. Activities were community based. In Australia, Mechanics' Institutes were set up in New South Wales and in Tasmania in the late 1820's. Mechanics' Institutes began in Victoria, with the first one in Melbourne dating from 1839, providing similar services but in time offered services tailored to their specific area. Warrnambool's Mechanics' Institute (or Institution as it was sometimes called) was one of the earliest in Victoria. On 17th October 1853 a meeting was held where it was resolved to request the Lieutenant Governor of the Colony to grant land for the erection of a Mechanics' Institutes building. A committee was formed at the meeting and Richard Osburne chaired the first meeting of this committee. The land on the North West corner of Banyan and Merri Streets was granted but there were no funds to erect the building. The Formal Rights of the Warrnambool Mechanics' Institute's encompassed its aims and these were officially adopted in1859; "This Institution has for its object the diffusion of literary, scientific, and other useful knowledge amongst its members, excluding all controversial subjects, religious or political. "These objects are sought to be obtained by means of a circulating library, a reading room, the establishment of classes, debates, and the occasional delivery of lectures on natural and experimental philosophy, mechanics, astronomy, chemistry, natural history, literature, and the useful and ornamental arts, particularly those which have a more immediate reference to the colony." The Warrnambool Mechanics' Institute opened its first reading room in November1884 in the National School building at the corner of Banyan and Timor Streets. The Institute was funded by member subscription, payable on a quarterly, half yearly or yearly basis. Samuel Hannaford, the Manager of the Warrnambool Bank of Australasia, was the first Honorary Secretary of the Mechanics' Institutes, and an early President and Vice-President. He also gave several of the early lectures in the Reading Room. Another early Secretary, Librarian and lecturer was Marmaduke Fisher, the teacher at the National School. Lecture topics included The Poets and Poetry of Ireland', 'The Birth and Development of the Earth', 'The Vertebrae - with Remarks on the pleasures resulting from the study of Natural History' and 'Architecture'. In q856 the Reading Room was moved to James Hider's shop in Timor Street, and by 1864 it was located in the bookshop of Davies and Read. In the 1860's the Mechanics' Institute struggled as membership waned but in 1866, after a series of fund raising efforts, the committee was able to purchase land in Liebig Street, on a site then called Market Square, between the weighbridge and the fire station. A Mechanics' Institute building was opened at this site in August 1871. The following year four more rooms were added to the main Reading Room and in 1873 the Artisan School of Design was incorporated into the Institute. The same year Joseph Archibald established a Museum; however it deteriorated when he was transferred to Bendigo in 1877. In 1880, with Archibald's return to Warrnambool, the Museum was re-established, and in 1885 a new building was built at the back of the Institute to accommodate the re-created School of Design, the Art Gallery and the Museum. In 1887 the Museum section was moved to the former court house in Timor Street (for some time the walls of the building formed part of the TAFE cafeteria but all is now demolished)). In 1911 the Museum was transferred back to the original building and the management of the Mechanics' Institute was handed over to the Warrnambool City Council. The Museum and Art Gallery became one and housed many fine works of art., and the Library continued to grow. The building was well patronised, with records showing that at the beginning of the 20th century there were between 500 and 800 visitors. During World War One the monthly figures were in the thousands, with 3,400 people visiting in January 1915. The Museum was a much loved Institution in Warrnambool until the contents of the Museum and Art Gallery were removed to make room for the Warrnambool City Council Engineers' Department. The contents were stored but many of the items were scattered or lost. In 1975 the original building was demolished and the site became occupied by the Civic Centre, which included the new City Library. (The library was temporarily located in the old Palais building in Koroit Street.) In the process of reorganisation the Collection was distributed amongst the community groups: - The new City Library took some of the historic books and some important documents, historic photographs and newspapers. - The Art Gallery kept the 19th Century art collection and some of the artefacts from the museum. - The Historic Society has some items - The State Museum has some items - Some items were destroyed - Flagstaff Hill Maritime Village has old newspapers, Government Gazettes, most of the Mechanics' Institute Library, ledgers and documents connected to the Mechanics' Institute Library, some framed and unframed art works and some photographs. The Warrnambool Mechanics' Institute Library book collection is deemed to be of great importance because it is one of the few collections in an almost intact state, and many of the books are now very rare and of great value. NOTE: Pages of this book have been digitally recorded and archived.The Warrnambool Mechanics Institute book collection has historical and social significance for its strong association with the Mechanics Institute movement and the important role it played in the intellectual, cultural and social development of people throughout the latter part of the nineteenth century and the early twentieth century. The collection of books is a rare example of an early lending library and its significance is enhanced by the survival of an original collection of many volumes. Record book, Warrnambool Mechanics Institute Curator's Diary, 1897,June to Dec (Donations). Printed and published by Sands & McDougall, Melbourne. Australian Rough Diary 1897 No 4, Card covers printed with advertising, 7 days to an opening, lined with cash columns.flagstaff hill, warrnambool, shipwrecked coast, flagstaff hill maritime museum, maritime museum, shipwreck coast, flagstaff hill maritime village, great ocean road, warrnambool mechanics' institute, mechanics' institute records warrnambool, record book c. 1897 -
 Flagstaff Hill Maritime Museum and Village
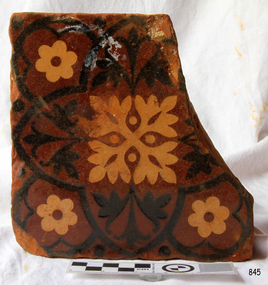
Ceramic - Tile, circa 1878
... life and property from the LOCH ARD registered as a shocking tragedy for the Colony of Victoria, at a time when social confidence and economic optimism were otherwise high. The wealth generated from Gold and Wool was increasingly being spent on grandiose private residences and imposing public buildings. The demand for quality furnishings and fittings was therefore strong. Among the products consigned to burgeoning colonial...life and property from the LOCH ARD registered as a shocking tragedy for the Colony of Victoria, at a time when social confidence and economic optimism were otherwise high. The wealth generated from Gold and Wool was increasingly being spent on grandiose private residences and imposing public buildings. The demand for quality furnishings and fittings was therefore strong. Among the products consigned to burgeoning colonial ...This Minton floor tile is from the wreck of the LOCH ARD along with other examples of this manufacture recovered from the wreck site and form part of the collection at Flagstaff Hill. The iron-hulled clipper ship from the Loch Line was heading for Port Phillip from London when it ran into the cliffs of Mutton Bird Island near Port Campbell and was wrecked on June 1st, 1878. The LOCH ARD was laden with high-value cargo including luxury goods intended for display at the Melbourne International Exhibition in 1880. One notable survivor from the ship’s freight manifest was the well-packed Minton porcelain peacock, a two-metre-high ceramic masterpiece of vivid glazed colours. The almost total loss of life and property from the LOCH ARD registered as a shocking tragedy for the Colony of Victoria, at a time when social confidence and economic optimism were otherwise high. The wealth generated from Gold and Wool was increasingly being spent on grandiose private residences and imposing public buildings. The demand for quality furnishings and fittings was therefore strong. Among the products consigned to burgeoning colonial markets by the Milton Pottery at Stoke upon Trent, were their new range of colourfully patterned but very durable floor tiles – ideal for the high-traffic spaces in the large civic buildings then being constructed in Australia and America. These new floor tiles were “encaustic”, meaning that their designs and colours were encased “within” the depth of the tile. Rather than their decorative patterns being glazed onto the surface of the tile, their inlaid designs were created during the manufacturing process, as “coloured slips” (or liquid clay) were poured into a deep pre-moulded casting. When fired, the resulting tile was colour-fast and design-fast. A brief history of the Loch Ard (1873-1878): - The sailing ship Loch Ard was one of the famous Loch Line ships that sailed from England to Australia. Barclay, Curdle and Co. built the three-masted iron vessel in Glasgow in 1873. It had sailed three trips to Australia and one trip to Calcutta before its fateful voyage. Loch Ard left England on March 2, 1878, under the command of recently married, 29-year-old Captain Gibbs. It was bound for Melbourne with a crew of 37, plus 17 passengers. The general cargo reflected the affluence of Melbourne at the time. Onboard were straw hats, umbrellas, perfumes, clay pipes, pianos, clocks, confectionery, linen and candles, and a heavier load of railway irons, cement, lead and copper. Other cargo included items intended for display in the Melbourne International Exhibition of 1880. The Loch Ard had been sailing for three months and was close to its destination on June 1, 1878. Captain Gibbs had expected to see land at about 3 am but the Loch Ard ran into a fog that greatly reduced visibility and there was no sign of land or the Cape Otway lighthouse. The fog lifted at 4 am and the sheer cliffs of Victoria's west coast were much closer to them than Captain Gibbs expected. He tried to manage the vessel but failed and the ship struck a reef at the base of Mutton Bird Island, near Port Campbell. The top deck loosened from the hull, and the masts and rigging crashed down, knocking passengers and crew overboard. The lifeboat was launched by Tom Pearce but crashed into the side of Loch Ard and capsized. He clung onto its overturned hull and sheltered under it. He drifted out to sea and the tide brought him back to what is now called Loch Ard Gorge. He swam to shore and found a cave for shelter. A passenger, Eva Carmichael, had raced onto the deck to find out what was happening and was confronted by towering cliffs above the ship. She was soon swept off the ship by a huge wave. Eva saw Tom Pearce on a small rocky beach and yelled to attract his attention. He swam out and dragged her to the shelter of the cave. He revived her with a bottle of brandy from a case that had washed up on the beach. Tom scaled a cliff in search of help and followed some horse hoof prints. He came from two men from Glenample Station, three and a half miles away. He told the men of the tragedy and then returned to the gorge while the two men rode back to the station to get help. They reached Loch Ard Gorge and took the two shipwreck survivors to Glenample Station to recover. Eva stayed at the station for six weeks before returning to Ireland by steamship. In Melbourne, Tom Pearce received a hero's welcome and was presented with a medal and some money. Of the 54 crew members and passengers on board, only two survived: the apprentice, Tom Pearce and the young woman passenger, Eva Carmichael, who lost her family in the tragedy. One of the most unlikely pieces of cargo to have survived the shipwreck was a Minton porcelain peacock - one of only nine in the world. The peacock was destined for the Melbourne International Exhibition in 1880. It had been well packed, which gave it adequate protection during the violent storm. Today, the Minton peacock can be seen at the Flagstaff Hill Maritime Museum in Warrnambool. From Australia's most dramatic shipwreck, it has now become Australia's most valuable shipwreck artefact and is one of very few 'objects' on the Victorian State Heritage Register. The Minton floor tile is significant for its hard-wearing yet attractive design. The shipwreck of the LOCH ARD is of State significance. Victorian Heritage Register S417. Flagstaff Hill’s collection of artefacts from LOCH ARD is significant for being one of the largest collections of artefacts from this shipwreck in Victoria. It is significant for its association with the shipwreck, which is on the Victorian Heritage Register (VHR S417). The collection is significant because of the relationship between the objects, as together they have a high potential to interpret the story of the LOCH ARD. The LOCH ARD collection is archaeologically significant as the remains of a large international passenger and cargo ship. The LOCH ARD collection is historically significant for representing aspects of Victoria’s shipping history and its potential to interpret sub-theme 1.5 of Victoria’s Framework of Historical Themes (living with natural processes). The collection is also historically significant for its association with the LOCH ARD, which was one of the worst and best-known shipwrecks in Victoria’s history. A square Minton floor tile with a black and apricot pattern against a chocolate brown background. There is a large chip missing. This decorative floor tile was recovered from the shipwreck of the LOCH ARD. On the back, or base, of the tile is inscribed the number “46” and the letters “Minton & Co Patent Stoke upon Trent”.flagstaff hill, warrnambool, shipwrecked coast, flagstaff hill maritime museum, maritime museum, shipwreck coast, flagstaff hill maritime village, great ocean road, loch line, loch ard, captain gibbs, eva carmichael, tom pearce, glenample station, mutton bird island, loch ard gorge, encaustic tile, melbourne international exhibition, floor tile, minton floor tile -
 Flagstaff Hill Maritime Museum and Village
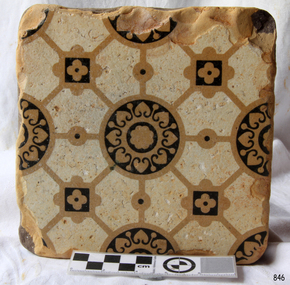
Ceramic - Tile, circa 1878
... life and property from the LOCH ARD registered as a shocking tragedy for the Colony of Victoria, at a time when social confidence and economic optimism were otherwise high. The wealth generated from gold and wool was increasingly being spent on magnificent private residences and imposing public buildings. The demand for quality furnishings and fittings was therefore strong. Among the products consigned to burgeoning colonial...life and property from the LOCH ARD registered as a shocking tragedy for the Colony of Victoria, at a time when social confidence and economic optimism were otherwise high. The wealth generated from gold and wool was increasingly being spent on magnificent private residences and imposing public buildings. The demand for quality furnishings and fittings was therefore strong. Among the products consigned to burgeoning colonial ...This Minton floor tile is from the wreck of the LOCH ARD. Other examples of this manufacture have been recovered from the wreck site and form part of the collection at Flagstaff Hill. The iron-hulled clipper ship from the Loch Line was heading for Port Phillip from London when it ran into the cliffs of Mutton Bird Island near Port Campbell and was wrecked on the early morning of June 1, 1878. The LOCH ARD was laden with high-value cargo including luxury goods intended for display at the Melbourne International Exhibition in 1880. One notable survivor from the ship’s freight manifest was the well-packed Minton porcelain peacock, a two-metre-high ceramic masterpiece of vivid glazed colours. The almost total loss of life and property from the LOCH ARD registered as a shocking tragedy for the Colony of Victoria, at a time when social confidence and economic optimism were otherwise high. The wealth generated from gold and wool was increasingly being spent on magnificent private residences and imposing public buildings. The demand for quality furnishings and fittings was therefore strong. Among the products consigned to burgeoning colonial markets by the Milton Pottery at Stoke upon Trent were their new range of colourfully patterned but very durable floor tiles – ideal for the high-traffic spaces in the large civic buildings then being constructed in Australia and America. These new floor tiles were “encaustic”, meaning that their designs and colours were encased within the depth of the tile. Rather than their decorative patterns being glazed onto the surface of the tile, their inlaid designs were created during the manufacturing process, as “coloured slips” (or liquid clay) that were poured into a deep pre-moulded casting. When fired, the resulting tile was colour-fast and design-fast.The Minton encaustic floor tile is significant for its method of manufacture which makes it durable as well as decorative. The shipwreck of the LOCH ARD is of State significance. Victorian Heritage Register S417. Flagstaff Hill’s collection of artefacts from LOCH ARD is significant for being one of the largest collections of artefacts from this shipwreck in Victoria. It is significant for its association with the shipwreck, which is on the Victorian Heritage Register (VHR S417). The collection is significant because of the relationship between the objects, as together they have a high potential to interpret the story of the LOCH ARD. The LOCH ARD collection is archaeologically significant as the remains of a large international passenger and cargo ship. The LOCH ARD collection is historically significant for representing aspects of Victoria’s shipping history and its potential to interpret sub-theme 1.5 of Victoria’s Framework of Historical Themes (living with natural processes). The collection is also historically significant for its association with the LOCH ARD, which was one of the worst and best-known shipwrecks in Victoria’s history.A square Minton floor tile with a black and beige pattern against a white base. This encaustic floor tile was recovered from the shipwreck of the LOCH ARD. On the back, or base, of the tile is inscribed the number “46” and the letters “Minton & Co Patent Stoke upon Trent”.flagstaff hill, warrnambool, shipwrecked coast, flagstaff hill maritime museum, maritime museum, shipwreck coast, flagstaff hill maritime village, great ocean road, loch line, loch ard, mutton bird island, loch ard gorge, minton floor tile, encaustic tile, melbourne international exhibition, floor tile -
 Flagstaff Hill Maritime Museum and Village
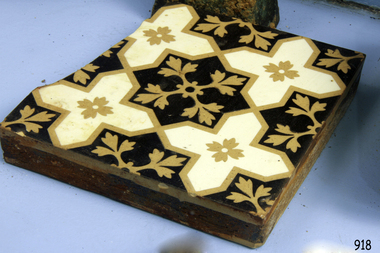
Ceramic - Floor Tile, circa 1878
... life and property from the Loch Ard registered as a shocking tragedy for the Colony of Victoria, at a time when social confidence and economic optimism were otherwise high. Wealth generated from Gold and Wool was increasingly being spent on grandiose private residences and imposing public buildings. The demand for quality furnishings and fittings was therefore strong. Among the products consigned to burgeoning colonial...life and property from the Loch Ard registered as a shocking tragedy for the Colony of Victoria, at a time when social confidence and economic optimism were otherwise high. Wealth generated from Gold and Wool was increasingly being spent on grandiose private residences and imposing public buildings. The demand for quality furnishings and fittings was therefore strong. Among the products consigned to burgeoning colonial ...This Minton floor tile is from the wreck of the Loch Ard and is currently on display in the Great Circle Gallery at Flagstaff Hill. The iron hulled clipper ship from the Loch Line was heading for Port Phillip from London, when it ran into the cliffs of Mutton Bird Island near Port Campbell. The Loch Ard was laden with a high value cargo including luxury goods intended for display at the Melbourne International Exhibition in 1880. One notable survivor from the ship’s freight manifest was the well packed Minton porcelain peacock, a two meter high ceramic masterpiece of vivid glazed colours. (This is also on display in the Great Circle Gallery). The almost total loss of life and property from the Loch Ard registered as a shocking tragedy for the Colony of Victoria, at a time when social confidence and economic optimism were otherwise high. Wealth generated from Gold and Wool was increasingly being spent on grandiose private residences and imposing public buildings. The demand for quality furnishings and fittings was therefore strong. Among the products consigned to burgeoning colonial markets by the Milton pottery at Stoke upon Trent, were their new range of colourfully patterned but very durable floor tiles ideal for the high-traffic spaces in the large civic buildings then being constructed in Australia and America. These new floor tiles were “encaustic”, meaning that their designs and colours were encased “within” the depth of the tile. Rather than their decorative patterns being glazed onto the surface of the tile, their inlaid designs were created during the manufacturing process, as “coloured slips” (or liquid clay) were poured into a deep pre-molded casting. When fired, the resulting tile was colours-fast and design-fast. The Minton floor tile is significant for its hard-wearing yet attractive design. The shipwreck of the Loch Ard is of significance for Victoria and is registered on the Victorian Heritage Register ( S 417). Flagstaff Hill has a varied collection of artefacts from Loch Ard and its collection is significant for being one of the largest accumulations of artefacts from this notable Victorian shipwreck of which the subject items are a small part. The collections of objects give us a snapshot of how we can interpret the story of this tragic event. The collection is also archaeologically significant as it represents aspects of Victoria's shipping history that allows us to interpret Victoria's social and historical themes of the time. Through is associated with the worst and best-known shipwreck in Victoria's history. A square Minton floor tile with a dark brown, beige and white pattern. The tile has a piece broken off along one side and some chipping along the edges. This ‘encaustic’ floor tile was recovered from the shipwreck of the LOCH ARD. Branded "... MINTON&CO Patent ..."flagstaff hill, warrnambool, flagstaff hill maritime museum, shipwreck coast, flagstaff hill maritime village, great ocean road, loch line, loch ard, captain gibbs, eva carmichael, tom pearce, glenample station, mutton bird island, minton floor tile, encaustic tile, melbourne international exhibition, floor tile
