Sunshine and District Historical Society Incorporated
Photograph - Sunshine Advocate Negative Collection
Negative collection donated to SD&HS by the Fairfax Community News Paper Group incorporating Northwestern Suburbs.Sunshine Advocate Negative Years|1988|1989|1900|1992|1993|1994|1995|1998|1999|2000
Envelope No Subject
1.1 Braybrook Tenants - Don McKay & Jan White
1.2 St. Albans Pool Summer Pictures
2.1 First Baby Born Wanda Maffi
2.2 Albion Primary School Garden Won Award
3.1 Opening Of Keilor Downs Shopping Centre By Mayor Of Keilor
3.2 Sunshine Swimming Pool
4.1 Soccer Camp Winners
4.2 McKay's Australia Factory
5.1 Soccer Xmas Picnic
5.2 Ukranian Students - Simone Cymbalak & Victoria Dutka
6.1 Joe Camelleri & Dust On His House
6.2 Rhonda Martin In Drain
7.1 Kids At Sunshine Pool & St. Albans Pool Summer Pictures
7.2 Dancers At Sunshine High School
7.3 Go-Carts
8.1 Scrub Fire Abercain Crt Deer Park Residents
8.2 Tai Kwon Do Boys
9 Flag To Exchange Students
10.1 Trainer Family Home
10.2 Pam Chabury Burnt House
11.1 Boral Quarry
11.2 Flower Shop
12.1 Samantha Sieradzki Exchange Student
12.2 Dorrie & Ron Huchison 50th Wedding Anniversary
13.1 John Handley
13.2 Staff Of Ultra Tune Ballarat Rd Sunshine
14.1 Vandalism To St. Albans Shops
14.2 Kate Young - VCE Graduate
15.1 Stan Cash St. Albans Store
15.2 Cr. Ciro Lombardi With Overgrown Concrete Drain Kings Park Area Gillespie Rd St. Albans
16.1 Alice & Fred Madden Home
16.2 Mr & Mrs Bob Peel 50th Wedding Anniversary
17.1 Florence Southgate Home
17.2 Industrial Accident South Rd Braybrook
18.1 School Leavers
18.2 Bowls Club Committee St. Albans Bowls Club Kings Park Reserve St. Albans
19.1 Mr Ypung & Mr Wisnieski - Peerless Factory
19.2 Sunshine Traders Dean Olarenshaw & Bob James
20.1 Andrew Doyle Bowls Player
20.2 Jeff Unger
21.1 Joe, Vimce & Marion Fagone - Pipe Makers Park
21.2 Greg Eade
22.1 Avondale Heights Scrub Fire
22.2 Basketballer Dave Stuart and Chirstopher & Robert Catania
23.1 Pauline McIntyre
23.2 McKay's Factory Gates
23.3 Five Ways Birthday Shirly & Mark Maroney
24.1 Jack Honey
24.2 Kay Setches Opens New Occasional Care Scheme Westvale Community Centre Kings Rd
25.1 Real Estate
25.2 Tony Knarth & Chris White For Neighbourhood Watch
26.1 Taylors Lakes Hotel
26.2 St. Albans Meadows School
27 Keilor Downs Secondary College
28.1 Steven Kling Of St. Albans Essendon Town Clerk & Youngest Town Clerk Of Melbourne
28.2 Lady With 1954 Membership Ticket To Footscray Football Games Premiership Year
29.1 Mr Wally Pichner 32 Years Of Service At Post Office St. Albans
29.2 Kids Holiday Program
30 Mr Wency Garrata Who Has Set Up Assoication Of Filopino Professionals In Western Suburbs
31.1 Joe Kanati - Refused To Be Allowed To Sell Travel MET Tickets By Met
31.2 Ian Baker
32.1 Mrs Parsons & Garnett St Sunshine
32.2 Peter Inkstler Old Sunshine Footballer
33.1 Derelict House Kosky St Sunshine
33.2 Mr Roberts & His Pumpkins
34.1 Ian Mill & Marie
34.2 Preps At School Albion North Primary School
34.3 Don Gray, Son Of Caretaker Of Gardens Years Ago, H.V. McKay Gardens Anderson St Sunshine
35 Dr. O'Gallagher Dental Unit Sunshine Hospital Sunshine
35.1 Tom Fox
35.2 Women Whose Course Has Been Cancelled By Western Institute After Admission
36.1 Mr. W. Peeler
36.2 Chris' Friends Talmage St Albion
37.1 Housing Tenants Protest
37.2 Les Twentyman
38.1 Marie Rice Shows Us The Rats
38.2 Pilkingtons Ballarat Rd - Bruce Harding & John Brezovel
39.1 Sister Marie Boulee Of St. Albans Going To Nigeria
39.2 Alan Griffiths Sacred Heart Primary School
40.1 Mrs Winifred Honey
40.2 House Fire Almond St Brooklyn
41.1 Dracula Advertising SolarLight & Skylights
41.2 Jenny Bradley At Keilor Park Athletics Track
42.1 Kellie Sutton
42.2 Lambada Dancers Claudia Karati Marie Mill Centre Sunshine
43.1 Michael Wood - Owner Of Shopping Centre, Crowd & K-Mart
43.2 Fred & His Hired Cars
44.1 Jack Roberts & Jack Sheridan
44.2 Piero At Alfrieda House Receptions Alfrieda St, St. Albans
45.1 Catherine Bishop & Keilor Ensemble
45.2 Principal, Deputy Principal & Kids St. Alban Meadows Primary School
46.1 Tina Miller
46.2 Asbestos House In Braybrook
47.1 Greek Church Service & Procession
47.2 Gerald Pemberton
47.3 Bridge Afton St & The Boulevard Maribyrnong
48.1 Jesse Boyce
48.2 Manager & Staff Leaving Sunshine Plaza
48.3 Don McKay & Peter Westmore At Old Massey Ferguson Factory
49.1 K'im Lyndon - Councillor Elect
49.2 Angela Disco HSC Examines
49.3 Nan Lumbers Tuck Shop
50.1 H & K Trendy
50.2 St. John's Church Deer Park
51.1 Joan Carstairs
51.2 George & Janet Tourlotos In Laneway
52.1 Unveiling Of Speeding Sign Along South Road
52.2 100 Years Old Sunshine Primary School Hampshire Rd Sunshine
53.1 Kids & Video Games
53.2 Sunshine Tip & Smell Seeping Over Residential Area
53.3 Trish Alexander Western Youth Support Unit Ascot Vale
54.1 Lanburner - Licencee Of Only Hotel In Taylor Lakes
54.2 Eril Pasula St. Albans Quality Shoes
55.1 Shop Managers Of Chas Wilks Jewellers
55.2 Robyn Gillis & Itay Peddle Hipfrog Deer Park College
56.1 Bill Button Who Spent Hours Cleaning Block Arcoss Road
56.2 Lady Nelson Childcare Nicole Huggard & Joe Debono
57.1 Wally Webb Who Recently Retired From Keilor City Council
57.2 St. Albans Secondary College An Lieu & Anh Hoai Hoang
58.1 Rosemary Drake - Social Worker St. Albans Migrant Resource Centre
58.2 Burton Cresent Oval Circus
59 Ardeer South Primary School Zafer Salih & Danielle Sparke
59.1 Norm Anstee Leaves Massey Ferguson
60.1 Mr & Mrs Waddell 50th Annivesary
60.2 Care For Kids Program St Sunshine East Primary School
61.1 Altona Babminton Luke Talbot & Bert Talbot
61.2 Argyle Florist 11 Devonshire Rd Sunshine
62.1 Long Que Of Muns & Kids Expecting For Baby Immunizations
62.2 Lourdes Thomas Lollypop Lady
63.1 Fred & Paul Pointer
63.2 Alex Tzoras Furniture Supermarket
64.1 Jun White At Suspension St Site
64.2 Tony Fox (Fox Parts)
65.1 Bernard Rielly Re: Met Ticket Selling Locations Incorrect
65.2 St. Albans Leisure Centre (Aerobics) Staff
66.1 Gavin Watt's With Cricket Video & Book
66.2 George Popodolo (Abbott & Dean)
67.1 Senior Citizens Moving Into Building Station Rd Deer Park
67.2 John Castle
68.1 Kerry Saunders Supporting Sportswoman Calendar
68.2 Trevor Redman
69.1 Cr. Rhonda Martin At Intersection Where A Crossing Is Needed
69.2 Dr. John Lawrie & New OP6 Machine For X-Rays In Your Mouth 23 Victoria Cres St. Albans
70.1 New Kindergarten Taylors Lakes
70.2 Class Of 1991 Shots Of Grade 6 Kids Ardeer Primary School
71.1 Head Shots Of Grade 6 Kids St. Albans North Primary School
71.2 Braybrook Primary School Doug Hawkins
72.1 Mrs Gina Valastro & Daughter Amanda For Baby Picture Contest
72.2 Bill Barnett Old Guy
73.1 Head Shots Of Grade 6 Kids Deer Park Primary School
73.2 Class Of 1991 Taylors Lakes Primary School
74.1 Joan Kirner Renaming School
74.2 Victoria Square Shops Cnr Elaine St & East Esplanade, St. Albans
75.1 Highest Pass Rate Amongst HSC Students Last Year - They Are Visting Kealba High School
75.2 Younsters Trying to Cross The Road, Cnr Grantham Pde & Main Rd West, St. Albans
76.1 Jean & Rob Robertson Who Support The Homeless
76.2 Rev. Thick Nhu Dinh, A Monk
77.1 3 Artists At The Hunt Club
77.2 "Feast Of St. Pauls", St. Pauls Church 200 Glengala Rd Sunshine West
78.1 Bad Condition Of St. John's Building Fraser St
78.2 Colin Clowes St. Albans Telephone Exchange
79.1 New Registrar Lather Hall Essendon
79.2 Telephone Exchanged Victoria St, St. Albans
80.1 Bridge Being Built
80.2 Bernard Reilly In Bus Stop No Longer Used Grieve Pde Brooklyn
81.1 Indoor Cricket
81.2 The Power House Talmage St Albion
82.1 Executive Director Head Of Nursing & A Patient
82.2 Dr. Anton Kafta
83.1 Rubblish Along Taylors Rd St. Albans
83.2 Senior Cizitens Enjoying Lunch Deer Park Shopping Centre
84.1 R.A.C.V. With Steve Watkins
84.2 Opening Of Cermaic Area Hunt Club Deer Park
85.1 Twins
85.2 Ashley St Tottenham
86.1 Soccer Melbourne Croatian V's Sydney Croatian
86.2 People Complaining About Noise
87.1 Soccer George Cross V's Sydney Croation
87.2 Kealba Playgroup At Animal Farm
88.1 Grant At Cameron Action
88.2 Stolen Seat Susan & Timothy Lutze
89.1 Wemer Schloemer
89.2 George Seitz Creek Clean Up Taylors Lakes
90.1 Majestic Video Inside Shot
90.2 Austpost Jerry Katz & Owner Of Newsagency George Nappi 21 Northumberland Rd Sunshine North
91.1 Massive Pumpkin & It's Owner
91.2 Re-Union For Tottenham Primary School
92.1 Mark Wilson & Piece Of Berlin Wall
92.2 Street Scene St. Albans Ballarat Rd
93.1 Displays Of Products & Salespeople Highpoint Shopping Centre
93.2 Ron Doerre - Video Enthusiast
94.1 Fr. Nicholas Of Greek Orthodox
94.2 Student Forum Sunshine Technical School Graham Street
95.1 Ex U.S.A. Basketballer Presented With Mazda 121
95.2 Run Down House Street Watch Series Tyler St Sunshine
96.1 Ralph Willis At I.C.I. Yarraville
96.2 Swim Carnival Sunshine Pool
97.1 R.A.A.F. Tottenham Wal T. Brennele & Al I. Brezinseak
97.2 Street Watch Hargreaves Cres
98.1 Wally Mazurak At Sunshine Court
98.2 Street Watch Fraser St Sunshine
99.1 Maribyrnong Medical Centre - Nancy Cain & First Babies Born
99.2 Street Watch Mr Turnball
100.1 Construction Sign May 32nd Ballarat Rd Footscray
100.2 Garbo Collection
101.1 R.A.A.F. Coral Holliday & Rodger Barnett
101.2 SRC On The Multi Complex Campus Sunshine Secondary College South Rd Braybrook
102.1 Paul Guyett Stancash Warehouse
102.2 Jack & June Jones 50th Wedding Anniversary
103.1 Anna Hercon & Her Tomatoe
103.2 Jamieson St Reserve
104.1 Robbed Ladies
104.1 Bernard Reilly Ten Pin Bowling Centre Car Park
105.1 Pizza Shop Fire
105.2 St. Albans East Primary School Maribyrnong River Clean Up
106.1 Sunshine Plaza Ada
106.1 Sunshine School Shots
107.1 Nancy Curtis Maribyrnong River
107.2 Wilton Harris 100 Years Old With Sunshine Mayor Bernard Reilly
108.1 Houses & Cars
108.2 St. Albans Post Office Peter Burrows
109 Eugene Didenkowski Pharmacy St. Albans
110.1 Georgina Liabos
110.2 Sunshine Technical School Arron, Tony & Justin
111.1 Adam Kaczanowski
111.2 Tottenham Primary School "Three Sided Football"
112.1 Plan Of Shops
112.2 Red Cross Isobal Caithrens
113 Street Watch Thomson St Sunshine
114.1 Councillors
114.2 St. Albans Primary School Science Display Alan Williams
115.1 Plane
115.2 Polish Club
116.1 Eric Goss
116.2 Brenda James At The Build The Wes Rally
117.1 Don McKay Mayor
117.2 Stevensville Primary School Huong Duons & John Calder
118 Fun City Go-Karts
119 Illegal Car Sales Neale Rd Deer Park
120 Keilor Scouts Mathew Norton & Stan Lucien
121 Albion North Primary School Brett & Maree Brocklesby
122 Jan De Gabrial Football Coach
123 Mrs Whitlow & Her 2 Kids Albion Community House Selwyn St
124 Steve Bound & Staff At Supermarket - Rambow
125.1 Jack Culpin Federal Candidate St. Albans Railway Station
125.2 Cr. Rhonda Martin & Junior Council Kids
126.1 Deer Park Blast
126.2 Nursery Rhymes Dress Up Day Deer Park North Primary School
127.1 Cathy Brown & Brenda James
127.2 Cr. Charles Skidmore At His Waste Collection Business 4 - 12 Salisbury St Sunshine North
128.1 Students At Western Institute
128.2 Maurice & Jennry Boase Sunshine Tolty Base
129.1 St. Albans South Primary School Kids
129.2 Opening Of New Extension To R.S.L. Club Rooms 16 Hoffmans Rd East Keilor
130.1 Sunshine South Primary School Kids
130.2 Aerial View Intersection Of Briggs St, Arthur St & Alfrieda St, St. Albans
131.1 John Kontek & Graeme Toomey
131.2 Street Watch Willaton St, St. Albans
132.1 Eden's Gardens Multicultural Celebrations
132.2 State Of Fire Station Hampshire Rd Sunshine
133.1 Norm & Joan Wale
133.2 Easter Bonnett Parade Deer Park Primary School
134.1 Dukes 50 Years Wedding
134.2 Trees Ripped Out Dundalt St Sunshine
135.1 Hot Rod Club Members
135.2 Energy Park Sunshine
136 Isabel McKay
137.1 Don McKay & Wally At The Peerless Factory
137.2 Apex Club Up 9 Metres Tower Keilor Shopping Centre
138.1 Cheque From R.A.A.F.
138.2 Lenthon Family Acting Family
139 Pile Of Concrete St. Albans Square
140 Christine Lashowski Outside Keilor Hotel
141 Huge Oversized Zucchinis Owned By Mrs Eve Tandy
142.1 Winners Of National Maths Competition
142.2 Centernary Fire Truck
143.1 Rene Carstain Nee Drinkwater
143.2 Mudford Family
144.1 Highpoint Shopping Centre Car Park Robin Raniera
144.2 Streetwatch Cnr Methera St & Euroa Ave Sunshine
145.1 Launching Of Book By Prue McGoldrick By Barry Jones
145.2 Tubemakers St. Albans Rd
146.1 Claire Brennan Dee Dunn
146.2 Val Moore On Old Bridge Arundel Rd
147.1 R.A.A.F. & Cubby House At Furlong Park School For Deaf
147.2 Tony Salvucci & Staff At Tasman Meats Butchers Milleara Mall Shopping Centre
148.1 Children's Art Display
148.2 Baby Boom At Hospital Mums & Babies Sunshine Hospital Furlong Rd
149.1 Eric Maxwell
149.2 India Restaurant
149.3 Keilor Basketball Stadium
150.1 Stenson Rd Named After Mrs Emma Hall & Mrs S.T. Honey
150.2 Girls At Avondale Secondary College
150.3 Class Of 1991 Moville Primary School
151.1 Cake Being Cut R.A.A.F. Base Tottenham
151.2 Kids & Principal Keilor Downs College
151.3 Street Watch Cutts St
152.1 Frank Micalef
152.2 Sunshine Activity Unit Sarah Gallagher
153.1 Braybrook Hotel
153.2 Tom Diele
153.3 Sunshine Christian School Jane Harper & Adrianna Sueno
154.1 Old Boys Football Footscray V's Collingwood
154.2 Roadworks O'Hean St, St. Albans
154.3 Overnewton College Christopher Blake & Douglas Blake
155.1 Michelle Lee & Others
155.2 Margaret Marks
155.3 Earthmoving Equipment On Building Site Robinsons Rd Deer Park
156.1 Huseyon Ramadan Volleyball
156.2 Louise Chircop & Others
156.3 Kevin & Bill Burke
156.4 Hotel & Manager Glengala Rd Sunshine
157.1 Eric Lund Western Insitute
157.2 Brayden Sinnamon & "T" Model Ford Bath Car
157.3 Mrdas Ballarat Rd Sunshine
158.1 Pete The Clown At West Sunshine Community Centre
158.2 Caroline Hogg & Children Services Expo
158.3 Plumbers Hardware
159.1 Constable Steve Reidy & Senior Constable Jim Panpoulos & Dope Plants
159.2 Oldies Dancing For Senior Citizens Week
160.1 Roland de Gabrielle
160.2 Chinese Restaurant
160.3 Keilor Historical Society
161.1 Fernando Ianni
161.2 St. Albans South Primary School Ashtons Circus
161.3 Past & Present Students & Teacher Putting A History Of The School Together Tottenham Community Secondary College Churchill Ave
162.1 Rita Nugara
162.2 Lithuania Medical Student
162.3 Rosemary Szirom & Maureen Kavanagh Under Gaslights Keilor Hotel
163.1 George Mullenger Deer Park Engineering
163.2 Nick Pino At Intersection & Petrol Station
163.3 Market Plumbing & Hardware
164.1 Sharon Auld - Competition Winner
164.1 Minister For Transport Tim Kennan Opening Ginifer Railway Station
164.2 Sunshine Tips
165.1 Graham Bonar & Wool Bales
165.2 Multicultural Dress & Food Day
165.3 Forrest St Contaminated Soil Site
166.1 Croatian Soccer Club
166.2 Ignaz Martinv At Arshria House
166.3 Hotel Installing New Bottle Shop Kealba Hotel
167.1 Peter Gordon Chatting To Kids
167.2 Outside Of Building Greek Orthodox Church
167.3 Launch Of "Good Shopping" Tour Sunshine Safeway
168.1 Andy Kratsis Used Car Lot
168.2 Henry Frithof Keilor Points Out A Sand Excarvation
168.3 Flicker's Employees St. Albans Rd & Gilmour Rd St. Albans
169.1 Teacher Strike
169.2 Intersection Being Built Sunshine Ave Taylors Lakes
169.3 Leyla Karahan & Baby Efra 29a Alfrieda St, St. Albans
170.1 Comalco Winner Michael Demjancuk Barkly Bottle & Recycling
170.2 Historial Homestead With Patricia Sydenham Park Golf Course
170.3 Bernard Reilly & Intersection Leading To Nowhere Interection Ballarat Rd & Station St
171.1 Winner Of Garden Competition Antoinette Ventresca
171.2 Veronica Larsen
171.3 Street Watch Lane In Between Houses Craigavon Crt Deer Park
172.1 Des Mitchell Retiring After 24 Years At Council
172.2 Kids Being Moved Out Of Portable Classrooms Deer Park North Primary School
172.3 New Bus Manufacturing Plant
173.1 Maths Winner Shawn Hindmarsh
173.2 Steve Trimcevslci In Zokky's Leather Shop
173.3 Nescell Factory Cnr Margrave St & West Esplanade St. Albans
174.1 Kids Decorating Walls Around Avondale High School
174.2 Kids Peace Conference
174.3 Street Watch Mernda St Pipe To Creek Sunshine
175.1 Teddy Bears Picnic For Kealba Play Group
175.2 Ascot Vale Primary Kids
175.3 Remy Sarmiento Philipino Protester
176.1 Art Token Around Presentation Niddrie Libary
176.2 Susan Pearce & John Scott With Trees
176.3 Maria Clak & Rick Vankeulen & Kids
177.1 Miss Teenager Entrant Kylie Bailey
177.2 Highpoint Fashion Parade
177.3 Peter Forbs & Michael Iacuone
178.1 Melissa Fanugia Miss Teenager Entrant
178.2 St. Albans Primary School Anzac Day With Wreath Laying Elena Krisonis
178.3 Colin & Elizabeth Paterson 50th Wedding Anniversary
179.1 St. Albans Mens' Nappy Changing Competition Grant Eadie
179.2 Premier & Arch Bishop Of Australia and Melbourne Opening Greek Church McKechnie St. Albans
180.1 Bowls Premiership Flag Sunshine R.S.L.
180.2 Jutia Scholz With Castle
180.3 Bill Chapman
181.1 Gesa Lindemann
181.2 Funeral Of Arthur Street Sacred Heart Catholic Church St. Albans
182.1 Works Going On At Railway Tracks
182.2 Noel Mumford
182.3 Black Soil Street Watch Ballarat Rd Near Hunt Club Deer Park
183.1 Mable McArdle
183.2 Sr. Marie Kehoe RSM
183.3 Jan White & Rubblish Dumped On Land Perry St, St. Albans Laneway
184.1 Matthew Brookshaw
184.2 Kylie Roberts (Selected In State Swin Team)
184.3 Keilor 30th Anniversity Carnival
185.1 Peter Ryan
185.2 Presentation Of Plaques By Mayor
185.3 Mother Mary Moshovakif & Snatched Vicki (Baby) 84 Atheldene Drive St. Albans
186.1 John Stevens - John St & Murray Stevens - Murray St
186.2 St. Pauls Primary School Visiting Keilor Council Chambers
186.3 8 Indonesian Bureaucrats Visiting St. Albans Secondary College
187.1 Police & Anti Drug Kit Deer Park North Primary School
187.2 Sugar Gilders Organ Pipes Calder Highway
187.3 Local People Spaldings McIntyre Rd Sunshine
188.1 Romanian Students Studing At School
188.2 3 Sergents & Easter Eggs R.A.A.F. Base Tottenham
188.3 Phyllis Restall & Twins Club
189.1 Jim Huseyin
189.2 Bill Jessop With Mayor Don McKay 74 Devonshire Rd Sunshine
189.3 Salvos Homeless People Program Launch 42 Devonshire Rd Sunshine
190.1 Kids In Fancy Dress
190.2 Joe Borrell
190.3 "B" Grade Champion Cricket Team Sunshine Cricket Club
191.1 Cars Being Sold On Vacant Land
191.2 Werner Schlomerers Store - Damien Gahan
191.3 Marie Fenech At Bad Footpath St. Albans
192.1 Model Of New Church
192.2 Sunshine Mayor & Children
192.3 Street Watch Shoping Centre St. Albans Ralph Fiovino
193.1 15 Cyclists With Sponsorship From Police Blue Light Disco
193.2 Demostration Over Public Housing Auctions Maidstone
194.1 K-Mart Manager & Staff
194.2 Petitioners For Bus Route Keilor Downs
194.3 100th Birthday Celebrations Sunshine Primary School
195.1 Launch Of Video By Kay Steches
195.2 Peter Williams
195.3 Sunshine Primary School 100th Birthday Tanya Simouska
196.1 Teachers & Students On Victorian Bike Ride
196.2 Keilor Downs Shopping Centre
196.3 Brimbank Park Heart Paths Project Marianne Khail & Michelle Fincke
197.1 English Poet John Keats
197.2 Toy Donation
197.3 Copy Of Negatives Of Dan Cauaghan
198.1 Sunshine Kindergarten Police Hanging Over Safety Certificates
198.2 Chas Wilks Jewellery
198.3 Trevor Thom Lufthansa Pilot
199.1 Bernard Smith & Birds
199.2 Grant Eadie
199.3 Street Watch Taylors Rd St. Albans
200.1 Kings Park High School Fire
200.2 Western Smallgoods 208 - 210 McIntyre Rd Sunshine
200.3 Geoff Parker Builder
201.1 Gary Niward Cyclist
201.2 Winners Of Easter Competition
201.3 Dandenong V's Adelaide Soccer Match
201.4 Resurrection Primary School Family Fun Day
202.1 200 Descendents Of Mary Davies Who Arrived In Keilor 150 Years Ago
202.2 Western Region Games Softball
202.3 Ian Carpenter & Andrew Georgion
202.4 Opening Of St. Albans Shopping Centre
202.5 Street Watch Westwood Way Sunshine
203.1 Col Martin
203.2 Kids In Xmas Train Ride
203.3 Frank Pringle & War Memorial Plaques Sydenham Road
203.4 Louise Scibierras & Footpath Street Watch 4 Leslie St, St. Albans
204.1 Exxon - R.A.A.F. Police Dog & Dentist
204.2 Andra Anderson - New Centre Management
204.3 Margaret & Her Collection Of Spoons
204.5 Albion Primary School M.S. Read-A-Thon Emma Christopoulos And Herve Tran
205.1 New Ring Road For The West
205.2 Hertford Rd House Fire
205.3 Industrial / Residential Dispute
205.4 St. Albans Police Station Joan Kirner
206.1 Maribyrnong High School Kids In 5kM Run
206.2 Sarah Lock & James Nardella
206.3 Keilor Reserves Sell Off
206.4 Anne Battersby Ex-Smoker
207.1 Edward Fraser - Activist
207.2 St. Albans Railway Station
207.3 Cr. Lindsay Graham Sunshine Hospital
208.1 Wally O'Brien & Others At I.C.I.
208.2 Peter Rengey
208.3 St. Albans Shops - Footpath Tables
208.4 Veli Fikret Going To Thailand
209.1 Ope Shenouda From Egypt
209.2 Hung Pham & Others
209.3 Dr. Karmen Mifsud, Ian Baker & Alex Adrianopoulos
209.4 Surveying People Sunshine Shopping Centre
210.1 Trestle Bridge
210.2 Vern & Joyce Bolt
210.3 Lelias Karasaridis B.H.P. Lysaght's Steel Service Centre
210.4 Manager & Items M.Y.M. Furiture & Buildings 77 Wright St Sunshine
211.1 Manager Ashley Reed & Mum Mary Read Deer Park Shopping Centre
211.2 Eden's Garden
211.3 Melbourne Crostia V's Adelaide Hellas
211.4 Sunshine George Cross Players Coaching Clinic Our Ladys Primary School
212.1 House Fire Deer Park
212.2 Switching On Traffic Lights Cnr Arthur St & Taylors Rd St. Albans
213 George Doukas Next To Fire Station Avondale Heights
214.1 Youth Festival Albanvale
214.2 David Davies An Artist From UK Restoring Statues Our Ladys Catholic Church
215.1 Open Day West Sunshine Community Centre
215.2 Mathew Vlek Asthmatil
215.3 Balloon Launch Of Prayers By Kids 848 Ballarat Rd
216 Lawn Mower Crew
217.1 "Jump Off" Day For National Heart Week
217.2 "Queen Victoria" Visiting Sunshine Nursing Home
218.1 Bradmill Phil Stoneham
218.2 Ardeer Primary School Education Week
219.1 Helen Of The Newsagency
219.2 Helmut Dominko Music Teacher
220.1 Ardeer Suspension St Lead Site
220.2 Viney - Sarcl Elna Sewing Centre
221.1 Dr. A. Bartone
221.2 Street Watch Tasman St Deer Park
222.1 House Of Happinesss Oldies Club
222.2 Sunshine Furniture Discounts 105 Anderson Rd Sunshine
223.1 Chirs Hatzis D.J. For BRRR
223.2 Organ Pipes Stevenson Primary School Trevor Covacci
224.1 Glenn O'Hara Pro Extra & Fireman
224.2 Furlong Park School - Jump For Heart Mong Hang Tien & Kylie Livermoore
225.1 Dorothy Brown & Her Cats
225.2 Terry & Sam Muscat
226.1 Mob Of Anti-Grease Mums & Citizens 52 Lois St, St. Albans
226.2 Deer Park Primary School John Forrester
227.1 Mothers Screaming About The Play "Grease"
227.2 Eileen At Relax & Trim 218 Main Rd East St. Albans
228.1 Garbage Truck With Lost Load Cnr Ashley St & Churchill Ave
228.2 Foto Kat 177 Main Rd West St. Albans
229.1 Port Melbourne Player Presenting Jumpers To Local Footy Side Resurrection Primary School
229.2 Ian Baker At Electrical Transformer Building Talmage St Albion
230.1 Kealba Secondary College Students Planting Trees
230.2 Ian Baker & Allan Griffiths
231.1 Lawrence & His Scrap Books
231.2 Sunshine North Secondary College Nicole Nicholson & Kristylee Britton
232.1 Kids Head Shots Kealba Primary School
232.2 Frank & Maria Micallef
233.1 Head Shots Of People Commenting On Hours Of Leisure Centre
233.2 Factory Feature Sunshine Cabinet Works
234.1 Andy The Swaggy Kids Holy Eucharist Primary School
234.2 Footpaths For Street Watch Braybrook
235.1 Alex Adrianopoulos & Chrisy Dennis Sarcred Heart Presbytery St. Albans
235.2 Braybrook Bus Shelter Andrew Bourrillon & Michelle Spiteri
236.1 John Darling Flour Mills
236.2 Arlene Andrewarthur Miss Sunshine 1956
237 Friends Of Dead Go-Kart Racer David Henry & Gavin Kingston
238 Deer Park Primary School Kyte Flying
239 Keilor Downs Shopping Centre Prep Kids From Mary MacKiller Primary School
240 Jamieson Park Secondary College
241 Sunshine Plaza Boomerang Making
242 Gibson Family Down Symdrome Week
243 I.C.I. Recycling Factory Feature
244 Paul Galoford Danger Spot
245 Peter Black City Manager For Keilor
246 Winner Of Competition Allan Ross Motors
247 Wyalong St House
248 Street Watch Bence Jones Keilor Downs
249 Tottenham Primary School Ivan Potama & Marcelino Moreno
250 Julie Anne Farrugia Working On Car
251 Richard Tedesco Fiemenco Giutarists
252 Keilor S.E.S.
253 Stenson Rd Crowd Of Angry Residents
254 Buses For Handicap People Supply By W.R.C.
255 Danny Frawley Presenting Football Jumpers Tottenham North Primary School
256 East Sunshine Primary School Circus Performance
257 Beth Drayton Retired School Teacher
258 Connie Oisano At Her Warrens West Leisure Disposal Store 237 Hampshire Rd
259 Principal Alan McNaughton Kings Park Secondary College
260 Sunshine Food Co-op Bert Tangey
261 John Galloway Baseball Coach
262 Father Joe Micallef & Mr Peter Furniss St. Paul's Parish Centre
263 Rev. Father Robert Cannon & Augustine's Church
264 Swinbourne Travelling Science Show Visiting School St. Albans Secondary College
265 Food Co-op Hansen Reserve Airport West
266 Brett Hill Turning 21 Telecom Australia Taylors Rd St. Albans
267 Zena Koope
267 Mayday 224 McIntyre Rd Sunshine
268 Harley Sweets 6 City Place Sunshine
269 Lindsay Hodge - Royal Victorian Association Of Judges
270 Time Zone 265 Hampshire Rd Sunshine
271 Kids Clean-up For World Enviroment Day Marian College
272 Penleigh College Keilor
273.1 Cr. Bernard Rielly Greening St. Albans
273.2 Street Watch Anne Dawson
274.1 Design Institute & Students Marian College
274.2 Sunshine Nursing Home Greta Winton & Heather Powell
274.3 Tasman Meats Sunshine Plaza
275.1 People In Low Cost Housing East Keilor
275.2 Jenny Patriki Of Himshes Hairdressing
276.1 Opening Youth Expo Highpoint
276.2 K.W. Hales Real Estate
277.1 Staff Of News Agencies Sunshine Plaza
277.2 Staff Photo Big Fields Fruit & Veg Sunshine Plaza
278.1 Oil Painting Of Flour Silos In Council Chamber
278.2 Bernard Reilly TAB Sunshine Hampshire Rd
279.1 Class Of 90 Head Shots Maidstone Primary School
279.2 Class Of 1991 Grade 6 Head Shots Deer Park North Primary School
280.1 Tony Of Ray White
280.2 Aboriginal Activities Glengala Primary School
281.1 Blackhawk Copper Tottenham R.A.A.F. Base
281.2 Aldo Roberto
282.1 Read-A-Thon For Kids Albion Primary School
282.2 Tom Walsh
283.1 Cat Competition Meryle Frame
283.2 Year 11 Drama Students Marian College
284.1 Mr & Mrs Saltmarsh
284.2 Palm Tree St. Albans Square
285.1 R.A.A.F. Base Tour
285.2 Chrisy Dennis, Author Of Development Book About Keilor - Melton Areas
286.1 Rod Hay Bike Rider
286.2 Class Of 1991 Grade 6 Head Shots Sunshine North Primary School
287.1 St. Pauls Primary School Niel O'Keefe & Kids
287.2 Mrs Esne Barr
288.1 Ruby Bukousky
288.2 Americo Costa Of Westgate Upholster
289.1 Pile Of Vandalised Play Equipment
289.2 Deer Park Central Tasman Meats
290 Deer Park Central Woods Florist
290.1 Helen & Charlie Aquilina
291.1 Tottenham North Primary School & Footscray Football Player Steven Kolniuk & Kids
291.2 Deer Park Central Gym Wah
292.1 Kids Jumping Rope For Money Raising Fund
292.2 Suspension St House Damage
293.1 Gerd Muller & Washing Powder
293.2 Joe Caruso Sunshine Travel
294.1 Mark Petvnka
294.2 Kim Wong Asian Pearl Restaurant
295.1 Cracked Footpaths Around St. Albans
295.2 W.L. Allen Foundary 3 Hulett St Sunshine
296.1 Deb Ball
296.2 Pieter Schoten Of Sunshine Plumbing
297.1 Sunshine Tip Fire
297.2 Matt Wilson - Local Person Former Railway Switch House Talmage St Albion
298 Students With Water Saving Posters Catholic Regional College St. Albans
299.1 Janina Rynkiewicz Movelle Primary School
299.2 Dane McManus Ginifer Railway Station
300.1 A Write In Day With The Kids St. Albans Primary School
300.2 Tony Van Deurzen Dutch Club
301.1 Tony Elias - Student At Melbourne Uni & Writer
301.2 Bob Sercombe Keilor Fire Station
302.1 Footpaths With Cracks St. Albans
302.2 Margot Tyrrell Of Book Council With Kids Holy Eucharist School
303.1 Erection Of Bridge Ceremony & Residents Complaining
303.2 Bernard Reilly On Ardeer Railway Station
304.1 Spastic Centre
304.2 Transport Visits The School St. Albans Meadows School
305.1 Ciro Lombardi
305.2 Row Over Use Of Hall Castley Hall
306.1 Lee-Anne Reidy & First Aid Doll
306.2 John Hyett Council Candidate
307.1 David White & Westlink Bridge Opening
307.2 Clothing 219 Hampshire Rd Sunshine
308.1 Sunshine Hospital - Cameron Brennan & Twin Babies
308.2 Dr. Graeme Thompson Who Grew Up In Sunshine
309.1 Tidy Town Winner - Arthur Quinton & Rhonda Martin
309.2 James Burns Angry About Sunshine Council
310.1 Rina Lauriola
310.2 Attard Family Comforts Daughter After Family Cat Is Shot
311.1 Annisa Groves & Science Awards
311.2 Boxing Lester Ellis V's Attila Fogas & Tony Miller V's Ken Carter
312.1 Old Homestead Keilor
312.2 Deer Park Central BB's Deli
313.1 Funeral Of Arthur Lovelock
313.2 Deer Park North Primary School Lorraine Wilson & Kids
314.1 Jim Sheridan & Livia La Rocca
314.2 Melissa Vella (Artist) Marian College
315.1 Palm Tree On Compericus Way Keilor
315.2 Street Watch Forrest St No Trees
316.1 Sunshine Plaza Manager - Geoff Flower
316.2 Baby Contest Nicole Best & Jessica Collins
317.1 Sunshine Heights Primary School - Peter Jankuluuski & Ellen Kockou
317.2 Deer Park Bazaar
318.1 Ossie & Hanna Belmore
318.2 Street Watch Burgoyne Lane Williamstown
319.1 St. Albans Co-Op
319.2 Monica Fresco & Home She Rents
320.1 Marian College Melisa Reardon & Samantha Holroyd
320.2 Tottenham Secondary College Girls Living In Fear
321.1 Ohla Terlecka & Stegania Kowalyk Authors Of "Australia We Salute You"
321.2 Govener McCaughey At Sunshine
321.3 John Kontek Real Estate
322.1 R.A.A.F. Announcement Of Housing Scheme
322.2 Announement Of Extension To School St. Albans East Secondary College
322.3 Spaldings Play By Students From Marian College
323.1 Deer Park Primary School
323.2 Class Of 1991 Calder Rise Primary School
324.1 Class Of 1990 Kids Keilor Primary School
324.2 Skipping For Heart Week Calder Rise Primary School
325.1 Michael Turner (Werribee Press) Accepts Cheque Of $15,000 From 3GL General Manager Nick Scott
325.2 Winning Sporting Team
325.3 Cornwall Rd Park Rubblish
326.1 Man On Forklift
326.2 Tottenham Primary School - Tennis Oz
327.1 Rod Can - Boxer - Presents Certificate To The Kids Tottenham North Primary School
327.2 Brothel Cramer Ave
328.1 Tina Miller At Re-Development Site
328.2 Sunshine Candidates Alfred Zahra, George Parnis & Sam Muscat
329.1 Pete The Clown & Kids Deer Park Hall Station Rd
329.2 Debra Bevridge Speed Roller Skater
330.1 Blown Up Boat Footscray
330.2 Artistic Studios Deer Park
331.1 Cr. Sam Ortisi
331.2 Unfinished Shopping Complex St. Albans
332.1 Chris Papas In His Barber Shop St. Albans
332.2 New Youth Centre Sunshine
333.1 Top 40 Estate - John Coghlan
333.3 Spoils Gift Shop Maree Aquilina
334.1 Judy Mason & Trish Smith
334.2 Margaret Johnstone & Joyce Arnold
335.1 Adrian Czernieki
335.2 Anglican Christ Church Keilor
336.1 Ian Patience & Matthew Breen - Basketball Players Who Work For The Council
336.2 Old Wooden Bridge Arundel Rd Peter Somerville
337.1 Indonsian & Aussie Defence Altaches On Tour
337.2 Basketballer From NBL Keilor Downs Plaza K-Mart
338.1 Inan Baker Presenting Flags Deer Park Senior Citizen Club
338.2 Nino Napoli - Former Student Of Sunshine High School
339.1 Bigbrother Mark Boyd 26 & Little Brother Dan Thomas 10
339.2 Adam Ramadan
340.1 Matthew Breen & Family
340.2 Street Watch McIntyre Rd Sunshine
341.1 Chimney Blown Up Explosive Factory Deer Park
341.2 Maribyrnong Valley
342.1 Eleanor Robinson & Christine Anderson With Leadlight
342.2 Play Daisy Pulls It Off Chris Gale
343.1 Cr. Andrea Surace & Alex Top
343.2 Les Twentyman
344.1 Keilor Council Candidate Tina Millar
344.2 Paul Wamright & Rosy Jolic
345.1 Tina Millar With Trees
345.2 Council & Private Vehicles Parked In Street
346.1 Bad Footpaths In Keilor
346.2 New Principal Sunshine Secondary College Graham Lee
347.1 Dance Students & Graffity Artists
347.2 Parking Meters & Action Group
348.1 Oliver Twist Kids Overnewton College
348.2 Surverying Customers Bilo & Jewell Supermarkets
349.1 Peter Bortelli
349.2 Pancake Kids
350.1 Michael Salmon & Kids Keilor Downs Primary School
350.2 Peter Tselikis & Bees
351.1 Alma & Frank Hallinane
351.2 Julie Murphy Keilor Council
352.1 St. Alban High School Sports Day
352.2 Surverying Shoppers Milleara Shopping Centre
353.1 Wilcox Family Living In Poverty
353.2 Class Of 1991 Millerara Primary School
354.2 Carmen Muscat Street Watch Falcon Walk Kings Park
355.1 Matthew Caruana & Simon Madden Sunshine Hospital
355.2 Volleyball Champions Milleara Primary School
356 Staff Photograth Deer Park Community Info Centre
356 Tree Planting
357 St. Albans Band Practice
358.1 Pat Sheridan
358.2 Elna Sewing Center
359.1 Paul Jefferies - Won $21,000 On Sale Of Centuary
359.2 St. Albans Chickens
360.1 Maltese Prime Minister Eddie Fenech - Adams
360.2 Joan Carstairs & Highlights Of St. Albans
361.1 Class Of 1990 Keilor Heights Primary School
361.2 Mr. Emil Lenc Of St. Albans Student Of The Year Footscray Insitute
362.1 Three Kids Who Represented Victoria Keilor Heights Primary School
362.2 Market Plumbing Staff Picture
363.1 Marie Mill Centre
363.2 Ivan Pogaic & Bike Shop
364.1 Maltese Prime Ministers Visit To Sunshine & St. Albans
364.2 Period Costumes Keilor Down Secondary College
365.1 Sgt Sam Halim Going To Gluf War
365.2 Photo Of Sign & Trees H.V. McKay Memorial Gardens Anderson Rd Sunshine
366.1 John Kontek At Sunshine Court House
366.2 Story Time For Children Children's Book Week
367.1 John Garrity - Upholsterer
367.2 Learner Drivers Program Launched By Barry Scott Avondale Heights Seconardy College
368.1 Vietnamese Adults Learning English
368.2 All Tab 2/5 Sara Grove Tottenham
369.1 Keilor Historic Society & Local Pub
369.2 Shops Hampshire Rd Sunshine
370.1 Max Walker Signing Copies Of His New Book
370.2 Sunshine Secondary College Launch Of New College Joan Kirner
371.1 R.A.A.F. Base Graduation Parade
371.2 Street Watch Mansfield St Sunshine
372.1 Romsey House - Jane Alley
372.2 Kids In Newpaper Production Group
373.1 St. Albans Secondary College Table Tennis Team
373.2 Children's Voolc Week Fancy Dress St. Albans East Primary School
374.1 St. Albans Secondary College What's In Space - Tasna Propadalo & Patrice Smith
374.2 New School Under Construction Monmia Primary School
375.1 St. Albans Secondary College - Helen Nguyen
375.2 George & Marjorie Caithness 50th Wedding Anniversary
376.1 Class Of 1990 Sunshine Primary School Hampshire Rd
376.2 Benradette Smith St. Paul's School Sunshine Ave Kealba
377.1 Peace Orgainiser TTFM Studios South Melbourne
377.2 Mary Brian, Went To School At St. Albans Primary School Years Ago
378 Doreen Gibson & Daughter Tracey
379.1 Dress Rehersal Sunshine North Secondary College
379.2 Copies
380 Dorothy Costa - Keilor's New Mayor
381.1 Play Rehersal Kings Park Secondary College
381.2 Street Watch Road Conditions St. Albans Rd & Gilmour Rd St. Albans
382.1 Flickers Fabric Dye Works St. Albans Rd & Gilmour Rd
382.2 Staff Picture At Graeme Toomey Retirement
383.1 Hamish Bell - A Student From the 1940's St. Albans Primary School
383.2 Ian Patience
384.1 Murie Butterworth - John Kontek
384.2 Debbie Flintoff - King Visiting St. Theresa Primary School Albion
384.3 Overnewton College Christine Northfield
385.1 Josie Huart - Widow Of Ex-Keilor Councillor
385.2 St. Albans Secondary College Nathalie Abela, Carlos Mora & Simone Wilson
386.1 Barry Jones Being Given A Petition Deer Park Shopping Centre
386.2 Glengala Primary School Kids Group Shot
387.1 Rhonda Martin Plastic Bottle Recycling
387.2 Bobby Pritchard Janitor St. Albans South Primary School
388.1 Vic Parsons
388.2 Street Watch Suspension St
389.1 Deer Park North Primary School Pupils Performing A Melodrama
389.2 Marian College Textile Students Julie Sultana & Linda Naselli
390.1 Joyce Arnold Under Street Sign Of Mayo St
390.2 Science Jali Hoysted
391.1 Kids Radio Production Braybrook Secondary College
391.2 Michale & Antonietta Palmobo 50th Anniversary
392.1 Mirage Plane R.A.A.F. Base Tottenham
392.2 Damanged Power Lines Street Watch
393.1 Literacy Rep Giving Out Books To Mothers - Sunshine Hospital Furlong Rd
393.2 Group Of Women Exhibiting Work At The Hunt Club Soon
394.1 Dr. Teunis Kwac & Ardeer Lead Site
394.2 Lad John, Saved A Man From A Gas Filled Home
395.1 Desktop Disaster Exercise Keilor
395.2 Sonay Bekcioglu Of John's Hair Design
396.1 Underwater Hockey Kids
396.2 Copies
397.1 Anne Witten - Winner Of Competition Braybrook Primary School
397.2 Rock Eisteddfod Rehersals "On The Beach" Essendon Grammer School
398 Henry Shapiro 21 White St Maribyrnong
399.1 Kids, Mutant Turtles & Animals (Real Ones)
399.2 Borrell Street Residents Protest
400.1 Play - "Guys & Dolls" Christ Of King Primary School St. Albans
400.2 Ian Baker & Locals Clening Graffiti Off Wall
401.1 Alex Antenopolois & Frield At Boarding Home
401.2 Vox Pop About New Car Park No Fence
402 Ian Baker At Old Railway Building Albion Transformer Site Talmage St Albion
403.1 New Sunshine Councillors Irene Shad, george Panis & Geoff White
403.2 Harry Vnger - One Time Dunrea Boy
404.1 Handicraft Shop Lis Collins
404.2 Dr. Marko Veselica
405.1 No Street Light Cr. Andrea Surace
405.2 Croatian Catholic Centre Fitzgerald Rd Sunshine
406.1 Fraespoulos Family Ex St. Albans Primary School Student
406.2 Burnt Out Building Foster St Airport West
407.1 Equal Driving School
407.2 Louis Schembri
408.1 Visiting Japanese Footy Players
408.2 Teunis Kurak
409.1 Smart Food Program
409.2 Class of 1990 Head Shots Albion Primary School
410.1 Play Called "Germs" By Kids
410.2 Class Of 1990 Head Shots Milliara Primary School
411 Minis Pizza Room And Kids
412.1 Harry Sommers Illegal Factory
412.2 Peter The Clown At Kealba Play Group
413.1 Liberal Candidate George Korytsky
413.2 Val Kuc Of WWKVC Watchmakers
414.1 Phan Van Giuong
414.2 Carek Walter
415.1 Sunshine High School June Martin
415.2 Clare Brennan & Dog Shandy
416.1 Street Watch Moama St Sunshine
416.2 Defence Minister Opening House
417.1 Youghon And His Paintings
417.2 Tottenham R.A.A.F. Base Geoff Phillips & Captain Colin Smith
418.1 Windows Of The West Avondale Primary School Steven Ladiges
418.2 Shane Greenman Cake Maker
419 Robin Green Celebrity Station Assistant Ginifer Railway Station
420.1 Champion Badminton And Table Tennis
420.2 Pearl Ewart & Her Prize Presentations
421.1 Krid Popczyk And Partners Assembling A Book On History Of Polish People
421.2 Wally O'Brien, Cycling Champion
422.1 Vox Pop About Medicare $3.50 Charge
422.2 Vic Swim Holiday Program Sunshine Swimming Pool
423.1 Rock Eisteddford Group
423.2 Bob Sercombe With Rock Etseddford Maners St. Columba's School
424.1 Alan Patten & Rex White Looking Over Extensions
424.2 Mrs McRob
425.1 Street Watch Darrach Dr Keilor Downs
425.2 Elizabeth Hayden & Daughter Pat Pemberton At Hayden St Street Sign
426.1 St. Albans Primary School
426.1 Victor Izwed, New Sunshine Council Planning Officer
427.1 St. Albans North Primary School
427.2 Robert & Minnie Pow Who Have Delivered The Sunshine Advocate For The Past 13 Years
428.1 Margaret Underwood Past Student Of Sunshine High School
428.2 Barry Harvey And Ladies' Loo
429.1 Class Of 1991
429.2 St. Albans Square
430.1 Mayor Of Keilor & Governor's Wife Mrs McCaughry
430.2 Vic Swim Graduates At Maidstone
431.1 Street Watch Orama Child Care Centre
431.2 Mary Ivanovski St. Albans Primary School
432.1 St. Augustine's Keilor
432.2 Brendan Condon - Rain Forest Profestor
433.1 Frank MicAllef & Mark Styxx
433.2 Kids At Play
434 Quarry Berkshire Rd & Duke St
435.1 Movelle Primary School Skipping Demonstrations
435.2 Sam & Andrew Mahoney
436.1 Jamieson Park Secondary College Andrew Gordon, Jason Sammut - Sax Players
436.2 Foster Parents & Children
437.1 Windows Of The West Keilor Downs Primary School Shane Pace & Oanh Huynh
437.2 Open Day Sunshine Fire Station
438.1 Dorrie & Ernie Lane 60th Wedding Anniversary
438.2 The St. Albans Santa Eugene
439.1 Windows Of The West St. John College Domonic Pinto
439.2 Guichan Erbas
440.1 Windows Of The West St. Theresas Carla Cabbera & Phuons Vu
440.2 People In Business
441.1 Statewide Sewing Kathy Kassan
441.2 Werner Schloemer
442.1 Street Watch Roberts St Sunshine
442.2 Jock Pollock - Keilor MFB
443.1 Sunshine North Secondary College Soccer Clinic Trish Triplet & Nicole Bajada
443.2 Jack Migdalek St. Albans East Primary School
444 Ian Baker & Mike McDonald
445.1 Sharon Fernandz Champion Classical Tap Dancer
445.2 Brian O'Laughlin
446.1 Mrs Behr
446.2 Spase Velanouski
447.1 Chew Wilks Jewellers Anna Maria Moscati
447.2 Le Crystal Natural Rock
447.3 John Little
448.1 Adam McCarthy Rock Eistenford
448.2 Sunshine Football Club Feature
448.3 Rob Vingerhoets
449.1 Michael Guirgi Rap Singer
449.2 Andrew Nuske Sunshine Indoor Sports Centre
449.3 Charlie Booth
450.1 Bob Philp
450.2 Construction & Opening Of New Playing Fields Ardeer High School
450.3 Sue Jennison
451.1 Bernard Reily
451.2 Keilor Ladies Bowls Team
451.3 She Oaks Estate St. Albans
452.1 Jamieson Park Secondary College Gold Medal Weight Lifters
452.2 Eric Lund Western Insitute
452.3 Etseddford Rock & Roll Competition
453.1 Eddie Corsaletti Street Watch
453.2 New School Building St. Albans High School
453.3 How Consul Rick Hewson
454.1 Wayside Opp Shop June Hardy
454.2 Snakes In School Picture Of Lab Assistant Keilor Downs Post Primary School
454.3 Wedding Peterson Family
455.1 Street Watch Enderby St Braybrook
455.2 Kealba Playgroup Easter Party
455.3 Quadraplegic Rugby
456.1 George Caruk
456.2 Bill & Gladys Bailey 60th Wedding Anniversay
456.3 Joyce Austin - Scaloppinis Restaurant
457.1 Frank Petruzzelli & Peter Caluzzi PC Accounting Services
457.2 Primary School Sports
457.3 Kids Who Have Organised A Fund-Drive For Salvation Army - Braybrook Primary School
458.1 Tree Lopping Pty Ltd Justin
458.2 Children Crossing Railway Line East Esplanade St. Albans
458.3 Kodokan Judo
459.1 Peter Micallef & Bob Razilia Western Suburbs Taxis
459.2 Gisella & Franco Cozzo
459.3 St. Albans Primary School - Benjamin Morcillo
460.1 Michael Robinson
460.2 Sunshine Christian School
460.3 Dieu Tan Photographic Award
461.1 Neil Branch
461.2 Bert Guileri Organ Pipes State Park Keilor
461.3 Maths Champions - Minh Mai, Zoran Dinev, Dat Dinh & David Zahra
462.1 Richard Maxwell Plastic Surgeon
462.2 Peter Portelli Sunshine Councillor Main Rd East Intersection
462.3 Deer Park Shopping Centre Trolley Race
463.1 Massey Ferguson Site
463.2 Cr. Charlie Apap Keilor Taylors Rd Intersection
463.3 Jamieson Park Secondard College Fuel Efficent Car - Brian Lawrence & Melissa Kovalevil
464.1 Ms. Read Athon Kids
464.2 Mark Briggs - Young Endevour Crew Member
464.3 Organ Pipes Park (Bird Week) Jonathon Dawson, Ieisha Redenbach & Arlene Sachon
465.1 Sketches Of Nursing Home
465.2 Deer Park Community Cente
465.3 Deer Park Shopping Centre 11th Birthday & 50 School Kids
466.1 Street Watch Oak Crt Braybrook
466.2 Main Rd East Footpath St. Albans
466.3 Mt. Cottrell Motorcross - Peter Barr
467.1 Kids & Teaches Protesting At Music Room Being Taken Away St. Albans East Primary School
467.2 Kids & Go Karts
467.3 Mike Feehan
468.1 Maidstone Tennants Union Presentation
468.2 Cnr Hampshire Rd & Ballarat Rd Sunshine
468.3 Elsa Blahut
469.1 Peter Calvzzi & Frank Fetruzzelli
469.2 Jeff Kennett & Peter Portelli
469.3 Ashley Reid & Trolley Race Winner
470.1 Safeway With Horses
470.2 "Girls In Science" (Science 23) Ardeer High School
470.3 Sunshine Sizzlers
471.1 Mother Of God Church Blanch St Ardeer
471.2 Pastor Greg Mitchell "The Potters House Church"
471.3 Kids Australian Day Sunshine Christian School
472.1 Tagged Litter Being Launched By Melbourne Water Board
472.2 Keith Broadbeat Oberon St, St. Albans
472.3 Vic Weaver
473.1 Fred Sciberras Street Watch
473.2 Arundel Rd Bridge Development
473.3 Shop Woners
474.1 Laurie Wheelahan
474.2 John & Sylvia Sheen
474.3 Grant Eadie
475.1 St. Albans Primary School Indonesian's Quang Pham
475.2 Fanny Dress Day Ardeer High School
475.3 Students Artists & Mural Maribyrnong High School
476.1 Golfer Philip Jones
476.2 Debbie Majiacz New Actress For Western Theatre
476.3 Vince & Rose Stella "Vince's Fruit Martket"
477.1 Deer Park Shopping Centre - Local Kids
477.2 St. Albans Roman Catholic Church Maltese March
477.3 Photographed A Segment Of A Report
478.1 Toni Marzel & Her Birs
478.2 Ardeer High School New Oval "Turning The Earth"
478.3 Ashley Reed & Friends
479.1 New Buddhist Community Centre
479.2 St. Pauls Kealba Easter Play
479.3 Bruce McAvennie Of Channel &
480 Les Smith
480.1 Artist With T-Shirt Design For Triple RRR Mary Thmoidis
480.2 Burn Out Cars & Caravan
481.1 Sunshine Council's & Engineer At Site Of New Area
481.2 Bert Guileri & Ivanhoe St St. Albans
481.3 Sunshine Council
482.1 The Animus Trash Band
482.2 Mr & Mrs Maxwell 50th Wedding Anniversay
482.3 Tony Chandler
483.1 Debra Beveridge Speed Skater
483.2 Bert Guileri & Calder - Holdens Rd Railway Station
483.3 Cr. Rhonda Martin & Jack Sheridan
484.1 John Kozarovstci & Peter James Doing Gardening Work For Old & Disable People
484.2 Cooee March
484.3 New Shopping Centre Site Avondale Heights
485.1 Shop Owners
485.2 Organ Pipes State Park & Bert Guileri
485.3 Pupils Launching Recycling Program Keilor Downs Primary School
486.1 Head Shots Sunshine Croation Soccer Team
486.2 Southern Cross Express
486.3 Cars In The Maribyrnong
487.1 Tree Planting
487.2 Roman Catholic Primary School King Park
487.3 Keilor Village Shopping Centre
488.1 Street Watch Metherill St
488.2 Tify Town Awards
489.1 Nazarena & Josephine Galea 50th Wedding Anniversary
489.2 Church St Keilor
489.3 Kealba Play Group Kids
490.1 Street Watch Lindsay Baum
490.2 Bert Guileri Meals On Wheels Kitchen
490.3 Class Of 1990 Sunshine Heights Primary School
491.1 Street Watch Jane Taffigiannakis
491.2 Rees & Toppy Williams 50th Wedding Anniversary
491.3 Pictures Of Shopping Centres Keilor Downs & Taylors Lakes
492.1 Tony Abouzeid Milk Bar
492.2 Godfathers Pizza
492.3 Sunshine Shopping Centre
493.1 Street Watch Robert Condy
493.2 Alby Hass Kick Boxer
493.3 Class Of 1990 St. Albans Primary SChool
494.1 Wally O'Brien & Aboriginal Cave
494.2 Veronica Tremble
494.3 Bernard Kemp & Richard De Gabrvielle
495.1 Baby Farm Matthew Lonsdale
495.2 Borel Quarry Duke St
495.3 Body Builders
496.1 Street Watch Ballarat Rd Sunshine
496.2 Leon Zerata Overgrown Pumpkins
496.3 Opening Of Amazing Hair
497.1 Iveta Klano Paper Dikivera
497.2 Sunshine Shopping Centre
497.3 Talking To People In Shops About Smoking Alfrieda St, St. Albans
498.1 Sunshine Plaza Alan Clark & Kathy Szremko
498.2 Sunshine MFB New Snorkel
498.3 Kielle Colver & Eda Irfan 88 Hall St Sunshine West
499.1 Corner Of Minerva Cres & Darracq Dr - Bad Footpath
499.2 Sunshine Community Theatre Vandalism
499.3 Coles / Fosseys Brian Lewis - Butcher & Bernie Karavla - Butcher
500.1 Street Watch - Dead Trees, Trees In Power Lines, Trees Over Footpaths
500.2 Ray Dodd - Keilor Hotel Feature
500.3 Head Shots Of Shop Owners Sunshine Shops
501.1 Sunshine Ladies Club
501.2 Hotrod Show
501.3 Wreath On Road Doherty's Rd Laverton
502.1 Mary & Martin Cullen Paper Deliveries
502.2 John Cain Opening Keilor Downs Post Primary School
502.3 Ted Flynn 6 Holehouse St Sunshine
503.1 Bill Reeves
503.2 Deer Park Shopping Centre Mothers Rooms
503.3 Simon Of Mr Fashions Hampshire Rd Sunshine
504.1 100 Year Old Celebrations For Church Of England
504.2 Ardeer Railway Station
504.3 Peter Cavan - Project Development Officer Western Institute St. Albans
505.1 Staff at Templation Boutique
505.2 St. Albans High School - Head Shots Of Students - Re Educations Systems
505.3 Marie Turner & Ker Dogs 137 Ballarat Rd Maidstone
506.1 Sportsco Staff
506.2 Lake Stanley Gardens Development Launch At Sunshine Townhall
506.3 Lady & Tramp Promotion - People & Kids
507.1 Kathy Thompson Won A Cladded House
507.2 Mrs Jan Beathy And Family
507.3 Bob Bartlett & Damaged Loos St. Albans
508.1 Young Soccer Players Who were Severely Injured In Soccer Games In Qld
508.2 Minister For Education - Caroline Hogg & Bob Sercombe
508.3 Mark Roberts Concrete Recycling
509.1 Joe Malla
509.2 Land For Sale Doherty Rd
509.3 Eva Mikesic & Her Photos Avondale Heights
510.1 Kontek Heads
510.2 Dead Set Straight
510.3 Tade Krolo - Young Boxer 2 Everton Crt St. Albans
511.1 Janelle Barr
511.2 Don Carville 31 Vincent Ave St. Albans
512.1 Melbourne Fire Bridage Open Day
512.2 Frank Imbesi - Tennis Player
512.3 Sunshine Primary School Ian Baker & Troy Young
513.1 Friends Of Kororoit Creek Receiving Cheque
513.2 A.D. Shirtmaker Suffolk Rd Sunshine - Fire
513.3 New Primary School "MacKellar" & New Principal George Murdoch Yeats Drive Sydenham
514.1 Youth Group To Help Young Kids Out Of Boredom
514.2 Deer Park Railway Station
514.3 Staff Management Of Sunshine Plaza
515.1 Visiting Play To School
515.2 Sunshine VFA Footy Team
515.3 Bernard Reilly On Bridge Station Rd Deer Park
516.1 Street Watch Eastcote Street
516.2 Mrs Petrynivk And Family
516.3 Shacks Of Green Shop 32 Sunshine Plaza
517.1 Aerobic (Water) For Over 50's
517.2 Dot Campell Sunshine Health Service For Youth
517.3 "Don't Dump It" Big M Campaign I.C.I. Ballarat Rd Gate 3
518.1 John Brumpton
518.2 Sean Lavin Deer Park Hotel
518.3 John Kontek & Auction Reid St Deer Park
519.1 Stan Branch
519.2 Evans, Rigg & Vella
519.3 Dean Tabone, Aged 16, Meets Alan Griffiths MP 60 Ford Ave Sunshine North
520.1 Avondale Secondary College - College Closure Street Survey
520.2 Avondale Heights Poor Road
520.3 Natalie Bruzzese 1 Gidgee Crt Kealba
521.1 Brendan Coyne - Principal
521.2 St. Albans High School 40hr Famine
521.3 David Leydon & A Tiger Snake 94 Beatty Ave Glenroy
522.1 John Kontek - Real Estate
522.2 Ardeer High School Play Rehersal
522.3 Keilor Play Group & Santa
523.1 Athalie Comp
523.2 Margaret Mahoney
523.3 Christmas Front Cover Keilor / St. Albans Avocate
524.1 Paul Dingley (Lewis & Condello)
524.2 St. Albans Primary School
524.3 Mary McKillop Fate David Zahra & Zoran Gorgiouski
525.1 Gus Napolo & Others
525.2 Cr. Don McKay At Car Park
525.3 George Kapitan Apprentice Of The Year
526.1 Cyril Anderson
526.2 Linda Harvey - ZZAZZ Saxaphone Player
526.3 Sunshine Play Group & Santa
527.1 Sunshine Margaret Traders
527.2 Mr & Mrs Blake 60th Wedding Anniversay
527.3 Steam Train Trip To Bacchus Marsh
528.1 Bill Reeves At Untidy Banks Of Taylors Creek
528.2 Train With Sunbury Sign
528.3 Burns Victim Sarah Hoiwell & Mum Karen
529.1 Colin Faulkner
529.2 Cr. Nick Pino
529.3 Lorraine Scott Keilor Heights Secondary College Principal
530.1 Junior Victorian Of The Year Natalie Kokoi
530.2 John Mortingjo With Horse
530.3 St. Albans Cop Shop Con Stuart Brown
531.1 Lorna Cooksley
531.2 John Mortingjo At Site For New St. Albans Library
531.3 Xmas Pagent Glengala Playgroup Maria Evanglou
532.1 Joan Carstain
532.2 Bernard Reilly Deer Park Swimming Pool
532.3 Colin Weir & Wife Cathy 95 President Rd St. Albans
533.1 Artist Kids
533.2 Cr. Bert - Overland Reserve
533.3 Award Winners Tottenham Secondary College
534.1 Bruno Tassoni
534.2 Maribyrnong Valley
534.3 Zora Kostovska & Neighbours 8 Dowling St St. Albans / Keilor
535.1 Mercy Hospice
535.2 Jamie Guppy
535.3 Graffitti Kid Aaron Radic
536.1 Keilor Downs Secondary College - Visiting Chinese Teachers
536.2 T.A.B. Winner And New Uniforms
536.3 Rev. Father Norman Gray & Church Avondale Heights
537.1 Thaunice - Davis & Son Alfred
537.2 Arundel Rd Bridge
537.3 Inspector Michael Moloney
538.1 Bern Jewellers
538.2 V.F.A. Sunshine V's Werribee (50th Birthday Sunshine Football Club)
538.3 Rev. Michael Stuth
539.1 Jim Hoskin Good Neighbor
539.2 Keilor Heights Primary School 25th Birthday
539.3 Sunshine St Party
540.1 School Garderning Team
540.2 Sunshine High School
540.3 George & Isabella Smitty
541.1 Barbara Jones - St. Albans Post Office
541.2 Sir Frederick Wiltshire - Wiltshire Files 50th Anniversary
541.3 St. Albans Youth Centre John Kirner
542.1 Eddie Camilleri - Killer Footpath
542.2 John Larocca
542.3 Irene Whellym & Lew Sollu
543.1 Milly Mimitrijevic Who Collected The Most Barcodes From Dairy Products
543.2 Housing Commission Flats
543.3 M.S. Centre Annual Fete St. Albans
544.1 Herb Hollingsworth & others
544.2 School Holiday Pictures
544.3 Traders Agro About Shop Being Built In Middle Of Footpaths 344 Main Rd West St. Albans
545.1 Ecio Simonetti
545.2 Broken Hydrant
545.3 Group Of Ex-I.C.I. Employees
546.1 Trader of the Week - Dario's
546.2 School Holiday Pictures
546.3 Rev. Ian Corlett At Sunshine Church Of Christ 81 Hampshire Rd Sunshine
547.1 Parking Meters Robert Clements
547.2 Sunshine Street Procession
547.3 Rhonda Martin Main Rd West Arcade
548.1 Breandon - Farther Trip to Africa
548.2 Schenemann
549.1 Braybrook Primary School Languages
549.2 Maureen Egan Speaking At Food Co-Op Meeting
549.3 Inerviews Of Massey Ferguson Factory With Mayor Don McKay & Geoff Flower - Sunshine Plaza Manager
550.1 Elsie Ebling - 17 Years Service
550.2 Parks & Gardens Staff Keilor Council
550.3 Tidy Towns Awards R.A.A.F. Base Tottenham
551.1 Thompson Wedding
551.2 Belinda Bright Miss Junior Victoria
551.3 Ex-Keilor Gift Runner
552.1 Alan Brown Being Shown Around Sunshine & St. Albans
552.2 Home Auction John Kontek's House
552.3 St. Albans V's Albion Grand Final
553.1 Andra Anderson
553.2 Bernard Rielly Diamond Ave Reserve
554.1 Keilor Downs Secondary College Orchestra
554.2 Melbourne Underground
555.1 Seven Labradoodle Puppies Visiting for Guide Dogs Association
555.2 Truck Accident Bizana St & Sunshine Rd
556.1 Kids Working On Art For Artshow in 2 Weeks
556.2 Cr. Bert Gaubero & Rev. Ian Smith Traffic Problems
557.1 Maria Harrington & Kids on Broken Footpath Streetwatch
557.2 Dale Constable Leader Of Calwell Young Labor Group
558.1 Des Barnard Trader of the Weel
558.2 Thompson St Reserve Group Of People Save Our River
559.1 Ancho, Propellor & Gun Launched In The Gardens
559.2 Doyle St Reserve
560.1 Sunshine Tech Copies
560.2 Tom Stark Council Candidate
561.1 John Holt & Jeanette Howard
561.2 Jack Sherdedon & Keilor Parking Officer
562.1 Navauliono Ravai, A Rubgy Champ Who Is Going Overseas To Represent Australia
562.2 Cr. Charlie Apap
563.1 Street Watch Cnr Tilburn Rd & Station Rd Deer Park
563.2 Cars Being Sold On Vacant Land
564.1 Children With Copies Of Books They Wrote & Published
564.2 Bernard Rielly
565.1 Displosals St. Albans
565.2 Judo Champion
566.1 Community Centre Andrew McCutcheon & Dorothy Costa
566.2 Overnewton Community College
567.1 Brinbank Park Cross Country Race
567.2 Street Carnival Clowns
568.1 Rate Collector Jack Pedifer
568.2 Moira Kelly
569.1 Melissa Vella State Athletics Champ
569.2 Karen Barter & Dog
570.1 St. Albans Secondary College School Cycling Team Mark Micaulef
570.2 Punk Day
571.1 Avondale Secondary College Farwell School Camp Pinic
571.2 Play Promo Dracula Spectacular
572.1 Joanne Mooney
572.2 Football Sunshine V's ?
573.1 John Henry Hamptons Menswear
573.2 Sports Theatre Group
574.1 E.T. Doherty John Aarons
574.2 Mature Age Student Wendy Gray
575.1 "Cindy Rella Wishes" Judie Justin, Juile Ryan, Katherine Lehtonen
575.2 Deteriation Of Sydenham
576.1 Nelson Cox & His Tree Stump
576.2 Sunshine City Band 60th Birthday
577.1 Kids Who Won Prizes In The Keilor Arts Show
577.2 Sassella Park
578.1 Finnish Ambassador Visiting Factory Valmet - Boustead Pty Ltd
578.2 Nidrie Bed Shop
579.1 Geoff Vnger
579.2 Deer Park Primary School Tracel Beaurex
580.1 Trader Of The Week - Sue Mitchell, Yesterday Fashions
580.2 Dine Out Scalloanis
581.1 Street Watch Gertrude St West Side Sunshine
581.2 Sunshine Medibank Private
582.1 Tom Fraser Reserch Lab
582.2 Albion Railway Station (Former Site) Memorial Cain
583.1 Glengala Hotel
583.2 Launching Of N.S.F. New Grounds
584.1 Senator Rod Kemp & Local Candiadate Stephen Carter Around St. Albans
584.2 House Fire
585.1 Japanese Truckcare
585.2 Duke St Rubblish Dump
586.1 Street Watch Power St St. Albans Between Grace St & Eddie St
586.2 Veronica Eastwood Headshot
587.1 majestic Vedio Staff
587.2 Mr Card Winner Of Passive Smoking Case
588.1 Fire
588.2 Cr. Veronica Eastwood Planting Trees
589.1 Grade 5 & 6 Cross Age Tutoring Painting Mural
589.2 Mrs Azzoparddi
590.1 Belle de Jour
590.2 Deer Park Primary School Kids Bandaging
591.1 Dorothy Costa Keilor Major Throwing Waste Into Compose
591.2 Mileage Marathon Vehicle
592.1 Mark Howe
592.2 Jeff Kennet
593.1 Entire School Population For 10th Anniversary
593.2 Ardeer Feature
594.1 Mrs & Mrs Celia Harmony Housing
594.2 Wrestlers Sunshine
595.1 Fun City Go-Karts
595.2 Motorcycle Exhibition
596.1 St. Albans East Primary School - Adivije Iljazi
596.2 Achterberg 50th Anniversary
597.1 Hippery Hop Baby Shop - Michele & Christine Royal
597.2 Albi Haass Kick Boxer
598.1 Staff At Shop
598.2 Quit Van Deer Park High School
599.1 Auon Ladies
599.2 Y.M.C.A. Old Time Dancing
600.1 Chris Evans
600.2 Charlie Apap T-Shirt
601.1 Copies
601.2 Language Program
602.1 Messy Parks
602.2 Jack Hatton With Tomato Bush
603.1 W.L. Allen Foundary Wins Top Award Terry Barnett & Employees
603.2 Sharon Daley Advocate Competition Winner
604.1 Vox Pops About Expanding Highpoint
604.2 Vic Life Saving Championships
604.3 Sun Cres Roadworks
605.1 Street Watch Junice Smith & Remains Of Footpaths
605.2 Joe Harper & P.R.A.
605.3 Croation Walk
606.1 Tongan Children Performing To School
606.2 Kids Playing Violins
606.3 Sunshine Ladies Benevolent Society 60th Birthday
607.1 George & May Trickey 50th Wedding Anniversary
607.2 Easter Bunny
607.3 Everybody Exhibition Nanaye Cain
608.1 Toy Library Lisa Babic
608.2 Family Pinic With Easter Bunny
608.3 Albanvale Primary School Music Hour
609.1 St. Albans East Primary School Band
609.2 MacKellar Primary School
609.3 Easter Hat Parade
610.1 Ben Lawry & Alexander Myers
610.2 Easter Parade & Bunning
610.3 Ivy Taylor
611.1 Violin & Cello Students Giving Performance
611.2 Financial Seminar Barry Jones & Vic Parsons
611.3 St. Albans Catholic College Soccer Team
611.4 Claude Sanacki
612.1 Enclosure Of Russians Ducks & Duckings To Keep Customers Occupied
612.2 Outside Of Building
612.3 Cr. Pino - New Keilor Mayor
613.1 Manager Laurie Woods
613.2 Kids Releasing Helium Balloons For Easter
613.3 Croation Singers
614.1 John Gabriel & St. Albans Hall
614.2 Herman Mouthan - Traffic Engineer With Altona Council
614.3 All Star Sports Stop
615.1 Bruno Rabensteiner
615.2 Organisers Of Tourist Book
615.3 Home Furnishers
616.1 Street Watch Tony Knalith
616.2 Neville Foord & His HG Ute & Trophy For Winning Nationals Street Car Championships
616.3 Soccer - Intermediate St. Albans V's Bell Park Tech
617.1 Santa & Andy Moffitt Crystal Arnold
617.2 Fire At The Warren Family Home Blackshaws Rd
617.3 Sunshine Womens' Cricket Club 60th Birthday
618.1 Our Ladies Church 50th Anniversary
618.2 St.Albans Special School & Tidy Towns
619.1 Braybrook First Street Festival
619.2 Lynn Kosky, Bruce Mildenhall with Edna Seelaf
619.3 Taylors Lakes Cricket Pitch
620.1 Jennifer From B.M. Cers
620.2 The Upper Storey Is Going To Be Reused For A Cinema
620.3 St. Johns Ambulance Funeral
621.1 Mrs Selkirk Celbrating Her 90th Birthday
621.2 Assumptionday March
621.3 Kerbrook Abbattoir
621.4 Rubblish Bins 4 Feet 6 Inches High
621.5 Dorris Rhodes & Sister Ethel Cole Reunited After 37 Years
622.1 Old Pictures Along Walls & Sqd Leader Tom Buckham
622.2 Duro Perica
622.3 Deer Park High School Book Week
622.4 Cory & Brendan Coghlan
623.1 Sonya Wictshire Young Citizen Of The Year
623.2 Rhonda Stone & Car
623.3 Albanvale Primary School Fete
624.1 Long Grass Snake / Fire Hazard
624.2 Sign "No Boating, Bank Fishing Only"
624.3 Sunshine Library Bookweek
625.1 Former Sunshine High Student - Zbigniew Andrzejewski
625.2 Ruby Daramarana - Young Achiever
625.3 Sunshine Traders car Park
626.1 People Building New Grand Stand
626.2 Simon Zdraveski Along Dynon Rd Steel Hit His Car
626.3 Maidstone Primary School Architect In Residence Peter Scully
627.1 Tom Roper
627.2 John Ciciubla Karate Champion
627.3 Spring St Homicide
628 Ex-Sunshine High Student - Wendy Lyle
629.1 St. Albans Christmas Festival Parade
629.2 Punter To Punter Gary Adams
630 Vic Roads Ducks With Child
631.1 Street Watch - Samatha Salamon
631.2 Head Shot Of Students Myrniong Primary School
632.1 Peter Charalambous
632.2 Mrs Jeanette Nelson With Son Brex
633 Taylors Lake Recreation Club
633 Head Shot Of Students Exford Primary School
634.1 Deer Park State Relay Championships Five Little Athletics
634.2 94 Year Old Charlie Stainer
635.1 Deer Park Central Somlia With Kids
635.2 Football V.F.L. Richmond V's Footscray
636.1 "Gear It"
636.2 Sunshine V's Brunswick At Football
637 Lebanese Family Used To Live In This House & They Wreaked It & Continue To Return
638 Rev. Dr. John Roffey
639 School Principal Jun Silver & Kids
640 Ray & Margaret Fleet On Yacht
641 Mrs Tucke & Son John
643 Buses & Trucks Turning The Corner With Great Difficulty
644 Dennis Twentyman & St. Albans High School Students In Aircraft
645 Brian Mitchell, Director Of The Association
646 Childcare Workers Strikes Have Caused Teachers To Bring Their Children To Class
647 Display For National Park Care Day
648 Bus Accident
649 Nat DePalma Truck Pointer
650 Ken Hook
651 New VFA President John Grieve - Dept Principal
652 Flooding
653 Kids & Principal Brian Rogers & Award
655 Geneivve Searle & Others
656 Allison Durbin & Sister Poatill
657 Flooding Dynon Rd / Francis St
658.2 Bill Noonan, Street Named After Him
659 Cracks In Walls Of Carlton St House
699 Lesley Bergin
700 Radio 3AR - 3LO Transmitting Tower
701 Lew Stafrace
702 Pet Parade
703 Deer Park North Pet Parade
704 Submariners Group
705 The Sunshine Marching Club
706 North Sunshine Kinder 25 Years Celebrations
707 St. Peter Chanel School Fete
708 Ardeer Festival
709 Jack Freeland Art Exhibition
710 Donald Duck
711 Tea Gardens & Colonial
712 Kids & Lorraine Wilson Deer Park North Primary School
713 Sunshine Laddies Cricket Team (Past & Present)
714 People In Empty Swimming Pool
715 Croquet
716 Cyrpress President's Wife
717 Craft Day
718 21st Birthday Of Deer Park Elderly Citizens Club
719 Kids Dress Up
720 Kids & Elderly People
721 Dancers & Cooking
722 People, Street Survey
723 Orchids & Tym Barlow
724 Chris Evans At Keilor Park Depot
725 Rate Notice, Sunshine Councillors McKay & Rielly
726 Vietnamese Brush Painting
727 Parachuting Santa
728 Dr. Jim Cairns Opening The Hunt Club
729 David Cunningham Drawing Lions Club Raffle
730 Sunshine Pool & Lady With Bucket
731 Mayor Ian Mill
732 Kids & Animals
733 Deer Park Shopping Centre Management
734 Cardinal Joseph Glemp
735 Deer Park Shopping Centre
736 Bristol Paint Shop
737 Rowny Azzopardi Epilespsy Suffera
745 Ada Scrivener
749 Elderly Citizens
775 Alessandra Porusasco
776 Motor Bikes In Deer Park
777 Flora St Query
778 Bernard Reilly
779 Keilor Mayor At Keilor Golf Club
780 Dog Under Car
781 Kate Young BHP Science Prize
790 Gail Gardener "Energetiks"
832 Pauline Cassar
833 3 Kids McDougall Dixon & Stebbing
834 Jackie Schembri
835 Dominic Schrippa
836 Junior Council
837 Bob Sibson & Windmill
838 Hammer Thrower Mark Sirett
839 Mrs Christine Moore, Rubbish Dumped Behind Her House, A Breeding Ground For Snakes - She has Been Bitten
840 Exchange Student Visiting Australia
841 Dress Circle
842 Camera Equipment For Advertising
843 Peter Portelli
844 Goth Annie Of Benevolent Society
845 Elsie Brown, Mayor Of Keilor Cr. Sam Ortisi & Adele Broan
846 Harry Mokes & Family
847 Geoff Guy Highpoint Shopping Centre Hoyts Cinema
848 "Boat Race" St. John College Braybrook
849 Soccer Just V's Makedomic
850 Soccer Croatia V's George Cross
851 Senior Constable Trevor Jury Talking To School Kids
852 MYM Furniture Advertising
853 MSK Furniture Advertising
854 Alex Andionopoulos Standing In Location Of Future Traffic Lights On Traffic Hazard Corner McIntyre Rd Sunshine North
855 Electoral Officer With Student Rep Council
856 Arundel Rd Holes In Road
857 Skateboard Kids (Group Shot)
858 Phillip Nelson Ardeer Church
859 Kids Reading In Bed
860 First Aid Graduates & Craft Ladies
861 A Banner Celebrating Palm Sunday
862 Doreen (Rentals Manageress)
863 Alf Zarah & Corey Bisset
864 Kids In Swim Carnival For Various Schools
865 Asbestos In Houses Around Braybrook Area
866 Cricket Champs - Michael McKenzie & Hung Phan
867 Gaye Nicol
868 Advertising - John Easton
869 George Mencl
870 Easter Hat Parade Sunshine North Primary School
872 Evelyn Alperstein - Sunshine Plaza Promotions Manager With Mike Williamson & Terry Wallace
873 Wally O'Brien Deer Park Resident
874 Arthur Lovelock
875 Mun & Kids In Salvo - Emergency Housing
876 Kids On Bus - Micheal & Mathew Gelder
877 People Taking Part In Heart Screening
878 Playback Theater C/O At St. Albans Technical School
879 Rhonda Martin & Co
880 Murder House Eymard St Deer Park
881 Jan Jones
882 Street Survey Head Shots
883 Lonie Treacy - 8 Year Old, One Of The 1st Girl In Australia To Be Accepted By Cubs
884 Macedonian Dance Group
885 Gaye Nicol
886 Speeding Traffic St. Albans Rd
887 Cops - Steve Gibb, Peter Egan & Peter Payne
889.1 Peter & Sam Kontek
889.2 Mr Geoff Land - Fleet Manager Has Won Fleet Manager Of The Year
890.1 Wally Mazurek
890.2 Black Prince Restaurant
891.1 Harry Spies & Others
891.2 Tenants Group In Western Suburbs Are Combining
892.1 Bernard Rielly
892.2 Elizabeth McKinnon
893.1 I.C.I. Nitrocellulose Plant Deer Park
893.2 Val Thompson & Robert Fordham
894.1 Female Firefighters - Karen Rautenbacher & Renee Pizzecco
894.2 3AW Fun Run
895 Fashion Parade
896 Sunshine Council Cambers (Protestors)
897 Det. Sgt. Mark Chambers
898 A Heart Week Play For Students
899 Glenda Kueng & Lynette Flowers
900 Residents Of St. Albans Angry About Car Park To Be Built On Their Houses
901 Jukie Harison, People Organising Gardening At School
902 Skillshare Project
903 Rose Grower Ross
904 Kids In Class St. Albans High School
905 Sr. Maree
906 Bernard Reily & Deer Park Residents Want A Pool For Deer Park Area
907 Mavis Dickie
908 Bruce Cook & John Tarulli
909 Plumbing & Hardware
910 Meeting Michael Wood For Details Of Shoping Centre Being Built
911 Adele Gasa Complaining Over Rubblish In Vacant Land
912 Stan Protheroe & Russell Tillbrook
913 Albert Zammit & Traffic
914 St. Albans Hotel Auction
916 Tidy Street Winner Joe Kruszynski & Lyn Bartlett
917 Tim Walsh
918 Majorie Tant Of 2 Perth Ave Albion Was Hurst When A Truck Ran Into A Met Bus She Was On
919 Moslan Prayers & Fete Memet Balkel
920 Queen Scouts Chris & Alan Dash
921 George Seitz & Gesa Lindemann
922 Kathy Kriechhammer & Cat Disease
923 Kath Potter Eviction
924 Detective Sgt Ken Riches & Stolen Goods
925 Ernest & Elsie Pinn 50th Anniversary
926 Migrant Woman's English Class
927 Sunshine Advocate Staff Pinic Footscray & Werribee
928 Edward & Daryl Dowens
929 Deer Park North Primary School Grandparents Day For Preps
930 Hod Rod Show With Evelyn
931 Music Group Jenny Aguirre
932 Corna Portaro & Cat
933 School Play Marika Tomic St. Albans High School
934 Launch Of Balloons Footscray Players Attending Resurrection Primary School
935 Ruth Davron
936 People Protesting Against Closure Of Street
937 Jack Stevens In Street Scene - Industrial & Residential
938 Aerobics Class St. Albans Leisure Centre
939 Soccer Melbourne Croatia V's Apia
940 Maltese Mother's Day Lunch
941 Barry Plant Team Photo
942 Eastwords Team Photo
943 Launch Of Newstart Projects
944 Ian Baker At Old Railway Building Albion Transformer Site Talmage St Albion
945 Clare Brennan
946 Lorna Cameron For Promotion Reading The Advocate
947 Lena Campbell Turned 100
948 J.B. Falcone Head Shots
949 Clare Brennan
950 Greg Brown Architech At Rialto
951 Anne Matthews Newport Railway Station
952 Science Show By St. Albans High School Teachers For Kids
953 John Kontek And The Sunshine Advocate
954 Dream Café Band Amusing The Students & New Computer In Library Western Insitute St. Albans
955 Headshots & Teamshots St. Albans Leisure Centre
956 Minister Of Transport To Launch Westrip Report / Street Kids Living
957 Sunshine West High School Vollyball Team
958 Deer Park Primary School Police In Training Doug Whiteford
959 Mr Greach At Evergreen Reserve
960 Sunshine Primary School McCourt Suffolk Oval
961 Nick Pino At Intersection & Petrol Station Taylors Rd & St. Albans Rd
962 Mrs Nell Rout & Neighbourhood Watch Meeting
963 Graeme Richards & Family With Milk Van
964 Citizenship Ceremony
965 Marion Martin - Sassella Park
967 Roc Kirby Village Roadshow
968 Charlie Theuma
969 Sunshine Golf Club Junior Golf Day Phillip Johns
970 Hazel Harwood
971 3LO Transmitter Russell Rolls
972 Dr Theophanous
973 Rev. Stewart Young & Family
974 Ashley Hotel Big Car Demolisher
975 Presentation Of Outdoor / Indoor Toys To Kids By Rotary
976 Homes Being Built On Ex-Factory Site Forrest St Ardeer
977 Peter Boyle & Phillip Johns
978 Church Withers St Sunshine
979 Phillipines National Day
980 Key Heyde & Kids On Public Transport
981 Dan Ganachan
982 Lorna Cameron At St. Albans Youth Centre
983 Marion Martin
984 Marie Schrden & Johanna Schrden At St. Albans With Children
985 Public Meeting Cr. Phillip Nelson
986 Collen Azzopardi
987 Alan Davidson
988 Power Walkers - Ellen Self At Brimbank Park Keilor
989 Marion Martin
990 Lisa Copeland Water Polo
991 Shannon O'Reilly Will Be Competing In Interstate Cricket Competitions
992 Middle Footscray Railway Station Underpass, Landlocked Terrace Houses
993 Ingrid & Her Chiner Dolls
994 Susan Pearce & Joe Watkins
995 Deer Park High School - Cassandra Phillips, Sandra Turndull & Haley Flower
996 St. Albans Health Centre Tracie Fynnell & Les Rooth
997 Vicki Brewster At Anglers Hotel
998 Deer Park Primary School Oldies & Kids Ellen Gelder
999 Westend Market
1000 Marion Martin
3541 Albanvale Youth Group - Hayden Marshall
1.1 First Babys For The New Year
1.2 Hot Shots Hair St. Albans
1.3 Tree Cutting Vlas Gergis
2.1 Street Watch - St. Albans
2.2 Placements Maribyrnong Secondary College
2.3 Tony Gigacz
3.1 George Caval
3.2 R. Matthews
3.3 Boats
4.1 Sam Merhi
4.2 Raining School Holidays - Johnny & Marcus Kasab
4.3 Susan Jennison
4.4 Tasman Meats Competition
5.1 Office Of Aelx Andrianopoulos
5.2 Major Cormbardi
5.3 Acid Thrown On Dog
6.1 Corna Vagg
6.2 Keilor Farm
6.3 Dick Howden
7.1 Richard Evans Stilts Walker
7.2 Essendon Mazda
7.3 Peter Wheelahan
8.1 Steve Marriot Sunshine Council
8.2 Moral Masonary Deer Park
8.3 Croatian Arts Group & Teachers Boundary Rd North Melbourne
9.1 Bill Reeves
9.2 Sunshine Fire Bridage - Chris Evans
9.3 William & Mavis Hunter 50th Wedding Anniversray 1 Erica Ave St. Albans
10.1 Nevis Mallon & Jan Peric
10.2 Chisholm College
10.3 John Brumby & Alan Griffiths Of ALP Milleara Mall East Keilor
11.1 Charlie Stefani & Harold Fister
11.2 Kealba Playgroup
11.3 Captain James Storen In Grass Too High For Fire Season Sydenham C.F.A. Sydenham Rd
12.1 Tom Hampton 40 Glenside Ave Avondale Heights
12.2 Acupunture Victoria Uni St. Albans
12.3 Karen Stevens Of Child Care Team New Centre Community Hub Sydenham
13.1 Panya Williams
13.2 Our Ladys Primary School - Kids Singing Anthem
13.3 St. Albans Parking
14.1 Sandy Johnson & Snakes
14.2 Rap Dancing - Kate Armstrong Avondale Heightd YMCA
14.3 First Born Baby For Victoria This Year - Jessica John & Lisa Webb, Sara & Andrew
15.1 Narelle Reilly & Pets
15.2 Keilor Auction
15.3 People In Sun At Sunshine Pool
16.1 Warren Wherrett
16.2 John Kontek
16.3 Rosemary Barbara - First Female Marriage Celebrant 2 Wildwood Crt Albanvale
17.1 Gabriel Nicol & Award
17.2 Yvonne Twaites - Fifth Generation Family 123 Station Rd Deer Park
17.3 People Swimming In Hot Weather St. Albans Leisure Centre
18.1 Kevin Baker & Paddocks
18.2 Cengiz Tervan - Kebab House 8 East Esplanade St. Albans
18.3 Doulta-Galla Province Candiate John Brumby, Luba Taleuslea & Natalie (Daughter) 12 Months Old Can't Use Buses St. Albans Railway Station
19.1 Laura Agius & Her Milk Bar
19.2 Keilor Gymnastic Club Kindergarten Classes St. Albans
19.3 Lloyd McCallum - Postie For 30 Years Sunshine Post Office & Area
20.1 Robert Mate Mate
20.2 Trader Of The Week - Graeme Baulch Sunshine
20.3 Street Watch - Katherine Chlewicki & Neighbouring Horse Touble 40 Albert Cres St. Albans
21.1 Car Winners - John & John Harris
21.2 Deer Park Community Centre At War With Sunshine Council Deer Park Shopping Centre
21.3 Suzanne Jordan & Son Luke 7 Weeks In Flea Infested House At Flat 3/28 Carlton St Braybrook
22.1 Edward Fraser - Citizen Of The Year 55 Station Ave St. Albans
22.2 Craig Parry - Golf
22.3 Tammie Rainbow 4th Generation Hair Fashion
23.1 Ener Sherifali & Very Broken Footpath 16 Rason Crt Keilor Downs
23.2 Kicked Out Of Home Of 40 Years
23.3 Teaching With Computers Monmia Primary School Keilor Downs
24.1 Hanh Van Ma Century 21 Real Estate 99 Main Rd West St. Albans
24.2 BBQ At Sunshine Flats
24.3 Trader Of The Week - Blinds Salesman Ballarat Rd Sunshine
25.1 Vox Pop - On "What Does Australian Day Mean To You?"
25.2 Maidstone Police Station Ballarat Rd Maidstone
25.3 Melbourne Water St. Albans
26.1 Australian Day Honours Award Handed Out
26.2 Chinese New Year Christ The King Primary School
27.1 Copies For A Chris Evans Job
27.2 After School Program
28.1 Peter Portelli & Friends Of Maltese Community Sunshine Project For Former Railway Building Talmage St Albion
28.2 Murray Black
29.1 Stephen Jones
29.2 Maribyrnong River - Dolphin
29.3 Principal Frank Devlin & Deputy Prinicpal Ray Reid St. Albans East Primary School Station Ave St. Albans
30.1 Fire Along Highway Ballarat Rd Deer Park
30.2 Vietnamese Soccer Team
30.3 U/19 Footscray Football
30.4 New Principal Les Mayes PhD Jamieson Park Secondary College
31.1 Bingo The Clown At His Daughter's 6th Birthday Renee 6 Kurung Drive Kings Park
31.2 Street Name Desire
31.3 Copies Of "Guns N Roses" Pictures
32.1 St. Georges Coptic Orthodox Parish Celebrates Christmas St. John Church Miles Street Deer Park
32.2 Fish & Chip Shop Deer Park
32.3 School Bus - St. Albans
33.1 Alex Andrianopoulos Unit 6/47 Alfried St, St. Albans
33.2 St. Albans Leisure Centre Taylors Rd Fire - Workers On Roof
33.3 Top 10% In School
34.1 Co-ordinator Nejla Kerry Remzi And Members Of Local Turkish Women's Group 12 East Esplanade St. Albans
34.2 Geoff Saxton - New Courier Service
34.3 School Bus - Braybrook
35.1 John Cassar At Intersection Where His Daughter Was Injured At Cnr Tilburn Rd & Station Rd Deer Park
35.2 Maltese Church Parade Mullbank Drive St. Albans
35.3 Back To Maribyrnong - Anglers Hotel
36.1 Deer Park Football Ground - I.C.I. Sponsorship
36.2 Alan Griffith
37.1 Dancers Angela Frost & Kathleen Nicholls
37.2 Natalie Bruzzese - Australian Junior Soccer Player
37.3 Sunshine Art Shop
38.1 Aboriginal Festival
38.2 Ambulance Officers - Peter Oliver & Peter Watson
38.3 50 Years Wedding
39.1 $10,000 Prize To Jeanette Cassar From National Australia Bank & Sunshine Council
39.2 Baseball
39.3 Sunshine Chicken Shop
40.1 Trader Of The Week - Anna Babic Hotbread Kitchen 251 Hampshire Rd Sunshine
40.2 Klaus Buehlen - Milk Bar Owner Rubbish Outside His Shop 57A Theodore St. Albans
40.3 Westvale Community Centre Kings Park
41.1 Anne-Marie Fitzpatrick, Alistair Bloom, Patricia Jensen, Elena Fergra & Maureen Bursiew Monmia Primary School Keilor Downs
41.2 Car Rally
42.1 Geoff Loft & Irons
42.2 Sunshine Fire Station
42.3 Back To Maribyrnong - Maidstone
43.1 Dr. Peter Dunn
43.2 Darren Piaientini - Testimonial AG Panels 199 Roberts Rd Airport West
43.3 Final For Pixifoto Most Appealing Baby & Toddler
44.1 Mark Kivaclvic Car Racer
44.2 Joe & Polly Wedge - 50th Wedding Anniversary
44.3 St. Johns Ambulance Volunteers 21 Stenson Rd St. Albans
45.1 Monmia Primary School Keilor Downs
45.2 Western Discounters
45.3 St. Pauls Primary School New Crossing Kealba
46.1 Sunshine Secondary College - Kids First Day Back
46.2 Champion Baby Deer Park
46.3 St. Albans Community Health Centre
47.1 Len Goninon Good Neighbour Braybrook
47.2 Prince Charles
47.3 Albion North Primary School Movie Making Day North Sunshine
48.1 Steve Asher
48.2 Christ The King Primary School - Chinese Dragon
48.3 Arthur Morris Gardens St. Albans East Primary School
49.1 Six Students Will Be Featured Every 3 Months Sunshine Secondary College Graham St Sunshine
49.2 Essendon Mazda
49.3 Womens Education Centre Students At Computers
50.1 Feature On Asians At College Braybrook Secondary College Ballarat Rd Braybrook
50.2 Kids Go To Japan World Championships
50.3 Jamieson Park Secondary College Solar Car
51.1 Michael From Kontek
51.2 Marcel Nigli - Nigli's Eurasion Café Main Rd West St. Albans
52.1 John Kontek & Staff At His Office Hampshire Rd Sunshine
52.2 Native Grassland St. Albans
52.3 Avon Lady Judith Herd Giving School Sunscreen Parks Ardeer Campus Of Sunshine Secondary College
53.1 Kacey Stevens 9 Wins Bike In Raffle From Lou Vasctio Owner Of Shoe Xstore 6 Alfrideda St, St. Albans
53.2 "Pockets Billards Club" World Kick-boxers
53.3 Merve Frost & Sons St. Albans Secondary College Main Rd East St. Albans
54.1 European Unisex Frank Calidonna 89 Glengala Rd Sunshine West
54.2 Norn Price - Country Singer 1 Kirk St Ascot Vale
54.3 Keilor Cemetery - Cemetery Workers
55.1 Uniform Branch Boys Excited About Their New Police Station
55.2 Rasile Tiles
55.3 St. Albans Police Station $36,000 Property Haul
56.1 Stuart Homer Principal St. Albans Secondary College Main Rd East St. Albans
56.2 Robyn Rochford
56.3 Vision Craft - Jean's Pot Plant
57.1 Street Watch - Rose St Braybrook
57.2 Sewing Group Ladies Sacred Heart Church Winifred St, St. Albans
57.3 Jane Ormila Just Returned From Trip On Ship To Somalia 24 Lyons St Maidstone
58.1 Peter Papadakis Protest Over Parkland Collenso Reserve Sunshine
58.2 Sunshine Cabinets
58.3 New Playground Equipment Monmia Primary Schools Keilor Downs
59.1 Joseph Gilberto Of St. Albans Pharmacy 320 Main Rd East St. Albans
59.2 Sunshine East Primary School - Clowns Performing
59.3 Trader Of The Week - Helga Swiss Butchers Shop 204 Main Rd East St. Albans
60.1 Street Watch - Cnr Christie St & Burnside St Deer Park
60.2 Sydenham C.F.A. Members
60.3 Grade 3's Being Ashed By The Parish Priest St. Pauls Primary School 230 Sunshine Ave Kealba
61.1 Street Watch - Vacant Block 49 Station Rd Deer Park
61.2 Car Prize - Steve Wallis (Essendon Mazda) Keilor Downs Shopping Centre
61.3 Rev. Joe Dang (Deacon) Who Will Be A Priest On 3rd March Holy Eucharist Presbytery 1A Oleander Dr St. Albans
62.1 Greg Kryrs
62.2 Over 40's Program
62.3 Head Shots - Kontek Sunshine
63.1 Martie Bell
63.2 Bernard Reilly St. Albans Transport System
63.3 Kinder Farmer Keilor Downs
63.4 Sophie Kiparoglon Owner Sharam Hair & Beautt
64.1 Stan Lavin Deer Park Hotel
64.2 St. Albans Hume & Hovel Memorial
64.3 Picture Of Building Self Bros Supermarket 18 East Esplanade St. Albans
65.1 Mural Sunvale Primary School
65.2 Chisholm College Softball Team
65.3 Nicholas Giorgiadis Youth Business Initiative 1 Mossfield Mews Tullamarie
66.1 Pay Axiak
66.2 Triplets Turn Two
66.3 Marie Bucak Century 21 Westend 99 Main Rd West St. Albans
67.2 Ardeer South Primary School - Kids Community Group
67.3 Sharons Spiteri & Sophie Kiparoglon 233 Hampshire Rd Sunshine
68.1 Erica Loone - Lead Site Suspension St Ardeer
68.2 Grand Prix Race Sunshine
68.3 Cars - Sunshine Hyundai Ballarat Rd
69.1 Joe Roda Hair Design
69.2 Sunshine Hair Saloon Staff Pictures
69.3 Cars - Essendon Mazda 169 Keilor Rd Essendon
70.1 Street Watch - Main Rd East St. Albans
70.2 Rize Electronics Sunshine
70.3 Cars - Mike Thomas Essendon Nissan
71.1 St. Phillips Big Band
71.2 Suns Irrisations
71.3 Parole Officer Donna Ascher
72.1 Barry O'Donohue
72.2 Croatia Soccer Club
72.3 Trees In Power Lines Butler St St. Albans
73.1 Michael Balhus & Runners
73.2 Denese Jones - Volunteer Worker Youth Resource Centre Taylors Rd Keilor
73.3 Karen French - Girl Guide
74.1 Olive & Sel Murray
74.2 Deer Park Playgroup Easter Bonnett Parade Sassella Park Station Rd Deer Park
74.3 Bendigo Building Society - Michelle
75.1 Mrs Gilbert
75.2 Public Housing Group Goes To Canberra 6 Commercial St Maidstone
75.3 Gladys Rainer 90 Year Old
76.1 Bernadette Smith
76.2 Go-Kart 1st & 2nd Prize Winners Bret Anderson & Roby Caruti 32 McIntosh St Sunshine
76.3 John Bellamy - Builder 3 Otway Palce Keilor
77.1 John & Kerryn Voletine Renage
77.2 Croatia Soccer Team
77.3 Street Watch - Peter Papas 48 Rutherglen Way Taylors Lakes
78.1 Sunshine Karate Centre Parents Learning Luke, Jeremy & Olga Bond
78.2 Elderly Citizens Fesitval Sunshine
78.3 St. Albans Police Station Bycycles Presentations
79.1 "Elemental As Anything" Koulla Demertzidis
79.2 Steven & Lucy Mecchi - Car Through House 121 Tamar Drive Deer Park
79.3 Baby Show - Deer Park Shopping Centre
80.1 Job Watch
80.2 Kontek Heads - Rein Oziline
80.3 Keilor Hotel - Children's House & Kitchens
81.1 St. Albans Square
81.2 Camec Promo
81.3 Fallshaw Wheels & Casters North Sunshine
82.1 Cut Price Del St. Albans - Sandra Zammit
82.2 Adrian Dororo
82.3 Rehersal Shots For "The Crucible" Play Sunshine Community Play Station Rd Deer Park
83.1 Mehmet Dirakoric
83.2 Peter Black
83.3 Trader Of The Week - Lynn Buehler Milk Bar 57A Theodore St, St. Albans North
84.1 Dead Birds Sunshine
84.2 Vox Pop - People's Opinions On Massey Ferguson Site Use Sun Cres Sunshine
85.1 Un-emptied Rubbish Bins St. Albans
85.2 Hanna Instrument
85.3 Missing Animals Story Narelle Savage & Daughter Rhiannon & Neighbour Cathy Hutchenson 5 Drummartin St Albion
86.1 Lyn Holland & IVF Triplets Royal Women's Hospital
86.2 Amando
86.3 Hairdresser Sheree Krajinovic & Class - Sunshine Community Centre Kermeen St West Sunshine
87.1 Chisholm College Golf Kids Brett Thornton
87.2 Baseball
87.3 Ciro Lombardi & Locals On New Equipment Tennyson Ave Delahey
88.1 Street Watch - Bart Pannuzzo St. Albans
88.2 Katie Miscevic
88.3 Deer Park Bowling Club
89.1 John Pino & His Killer Tomatoes
89.2 Our Lady's Primary School Dancing
89.3 Dame Joan Patterson
90.1 Allen Saylav Rally Car
90.2 Florist Keilor Downs
91.1 Brooklyn Tip Jones Rd
91.2 CMS Security Solutuins - Terry Coleman
91.3 Union Boss - Mr Lou Di Gregorio & Family East Keilor
92.1 Sunshine Festival Carmel Rides (1 Of 3)
92.2 Sunshine Festival Carmel Rides (3 Of 3)
92.3 Andrew Blobel Dianasamrzija 26 Alfreida St, St. Albans
93.1 Street Watch - La Costa Family Home Cavendish Drive Deer Park
93.2 City Of Sunshine
93.3 Young Girl Saves Kids In House Fire 66 Churchill Ave Braybrook
94.1 Tony Zidarich - St. Albans Police Station
94.2 Vandalism St. Albans
94.3 Colin Bugeja - Delta Clothes Hoist 61 Arthur St, St. Albans
95.1 Dress Rehersal "My Three Angels" Sunshine Community Theatre
95.2 Di Pack Deer Park
95.3 Kerrie Morton - Kerrie's Hair Design 1 Crosslee Crt Deer Park
96.1 Gayle - Deer Park Shopping Centre
96.2 Amanda Pufek 2 1/2 In Front Of Gary Christie Hair Saloon 44 Alfrieda St. St. Albans
97.1 Feature On School - St. Theresa's Primary School Albion
97.2 "Keilor Fesitval" Cliff Harvey Lagoon Reserve Keilor
98.1 Manican Of The Year St. Albans
98.2 Phillip Kass imatis & His Beautiful Car
99.2 Opening Of Duty Free Shop St. Albans
99.2 Street Watch - Helen Robinson & Long Bushes East Esplanade St. Albans
100.1 Street Watch - Maryann Pantallfresco & Drain St. Albans
100.2 Indoor Rock Climbing
101.1 Alfred & Dororthy Stark 50th Wedding Anniversary 33 Hampshire Rd Sunshine
101.2 Shooter St. Albans
102.1 Deanne Smith Of Deer Park Who Won A Scholorship St. Albans Campus Of VUT Joan Kirner Building
102.2 Sunshine Hair Dresser
102.3 U/16 Disco Kemal Belric
103.1 Marianne Micalleff & Dog On Pathway 295 Main Rd East St. Albans
103.2 Sunshine Secondary College Radio School
104.1 Jackson Special School Mulhall St, St. Albans
104.2 Graeme Wlrm Deer Park
105.1 Marie Bell Roxannes Fashions Hampshire Rd Sunshine
105.2 Brian O'Dea New Principal St. Albans East Primary School
106.1 Marre Aquilina, Carmel Robson & Cybil - Spoils Deer Park Shopping Centre
106.2 Basketball New YCW Building With Sunshine Mayor & Two Basketball Players Lily St Braybrook
107.1 Kids Taking Part In School's Page Feature Maribyrnong Secondary College
107.2 Trader Of The Week - Melaine Rowe Suffolk Rd Sunshine
108.1 Kally Hitas & Tammie Rainbow - Fourth Generation Hair Salon 3 Dickson St Sunshine
109.1 Libby McIroy & Louise Kay - 55 Devonshire Rd Sunshine
109.2 Kozas Hair
110.1 Marriage Guidance Jill Parris & Jenny Booth - 1st Floor 1C Clarke St Sunshine
110.2 Susan - Tango Café St. Albans
111.1 St. Albans Secondary College International Women's Day
111.2 Sunshine East Primary School Victorian state Opera Performs For Children
112.1 Kealba Secondary College Swimming Carnival
112.2 Greek Festival West Sunshine
113.1 Kealba Community Centre Travelling Farm
113.2 Jeff O'Donell Youth Centre Maidstone
114.1 West Sunshine Community Centre - Young Tennis Players
114.2 West Sunshine Community Centre - Young Tennis Players (Clipped Negatives)
114.3 Woolstore Maribyrnong
115.1 Rita Cascun With Father Angelo Casun & 2 1/2 Kilo Patatoes 75 Warwick Rd North Sunshine
115.2 Book - Education In 1890 Braybrook
116 Sunshine Auction
117.1 KSB Ajax Pumps Opening By Jeff Kennett
117.2 Gym Equipment Youth Centre Deer Park
118.1 Kaylene Micallef's 1985 Corvette 2 Avondale Ave St. Albans
118.2 Keilor, Dead Men Do Tell Tales - New Book
119.1 Year 11 Pupils Of St. Albans Secondary Collee Talk Science To Grade 6 Kids Of Holy Eucharist Primary School Oleander Drive St. Albans
119.2 Roundabout Taylors Rd St. Albans - Taken In Cherry Picker
120.1 Job Start - Head Shots
120.2 J & S Air Conditioning Staff Picture
120.3 John Kontek & Staff Portraits Kontek Office Hampshire Rd Sunshine
121.1 Don McKay
121.2 Kings Park Secondary College Classical Guitar Ensemble Goldsmith Ave Delahey
121.3 Trader Of The Week - Geoff Humphreys Pizza Haven Victoria Square St. Albans
122.1 Gustave Lozeris & His House
122.2 R.A.C.V. Phone Sunshine
122.3 Deaf Students Who Attend Secondary Deaf Facility Cnr Glengala Rd & Allison St Ardeer
123.1 Street Watch - Jenny Trainor
123.2 100 Years Old
123.3 Teachers Stop Work To Picket School Because Of Education Cuts Albanvale Primary School Diamond Ave & Dover St
124.1 Ken Wright - St. Albans Rail Gates
124.2 60th Wedding Anniversary
124.3 Bingo The Clown / Magician With Kids From Play Group Albanvale Residents House Diamond Ave Reserve
125.1 Carmelo Nigidd - Big Tomatos
125.2 North Melbourne Giants
125.3 Award Winning 14 Month Old Ryan Grant & Dad Trevor 5 Balmoral Close St. Albans West
126.1 Trader Of The Week - Jim Haddad
126.2 Lamborghini Diablo Racing Car Sunshine Autobarn 493 Ballarat Rd Sunshine
126.3 Dave Formosa 25 And His Torana 5000 L3 1977 Model 20 Roberts Cresent West Sunshine
127.1 Steve Heffernan Youth Worker
127.2 Groovy Cuts St. Albans
127.3 Students Who Took Park In School Page 2 Feature Braybrook Secondary College
128.1 New Apostolic Church For Sale Maidstone
128.2 Allenby Park Estate
128.3 Wedding Anniversary Samuel & Nora Jane Hill 27 Errington Rd St. Albans
129.1 Principal Allen McNaughton & Model Of New $5 Million Campus Kings Park Secondary College
129.2 St. Albans House Fire
129.3 Traffic Chaos Through Road Works In Monash St, South Rd & Hampshire Rd Sunshine
130.1 People Donating Memorabilia, Etc To National Library St. Albans Library Alfreida St, St. Albans
130.2 Grandmothers Day
130.3 Oscar Snr, Oscar Jun & Anthony Celebrate Birthdays With Traditional St. Albans Then To A Park In Green Gully
131.1 Big Fields Fruit & Vegie Sunshine Plaza Hampshire Rd Sunshine
131.2 Disable Basketballers
131.3 Street Watch - St. Albans
132.1 Trader Of The Week - Classique Styles 117 Durham Rd Sunshine
132.2 Maltese Minister
132.3 Ferrets
133.1 Keilor Council Employees In Picket Lines At Keilor Council Depot Keilor Park Drive
133.2 Buddist Community Hall Sunshine
133.3 Sydenham Primary School AV Jenning Real Estate Table Presentation
134.1 Tasman Meats Sunshine Plaza
134.2 Midas (Trader)
134.3 Deer Park Toddlers Playgroup Children With Easter Bunny
135.1 Burn Off At I.C.I. Station Rd Deer Park
135.2 New Book - "Blood On Whose Hands"
135.3 Chubby Checker Twisting Away
136.1 Trader Of The Week - Angelo Ambelas Stanley Boby Works 188 Duke St Sunshine
136.2 BBQ Supermarket
136.3 Deer Park Primary School Easter Games
137.1 Eady & John Giblin 60th Wedding Anniversay Christ The King Hall Churchill Ave Braybrook
137.2 Raquel Stevens 3AW Radio Bank St South Melbourne
137.3 St. Albans Home Entertainment Centre
138.1 Spot On Panels 4 Charles St, St. Albans
138.2 Diane Attard -Attard Mobile World Communication 253 City Rd South Melbourne
138.3 Freeway / Traffic Intersection Keilor
139.1 Spot On Panels 285 Sunshine Rd Sunshine
139.2 Books Our Lady's Sunshine
139.3 C.J's Café St. Albans
140.1 Bins With Advestisments Sun Cresent Sunshine
140.2 "Dead Men Do Tell Tales" Launch Of New Book St. Albans Historical Society
140.3 Chernobil Victim - Valentin Family 20 Pridham St Maidstone
141.1 Trader Of The Week - Luca Tonelli St. Albans Glass 49 West Esplanade St. Albans
141.2 Delahey New Community Centre Copperfield Drive Delahey - Opening By Minister Of Planning Rob Maclellan
141.3 Deer Park Primary School Students & Grandparents
142.1 Trader Of The Week - Dean Kennedy Belle de Jour Shop 19 Deer Park Shopping Centre
142.2 John Kuehn - Visting Professor From Indiana Taylors Lakes Secondary College
142.3 Betty Jones Newport Prep Photo
143.1 Jeff Kennett Being Shouted At By Locals 29 Alfreida St, St. Albans
143.2 Bradley Munari - Wins Bike For Safety Riding Deer Park West Primary School
143.3 Opening Of New Premises New Post Office Cnr Elaine St & Victoria Cres St. Albans
144.1 Ray O'Shannessy At Home 46 Walmer Ave St. Albans
144.2 Daud - History Film Of Sunshine
144.3 Craig Mackle & His Paving 17 Buckland Ave Keilor
145.1 First Day Back At School Sunshine Primary School
145.2 Keilor Downs Playgroup
145.3 Brad Ayton, Saved A Truck Driver After He Had Been Robbed Mother Of God School 67 Blanche St Ardeer
146.1 Photograph Whole School Monmia Primary School
146.2 Essendon Mazda
146.3 Soccer Club Sunshine
147.1 4 Babies Born On 29th Feb With Mums Western Hospital Sunshine
147.2 Fire St. Albans
147.3 Highpoint Shopping Centre Cinema Queues & Major "D" Silver Bullet
148.1 Afternoon Tea With Residents Hargreaves Cres Braybrook
148.2 Theo Wersching & Others
148.3 Dancing - Senior Citizens Westend Complex 47 McIntyre Rd North Sunshine
149.1 Various Job Seekers Sunshine CES Withers St Sunshine
149.2 Alison Feenstra
149.3 Lilly Pufek - Dynamic Haur Studio 44 Alfrieda St, St. Albans
150.1 Keith Ashton Around River 72 The Esplanade Maribyrnong
150.2 Majestic Videos 14 East Esplanade St. Albans
150.3 Dr. Edgar Gatt Malta George Cross 79 Brees Rd East Keilor
151.1 Joan Kirner & Bob Sercombe Meet Italians Halian Community Of Keilor 21 Slater Pde East Keilor
151.2 Nhan Nguyen Albion Primary School
152.1 Trader Of The Week - Joe Bebic Shop 1/120 Main Rd East St. Albans
152.2 Refugees - Bosnican, Sebian & Croations Tottenham Language Centre
152.3 Bus Terminal Alfrieda St, St. Albans
153.1 Keilor Mayor Dorothy Costa & State Member George Seitz Cnr Ruth St & West Esplanade St. Albans
153.2 Maribyrnong Living Museum Of The West Talking Book
153.3 Nell Layton & Kitty Seymour - Former Amunition Factory Workers 12 Winston St Maidstone
154.1 Taylors Lakes Secondary College - Dorothy Costa
154.2 Portrait Of Mrs Hall 90 Years
154.3 Samuel Hood With Medals 71 Camperdown Ave Sunshine North
155.1 Jack Freeland & His Paintings 181 Furlong Rd St. Albans
155.2 Catholic Regional College
155.3 Baby Show - Deer Park Shopping Centre
156.1 Lynda Fry & Her Cat - Sunshine Cat Club
156.2 St. Albans Fire
156.3 "Fix Up The West" Project To Improve Life For Commission Flat Dwelers 6 Commercial St Maidstone
157.1 Trader Of The Week - Blindstyle 308 Ballarat Rd Sunshine
157.2 Exotic Fruits St. Albans
157.3 Keilor Council Chambers - St. Albans East Primary School Child Dress-up
158.1 Five Generations Of The Dalyymple Family 67 Hudderfield Rd Deer Park
158.2 Eddie Rollason
158.3 Resurrention Primary School Gum Rd St. Albans Annual Feast Day
159.1 Cons Frank Fierro & Arthur Tyril Patient Western General Hospital
159.2 Fire In Gym
159.3 Playgroup Awareness Land Sales Office 3 Packard St Keilor Downs
160.1 Bruno Danno Braybrook Hotel Ballarat Rd
160.2 Dr. Patrick Aldysius O'Brien 34 Victoria Cres St. Albans
161.1 Fergus Dean RIE Fairbairn Rd Sunshine
161.2 Sunshine Secondary College School Renovations
161.3 Braybrook Tip - Illegally Dumped Rubbish
162.1 Pierce D'Eia - Alfreida House Reception
162.2 One Year Birthday Festival Supermarket
162.3 New Family Planning Clinic Moire Muldoon & Dr. Anne Myers 152 Churchill Ave Braybrook
163.1 Anglican Parish Op Shop
163.2 Simon Atkins Maidstone Primary School
163.3 Awareness Week For Playgroups Warrs Rd Maribyrnong Kindergarten
164.1 Street Watch - Sharon Walker 85 Tarella Drive Keilor Downs
164.2 Author - John Marsden
164.3 Young Womens Group Sassella Park Deer Park
165.1 Store Manager - Alex Evangelidis & Kerry Kirkham 146 Ashley St Maidstone
165.2 St. Albans Youth Club
165.3 Arundel Farm - Ted Cockran
166.1 Con The Fruiterer - Alan Griffith
166.2 House Fire 228 Taylors Rd St. Albans
166.3 Bernard Reilly - Wic Weaver Plantation Save The Trees Station Rd Deer Park
167.1 Geoff Loft & Traffic Lights
167.2 Kontek - Charlie Griksoy
168.1 Overnewton College - Dr. Keith Rayner
168.2 Jason Geary, Ex Student Talks To Kids About Drama Kealba Secondary College Driscolls Rd Kealba
169.1 Cheryl & The Guy In The Car Boot
169.2 Catrabilia St. Albans
169.3 Lauren Welgus - Miss Victoria Quest Entrant Flat 12/5 King Edward Ave Sunshine
170.1 Maidstone Pool - Lindsay Claughton
170.2 Maltese Community Hall Sunshine
170.3 Resurrection Parish Centre 51 Gum Rd St. Albans
171.1 Street Watch - Couch St Sunshine
171.2 Trader Of The Week - Lee Trickey Shiatsu Therapy
171.3 Monmia Primary School New School Building
172.1 Trader Of The Week - Ismail
172.2 Aerobics Champs Spotswood Primary School
172.3 St. Albans North Infant Welfare Centre Playgroup Open Day Fox St, St. Albans
172.4 Kids Learning About Stamps
173.1 Australian Croquet Championships Sunshine Croquet Club Standford St Sunshine
173.2 Felcity Braing Outreach Centre
173.3 Deer Park Primary School - School Of The Future
174.1 Libby Mcllroy at Sunshine Physiotheraphy 55 Devonshire Rd Sunshine
174.2 Lester Ellis
174.3 Champion Horse Raised In Keilor
175.1 All Sales Reps Photographed Kontek Office Sunshine
175.2 Sunshine Fire Station
175.3 Resurrection Theatre Company "Cinderella Baby"
176.1 John Ure & His 800 Tonne Crane
176.2 Models Graduation From Course Marinbyrnong Community Centre
176.3 G.S.T. Protest Rally & March Sunshine
177.1 Julie Milicevic Of St. Albans Raised Money For Croatia Relief
177.2 Margaret Peterson WRB-FM Sunshine
177.3 David Nugara & Cr. Ian Hicks
178.1 Jim Gaylor 4 Benjamin St Sunshine
178.2 Sunshine Little Theatre Deer Park
178.3 Dick Howden & Wife 50th Wedding Anniversary
179.1 Murray Stevens Oldest Continuing Advestiser DLG Stevens Real Estate St. Albans
179.2 Pam Graham
179.3 Car Accident Ardeer
180.1 Kealba Playgroup - Aaron West
180.2 St. Pauls Secondary College Marketing D/C Holders
180.3 Making New Garden For Student Village Footscray
181.1 Alf Leckie
181.2 Y.C.W. Sunshine
181.3 Southern Sons Highpoint Shopping Centre
182.1 Mrs Christine Brvenik & Son Kim & Daughter Gabrille With Two Dogs "Boss" & "Shep"
182.2 St. Albans Football Club - Five Players With Over Two Hundred Games
182.3 Ju Jutsu (Judo) Students Going To Japan
183.1 Sydenham College Re-Union
183.2 New Young Band Red Cloud
183.3 Jan Liddicut Writing Book On Her Aunt
184.1 Mark Blair & Tzu Pei Chachen With AusRoc Deer Park Ravehall Test Facility
184.2 Trader Of The Week - Mick Pap 11 City Place Sunshine
184.3 Future Kids Computer Learning Centre Rwanda Appeal Day
184.4 Street Watch - Mr Borg Footpath St. Albans
185.1 Gary Trainor & Residentts Protest
185.2 Old Cinema Projectionist - Alan Windley 1 Donnelly Crt Kealba
185.3 T2 Industries Site - Steven Diomides
185.4 Mr Pisani - Kings Park Footpaths
186.1 Alison Abernethy With Mrs Vera Naylor
186.2 Deer Park Motors 784 Ballarat Rd Deer Park
186.3 Sunshine Golf Club
186.4 Trader Of The Week - Greg Nicholas Eat More Meats 282 Hampshire Rd Sunshine
187.1 Fergus Dean & Yuksel Kernal - New Real Estate 136 Durham Rd Sunshine
187.2 Vox Pop - Prison In Deer Park
187.3 Our Ladys Basketball - Warick Giddey & Nicholas Hayes
188.1 Kids Who Wrote Page 2 School Swimming Championships Chisholm College Braybrook
188.2 Frank Camilleri
188.3 George George - Sunshine Council
189.1 Trader Of The Week - Louise Stevic 71 Alfrieda St, St. Albans
189.2 Eloise Southby - Under 21 Netballer
189.3 Arundel Farm Auction
190.1 Easter Egg Competition Deer Park Central Shopping Centre Neale & Station Rd Deer Park
190.2 Barry Shorten
190.3 Mackellar Primary School - Poetry Competition
191.1 Ernest & Doris Nicholls 50th Anniversary
191.2 Rubbish Bins Maribyrnonf
191.3 Deer Park Shopping Centre - Presentation Primary School Winner
192.1 Joan Carstairs - Keilor Cemetery
192.2 Trader Of The Week - Jenny Carter Centreway East Keilor
192.3 The Manchester Shop - Minnie Duligall 31 Beachley St Sunshine
193.1 Albert & Elvie Sexton 50th Anniversary 15 McClean St Sunshine
193.2 Trader Of The Week - R.M. News & Gifts Taylors Lakes
193.3 St. Johns College Students Collecting Water Samples Brimbank Park Keilor
194.1 Albanvale Primary School - Winners Of The Deer Park Shopping Centre Easter Bonnett Parade
194.2 Deer Park Primary School 120th Anniversay
194.3 Susan Cappelleri & Tina Leonard - Hair Care Centre 21A Devonshire Rd Sunshine
195.1 Leo's Club - Todd Darmanin & Others
195.2 Trader Of The Week - Tony Avondale Height
195.3 Mark Saliba & Tony Borg - Warehouse Sales 262 Hampshire Rd Sunshine
196.1 Trevor & Flo Fleming Maidstone
196.2 Linden Thompson
196.3 Trader Of The Week - Bob James CSC Estate Agency 29A Sun Cres Sunshine
197.1 Elderly Citizens Street March
197.2 Asbestos Westend Market McIntyre Rd Sunshine North
197.3 Trader Of The Week - Louise Zammit 59A Theodore St, St. Albans
198.1 Jack & Berryl Rolfe & Their New Unit Maidstone
198.2 Lynee Petkov - Playground
198.3 Ciro Lombardi On Garden Bed Padley Park Oberon Ave St. Albans
199.1 St. Albans Secondary College Page Two Kids
199.2 Sunshine Y.C.W. Sports
199.3 Tony & Joe Arduca With Their Invention OF An Aluminium Bottle Top 11 Hawthorn Ave North Sunshine
200.1 St. Albans East Primary School Science Show - Kristy Eyles
200.2 Marilyn Jones - Joey Leader
200.3 Sillce & Kerry Complain About Roadworks Flower Shop Dickson St Sunshine
201.1 Mark Raye & Fat Boy Harley
201.2 Green Gully Safety Centre - John Hodges
201.3 Street Watch - Offending Tree In Front Of House 45 Ruth St, St. Albans
202.1 Jasmine Bird & Her Cats
202.2 Westvale Community Centre St. Albans West
202.3 Head Shots - John Kontek Keilor
203.1 Street Watch - Morris St Sunshine
203.2 Paul - Actor
203.3 Sunshine Council Installing Two Palm Trees Around Gates To Errington Reserve
204.1 Mike Crechko
204.2 Trader Of The Week - Judy Blum 68 Kings Rd St. Alband
205.1 Lorna & Laurie Taylor Diamond Anniversary
205.2 Annette Woodward
205.3 Student Village Williamson Rd Maribyrnong
206.1 Deer Park Secondary College Billingham Rd "Marler Plan" For Deer Park
206.2 Creek Church Henry St, St. Albans
206.3 Malouf Industries 410 Francis St Brooklyn
207.1 Braybrook Secondary College 353 Ballarat Rd - Kids Who Made Passionate Speech About Unemployment
207.2 Creek Church McKechrie St, St. Albans
207.3 Police Award - Constable Trevor Poulton & Russell Brown St. Albans Police Station Main Rd West St. Albas
208.1 John Rowlinson
208.2 Metro College Of TAFE Open Day Panel Beating
208.3 Yasna Dusel - New Social Worker Migrant Resource Centre
209.1 Kids & Clowns - Liam Castellas & Alisha Currie
209.2 Play Aquarius Deer Park Secondary College
209.3 Street Watch - Connie Cilia 8 Bletchley Place St. Albans East
210.1 Mr Music Man
210.2 Vic Weaver Funeral
210.3 Jinny Hwang Movelle Primary School
211.1 School Boys Who Copped a $100 Fine For Jumping A Fence Sydenham Railway Station
211.2 Taylors Lakes Skipping
211.3 St. Albans East State School - Three Teachers Retiring
212.1 Ben Zeglinski 42 Oberon Ave St. Albans
212.2 Brett Anderson - Hockey Player Kings Park Secondary College
212.3 Sunshine Caravan Park Wright St Sunshine
213.1 Davidson Family Netball Team
213.2 Garbage Group
213.3 Western Ring Road - Thiess Company
214.1 Louise Amati Lookinf For A Job
214.2 Overnewton House
214.3 Italian - Australian Social Club - CES Unemployed Feeding Senior Citizens
215.1 Trader Of The Week - Jow Barbar
215.2 Kym Lurden - Book Week Our Lady's School
215.3 Bill Reeves - Arundel Rd Bridge
216.1 Soon To Be Finished Road Near Home Taylors Rd Near Theodore St, St. Albans
216.2 Sunshine Plaza Construction Progress
216.3 Penliegh & Essendon Grammer - Science Students
217.1 Trader Of The Week - Sam Lepore Kealba Hotel St. Albans East
217.2 Gabriel Warina - Job Club St. Albans
217.3 Members Of School Parents Club Upset Over State Cut To Education St. Albans East Primary School Lester Ave St. Albans
218.1 Trader Of The Week - Nives Rinvento Australian Lighting Ballarat Rd Sunshine
218.2 Belinda Schille - Model
218.3 Crafts In School Hall To Show Kids St. Albans Primary School
219.1 Howard Kingham Lodge New Hydrotherpy Pool Braybrook
219.2 Countey Fair Promotion Horseshoe Bend Farm Keilor
219.3 R.A.A.F. Parade - Rights To The City Of Sunshine Hampshire Rd Sunshine
220.1 Ken Cunningham BP Food-Plus 311 Main Rd East St. Albans
220.2 Trader Of The Week - Manju Agrawal
220.3 Avondale Heights Primary School - Opening Of Rainforest & Garden
221.1 John Manly Solo Gospel Singer With Family 7 West Esplanade St. Albans
221.2 Nellie & Albert Donnie 50th Wedding Anniversary
221.3 Bev & Dean Soleimani - Mom & Me Clothes For Nursing Mothers 11 Rutherglen Way Taylors Lakes
222.1 Sunshine Plaza Centre "Days Of Sunshine" Lost Dogs
222.2 Cheryl Hilderbrandt Keilor Mayor
222.3 Sunshine Christian School - Three Students Skipping
223.1 "Relax n Trim" Eileen Moran 218A Main Rd East St. Albans
223.2 Trader Of The Week - Avondale Heights
223.3 Truck Stuck Under Ashley St Bridge
224.1 Unemployed Students St. Albans Sqaure
224.2 Street Light Sunshine
224.3 Frank Peronace Of Warrens Western Leisure 237 Hampshire Rd Sunshine
225.1 Street Watch - Martha Melwiski 36 Cornhill St, St. Albans
225.2 Father Joe Micallef
225.3 Trader Of The Week - Teresa Cuzzupe & Nicole Corona Skylords Travel Shop 4 The Arcade 323 Main Rd East St. Albans
226.1 Sunshine Library McCracken Street Diamonte's Mini Circus
226.2 Des - Bashing Victim
226.3 Western Seafoods - Gordon & Raewin Ross 244 Hampshire Rd Sunshine
227.1 D'Agostino Deer Park Florist Burnside St Deer Park
227.2 Patients Western Hospital Sunshine
227.3 Christ The King Parish Students To See Pope 20 Margaret Cres Braybrook
228.1 Web King Age 90 With Family Sunshine Presbyterian Church Hall Anderson Rd Sunshine
228.2 Our Lady's Primary School Rwanda Appeal
228.3 Kirchners Family - Ray, Margaret, Cecil & Peter Military Rd Avondale Heights Newsagency
229.1 Community Health Nurse & Patient With Child Who Suffers From Asthma St. Albans Community Health Centre
229.2 Japanese Exchange Students Keilor Downs Secondary College
229.3 Daryl Johnson - Sitting On Street With Sign "Work Wanted" Wright St Sunshine
230.1 Nance & Cyril Humphreys 50th Wedding Anniversary 55 Duke St Sunshine
230.2 Japanese Festival Monmia Primary School
230.3 Reid Family - House Fire
231.1 Westend Market Florative Receptions Sunshine Senior Citizens Dance & Afternoon Tea
231.2 Wolfram Steinice Roundabout St. Albans South
231.3 Anne Tanian - Principal With 35 Years In Education Sunshine East Primary School Duke St Sunshine
232.1 Jamieson Park Secondary College School's Award Winner
232.2 Hjunior 10 Pin Bowls Sunshine
232.3 Traffic Lights - Main Rd East & Collins St, St. Albans
233.1 Allan Tonkin - Vietnam Veteran 197 Gillespie Rd St. Albans
233.2 St. Peters Little Athletics
233.3 Deer Park Club $3 Meals Ballarat Rd Deer Park
234.1 Vic Roads Donated A Trailer Full Of Bike Helments & Bikes Sunshine East Primary School Duke St Sunshine
234.2 Ken & Ben Johnson
234.3 Two Classes At Community Centre 152 Churchhill Ave Braybrook
235.1 Cow Lost - Found By Ranger Randich Forrest St Sunshine
235.2 Town Hall (St. Albans Public Hall) Sell Off
235.3 Hue Nguyen
235.4 Trader Of The Week - Phil McLaughin Sizzler Cnr Hampshire Rd & Ballarat Rd Sunshine
236.1 Trader Of The Week - Deer Park Dog Service 821 Ballarat Rd Deer Park
236.2 Alex Spiteri Rat Catcher
236.3 Plans For Hampshire Rd & Devonshire Rd Sunshine
237.1 Mary-Ann, Michael & Daniel Batinovic - Run Over By Car Main Rd East St. Albans
237.2 Cooper, Cameron & Hepburn Youth Club Veranda
237.3 Self's Supermarket Now Festival Cnr East Esplanade & Victoria Cres St. Albans
238.1 Old People Raised Money, Bought 20 Trees, Planted Them & Had Them Stolen 41 Thomson St Maidstone Private Nursing Home
238.2 Red Nose Day Glengala Park Primary School
238.3 Sight Of Accident Last Night Anderson Rd Railway Crossing
239.1 Picture Of Building Pilkington ACI Site 234 Ballarat Rd Braybrook
239.2 Stephen Dix
239.3 Akika Miyashica - Japanese Teacher St. John Roman Catholic School Churchill Ave Braybrook
240.1 Trader Of The Week - Joseph Veg & Lee Grandja 55 Alfrieda St St. Albans
240.2 Rwanda Poster Maidstone Primary School
240.3 Sunvale Primary School Neil St Sunshine - Asthma Checks At School
241.1 Lilija Martin St. Albans Library
241.2 Clannotes Reunion Sunshine Sizzle
241.3 New Trees - Station Rd Deer Park
242.1 Graeme Bausch Craftland 14 City Place Sunshine
242.2 Jane & Joe Baldacchino Day St Sunshine
242.3 Stevensville Primary School - Aerobics Champions
243.1 Alan Griffiths (MP), Noel Oliver & Tom Triplett Of St. Albans Bowls Club Kings Park Reserve St. Albans
243.2 Elia (Lee) Aloizas T.O.T.W. Taylors Lakes
243.3 Sculptor - Castley Hall Sunshine West
244.1 Nicole Piotrowski - Champion Runner (Athletics)
244.2 Anne Casey Conservation Officer Brimbank Park
244.3 Jenny Markakis Shy Looks Hair Salon 327 Main Rd East St. Albans
245.1 Pedestrian Tunnel Sunshine Railway Station
245.2 Jamieson Park Secondary College
245.3 Firemen Cutting Car With Jaws Of Life For Local Kids Sunshine Fire Station McIntyre Rd Sunshine North
246.1 Opening Of The Connection Youth Centre Sassella Park Deer Park
246.2 Cheryl Hilderbrandt Keilor Mayor
246.3 Kevin Muscut
247.1 Mary-Anne Robertson Fleming & Husband
247.2 Marie Bell
247.3 New Play Sunshine Theatre Group
248.1 Custo Family With Triplets Sunshine Hospital
248.2 Kings Park Secondary College Media Class
248.3 Koori Gardeners On Special Gardening Program Pipemakers Park Maribyrnong
249.1 "The Model 200 School" Florentine Receptions Westend Market McIntyre Rd Sunshine North
249.2 Victoria Squire 90th Birthday
249.3 Dorothea & Walter Greenwoods 60th Wedding Anniversary 73 Madden St Maidstone
250.1 Victorian University Of Techology St. Albans - Acupuncture
250.2 Deer Park North Primary School Sports Day
250.3 Maribyrnong Community Centre Randall St Ballroom Dances
251.1 R.S.L. Raleigh Rd Maribyrnong - Diggers
251.2 Henry St Sunshine Mural
251.3 Mrs Milfrid - Train Crossing Victim
252.1 Gina Ciccone (Nurse) - South Dynon Container Terminal
252.2 Richard Liddicut
252.3 Sunshine Secondary College - Koori Dancers
253.1 Trader Of The Week - Allan Taylor Arabin Plaza Keilor
253.2 Annette Woodward - Gold Medal Winner At The Commonwealth Games
253.3 Youth Circus For Local Kids Braybrook Youth Centre Churchill Ave Braybrook
254.1 Arabin St Keilor Shops Survey
254.2 Jane Pacall With Her Embroderies Outreach Community Centre Williamstown
254.3 Malta's Prime Minister Dr. Tabone & Wife
255.1 St. Pauls Church Glengala Rd West Sunshine
255.2 Zambias Youth Choir Baptist Church Newport
255.3 Art Show Of Works Of Parents & Teachers Maribyrnong Secondary College
256.1 Braybrook Secondary College - Kerri Conway
256.2 Bill Reeves Principal & Kids For Opening Of School Monmia Primary School Keilor Downs
257.1 Boral Factory Closing Down Duke St
257.2 Clothing Bin Maidstone
257.3 Trader Of The Week - Paul & Chris Nicolaou & Michelle Stewart Fish & Chip Shop 56 Kings Rd St. Albans West
258.1 Don McKay Funeral
258.2 School Fire Kealba Secondary College
258.3 Deer Park Video Razz & Frank D'Agostino 1 Burnside St Deer Park
259.1 Freestone Transport Tullamarine - Paul Freestone
259.2 Bruno & Chass Deer Park Primary School
259.3 Craig Buckland - Lakes Real Estate Suite 5 Medical Centre Cnr Sunshine Ave & Keilor - Melton Rd Taylors Lakes
260.1 Trees Removed Hilma St Sunshine
260.2 Mrs Sculz
260.3 Les & Nonie Holland 50th Wedding Anniversay 7 Gerona St Keilor
261.1 Trader Of The Week - Patrick Macsany 57 Mayne St West Sunshine
261.2 Op Shop St. Albans - Federenko
261.3 Maria & Giovanni Di Gregorio 50th Wedding Anniversay Unit 2 / 2 North Rd Avondale Heights
262.1 Mother's Day Babies Western Hospital Sunshine
262.2 Cubby House Winner
262.3 Sue Phelan - Keilor Ballet School
263.1 Street Watch - Bert Thompson 36 Moyangul Drive Keilor East
263.2 Mr & Mrs Psaila
263.3 Women Wrestlers Going To Norway
264.1 Trader Of The Week - Eileen Moran "Relax N Trim" St. Albans
264.2 Sunshine Plaza Clocktower
264.3 New Pacific Festival Supermarket
265.1 Car Crash Cnr Rosamond Rd & Ballarat Rd Maidstone
265.2 St. Albans Secondary College Year 12 Pupils With Steve Moneghetti Champion Runner Of Australia
266.1 Neil Pope Minister Of Education Visits Schools - Kealba, Keilor, Taylors Lakes & Monmia
266.2 Cat Exhibition Sunshine Plaza
266.3 Demonstration & Opening By Mayor & Alan Griffins Green Gully Traffic Safty Centre
267.1 Mark Gatt
267.2 Striking Students VUT St. Albans
267.3 Dobson Kindergarten Burns St Maidstone - Mothers Who Could Be Affected By Cuts In State Funding
268.1 Dick Howden
268.2 Sgt Andrew Hunting Keilor Downs Police Station
268.3 Trader Of The Week - Joan & Phil Barkly "Your Memories" Room 14 / 266 Hampshire Rd Sunshine
269.1 Joseph Cini - Retired Teacher Of The Maltese Language 35 Erica Ave St. Albans
269.2 Turkish Protest Against Cricket Played At Their Soccer Ground
269.3 Soccer Team At School Who Cannot Play Anymore Due To Cuts In Education System - Deer Park Secondary College Billingham Rd Deer Park
270.1 Trader Of The Week - Charlie Eres & Steve Biewer Taylors Lakes Shopping Centre
270.2 Melbourne Show - Kids At Show Ground, On Rides, Etc
270.3 Colin Crawford - Mr Muffler Ballarat Rd Braybrook
271.1 John Whitmore Principal Sunshine Heights Primary School
271.2 Consultative Committee Keilor Downs Police Station
271.3 Domestic Violence Story With 3 Women 9 Canterbury St Deer Park
272.1 Costume Parade Deer Park
272.2 Jim Ioannov Shopping Spree Sunshine Bunnings
272.3 Fire In House - Kaven Wallace & Sons Troy & Cory Saved From Burning To Death By Bob Harrison 139 Mitchell St Maidstone
273.1 Aussie Bake Off
273.2 Young Parliamentarians Parliament House Spring St Melbourne
273.3 Kids Kit By Other Kids Ann Johnson & Daughter Kelly, Michael Moore & Daughter Kristen 1/32 Carlton Crt Braybrook
274.1 Trader Of The Week - Dean Kennedy Belle de Jour Deer Park Shopping Centre
274.2 Dean Wright Aerobics Champion
274.3 Terry Hitch
274.4 Tree Planting Sunshine
275.1 Sunshine Heights Primary School Education Weekplays
275.2 Rick Diamond
275.3 John Mahoney - Sunshine Baseball Club
276.1 New Studio Buildings St. Albans
276.2 RMIT
276.3 Keilor Secondary College Librarary Opening By John Brumby M.L.C.
277.1 Music Student
277.2 Jack Millman Deer Park Senior Citizens
277.3 Him / She Hairdressers 255 Hampshire Rd Sunshine
278.1 Gallery Exhibition Kealba
278.2 Kids At Ren & Stumpy
278.3 Kevin Bowler Shows A House He Thinks Needs Preserving By Hertiage 1 Moffat St Avondale Heights
279.1 Jobtrain
279.2 McDonalds Protestors
279.3 Display For Fire Displays Over School Holidsays Sunshine Fire Station McIntyre Rd North Sunshine
280.1 Senior Citizens Visit School
280.2 Jail Rally
280.3 Movelle Primary School Kids In Fun Run
281.1 Deer Park Secondary College - Professor Colin Hocking
281.2 Jean Boles
281.3 Kerry Cornell 17 Competes In Theatrical Tap Championshiprs 1 Locharn Crt Kealba
282.1 Roger Shepherd - Principal Jamieson Park Secondary College
282.2 Shakey Bill Tattoo St. Albans
282.3 Community View At Supermarket Pacifics Festival / IGA 18 East Esplanade St. Albans
283.1 St. Albans Heights Primary School - School Concert
283.2 Cliff & Newborn Goat Horseshoe Bend Farm
283.3 Copy Of Photo Of Class Of 1963 From Maidstone Primary School
284.1 St. Albans South Primary School "Build, Make And Do"
284.2 Horseshoe Bend Farm
284.3 Katherine Mitchell Heading To Singapore To Compete In Cross Country Run Jamieson Park Secondary College
285.1 Ardeer Secondary College Education Week
285.2 Girls Gymnastics Keilor
285.3 Five Businesses For People In Business Main Rd East, Main Rd West & Alfrieda St, St. Albans
286.1 Festival Supermarket Hampstead Rd - Ernie & Mario
286.2 Welfare Worker - Mr Hearisize
286.3 Braybrook Secondary College - Steve Monaghetti Marathon Runner
287.1 Castle Hall Opening
287.2 Michelle Finco
287.3 Water Bill Shock - Lyn Quick & Denice Shaw 108 Churchill Ave Braybrook
288.1 Sunshine Theatre Co. Play "Don’t Just Lie There, Say Something"
288.2 Sunshine Swim Centre - John Boomsma (Manager)
288.3 Westvale Community Centre - Beryl Burrows
289.1 Opening Of St. Albans Orthodox Church
289.2 Keilor Primary School - Kids With New Equipment
289.3 Van The Ho - New Extractors For Car 3 Roussac Crt North Sunshine
290.1 Janine Kreltszheim Wholistic Healing Centre 34 Nottingham St Sunshine
290.2 Western Hospital Sunshine - Fire Bridage Presenting Smoke Detectors
290.3 Sunshine Baseball Club - John Mahony
291.1 St. Peter Chanel School And Jump Rope Kids 848 Ballarat Rd Deer Park
291.2 Maureen Cullen & Husband St. Albans Community Health Centre
291.3 New Library - Jenny Lawrence
292.1 Trader Of The Week - Lou Abascal 471 Ballarat Rd Sunshine
292.2 Frank Flauney
292.3 BBQ Fire Sunshine
293.1 Sharon Jones - ANZ Bank Taylors Lakes
293.2 Trader Of The Week - Bill Abdallah Keilor Village Take Away 696 Old Calder Highway
293.3 Market Plumbing 13 Market St Sunshine
294.1 Geylan Koyu Work Experience Student Sunshine Police Station Sun Cres
294.2 Mary McKillop Primary School Traffic Lights Campaign
294.3 Cathy's Fair Affair 287A Glengala Rd Sunshine West
295.1 Dr. Jack Rodgozinski - Dentist
295.2 Cooking Class Taylors Lakes Secondary College
295.3 Captain Snooze Ballarat Rd Braybrook
296.1 Mr Pozzebon - Rubbish Tip Whitehall St Sunshine North
296.2 Westland Furniture 300 Ballarat Rd Braybrook
296.3 Maribyrnong Festival Pipemakers Park
297.1 Winner Of Trip To Rome Deer Park Shopping Centre
297.2 Art Class Chisholm College Maidstone
297.3 Mehry's Fruit & Veg 23 Sun Cres Sunshine
298.1 Kids Using The Life Education Van - Our Ladys Primary School Monash St Sunshine
298.2 Dear Venus Sunshine Theatre
298.3 Eatmore Meats 282 Hampshire Rd Sunshine
299.1 Kids Planting Trees From St. Albans Meadows Primary School Grantham Pde St. Albans
299.2 Michelle Stott
299.3 Kontek Head Shots Main Rd East St. Albans
300.1 Ian Baker Meeting Macedonians Scout Hall Percy St St. Albans
300.2 Keilor Shops
300.3 Nursing Mothers Assoication Having Afternoon Tea To Mark Thie 30th Annivesary 3 Ikara Close St. Albans
301.1 Nick Gerkis Complaining About The Wait List At The Western Hospital 16 Fox St, St. Albans
301.2 Jets Over Houses
302.1 Launch Of "Frog Watch" For World Enviroment Day Pipemakers Park Van Ness Ave Maribyrnong
302.2 Unisex Salon St. Albans
302.3 Fire Bridage Disaster Exercise Poole St Deer Park
303.1 Trader Of The Week - Sean Lavin Deer Park Hotel
303.2 Mayor Marion Martin At Launch Of New Complex For Sunshine Council
303.3 "Me And My Girl" Gregory Keyes Princess Theatre Melbourne
304.1 Demolishing Of Peoples Homes 2/93 Hargraves Cres Braybrook
304.2 Cat Club - Lyn Fry & Friends 82 Ballarat Rd Sunshine
304.3 Bernie Brown - Browns Rd Keilor
305.1 Cr. Bill Reeves - New Traffic Lights Centre Way East Keilor
305.2 Jessie Hodgson - Broken Slide
305.3 Ring Rd St. Albans Road Works
305.4 "Don't Worry Be Happy" Barbara, Pam & Judy Maribyrnong Community Centre
306.1 Michael Bower At Harry Black's Scottish Butcher Shop 41 Perth Ave Albion
306.2 Skinner Reserve - New Coaches At Their New Ground
306.3 McMullon - TAB Perth Ave Albion
307.1 Old Man (Bill) Sunshine Shops
307.2 Trader Of The Week - Lind Heatherton Of Cut Label Shop 32 Sunshine Plaza Sunshine
307.3 Charlie Farrugia & David Calleja (Architect) - Green Gully Soccer Club Green Gully Reserve Rd Keilor Downs
308.1 Deer Park Secondary College School Page
308.2 Marco Babic New Rep Kontek Hampshire Rd Sunshine
308.3 Garage - Derelict Possible New McDonald's Site Cnr St. Albans Rd & Princess St, St. Albans
309.1 Warrick Giddey Of Melbourne Tigers Basketball Team With Kids Our Lady's Primary School Monash St Sunshine
309.2 Anna McKenzie In Search Of Relatives She May Have Unit 2/9 Victoria Rd Sydenham
309.3 Western Region Games Parsons Reserve Sunshine
310.1 Trader Of The Week - Adriana Pino
310.2 Senior Sergeant Paul Pepperlcamp New Police Station Keilor Downs
310.3 Circus Protest Sunshine
311.1 Vietnamese Budhhist Temple 177 Morris St Sunshine
311.2 Peter Giemsa Of Giemsa Auto 54 Birchwood Blvd Deer Park
311.3 Buddist Braybrook
312.1 Student Orchestra Playing Overnewtown Castle Keilor
312.2 Japanese Exchange Students Keilor Downs Secondary College
312.3 Catholic Regional College Sydenham
313.1 Marie Gatt
313.2 Trader Of The Week - Florian Burtscher Roofing Engineer 2 Borrell St Keilor
313.3 Jamieson Park Secondary College St. Albans West - Public Speaking Competition
314.1 Western Suburbs Motorbike Riders Association
314.2 The Launch Of the St. Albans Urban Design Master Plan Sweet Life Cake Shop St. Albans Town Square
314.3 MacKellar Primary School Veats Dr Delahay - Kit The Fire Dog
315.1 Michael Mitchel Collecting Coles Receipts
315.2 Veda Curtis - Model For Myer Highpoint Shopping Centre Maribyrnong
315.3 Garry Baggot St. Albans
316.1 Donut Eating Competition Deer Park Shopping Centre
316.2 Ethyl Richardson - Silver Medalist Transplant Games 68 Rosehill Rd East Keilor
316.3 Ren & Stimpy Keilor Downs Plaza
317.1 Wedding Anniversary
317.2 Haircutting Lessons at Centre Kermeen St West Sunshine
317.3 Starlab Deer Park Library
318.1 Avondale Heights Primary School - Parliamentary Set-up At School
318.2 Barry Plant Real Estate - Warren Herbert & Helen Kichakov 23 East Esplanade St. Albans
318.3 The Miltons - 50th Anniversary Deer Park
319.1 Met Ticket Refuse To Sell
319.2 Lloyd McAllum The Postie With Terrible Letter Boxes Sunshine Post Office & Coach St Sunshine
319.3 Neighborhood Watch Award - Len Goninon & Alan King 5 Harry St Maidstone
320.1 Mark Talbone MA Kitchens Market Rd Sunshine
320.2 Jeff Kennett Auctions 1st Bales Of Wool At Victorian Wool Centre 691 Geelong Rd Brooklyn
320.3 Strike - South Corp Rheem Picketing On Behalf Of 80 On Strike 77 Bunnet St North Sunshine
321.1 Trader Of The Week - Lance Russell 4 Suffolk St
321.2 Economic Students In Competition Chisholm College Churchill Ave Braybrook
321.3 John Stevens & Staff - Western Distributors 234 McIntyre Rd North Sunshine
322.1 Hue Hjuyeri St. Albans Migrant Resource Centre
322.2 Tom Smith - 90 Years Old Sizzler Reatraurant Sunshine
322.3 Trader Of The Week - Michael Psaila Main Rd Motors St. Albans
323.1 Fairnbain Rd Kindergarten Garage Sales
323.2 Henry Thompson Hynh& Girlfriends 8 Thompson St Maidstone
323.3 VCE Students English Exam Jamieson Park Secondary College
324.1 Albert & Joy Sayer 50th Anniversary 125 Ballarat Rd
324.2 Braybrook Secondary College Youth Band Cherry Cresent Kindergarten
325.1 Albanvale Primary School Kids At Science Expo Doing Different Things FIT Ballarat Rd Footscray
325.2 Japanese Exchange Students Marian College Sunshine
325.3 Father O'Reilly St. Albans
326.1 Trout Fishing Sunshine Swimming Pool
326.2 Trader Of The Week - Joe D'Angelo Max's Fruit Supply Melton Market Fruit & Vegies
326.3 Maria & Lewis Surfrace 40 Years Of Marriage 6/39 Warrds Rd Maribyrnong
327.1 Buddist Temple Church Service Sunshine
327.2 Trader Of The Week - Tim Newman Big Apple Sight & Sound CD & Record Shop Main St Bacchus Marsh
327.3 Val Heanes - Val-Tas Woolshop 20 Devonshire Rd Sunshine
328.1 Spaghetti Easting Competition Deer Park Shopping Centre
328.2 Local People On "Nightrider Bus" From 3.30am From Swanston St City To St. Albans
328.3 Thomas Family - Just Returned From Rwanda 2A Mernda St Sunshine
329.1 Footscray Western Oval School Footie Clinic
329.2 Trader Of The Week - Troy Kantzidis Shop 13 Troy's Hair Shop Keilor Downs Shopping Centre
329.3 Kennedy's In Billy Cart St. Albans
330.1 Justices Of Peace - New Justices Sunshine Courts
330.2 Val Noble - Peace Campaigner & Ex-Catholic Priest Building 8 Room 125 VUT St. Albans Campus
330.3 Ray Dodd - Keilor Hotel Old Calder Highway Keilor
331.1 Spalding Factory Closing
331.2 Pine Factory 77 Webber Pde East Keilor
331.3 Aerial Shots Cnr Sunshine Avenue & Odessa Ave Keilor Downs
332.1 Trees Removed From Streets - Cause Ill Health Deer Park
332.2 Huntsman Chemicals Backs Bulldogs Care For Kids North Sunshine Primary School Suffolk St Sunshine North
332.3 St. Albans Meadows Primary School Laurel St. St. Albans Technology Day "Marble Roll"
333.1 Mayday Car Accessories 224 McIntyre Rd Sunshine North
333.2 Gerry Aqunio & Business People Complaining About Parking City Place Sunshine
333.3 Mackellar Primary School Goldsmith Ave Delahey CSIRO Science Day
334.1 Chisholm College Cross Country Runners 204 Churchill Ave Braybrook
334.2 Joseph & His Amazing Technicolor Dreamcoat Rehersals Christ The King Primary School Braybrook
334.3 George & Pearl Tinkier 50th Wedding Anniversary 31 Wilkinson Rd Sunshine
335.1 Don & May Puli - Local Character 72 Alfreida St St. Albans
335.2 Brother Joe Bouchard On His Trumphet Chisholm College
335.3 St. Pauls Kindergarten Glengala Rd Sunshine West To Close
336.1 Maribyrnong Secondary College River St Student Journalalist
336.2 Limousine Hire 9 Prendergast Ave East Keilor
336.3 Fay Mechan - History Feature Our Ladys Church Monash St Sunshine
337.1 St. Albans Leisure Centre - Governer McGarvie With Local Youths Taylors Rd St. Albans
337.2 Paul Ferraro Stepensville Primary School
337.3 Taylors Lodge Nursing Home 2 Copernius Way Keilor Downs - Primary School Concert
338.1 Archbishop Frances Little - 40th Anniversary Of The Church's Fire Christ The King School Churchill Ave Braybrook
338.2 Stephen Thorpe St. Albans Sqaure
338.3 Sunshine Primary School Hampshire Rd - Champion Junior Athletes John Taufa & Steven Paki
339.1 Schoolboys Football Grand Finald Strathmore V's Sunshine Secondary College
339.2 Graeme & BBQ Showroom 75 Webber Parade East Keilor
339.3 Arts Awards Catholic Regional College North Keilor
340.1 Marian College Book Presentation Glengala Rd Sunshine West
340.2 St. Albans Primary School Singers For Folkfest Deer Park Shopping Centre
340.3 Mackellar Primary School Goldsmith Ave Delahey Fuel Economy Trek
341.1 Mr & Mrs Borrell 50th Wedding Anniversary 12 Borrell St Keilor
341.2 Dean Riolils & Matthew Turner Aged 16 - Aborginal Footy Start Western Oval Footscray
341.3 Deer Park Primary School Ballarat Rd Drama Performance
342.1 Trader Of The Week - Keilor Interiors Audrey Eaton & Beverley Ellis 698 Old Calder Highway Keilor
342.2 Trader Of The Week -Luigi Nardella Willshine Cleaning
342.3 Kings Park Secondary College Soccer Players Louie Acevski & Mohommed Elkesh
343.1 Students Presenting Cheque $212 To Youth Worker & Councillor Sunshine Council Offices
343.2 Stephen Lucas 11 Prendergast Ave East Keilor
343.3 Dominique Langdon Winner Of "Name The Baby Kid Competition" Horseshoe Bend Farm Keilor
344.1 Jack Connor 50 Years Service Extruded Metela
344.2 Dorothy Carlton Kinder "Balloon Blow-Up" 47 Furlong Rd North Sunshine
344.3 Damien Digby Avondale Heights
345.1 Youngs Real Estate Staff Picture 2 Parakeet Crt Taylors Lakes
345.2 Video Ezy - John Dyer & Parnee Fletcher 25 Devonshire Rd Sunshine
345.3 Maribyrnong Community Centre Randall St - Aventure Platgroup Actice Adults Class
346.1 Alan Griffiths & Bob Jane In Race Cars Tunderdome Calder Highway Sydenham
346.2 Jamieson Park Secondary College Band Deer Park Shopping Centre
346.3 Various Traders - Victoria Square St. Albans
346.4 Ardeer Primary School Suspression St - New Equipment
347.1 Indoor Shots 16 Perth Ave Albion
347.2 Ellios Vivarelli & Tom Blazic - Home Furniture Webber Pde East Keilor
347.3 Deer Park Primary School Ballarat Rd - Cash A Cans With Kids
348.1 Trader Of The Week - O'Donnell Highway Inn 608 Ballarat Rd Ardeer
348.2 Annette Charlie & Joanne - Photo Classics Sunshine Plaza
348.3 Ken Myles Sunshine
349.1 Bob Sercombe & Kids At Photocopier 7 - 9 Wallis Mall Niddrie
349.2 Gus Velardo & Hector Carini - Tile Shed 81 Webber Pde East Keilor
349.3 Opening Of New Police Station By Pat McNamara Police Minister
349.4 Robert Papageorge Albion
350.1 Joyce Apap & Ann Mitchell - Legal Consultants For St. Albans 147 Main Rd West St. Albans
350.2 Accident Blackspot For Kids From Nearby Primary School Kings Rd Kings Park
350.3 Old Police Station St. Albans - Residents Complain About Increase In Crime Main Rd West St. Albans
350.4 Frank Gathercole Sunshine
351.1 Bob Crossman - Orchide Winner Highpoint Shopping Centre
351.2 Aerobics Class Keilor Downs Secondary College
351.3 Sandra Turner Taylors Lakes
352.1 Shot Of Street Templewood Cres Avondale Height
352.2 Sunshine Theatre Co. Rehersals Deer Park
352.3 Stav Anagasovro - Thallasmarmia Suffer
353.1 George Kostrevski St. Albans
353.2 Crio Lombardi Sunshine
353.3 Circus Clowns Keilor
354.1 Maribyrnong Sociel Singles
354.2 Rock Eisteddtod Cast Jamieson Park Secondary College
354.3 Stevensonville Primary School Kings Rd St. Albans With Laptops Solar Car Team
355.1 Robin Hood Charity Sunshine
355.2 Drumming Lessons For Children Maribyrnong Community Centre
355.3 Sacred Hearts Primary School Winifred St St. Albans New Library
356.1 Sunshine Advocate
356.2 Staff Shot - Japanese Truck Care
356.3 Werner Scholofmer - Red Cross Worker 132 Wright St Sunshine
357.1 Maria Fennet
357.2 St. Albans Secondary College Community Mural
357.3 Wayne Smith & George Aleksiv - Hoyts Cinema Highpoint Shopping Centre
358.1 Pam Egan
358.2 Jamieson Park Secondary College School Play "Time And Time Again"
358.3 Ray & Jamien Russell With Pigeons West Sunshine
359.1 Keilor Ensemble
359.2 Monica Terbos Grantham Heighborhood House
359.3 Dummy On Billboard Sunshine
360.1 David Francis - Trees Cut Down Illegally St. Albans
360.2 Noel Brown Who Coached Joe Misiti
360.3 Theatre Sports Winners Kealba Secondary College
360.4 Music Band - Hayley Boys St. Albans
361.1 Super House Unsold - 21 Riverside Ave Keilor
361.2 Tottenham North Primary School - Book Week
361.3 Deer Park Club - New I.C.I. Netball Courts Deer Park
362.1 Tractor Stolen From "Village Builders" - Richard Miles Deer Park
362.2 The Hunt Club Scultures - Juan & Rafik
362.3 Deer Park Central Kids Club
363.1 "Taylor Lodge" Nursing Home $1 Million Worth Of Renovations Keilor Downs
363.2 Toy R Us Highpoint Shopping Centre
363.3 Trader - Herbert Eckhardt St. Albans
364.1 Highpoint Shopping Centre Nintanda Championships
364.2 Kindergarten Protest - Keilor Football Ground Keilor
364.3 E.E. Long St. Albans M.S. Unit - Residents Being Sent Home
365.1 Headshots Of Residents & Traders Concerning Their Desire To Swap Keilor For Essendon Council Keilor Rd Niddrie
365.2 The Switch House 27 Talmage St Albion - Men Working On Building
365.3 Sunshine Cricket Club - Peter Maeatas (Batter) & Matt Biskupski (Bowler)
366.1 Bugs Bunny Visiting Myer Toy Department Highpoing Shopping Centre
366.2 Trader Of The Week - John Galea
366.3 Keilor Shire Hall St. Albans Rotary Club Art Show - Lou Gionfridda
367.1 Bill West In Playground Hoffmans Place Niddrie
367.2 Sunshine Secondary College - Student Journalists
367.3 Shakira & Ramona Lever St. Albans
368.1 Trader Of The Week - Chris Lane
368.2 Tutoring College St. Albans
368.3 Lois & Frank Sullivan Tullamarine
369.1 Gas Explosion On Towed Car Keilor Rd Niddrie
369.2 Dante Foix McDonalds Deer Park
369.3 Polish Dancers Braybrook
370.1 Peter Southall Aged 22 Intellectually Disable Had Car Accident Arm Swelled Not Hospital Help 38 Shepherd St Braybrook
370.2 Sunshine Secondary College Play "Frustrated Neighbours"
370.3 Chilean Dances Braybrook
371.1 Trader Of The Week - Graeme Wurm 104 Station Rd Deer Park
371.2 "Smith Family" Open Of Welfare Centre 52 Sun Cres Sunshine
371.3 Country & Western Feature Maidstone
372.1 Scout Hall Percy St, St. Albans - Appaling Conditions
372.2 Bishop Of Tonga Maidstone
373.1 Charlie Eres - Infested Lot Opposite House 29 Willy Ave Keilor Downs
373.2 Wilma Farrow Alias Mary Dodd Delahey Keilor
374.1 "Chevey" The Dog With His Training Wheels & Edith Barr
374.2 Sunshine Community Theatre Deer Park
375.1 Keilor Village Hair Ebru, Braun & Jodie 17 Arabin St Keilor
375.2 Sam Leule Christmas Trees Deer Park
376.1 Poker Machines Bruno D'Annd Braybrook Hotel
376.2 Deer Park Street Parade
377.1 Street Watch - Glengala Rd Sunshine West
377.2 Western Hospital Sunshine - Joint Speech Pathology & Occupational Therapy
378 Our Lady's Primary School Monash St - Year Of The Family Quilt
379.1 Trader Of The Week - Frank Petruzzelu 16 Withers St Sunshine
379.2 Keilor Interiors Hand Painted Christmas Cards 698A Old Calder Highway Keilor Village
380.1 Highpoint Shopping Centre - The Jetsons
380.2 Brother Mark Hilton Chisholm College 204 Chruchill Ave Braybrook
381.1 Morris Family - Who's House Was Burned Down 85 Fox St, St. Albans
381.2 Sunshine Paint Shop 142 McIntyre Rd Sunshine North - Staff Pictures
382.1 Wanda Johnson - Retiring Cashier Sunshine Swimming Pool
382.2 Mary Cassar's Chalk Drawings On Her House 262 Glengala Rd West Sunshine
383.1 Trader Of The Week - Sunshine West
383.2 Silver's Circus Taylors Rd Keilor Downs
384.1 John Kontek St. Albans
384.2 Allan Border Maidstone
385.1 New Paving Stones Hertford Rd & Alice St Sunshine
385.2 Father Thomas Abdelmalek In His New Church 79 Henry St St. Albans
386.1 Travis Barry - Deer Park Scout Member Since 1977 - 38 President Rd St. Albans
386.2 Sugargum Dog Centre 20 Boronia Drive Sydenham
387.1 MCC Office 45A Alfrieda St, St. Albans
387.2 Judy Adams Pre-School Teacher Leaving School Kealba Kindergarten St. Albans
388.1 Monmia Primary School - Dorothy Costa & Bill Reeves
388.2 Santa Highpoint Shopping Centre
389.1 Kit & Alex Crump 50th Wedding Anniversary 30 Ford Ave Sunshine North
389.2 Colin & Jean Larcombe 50th Wedding Anniversary 27 Maxwell St Ardeer
390.1 Class Of 1992 Grade 6 - Mary MacKillop Primary School
390.2 Kids Painting Shop AJS Milkbar King Edward Ave Albion
391.1 I.C.I. Australian Explosives Factory - Burning Of Houses Deer Park
391.2 Kick-Boxing 51A Main Rd West St. Albans
392.1 Kevin Falloon
392.2 Govenor Richard McGarvie Talking To Kinds In Pinball Bar Sun Cres Sunshine
393.1 Henrkit Swieboda - Muddy Footpath Keilor Downs
393.2 Santa Keilor Downs Shopping Centre
394 Olympics
395 Unemployment Forum
396.1 Marcus Ramon
396.2 Peter McLoughlin
397 Enterpise Centre Sunshine Council
398 Crossing - Sunshine
399 Page 2 Sunshine College Ardeer
400 Spoils Staff Deer Park
401 Gary Honey & Steve McPherson Maidstone
402 Barry Plunkett Deer Park
403 Ruth Badenhope St. Albans
404 Claire Breman - New Councillor
405 "Spiders & Chamber Music" New Play Station Rd Deer Park
406 Overnewton Play "Cheaper By The Dozen"
407 Patricia Walch - Young Football Player 3 Arthur St, St. Albans
408 Taylors Lakes College
409 Alan Griffiths St. Albans West
410 Ron & Pat Mercieca St. Albans
411 St. Albans Railway Station Gates - Bill Baxter Opposition Spokesman On Roads
412 Braybrook Secondary College - Winners Of School Band Competition
413 Braybrook Hotel Pokie Machines Cobb & Co, Etc
414 New Supermarket - Nick & Danka Hycenko 125 South Rd Braybrook
415 Chisholm College - Students Win Computer Competition
416 Cat Show Sunshine
417.1 Dress Rehersal St. Albans
417.2 Joseph Sciberras & Bao Quach St. Albans Secondary College Main Rd East St. Albans
418 Trader Of The Week - Nick Christopher St. Albans Chicken Centre 53 Main Rd West St. Albans
419 Stephen Carter - Liberal For Keilor Door Knocking
420 Street Watch - Tramline Disappearing Into Dirt Cnr Williamson Rd & Rosamond Rd Maidstone
421 Sunshine Secondary College Students Who Wrote Page 2 Cnr Glengala Rd & Allsion St Ardeer
422 Trader Of The Week - Raz & Frank D'Agostino Deer Park Florist Burnside St Deer Park
423 St. Albans Hotel Australia College Of Travel & Hospitality McKechnie St, St. Albans
424 Sunshine Secondary College "Melbourne Giants" Basketball Team
425 St. Albans South Primary School The Whole School Group Picture
426 Keilor Downs Community Centre - Aged Bosnians
427 St. Bernadettes Primary School Police Band North Sunshine
428 Polish Dancers St. Albans
429 Benrard Reilly At Deer Park Railway Station Near Station Rd Deer Park
430 Ian Baker, Bruce Midenhall, Tom Roper - Lots Of Pollies Digging Dirt On New Building Site 460 Ballarat Rd Sunshine
431 Ciro Lombadi & Gus Ingram Keilor Cemetery
432 St. Albans Football Club Re-Union
433 City Cycles - Police Get New Bikes Senior Sgt O'Shannossy
434 Colleen Farriucia - Head Lice 44 Presidents Rd St. Albans
435 Taylors Lakes College - Won Major Prizes
436 Kororoit Creek - Ian Baker Cheque Presentation Buckingham Reserve Sunshine West
437 Grace olivieri - Franciann Ladies Wear 10 The Centreway East Keilor
438 Sod Turning - Maureen Lyster New Nursing Home Burnside St Deer Park
439 Keilor Cemetery - Angela Evans
440 Sunshine Secondary College - Two New Spectrometers Machines
441 Plane Fokker F27 Arrives At Compus Of Broadmeadows College Avondale Heights
442 Rev. Stan Caple
443 Highpoint Kindergarten "Red Noses" Rosamond Rd Maidstone
444 Kirstin - Author Of Books & Poems
445 Trader Of The Week - Julie McCarron National Pride Cleaning Products Cnr Third Ave & Market Rd Sunshine
446 Gerry Acquero, Martin Yeates & Robert At New Bus Stop 19 Sun Cres Sunshine
447 Sunshine Vietnamese Buddist Youth Group Receives A Donation From Lucia Kokoski Hampshire Rd Sunshine
448 Maria Kretiuk
449 "Green Hair" Productions Braybrook
450 Computer School Keilor Downs
451 Mentally Disable Cleaners West Sunshine
452 Lice Crisis Keilor
453 Phillip Tandaram St. Albans
454 Sunshine Trader - Peter Gore
455 Frances Eder Kealba
456 Trader Of The Week - Ebru Caki Hair & Beauty Shack Arabin St Keilor
457 Kealba Secondary College Students In Musical
458 St. Albans Secondary College - Punch & Judy
459 Shop Has Been Bombed During The Night 1 - 3 Princess St, St. Albans
460 Kids Taking Part In Page 2 Feature 65 - 75 Churchill Ave Braybrook
461 Trader Of The Week - Bill Dawson & Brad McLean Complete Car Care 29 St. Albans Rd
462 Deer Park Central Shopping Centre School Committee
463 Yooralla Kids At Kindergarten For Award With Kay Setches Milleara Gardens Park Drive East Keilor
464 Danny Del Re & Mother Maria 10 Bianci Crt Keilor Downs
465 Adult Migrant Education Centre Last Day In Old Building 31 Alfrieda St, St. Albans
466 Johanne Dujic & Grandson Phillip 9 Months Old - No Where To Change The kid Town Sqaure Near Alfrieda St, St, Albans
467 Dallas Bladen Last 12 For The Appentice Of The Yeat 41 McFarlane St East Keilor
468 Youngs Real Estate - Sam Mezzatesta, Charles Grixti & Josephine Hunter Medical & Professional Centre Cnr Keilor Rd & Keilor - Melton Rd & Sunshine Ave Taylors Lakes
469 Australian Gomeboy Championships Highpoint
470 Protest About Keilor Cemetery
471 Popular Chinese Section & Library Highpoint Library Rosamond Rd Maribyrnong
472.1 Vox Pop - Sunshine Plaza & Hampshire Rd Sunshine
472.2 Rick Olanrenshaw & Others Essendon Football Ground
473.1 Cindy Muse & Rollar Blades 12 Hyde St Deer Park
473.2 Trader Of The Week - Seaford Shop Sunshine Plaza
473.3 St. Albans Old Post Office
474.1 Pretty Pictures Of St. Albans & Keilor
474.2 Solar Car & Anjelko Duvnjak Jamieson Park Secondary College
475.1 Gary Hunter With Kangaroo For Cooking Sunshine Pipemakers Park
475.2 Pretty Pictures Of Sunshine
475.3 Soil Moisture Test Students Jamieson Park Secondary College
476.1 Ivan Filiposki & Svetlana & Baby Daniela Flat 3 / 218 Biggs St, St. Albans
476.2 Rachelle Bord - Soccer Star Keilor Downs Secondary College
477.1 Streetscape Picture Ballarat Rd Maidstone
477.2 Frank Costa - FGDM Trailers North Sunshine
478.1 Bowling Green R.S.L. Sunshine - Vandels Wreck Greens
478.2 John Tanner & Tony Cook Tullamarine
479.1 Raymond Cilia - Turkey Breeder 11 Mark St, St. Albans
479.2 Sunshine Feature - Sunshine Traders
480.1 New Road Works - Deer Park
480.2 Mick Turner Footscray
481.1 Australian Womens Book Review - VUT St. Albans Campus
481.2 Volleyball Squad - Resurrection Primary School
482.1 Stan Cash's Cowboy & Indian Cnr Ashley St & Ballarat Rd Maidstone
482.2 Flooding From Soccer Ground 53 Eddie St, St. Albans - Mila Ninovic
483.1 Hong Young Chinese Restaurant 66 Alfrieda St, St. Albans - Linda & William Lim
483.2 Betty King - Croche For Melbourne Show 5 Harry St Maidstone
484.1 Trader Of The Week - Neil Wilson Sunshine Plaza
484.2 Jack Meyers - Young Actor For "Shadow Hands" Greentree Drama School
484.3 Balloon Protest Sunshine TAFE
485.1 Ray Borner - Olympic Basketballer 18 Guildfoerd Cres Keilor Downs
485.2 Fashion Parade Deer Park Shopping Centre
486.1 Trader Of The Week - Reno Cichello
486.2 Dickson St Sunshine Overpass
487.1 Hong Lok Restaurant Shop 10 The Esplanade - Lucy Quan
487.2 Football Clinic Overland Primary School
488.1 Traders Angry About New Bus Terminal Sun Cres Sunshine
488.2 St. Albans Soccer Club New Lights
489.1 Keilor Library Matthews Ave Niddrie - Childrens Art Competition
489.2 St. Albans South Primary School - Council Holiday Program
490.1 Cat (Sooty) Caught In Rabbit Trap 211 Hall St Ardeer
490.2 Babies - Western Hospital Literacy Day
491.1 Hong Kong Paradise 44 Arthur St, St. Albans
491.2 Joan Kirner - School Art Exhibition Point Gellibrant Bayview St Williamstown
491.3 Mary Mackillop Primary School Balloon Release
492.1 Jack & Paul Neagle - Tattslotto Agency 358 Keilor Rd Niddrie
492.2 Bill Nicol & Plants Spotswood
493.1 Comedian Mark Mitchell & Children At Release Of New Child Restraint Seat Britex Derby St Sunshine
493.2 Bob Clark & Studebaker Car Newport
494.1 David Wallis - Market Gardener Browns Rd Keilor
494.2 Premiers On Parade Werribee
495.1 Bruno Battaglia - Market Gardener Arundel Rd Keilor
495.2 Lowes Pharmacy Werribee
496.1 John Milburn - Market Gardener Milburn Rd Keilor
496.2 Angela Merlino - Little Darlings Shop Werribee
497.1 St. Albans Secondary College Main Rd East School Play "Green Hair"
497.2 Joanne Paulson Werribee
498.1 Jim Gillespie Secondary Of Keilor Pigeon & Homing Club 46 Deutscher St Avondale Heights
498.2 Maureen Jackson Werribee
499.1 Paul Mirabella - Italian Kitchen Importer Tullamarine
499.2 Benjamin Furlong & Family - Chilis Mexican Restaurant
500.1 Trader Of The Week - Frank Perez 69 Alfrieda St, St. Albana
500.2 Migrant Centre St. Albans
501.1 Vox Pop - Deer Park Central Shopping Centre
501.2 Deer Park Shopping Centre Animal Farm
502.1 Trader Of The Week - Charlie Azzopardi Deer Park Fly Screens 11 Wildwood Crt St. Albans
502.2 Peter Brown Clown West Sunshine
503.1 Krstle Halton Aged 10 Fire Chief For A Day & Others Sunshine Fire Station McIntyre Rd Sunshine North
503.2 Kratsis 50th Wedding Anniversay
504.1 Vox Pop - House Of Hamppiness Senior Citizens Club 21 Yardley St Maidstone
504.2 Soccer - Melbourne Croatia V's Sydney Croatia Sunshine Football Ground Somers Rd North Sunshine
505.1 Vox Pop - St. Albans
505.2 Sunshine Community Theatre Station Rd Deer Park
506.1 Warren Nicholls - Finance Department Sunshine Council
506.2 Roland Broheska - Ring Road Bridge (Whitten Bridge) Keilor
507.1 Braybrook Hotel "Lets Get the West Working"
507.2 School Play - Sunshine Secondary College
508.1 Trevor Smith - Rubblsh Removals 4 Barnes Cres West Sunshine
508.2 New By-Pass Sunshine
509.1 Andraos Family - Milk Bar Winners 15 Suffolk Rd Sunshine North
509.2 Michael & Carmel Hewett
510.1 St. Albans Square Celebrations
510.2 School Page - Keilor Downs
511.1 Tiger Snake - Theresa Ross 70 Rockbank Rd Ardeer
511.2 Kubis Auction Deer Park
512.1 Louis Pregun - Mr Pockets Snooker Café 21 Devonshire Rd Sunshine
512.2 Police & EPA Blitz South Rd Braybrook
513.1 Leo & Eileen Henderson Renew Wedding Vows On 50th Anniversary 74 Devonshire Rd Sunshine
513.2 Service Tyres Sunshine
514.1 Graeme Jeffs - GT's Café 56 Alfrieda St, St. Albans
514.2 Hi Tech Sunshine
515.1 200 Plus People - Ex Members Of Gym Gone Into Receivership Ascot Vale Leisure Centre Epsom Rd Ascot Vale
515.2 Car Care Centre St. Albans
516.1 Nursing Mothers Keilor Community Centre
516.2 Jamieson Park Secondary College - Solar Cars
517.1 Alan Lee Sunshine
517.2 Stevensville Primary School St. Albans West - New School Flag & Logo
518.1 Fashion Parade Deer Park Shopping Centre
518.2 St. Albans Secondary College - Ethnic National Costumes
519.1 Vox Pop - St. Albans
519.2 Soccer St. Albans
520.1 Vox Pop - Sunshine
520.2 Fire Week
521.1 Police Band With Local Kids Tottenham Primary School Sunshine Rd Tottenham
521.1 Fiecy 50th Wedding Anniversay Maidstone
522.1 Sunshine Theatre
522.2 Trader Of The Week - Sunshine
523.1 Noel Shell Saves Dog "Frocius" 51 Clayton St Sunshine
523.2 Molly Accadia & bruno - North Towing
524.1 Monsignor Hilton - Catholic Regional College
524.2 Robert Matic St. Albans East Primary School
525.1 St. Albans Community Youth Centre Tea Ladies, Vogo & Painting Tee Shirts
525.2 VUT Picket Line St. Albans
526.1 St. Albans Tucker Bag Supermarket 35 Conrad St, St. Albans
526.2 TAB Highpoint
527.1 Soccer Runner-Up Team Chisholm College Braybrook
527.2 Stephaine Michael Sunshine
528.1 Road Works Cnr Biggs St & Arthur St, St. Albans
528.2 Tom Ulovac St. Albans
529.1 Kally Hitas - 4th Generation Hair Fashion 3 Dickson St Sunshine
529.2 Steven & Chriskustura - Robert Anthony Motors
530.1 Matthew Bourke - Runner (Athletics) 49 Welwyn Pde Deer Park
530.2 Kylie Freeman Sunshine
531.1 Albion Primary School Adelaide St Albion - School Gardens Award
531.2 Kontek Heads Sunshine
532.1 Luis Arevedo - RACV Manager 282 Hampshire Rd Sunshine
532.2 School Closure Sunshine
533.1 Almario Setia - "Job Search" 1/82 Rockbank Rd Ardeer
533.2 James Gleeson - Head Professor Of VUT St. Albans
534.1 Kontek Reps - Hampshire Rd Sunshine
534.2 Des Johnson - Photographer Of Creeks, Etc 5/27 Poole St Deer Park
535.1 Kally Hitas - 4th Generation Hair Fashion 3 Dickson St Sunshine
535.2 School Art Show Maidstone
536.1 Frankies Pizza 54 Stradbroke Drive St. Albans
536.2 Fashion Parade "Hats" - Highpoint Shopping Centre
537.1 Taylors Lakes Shopping Centre - New Plans
537.2 St. Albans East Primary School Fire Education
538.1 John Klemenchich Who Fell At His Sunshine Flat Essendon Hospital
538.2 Lady Nelson Way Childcare Centre
539.1 Gilbert Martin Secretary Of Brooklyn Ratepayers Association Nicholson St Brunswick
539.2 School Page - Taylors Lakes
540.1 Self's Supermarket Final Closure 18 East Esplandade St. Albans
540.2 Pupperts Ardeer Primary School
541.1 Bill Reeve Principal With Kids Monmia Primary School Copernicus Way Keilor Downs
541.2 Guide Dog & Kids Deer Park
542.1 Trader Of The Week - Trudy Burke 44 Walmer Ave St. Albans
542.2 Bike Education Program St. Albans
543.1 Tony Mom - St. Albans Longest Serving Electrical Contractors 93 Alfrieda St, St. Albans
543.2 Bakery - Win Victorian Bakery Award 95 Glengala Rd West Sunshine
544.1 Principal Christine Anderson & Noel Giacometh - Kings Park Secondary College Goldsmith Ave Delahey
544.2 Trader Of The Week - Jim & Maire Glan Vill 4 Mills St Sunshine
545.1 Eva Enders & Gabrielle Rohlje - Artist The Hunt Club 775 Ballarat Rd Deer Park
545.2 Liza Hall - Quagfire & Hagg Emporium Nelson Place Williamstown
546.1 Feature On Noth Stores & Managers - Safeway At Deer Park & St. Albans
546.2 Padley Reserve St. Albans - Neil Whamitt & Locals
547.1 Trader Of The Week - Hing So 203 Hampshire Rd Sunshine
547.2 St. Albans Bus Stop
548.1 Copies For Chris
548.2 Jim Poulter Sunshine
549.1 Students & Staff On A Fun Run Deer Park Secondary College Billingham Rd
549.2 Santus Claus Myer Highpoint City
550.1 Students Who Took Part In Page 2 Write Ups Marian College Glengala Rd West Sunshine
550.2 Kids At Bus Stop Sunshine
551.1 Double Wedding Phillip & Trudy Watts & Mark & Sharon Grima Our Lady's Church Sunshine
551.2 Mobil Computer Donation Altona Police Station
552.1 50th Birthday Of Niddrie Shopping Centre
552.2 Melbourne Tigers Team Manager & Rokie Albert Park Basketball Centre
553.1 Students In Rehersal For Circus Performance For Braybrook Street Festival Braybrook Youth Centre
553.2 Laura Vasjuta Study For Exams St. Albans
554.1 Students Mandy Kwot & Art Teacher Wahba Italal For Art Shows River St Maribyrnong
554.2 St. Albans Library - Token Winners
555.1 Theresa Ross - Boxer Breeder
555.2 Biswader Mitra VDE Student Braybrook Secondary College
556.1 Japanese Truck Care 25 Wright St Sunshine
556.2 Dipah Sanshui St. Albans
557.1 Deer Park Secondary College Billingham Rd Deer Park - Page 2 School Feature
557.2 Junge Book Poster Sunshine
558.1 Vox Pop - Sunshine & St. Albans
558.2 Michael Hazel Long Jumper (Athletics) Sunshine
559.1 Greening Sunshine Training Centre Opening 86 Berkshire Rd Sunshine North
559.2 Italian Day St. Albans
560.1 Shane Pavey (Widower) With Daughters 1/1 Novara Parade St. Albans
560.2 Performing Arts Maribyrnong
561.1 Anne Cummins (Poet) 1/36 Adelaide St, St. Albans
561.2 Trader - St. Albans
562.1 St. Albans Post Office Crowds Outside Waiting For Buses
562.2 Highpoint Shopping Centre Father Christmas Arrives By Chopper
563.1 Opening Of 13 Display Homes Keilor Gateway Estate Dundee Way Sydenham
563.2 Neighbourhood Watch Prizes Ardeer
564.1 Glen Condon With Moterh Sandra 412 Main Rd West St. Albans
564.2 Kinder St. Albans
565.1 Enviromental Children & Friends Cranwell Park Braybrook
565.2 Deer Park Primary School
566.1 Tania Baldacchino (Jobsearch) 42 Links St West Sunshine
566.2 School Page - Kings Park
567.1 Malcolm Kennard - Star Of "Secret" Handprint Highpoint Shopping Centre
567.2 Russian Families St. Albans
568.1 Western Ring Rd Gets Close To Maribyrnong
568.2 Rubbish On Footpath Kings Park
569.1 F.E. Lowe MS Resident Home & Their Textile Mural VUT St. Albans Joan Kirner Building
569.2 Fenech Twins
570.1 Kids & Painted Umbrella Jackson Special School Mulhall Drive St. Albans
570.2 Surgery Keilor
571.1 Trader Of The Week - Fresh Fish Shop Keilor Downs Shopping Centre
571.2 Successful Students St. Albans
572 Catherine Young Leaving A Child Care Centre Sunshne Hall
573.1 Peter Spase - Soccer Champion St. Albans Secondary College
573.2 Pickett Line Sunshine
574.1 Vox Pop - Around Sunshine & St. Albans
574.2 Toy World Tullamarine
575.1 11 People On Great Victorian Bike Ride From St. Albans Secondary College
575.2 Duty Free Shop St. Albans
576.1 Western Suburbs Pre-School Kids On Trip To Bacchus Marsh For Day On Steam Train At Deer Park Railway Station
576.2 Food Promotions St. Albans
577.1 Kids With Apples For Coles Promotion Fairbairn Rd Sunshine West
577.2 Kevin Jess Aged 71 & Grandson Stephen Fowler Is Bowling Champ Sunshine VRI Bowling Club
577.3 Florist St. Albans
578.1 Vox Pop - Head Shots Around Williamstown, Footscray & Altona Gate Shopping Centre
578.2 Jesus & Mary St. Albans
579.1 Headshots Kontek Main Rd East St. Albans
579.2 St. Albans Sports Club
580.1 Michael Nineciv - Kontek 308 Main Rd East St. Albans
580.2 Michaels Sunshine
581.1 Julie Carlin & Leo Gauriel - Barnacle Bills Milleara Mall East Keilor
581.2 Rhys Thomas Kealba
582.1 Harry Kotsinadelis Winning Fresh Fish Shop Milleara Mall East Keilor
582.2 Science Students St. Albans
583.1 Daniel Brvenik - Wife & Child Killed In House Fire Gets Yoys & Donations For Christmas
583.2 Hospitaly Course Sunshine
584.1 Auction St. Albans
584.2 Milk Bar Fire West Sunshine
585.1 Pauline Grace Braybrook
585.2 Christ The King Primary School Riley St Braybrook - Big Brother Big Sister Program
586.1 Brimbank Farm Keilor
586.2 Gordon & Frances Pippett House Fire 11 Burnewang St Albion
587.1 Santa Claus St. Albans
587.2 Morava Deli Deer Park Shopping Centre
588.1 Santa Claus Albion
588.2 Opening Of St. Albans Bowling Green
589.1 Deer Park Shopping Centre Parade
589.2 Best Picture Award St. Albans
590.1 Mr & Mrs Quarrier 50th Wedding Anniversary
590.2 S. Facey - Artist Keilor
591.1 New Look Restaurant Each Tuesday Evening McDonald Ballarat Rd Braybrook
591.2 School Fitness Keilor
592.1 Annual Carols By Candle Light Monmia Primary School Keilor Downs
592.2 Sister Bernaden 9 Years Sunshine
593.1 Robert Pawlish Looking For Owner Of Racing Trophy He Found 45 Appian Drive Deer Park
593.2 Xmas Party Sunshine
594.1 Jewellers Hampshire Rd Sunshine
594.2 Christmas Promotion St. Albans Post Office
595 Snakes In West Sunshine
596 Police Display Sunshine
597 Sunvale Primary School Neil St Sunshine - Making Xmas Donations For Sunshine Council
598 Xmas Promotions Church St Sunshine
599 F/Dean Real Estate Sunshine
600 Tree Of Hope Deer Park
601 School Closing Maribyrnong
602 Sairo Zahrf Sunshine
603 Sadie Jinks Braybrook
604 Syme Photo Of The Year Keilor Downs
605 Cardabilia St. Albans
606 Big Bins (Sunshine)
607 Deer Park Residents Against Soccer Oval
608 Sunshine Australians Of The Year
609 Peter & Andrew Fight Fires
610 Hair Saloon Sunshine
611 Hardware St. Albans
612 Kontek Real Estate Sunshine
613 Sunshine Fire Station
614 Highpoint City Maribyrnong
615 Jim From Parkville Football Club
616 Street Watch - St. Albans
617 Essendon Mazda
617 Baby Ducks Williamstown North Primary School
618 Modelling
620 Connections Youth Centre Deer Park
621 Swimming - Five Children At Keilor Leisure Centre Taylors Lakes Rd
622 Keilor Downs Playgroup
623 Citizenship
624 Keilor Heights Primary School
625 Farnbach Burnham Sunshine
626.1 Joan Bell Seventh Ave North Altona
626.2 Take Away Sunshine Station
627 60th Anniversary Yarraville
628 Wally Conron
629 Footscray Park
630 Footscray Swimming Centre
631 Book Shop Williamstown
632 New Footscray Library
633 Dancer With Family
636.1 Underground Night Club - Photo Winner
636.2 Williamstown Holy Trinity Anglican Church - Renewing The Marriage Vows
637 Eddie Welsh Citizen Of The Year 31 Anzac Cres Williamstown
638 Bill Miller - Musician
639 Buttercup Factory Yarraville
640 Cecilia Caftery & Bec Ryrie
641 Hatch Cricket Game
642 Kinn Beatson - New Manager Of The Brisbane Bears
643 Demonstration Altona Civic Centre
644 Lloyd Drayton - Retiring Tailor 80 Charles St Yarraville
645 Syme - West
646 Tennnis Tournament - Manela Rosza & Koren Anderson
647 Westgate Traffic Altona
649 Australia Day - Altona West Primary School
650 Dorothy Lee - Altona Citizen Of The Year 57 Ross St North Altona
651 First Day At School - Altona West Primary School
652 Jason Duff - Young Australian Citizen Of The Year
653 Health & Fitness Altona
690 Football Finals F.D.L. Altona V's Kingsville
691 Tony De Fazio Hobson Bay (Note no date on evelope)
1.1 Bill McDonnell Has Cancer
1.2 John Zitta
3 Rabbits At Sunshine Fire Station
3 Cr. Charlie Apap
4 Christ Konstanlenidis - Cricket Stat
5 Ben Ciach - Wicket Keeper
6 Johnny Cvetanoski - Soccer
7 Anglican Christ Church Keilor - Garvin Family Fight Over Sons Grave
8 Solmaz Seyclali
9 SA Grow Native Plants Push - V.U.T. St. Albans
10 SAE Risk Land Fill Taylors Creek Keilor
11 Rasil Tiu Of St. Albans
12 Michael Staedlec Of Deer Park
13 Clair Brachmanis Of Avondale Heights
14 David Simonovski Of Taylors Lakes
15 Michael Tucci Of Keilor Downs
16 Ellie Kyrigon Of Ardeer
17 Payl & Angela Biewer 60th Wedding Anniversary
18.1 Amey & Albert Russell 50th Wedding Anniversary
18.2 Bob Sercombe MP Sydenham Transmitting Station
19 Dianne & Matthew Morrisby Car Accident At Sydenham Roundabout
20 Cr. Sam David
21 International Year Of The Eldery Ardeer Nursing Home
22 Steve Scopelianos With His Lettuces
23 Bruce Lamcashive
24 "Rain" Greugh
25 Jeff O'Donnell Of DRAC & SAFE
26 Speeds Shoes Brimbank Shopping Centre
27.1 Sisters With Babies
27.2 Bernard Reilly
28 "Hundu Temple" Hundu Community Cultural Centre St. Albans
29.1 Vietnamese Lunar New Year Preparation
29.2 "Pavers" Patricia Beuhler & Jayden 5 On Cnr Taylors Rd & Arthur St, St. Albans
30.1 St. Pauls Multcultural Banner
30.2 Steve Tilburn Keilor Gift Winner 1998
31.1 Australia Day
31.2 Loreta Mankcli Citizen Of The Yeat
32.1 Keilor Golf Course Proposal Of Driving Range
32.2 Brimbank Community Centre Deer Park
33.1 Les Smith Stockpile Furlong Rd Railway Line
33.2 Girl Guides
34.1 Vietnamese Lunar New Year
34.2 Natalie Smith Leprosy Worker
35.1 Concrete Truck Tips Over Cnr Biggs St & Sunshine Ave
35.2 Sportstar Ben Ciach - Wicketkeeper
36.1 Youth Club Presidents - Brian Hill & Jon Reader
36.2 Keilor Pony Club
37.1 Rob Knowles Sunshine Hospital
37.2 Students Painting Poles
38.1 Vox Pop - St. Albans
38.2 Debra Beveridge Speed Skater
39.1 Julie French
39.2 George Auana
40.1 Clean Up Australia Day - James Galea & Jeff Brenner
40.2 Mark Antnowicz St. Albans Ruckman
41.1 Illegal Fill Keilor
41.2 Sunshine V's Werribee Subdistrict Cricket
42 Thea Dukic
43 Cameron Gavaghan
44 Les Belles Flowers Florist St. Albans
45 Sunshine City V's Footscray / Yarraville Lawn Bowls
46 Les Tarxzon
47 Carnation Sewers
48 Joel Magpayo
49 Greg Selman
50 Borris Josipovic
51 Sports Program St. Albans Primary School
52 Norah Wentworth
53 Nick Aggeletos - Cucumbers
54 Brian Hill - Fire Lecturer
55 John Conolan - Inspector
57 Autobarn Competition Winners
58 John Darling Flour Mills
59 Janet Harley Reads Water Meter
60 Japan Visit - Robyn Stevens
62 Chinese New Year St. Albans
63 Catia Sicari
64 Albion North Primary School First Day For Preppies
65 The Rebels Motoscycle Club & Hot Rod Show
66 Anna Piotravski
67 Chris MacGregor
68 Farnbach Burnham Staff
69 Brimbank College Celebrations
71 Supagas St. Albans
73 Craig Wells
74 Lisa Dick At Sunshine Hospital
75 Amanda Bewley
76 Dance Party Promo
78 St. Albans V's Hoppers Crossing Lawn Bowls
79 Kitts The Firedog At Sunshine Hospital
80 Huntsman Chemical Plant - Safety
81 Glenda Goodyear
82 Day In The Life Of A Tenant
83 Tony Hallam Working On New Skate Park Spotswood
84 Cr. Sam David
85 Ukraine Cyclist - Igor Pornoy & Michael Bovesta
86 Malcolm Thomas
88 Des Barnard
89 Bershire Car Sales Ballarat Rd
90 Brimbank Festival 1999
91 International Womens Day Celebrations At Taylors Lakes Secondary College
92 Vox Pop - Community Pokie Machines
93 Errington Reserve St. Albans
94 Sunshine TAFE Fire
95 Eric Bartza
96 Fran Gore
97 Lisa Taylor
98 Harry Karl & Goran Trogrlic
99 Cardiac Rehab Program
100 Cr. Brooke Gujinovic
101.1 Bells Real Estate Auction 19 Hertford Rd Sunshine
101.2 Brooke Glyinovic
102 Vox Pop - Smell At Pridhams
103 Sunshine Garden Supplies
104 Sunshine Hospital - Bakers Delight
105 Smoke Over Western Ring Road St. Albans
106 Blood Bank Sunshine Secondary College
108 Christopher Abela, Victoria Abela & Carmen Abela
109 Belinda Miggiani & Melissa Ashman
110 Keith McGovan
111 Lewis Stafrace
112 New Playground St. Albans South Primary School
113 David Connolly
114 Brian Fox - Lane
115 Artist Thea Duke With Her Vandalised Mural
116 Dominic Vcceelini
117 Jason Krainski
118 Heather Burns - Hospital Petition
119 Sonja Cranston
120 Vox Pop - Sydenham Railway Station
121 Nicholls Funeral Procession Keilor
122 Voc Pop - Sunshine
123 Salvation Army Red Shield Volunteers
124 Home Show
125 Story Time Keilor Village Branch Library
126 Jessica Goldsworthy Anti Gaming
127 Vollyball Teams St. Albans Secondary College
128 Champion Boxers
129 Fr. Francis - Orthodox Church
130 Linedancing
131 Cheed Flego
132 Can Drive At Catholic Regional College
134 St. Meadows Primary School
135 Tennis Clinic For Psychiatrically Disable
136 Jenk Behic Kickboxer
137 Deer Park North Primary School Face Painting
138 Xmas Picnic Head Shots
139 Neighbourhood Watch Keilor
140 Brimbank College Sport
141 Marian College Sports Day
142 Leanne & Cherie Cooper
143 Vox Pop - Hospital System
144 Lola Anderson Bons Trees
145 Peter Daglish
146 Circus Scaelli
147 Neighbourhood Watch Police Constable Neil Couvie
148 Pridhams Peerless Holdings Laverton North
149 Judy & Frank Taro
150 Jason Summers
151 Australian Ten Pin Open Championships
152 Don Nandoueerie
153 R.S.L. Sunshine ANZAC Service
154 Sareed St. Albans Library Cooking
155 Vietnamese & Chinese Dancers
156 Fiji Volunteer Sydney Ellis
157 Internet Access & Training Program
158 Emergency Relief
159 Anzac Day Braybrook Secondary College
160 John McPherson
161 St. Railways & Sydenham Railway Crossings
162 Rehersal Of Vietnamese Paly
163 Teresa Salerno & Dog Portrait Rocky
164 Stolen Dog - Kim James
165 Duke St Neighbourhood House - Dale Pobega
166 Jeremy Bugetic Sunshine
167 Glengala Pizza Glengala Rd
168 St. Pauls Parish Glengala Rd Fire Sunshine
169 Tracy Mitchell Sports Start
170 Sunshine Hospital Raffle
171 Sunshine Cricket 2 Generations
172 John McPherson Rates Crossings
173 Vox Pop - Contaminated Soil
174 Grant Dimitrijevic
175 Catholic Regional College Ballons
176 Kirstie Tran - Dun Fringle Festival Awards
177 Essendon Quilters At Sunshine Hospital
178 AZZ Commuric At Sunshine Plaza
179 Prision New Program
180 Dr. Netla Duggan, Dr. Maree White & Dr. Vladimir Vixex
181 "Opening Space" Carolyn Chisholm School Michael Canturi, Vivian Trang & Pluc Tu
182 Tennages March Brimbank Council
183 Ex-Cops Flemington Racecourse John Brennan (Cardigan) & Peter Egan (Blue Shirt)
184 Brian Gaskett
185 Spider Eating
186 George Pace
187 Time Capsule Brimbank Secondary College
188 Planting At Green Gully By St. Pauls Primary School
189 George Smith Is 90 Years Old
190 Jake & Molly Wilson
191 Phil Barkley At Hampshire Rd Shops
192 Immuniz Van At Brimbank Park Central
193 Fay Chapple
194 Bristol Unit Project St. Albans Primary School
195 Sunshine Youth Housing Group Eviction 266 Hampshire Rd Sunshine
196 Squatters In Wood St Laverton
197 Wyndvale V's Sunshine Football Kinder Smith Reserve
198 Milburns Garden Keilor
199 McKay Memorial
200 Sherrie Sinabia Wrestler
201 St. Albans V's Spotswood Football Kings Park Reserve St. Albans
202 Buddhist Festival Preparation
202 Dancing Group
203 Pent House Model At Hampshire Rd Newsagent
204 Keilor Downs Kinder Measurement Day
205 Sports Star - Shane Fordham
206 Croatia Dress
207 Overnewton Anglican Community College
208 Sam Muscat
209 Aborginal Site Abercairn Crt Deer Park
210 Sunshine Western Hospital Buildings
211 Kings Park Secondary College
212 Vox Pop - Brimbank Council
213 "E" Team At Melcania
214 Incomplete Police & Court Complex
215 Picker Outside Berkley Factory
216 Joanne Fench Complaining About Dust From Sunshine Quarry
217 Opening Of New Resin Plant At Azzco Nobel
218 Rhodda Johnson Funeral
219 Wayne Bocuhard Packing For His 400th Games
220 Sydenham Kinder Foundation Day
221 Sunshine Chiropratic Sunshine
222 Camp Quality Puppet Show St. Peter Channel Primary School Deer Park
223 Alex Rulla DJ
224 Brimbank College
225 Ashton Circus Deer Park
226 Bill Llapiton
227.1 Katie Miller Going To Parliament
227.2 Glen Dodd Sports Star Braybrook
228 Edward Patrecic Ginifer Station St. Albans
229 Ray Hill To Have Head Shaved
230 Keilor Primary School Oz Biggest Cuppa
231 Vietnamese Dances From St. Albans East Primary School
232 Vox Pop - Sunshine Railway Station
233 Sam Muscat 65 - 67 Sydney St Fire Escape (Darlings Flour Mills)
234 Minister For Roads Mr. Geoff Craige Sunshine Rd
235 Sunshine Swimming Pool Closure
236 Dean Blasclke, Vic Baslt, Steve Monkhorst & Andrew Rawtt
237 Marie Napoli Sports Start
238 Recociliation Week Sunshine Communty Services
239 Pontiaki Estia
240 Overnewton College Corbett & Best Science Students
241 Sunshine West Community Centre Kinder Gym
242 Grech 60th Wedding
243 Possible Fees For Ardeer Railway Station Car Park
244 First Aid At Sunshine West Community Centre
245 Barry Fletcher
246 Boys Class Kings Park Secondary College
247 Merv Ashton - Ashton Circus
248 Paul Borg - Artist
249 Sports At Emmaus School
250 Italian Day At Stephensville Primary School
251 Basket Ball
252 Syd Smale
253.1 49 Wright St Sunshine - Fire
253.2 George & Phyllis McCann 50th Wedding Anniversary
254 West Sunshine Education Presentation
255 Bakers Delight
256 New Footy Jumpers At Sunshine Primary School
257 Lolipop Men At Sydenham Railway Crossing
258 Matthew Csles Sports Start
259 Laura Breenan & Arthut Singers
260 New Footy Jumpers & Boots For Jackson Special School
261 Winter Fire Safety At Sunshine Fire Station
262 Constitutional Convention At Sunshine Secondary College
263 Indoor Soccer St. Albans Secondary College
265 Volcanic Rock Sydenham
266 Launch Of Maribyrnong Catchment Action Program
267 New Sports Ground Kings Park
268 Frank Webb St. Albans Bowls Club
269 Sunshine Chislom College Art Entry
270 Bob Philip
271.1 Mad Hatters Tea Party Western Gate Kinder
271.2 Ben Power Sports Star
272 Bus Painting - Senior Constable Jon Readee
273 Vietnamese Trained Teacher - Dinlt Hiang
274 Official Launch "Cairnlea"
275 Kontek Heads
277.1 Pharmacy At Sunshine Hospital
277.2 Chantel Zamm's Water Slide
278 Bob Hayes & Lindsay Smith
279 Conservation Award Presented To Marilyn Duncan
280 Green Gully President (Charlie)
281 June Walsh Sports Star
282 Fire Safety John Cannon
283 Tabarine Making
284 School Holiday Fun North Sunshine Primary School
285 Mr Kennett Turning Up To Opening Of Body Works
286 Blu Tio - Ian Sinlciar & Jackie
287 Vox Pop - Sunshine
288 Ezee Tennis West Sunshine Community Centre
289 Miss Tara Caine - Girl Friend / Bone Bell Model Semi Finalist
290 St. Albans Business Group
291 Musical Bans Angel Hip Hop North Melbourne
292 Horseshoe Bend Children's Farm
293 Albanvale Football Club Announcing Sponsorship
294 Bernard Reilly Deer Park
295 Parkside V's Sunshine Epsom Rd
296 Ben Stafrace
297 Cheryl Bonazia Rail Scare Albion
298 Kane - Keilor Park
299 Chinese Tantric Budhist Meditation Centre
300 Construction Work On Cnr Hampshire Rd & Devonshire Rd Sunshine
301 Sports Chiro Clinic - Kellie At Clinic
302 St. Albans Hotel Sports Bar Ads
303 Plaster Painting Sunshine Market Place
304 Council Truck
305 Cadets On Parade Kealba Secondary College
306 Centrelink
307 Sunshine East Primary School
308 Lloyd McCallum - Postie
309 Frank & Angela Borg Married 50 Years
310 Ben Apap - Karate
311 Marion Mortimer
312 Albion Primary School Rock Eisteford
313 AGL Depot 208 Hall St Sportswood
314 Focus St. Albans
315 Dumped Waste Ardeer
316 Bulldogs Visit Sunshine West Primary School
317 Macedonian Senior Citizen
318 James Jones Taxation Business
319 Joy Pollard And Nursing Mothers
320 Sunshine North Secondary College
321 Youth Forum - Marian College
322 Ardeer South Primary School, Dinjarra Primary School & Gilson College
323 Senad Dizdauevic Sports Start
324 David Callesa & Brian Parmanin
326 Jusitsu Keilor Park
327 Joy Pollard & Jytte Randel Keilor Golf Club
328 Shop Traffic Protest
329 Bob Sercombe (MP) & Brian O'Loughlin
330 Renee Biewer
331 Centrelink Staff
332 Andrews Theoponous Politician
333 Retravision
334 Christ The King School
335 Sunshine House
336 Cr. Charlie Apap
337 St. Albans Signs
338 Vicar Retiring - Fred Dearnaley
339.1 Bill Sheaham - Umpire
339.2 St. Albans House Fire
340 Fire Safety
341 Keilor Primary School
342 Mark Waugh
343 Fishing Club
344 Wedge Park V's Stevensville Primary School
345 Icecream Day Stevenson Primary School
346 Brooklyn V's Wyndhamvale Football
347 Lauren Farugia Sports Start
348.1 Students & Footballers St. Bernards Primany School
348.2 Natalie Suleyman & New Truck Brimbank Council Depot
349 Radio Show - Doug Hawkins
350 David Glen & Sam David
351 Peter Rautensachee - Wood Contractor
352 Car On Nature Strip Sunshine
353 Zac McCauley & Dennis O'Dowd Altona East Primary School
354 Jon Reader, Scott Widdicombe & Sam David
355 Church Rebuilding St. Bernadettes
356 Kontek Signs Main Rd West & Station Rd
357 Cr. Apap & Cr. Muscat At Brimbank Central
358 Catholic Regional College Youth Rock Band
359 Coco's Hair Advert
360 Keep Australia Beautiful Metro Women's Correctional Centre
361 Tiffanny's
362 Chris Grant At UN Mobiles Sunshine
363 Youths - Woif & Wilson Get Jobs At Bunnings In Sunshine
364 Alister Smart
365 Joe Biskic
366 Jane Stack - Smith, Engineer At Oricia
367 Kids Drug Programme St. Albans Primary School
368 Peter & Sophie Dimitriadis & Atharsia
371 Jake Visel Overnewton College
372 Sunshine Model Railway Club - Neville Filer
373 Art Programe Sunshine East Primary School
374 Street Bus
375 Brimbank Youth Festival
376 Soccer Green Gully V's St. Albans
377 Police Helicopter Kealba Secondary College
378 Dennis Parker Crime Stoppers Sward
380 Operation Newstart Cooking Classes
381 Kelsey Taylor With Flower
382 Doeu Dell Byce
383 Australian - Greek Tavern Day
384 Braybrook College
385 Albion North Primary School Art Show
386 Tony Marino
387 Ukrainian Cultural Day Mother Of God Primary School
388 Art Display Overnewton Gatehouse
389 Monika Markovski Classical Guitarist
390 Phillip Graham St. Albans VUT
391 Senior Magistrate Greg Levine
392 Simon Gerada Ping Pong
393 Bob Taylor
394 Shane Azzopardi
395 Sunshine R.S.L. Vietram Day Dupuy & Rikard
396 Siezure Of Marijuana At Sunshine Police Station Constable Dancey
397 Veli Fikret & John Kontek Headshot
398 Jack Sheridan Brimbank Park
399 Sunshine Court Complex Opening
400 Braybrook College Volleyball
401 Sunshine Secondary College Education Week Dancing Classes
402 Kris Leber
403 Darren Hamilton Scott At Blond On Blond
404 Vox Pop - St. Albans
405 Girls Playing Football
406 Caroline Chisholm College Artwork
407 Calder Rise Primary School CSIRO Science
408 Turkish Childcare Centre
409 Mr & Mrs Fisher Fathers' Day
410 Sunshine Croquest Club
411 Cecilia Turns 102
412 Father Stewart St. Marks Church Sunshine
413 Rocky Horror Picture Show Brimbank Secondary College
414 Japanese Exchange Students St. Albans
415 Nel Dewin Pencil Case VUT
416 Maurice Oppedisocanci
417 George Maciel
418 Aaron Kellett
419 Dr. Sophie Nottle
420 Mario Portelli
421 Recycling Award Presentation City Of Brimbank
422 Marian Girls College Piazza
423 Dominic Boland - Community Visitors Program
424 Piglet
425 Soccer President - Tony Karlusic (Melbourne Knights Football Club)
426 Candiates Bonfield Reserve Keilor
427 Vox Pop - Sunshine
428 Laverton Secondary College - Simon Higgins
429 Labour Voter David Palmer
430 Rock Eistesford Kealba Secondary College
431 Rebecca Pace & Ben Davidson Sunshine North Secondary College
432 Truck Rolled Over Cnr Geelong Rd & Somerville Rd Footscray West
433 Gary, Luke & Tanara Fisher
434 Squash - Mark Price With School Kids St. Albans East Primary School
435 Ian Baker Around St. Albans
436 Jane Stevens
437 Lucy Jensen
438 Western Hospital Masseuers
439 Don Kirham Christmas Gift
440 Daniel Avano, Casey Peden & Nicole Merciesa Kings Park Secondary College
441 Maucin Simons - Photographer
442 Sally Balfort - Aid Award
443 Cr. Karen Roberts
444 Sunshine Little Athletics Club Highpoint
445 Michael Salmon Author
446 Mark Parsons Swinging Voter Gazzas Auto Dismantlers
447 APM Auto Repairs
448 Yoga - Robyn Stephens
449 Literacy Week Kings Park Secondary College
450 Head Shot Karen Said Stockdale & Leggo
451 True Value Hardward St. Albans
452 Anne Stratton MS Suffer Who Was Robbed
453 Coco's Hair Advert
454 Archie Fussilto Keilor Downs College
455 Watergardens Kings Park Secondary College
456 Robert Harvey At Don Smallgoods
457 Glennys Jadeson - New Family Law Regintrar
458 Sale Of Braybrook Clothing Manufacturer Duke St
459 Pergon Loaded With Newpapers
460 Jeanne Deoki Psthotic
461 Mathew Bridda & Raymond Creristo Keilor Downs Secondary College
462 Meagan Thornton - Indoor Soccer
463.1 Sunshine Primary School Literacy Week
463.2 Sunshine Secondary College Leadership Program Students
464.1 Maltese Cultural Centre
464.2 Kontek Staff Shots - Ted Anderson, Patrick Luong, Luong Truong & Nicholas Sujica
465.1 Chris Milne - Author At St. Albans Primary School
465.2 Prize Winning Garden At St. Albans South Primary School
466.1 Female Kickboxer
466.2 Leonards Chicken
467.1 Frances Chiarezza & Leadlight Door
467.2 Salvation Army Orica & Westcare Giving Mini Bus
468.1 Keilor Downs Secondary College Literacy Week
468.2 Badminton Boys Champions
469.1 Million Development & Sunshine Hospital
469.2 Brimbank Amcal Phamacy
470.1 Hunt Club Community Arts Centre Painting
470.2 Paul Cachia Ambulance Cadet
471.1 Saverier Rocca Keilor Primary School
471.2 Watergardens Pets
472.1 Stock & Leggo Head Shots
472.2 Joanne Falzon
473.1 S & L Head Shots
473.2 Mental Heath Drama Week Gilmore College Sunshine
474 Brendan Middling
475.1 Kontek Heads Shots
475.2 Royal Australian Navy Band At Horseshoe Bend Farm
476 Jenaya, Health & Brook Ellis Holy Eucharist School
477 Ian Baker Electorate Office
478.1 Turkish - Cypriot Elderly Womens Group
478.2 K-Mart Winning Kids
479.1 Operation Newstart Williamstown
479.2 Deer Park Primary School
480.1 Flags Half Mask Brodie Guyinovic
480.2 Bike Accident - Carol Barnes
481.1 John Barriet - Skate Park Keilor Downs
481.2 Dorothy Price
482.1 Albion North Primary School Art Show
482.2 Dr. Winsor Choi
483 Craig Rosince Parkinsons Sufferer
484.1 Movelle Primary School Ecorecycle Awards
484.2 Haregu Sebratu Cargill Processing
485.1 Ames Centre Literacy St. Albans
485.2 Keilor Primary School Exhibition Week
486.1 Dog - St. Albans
486.2 Caravan For Homeless Kids At Sunshine
487.1 TAB Charity Collector St. Albans
487.2 South Sunshine Kinder Parents And Children Working On New Outdoor Yard
488.1 Brain Injured - Brian Manhalt Part Of Art Project At Hunt Club
488.2 Peter Kelly & Belinda Roxter Nurse Awards
489.1 Eagles V's Panthers Baseball
489.2 "Cancer Feature" Barbara & Clint Edwards
490.1 Vox Pop Week 40
490.2 Car Accident Police Pursuit
491.1 Declaration Of The Poll - Languiller, McGeary & Nardella
491.2 North Sunshine Kinder 25 Years Celebrations
492.1 Frank Smith At Sunshine Bowls
492.2 MFB Burning Off Weeds And Grass
493.1 Footy Game By Special Needs Adults
493.2 Rays Cycles
494.1 St. Pauls Church Sunshine
494.2 Ron Edwards & Walter "Wally" Peeler Memorian Sunshine R.S.L.
495.1 Unity Care Sunshine Mission - Mr Barry Mitchell & Jessica Holdsworthy
495.2 Nelida Paciocco & Rebe Luciew Overnewton Gatehouse
496.1 Luke Holford
496.2 Ted Allen With Trains
497.1 Catherine Carnovale Diabetic
497.2 Our Ladies Primary School
498.1 St. Albans Little Athletics
498.2 Jacqui Carvana Fashion Student
499.1 Stroke Victim Suzanna Hill & Husband Doug At Western Hospital
499.2 Lindsay Fox
500.1 Face Painting Holy Euchist Primary School
500.2 Mayland Doggett
501.1 Kids Playing Earth Ball Keilor Downs Primary School
501.2 Scene From Prince Alis Grand Ball Brimbank College
502.1 Backgammon Kids Brimbank Secondary College
503 Fire Demostration Calder Park
504.1 Toxic Tablet Cairnlea Estate
504.2 Rememberance Day Ceremony At Brimbank Council Offices
505.1 Foster Grandparents
505.2 Sunshine Historical Society
506.1 Ray Harrington & Justin Who's Dog Died From Snakebite
506.2 Sunshine Hospital - New Family Birthing Unit
507.1 Albanvale Community Centre Car Park With Skid Marks
507.2 Holy Eucharist Parish
508.1 Ohsohs Tae Kwondo
508.2 Bryce Stevens - Immunisation
509.1 Calder Race Track Children's Day
509.2 Andrew Johnson - Athlete
510.1 Fire At Kealba Community Centre McShane Drive Kealba
510.2 St. Albans Secondary College
511.1 Residents Angry Denleigh Crt Keilor
511.2 Colin Johanseen Spinal Awareness Week
512.1 Meeghan Blue Ribbon Day
512.2 Sunshine City Club
513.1 Chris Evans Head Shot
513.2 Victor Bray - Race Car Dragster
514.1 Les Crotis 50th Wedding
514.2 German Club
515.1 Martess Borg Breast Feeding
515.2 Plaque Unveiling Transport Minster Sunshine Railway Station
516.1 Stony Creek Project
516.2 Marian College Kids Painting Flower Boxes
517.1 Apostolic Catholic - Tony Knautz
517.2 Jamie Hancix Archery Competition
518.1 Westling - Farshad, Parzad, Tarash, Ali Ahdo & Sam Parker
518.2 Jacqueine Lowe - Artist
519.1 Soccer Melbourne Knights V's Brisbane
519.2 Sunshine Secondary College Best Lotle Teacher
520.1 Names In Horseshoe Bend Brimbank Park
520.2 Bishop Tony Knauth Keilor Downs
521.1 Melinda Wills Bonnie Babies Foundation
521.2 Owusu Kojo Braybrook / Dinjerra Primary School
522.1 Horseshoe Bend
522.2 Kealba Community Kids
523.1 Alice Austin
523.2 Valentina Kugmcenovski
524.1 Pig Giant Crystals - Jennifer
524.2 Kings Park Secondary School
525.1 Ray Barry Wrestler
525.2 Westvale Christian Centre
526.1 Sunshine Quilters
526.2 Brimbank College Art Show
527.1 Vicky Triandafyllekoules
527.2 Sunshine Primary School Julie Troeth
528.1 Lisa Lawler & Brenda McCormick Saches
528.2 Sunshine City Club Staff Shot
529.1 Beverly Isaac (Artist)
529.2 Kings Park Secondary College Artwork
530.1 Dr. David Cunnington - Asthma Registrar
530.2 Italian Day Ardeer Primary School
531.1 Exchange Students Japan
531.2 Jim Stynes At Brimbank Secondary College
532.1 Mirrcred Images Art Exhibution - Samirr
532.2 Wally O'Brien Clean Up Deer Park Medical Centre
533.1 Ross Heathcote Taylors Lakes
533.2 Play Performance Sunshine Secondary College
534.1 Sunshine North Primary School Football Clinic - Paul Hudson
534.2 Sam Muscat & Clark Gross
535.1 Doreen Foster, Margaret Hedley & Sheryl Willet
535.2 David Vidojevic St. Albans Public Hall
536.1 Feet
536.2 Team Building Exercise St. Albans Secondary College
537.1 Church Of Christ Sunshine
537.2 Adele Camilleri Taylors Lakes
538.1 Lions Fundraising Sunshine Bunnings
538.2 Adele Camilleri Taylors Lakes
539.1 St. Albans Youth Club - Mural
539.2 Cooperation Exercises St. Albans Secondary College
540.1 Radio - Gospel Radio
540.2 Deer Park Primary School Italian Festival
541.1 Advertising - Kontek Head Shots
541.2 Greenwood Management
542.1 Elysia Aguis
542.2 Vox Pop - Braybrook
543.1 Martha Arms - Toy Library
543.2 Save Kororoit Creek
544.1 Melbourne Knights Soccer Players
544.2 Sunshine Youth Housing
545.1 Basketball - Cecil Ezuns Caroline Chisholm College
545.2 Grahame Rogers
546.1 Taylors Lakes Secondary College
546.2 Betty McGuire
547.1 Kealba Secondary College
547.2 Maketing Brimbank Central Xmas Parade
548.1 Human Rights VUT St. Albans
548.2 Sue Stanley
549.1 Dogs Maidstone
549.2 Sunshine Secondary College Rehersal Student Awards
550.1 Car Smash Cnr Annesly St & Ballarat Rd Braybrook
550.2 Learning Road Safety Keilor
551.1 Gang Feature Needles & Graffitti Sunshine
551.2 Boccia
551.3 St. Albans Leisure Centre Empty Pool
552.1 Soccer Team St. Albans Secondary College
552.2 Braced Pole North Sunshine
553.1 Write To Publish St. Albans VUT
553.2 Disable People At Sunshine Megaplex
554.1 Halloween Fancy Dress Esmerelda
554.2 St. Albans Traders
555.1 Music Brimbank College
555.2 30th Regional Cadet Unit Of Australian Freedom Of The City
556.1 Mr Ord & Motorbike St. John Ambulance Kealba
556.2 Emma McLean Kindgergarden
557 Aerobics Caroline Chisholm College
558.1 Sunshine Secondary College Mural
558.2 Dragon At St. Albans Primary School
559.1 Sunshine Pool - Two Girls
559.2 Radio St Maidstone & 3LO Transmitter Hut
560.1 Sub District Cricket 2nds Sunshine V's Preston
560.2 John McArdle
561.1 Easy Gourmet Foods Taste Testing
561.2 Computer Students Sunshine Campus
562.1 Quaratine Talk Ardeer South
562.2 Mr Leon S. Samuels Artist Commercial Hotel
563.1 Rohan Smith & Mike Bourke
563.2 Vox Pop - Sunshine
564.1 Paul Scenini
564.2 Roland McDonald Laverton Commonwealth Bank
565.1 Science Students Overnewton College
565.2 Marian College Piazza
566.1 School For The Deaf Bike Education
566.2 Conlcumer Packaging - Tony Pagne
567 Shops At Hampshire Rd Owners Protest
568.1 Oplunium Real Estate - Trung Nguyen
568.2 Artist Joel Magpayo
569.1 Frank & Thea Strazir
569.2 Nazarine Church Keilor Downs
570.1 Ray Dodd Keilor Village
570.2 Chisholm College
571.1 Door Knock In Denton Ave - Stockpipe
571.2 Talent Discovery Quest Winners
572.1 Kiss Family
572.2 Jessie Wallace At Keilor Primary School
573.1 Sunshine East Primary School Choir At Sunshine Market Place
573.2 Harvester Customer Service Centre Sunshin
574.1 St. Albans Secondary College Top VCE Students
574.2 Republicians Jack & Brooke
575 Sunshine Language Centre
576.1 Bruce Ruxton Sunshine R.S.L.
576.2 St. Albans South Primary School Gardening Award
577.1 Chris Beasley & Jo Mannion
577.2 Western World Deer Park
578.1 Glenn Buijs
578.2 Kelly Bassingthwaighte
579.1 Elizabeth Drozd & Libby McKinnon
579.2 Luke Bond Sunshine Secondary College
580.1 St. Albans Ambulance
580.2 Sharon Grima
581.2 Mural At Sunshine Hosptial
581.2 Kristina Vukovic
582.1 Centrelink Strike
582.2 Teabag Ladies
583.1 Anthony Sensevick - Toxic Soil Keilor
583.2 Mathew Wilson Darice King
584.1 Joe Azzopadie
584.2 Clean-up Deer Park West Primary School
585.1 Margaret Wincheater
585.2 Jacqualine Lang Art Exhibution
586.1 Autie Pro "Bluey One" Drag Cars Deer Park
586.2 Fire At Szabo Household Ardeer
587.1 Vox Pop - Trains
587.2 Brad & Nathan Johnson
588.1 Cr. Jack Brislout Sunshine
588.2 Sleep Week
589.1 Proposed Skate Park For Keilor Downs
589.2 Sonia Reid
590.1 Eammaus Primary School Students At Seniors Lunch
590.2 Keilor Tree Planting
591 Adrian Sposato Under 16 Soccer Player
592 Nation Play Aqainst Racisum
593 Reverard Corkauserharn & Youth Group Presbyterian Church
595 Bronwyn Bishop At Home For Aged Grreks
596 Fire At Rebels Motor Cycle Club Cnr Faribairn Rd & Somerville Rd
597 H.V. McKay Development
598 Emma Forham
599 Sunshine Hospital Murial
600 Easy Timor Day VUT St. Albans
601 Dr. Creek Wesleyan Minister Devonshire Rd Sunshine
602 Promo For Living Springs Baptist Church Youth Fun Day
603 Launch Of Wishing Tree Keilor Downs Kmart
604 St. Albans Secondary College VCE Exam
605 Bruce Ruxton Visits Keilor Primary School
606 Alex Andrianopoulos State Parliament Speaker
607 Peter Deverux Principal Sydenham Primary School
608 Sunshine V's Altona Cricket Match
609 Pictures Of Eclipse Flour Mill For Rate Card
610 Salvation Army Promo Of Xmas CD
611 Reptile Show Ardeer South Primary School
614 Maltese Kids West Sunshine Community Centre
615 Bill Mooney - Artist
616 Playgroup With Brimbank Mayor Brooke Gujinovic
617 Joe Misiti (Footballer) & Emmuel (Trainer)
618 Sydney Railway Crossing
619 Church Shot
620 Vox Pop - About Brimbank Council
621 Belly Cast By Margaret Buni & Susanne Parsons
622 Credit Cards
623 Sam's Market
624 Ralph Phillips At Sunshine Baptist Church
625 Nola Flynn
626 Vox Pop - Sunshine
627 3 Characters In Costume Brimbank Central Secondary College
628 Features - Taylors Lakes, St. Albans, Ardeer, Sunshine & Keilor Downs
629 John Bolton "Shadow & Light"
630 National Trust Home Demolished 5 Watt St Sunshine
631 Western Hospital New Textbook Launch
632 Les Tarczon In Kings Park
633 Vandals Damaged Furniture At Excel Craft
634 Joe & Mary Parkinson - Dart Players
635 Dr. Ross & Robert Payne - Vets
636 Richard & Tina Diaz & Baby
637 Mr Lydsay Parson Caroline Chisholm College
638 Amanda Berry Hockey
639 Ivy & Neil Hunt East Keilor
641 Nhan Nguyen
642 Doris Perkins Close Slave
642 Pastor York Keilor Downs
643 Overnewton College Final Year Students
644 Ivy Del Sunshine
645 Kings Rd Underpass
646 Bruce Ruxton & Telmon Languiller
647 Art Classes Taylors Lakes
648 Rednose Trophy
649 Ashley Tobacco Control Agency
650 Soccer Camp Kealba Secondary College
651 Paraclish Café Deer Park
653 Jasmine Holdsworth
654 Hat Promotions St. Albans
655 Cork Recyling Girl Guides Jade
656 George & Gloria Hale 50th Wedding Anniversary
657 Bradey Britton & Grant Baley Jackson School
658 Malcolm & Chris (Musicians)
660 Victorian U/16 Softball Stars
661 Albion Primary School Science Program
662 City Water & Bialcrow 628 Normanby Ave Sunshine
663 Optimin Real Estate Mary Jane Vella
664 Beds On Collins No 1 Collins St, St. Albans & Ivan Kelic Melbourne Knights Star
665 Phuong Tang Going To Japan
666 Eezy Tennis Sunshine West
667 Optimeun Real Estate Head Shots
668 Our Ladys Church 46 Ballarat Rd Maidstone
669 Norma & Jack Taylor 9 Stevedore St
670 White Diamonds School Of Singing
671 Millenium Candle Fr. Carrucan Holy Eucharist Church
672 Rachel Walker Pharmacist
673 Teacher Anna Pawlowicz Leaving Holy Eucharist Primary School
674 Taylors Lakes Leisure Centre
676 Cameron Bunney
677 People Gardening Garden Biz Brimbank
678 Wilmont Ave / Kings Rd Extension St. Albans
679 Batavia Furniture
680 Western Hospital Sign
681 Picture Of Suburbia
682 Holy Eucharist Primary School Choir
684 Rosa Hage - ALI St. Albans
685 Time Capsule St. Albans
686 Traffic St. Albans & Footscray
687 Trainee From Bulldogs Training Centre At St. Bernadettes
688 Line Dancing Lone Start Taylors Lakes
689 Tup Marks, Ozan Begit & Marilyn Lopez Sunshine Secondary College
691 Abandoned Farm House Main Rd West St. Albans
692 Face For New Year Nicole Janiutsos
693 Aged Care Centre At Sunshine Hospital
694 Shadow Health Minister Jenny Macklin
695 Sunshine Community Centre Playground
1078 Energy Park Sunshine
1079 Brass Band At Kingham Lodge
1080 Frank - Centrelink International Day People With A Disabilty
1081 Marian College
1082 Brimbank City Council Car Pound
1083 SES Volunteers Keilor Downs
1084 Tennis For The Disable West Community Centre
1085 Play Of Oz St. Albans Community Centre
1086 Roslyn's Cards & Gifts
1087 St. Albans Senior Citizens Centre
1088 Caroline Chisholm College
1089 Traffic School At Green Gully With Kids From Kealba Kinder
1090 Michael Miconiatis
1091 Spook Block Paddock Needs Clearing Keilor
1092 Nic Baker & Liz Tavernea
1093 Tony Barber & Teresa Vee
1094 Catholic College St. Albans
1095 State Of Faith - Stuart Nicholls
1096 New Classmrooms St. Albans North Primary School
1097 School Bond At Sunshine Secondary College
1098 Melbourne Knights Keilor Gift
1099 Fire Festival Vic Uni St. Albans
2000 Kealba - Pokies
2001 Bocco At Italia Australia Social Club
2002 Duthcommitz Council
2003 Doug Chappel
1 Australian Day - MRC St. Albans
2 State Of Faith - Macedonia Church Sydenham
3 Elwyn Davies Western Hospitals
5 4 Sets Of Twins
6 Francene Zagra Theatre Course
7 Community Hub Kinder
8 Overnewton Castle Overnewton Rd
9 Max Bowman
10 Traffic Congestion 28 Gumtree Close St. Albans
11 Kontek Staff Shots - John Abraham & Christine Michael
12 Vox Pop - St. Albans Secondary College Techology
13 2000 Baby Phuc Ngnyen Sunshine
14 Disability Day St. Albans Leisure Centre
15 Floral Tribute To Dead Teenager Kathlyn Meilak
16 Powder Mill Building Deer Park
17 Vox Pop - Taskforce Advice
18 Lowther Hall Sports Centre Keilor
19 Vicky Ratkaj Teacher
20 Head Shot Nick Tean Homeland Real Estate
21 Denise & Colin Kennedy Overnewton Winery Keilor
22 Luna Festival St. Albans
23 Shieley & John McArdle Deer Park
24 Christmas Day At Macedonian Church Sydenham
25 Westgate Real Estate Martin Tomek
26 Adam Vella
27 Tom & Maria Diete 50th Wedding Anniversay
28 Rev. Father Synesios Frangos St. Albans
29 Bowls Deer Park V's Altona
30 Blue Chip Tuning
31 Desi MacFarlane - Artist
32 Fire In House Sydney St Albion
33 Sydenham Railway Crossing Signals
34 Australia Cities St. Albans
35 Lost Dog Found Albion
36 Graduate Nurse At Western Hospital
37 Cardiolgy Western Hospital
38 Rundown House Main Rd West St. Albans
39 Cooling Of Ice Box Sunshine
40 Dog & Robyn
42 Red Cross Class Braybrook High School
43 Tony Rulfs Council Pound Keilor
44 Nurse Shortage - Jayne & Amy Sunshine Hospital
45 Lung Transplat - Chantel
46 Angie Mai
47 Triplets Paul & Christopher Victoria Overnewton Primary School
48 Sunshine Police Gym - Lester Ellis
49 Clean Up Oz Sunshine
50 Skate Park Keilor Downs
51 Resurrection Theatre Social St. Albans
52 Kristina Kalaitzisiz
53 Vox Pop - Deer Park
54 Yoga - Living Colur Studio
55 "Olympic Torch" - Barry Kelly
56 Frances & Joe 50th Wedding Anniversary
57 Order Of Australian Receipients
59.1 Cr. Van Seer Scheer
59.2 I.C.I. Houses In Deer Park May Be Listed As Heritage
60 Senator Hill At Halon Bank
61 Saskate
62 Rev. Dean Eland
64 Computer Science Braybrook Secondary College
65 Mr & Mrs Probst 50th Wedding Anniversary
66 Buddy School Program St. Albans East Primary School
67 Sister Antia-Marie Neumann St. Albans
68 Keilor Gift
69 Darren Pace Keilor Downs Secondary College
70 Candy The Clown With Hanna & Sara Sunshine Hospital
71 Rabbits On Show With Kids St. Albans Community Centre
72 Patricia Edwards
73 Ballroom Dancing Cricket & Ezee Tennis Sunshine Community Centre
74 Mrs Ellen Berry Deer Park
75 CPR Training Sunshine
76 St. Albans Football Club - Womens Footballer
77 New School Braybrook Primary School
78 Gang Problems Sunshine
79 Jniryd Jinks Braybrook Primary School
80 Bill & Cathy Pop 50th Wedding Anniversay
81 Josephine Ann Mouney West Sunshine
82 Basketball Lessons Sunshine Community Centre
83 Deer Park Tennis Club
84 Smelly St. Albans John Polotzek
85 Keilor Cemetery Keilor
86 Robbed Club X Store Front St. Albans
87 Pole On Fire St. Albans
88 Alpine School "Justin Madden" Braybrook Secondary School
89 Multiple Births Horseshoe Bend Farm Keilor
90 Michael & Ondine Adey - Taekwondo
91 Police Band At Keilor Primary School
92 Japanese Tea Ceremony Footscray City College
93 Customer's Car & Simon Gouchi
94 Singers James Redfern & Caroline Gonhier
95 Kids Program Community Centre West Sunshine
96 Overcrowded Pool Outside Pools Empty Sunshine Pool
97 Digi Home Entertainment St. Albans
98 Mary McKillop At Brimbanl Council Chambers
99 Danny Fitzgerald & Judy O'Donnel At Brimbank Council Meeting
100 974 FM New Show With Lyn Goodall
101 Working Group To Fix Problems In City Of Maribyrnong
102 Pelaco Workers Protest Meeting Braybrook Community Centre
103 Sunshine East Primary School 50th Birthday
104 Wharf Arts Williamstown
105 Vlado Trpcevski
106 Promo For Brimbank Festival
107 New Bowling Green St. Albans East
110 ISIS Eygptian Goddess
111 Olympic Torch Holder - Tony Misfud Albanvale Football Club
112 Protest - Closure Of Swimming Pool
113 Sports Star - Natalie Mifsud
114 Kontek Single Head Shots St. Albans
115 Councillors
116 Westend Market
117 Kontek Staff Picture Taylors Lakes
118 Kontek Staff Shots
119 Kontek Staff Group Shot St. Albans
120 Vox Pop - "Valentines Day" Sunshine Mall
121 Sunshine Community Centre Holiday Program
122 Kontek Real Estate
123 Kontek Sunshine Group
124 Bill Tucker & Damaged Tree
125 Thalsari New Hostel Wing
126 Jason Summers Green Gully Reserve
127 Scott Braini On Mobile
128 Unwelcome Housing Development Near Quang Monastery
129 St. Bernadettes Primary School Puppets
130 Desi Potiriasis Found Picture
131 Batavia Importers Sunshine
132 Joanne Newman Wales
133 Braybrook Autowreakers
134 Lester Ellis (Boxer) & Peter Beardsley (Melbourne Knights Player) At Sunshine Police Gym Sun Cres Sunshine
135 Road Safety - Stevensville Primary School
136 Cricket Sunshine V's Airport West
137 Lucas Recruitment
138 Business Profile Sunshine Roller Shutters 2 Malcolm Crt Kealba
139 Sunshine Secondary College Pariliment House
140 Lynee Betts - Cairnlea Estate
141 Roy McMillan & Greyhound
142 Adam Bery - Sports Star
143 Nelly Cybulski
144 Softball Australia V's Finland
145 William Murinf, Ian Ponter & Tim Archibald Western Wheels Car Yard 62 Ballarat Rd Maidstone
146 Batavia Importers Sunshine
147 Keilor Gift
148.1 Pat Todd Dressed For St. Pats Day
148.2 Overnewton College Technolgy Day
149 Lou's Shoes St. Albans
150 Garden Show
151 Grandma Janice Reid & Tamara Moss Aged 6 St. Albans East Primary School
152 Minnie Gersucy With Daughters Myra & Joan St. Bernadettes Nursing Home Sunshine North
153 Stereo 974 Presents Kris Withers With New Bike
154.1 Used Cars Berkshire Rd, Churchill Ave & Ballarat Rd
154.2 Judith Leverberger - Artist
155.2 Syd Ellis Ballarat Rd
155.2 Peter Graham R.M.I.T. Lecturer
156.1 Inscribed Property Keilor Police Station
156.2 Kay Darveniza At Stony Creek Lae St West Footscay
157.1 Sophia Meas, Masiba Imero, Marta Ninuenic, Jalentina Nur & Theresa Kozar St. Albans AMES Office
157.2 Flexi Personel Neville St Laverton
158.1 Digo Home Entertainment Product Shots Main Rd St. Albans
158.2 Beach Goers In Heatwave Altona Beach
159.1 Abbott & Dean Real Estate Head Shots Keilor Rd
159.2 Anti Bullying Launch
160.1 Rabbit Control Program Keilor
160.2 Fire Station Cardiac Arrest Victims
161.1 Kealba Secondary College
161.2 Denise Dripdale
161.3 Belinda Musco - Artist
162.1 BMX Sports Star - Dylan Murnane
162.2 Staff Pictures - Jas Stephens Estate
163.1 Natasha Wolf & Gabrielle Keating
163.2 Rohenna Young - Footballer
164.1 Sunshine Fire Station Kinder Visit
164.2 Williamstown Film Festival
165.1 State Of Faith Lieutenant Nicole Craddock
165.2 Football Bulldogs V's Fremantle
166 Cr. Dat
167.1 Jacqui Anile Dump Site Williamstown
167.2 "Its A Dad Thing"
168.1 Chief Nurse Western Hospital
168.2 Alison Beer With Baby
169.1 Shirley Bunton St. Albans
169.2 Discover Chiropractic Hampshire Rd Sunshine
169.3 New School Plans Dinjarra Primary School
170.1 Marian College Athletics
170.2 Luis Geraldes
171.1 Worm Farm Christian Curringham
171.2 Table Tennis 4 Senior Citizens Braybrook Community Centre
172.1 Archbishop Pell Catholic Regional College
172.2 Western Nursing Home Commercial Rd Footscray
173.1 Commonwalth Bank Glengala Rd & McIntyre Rd Closure Protest
173.2 I.C.A. Products
174 Angus Walsh & Memorial Site
175.1 Brimbank Fashion
175.2 Soldiers Return From East Timor To Williams R.A.A.F. Base Laverton
176 Waste Recycling Hoppers Crossing
177.1 Bashed Victim Ervins Apinis Western Hospital Footscray
177.2 March In Williamstown To Celebrate Sailing Competition
178.1 Ian Whelan With Stolen Booze Sunshine Police Station
178.2 "The Ready Group" Simon Salmon & Ryan Brown
179.1 WREDO - Barbara McLune
179.2 Fels Park Victory Yarraville
180.1 Hunt Club Astrology Sural Palmer
180.2 Bulldog's V's Fremantle Practice Match Western Oval Footscray
181.1 West Sunshine Community Centre Exy Tennis & Funding Grant
181.2 Sacred Heart Missions
182.1 Diabetes Trail Taylors Lakes Primary School
182.2 Nautical World Williamstown
183.1 Sunshine Special Development School
183.2 Women In Power Launch Mary Delahunty
184.1 Pool Competition Jeromy Aged 14 & Jacob Aged 13
184.2 Devonshire Rea Osborne House 54 Osborne St Williamston
185.1 Ray Baery Olympic Torch Carrier Deer Park
185.2 Maclean Reserve New Playground
186.1 Keilor Primary School Easter Bonnets
186.2 Aldrill Fire Training Altona Complex Fire Training
187.1 Keilor Cemetery Mausoleum
187.2 Jim Howard & Patricia Stewart - Actors
188.1 Cheap Petrol Deer Park
188.2 Ted Allsop - Olympian Walker
189.1 Charlie Apap & Land
189.2 Pamela Dennis Stanlake Special Centre
190.1 Laverton Community Bank Hobsons Bay Mayor Carl Marsid
190.2 Women's Elliot Regatta Royal Yacht Club Williamstown
191.1 Peter Taylor Photo Competition Laverton
191.2 Cathy Stanswiski
192.1 Nicola Roxon St. Albans
192.2 EPA Checks - Footscray
193.1 Football Devils V's Cobras Robert Bruce Reserve Deer Park
193.2 Bill Harrocks New BBQ
194 Immigration Museum
195.1 Little Girl On Ride Sunshine Shopping Centre
195.2 Joan Williams
196.1 Joseph McNamara ANZAC Writing Competition
196.2 Footscray City Secondary College
197.1 Sunshine Mercy Hospital
197.2 Sports Star - Dean Malthouse
198 Pamela & Chickens
199.1 Angela Bliss
199.2 Keilor Leo's Youth Group
200.1 Jane Kelly - Aerobics Star
200.2 Back To Basics
201.1 Sports Star - Samantha Gagovska
201.2 Wedding Reunion At Jack's Mazagine ADI Footscray
202 Giodana (George)
203 Jemma Mead And Generation "Q" At Keilor Downs Youth Centre
204.1 Julia Gillard At Protest At Commonwealth Bank East Sunshine
204.2 Bill Rodgers & Elrshial Rodgers
205.1 Telmo Languiller Sunshine Hospital
205.2 Willis St Kindergarten
206.1 Grass Fire Deer Park
206.2 Bulldogs Football
207.1 Jane Edmanson St Bunnings In Sunshine
207.2 Laverton Community Centre Has Reopened
208.1 Vincent Pulis (Artist) Good Friday Procession St. Albans
208.2 Western Hospital Cardiac Patients
209.1 Mayor Apap & Bandicoat Billy
209.2 Mr & Mrs Weedon 60th Wedding Anniversary
210.1 Protest Veitnamese Anti Government
210.2 Stockdale & Leggo Staff
211.1 Keilor Primary School
211.2 Qenos Art Show
212.1 Hunt Club Youth Drama
212.2 Charity Bins Pictures
213.1 Red Cross Youth Connect Unit
213.2 Workers Protest - Rakic
214.1 Ozan Beyit
214.2 Barry Michael - Former World Champion Boxer
215.1 Sunshine College New Science Block
215.2 Farzad Tarash - Sports Star
216 Cricket Grand Final Williamstown Cricket Team
217.1 Gino Dyed His Hair In Essendon Colors
217.2 St Mary's Fete 97 Railway St North Altona
218.1 Manrina Mohamed
218.2 Williamstown V's Werrivee VFL Match
219.1 Sunshine Hospital Breast Screening Clinic
219.2 Altona Festival
220.1 Smoke Deer Park Burn Off
220.2 Anna Murray Fair Trading Nicholson St Footscray
221.1 Grass Fire Cnr Ballarat Rd & Station Rd Deer Park
221.2 Planeterium Music
222.1 Brimbank Secondary College Science Week
222.2 Cannon Re-Enactment Williamstown
223.1 Western Hospital Cardiac Rehab
223.2 Birthday Celeb Western Region Health
224 U/14 Basketball Premiership - Western Eagles
225.1 Brimbank Support Services Activities Day
225.2 Williamstown High School Swim Team
226 Kaye Frankcoh Psychologist Williamstown
227.1 Maria Cois & Baby Joseph
227.2 Patrick Casey - Mural
228.1 Sports Star - Cathy Tyers
228.2 Shed At Melons St Religious
229.1 Spastic Society
229.2 Musicians From Yarraville
230.1 Sri Lanka Budslist Society
230.2 Gary Clark Lawyer & Mark Stone
231.1 Kitchen Sunshine Community Centre
231.2 Rex Swann & Ray Dowling Probus
232.1 Nick Hatzoglou
232.2 New Mayor Of Footscray Gerard White
233.1 Donald Spry
233.2 Williamstown Festival
234.1 Soccer Sunshine Community Centre
234.2 Lisa Burry
235 Dr. Bogusha
236.1 Ballroom Dancing Sunshine Community Centre
236.2 Y2K Job Training
237.1 Warren Smellie New Sunshine Golf Manager
237.2 Smashed Fence Ron Dicks
238.1 Shannon McFerrin - Sports Star St. Albans Football Club
238.2 Newport Epilation Centre
239.1 Cheque Presentation For New Wheelchair Delco Hardware
239.2 Launch Of Child Protection Policy Altona Council
240.1 Social Club Opening McKenhnie St, St. Albans
240.2 Promo For Parenting Exhibution Maribyrnong Community Centre
241.1 Sunshine Swin & Leisure Centre
241.2 Car Accident Rosamond Rd Maidstone
242 St. Bernards College Later Quality Festival
243 Taiso Kick Boxing
244 Science Centre Sunshine College West Junior Campus
245 Keilor Primary School Internet Kids
246 New Soccer Club Green Gully Soccer Club
247 Erin Gough Archery U/13 - Sports Star
248 Jeffery Howard
249 VUT Work Cover St. Albans
250 Lionel Nicholas Calligraphy
251 Beth Argyle Anti Cancer Tea Day
252 Football Parkside V's Braybrook
253 State League Soccer Sunshine George Cross V's Essendson
254 Ross Stewart - Fly Fishing Action
255 Football Wyndham V's St. Albans
256 Sunshine Commercial Association Bruno Tassone
257 Nicole Strickland Salvation Army Sunshine
258 Vic Bash 2000 Sunshine Lamb Company
259 Rev. Lindsay Smith New Sydenham Church
260 Patient Rehab With Animals Sunshine Hospital
261 Red Cross Youth Development Program St. Albans Secondary College
262 Vandalism At Glenmaggie Reserve
263 Jackson Special School Planting Trees
264 Robert McCoid Sunshine R.S.L.
265 Vox Pop - Sunshine
266 Eldery People At Gym ISIS Primary Care
267 Jeffrey Smith Talyors Lakes Scout Hall
268 Education Week Albion North Primary School
269 Care For Kids Program Sunshine North Primary School
270 John Scida - Sports Star
271 George Carter Is 90 Years Old
272 St. Albans East Primary School Dancers
273 Melbourne Knights
274 Soccer St. George Cross V's Westside
276 Jan De Gabrielle Football Coach
277 John Brenan New Principal Overnewton College
278 Sunshine Ten Pin Bolwing
279 Rubbished Left For Ages In Deer Park
280 Brimbank Council Flying Aboriginal Fag
281 Koori Tom Slater & Telmo Languiller
285 Sunshine R.S.L.
286 Keilor Primary School Bonfield Park
288 The Wax Spot Sunshine
290 Stepping Stone Childcare St. Albans
291 Maro Cultural Centre St. Albans
292 Peter Garrett At VUT St. Albans
293 Rock Eistedford At Overnewton College
294 Golasmith Secondary College Delahey
295 Auburn Rd North Sunshine
296 Art Classes - Nelinda Paciocco
297 "Celas" Dancers Chilean
298 Sunshine Hospital Back Attack Program
299 Ralene Boyle Anti Cancer Council
300 Peter Bachelor Minister For Transport
301 City West Water
302 Brimbank College Rock Dress-up
303 Sunshine Pool
304 Des Johnson - Aboriginal Artefacts
306 Richard Maroney - Javelin Thrower
307 Ali Abdo Olympic Wrestler
309 Eliza Biddle - Photographer
310 100 Years Ambulance Parade Swanston St Melbourne
312 Centre Management Watergardens
313 Sunshine Feature Storey
314 Skills Link West Launch
315 Carol Johnson
316 Brimbank College Literacy Classes
317 Pinball Machines At Brimbank Christian Church
318 The Vlcek Family
319 New Bowls Surface At Sunshine Bowls Club
320 God Squad's David Fuller
322 Councillors Guidice & Suleyman
323 Pictures Outside Sydenham / Hillside Primary School
324 Mural Painting Overnewton College
325 "Peter Pan" Resurrection Primary School St. Albans
326 GST Feature
327 Sunshine Taxation Services - Wolly Borkut
328 Frank McCarthy - Brooklyn Springs
329 Operation Newstart Graduation
330 Peter Adamson Fireman Retires Sunshine
331 Stuart Walton - Sunshine Police Officer In Training At Youth Gym Sun Cres Sunshine
332 Keith Grant - New Kontek Staff Member
333 Olympic Torch Bearers Preparing At Sunshine
334 Sunshine Greek Orthodox Church
335 Simon Gerada & His Mother Laura
336 Outer Western Disabilities Services Association
337 New Nurse St. Albans Secondary College
338 Italian Sunshine Secondary College
339 Tai-Chi Braybrook
340 Sunshine Historical Society Albert Drayton
341 Steve Bracks At Belandra Having At BBQ
343 Pictures On Ballarat Rd For Olympic Torch Relay
344 Triplets Danielle Christie
345 George Biggs
346 Domestic Violence
347.1 Achievement Australia Company - Tarik Ahmet
347.2 Anti Drug Rally Footscray
348 Jessica Diep - Butterfly Logo Competition
349 United Weighing Braybrook
350 Burnt House Where Man Died Berksire Rd
351 Sisters In Birthing Centre Sunshine Hospital
352 Sunshine R.S.L. Pokies
354 Fire Festival Project St. Albans VUT
355 Kylie Clark & Family
356 Lady Nelson Childcare Centre Keilor Downs
357 Smith Family Sunshine
358 Heinz - Watties Hamper Community Fund Keilor Downs
359 Timbo & Bedder Sydenham McDonald
360 Kim Collins - Entertainer
361 Neighhood Watch
362 Katie Williams - Sports Star Athletics
363 Keilor Library 25th Birthday
364 Refresher Course - Aggressive Incidents Western Hospital
365 Brimbank Youth Festival
366 Unmotorised Scooter Falkner Cycles Watergardens
367 Vox Pop - Sunshine
368 Brimbank Special
370 Pictures For Story About What City Of Brimbank Spends It Yealy Budget On
371.1 Sunshine Heights Primary School Premiership Talk
371.2 Daniela Markovic Of Job Co.
372.1 Mark Patterson Bulldogs CEO At Omega Bar In Sunshine
372.2 Dennis Napthine At Footscray YMCA
373 Montclere Antiques 15 Mackay St Yarraville
374.1 Donna Smith Make A Wish Cyclist
374.2 St Mary's Catholic Church 97 Railway St North Altona
375.1 Water Dispute Anthony Senserrick Keilor
375.2 Fishing At Altona
376.1 Steve Douglas - Sports Star
376.2 Soccer Laverton V's Williamstoen
377.1 Overnewtown Castle
377.2 Residents Of Park Cres Unhappy With Proposed Redevelopment Park Cres Williamstown
378.1 Opometrist Dr. Laima Brazianis & Patient Nancy Weston
378.2 Playgroup Month Trafalgar Tots Playgroup
379.1 Paul & Carmen Mallis 50th Wedding Anniversay
379.2 New Ward Opens Williamstown Hospital
380.1 Soccer - Green Gully V's Bentleigh
380.2 Dr. Peter Crossley Williamstown Hospital
381.1 Western Health - Chair Rennis Witham, CEO George Shaw & Katrina Witham & Baby
381.2 Catherine Sceirs & Luci Dalley - Footscray Railway Station
382.1 Chris Dorgan Taylors Lakes
382.2 Josh Springall - Williamstown High School
383.1 Wayside Op Shop
383.2 Water Quality Testing Newport Primary School
384.1 Good Shepherd Financial Services
384.2 Grassland Grocery Footscray
385.1 Father John Oryan West Sunshine
385.2 Viv. Hide & Skin Laverton
386.1 Albion Primary School Eisteford Preparation
386.2 Lolly Pop Ladies Spotswood Primary School
387.1 Ted Allan Model Trains Sunshine
387.2 Freight Services Footscray
388 Salvation Army Stores
389.1 Andres Apostolos Greek Church West Sunshine
389.2 Western Outreach Footscray
390.1 Olympic Torch Bearers Deer Park Hotel
390.2 St Mary's Parish
391.1 Loose Telephone Cables near Corner Main Rd & Collins St, St. Albans
391.2 Voluteer Awareness Program Western Hospital
392.1 Fronditha VUT Nurse
392.2 Variety Club VicBash 2000 - David Marshall
393.1 West Footscray Primary School Responsible Pet Ownership
393.2 Teddy Bear Picnic
393.3 Animal Quarantine Spotswood
393.4 Brimbank Secondary Collge Eistedfold
394.1 Kidney Donor & Recipient Mirko & Marko Goljanin
394.2 Arbor Week - Bruce Comben Reserve Altona Meadows
395.1 Kim Coventry Under 16 Tennis Champions - Sports Star
395.2 Vox Pop - Where Should The Swim Pool Go
396.1 "English Week" Andrea Theodoror Brimbank College
396.2 Altona Neighood House Home Food Cooking & Tasting
397.1 Paul Kell
397.2 Parade Pharmacy Wrap Staff Photos 44 Douglas Pde Williamstown
398 Andres Puig Ardeer Railway Station
399.1 Caroline Chisholm College Students Going To Italy
399.2 Nicola Roxon At Footscray Community Arts Centre
400.1 Missing Person Sunshine Police
400.2 Top VCE Artist Works At Science Works
401.1 People Skating Sunshine Roller Skating
401.2 Altona Library Storytime
402 Caroline Chisholm Students Relax Before Exams
403.1 Olympic Relay Banner By Art Artists Caroline Chisholm College
403.2 Charlie Camilleri - St. Pauls Parish Display
404.1 Vox Pop - Highpoint About Youth & Divorce
404.2 Williamstown Hospital Book Boxes
405.1 Neil Park (Dentist)
405.2 Lost Diggers Plaque West Footscray
406.1 Vox Pop - Braybrook About Youth Fashions
406.2 Christine Pistofian
407.1 Brien Priest Lions Club & Hailey
407.2 Friends Of Truganina Swamp
408 Aust Cutting Systems
409.1 Keilor Youth Accommodation Group
409.2 Kieran Crowley Williamstown Beach
410.1 Studi Envi Hair Salon & Brimbanl Christian Church
410.2 Jason Sheridan Williamstown Football Oval
411.1 Justin Madden Deer Park Primary School
411.2 Masons Hall At Williamstown - Steve Margeson
412.1 Japanese Exchange Students Caroline Chisholm College
412.2 Laverton Commnity Bank
413.1 Save Koala Day At Bunnings Sunshine
413.2 Good Samarition Award - Muriel Love
414 Sustainable House 17 Scott St Seddon
415.1 Ted Whitten Statue & Ted's Picture Spread
415.2 Australia Biggest Breakfast Morning Tea
415.3 City West Water New Enviroment Strategy
416 Mark Heintz Fairfax Fellowships Graduate
417.1 Taperstry Exhibition Royal Melbourne Hospital
417.2 Visitors From China Williamstown North Primary School
418.1 Italain Act Sunshine Secondary College
418.2 TNT Truck Protest
419.1 Frank D'Alterio - Sports Star
419.2 Yr 10 Science Students With Display Model Laverton Secondary College
420.1 Telstra Poles
420.2 Preschool Foundation Day Robina Scott Kindergarten 105 Ferguson St Williamstown
421.1 Mrs Cross Upset About Footpath Conditions
421.2 Performance Company "Staying There" Footscray Community Arts Centre
422.1 Vox Pop - Footscray
422.2 Maribyrnong Mayor Gerard White Maribyrnong Townhall
423.1 Sunshine Secondary College Italian Carnival
423.2 Amanda Hardy Altona Badminton Centre
424.1 Street Of Sunshine Predicted House Boom
424.2 Greencorp At Stony Creek Hyde St Yarraville
425.1 Powder Puffs Bowling Sunshine
425.2 Pupils Dancing Tarantella Mackellar Primary School
426.1 Simon Skazic Keilor Park Soccer Player
426.2 Cross Shaped Mobile Phone Transponder St. Marys Catholic Church 97 Railway St Altona
427 Mid West Area Mental Health Services
428 Shane Pace & Mother - Sports Star
429 Todd Paeglitis Police Academy Graduate
430 Kealba Secondary College Battle Of The Bonds
431 Cath Shimmin Rosamond Special School
432 Bert & Noreen Craddock 60th Wedding Anniversay
433 Horseshoe Bend Farm Promo For "Country Fair"
434 Tree Vandalism James Galea & Local Residents Collenso Park Sunshine West
435 Greek Community Of Keilor Cheque Presentation
436 Youth Week
437 Crane Topple
438 New Ambulance Service Deer ParK
439 Police Station Sunshine
440 Proposed Water Pump Paul Aquiline Cairnlea
441 Western Hospital Better Health Internet Facility
442 Albert Proud - Sports Star
443 Western Hospital Physiotherapy Project
444 Goran Petrovski - Soccer Player
445 Calder Park
446 Glen Orden V's Sunshine
447 Filopino Community Council Cheque Presentation
448 Aaron Galea St. Albans
449 Jackson Special School Recycling Award
450 Christine Laskowski - Author "Keilor Primary School History"
451 Ultimate Health Care Highpoint
452 Helen Karagiozakis Sciene Student
453 Dadnce Siline - Dog Mauling
454 Sunshine Skate Centre Noise Problem
455 Youth Celebration Of The West St. Albans Secondary College
456.1 Port Colts V's St. Albans Football
456.2 Morman Missionaries From Mostly USA Tree Planting For City Of Brimbank
457 Laura Skinner Sunshine Kick Boxer
459 Wizard Of Oz Braybrook Secondary College
460 Adel De Crescenzo
461 Friends Of Kororoit Creek
462 Billy Pisani Hillside
463 Jenny Harrington
464 Sunshine Pool & Council
465 Michael Mascia Big W Sunshine
466 Soccer Player - Goran Petrovski
467.1 Overnewtown College James Kwiecinski & Dominis Mollica
467.2 St. Albans Secondary College "Fame The Musical"
468 Michael Salmon Author St. Albans Primary School
469 Albion - Broadmeadows Railway Bridge Black Spot
470 Italian Day North Sunshine Primary School
471 Horseshoe Bend Park Tales Of Enchantment Promo
472 Millenium Birth Certificate Codie Dimech
473 Jeanne Taylor
474.1 Torch Bearer 146 to 152 Olympic Flame Sunshine
474.2 Torch Bearer 102 to 105 Olympic Flame Bacchus Marsh
474.3 Torch Bearer 135 to 145 Olympic Flame Burnside
474.4 Torch Bearer 107 to 113 Olympic Flame Bacchus Marsh & Melton
474.5 Torch Bearer 127 to 134 Olympic Flame Melton & Burnside
sunshine advocate

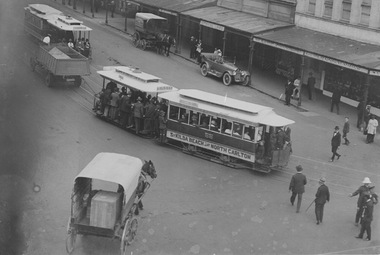 Melbourne Tram Museum
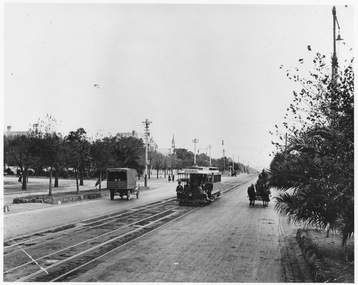 Melbourne Tram Museum
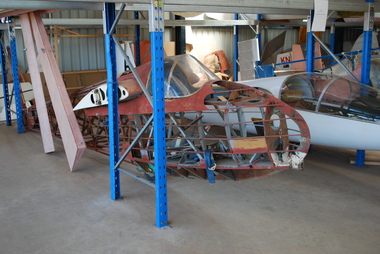 Australian Gliding Museum
 Frankston RSL Sub Branch
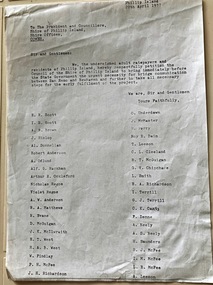 Phillip Island and District Historical Society Inc.
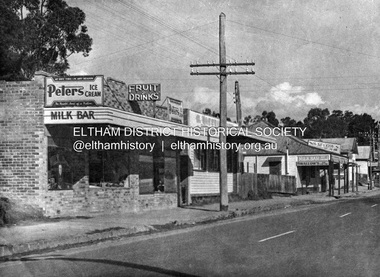 Eltham District Historical Society Inc
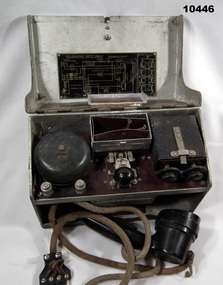 Bendigo Military Museum
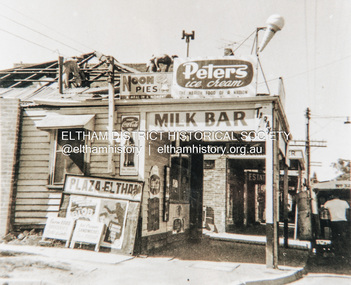 Eltham District Historical Society Inc
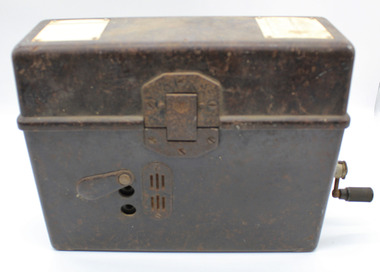 Warrnambool RSL Sub Branch
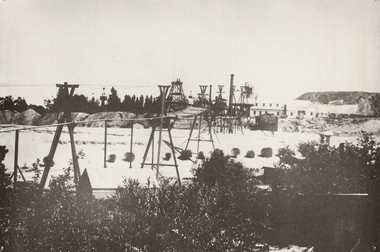 Bendigo Historical Society Inc.
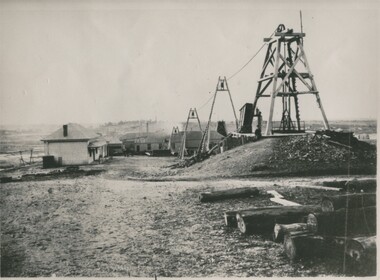 Bendigo Historical Society Inc.
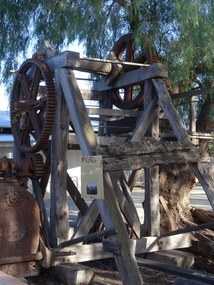 Port of Echuca
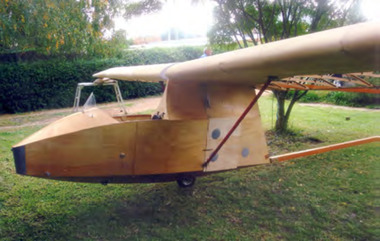 Australian Gliding Museum
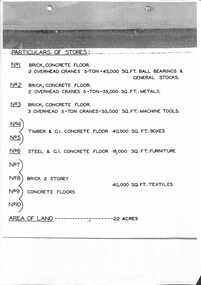 Sunshine and District Historical Society Incorporated
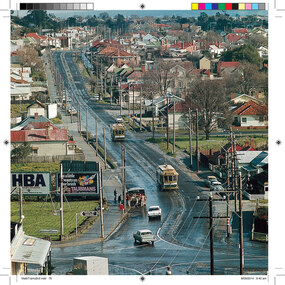 Ballarat Tramway Museum
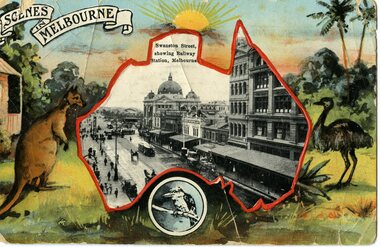 Ballarat Tramway Museum
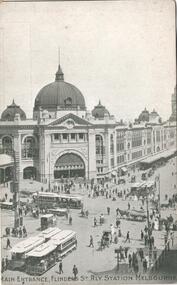 Ballarat Tramway Museum
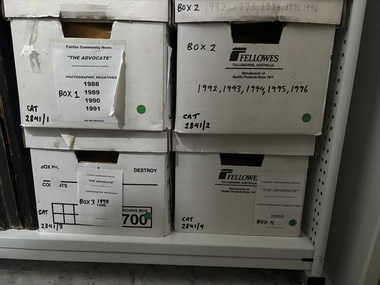 Sunshine and District Historical Society Incorporated
 Sunshine and District Historical Society Incorporated
 Sunshine and District Historical Society Incorporated
 Sunshine and District Historical Society Incorporated
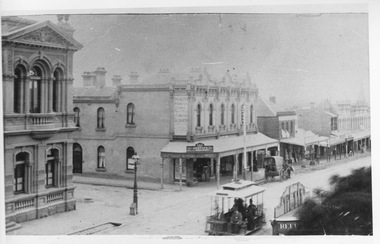 Melbourne Tram Museum
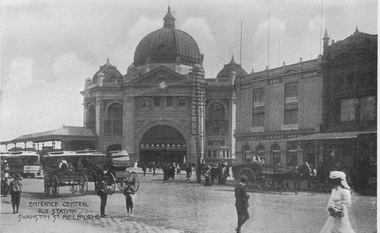 Melbourne Tram Museum
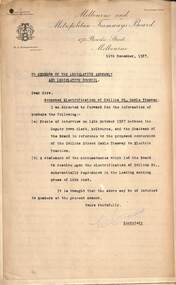 Melbourne Tram Museum
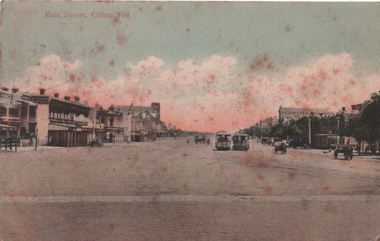 Melbourne Tram Museum
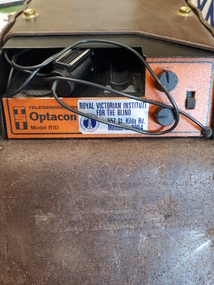 Vision Australia
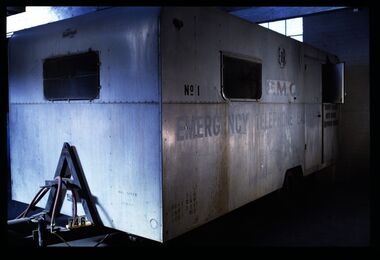 National Communication Museum
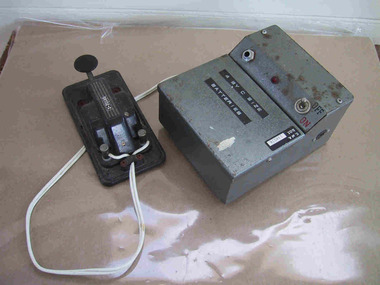 Parks Victoria - Cape Nelson Lightstation
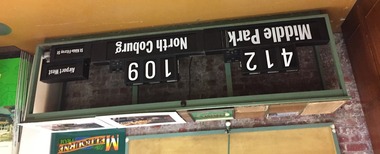 Melbourne Tram Museum