
Showing 29 items matching "mcrae st"
-
 Bendigo Historical Society Inc.
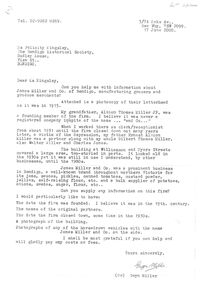
Document - Jones Miller and Co. - letters and document, 2000
... ...McRae St...Bendigo Jones Miller and Co. vegetables confectionary sauces McRae St 'Mann' top right hand corner handwritten a Letter to Bendigo Historical Society requesting information about the Bendigo company Jones Miller and Co. from descendant of one of the owners. b Letter to a Mrs Miller regarding the birth of a David Miller. c One page about the history of company Jones Miller & Co. d Photocopy of a letterhead used by the Jones Miller and Co. e Photograph of staff outside the factory of Jones Miller & Co. in 1901. ...Jones Miller & Co. was founded in 1862 with the major shareholders being William Jones, Edwin Miller, Albion Miller and Walter Miller. It conducted business in a variety of products including vegetables and fruit, confectionary and aerated waters. The company also produced confectionary as well as pickles, sauces and chutneys. The company had a branch in Melbourne but the business was sold in 1937 to H, M. Leggo & Co.a Letter to Bendigo Historical Society requesting information about the Bendigo company Jones Miller and Co. from descendant of one of the owners. b Letter to a Mrs Miller regarding the birth of a David Miller. c One page about the history of company Jones Miller & Co. d Photocopy of a letterhead used by the Jones Miller and Co. e Photograph of staff outside the factory of Jones Miller & Co. in 1901.'Mann' top right hand corner handwrittenbendigo, jones miller and co., vegetables, confectionary, sauces, mcrae st -
 Bendigo Historical Society Inc.
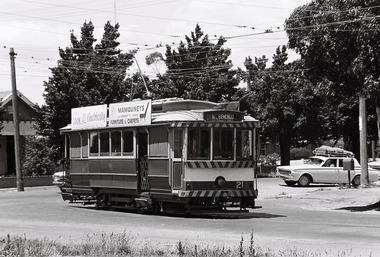
Photograph - Robert Green Collection - Photos of Bendigo Tramways - Sheet 3 of 8, 1960s
... Photos: 11147.3a No 21 turns out of McRae St into Nolan Street, on its way to North Bendigo 11147.3b No 5 on the way to Eaglehawk 11147.3c No 21 leaves Charing Cross towards North Bendigo, City Family Hotel in the background 11147.3d No 18 completes its run from Eaglehawk at the fountain, and is returning to the depot 11147.3e No 18 turns from McRae St into Tramway Avenue and the depot 11147.3f No 18 turns from McRae St into Tramway Avenue and the depot 11147.3g No 28 at the depot 11147.3h No 6 on its way to Golden Square 11147.3i No 6 at the Golden square Terminus, High and Maple Streets 11147.3j No 25 from Quarry Hill at the intersection of Wills and Mitchell Street 11147.3k No 2 leaves the Mitchell St railway bridge into Carpenter Street on its way to Quarry Hill 11147.3l No 21 comes into the Golden square Terminus, steeple of the Methodist church in the background 11147.3m Tram heading along McRae St in front of the School of Mines 11147.3n Tram heading along McRae St towards Pall Mall in front of the School of Mines 11147.o No 24 heading to Eaglehawk at the corner of Barnard and Forest Streets 11147.3p Three trams lined up in the depot, possible early morning or evening 11147.3q Tram No 21 at the North Bendigo Terminus, possible early morning or evening 11147.3s Tram leaving the Eaglehawk Town Hall in the dark 11147.3t View up Pall Mall towards the fountain from Mundy Street intersection 11147.3u Birney Car No 28 Special leaving the depot, crossing the Back Creek 11147.3w Birney Car No 28 Special at Eaglehawk Canterbury Park 11147.3x No 28 Birney Car Special hading to Eaglehawk at Iron Bark, just past the Marong Road turn-off at Iron Bark 11147.3y No 28 Birney Car Special heading to Eaglehawk at Long Gully, opposite the Manchester Arms Hotel 11147.3z No 28 Birney Car Special 11147aa No 28 Birney Car Special comes into the Eaglehawk Terminus 11147ab No 28 Birney Car Special heads down view St past the Rifle Brigade Hotel 11147ac No 28 Birney Car Special heads down Pall Mall past the Court House Hotel 11147.3ad No 5 to Eaglehawk runs up McCrae St in front of the School of Mines 11147.3ae No 28 Birney Car passes the Mundy St intersection with McRae St heading to the fountain 11147.3af No 3 passes the Mundy St intersection with McRae St heading to Eaglehawk 11147.3ah Tram passes the School of Mines in McRae St heading to the fountain 11147.3ai Birney Car Tram passes the School of Mines in McRae St heading to the fountain 11147.3aj Tramways High Electrical termination box...Photos: 11147.3a No 21 turns out of McRae St into Nolan Street, on its way to North Bendigo 11147.3b No 5 on the way to Eaglehawk 11147.3c No 21 leaves Charing Cross towards North Bendigo, City Family Hotel in the background 11147.3d No 18 completes its run from Eaglehawk at the fountain, and is returning to the depot 11147.3e No 18 turns from McRae St into Tramway Avenue and the depot 11147.3f No 18 turns from McRae St into Tramway Avenue and the depot 11147.3g No 28 at the depot 11147.3h No 6 on its way to Golden Square 11147.3i No 6 at the Golden square Terminus, High and Maple Streets 11147.3j No 25 from Quarry Hill at the intersection of Wills and Mitchell Street 11147.3k No 2 leaves the Mitchell St railway bridge into Carpenter Street on its way to Quarry Hill 11147.3l No 21 comes into the Golden square Terminus, steeple of the Methodist church in the background 11147.3m Tram heading along McRae St in front of the School of Mines 11147.3n Tram heading along McRae St towards Pall Mall in front of the School of Mines 11147.o No 24 heading to Eaglehawk at the corner of Barnard and Forest Streets 11147.3p Three trams lined up in the depot, possible early morning or evening 11147.3q Tram No 21 at the North Bendigo Terminus, possible early morning or evening 11147.3s Tram leaving the Eaglehawk Town Hall in the dark 11147.3t View up Pall Mall towards the fountain from Mundy Street intersection 11147.3u Birney Car No 28 Special leaving the depot, crossing the Back Creek 11147.3w Birney Car No 28 Special at Eaglehawk Canterbury Park 11147.3x No 28 Birney Car Special hading to Eaglehawk at Iron Bark, just past the Marong Road turn-off at Iron Bark 11147.3y No 28 Birney Car Special heading to Eaglehawk at Long Gully, opposite the Manchester Arms Hotel 11147.3z No 28 Birney Car Special 11147aa No 28 Birney Car Special comes into the Eaglehawk Terminus 11147ab No 28 Birney Car Special heads down view St past the Rifle Brigade Hotel 11147ac No 28 Birney Car Special heads down Pall Mall past the Court House Hotel 11147.3ad No 5 to Eaglehawk runs up McCrae St in front of the School of Mines 11147.3ae No 28 Birney Car passes the Mundy St intersection with McRae St heading to the fountain 11147.3af No 3 passes the Mundy St intersection with McRae St heading to Eaglehawk 11147.3ah Tram passes the School of Mines in McRae St heading to the fountain 11147.3ai Birney Car Tram passes the School of Mines in McRae St heading to the fountain 11147.3aj Tramways High Electrical termination box Photograph Robert Green Collection - Photos of Bendigo Tramways - Sheet 3 of 8 ...This collection contains eight archive sheets (Sheet 1 to Sheet 8) of strips of original 35mm black and white negatives of photographs taken during the 1960s and early 1970s by Robert Green, of the Bendigo State Electricty Commission of Victoria Tramways prior to their abandonment The collection also includes two archive quality sheets (Sheet A and Sheet B) of original 35mm colour slides taken by Robert Green during the same period. Sheet B also contains one slide taken by Robert's friend Keigh S King (1928-2019) who was the author of the book 'The Bendigo Tramways an illustrated history, published by the Australian Railway Historical Society Victorian Division Melbourne in February 1972; BHS Item no. 5052. The collection also includes one USB stick which contains images of all photographs described above, except for one colour slide taken by Keith S Kings. Sixteen black and white prints from the images are also included.Robert Green Collection, this item contains 35 Black and White Negatives of the trams at various locations around Bendigo. Photos: 11147.3a No 21 turns out of McRae St into Nolan Street, on its way to North Bendigo 11147.3b No 5 on the way to Eaglehawk 11147.3c No 21 leaves Charing Cross towards North Bendigo, City Family Hotel in the background 11147.3d No 18 completes its run from Eaglehawk at the fountain, and is returning to the depot 11147.3e No 18 turns from McRae St into Tramway Avenue and the depot 11147.3f No 18 turns from McRae St into Tramway Avenue and the depot 11147.3g No 28 at the depot 11147.3h No 6 on its way to Golden Square 11147.3i No 6 at the Golden square Terminus, High and Maple Streets 11147.3j No 25 from Quarry Hill at the intersection of Wills and Mitchell Street 11147.3k No 2 leaves the Mitchell St railway bridge into Carpenter Street on its way to Quarry Hill 11147.3l No 21 comes into the Golden square Terminus, steeple of the Methodist church in the background 11147.3m Tram heading along McRae St in front of the School of Mines 11147.3n Tram heading along McRae St towards Pall Mall in front of the School of Mines 11147.o No 24 heading to Eaglehawk at the corner of Barnard and Forest Streets 11147.3p Three trams lined up in the depot, possible early morning or evening 11147.3q Tram No 21 at the North Bendigo Terminus, possible early morning or evening 11147.3s Tram leaving the Eaglehawk Town Hall in the dark 11147.3t View up Pall Mall towards the fountain from Mundy Street intersection 11147.3u Birney Car No 28 Special leaving the depot, crossing the Back Creek 11147.3w Birney Car No 28 Special at Eaglehawk Canterbury Park 11147.3x No 28 Birney Car Special hading to Eaglehawk at Iron Bark, just past the Marong Road turn-off at Iron Bark 11147.3y No 28 Birney Car Special heading to Eaglehawk at Long Gully, opposite the Manchester Arms Hotel 11147.3z No 28 Birney Car Special 11147aa No 28 Birney Car Special comes into the Eaglehawk Terminus 11147ab No 28 Birney Car Special heads down view St past the Rifle Brigade Hotel 11147ac No 28 Birney Car Special heads down Pall Mall past the Court House Hotel 11147.3ad No 5 to Eaglehawk runs up McCrae St in front of the School of Mines 11147.3ae No 28 Birney Car passes the Mundy St intersection with McRae St heading to the fountain 11147.3af No 3 passes the Mundy St intersection with McRae St heading to Eaglehawk 11147.3ah Tram passes the School of Mines in McRae St heading to the fountain 11147.3ai Birney Car Tram passes the School of Mines in McRae St heading to the fountain 11147.3aj Tramways High Electrical termination boxkeith s king, bendigo, trams, robert green -
 Ballarat Tramway Museum
Photograph - Black & White Photograph/s, Chris Wurr, early 1970's
... Black and White Photograph of Bendigo No. 30, Birney, inbound to Charing Cross, McRae St, Bendigo, at Baxter St intersection? ...Black and White Photograph of Bendigo No. 30, Birney, inbound to Charing Cross, McRae St, Bendigo, at Baxter St intersection? ...Yields information about the appearance of Bendigo Birney tram No. 11, stored at the depot, following an accident. Was not returned to service until after the SEC closed the tram system.Black and White Photograph of Bendigo No. 30, Birney, inbound to Charing Cross, McRae St, Bendigo, at Baxter St intersection? with the Bendigo Technical College in the background. Note the direction sign for "Heathcote". Tram has the destination of Golden Square. Photo Chris Wurr, early 1970's. "Photo by Chris Wurr" stamped on the rear.trams, tramways, bendigo, mccrae st, tram 30 -
 Bendigo Historical Society Inc.
Slide - BENDIGO VIEWS, Jun 1965
... View of a Lady wearing white robes and standing in an opening in a rock wall, at At Killians Church McRae St Bendigo. Another lady wearing a brown dress and a blue veil is kneeling amongst some plants to her left. ...View of a Lady wearing white robes and standing in an opening in a rock wall, at At Killians Church McRae St Bendigo. Another lady wearing a brown dress and a blue veil is kneeling amongst some plants to her left. ...Slide. Bendigo Views. View of a Lady wearing white robes and standing in an opening in a rock wall, at At Killians Church McRae St Bendigo. Another lady wearing a brown dress and a blue veil is kneeling amongst some plants to her left. May be the statue at the Catholic College in Barkly St just off View Stslide, bendigo, bendigo views, bendigo views -
 Ballarat Tramway Museum
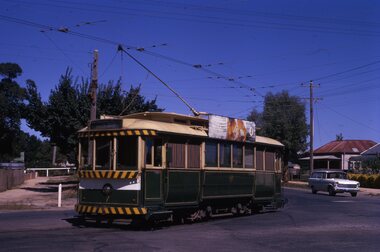
Slide - 35mm slide/s - set of 13, Noel Simons, 24/05/1971 12:00:00 AM
... Information written on in black ink and date stamped on purple ink. 1200.1 - "No. 7 entering Nolan St. from Bridge St." 1200.2 -"No. 21 in McRae St. about to turn into Nolan St." 1200.3 - "No. 7 in Nolan St. at corner of McRae St." 1200.4 - "No. 7 turning from Nolan St. into McRae St." 1200.5 - "No. 7 in Thunder St. just after turning from Caledonia St." 1200.6 - "No. 5 just after leaving Needle Loop between Long Gully and California Gully. 1200.7 - "No. 5 in High St. ...Tramways trams Bendigo McCrae St North Bendigo California Gully Eaglehawk Depot tram 5 tram 7 tram 21 Information written on in black ink and date stamped on purple ink. 1200.1 - "No. 7 entering Nolan St. from Bridge St." 1200.2 -"No. 21 in McRae St. about to turn into Nolan St." 1200.3 - "No. 7 in Nolan St. at corner of McRae St." 1200.4 - "No. 7 turning from Nolan St. into McRae St." 1200.5 - "No. 7 in Thunder St. just after turning from Caledonia St." 1200.6 - "No. 5 just after leaving Needle Loop between Long Gully and California Gully. 1200.7 - "No. 5 in High St. ...Set of 13 transparencies taken on 24/5/1971 on Kodak mounts. 1200.1 - No. 7 en route to Golden Square turning from Bridge St. into Nolan St. Photo taken after tram has passed photographer. Tram has a briquettes roof ad. 1200.2 - No. 21 in McCrae St. just before Nolan St. Photo taken after tram has passed photographer. 1200.3 - No. 7 in Nolan St at corner with McCrae St. Passenger boarding tram at a tram stop. 1200.4 - No 7 turning from Nolan into McCrae St. with Golden Fleece service station in background. 1200.5 - No. 7 in Thunder St en route to North Bendigo. Photo taken after tram has passed photographer. 1200.6 - No. 5 en route to Eaglehawk just after leaving Needle Loop between Long Gully and California Gully. 1200.7 - No. 5 at the start of the double track in High St. Eaglehawk. 1200.8 - No. 5 at Eaglehawk terminus showing "Depot" with Leo A Hughes Photographer advertisement on building in background. 1200.9 - No. 5 at Eaglehawk terminus. Has two SEC roof ads 'Everything's fine in my all electric kitchen' and 'Electricity best for cooking'. 1200.10 - No. 5 at Eaglehawk terminus, with canon, war memorial outside Town Hall and Leo A Hughes Photographer advertisement on building in background. 1200.11 - No. 5 in McCrae St. about to enter Arnold St. and depot. Tram showing depot, has driver changing points. 1200.12 - No. 5 in Arnold St. Photo taken looking up the centre of the access track - shows the overhead at depot junction. 1200.13 - Depot entrance with signage at depot entrance and depot building in background.Information written on in black ink and date stamped on purple ink. 1200.1 - "No. 7 entering Nolan St. from Bridge St." 1200.2 -"No. 21 in McRae St. about to turn into Nolan St." 1200.3 - "No. 7 in Nolan St. at corner of McRae St." 1200.4 - "No. 7 turning from Nolan St. into McRae St." 1200.5 - "No. 7 in Thunder St. just after turning from Caledonia St." 1200.6 - "No. 5 just after leaving Needle Loop between Long Gully and California Gully. 1200.7 - "No. 5 in High St. Eaglehawk at start of double track." 1200.8 - "No. 5 at Eaglehawk terminus" 1200.9 - "No. 5 at Eaglehawk terminus" 1200.10 - "No. 5 at Eaglehawk terminus."\ 1200.11 - "No. 5 in McCrae St. about to enter Arnold St." 1200.12 - "No. 5 in Arnold St." 1200.13 - "Entrance to Bendigo Tram Depot, No. 5 running into shed."tramways, trams, bendigo, mccrae st, north bendigo, california gully, eaglehawk, depot, tram 5, tram 7, tram 21 -
 Bendigo Historical Society Inc.
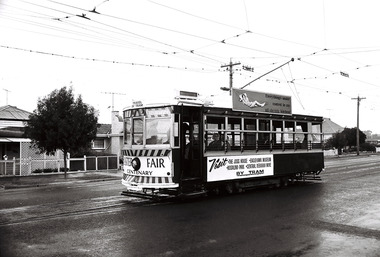
Photograph - Robert Green Collection - Photos of Bendigo Tramways - Sheet 5 of 8, 1960s
... Photos: 11147.5a Birney car decked out in advertising for the Bendigo Easter Fair 11147.5b Birney car decked out in advertising for the Bendigo Easter Fair heading to North Bendigo in Mcrae St 11147.5c Birney car decked out in advertising for the Bendigo Easter Fair heading to North Bendigo in Mcrae St passing No 17 and another tram approaching from the depot 11147.5d Birney car decked out in advertising for the Bendigo Easter Fair heading into the depot in Tramway Avenue 11147.5e No 18 and old shop front 11147.5f Tram Turning into Tramways Avenue from Mcrae St 11147.5g Three trams at the Golden Square Terminus in High Street 11147.5h No 18 tram in Mcrae Street passing by Tramways Avenue to North Bendigo 11147.5i No 21 returning to the Tramways Avenue Depot off Mcrae Street 11147.5j No 21 returning to the Tramways Avenue Depot off Mcrae Street 11147.5k No 21 returning to the Tramways Avenue Depot crossing the Back Creek 11147.5l No 21 returning to the Tramways Avenue Depot 11147.5m No 21 returning to the Tramways Avenue Depot with the scrubber tram on the left 11147.5n No 21 in the Tramways Avenue Depot 11147.5o Nos 18 and 17 pass at the Golden Square Terminus in High St 11147.5p No 17 on its way to the North Bendigo Terminus 11147.5q No 17 turns from the North Bendigo Terminus into Finn Street 11147.5r No 17 heading to the North Bendigo Terminus along Thunder Street 11147.5s No 17 at the North Bendigo Terminus off Finn Street 11147.5t Train heading from the Swan Hill direction to Bendigo off the Finn Street crossing 11147.5u No 25 heading to Golden Square 11147.5v No 25 turns from Weeroona Avenue into Caledonia Street 11147.5w The Easter Fair, intersection of Pall Mall and Williamson St with Myer Stores in the background...Photos: 11147.5a Birney car decked out in advertising for the Bendigo Easter Fair 11147.5b Birney car decked out in advertising for the Bendigo Easter Fair heading to North Bendigo in Mcrae St 11147.5c Birney car decked out in advertising for the Bendigo Easter Fair heading to North Bendigo in Mcrae St passing No 17 and another tram approaching from the depot 11147.5d Birney car decked out in advertising for the Bendigo Easter Fair heading into the depot in Tramway Avenue 11147.5e No 18 and old shop front 11147.5f Tram Turning into Tramways Avenue from Mcrae St 11147.5g Three trams at the Golden Square Terminus in High Street 11147.5h No 18 tram in Mcrae Street passing by Tramways Avenue to North Bendigo 11147.5i No 21 returning to the Tramways Avenue Depot off Mcrae Street 11147.5j No 21 returning to the Tramways Avenue Depot off Mcrae Street 11147.5k No 21 returning to the Tramways Avenue Depot crossing the Back Creek 11147.5l No 21 returning to the Tramways Avenue Depot 11147.5m No 21 returning to the Tramways Avenue Depot with the scrubber tram on the left 11147.5n No 21 in the Tramways Avenue Depot 11147.5o Nos 18 and 17 pass at the Golden Square Terminus in High St 11147.5p No 17 on its way to the North Bendigo Terminus 11147.5q No 17 turns from the North Bendigo Terminus into Finn Street 11147.5r No 17 heading to the North Bendigo Terminus along Thunder Street 11147.5s No 17 at the North Bendigo Terminus off Finn Street 11147.5t Train heading from the Swan Hill direction to Bendigo off the Finn Street crossing 11147.5u No 25 heading to Golden Square 11147.5v No 25 turns from Weeroona Avenue into Caledonia Street 11147.5w The Easter Fair, intersection of Pall Mall and Williamson St with Myer Stores in the background Photograph Robert Green Collection - Photos of Bendigo Tramways - Sheet 5 of 8 ...This collection contains eight archive sheets (Sheet 1 to Sheet 8) of strips of original 35mm black and white negatives of photographs taken during the 1960s and early 1970s by Robert Green, of the Bendigo State Electricty Commission of Victoria Tramways prior to their abandonment The collection also includes two archive quality sheets (Sheet A and Sheet B) of original 35mm colour slides taken by Robert Green during the same period. Sheet B also contains one slide taken by Robert's friend Keigh S King (1928-2019) who was the author of the book 'The Bendigo Tramways an illustrated history, published by the Australian Railway Historical Society Victorian Division Melbourne in February 1972; BHS Item no. 5052. The collection also includes one USB stick which contains images of all photographs described above, except for one colour slide taken by Keith S Kings. Sixteen black and white prints from the images are also included.Robert Green Collection, this item contains 23 Black and White Negatives of the trams at various locations around Bendigo. Photos: 11147.5a Birney car decked out in advertising for the Bendigo Easter Fair 11147.5b Birney car decked out in advertising for the Bendigo Easter Fair heading to North Bendigo in Mcrae St 11147.5c Birney car decked out in advertising for the Bendigo Easter Fair heading to North Bendigo in Mcrae St passing No 17 and another tram approaching from the depot 11147.5d Birney car decked out in advertising for the Bendigo Easter Fair heading into the depot in Tramway Avenue 11147.5e No 18 and old shop front 11147.5f Tram Turning into Tramways Avenue from Mcrae St 11147.5g Three trams at the Golden Square Terminus in High Street 11147.5h No 18 tram in Mcrae Street passing by Tramways Avenue to North Bendigo 11147.5i No 21 returning to the Tramways Avenue Depot off Mcrae Street 11147.5j No 21 returning to the Tramways Avenue Depot off Mcrae Street 11147.5k No 21 returning to the Tramways Avenue Depot crossing the Back Creek 11147.5l No 21 returning to the Tramways Avenue Depot 11147.5m No 21 returning to the Tramways Avenue Depot with the scrubber tram on the left 11147.5n No 21 in the Tramways Avenue Depot 11147.5o Nos 18 and 17 pass at the Golden Square Terminus in High St 11147.5p No 17 on its way to the North Bendigo Terminus 11147.5q No 17 turns from the North Bendigo Terminus into Finn Street 11147.5r No 17 heading to the North Bendigo Terminus along Thunder Street 11147.5s No 17 at the North Bendigo Terminus off Finn Street 11147.5t Train heading from the Swan Hill direction to Bendigo off the Finn Street crossing 11147.5u No 25 heading to Golden Square 11147.5v No 25 turns from Weeroona Avenue into Caledonia Street 11147.5w The Easter Fair, intersection of Pall Mall and Williamson St with Myer Stores in the backgroundkeith s king, bendigo, trams, robert green -
 Ballarat Tramway Museum
Slide - 35mm slide/s - set of 13, Peter Moses, 1974
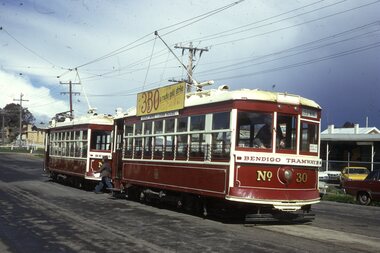
... Moses" in black ink. .1 - "1974 Bendigo Central Deborah Mine" in blue ink and in red ink “16”. .2 - "1974 Bendigo two Birney cars / Central Deborah Mine" in blue ink and in red ink “18”. .3 - "1974 Bendigo trams at Central Deborah Mine" in blue ink and in red ink “17”. .4 - "1974 Bendigo High St / tram near Sacred Hearth Cathedral" in blue ink and in red ink “15”. .5 - "1974 Bendigo two Birney cars / Charing Cross" in blue ink and in red ink “20”. .6 - "1974 Bendigo No. 28 Pall Mall" in blue ink and in red ink “8”. .7 - "1974 Bendigo / Old Tramline View St." in black ink and in red ink “5”. .8 - "1974 Bendigo, McRae St. (Pall Mall)" and in red ink "9". .9 - "1974 Bendigo, Lake Weeroona, / tram " and in red ink "10". .10 - "1974 Bendigo, Lake Weeroona" and in red ink “11”. .11 - "1974 Bendigo / Outside depot" and in red ink “24”. .12 - "1974 Bendigo / Outside depot" and in red ink “25”. .13 - "1974 Bendigo / Depot" and in red ink “26”....Moses" in black ink. .1 - "1974 Bendigo Central Deborah Mine" in blue ink and in red ink “16”. .2 - "1974 Bendigo two Birney cars / Central Deborah Mine" in blue ink and in red ink “18”. .3 - "1974 Bendigo trams at Central Deborah Mine" in blue ink and in red ink “17”. .4 - "1974 Bendigo High St / tram near Sacred Hearth Cathedral" in blue ink and in red ink “15”. .5 - "1974 Bendigo two Birney cars / Charing Cross" in blue ink and in red ink “20”. .6 - "1974 Bendigo No. 28 Pall Mall" in blue ink and in red ink “8”. .7 - "1974 Bendigo / Old Tramline View St." in black ink and in red ink “5”. .8 - "1974 Bendigo, McRae St. (Pall Mall)" and in red ink "9". .9 - "1974 Bendigo, Lake Weeroona, / tram " and in red ink "10". .10 - "1974 Bendigo, Lake Weeroona" and in red ink “11”. .11 - "1974 Bendigo / Outside depot" and in red ink “24”. .12 - "1974 Bendigo / Outside depot" and in red ink “25”. .13 - "1974 Bendigo / Depot" and in red ink “26”. ...Set of 13 colour slides, 7 on Kodak cardboard mounts and 6 on Agfa colour plastic mounts. .1 - Bendigo Trust, Birney trams 28 and 30 at Central Deborah Mine terminus. No. 30 has a 3BO Roof advertisement. .2 - ditto .3 - ditto with the Central Deborah mine and buildings in the background. .4 - No. 30 inbound in High St. with Sacred Heart Cathedral in the background (spire under construction) .5 - Nos. 30 and 28 crossing at Charing Cross with the Fountain Plaza building and the fountain in the background. .6 - No. 28 north bound in Pall Mall, after leaving Charing Cross with the Shamrock Hotel in the background. .7 - Photo showing track and centre poles in View St. looking west - no overhead. Has AMOCO service station near McKenzie St. .8 - No. 28 taken from cab of No. 30, in McCrae St, at end of double track. .9 - No. 28 turning from McCrae St. into Nolan St. .10 - No. 28 in Nolan St. with Lake Weeroona rowing sheds in the background. .11 - No. 19 in now Tramway Ave (then Arnold St.) running into depot .12 - No. 19 outside Bendigo depot .13 - ditto Slides taken by Peter Moses, during the winter of 1974 (no leaves on the trees).On the rear of all the slides "P. Moses" in black ink. .1 - "1974 Bendigo Central Deborah Mine" in blue ink and in red ink “16”. .2 - "1974 Bendigo two Birney cars / Central Deborah Mine" in blue ink and in red ink “18”. .3 - "1974 Bendigo trams at Central Deborah Mine" in blue ink and in red ink “17”. .4 - "1974 Bendigo High St / tram near Sacred Hearth Cathedral" in blue ink and in red ink “15”. .5 - "1974 Bendigo two Birney cars / Charing Cross" in blue ink and in red ink “20”. .6 - "1974 Bendigo No. 28 Pall Mall" in blue ink and in red ink “8”. .7 - "1974 Bendigo / Old Tramline View St." in black ink and in red ink “5”. .8 - "1974 Bendigo, McRae St. (Pall Mall)" and in red ink "9". .9 - "1974 Bendigo, Lake Weeroona, / tram " and in red ink "10". .10 - "1974 Bendigo, Lake Weeroona" and in red ink “11”. .11 - "1974 Bendigo / Outside depot" and in red ink “24”. .12 - "1974 Bendigo / Outside depot" and in red ink “25”. .13 - "1974 Bendigo / Depot" and in red ink “26”.tramways, trams, bendigo, central deborah, bendigo trust, sacred hearth cathedral, north bendigo, depot, tram 19, tram 28, tram 30 -
 Ballarat Tramway Museum
Slide - 35mm slide/s - set of 32, Noel Simons, 25/02/1971 12:00:00 AM
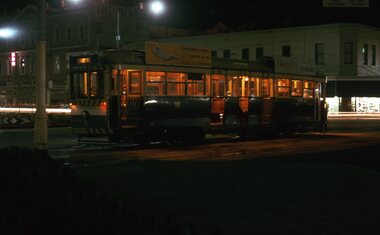
... . & Mackenzie St." 1201.5 - "No. 5 in View St. near Mackenzie St." 1201.6 - "No. 5 in View St. nearing Charing Cross." 1201.7 - "No. 7 in Nolan St. seen from Lake Weeroona Park." 1201.8 - "No. 7 entering McRae St. from Nolan St. Note "TRAM" warning sign on left. 1201.9 - "No. 7 in High St. passing Short St." 1201.10 - "No. 7 crossing Bendigo Creek bridge in High St. near Golden Square." 1201.11 - "No. 7 at Golden Square terminus" 1201.12 - "No. 7 at Golden Square terminus" 1201.13 - "No 7, 21 and 5 at Charing Cross" 1201.14 - "No. 7 at Golden Square terminus" 1201.15 - "No. 7 at Golden Square terminus" 1201.16 - "No 5 waiting at California Gully loop." 1201.17 - "Nos. 5 and 26 crossing at California Gully loop" 1201.18 - "No. 26 at Eaglehawk terminus" 1201.19 - "No. 21 arriving at Charing Cross from Golden Square" 1201.20 - "No. 26 at Charing Cross" 1201.21 - "Nos. 5 and 26 at Charing Cross." 1201.22 - "No. 26 at Quarry Hill terminus" 1201.23 - "No. 26 at Quarry Hill terminus seen through the gates of the Bendigo Cemetery." 1201.24 - "Quarry Hill terminus showing remains for former double track layout abandoned before 1964." 1201.25 - "No. 2 at Quarry Hill terminus" 1201.26 - "No. 2 at Quarry Hill terminus" 1201.28 - "The Southern approach to Golden Square with No. 7 standing at the terminus, "TRAM" warning sign on the left. 1201.29 - "No. 7 passing through Golden Square Shopping Centre" 1201.30 - "No. 7 in High St. .... & Mackenzie St." 1201.5 - "No. 5 in View St. near Mackenzie St." 1201.6 - "No. 5 in View St. nearing Charing Cross." 1201.7 - "No. 7 in Nolan St. seen from Lake Weeroona Park." 1201.8 - "No. 7 entering McRae St. from Nolan St. Note "TRAM" warning sign on left. 1201.9 - "No. 7 in High St. passing Short St." 1201.10 - "No. 7 crossing Bendigo Creek bridge in High St. near Golden Square." 1201.11 - "No. 7 at Golden Square terminus" 1201.12 - "No. 7 at Golden Square terminus" 1201.13 - "No 7, 21 and 5 at Charing Cross" 1201.14 - "No. 7 at Golden Square terminus" 1201.15 - "No. 7 at Golden Square terminus" 1201.16 - "No 5 waiting at California Gully loop." 1201.17 - "Nos. 5 and 26 crossing at California Gully loop" 1201.18 - "No. 26 at Eaglehawk terminus" 1201.19 - "No. 21 arriving at Charing Cross from Golden Square" 1201.20 - "No. 26 at Charing Cross" 1201.21 - "Nos. 5 and 26 at Charing Cross." 1201.22 - "No. 26 at Quarry Hill terminus" 1201.23 - "No. 26 at Quarry Hill terminus seen through the gates of the Bendigo Cemetery." 1201.24 - "Quarry Hill terminus showing remains for former double track layout abandoned before 1964." 1201.25 - "No. 2 at Quarry Hill terminus" 1201.26 - "No. 2 at Quarry Hill terminus" 1201.28 - "The Southern approach to Golden Square with No. 7 standing at the terminus, "TRAM" warning sign on the left. 1201.29 - "No. 7 passing through Golden Square Shopping Centre" 1201.30 - "No. 7 in High St. ...Set of 31 transparencies taken on 25/2/1972 on Kodak mounts. 1201.1 - Bendigo No. 26 in Bond St. just after leaving Long Gully en route for Quarry Hill. Has Norris Supermarket in background. Has two SEC roof ads. 1201.2 - No. 26 climbing View St. from Charing Cross en route to Eaglehawk. Has ANZ bank and AMOCO service station in background. 1201.3 - as for 1201.3, but after tram has passed photographer. Has buildings west of Mackenzie St. in photograph. 1201.4 - Tram stop and centre of the road pole with two "CARS STOP BY REQUEST" signs mounted on pole at the corner of Mackenzie St. 1201.5 - same position as for 1201.3, but with No. 5 descending the street. 1201.6 - same position as for 1201.2, but with No. 5 descending the street. Photo taken after tram has passed photographer. 1201.7 - No. 7 in Nolan St. from across the park at Lake Weeroona. 1201.8 - No. 7 entering McCrae St from Nolan St. - distant view. Note "TRAM "sign on left hand side under tree and overhead in McCrae St. from former track that once was in this street. 1201.9 - No. 7 in High St. with Cathedral in background. Tram en route to North Bendigo. Note scaffolding around Cathedral main spire area. 1201.10 - No. 7 crossing Bendigo Creek bridge in High St. near Golden Square. Has a Caltex Service station in the background. 1201.11 - No. 7 at Golden Square terminus with Sunburst Fruit Juices and a Peters Ice cream delivery vans alongside. 1201.12 - as for 1201.11 but photo taken from behind tram, with the end of the rails in the photograph. 1201.13 - No. 7 and 21 in Pall Mall at Charing Cross with No. 5 in the background. Taken some distance away from the location. 1201.14 - No. 7 at Golden Square terminus, taken a short distance from the tram terminus. Shows Milk Bar on right hand side and the hotel on the left hand side. Taken from the south side of the roadway. 1201.15 - as from 1201.14 but taken from the north side of the roadway. 1201.16 - No 5 waiting at California Gully loop. Distant photo showing surrounds 1201.17 - No. 5 en route for Quarry Hill crossing No. 26 at California Gully. 1201.18 - No. 26 at Eaglehawk terminus with Eaglehawk Town Hall and Post Office in background. 1201.19 - No. 21 arriving at Charing Cross en route to North Bendigo. Has Alexandra Fountain in the background, ANZ bank RACV building, and other buildings on the north side of Pall Mall or Nolan St. 1201.20 - No. 26 en route for Quarry Hill at Charing Cross, with crew standing by front door. Has Colonial Mutual life building, Armstrong Tyre Service (Firestone) and a sign for Cohns Drinks in the background. 1201.21 - as for 1201.20 but with No. 5 en route to Eaglehawk now in photograph. 1201.22 - No. 26 at Quarry Hill terminus. 1201.23 - No. 26 at Quarry Hill terminus, view of front portion of tram only from a gate at the Bendigo cemetery. 1201.24 - Track at the end of the Quarry Hill line showing the point blades of the former "Y" terminus and the overhead for this. 1201.25 - No. 2 at the Quarry Hill terminus, looking along the former Trackwork. 1201.26 - as for 1201.25 1201.27 - number not used. 1201.28 - Golden Square terminus from some distance from the actual terminus, showing the Warning sign "TRAM" for motorists from the south. No. 7 at the terminus. 1201.29 - No. 7 passing through the Golden Square shopping centre. Numerous cars and pedestrians. Tram en route for North Bendigo. 1201.30 - No. 7 in High St. Golden Square, en route for North Bendigo. Photo taken after tram has passed photographer. 1201.31 - No. 7 in High St. just past Wattle St. with the Cathedral in the background. Tram has two SEC roof ads good side on photo, 'Everything's fine in my all electric kitchen' and 'Electrical cooking - clean, quick, economical'. 1201.32 - No. 7 in High St. nearing Wattle St. Has Cathedral in the background. Photo taken after tram has passed photographer.Information written on in black ink and date stamped on purple ink. 1201.1 - "No. 26 in Bond St just after leaving Long Gully" 1201.2 - "No. 26 climbing View St. from Charing Cross" 1201.3 - "No. 26 ascending View St. from Charing Cross (At Mackenzie St.)" 1201.4 - "View St. & Mackenzie St." 1201.5 - "No. 5 in View St. near Mackenzie St." 1201.6 - "No. 5 in View St. nearing Charing Cross." 1201.7 - "No. 7 in Nolan St. seen from Lake Weeroona Park." 1201.8 - "No. 7 entering McRae St. from Nolan St. Note "TRAM" warning sign on left. 1201.9 - "No. 7 in High St. passing Short St." 1201.10 - "No. 7 crossing Bendigo Creek bridge in High St. near Golden Square." 1201.11 - "No. 7 at Golden Square terminus" 1201.12 - "No. 7 at Golden Square terminus" 1201.13 - "No 7, 21 and 5 at Charing Cross" 1201.14 - "No. 7 at Golden Square terminus" 1201.15 - "No. 7 at Golden Square terminus" 1201.16 - "No 5 waiting at California Gully loop." 1201.17 - "Nos. 5 and 26 crossing at California Gully loop" 1201.18 - "No. 26 at Eaglehawk terminus" 1201.19 - "No. 21 arriving at Charing Cross from Golden Square" 1201.20 - "No. 26 at Charing Cross" 1201.21 - "Nos. 5 and 26 at Charing Cross." 1201.22 - "No. 26 at Quarry Hill terminus" 1201.23 - "No. 26 at Quarry Hill terminus seen through the gates of the Bendigo Cemetery." 1201.24 - "Quarry Hill terminus showing remains for former double track layout abandoned before 1964." 1201.25 - "No. 2 at Quarry Hill terminus" 1201.26 - "No. 2 at Quarry Hill terminus" 1201.28 - "The Southern approach to Golden Square with No. 7 standing at the terminus, "TRAM" warning sign on the left. 1201.29 - "No. 7 passing through Golden Square Shopping Centre" 1201.30 - "No. 7 in High St. Golden Square" 1201.31 - "No. 7 in High St. passing Wattle St." 1201.32 - "No. 7 in High St. nearing Wattle St."tramways, trams, bendigo, bond st., view st., nolan st., high st., eaglehawk, california gully, charing cross, quarry hill, trackwork, tram 2, tram 5, tram 7, tram 21, tram 26 -
 Bendigo Historical Society Inc.
Mixed media - Robert Green Collection - Photos of Bendigo Tramways - Black and White Prints, 1968
... Robert Green Collection, this item 11147.12 contains 20 printed photos scanned from eight plastic archival sheets of black and white negatives, also one PDF Document entitled "Bendigo's Last Tram Mail" 11147.12v PDF The day before permanent closure of the Bendigo tramways on Sunday 16 April 1972, the Tramway Museum Society of Victoria Inc (TMSV) arranged for “Last Tram Mail” to be carried along the Eaglehawk line to simulate the once regular transport of mail around the city by tram. 5.5 x 3.5 Inch Photo Prints 11147.12a Print from Sheet 3 (11147.3ac) No 28 Birney Car Special heads down Pall Mall past the Court House Hotel 11147.12b Print from Sheet 8 (11147.8c) No 18 passing the View Street and Rowan Street intersection 11147.12c Print from Sheet 8 (11147.8u) No 25 at the Bendigo Cemetery Terminus 11147.12d Print from Sheet 5 (11147.5e) No 18 and old shop front 11147.12e Print from Sheet 7 (11147.7s) Passing Trams 11147.12f Print from Sheet 3 (11147.3s) Tram leaving the Eaglehawk Town Hall in the dark 11147.12g Print from Sheet 5 (11147.5m) No 21 returning to the Tramways Avenue Depot with the scrubber tram on the left 11147.12l Print from Sheet 6 (11147.6ag) Four trams and one driver at the depot TMS Bendigo Tour 24 March 1968. 11147.12m Print from Sheet 2 (11147.2ac) Birney Car 28 passes 17 at the Long gully Manchester Arms Hotel Loop TMS Bendigo Tour 24 March 1968 11147.12n Print from Sheet 2 (11147.2u) No 28 Special Birney Car on the Quarry Hill Line TMS Bendigo Tour 24 March 1968 11147.12o Print from Sheet 2 (11147.2v) No 30 Special Birney Car on the Quarry Hill Line TMS Bendigo Tour 24 March 1968 11147.12q Print from Sheet 2 (11147.2ab) The four Birney Cars at Eaglehawk beside the town hall TMS Bendigo Tour 24 March 1968 11147.12r Print from Sheet 6 (11147.6z) Birney Car 11 and two others arriving at the depot TMS Bendigo Tour 24 March 1968 11147.12s Print from Sheet 2 (11147.2t) The four Birney Cars at the Carpenter Street, Quarry Hill Loop TMS Bendigo Tour 24 March 1968 11147.12t Print from Sheet 2 (11147.2h) No 30, 29, 28 and 11 Birney Cars lined up at the Depot TMS Bendigo Tour 24 March 1968 11147.12u Print from Sheet 2 (11147.2ad) No 21 and two others at the North Bendigo terminus TMS Bendigo Tour 24 March 1968 8 x 10 Inch Photo Prints 11147.12h Print from Sheet 3 (11147.3ai) Birney Car Tram passes the School of Mines in McRae St heading to the fountain 11147.12i Print from Sheet 2 (11147.2a) No 30, 29, 28 and 11 Birney Cars lined up at the Depot 11147.12j Print from Sheet 2 (11147.2a) No 30, 29, 28 and 11 Birney Cars lined up at the Depot 11147.12k Print from Sheet 2 (11147.2a) No 30, 29, 28 and 11 Birney Cars lined up at the Depot...Sixteen black and white prints from the images are also included. keith s king bendigo trams robert green Robert Green Collection, this item 11147.12 contains 20 printed photos scanned from eight plastic archival sheets of black and white negatives, also one PDF Document entitled "Bendigo's Last Tram Mail" 11147.12v PDF The day before permanent closure of the Bendigo tramways on Sunday 16 April 1972, the Tramway Museum Society of Victoria Inc (TMSV) arranged for “Last Tram Mail” to be carried along the Eaglehawk line to simulate the once regular transport of mail around the city by tram. 5.5 x 3.5 Inch Photo Prints 11147.12a Print from Sheet 3 (11147.3ac) No 28 Birney Car Special heads down Pall Mall past the Court House Hotel 11147.12b Print from Sheet 8 (11147.8c) No 18 passing the View Street and Rowan Street intersection 11147.12c Print from Sheet 8 (11147.8u) No 25 at the Bendigo Cemetery Terminus 11147.12d Print from Sheet 5 (11147.5e) No 18 and old shop front 11147.12e Print from Sheet 7 (11147.7s) Passing Trams 11147.12f Print from Sheet 3 (11147.3s) Tram leaving the Eaglehawk Town Hall in the dark 11147.12g Print from Sheet 5 (11147.5m) No 21 returning to the Tramways Avenue Depot with the scrubber tram on the left 11147.12l Print from Sheet 6 (11147.6ag) Four trams and one driver at the depot TMS Bendigo Tour 24 March 1968. 11147.12m Print from Sheet 2 (11147.2ac) Birney Car 28 passes 17 at the Long gully Manchester Arms Hotel Loop TMS Bendigo Tour 24 March 1968 11147.12n Print from Sheet 2 (11147.2u) No 28 Special Birney Car on the Quarry Hill Line TMS Bendigo Tour 24 March 1968 11147.12o Print from Sheet 2 (11147.2v) No 30 Special Birney Car on the Quarry Hill Line TMS Bendigo Tour 24 March 1968 11147.12q Print from Sheet 2 (11147.2ab) The four Birney Cars at Eaglehawk beside the town hall TMS Bendigo Tour 24 March 1968 11147.12r Print from Sheet 6 (11147.6z) Birney Car 11 and two others arriving at the depot TMS Bendigo Tour 24 March 1968 11147.12s Print from Sheet 2 (11147.2t) The four Birney Cars at the Carpenter Street, Quarry Hill Loop TMS Bendigo Tour 24 March 1968 11147.12t Print from Sheet 2 (11147.2h) No 30, 29, 28 and 11 Birney Cars lined up at the Depot TMS Bendigo Tour 24 March 1968 11147.12u Print from Sheet 2 (11147.2ad) No 21 and two others at the North Bendigo terminus TMS Bendigo Tour 24 March 1968 8 x 10 Inch Photo Prints 11147.12h Print from Sheet 3 (11147.3ai) Birney Car Tram passes the School of Mines in McRae St heading to the fountain 11147.12i Print from Sheet 2 (11147.2a) No 30, 29, 28 and 11 Birney Cars lined up at the Depot 11147.12j Print from Sheet 2 (11147.2a) No 30, 29, 28 and 11 Birney Cars lined up at the Depot 11147.12k Print from Sheet 2 (11147.2a) No 30, 29, 28 and 11 Birney Cars lined up at the Depot Mixed media Robert Green Collection - Photos of Bendigo Tramways - Black and White Prints ...This collection contains eight archive sheets (Sheet 1 to Sheet 8) of strips of original 35mm black and white negatives of photographs taken during the 1960s and early 1970s by Robert Green, of the Bendigo State Electricty Commission of Victoria Tramways prior to their abandonment The collection also includes two archive quality sheets (Sheet A and Sheet B) of original 35mm colour slides taken by Robert Green during the same period. Sheet B also contains one slide taken by Robert's friend Keigh S King (1928-2019) who was the author of the book 'The Bendigo Tramways an illustrated history, published by the Australian Railway Historical Society Victorian Division Melbourne in February 1972; BHS Item no. 5052. The collection also includes one USB stick which contains images of all photographs described above, except for one colour slide taken by Keith S Kings. Sixteen black and white prints from the images are also included.Robert Green Collection, this item 11147.12 contains 20 printed photos scanned from eight plastic archival sheets of black and white negatives, also one PDF Document entitled "Bendigo's Last Tram Mail" 11147.12v PDF The day before permanent closure of the Bendigo tramways on Sunday 16 April 1972, the Tramway Museum Society of Victoria Inc (TMSV) arranged for “Last Tram Mail” to be carried along the Eaglehawk line to simulate the once regular transport of mail around the city by tram. 5.5 x 3.5 Inch Photo Prints 11147.12a Print from Sheet 3 (11147.3ac) No 28 Birney Car Special heads down Pall Mall past the Court House Hotel 11147.12b Print from Sheet 8 (11147.8c) No 18 passing the View Street and Rowan Street intersection 11147.12c Print from Sheet 8 (11147.8u) No 25 at the Bendigo Cemetery Terminus 11147.12d Print from Sheet 5 (11147.5e) No 18 and old shop front 11147.12e Print from Sheet 7 (11147.7s) Passing Trams 11147.12f Print from Sheet 3 (11147.3s) Tram leaving the Eaglehawk Town Hall in the dark 11147.12g Print from Sheet 5 (11147.5m) No 21 returning to the Tramways Avenue Depot with the scrubber tram on the left 11147.12l Print from Sheet 6 (11147.6ag) Four trams and one driver at the depot TMS Bendigo Tour 24 March 1968. 11147.12m Print from Sheet 2 (11147.2ac) Birney Car 28 passes 17 at the Long gully Manchester Arms Hotel Loop TMS Bendigo Tour 24 March 1968 11147.12n Print from Sheet 2 (11147.2u) No 28 Special Birney Car on the Quarry Hill Line TMS Bendigo Tour 24 March 1968 11147.12o Print from Sheet 2 (11147.2v) No 30 Special Birney Car on the Quarry Hill Line TMS Bendigo Tour 24 March 1968 11147.12q Print from Sheet 2 (11147.2ab) The four Birney Cars at Eaglehawk beside the town hall TMS Bendigo Tour 24 March 1968 11147.12r Print from Sheet 6 (11147.6z) Birney Car 11 and two others arriving at the depot TMS Bendigo Tour 24 March 1968 11147.12s Print from Sheet 2 (11147.2t) The four Birney Cars at the Carpenter Street, Quarry Hill Loop TMS Bendigo Tour 24 March 1968 11147.12t Print from Sheet 2 (11147.2h) No 30, 29, 28 and 11 Birney Cars lined up at the Depot TMS Bendigo Tour 24 March 1968 11147.12u Print from Sheet 2 (11147.2ad) No 21 and two others at the North Bendigo terminus TMS Bendigo Tour 24 March 1968 8 x 10 Inch Photo Prints 11147.12h Print from Sheet 3 (11147.3ai) Birney Car Tram passes the School of Mines in McRae St heading to the fountain 11147.12i Print from Sheet 2 (11147.2a) No 30, 29, 28 and 11 Birney Cars lined up at the Depot 11147.12j Print from Sheet 2 (11147.2a) No 30, 29, 28 and 11 Birney Cars lined up at the Depot 11147.12k Print from Sheet 2 (11147.2a) No 30, 29, 28 and 11 Birney Cars lined up at the Depotkeith s king, bendigo, trams, robert green -
 Federation University Historical Collection
Book, Extra Muros 1956, Teachers' College Ballarat, 1956
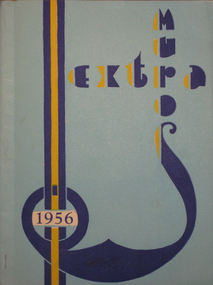
... St. (BTC Handbook 1965) btc ballarat teachers college n. l. harvey t. w. h. turner john pianta d. stanley b. parker j. hutchings n. ruddick b. poole r. arthur e. w. doney f. golding a. hutchings j. hammet d. wyley m. hutchinson i. burt y. davey p. mcconville m. ryan h. miller p. wiltshire d. wright m. hyndman v. goodwin k. reither h. weeks r. delbridge n. freeman b. pointer w. taylor g. mcrae l. dugdale b. robson e. o. walpole r. j. croft e. constable j. brown j. dugdale ian burt heather sparkes g. whitelaw e. major ruth ray ron bunn w. j. taylor shirley a. mclay d. henderson a. gleeson p. utber a. rutter i. erdmanis e. phillips i. mckinley a. stalker m. spencer c. rodger r. ross l. jenkins j. m. blair j. kirk m. odd b. dahlenburg m. cattanach Light blue cover (cream inside cover) with dark blue and yellow titles. ...Editorial, Our Principal, Second Year Staff and Students', First Year Students', Main Events of '56, Hostel Highlights, Sporting World, Sports Awards. December 1955 Ballarat Teachers’ College held its first Graduation Ceremony. The words of the Graduation Hymn were written by Mavis Canty. (BTC Handbook 1965) July 1956 Tenders were called for the first section of the new Ballarat Teachers’ College to be built in Gillies St. (BTC Handbook 1965)Light blue cover (cream inside cover) with dark blue and yellow titles. Soft covered magazine of the Ballarat Teachers College. Title page states Vol. 2. No. 3.btc, ballarat teachers college, n. l. harvey, t. w. h. turner, john pianta, d. stanley, b. parker, j. hutchings, n. ruddick, b. poole, r. arthur, e. w. doney, f. golding, a. hutchings, j. hammet, d. wyley, m. hutchinson, i. burt, y. davey, p. mcconville, m. ryan, h. miller, p. wiltshire, d. wright, m. hyndman, v. goodwin, k. reither, h. weeks, r. delbridge, n. freeman, b. pointer, w. taylor, g. mcrae, l. dugdale, b. robson, e. o. walpole, r. j. croft, e. constable, j. brown, j. dugdale, ian burt, heather sparkes, g. whitelaw, e. major, ruth ray, ron bunn, w. j. taylor, shirley a. mclay, d. henderson, a. gleeson, p. utber, a. rutter, i. erdmanis, e. phillips, i. mckinley, a. stalker, m. spencer, c. rodger, r. ross, l. jenkins, j. m. blair, j. kirk, m. odd, b. dahlenburg, m. cattanach -
 Federation University Historical Collection
Programme, Harry Brown and Co, Ballarat Teachers' College Grand Concert Programme, 1949, 1949
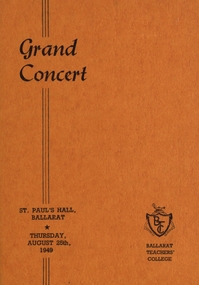
... grand concert ballarat teachers' college programme college choir margaret blaby shirley freckleton donald evans richard stowell john blackie lorraine english neil tippett choral club pat nield david collins phys. ed club joan addinsall nancy lee sylvia read beverley thorpe jean holland margaret hives moira connellan valda kelly leonard mcrae mary gearing lesley latch wallace wall Yellow coloured program from the Grand Concert of the Ballarat Teachers' College held at St Paul's Hall, Ballarat, Thursday August 25th 1949. ...Yellow coloured program from the Grand Concert of the Ballarat Teachers' College held at St Paul's Hall, Ballarat, Thursday August 25th 1949. Includes the name of the performance and the performer/s.grand concert, ballarat teachers' college, programme, college choir, margaret blaby, shirley freckleton, donald evans, richard stowell, john blackie, lorraine english, neil tippett, choral club, pat nield, david collins, phys. ed club, joan addinsall, nancy lee, sylvia read, beverley thorpe, jean holland, margaret hives, moira connellan, valda kelly, leonard mcrae, mary gearing, lesley latch, wallace wall -
 Bendigo Military Museum
Photograph - 4th Field Survey Squadron Adventurous Training, Wilpena pound, Flinders Ranges, SA, 1989
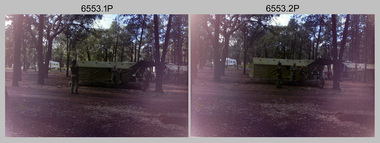
... St. Mary’s Peak. SPR Andrew Quin. .42) - Photo, colour, 1989. Flinders Ranges topography, SGT Stu Symonds. .43) - Photo, colour, 1989. Social activities. L to R: unidentified (x6), CPL Perry Langeberg, SGT Laurie Justin. .44) - Photo, colour, 1989. Social activities. L to R: CPL Perry Langeberg, SGT John Zuringer, SGT Laurie Justin, SGT Mick Hogan, unidentified, SGT Stu Symonds. .45) - Photo, colour, 1989. Social activities. L to R: unidentified (x6), CPL Perry Langeberg, SGT John Zuringer. .46) - Photo, colour, 1989. Social activities. L to R: CPL Jamie McRae...St. Mary’s Peak. SPR Andrew Quin. .42) - Photo, colour, 1989. Flinders Ranges topography, SGT Stu Symonds. .43) - Photo, colour, 1989. Social activities. L to R: unidentified (x6), CPL Perry Langeberg, SGT Laurie Justin. .44) - Photo, colour, 1989. Social activities. L to R: CPL Perry Langeberg, SGT John Zuringer, SGT Laurie Justin, SGT Mick Hogan, unidentified, SGT Stu Symonds. .45) - Photo, colour, 1989. Social activities. L to R: unidentified (x6), CPL Perry Langeberg, SGT John Zuringer. .46) - Photo, colour, 1989. Social activities. L to R: CPL Jamie McRae ...This is a set of 55 photographs of a 4th Field Survey Squadron adventurous training held at Wilpena pound, in the Flinders Ranges of South Australia in 1989. It is evident the training focussed on teamwork, leadership, abseiling, rock climbing, field craft and living off the land survival skills. Elements from units of the Army Reserve also participated in the training. In this photo set, one of 4th Field Survey’s sections participated in abseiling and trekked to the highest mountain in the Flinders Ranges – St. Mary’s Peak. Refer to item 6552.43P for black & white photographs taken during the adventurous training exercise.This is a set of 55 photographs of 4th Field Survey Squadron personnel undergoing adventurous training held at Wilpena pound, in the Flinders Ranges of South Australia in 1989. The colour photographs are on 35mm negative film and are part of the Army Survey Regiment’s Collection. The photographs were scanned at 96 dpi. .1) & 2)- Photo, colour, 1989. Base camp. WO1 Bill Griggs 2nd from left, remainder unidentified. .3) - Photo, colour, 1989. Old homestead inside Wilpena Pound. SPR Cheryl Deluca-Cardillo, 2nd from left, remainder unidentified. .4) - Photo, colour, 1989. Wilpena Pound topography. .5) - Photo, colour, 1989. Abseiling activities, unidentified personnel. .6) & .7) - Photo, colour, 1989. Flinders Ranges topography. .8) - Photo, colour, 1989. Abseiling activities. L to R: SSGT Max Coletti, SGT Stu Symonds. .9) - Photo, colour, 1989. Abseiling activities, unidentified personnel. .10) - Photo, colour, 1989. Flinders Ranges topography. .11) - Photo, colour, 1989. Abseiling activities. L to R: unidentified, CPL Michelle Griffith, SGT Stu Symonds. .12) - Photo, colour, 1989. Abseiling activities. L to R: unidentified, SPR Andrew Quin, SGT Laurie Justin, SGT Stu Symonds. .13) - Photo, colour, 1989. Abseiling activities. L to R: SGT Stu Symonds SGT Laurie Justin. .14) - Photo, colour, 1989. Abseiling activities. L to R: unidentified, SGT Stu Symonds. .15) - Photo, colour, 1989. Abseiling activities. SGT Laurie Justin. .16) - Photo, colour, 1989. Abseiling activities. SGT Stu Symonds. .17) & .18) - Photo, colour, 1989. Abseiling activities. SPR Cheryl Deluca-Cardillo. .19) - Photo, colour, 1989. Abseiling activities. L to R: SPR Cheryl Deluca-Cardillo, unidentified. .20) - Photo, colour, 1989. Abseiling activities. SSGT Max Coletti. .21) - Photo, colour, 1989. Abseiling activities. SPR Andrew Quin. .22) - Photo, colour, 1989. Abseiling activities. CPL Michelle Griffith. .23) - Photo, colour, 1989. Abseiling activities. CPL Michelle Griffith. .24) - Photo, colour, 1989. Flinders Ranges topography, unidentified personnel. .25) - Photo, colour, 1989. Flinders Ranges topography, unidentified SGT. .26) to .30) - Photo, colour, 1989. Flinders Ranges topography. .31) - Photo, colour, 1989. Flinders Ranges topography, unidentified personnel. .32) & .33) - Photo, colour, 1989. Flinders Ranges topography. L to R: unidentified, CPL Michelle Griffith, SGT Stu Symonds, CPL Roger Graf, SSGT Max Coletti, SGT Laurie Justin. .34) - Photo, colour, 1989. St. Mary’s Peak. L to R: unidentified, CPL Michelle Griffith, CPL Steve Nokes, SGT Stu Symonds. .35) - Photo, colour, 1989. St. Mary’s Peak. SGT Stu Symonds. .36) & .37) - Photo, colour, 1989. St. Mary’s Peak. CPL Steve Nokes. .38) - Photo, colour, 1989. Flinders Ranges topography. .39) - Photo, colour, 1989. St. Mary’s Peak. SGT Laurie Justin. .40) - Photo, colour, 1989. St. Mary’s Peak. SPR Cheryl Deluca-Cardillo. .41) - Photo, colour, 1989. St. Mary’s Peak. SPR Andrew Quin. .42) - Photo, colour, 1989. Flinders Ranges topography, SGT Stu Symonds. .43) - Photo, colour, 1989. Social activities. L to R: unidentified (x6), CPL Perry Langeberg, SGT Laurie Justin. .44) - Photo, colour, 1989. Social activities. L to R: CPL Perry Langeberg, SGT John Zuringer, SGT Laurie Justin, SGT Mick Hogan, unidentified, SGT Stu Symonds. .45) - Photo, colour, 1989. Social activities. L to R: unidentified (x6), CPL Perry Langeberg, SGT John Zuringer. .46) - Photo, colour, 1989. Social activities. L to R: CPL Jamie McRae, SGT Laurie Justin, SGT Mick Hogan, unidentified, SGT Stu Symonds, SPR Cheryl Deluca-Cardillo, WO1 Bill Griggs. .47) - Photo, colour, 1989. Social activities. L to R: SGT Laurie Justin, unidentified, CPL Steve Nokes, SGT Stu Symonds, SPR Cheryl Deluca-Cardillo, WO1 Bill Griggs, unidentified (x2). .48) - Photo, colour, 1989. Social activities. L to R: CPL Steve Nokes, WO1 Bill Griggs, SPR Cheryl Deluca-Cardillo, unidentified (x2), CPL Steve Ellis, CPL Michelle Griffith, SGT Gill Park. .49) - Photo, colour, 1989. Social activities. L to R: CPL Perry Langeberg, SGT John Zuringer, CPL Jamie McRae, SGT Laurie Justin, SGT Mick Hogan, unidentified, SGT Stu Symonds. .50) - Photo, colour, 1989. Sheep cooking in fire pit. L to R: WO2 Peter Symmans, unidentified (x5), CPL Steve Ellis. .51) - Photo, colour, 1989. Sheep cooking in fire pit. L to R: WO2 Peter Symmans, unidentified. .52) - Photo, colour, 1989. Sheep cooking in fire pit. Unidentified personnel. .53) - Photo, colour, 1989. Cooked sheep removed from fire pit. L to R: unidentified. WO2 Peter Symmans, unidentified. .54) - Photo, colour, 1989. Cooked sheep removed from fire pit. L to R: CPL Michelle Griffith, SGT Gill Park, unidentified, SSGT Max Coletti, unidentified, SPR Cheryl Deluca-Cardillo. .55) - Photo, colour, 1989. Cooked sheep removed from fire pit. L to R: unidentified, CPL Michelle Griffith, WO2 Peter Symmans..1P to .55P – There are no personnel identified. ‘1989 ADV TRAINING’ annotated on negatives sleeve.royal australian survey corps, rasvy, 4 fd svy sqn -
 Bendigo Historical Society Inc.
Newspaper - LONG GULLY HISTORY GROUP COLLECTION: BENDIGO'S CENTURY VOLUME FOUR: 1930 - 1939
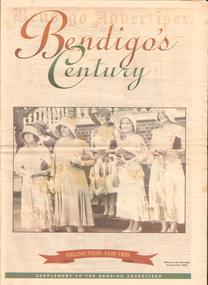
... St Aidan's Orphanage... RSL Memorial Hall... Lord and Lady Huntingfield... Cr Michelsen... Bendigo Art Gallery... Bendigo Agricultural Show... New Blue Mine... Joseph Stapleton... Bendigo Law Association... Bendigo Hospital Committee of Management... Bendigo Rotary Club... Mr J McRae...BENDIGO History long gully history group The Long Gully History Group - Bendigo's Century - Volume Four: 1930 - 1939 Eaglehawk Cricket Club Ernst Mueller The Bendigo Stock ExchangeL L Dungey T Williams M P Kelly C Mueller E Hommoloff R Kelly T H Busst T Hall R Tremabath E A Woodcock C Burridge Charshalton Mine Edith and G V Lansell Laboratory St Andrew's Church RSL Memorial Hall Mr Gordon Carter Sir John Monash State Electricity Commission Cr R Watson Colonel GT V Lansell Empire Press Congress Bendigo Advertiser Mr E J Hogan Eppalock Weir Lyric Theatre Bendigo Red Cross Mrs George Mackay St Andrew's Presbyterian Church Mrs William Hunter Right Rev John Douse Langley Monsignor Rooney Bendigo Art Gallery The Ironbark Mine Coliban Water Mr W Wright Station 3BO Amalgamated Wireless of Australia Ltd Advance Bendigo Group The North League St Aidan's Orphanage Bendigo Freezing Works Mr W Wright Bendigo Advertiser Mr W J Stephens Advance Bendigo Group North League Garden Gully United Gold Mining Company Bendigo Football League Sir John Quick John Quick Snr Ironbark Foundry Bendigo Evening News Bendigo Independent Bendigo Advertiser Deakin Governmnet Sir Charles Kingsford Smith Southern Cross Eppalock Weir Bendigo Art Gallery The Hercules Mine Gillies Aids & Appliance Shop Anne Caudle Centre Bill Woodfull Harold Larwood Dr John McCarthy The Hercules Douglas Jardine Don Bradman Sacred Heart Cathedral Joseph Stapleton John Lynch Bert McConchie New Red White and Blue Mine Royal Humane Society William James Vernon Shaw South New Moon Mine Bendigo Hospital Bendigo Base Hospital Duke of Gloucester RSL Memorial Hall Electricity Commission Eaglehawk Borough Council The Plaza Backhaus Estate Amalgamated Freezing Company Fortuna Villa Mrs Edith Lansell Colonel Lansell The Hercules Mine Toni Riley Pharmacy Boardwalk Barkly Hyett The Big Blue Consolidated Company The Bendigo Hospital Eaglehawk Football Team Kurmala Wing of the Bendigo Base Hospital Sir Isaac Isaacs Lyric Theatre Sir John Quick Hanro Knitting Mills St Luke's Toddlers Home St Aidan's Orphanage RSL Memorial Hall Lord and Lady Huntingfield Cr Michelsen Bendigo Art Gallery Bendigo Agricultural Show New Blue Mine Joseph Stapleton Bendigo Law Association Bendigo Hospital Committee of Management Bendigo Rotary Club Mr J McRae Education Department Andrew Sunstan Sir Stanley Argyle Bendigo Football League North Blue Mining Company Cr Staples King George V King Edward VIII Cr J A Michelsen Andrew McLay Bendigo Advertiser Cohn Bros Mrs Wallis Simpson King George VI Capping Mine Shafts 1936 Bendigo Art Gallery Madge Freemen William John Leslie Cross Judge Wasley The Myer Emporium The Baptist Church Salvation Army Ron Masters The Central Nell Gwyn Sir John Quick Leanne McDonnell Windermere Hotel Rev Donald Baker John Rumbold Central Nell Gwynne The Beehive Building The Beehive Store James Buick and Co Thomas Hope Henderson Buick Henderson & Co Mr Goodison Mr R O Henderson Lt-Col Henderson Angus Mackay Bendigo Sewerage Authority Mr S Gordon Moore Commercial Bank of Sydney Bendigo Advertiser Edward Alan Morcom Polio DR Gardner Kerr The Right Rev Conald Baker Ridley Theological College Newspaper supplement titled Bendigo's Century Volume Four: 1930 - 1939. ...Newspaper supplement titled Bendigo's Century Volume Four: 1930 - 1939. Front page is titled Bendigo's Century and has a photo of some women at the Bendigo Jockey Club, 1930s. Each year has heading of Who's Who, Weather, Sport and Business. First years are 1930 - 1939 titled A look back when. The page has photos of the Eaglehawk Cricket Club's first A Grade cricket premier ship team (1932 - 1933)., The monument to the late Bendigo mining magnate Ernst Mueller in Rosalind Park, The Bendigo Stock Exchange in the early 1930's - pictured are L L Dungey, T Williams, M P Kelly, C Mueller, E Hommoloff, R Kelly, T H Busst, T Hall, R Trembath, E A Woolcock, and C Burridge, the Carshalton mine in 1936 and The Edith and G V Lansell Laboratory at the Bendigo Hospital. 1930 - a photo of St Andrew's Church, the sundial outside the RSL Memorial Hall, The late Monsignor Rooney and The late John Douse Langley. The Ironbark Mine was the top gold producer. 1931 - Radio station goes on air, 1932 - Sir John dies, 1933 Bodyline men come to town, 1934 - Heroic rescues, 1935 - Hospital's new wing opened, 1936 - King mourned, 1937 - Beehive store towers above, 1938 - Mining shows mixed results and 1939 - Outbreak of war sobering.bendigo, history, long gully history group, the long gully history group - bendigo's century - volume four: 1930 - 1939, eaglehawk cricket club, ernst mueller, the bendigo stock exchangel l dungey, t williams, m p kelly, c mueller e hommoloff, r kelly, t h busst, t hall, r tremabath, e a woodcock, c burridge, charshalton mine, edith and g v lansell laboratory, st andrew's church, rsl memorial hall, mr gordon carter, sir john monash, state electricity commission, cr r watson, colonel gt v lansell, empire press congress, bendigo advertiser, mr e j hogan, eppalock weir, lyric theatre, bendigo red cross, mrs george mackay, st andrew's presbyterian church, mrs william hunter, right rev john douse langley, monsignor rooney, bendigo art gallery, the ironbark mine, coliban water, mr w wright, station 3bo, amalgamated wireless of australia ltd, advance bendigo group, the north league, st aidan's orphanage, bendigo freezing works, mr w wright, bendigo advertiser, mr w j stephens, advance bendigo group, north league, garden gully united gold mining company, bendigo football league, sir john quick, john quick snr, ironbark foundry, bendigo evening news, bendigo independent, bendigo advertiser, deakin governmnet, sir charles kingsford smith, southern cross, eppalock weir, bendigo art gallery, the hercules mine, gillies, aids & appliance shop, anne caudle centre, bill woodfull, harold larwood, dr john mccarthy, the hercules, douglas jardine, don bradman, sacred heart cathedral, joseph stapleton, john lynch, bert mcconchie, new red white and blue mine, royal humane society, william james, vernon shaw, south new moon mine, bendigo hospital, bendigo base hospital, duke of gloucester, rsl memorial hall, electricity commission, eaglehawk borough council, the plaza, backhaus estate, amalgamated freezing company, fortuna villa, mrs edith lansell, colonel lansell, the hercules mine, toni riley pharmacy, boardwalk, barkly hyett, the big blue consolidated company, the bendigo hospital, eaglehawk football team, kurmala wing of the bendigo base hospital, sir isaac isaacs, lyric theatre, sir john quick, hanro knitting mills, st luke's toddlers home, st aidan's orphanage, rsl memorial hall, lord and lady huntingfield, cr michelsen, bendigo art gallery, bendigo agricultural show, new blue mine, joseph stapleton, bendigo law association, bendigo hospital committee of management, bendigo rotary club, mr j mcrae, education department, andrew sunstan, sir stanley argyle, bendigo football league, north blue mining company, cr staples, king george v, king edward viii, cr j a michelsen, andrew mclay, bendigo advertiser, cohn bros, mrs wallis simpson, king george vi, capping mine shafts 1936, bendigo art gallery, madge freemen, william john leslie cross, judge wasley, the myer emporium, the baptist church, salvation army, ron masters, the central nell gwyn, sir john quick, leanne mcdonnell, windermere hotel, rev donald baker, john rumbold, central nell gwynne, the beehive building, the beehive store, james buick and co, thomas hope henderson, buick henderson & co, mr goodison, mr r o henderson, lt-col henderson, angus mackay, bendigo sewerage authority, mr s gordon moore, commercial bank of sydney, bendigo advertiser, edward alan morcom, polio, dr gardner kerr, the right rev conald baker, ridley theological college -
 Bendigo Historical Society Inc.
Photograph - Robert Green Collection - Photos of Bendigo Tramways - Sheet 4 of 8, 1960s
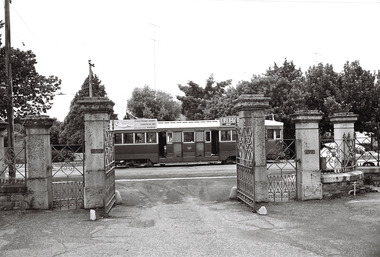
... Photos: 11147.4a Tram at Carpenter St Quarry Hill, Cemetery Gates Terminus 11147.4b Tram and Conductor at Carpenter St Quarry Hill, Cemetery Gates Terminus 11147.4c Overhead Pole, wires and tram stop sign; and end of section sign 11147.4d Overhead Pole, wires and tram stop sign; and end of section sign, in View Street 11147.4e Quarry Hill, Eaglehawk and Golden Square Trams meeting at the Fountain, Charing Cross 11147.4f Quarry Hill, Eaglehawk trams and overhead sign at the fountain roundabout 11147.4g Tram line Point at the Fountain 11147.4h All lines cross at the fountain 11147.4i Turning Caution sign at Tramways Avenue (to the depot) and McRae Street 11147.4j Trams stop by request sign 11147.4k No 4 at the intersection of Eaglehawk and Havilah Roads, Long Gully 11147.4l No 4 to Quarry Hill picking up passengers in Eaglehawk Road 11147.4m No 30 Birney Car heading to Golden Square 11147.4n Birney Car crossing the creek 11147.4o Birney Car No 30 leaving Golden Square in High Street 11147.4p No 3 heading to Eaglehawk 11147.4q No 25 heading to Quarry Hill in Carpenter St possibly 11147.4r Three trams at the loop in Carpenter St Quarry Hill 11147.4s Two trams at the Quarry Hill Terminus Carpenter St 11147.4t Two trams at Canterbury Park Eaglehawk 11147.4u Birney Car 29 Special at Eaglehawk Terminus 11147.4v Passing No 26 at Eaglehawk...Photos: 11147.4a Tram at Carpenter St Quarry Hill, Cemetery Gates Terminus 11147.4b Tram and Conductor at Carpenter St Quarry Hill, Cemetery Gates Terminus 11147.4c Overhead Pole, wires and tram stop sign; and end of section sign 11147.4d Overhead Pole, wires and tram stop sign; and end of section sign, in View Street 11147.4e Quarry Hill, Eaglehawk and Golden Square Trams meeting at the Fountain, Charing Cross 11147.4f Quarry Hill, Eaglehawk trams and overhead sign at the fountain roundabout 11147.4g Tram line Point at the Fountain 11147.4h All lines cross at the fountain 11147.4i Turning Caution sign at Tramways Avenue (to the depot) and McRae Street 11147.4j Trams stop by request sign 11147.4k No 4 at the intersection of Eaglehawk and Havilah Roads, Long Gully 11147.4l No 4 to Quarry Hill picking up passengers in Eaglehawk Road 11147.4m No 30 Birney Car heading to Golden Square 11147.4n Birney Car crossing the creek 11147.4o Birney Car No 30 leaving Golden Square in High Street 11147.4p No 3 heading to Eaglehawk 11147.4q No 25 heading to Quarry Hill in Carpenter St possibly 11147.4r Three trams at the loop in Carpenter St Quarry Hill 11147.4s Two trams at the Quarry Hill Terminus Carpenter St 11147.4t Two trams at Canterbury Park Eaglehawk 11147.4u Birney Car 29 Special at Eaglehawk Terminus 11147.4v Passing No 26 at Eaglehawk Photograph Robert Green Collection - Photos of Bendigo Tramways - Sheet 4 of 8 ...This collection contains eight archive sheets (Sheet 1 to Sheet 8) of strips of original 35mm black and white negatives of photographs taken during the 1960s and early 1970s by Robert Green, of the Bendigo State Electricty Commission of Victoria Tramways prior to their abandonment The collection also includes two archive quality sheets (Sheet A and Sheet B) of original 35mm colour slides taken by Robert Green during the same period. Sheet B also contains one slide taken by Robert's friend Keigh S King (1928-2019) who was the author of the book 'The Bendigo Tramways an illustrated history, published by the Australian Railway Historical Society Victorian Division Melbourne in February 1972; BHS Item no. 5052. The collection also includes one USB stick which contains images of all photographs described above, except for one colour slide taken by Keith S Kings. Sixteen black and white prints from the images are also included.Robert Green Collection, this item contains 22 Black and White Negatives of the trams at various locations around Bendigo. Photos: 11147.4a Tram at Carpenter St Quarry Hill, Cemetery Gates Terminus 11147.4b Tram and Conductor at Carpenter St Quarry Hill, Cemetery Gates Terminus 11147.4c Overhead Pole, wires and tram stop sign; and end of section sign 11147.4d Overhead Pole, wires and tram stop sign; and end of section sign, in View Street 11147.4e Quarry Hill, Eaglehawk and Golden Square Trams meeting at the Fountain, Charing Cross 11147.4f Quarry Hill, Eaglehawk trams and overhead sign at the fountain roundabout 11147.4g Tram line Point at the Fountain 11147.4h All lines cross at the fountain 11147.4i Turning Caution sign at Tramways Avenue (to the depot) and McRae Street 11147.4j Trams stop by request sign 11147.4k No 4 at the intersection of Eaglehawk and Havilah Roads, Long Gully 11147.4l No 4 to Quarry Hill picking up passengers in Eaglehawk Road 11147.4m No 30 Birney Car heading to Golden Square 11147.4n Birney Car crossing the creek 11147.4o Birney Car No 30 leaving Golden Square in High Street 11147.4p No 3 heading to Eaglehawk 11147.4q No 25 heading to Quarry Hill in Carpenter St possibly 11147.4r Three trams at the loop in Carpenter St Quarry Hill 11147.4s Two trams at the Quarry Hill Terminus Carpenter St 11147.4t Two trams at Canterbury Park Eaglehawk 11147.4u Birney Car 29 Special at Eaglehawk Terminus 11147.4v Passing No 26 at Eaglehawkkeith s king, bendigo, trams, robert green -
 Bendigo Historical Society Inc.
Book - GOLDEN SQUARE LAUREL STREET P.S. COLLECTION: HANDWORK FOR SCHOOLS
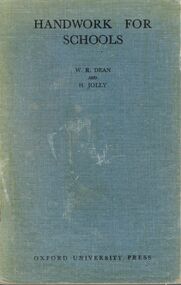
... st p.s....Golden Square Laurel Street P.S. Collection - Handwork for Schools... W R Dean... H Jolly... Geoffrey Cumberlege... Oxford University Press... J McRae...st p.s. Golden Square Laurel Street P.S. Collection - Handwork for Schools W R Dean H Jolly Geoffrey Cumberlege Oxford University Press J McRae G S Browne A H Ramsay Geoffrey Cumberlege, Oxford University Press, Melbourne. ...Handwork for Schools by W.R.Dean and H. Jolly. 1953 Reprint. Book has light blue cloth cover with black printing. Back cover has part of the jacket which is light brown with dark red and blue printing and decoration pasted on it. Subjects covered are: Modelling and Carving; Pattern and Decoration; paper and Cardboard Handwork; Printed Decorations; Weaving; Handwork in Wood; Other Crafts; Decorative Needlework and PuppetryGeoffrey Cumberlege, Oxford University Press, Melbourne. Wellington. Brown, Prior, Anderson Pty Ltd., 430 Little Bourke Street., Melbourne, C.1.education, primary, golden square laurel st p.s., golden square laurel street p.s. collection - handwork for schools, w r dean, h jolly, geoffrey cumberlege, oxford university press, j mcrae, g s browne, a h ramsay -
 Bendigo Historical Society Inc.
Photograph - ST. KILLIAN'S CHURCH, 1861
... Original St. Killian's church, on site corner McRae and Chapel Street....Original St. Killian's church, on site corner McRae and Chapel Street. ...black and white photo : ( copy ) stone church building, with buttresses, and portico on side. Slate ( ? ) roof. Post and rail fence across front of church, paling fence visible at side and rear. Original St. Killian's church, on site corner McRae and Chapel Street.Batchelderorganization, church, st. killian's -
 Bendigo Historical Society Inc.
Slide - BENDIGO VIEWS, Nov 1960
... Bendigo Views. St. Killian's Church, McRae Street Bendigo....Bendigo Views. St. Killian's Church, McRae Street Bendigo. Slide BENDIGO VIEWS ...Slide. Bendigo Views. St. Killian's Church, McRae Street Bendigo.slide, bendigo, bendigo views, bendigo views -
 Uniting Church Archives - Synod of Victoria
BW photo, 1972
... Colin McRae; Methodist-Uniting Church minister; Nyah West, Zeehan, Beulah, Hobart (Swan St), Invermay, as a chaplain in the AIF, Ballarat (Pleasant St), Geelong (Belmont), Hamilton, as Separated Chairman (North Western), Shepparton (Wesley), and as supernumery at Shepparton and Mooroopna....Colin McRae (1903–1986) was ordained as a Methodist minister in 1932, and served at Nyah West, Zeehan, Beulah, Hobart (Swan St), Invermay, as a chaplain in the AIF, Ballarat (Pleasant St), Geelong (Belmont), Hamilton, as Separated Chairman (North Western), Shepparton (Wesley), and as supernumery at Shepparton and Mooroopna....Colin McRae; Methodist-Uniting Church minister; Nyah West, Zeehan, Beulah, Hobart (Swan St), Invermay, as a chaplain in the AIF, Ballarat (Pleasant St), Geelong (Belmont), Hamilton, as Separated Chairman (North Western), Shepparton (Wesley), and as supernumery at Shepparton and Mooroopna. ...Colin McRae (1903–1986) was ordained as a Methodist minister in 1932, and served at Nyah West, Zeehan, Beulah, Hobart (Swan St), Invermay, as a chaplain in the AIF, Ballarat (Pleasant St), Geelong (Belmont), Hamilton, as Separated Chairman (North Western), Shepparton (Wesley), and as supernumery at Shepparton and Mooroopna.The Rev. Colin and Mrs McRae are shown receiving a presentation, presumably at a service to mark his retirement. Others in the photograph are the Rev. John Wade (making the presentation) Rev Colin McRaecolin mcrae; methodist-uniting church minister; nyah west, zeehan, beulah, hobart (swan st), invermay, as a chaplain in the aif, ballarat (pleasant st), geelong (belmont), hamilton, as separated chairman (north western), shepparton (wesley), and as supernumery at shepparton and mooroopna. -
 Uniting Church Archives - Synod of Victoria
BW photo, 1972
... Colin McRae (1903–1986) Methodist minister; Nyah West, Zeehan, Beulah, Hobart (Swan St), Invermay, as a chaplain in the AIF, Ballarat (Pleasant St), Geelong (Belmont), Hamilton, as Separated Chairman (North Western), Shepparton (Wesley), and as supernumery at Shepparton and Mooroopna....Colin McRae (1903–1986) was ordained as a Methodist minister in 1932, and served at Nyah West, Zeehan, Beulah, Hobart (Swan St), Invermay, as a chaplain in the AIF, Ballarat (Pleasant St), Geelong (Belmont), Hamilton, as Separated Chairman (North Western), Shepparton (Wesley), and as supernumery at Shepparton and Mooroopna....Colin McRae (1903–1986) Methodist minister; Nyah West, Zeehan, Beulah, Hobart (Swan St), Invermay, as a chaplain in the AIF, Ballarat (Pleasant St), Geelong (Belmont), Hamilton, as Separated Chairman (North Western), Shepparton (Wesley), and as supernumery at Shepparton and Mooroopna. ...Colin McRae (1903–1986) was ordained as a Methodist minister in 1932, and served at Nyah West, Zeehan, Beulah, Hobart (Swan St), Invermay, as a chaplain in the AIF, Ballarat (Pleasant St), Geelong (Belmont), Hamilton, as Separated Chairman (North Western), Shepparton (Wesley), and as supernumery at Shepparton and Mooroopna.Rev John Wade, Rev Norman Mapperson, Rev. Colin and Mrs McRae. (Note: Different view of the same function as F516-2)Colin McRae; John Wade; Norman Mappersoncolin mcrae (1903–1986) methodist minister; nyah west, zeehan, beulah, hobart (swan st), invermay, as a chaplain in the aif, ballarat (pleasant st), geelong (belmont), hamilton, as separated chairman (north western), shepparton (wesley), and as supernumery at shepparton and mooroopna. -
 Stawell Historical Society Inc
Photograph, Primitive Methodist Christian Endeavour July 1901 -- Studio Portrait, Feb 1st 1992
... McRae, Rev. L.T. Copeland (President) Mrs Russelll, Miss L. Goldsworthy Miss L. Beard Miss Bell Sumner Miss S.Gillams Religion July 1901 Primitive Methodist Christian Endeavour Stawell Photographic Co. Close Railway Station C. Hewitt Manager Mrs R. Gray Wakeham St ...Same as photo 260 Primitive Methodist Christian Endeavour Group July 1901. Photo taken in Stawell by Stawell Photographic Company. Mrs R. Gray would be Mary Gray. Back Row: L-R J. Anyon W.A.Perry (vice-president) W. Hambly, G. Smith, Miss V. Willoughby Second Row: L-R Miss L. Crawford, (Secretary) Miss M Schnieder, Miss Matthews Miss M. Hambly, Miss B. Fletcher, Mis B. Yates, Miss E. Bunting Miss B. Dickie, Miss B. Hambly Miss W. Matthews, Mr Gillams. Third row: L-R Miss. L. Corrie, Mrs Corrie, Mrs Jenkinson, Mrs McDonald Mrs McRae, Rev. L.T. Copeland (President) Mrs Russelll, Miss L. Goldsworthy Miss L. Beard Miss Bell Sumner Miss S.GillamsBlack and white photograph of a group of males and females, Taken in the studio of Stawell Photographic Company, 1901 Primitive Methodist Christian Endeavour group.July 1901 Primitive Methodist Christian Endeavour Stawell Photographic Co. Close Railway Station C. Hewitt Manager Mrs R. Gray Wakeham St Stawellreligion -
 Sunshine and District Historical Society Incorporated
Document - Stories About St. Albans Celebrating 125 Years, Joseph "Joe" Ribarow, 2018 Revised and reprinted
... St. Albans occurred in the early 1900s when the Closer Settlement board subdivided Overnewton Estate into blocks of 200 to 300 acres and offered these for selection. This attracted the new pioneers' families to the district, such as the McAuleys, Boyds, Andersons, Stevens, Colemans, Griffiths, McRaes, King and others to acquire land along Taylors Road and in the Western part of St. ...St. Albans occurred in the early 1900s when the Closer Settlement board subdivided Overnewton Estate into blocks of 200 to 300 acres and offered these for selection. This attracted the new pioneers' families to the district, such as the McAuleys, Boyds, Andersons, Stevens, Colemans, Griffiths, McRaes, King and others to acquire land along Taylors Road and in the Western part of St. ...The most significant phase in the settlement of St. Albans occurred in the early 1900s when the Closer Settlement board subdivided Overnewton Estate into blocks of 200 to 300 acres and offered these for selection. This attracted the new pioneers' families to the district, such as the McAuleys, Boyds, Andersons, Stevens, Colemans, Griffiths, McRaes, King and others to acquire land along Taylors Road and in the Western part of St. Albans through to Sydenham.The stories in this document are about the families who are directly connected to the above era or came somewhat later, but all have contributed to the development of community. They are stories about transition of St. Albans from a sparse rural district to a number of crowded suburban neighborhoods.Stories About St. Albans Celebrating 125 Years Marion McAuley John Stevens Self and Goddard Jimmy Knowles Isabelle Davidson John Perrett Fred Barlowst. albans, john stevens, self and goddard, jimmy knowles, isabelle davidson, john perrett, fred barlow, marion mcauley -
 Melbourne Tram Museum
Certificate, Hawthorn Tramways Trust (HTT), "Hawthorn Tramways Trust - Certificate of Competency as Motorman", 1919
... St, opposite Town Hall, telephone 108W. Most certificates issue 29.12.1919. Certificates 1 to 58 issued by HTT 59 and 60 issue with HTT crossed out and MMTB written in. 61 to 75 and 92 to 99 removed from book and No. 100 removed altogether. No. 74 is loose. See related documents for a list of the names. "Hawthorn Tramways Trust - Certificate of Competency as Motorman" Certificate Hawthorn Tramways Trust (HTT) H. Cosgrove P. Clarke G. L. E. Moore T. Lewin A. Gregory T. Cooper M. McRae ...Bound book of 100 Certifications - "Hawthorn Tramways Trust - Certificate of Competency as Motorman". Consists of 100 pages of certificates, numbered 1 to 100, with butt of each certificate retained in the book. Bound with heavy card covers, red coloured on the outside of the covers, stapled with black binding material. Each Certificate numbered, in top left hand corner, giving date, employee name, date of birth and signed or initialled by the Engineer and Manager. In the top left hand corner of the book is printers logos - The Prahran Telegraph Printing Co, King St, opposite Town Hall, telephone 108W. Most certificates issue 29.12.1919. Certificates 1 to 58 issued by HTT 59 and 60 issue with HTT crossed out and MMTB written in. 61 to 75 and 92 to 99 removed from book and No. 100 removed altogether. No. 74 is loose. See related documents for a list of the names.See separate List - located in box 01-03-05trams, tramways, hawthorn tramways trust, htt, motormen, certificates -
 Melbourne Tram Museum
Document - Memorandum, Melbourne & Metropolitan Tramways Board (MMTB), Bands Festival - St Kilda Cricket Ground, 27/09/1946 12:00:00 AM
... Bands Festival - St Kilda Cricket Ground Document Memorandum Melbourne & Metropolitan Tramways Board (MMTB) JM Harry, Mr McLean, Mr Mazoletti, Mr Cliff, Mr Lawrence, Mr McRae ...5 memos from Dist Traffic Supt SS relating to tram arrangements for event at St Kilda Cricket Ground on Sunday 29 September 1946."Band Festival @ St Kilda Grd Sunday 29/9/46" written in blue pencil on first memo. Also has "Dist Supt" in black penciltrams, tramways, instructions, events -
 Melbourne Tram Museum
Document - Memorandum, Melbourne & Metropolitan Tramways Board (MMTB), Head of the River Boat Races, Apr. 1946
... Trams tramways Letters Instructions Events Hanna St Depot Malvern Depot Glenhuntly Tram Depot Hawthorn Depot Camberwell Depot Memos from Dist Traffic Supt SS about the Head of the River Boat Races held Wednesday 10th and Saturday 13th April, 1946. Head of the River Boat Races Document Memorandum Melbourne & Metropolitan Tramways Board (MMTB) JM Harry, Mr McCutchan, Mr Mazoletti, Mr Cliff, Mr Fisher, Mr Head, Mr Taylor, Mr McRae, EW Davidson ...Memos from Dist Traffic Supt SS about the Head of the River Boat Races held Wednesday 10th and Saturday 13th April, 1946.trams, tramways, letters, instructions, events, hanna st depot, malvern depot, glenhuntly tram depot, hawthorn depot, camberwell depot -
 Melbourne Tram Museum
Document - Memorandum, Melbourne & Metropolitan Tramways Board (MMTB), Visit of RAN squadron to Melbourne, 8/02/1946 12:00:00 AM
... St Depot Malvern Depot Glenhuntly Tram Depot Camberwell Depot Central Bus Garage Notations written in pencil on several memos. Visit of RAN squadron to Melbourne January 1946 Letter from HS Wootton, Town Clerk, City of Melbourne, describing arrangements for the parade of RAN personnel through the city streets on Friday 25 January 1946. 8 memos from JM Harry, Dist Traffic Supt SS regarding tram arrangements to various inspectors. Memos dated January 1946. Visit of RAN squadron to Melbourne Document Memorandum Melbourne & Metropolitan Tramways Board (MMTB) JM Harry, Mr Taylor, Mr McRae ...Visit of RAN squadron to Melbourne January 1946 Letter from HS Wootton, Town Clerk, City of Melbourne, describing arrangements for the parade of RAN personnel through the city streets on Friday 25 January 1946. 8 memos from JM Harry, Dist Traffic Supt SS regarding tram arrangements to various inspectors. Memos dated January 1946.Notations written in pencil on several memos.trams, tramways, events, port melbourne, port melbourne depot, hanna st depot, malvern depot, glenhuntly tram depot, camberwell depot, central bus garage -
 Melbourne Tram Museum
Document - Memorandum, Melbourne & Metropolitan Tramways Board (MMTB), Parade of units of victory march personnel through city streets, 8/02/1946 12:00:00 AM
... St Depot Malvern Depot Glenhuntly Tram Depot Hawthorn Depot Camberwell Depot Port Melbourne Depot Central Bus Garage Notations written in pencil on several memos. Parade of units of victory march personnel through city streets Thursday 18 April 1946 - 1:00PM to 1:30PM 18 memos from JM Harry, Dist Traffic Supt SS regarding bus & tram arrangements to various inspectors. Memos dated 13, 15 April 1946. Parade of units of victory march personnel through city streets Document Memorandum Melbourne & Metropolitan Tramways Board (MMTB) JM Harry, Mr McCutchen, Mr Cliff, Mr Fisher, Mr Head, Mr Taylor, Mr McRae ...Parade of units of victory march personnel through city streets Thursday 18 April 1946 - 1:00PM to 1:30PM 18 memos from JM Harry, Dist Traffic Supt SS regarding bus & tram arrangements to various inspectors. Memos dated 13, 15 April 1946.Notations written in pencil on several memos.trams, tramways, events, parades, hanna st depot, malvern depot, glenhuntly tram depot, hawthorn depot, camberwell depot, port melbourne depot, central bus garage -
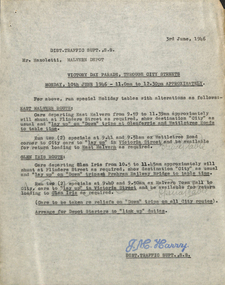 Melbourne Tram Museum
Document - Memorandum, Melbourne & Metropolitan Tramways Board (MMTB), "Victory Day Parade, through city streets", Apr. 1946
... Parade of units of victory march personnel through city streets Monday 10 June 1946 - 11:00AM to 12:30PM Memos from JM Harry, Dist Traffic Supt SS regarding tram arrangements to Mr Mazolettti, Malvern Depot, Mr McLean, Hanna St, Mr Cliff, Glenhuntly Depot, Mr Fisher, Hawthorn Depot, Mr Head, Camberwell, Mr Lawrence, Port Melbourne, Mr McRae, Central Bus Garage Memos dated 3 June 1946. ...Parade of units of victory march personnel through city streets Monday 10 June 1946 - 11:00AM to 12:30PM Memos from JM Harry, Dist Traffic Supt SS regarding tram arrangements to Mr Mazolettti, Malvern Depot, Mr McLean, Hanna St, Mr Cliff, Glenhuntly Depot, Mr Fisher, Hawthorn Depot, Mr Head, Camberwell, Mr Lawrence, Port Melbourne, Mr McRae, Central Bus Garage Memos dated 3 June 1946. ...Parade of units of victory march personnel through city streets Monday 10 June 1946 - 11:00AM to 12:30PM Memos from JM Harry, Dist Traffic Supt SS regarding tram arrangements to Mr Mazolettti, Malvern Depot, Mr McLean, Hanna St, Mr Cliff, Glenhuntly Depot, Mr Fisher, Hawthorn Depot, Mr Head, Camberwell, Mr Lawrence, Port Melbourne, Mr McRae, Central Bus Garage Memos dated 3 June 1946. Letter from JM Harry regarding bus services. Letter from HS Wootton, town clerk. Documents from ADFNotations written in pencil on memo.trams, tramways, events, parades, malvern depot, hanna st depot, hawthorn depot, central bus garage -
Glen Eira Historical Society
Document - St Giles Presbyterian Church, Murrumbeena, 15/07/1990
... McRae Dick Elmore Frank Rev. Tara Grove Brown Robert Rev. Murrumbeena Murrumbeena Road Church groups Three A5 booklets with cover page in yellow paper, pages within being white paper. 27 pages of typed information including front title page with some photographs Document St Giles Presbyterian Church, Murrumbeena ...One item about the history of this Church for later period: Three copies of the booklet ST GILES 1890 TO 1990, ONE HUNDRED YEARS IN MURRUMBEENA, dated 15/07/1990 by St Giles Publicity Committee, includes photographs.Three A5 booklets with cover page in yellow paper, pages within being white paper. 27 pages of typed information including front title page with some photographsst giles presbyterian church, murrumbeena presbyterian church, murrumbeena methodist church, ministers, sunday schools, uniting church, armstrong w. j., armstrong w. j. mrs., secomb w. e. rev., andrews mr., crabtree mr., hocking mr., hocking mrs., dandenong road, belgrave road, murrumbeena, harwood c., oakleigh carnegie circuit, sunday schools, murrumbeena methodist men’s movement, hartley f. rev., orton j. russell rev., manzoney w. s. rev., shotton h. t. rev., eldridge l. b. rev., wilcock s. c. rev., bye r. rev., slattery k. rev., archbold b. rev., sunderland h. rev., blanksby a., mcdonald n., porritt d., lukies j., reid g., orton a., reid g., orton a., reid pris, reid will, pollock lex rev., pollock mabel, evans derek rev., mclean colin rev., denholm robin rev., mcrae dick, elmore frank rev., tara grove, brown robert rev., murrumbeena, murrumbeena road, church groups -
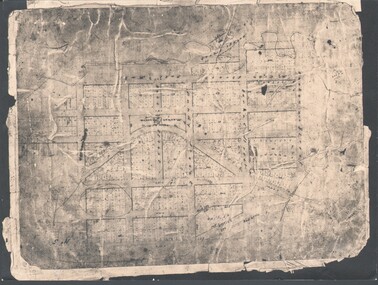 Bendigo Historical Society Inc.
Photograph - WES HARRY COLLECTION: TOWNSHIP OF SANDHURST, 1854
... It covers the area of the CBD from Mitchell (not named) to Bernal Streets and from the Bendigo Creek to Mollison St. (other than Pall Mall and McRae streets, none of these parallel streets are named)...It covers the area of the CBD from Mitchell (not named) to Bernal Streets and from the Bendigo Creek to Mollison St. (other than Pall Mall and McRae streets, none of these parallel streets are named) Photograph WES HARRY COLLECTION: TOWNSHIP OF SANDHURST ...Photograph of the Parish Plan of the Township of Sandhurst in 1854. It covers the area of the CBD from Mitchell (not named) to Bernal Streets and from the Bendigo Creek to Mollison St. (other than Pall Mall and McRae streets, none of these parallel streets are named)place, bendigo, first survey, sandhurst, first survey, bendigo creek
