Showing 24 items matching "melbourne illustrated and victoria described"
-
 Flagstaff Hill Maritime Museum and Village
Book, Melbourne Illustrated and Victoria Described
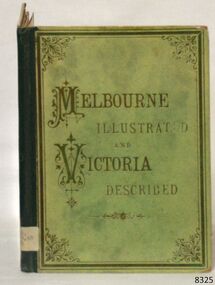
... Melbourne Illustrated and Victoria Described......Melbourne Illustrated and Victoria Described...Melbourne Illustrated and Victoria Described Author: Horace Perkins Publisher: Horace Perkins Further Information: Melbourne Illustrated and Victorian Described. ...The Visitors Handbook of Facts and Figures Melbourne Illustrated and Victoria Described Book ...This book was part of a large group of books referred to as the Pattison Collection, which belonged to the Warrnambool Public Library, part of the Warrnambool Mechanics’ Institute. About RALPH ERIC PATTISON and the ‘PATTISON COLLECTION’ The ‘Pattison Collection’ is a collection of books and records that was originally owned by the Warrnambool Mechanics’ Institute, founded in Warrnambool in 1853. By 1886 the Warrnambool Mechanics’ Institute (WMI) had grown to have a Library, Museum and Fine Arts Gallery, with a collection of “… choice productions of art and valuable specimens in almost every branch and many wonderful national curiosities, are now to be seen there, including historic relics of the town and district.” It later included a School of Design. Although it was very well patronised, the WMI was led to ask the City Council to take it over in 1911 due to a lack of financial support. In 1935 Ralph Pattison was appointed as City Librarian to establish and organise the Warrnambool Public Library as it was then called. Ralph Eric Pattison was born in Rockhampton, Queensland, in 1891. He married Maude Swan from Warrnambool in 1920 and they set up a home in Warrnambool. In 1935 when Pattison accepted the position as City Librarian for the Warrnambool City Council his huge challenge was to make a functional library within two rooms of the Mechanics’ Institute. He tirelessly cleaned, cleared and sorted a disarrayed collection of old books, jars of preserved specimens and other items reserved for exhibition in the city’s museum. He developed and updated the library with a wide variety of books for all tastes, including reference books for students; a difficult task to fulfil during the years following the Depression. He converted all of the lower areas of the building into a library, reference room and reading room for members and the public. The books were sorted and stored using a cataloguing and card index system that he had developed himself. He also prepared the upper floor of the building and established the Art Gallery and later the Museum, a place to exhibit the many old relics that had been stored for years for this purpose. One of the treasures he found was a beautiful ancient clock, which he repaired, restored and enjoyed using in his office during the years of his service there. Ralph Pattison was described as “a meticulous gentleman whose punctuality, floorless courtesy and distinctive neat dress were hallmarks of his character, and ‘his’ clock controlled his daily routine and his opening and closing of the library’s large heavy doors to the minute.” Pattison took leave from 1942 to 1945 to serve in the Royal Australian Navy, Volunteer Reserve as Lieutenant. A few years later he converted one of the Museum’s rooms into a Children’s Library, stocking it with suitable books for the younger generation. This was an instant success. In the 1950’s he had the honour of being appointed to the Victorian Library Board and received more inspiration from the monthly conferences in Melbourne. He was sadly retired in 1959 after over 23 years of service, due to the fact that he had gone over the working age of council officers. However, he continued to take a very keen interest in the continual development of the Library until his death in 1969. THE NEW WARRNAMBOOL LIBRARY When the WMI building was pulled down in 1963 a new civic building was erected on the site and the new Warrnambool Library, on behalf of the City Council, took over all the holdings of the WMI. At this time some of the items were separated and identified as the ‘Pattison Collection’, named after Pattison. Eventually, the components of the WMI were distributed from the Warrnambool Library to various places, including the Art Gallery, Historical Society and Flagstaff Hill. Later some were even distributed to other regional branches of Corangamite Regional Library and passed to and fro. It is difficult now to trace just where all of the items have ended up. The books at Flagstaff Hill Maritime Village generally display stamps and markings from Pattison as well as a variety of other institutions including the Mechanics’ Institute itself. The Pattison Collection, along with other items at Flagstaff Hill Maritime Village, was originally part of the Warrnambool Mechanics' Institute’s collection. The Warrnambool Mechanics’ Institute Collection is primarily significant in its totality, rather than for the individual objects it contains. Its contents are highly representative of the development of Mechanics' Institute libraries across Australia, particularly Victoria. A diversity of publications and themes has been amassed, and these provide clues to our understanding of the nature of and changes in the reading habits of Victorians from the 1850s to the middle of the 20th century. The collection also highlights the Warrnambool community’s commitment to the Mechanics’ Institute, reading, literacy and learning in the regions, and proves that access to knowledge was not impeded by distance. These items help to provide a more complete picture of our community’s ideals and aspirations. The Warrnambool Mechanics Institute book collection has historical and social significance for its strong association with the Mechanics Institute movement and the important role it played in the intellectual, cultural and social development of people throughout the latter part of the nineteenth century and the early twentieth century. The collection of books is a rare example of an early lending library and its significance is enhanced by the survival of an original collection of many volumes. The Warrnambool Mechanics' Institute’s publication collection is of both local and state significance. Melbourne Illustrated and Victoria Described Author: Horace Perkins Publisher: Horace Perkins Further Information: Melbourne Illustrated and Victorian Described. The Visitors Handbook of Facts and FiguresThe label on the spine cover has the typed text RA 919.45 PER flagstaff hill, warrnambool, shipwrecked coast, flagstaff hill maritime museum, maritime museum, shipwreck coast, flagstaff hill maritime village, great ocean road, book, pattison collection, warrnambool library, warrnambool mechanics’ institute, ralph eric pattison, corangamite regional library service, warrnambool city librarian, mechanics’ institute library, victorian library board, warrnambool books and records, warrnambool children’s library, melbourne illustrated and victoria described, horace perkins -
 Warrnambool and District Historical Society Inc.
Book, Melbourne illustrated & Victoria described, c.1885
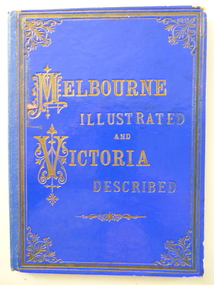
... Melbourne illustrated & Victoria described...The inscription at the front of the book is handwritten in purple ink. Melbourne illustrated & Victoria described Book ...This book was given to Henry Huntingdon Smith in 1918 by a grateful sister of a soldier killed in World War One. Private Percy Palmer was listed as coming from the Warrnambool area even though his enlistment place was given as Bannockburn. H.H.Smith (1857-1941) is an important figure in Warrnambool’s history. He had a bakery business at the corner of Lava and Fairy Streets. He was a Warrnambool Councillor and Mayor, a Hospital Committee member for 39 years, a Methodist church office-bearer and an active worker for the welfare of local returned soldiers. It was said that he greeted every returning soldier at the Warrnambool Railway Station. Mrs Sharpe was one of those who benefited from his solicitude and kindness.This is book is of antiquarian interest but more importantly it is a lovely memento of Henry Smith’s untiring concern for local soldiers returning from World War One and for their family members. This is a hard cover book of 38 pages. The cover is blue with gold lettering and gold ornamentation on the front and back covers. There are two sepia-coloured photographs of Melbourne at the front of the book and two blue stamps of the Warrnambool and District Historical Society at the front and the back of the book. The pages of the book have become detached from the binding. The inscription at the front of the book is handwritten in purple ink.‘Melbourne, Aug. 28, 1918, To Mr H. Smith as a small token for kindness shown on behalf of my dear late brother, Private Percy Palmer from N. Sharpe.’private percy palmer, world war one and warrnambool, henry huntingdon smith, warrnambool history -
 Mission to Seafarers Victoria
Booklet, Mission to Seafarers, Caring Across the Seas: The Story of The Mission to Seafarers, circa mid 2000
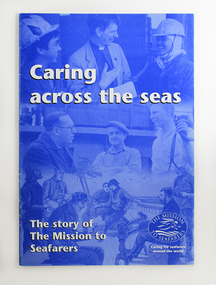
... Mission to Seafarers Victoria 717 Flinders Street Docklands melbourne booklet caring story mission to seafarers headoffice Nineteen page booklet with blue cover. The booklet describes ...Nineteen page booklet with blue cover. The booklet describes a brief account of the development of this Mission to Seafarers from its foundation in England in the 19th Century as the Mission to Seamen to its work today. It is illustrated with photos and engravings.booklet, caring, story, mission to seafarers, headoffice -
 Mission to Seafarers Victoria
Article - Newspaper clipping, The Age, For Mission to Seamen, 31 May 1941
... melbourne In 1941, a play in South Yarra was a fundraising opportunity for the Mission during wartime. Daryl Lindsay designed the programme of the evening. He was the Curator of the National Gallery of Victoria at the time. The article describes the design: "Mr. Daryl Lindsay made a special drawing for the front of the programmes, picturing a member of a merchant vessel on the bridge of his ship in a gale." He had previously illustrated ...In 1941, a play in South Yarra was a fundraising opportunity for the Mission during wartime. Daryl Lindsay designed the programme of the evening. He was the Curator of the National Gallery of Victoria at the time. The article describes the design: "Mr. Daryl Lindsay made a special drawing for the front of the programmes, picturing a member of a merchant vessel on the bridge of his ship in a gale." He had previously illustrated the Mission's 1925 calendar.Shows the association with Melbourne's artworld.daryl lindsay, artists, fundraising, padre lavender, lady macpherson, reverend c. g. lavender, ngv -
 City of Moorabbin Historical Society (Operating the Box Cottage Museum)
Book, Carroll, Brian, Early Melbourne sketchbook, 1977
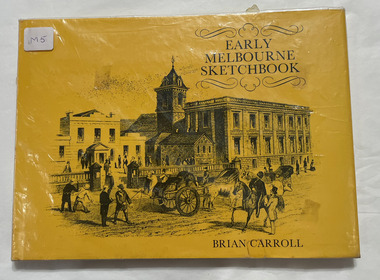
... Victoria's capital city: Batman, Fawkner, Bourke, La Trobe. In addition, there is a wealth of information about Melbourne's buildings and landmarks - places such as St Francis', the Post Office, the Town Hall, Princes Bridge, and Young and Jackson's. Early Melbourne Sketchbook describes ...In 1839 a runaway horse crashed into a tree stump that stood in the middle of Bourke Street; and in 1840 there were holes in Collins Street so deep that a child was nearly drowned in one. Early Melbourne Sketchbook recaptures the exciting early days of the city, days when rainy weather rendered Elizabeth Street impassable without a punt, and when Melbourne's first city councillor was elected on the promise of free beer to his constituents. Brian Carroll has sought out an interesting collection of contemporary illustrations to take us back to the beginning of Melbourne, from the original discovery of Port Phillip in 1802. David Collins' abortive settlement at Sullivan's Bay was abandoned in 1803, and it was not until 1835 that John Batman settled on his now famous 'place for a village'. Here are fascinating stories of the men who founded and shaped Victoria's capital city: Batman, Fawkner, Bourke, La Trobe. In addition, there is a wealth of information about Melbourne's buildings and landmarks - places such as St Francis', the Post Office, the Town Hall, Princes Bridge, and Young and Jackson's. Early Melbourne Sketchbook describes vividly the historical development and cultural growth of the city that was to become Australia's financial capital and its second largest city. (Inside cover)62 pages : illustratednon-fictionIn 1839 a runaway horse crashed into a tree stump that stood in the middle of Bourke Street; and in 1840 there were holes in Collins Street so deep that a child was nearly drowned in one. Early Melbourne Sketchbook recaptures the exciting early days of the city, days when rainy weather rendered Elizabeth Street impassable without a punt, and when Melbourne's first city councillor was elected on the promise of free beer to his constituents. Brian Carroll has sought out an interesting collection of contemporary illustrations to take us back to the beginning of Melbourne, from the original discovery of Port Phillip in 1802. David Collins' abortive settlement at Sullivan's Bay was abandoned in 1803, and it was not until 1835 that John Batman settled on his now famous 'place for a village'. Here are fascinating stories of the men who founded and shaped Victoria's capital city: Batman, Fawkner, Bourke, La Trobe. In addition, there is a wealth of information about Melbourne's buildings and landmarks - places such as St Francis', the Post Office, the Town Hall, Princes Bridge, and Young and Jackson's. Early Melbourne Sketchbook describes vividly the historical development and cultural growth of the city that was to become Australia's financial capital and its second largest city. (Inside cover)melbourne, historic buildings -
 Federation University Historical Collection
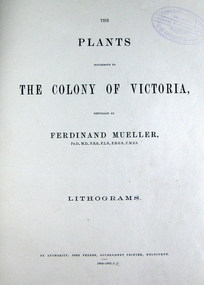
Book, The Plants Indigenous to the Colony of Victoria, 1865 (exact); "1864-1865, CR"
... describing a large number of unknown to Western science plants. He wrote a few papers to German periodicals on botanical subjects. In 1851, Mueller moved to Melbourne, capital of the new colony of Victoria. ...Baron Sir Ferdinand Jacob Heinrich von Mueller was born in Germany on 30 June 1825. Ferdinand was a German-Australian physician, geographer, and a botanist. After passing the pharmaceutical examinations he studied botany at Kiel University. In 1847 he received the degree of Doctor of Philosophy from Kiel University.when he was 21 years old for a thesis on the flora of Schleswig-Holstein. In 1847, he moved to Adelaide, Australia and worked as a chemist. From 1848 to 1852 he travelled through the colony, discovering and describing a large number of unknown to Western science plants. He wrote a few papers to German periodicals on botanical subjects. In 1851, Mueller moved to Melbourne, capital of the new colony of Victoria. In 1853, He was appointed Government Botanist for Victoria by Governor Charles La Trobe. In 1873, Ferdinand received an honorary doctorate of the University of Rostock. In 1883, he was awarded the Clarke Medal by the Royal Society of New South Wales. He published many volumes on the Victorian plants. Many of Australian geographical features were named after him such as: the Mueller Ranges (WA), Muellers Range (Qld), Mount Mueller (in WA, NT, Tas and Vic) and many more. Mueller died in Melbourne on 10 October 1896 and is buried in the St. Kilda Cemetery A green cloth hard cover book. Title and author's name is engraved in gold on spine. It includes an introduction, a table of contents and plates. Lithograms in b/w. Each plate accompanied by a page with descriptive print. Number of plates XIII-LXXI. No. of supplement plates XII-XVII. The book illustrates Victorian plants and outlines the principal characters of those species. This book is No 1290 in the Original Register of Books (Cat. No. 005)Hand written pencil notes on contents page. Stamped throughout with "The School of Mines, Industries & Science, Ballarat. Ingenio Effodere Opes. In the University of Melbourne."australia, botany victoria, plants, ferdinand mueller, ferdinand von mueller, biodiversity, flora -
 Alfred Hospital Nurses League - Nursing History Collection
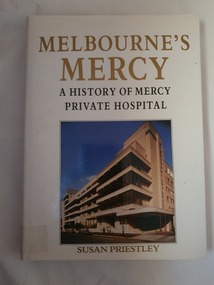
Book - Illustrated book, Susan Priestly, Melbourne's Mercy: a history of Mercy Private Hospital, 1990
... Mercy Private Hospital-Melbourne Mercy Maternity Hospital-Melbourne St Benedict's Hospital-Malvern Hospitals-Victoria East Melbourne This illustrated book is a history of the Mercy private Hospital in Melbourne. It describes ...This illustrated book is a history of the Mercy private Hospital in Melbourne. It describes the work of the Sisters of Mercy, first at St Benedict's hospital Malvern (opened 1920) and then from December 1934 at the Mercy Private Hospital in East Melbourne. Also included is a history of the Mercy Maternity Hospital, that opened in East Melbourne in 1971. The period covered by the book extends to the mid 1980's. The text is enlivened by anecdotes of doctors, nurses, other staff and patients.Illustrated hardcover book with dust jacket. Book is bound in white, Melbourne's Mercy in gilt on front cover, Melbourne's Mercy, authors surname and publisher's mark in gilt on spine. Dust jacket has a white background, with full title and authors full name on front, Melbourne's Mercy, authors surname and publisher's mark on spine. Also on front cover is a photograph of the hospital [ca.1990]. On the back cover there is a coloured photograph of the Bronze Dove sculpture (crafted by Flynn Silver, Kyneton).non-fictionThis illustrated book is a history of the Mercy private Hospital in Melbourne. It describes the work of the Sisters of Mercy, first at St Benedict's hospital Malvern (opened 1920) and then from December 1934 at the Mercy Private Hospital in East Melbourne. Also included is a history of the Mercy Maternity Hospital, that opened in East Melbourne in 1971. The period covered by the book extends to the mid 1980's. The text is enlivened by anecdotes of doctors, nurses, other staff and patients.mercy private hospital-melbourne, mercy maternity hospital-melbourne, st benedict's hospital-malvern, hospitals-victoria, east melbourne -
 Victorian Aboriginal Corporation for Languages
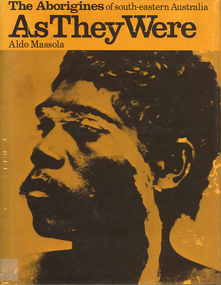
Book, Aldo Massola, The Aborigines of south-eastern Australia : as they were, 1971
... Victoria &? other myths illustrating origins of fire &? natural rock formations, mythical beasts (Bunyip, Mindie), stellar beliefs; magic, medicine men, powers, native remedies for sickness, describes ceremony held in Melbourne, 1847 to avert evil, sorcery, pointing bone, love magic, rain makers; messengers, appearance, etiquette, message sticks; p.54-71; Rock art, motifs, colours, decorative art, engraving of utensils, rock engravings, manufacture &? ...Victoria &? other myths illustrating origins of fire &? natural rock formations, mythical beasts (Bunyip, Mindie), stellar beliefs; magic, medicine men, powers, native remedies for sickness, describes ceremony held in Melbourne, 1847 to avert evil, sorcery, pointing bone, love magic, rain makers; messengers, appearance, etiquette, message sticks; p.54-71; Rock art, motifs, colours, decorative art, engraving of utensils, rock engravings, manufacture &? ...Contents: p.1-3; Origins, arrival in Australia; p.4-9; How they lived - camp sites, dating (including carbon dating); p.10-27; Physical appearance, skin colour, hair, clothing, body ornaments, cicatrization; exchange system, distribution of food, marriage &? sexual relations; the tribe - structure, relationship to land, territory, gives map showing locations of tribes, New South Wales, Victoria &? eastern South Australia, leadership, government, division of labour, status of women, estimated population at white settlement, density of population (Victoria); p.28-31; Language - names &? naming, reproduces Wembawemba vocabulary, notes use of secret languages, gives 12 rules for pronounciation; p.32-53; Religion, spirit beliefs, totemism, moieties, phratries, marriage rules; mythology, gives eaglehawk &? crow myth from Lake Victoria &? other myths illustrating origins of fire &? natural rock formations, mythical beasts (Bunyip, Mindie), stellar beliefs; magic, medicine men, powers, native remedies for sickness, describes ceremony held in Melbourne, 1847 to avert evil, sorcery, pointing bone, love magic, rain makers; messengers, appearance, etiquette, message sticks; p.54-71; Rock art, motifs, colours, decorative art, engraving of utensils, rock engravings, manufacture &? use of pigments, engraving techniques; trade system, objects bartered, meeting places for trade (Victoria), map shows possible routes (south east Australia); corroborees, purpose, body ornaments &? decorations, musical instruments; p.72-93; Ceremonial life, marriage, punishment for infidelity, birth, childhood, games &? amusements, initiation, etiquette of visiting tribes, details of ceremony, womens role, earth figures &? ground designs, bull roarers, female puberty ceremonies; p.94-133; Shelters, fire making, cooking, construction of canoes, wooden implements, use of reeds, animal skins &? sinews, shells; stone tools, cylindro conical stones, scrapers, knives &? microliths; hunting weapons, spear, other methods pits, nets; fishing methods &? spears, traps; food sharing, womens responsibilities for collecting, digging stick, cooking methods, insect foods, plant foods, water resources; manufacture &? use of spears, spear throwers, shields, clubs, boomerangs; inter- &? intratribal fighting; p.134-147; Death, disposal of body - eating of the dead, burial, cremation, platform exposure, dendroglyphs (N.S.W.), Aboriginal burial grounds (Darling &? Murray Rivers), mourning, widowhood, kopi caps (N.S.W.), causes of death, inquest ceremonies, revenge expedition, after death beliefs; p.148-157; The end of the tribes white settlement &? its impact on Aboriginal life, friction between natives &? settlers, establishment of Protectorates; copiously illustrated throughout.maps, b&w illustrations, b&w photographswemba wemba, murray river, darling river, lake victoria -
 Whitehorse Historical Society Inc.
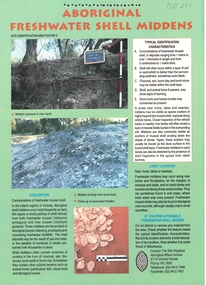
Pamphlet, Aboriginal Freshwater Shell Middens, 1996
... Whitehorse Historical Society Inc. 2-10 Deep Creek Road Mitcham melbourne aborigines middens mussels Coloured illustrated leaflet produced by Aboriginal Affairs, Victoria describing Aboriginal Freshwater shell middens. ...Coloured illustrated leaflet produced by Aboriginal Affairs, Victoria describing Aboriginal Freshwater shell middens.Coloured illustrated leaflet produced by Aboriginal Affairs, Victoria describing Aboriginal Freshwater shell middens. Brief descriptions are given of the role of freshwater mussels in Aboriginal life and instructions given on what to do if middens are found.Coloured illustrated leaflet produced by Aboriginal Affairs, Victoria describing Aboriginal Freshwater shell middens. aborigines, middens, mussels -
 Whitehorse Historical Society Inc.
Book, Aboriginal People of Victoria, 1990
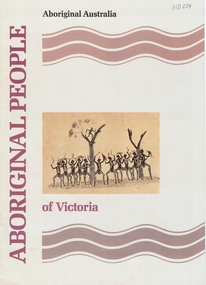
... Illustrated booklet describing Aboriginal life from pre-contact times to the present day. Illustrations (some coloured). Map. Bibliography. Aboriginal People of Victoria ...Illustrated booklet describing Aboriginal life from pre-contact times to the present day. Illustrations (some coloured).Illustrated booklet describing Aboriginal life from pre-contact times to the present day. Illustrations (some coloured). Map. Bibliography.Illustrated booklet describing Aboriginal life from pre-contact times to the present day. Illustrations (some coloured). aborigines, booklet -
 Whitehorse Historical Society Inc.
Pamphlet, Aboriginal Flaked Stone Artifacts, 1996
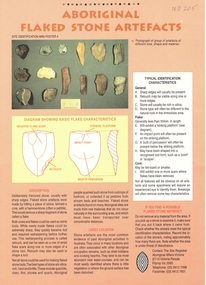
... Whitehorse Historical Society Inc. 2-10 Deep Creek Road Mitcham melbourne A4 aborigines stone tools Coloured, illustrated phamphlet produced by Aboriginal Affairs Victoria. ...Coloured, illustrated phamphlet produced by Aboriginal Affairs Victoria. Describes features of various artifacts and likely locations.Coloured, illustrated phamphlet produced by Aboriginal Affairs Victoria. Describes features of various artifacts and likely locations. Instructions are given on what to do if they are found. Methods of construction and their importance are discussed.Coloured, illustrated phamphlet produced by Aboriginal Affairs Victoria. Describes features of various artifacts and likely locations.aborigines, stone tools -
 Kew Historical Society Inc
Booklet, The Public Library of Victoria
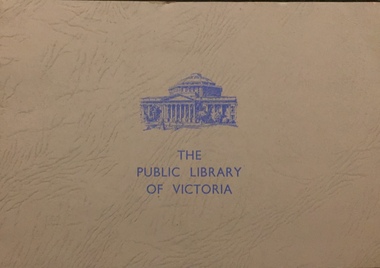
... Kew Historical Society Inc Kew Court House 188 High Street Kew melbourne public library -- melbourne state library of victoria christian-washfold collection An illustrated booklet describing the history and collections of the Public (State) Library of Victoria Small booklet produced about the State Library of Victoria The Public Library of Victoria Booklet ...An illustrated booklet describing the history and collections of the Public (State) Library of VictoriaSmall booklet produced about the State Library of Victorianon-fictionAn illustrated booklet describing the history and collections of the Public (State) Library of Victoriapublic library -- melbourne, state library of victoria, christian-washfold collection -
 Bendigo Historical Society Inc.
Photograph - Robert Green Collection - Photos of Bendigo Tramways - Sheet 3 of 8, 1960s
... Victoria Tramways prior to their abandonment. The collection also includes two archive quality sheets (Sheet A and Sheet B) of original 35mm colour slides taken by Robert Green during the same period. Sheet B also contains one slide taken by Robert's friend Keigh S King (1928-2019) who was the author of the book 'The Bendigo Tramways an illustrated history, published by the Australian Railway Historical Society Victorian Division Melbourne in February 1972; BHS Item no. 5052. The collection also includes one USB stick which contains images of all photographs described...Victoria Tramways prior to their abandonment. The collection also includes two archive quality sheets (Sheet A and Sheet B) of original 35mm colour slides taken by Robert Green during the same period. Sheet B also contains one slide taken by Robert's friend Keigh S King (1928-2019) who was the author of the book 'The Bendigo Tramways an illustrated history, published by the Australian Railway Historical Society Victorian Division Melbourne in February 1972; BHS Item no. 5052. The collection also includes one USB stick which contains images of all photographs described ...This collection contains eight archive sheets (Sheet 1 to Sheet 8) of strips of original 35mm black and white negatives of photographs taken by Robert green during the 1960s and early 1970s of the Bendigo State Electricty Commission of Victoria Tramways prior to their abandonment. The collection also includes two archive quality sheets (Sheet A and Sheet B) of original 35mm colour slides taken by Robert Green during the same period. Sheet B also contains one slide taken by Robert's friend Keigh S King (1928-2019) who was the author of the book 'The Bendigo Tramways an illustrated history, published by the Australian Railway Historical Society Victorian Division Melbourne in February 1972; BHS Item no. 5052. The collection also includes one USB stick which contains images of all photographs described above, except for one colour slide taken by Keith S Kings. Sixteen black and white prints from the images are also included.Robert Green Collection, this item contains 35 Black and White Negatives of the trams at various locations around Bendigo. Photos: 11147.3a No 21 turns out of McRae St into Nolan Street, on its way to North Bendigo 11147.3b No 5 on the way to Eaglehawk 11147.3c No 21 leaves Charing Cross towards North Bendigo, City Family Hotel in the background 11147.3d No 18 completes its run from Eaglehawk at the fountain, and is returning to the depot 11147.3e No 18 turns from McRae St into Tramway Avenue and the depot 11147.3f No 18 turns from McRae St into Tramway Avenue and the depot 11147.3g No 28 at the depot 11147.3h No 6 on its way to Golden Square 11147.3i No 6 at the Golden square Terminus, High and Maple Streets 11147.3j No 25 from Quarry Hill at the intersection of Wills and Mitchell Street 11147.3k No 2 leaves the Mitchell St railway bridge into Carpenter Street on its way to Quarry Hill 11147.3l No 21 comes into the Golden square Terminus, steeple of the Methodist church in the background 11147.3m Tram heading along McRae St in front of the School of Mines 11147.3n Tram heading along McRae St towards Pall Mall in front of the School of Mines 11147.o No 24 heading to Eaglehawk at the corner of Barnard and Forest Streets 11147.3p Three trams lined up in the depot, possible early morning or evening 11147.3q Tram No 21 at the North Bendigo Terminus, possible early morning or evening 11147.3s Tram leaving the Eaglehawk Town Hall in the dark 11147.3t View up Pall Mall towards the fountain from Mundy Street intersection 11147.3u Birney Car No 28 Special leaving the depot, crossing the Back Creek 11147.3w Birney Car No 28 Special at Eaglehawk Canterbury Park 11147.3x No 28 Birney Car Special hading to Eaglehawk at Iron Bark, just past the Marong Road turn-off at Iron Bark 11147.3y No 28 Birney Car Special heading to Eaglehawk at Long Gully, opposite the Manchester Arms Hotel 11147.3z No 28 Birney Car Special 11147aa No 28 Birney Car Special comes into the Eaglehawk Terminus 11147ab No 28 Birney Car Special heads down view St past the Rifle Brigade Hotel 11147ac No 28 Birney Car Special heads down Pall Mall past the Court House Hotel 11147.3ad No 5 to Eaglehawk runs up McCrae St in front of the School of Mines 11147.3ae No 28 Birney Car passes the Mundy St intersection with McRae St heading to the fountain 11147.3af No 3 passes the Mundy St intersection with McRae St heading to Eaglehawk 11147.3ah Tram passes the School of Mines in McRae St heading to the fountain 11147.3ai Birney Car Tram passes the School of Mines in McRae St heading to the fountain 11147.3aj Tramways High Electrical termination boxkeith s king, bendigo, trams, robert green -
 Bendigo Historical Society Inc.
Photograph - Robert Green Collection - Photos of Bendigo Tramways - Sheet B of 10, 1960s
... Victoria Tramways prior to their abandonment. The collection also includes two archive quality sheets (Sheet A and Sheet B) of original 35mm colour slides taken by Robert Green during the same period. Sheet B also contains one slide taken by Robert's friend Keigh S King (1928-2019) who was the author of the book 'The Bendigo Tramways an illustrated history, published by the Australian Railway Historical Society Victorian Division Melbourne in February 1972; BHS Item no. 5052. The collection also includes one USB stick which contains images of all photographs described...Victoria Tramways prior to their abandonment. The collection also includes two archive quality sheets (Sheet A and Sheet B) of original 35mm colour slides taken by Robert Green during the same period. Sheet B also contains one slide taken by Robert's friend Keigh S King (1928-2019) who was the author of the book 'The Bendigo Tramways an illustrated history, published by the Australian Railway Historical Society Victorian Division Melbourne in February 1972; BHS Item no. 5052. The collection also includes one USB stick which contains images of all photographs described ...This collection contains eight archive sheets (Sheet 1 to Sheet 8) of strips of original 35mm black and white negatives of photographs taken by Robert green during the 1960s and early 1970s of the Bendigo State Electricty Commission of Victoria Tramways prior to their abandonment. The collection also includes two archive quality sheets (Sheet A and Sheet B) of original 35mm colour slides taken by Robert Green during the same period. Sheet B also contains one slide taken by Robert's friend Keigh S King (1928-2019) who was the author of the book 'The Bendigo Tramways an illustrated history, published by the Australian Railway Historical Society Victorian Division Melbourne in February 1972; BHS Item no. 5052. The collection also includes one USB stick which contains images of all photographs described above, except for one colour slide taken by Keith S Kings. Sixteen black and white prints from the images are also included.Robert Green Collection, this item contains 20 Colour Slides of the trams at various locations around Bendigo. Photos: 11147.10a Tram in the darkness, sunset or morning 11147.10b Coming off the railway Line bridge towards Eaglehawk 11147.10c Coming on to the railway Line bridge from Eaglehawk 11147.10d The Quarry Hill and Eaglehawk trams waiting to leave the fountain 11147.10e No 18 from Quarry Hill arrives at the fountain 11147.10f Getting ready to leave the fountain for Eaglehawk 11147.10g Policeman on point duty and tram at the fountain, Charing Cross 11147.10h Eaglehawk and Quarry Hill trams at the fountain 11147.10i Policeman on point duty and tram at the fountain, Charing Cross, looking down Pall Mall 11147.10j No 3 roars up View Street at the corner of McKenzie Street 11147.10k From the Rifle Brigade Hotel the Eaglehawk tram comes past the Queen Elizabeth Oval down View Street 11147.10l From the Rifle Brigade Hotel the Eaglehawk tram comes past the Queen Elizabeth Oval down View Street 11147.10m From the Rifle Brigade Hotel the Eaglehawk tram up View Street opposite the Masonic Hall 11147.10n From the Rifle Brigade Hotel the Eaglehawk tram goes past the Queen Elizabeth Oval up View Street 11147.10o From the Rifle Brigade Hotel the Eaglehawk tram comes up View Street opposite the Masonic Hall 11147.10p From the Victoria Hotel Balcony, the Eaglehawk No 18 arrives 11147.10q From the Victoria Hotel Balcony, the Eaglehawk No 18 departs towards Bendigo 11147.10r Tram No 2 arrives into Eaglehawk 11147.10s Tram No 2 heads to Quarry Hill from California Gully (Probable) 11147.1t Tram on its way out of Long Gully along Mt Korong (Eaglehawk) Road towards Eaglehawk. Houses in the foreground, on the left is 245 Eaglehawk Road and on the right 241 Eaglehawk Road.keith s king, bendigo, trams, robert green -
Bendigo Historical Society Inc.
Mixed media - Robert Green Collection - Photos of Bendigo Tramways - USB of Images, 1960s
... Victoria Tramways prior to their abandonment. The collection also includes two archive quality sheets (Sheet A and Sheet B) of original 35mm colour slides taken by Robert Green during the same period. Sheet B also contains one slide taken by Robert's friend Keigh S King (1928-2019) who was the author of the book 'The Bendigo Tramways an illustrated history, published by the Australian Railway Historical Society Victorian Division Melbourne in February 1972; BHS Item no. 5052. The collection also includes one USB stick which contains images of all photographs described...Victoria Tramways prior to their abandonment. The collection also includes two archive quality sheets (Sheet A and Sheet B) of original 35mm colour slides taken by Robert Green during the same period. Sheet B also contains one slide taken by Robert's friend Keigh S King (1928-2019) who was the author of the book 'The Bendigo Tramways an illustrated history, published by the Australian Railway Historical Society Victorian Division Melbourne in February 1972; BHS Item no. 5052. The collection also includes one USB stick which contains images of all photographs described ...This collection contains eight archive sheets (Sheet 1 to Sheet 8) of strips of original 35mm black and white negatives of photographs taken by Robert green during the 1960s and early 1970s of the Bendigo State Electricty Commission of Victoria Tramways prior to their abandonment. The collection also includes two archive quality sheets (Sheet A and Sheet B) of original 35mm colour slides taken by Robert Green during the same period. Sheet B also contains one slide taken by Robert's friend Keigh S King (1928-2019) who was the author of the book 'The Bendigo Tramways an illustrated history, published by the Australian Railway Historical Society Victorian Division Melbourne in February 1972; BHS Item no. 5052. The collection also includes one USB stick which contains images of all photographs described above, except for one colour slide taken by Keith S Kings. Sixteen black and white prints from the images are also included.Robert Green Collection, this item 11147.11a contains images scanned from eight plastic archival sheets of black and white negatives and colour slides.keith s king, bendigo, trams, robert green -
 Bendigo Historical Society Inc.
Photograph - Robert Green Collection - Photos of Bendigo Tramways - Sheet 5 of 8, 1960s
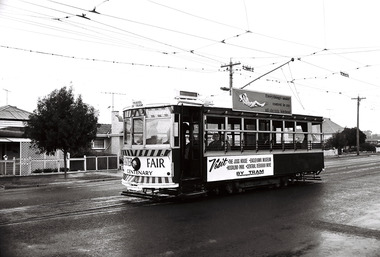
... Victoria Tramways prior to their abandonment. The collection also includes two archive quality sheets (Sheet A and Sheet B) of original 35mm colour slides taken by Robert Green during the same period. Sheet B also contains one slide taken by Robert's friend Keigh S King (1928-2019) who was the author of the book 'The Bendigo Tramways an illustrated history, published by the Australian Railway Historical Society Victorian Division Melbourne in February 1972; BHS Item no. 5052. The collection also includes one USB stick which contains images of all photographs described...Victoria Tramways prior to their abandonment. The collection also includes two archive quality sheets (Sheet A and Sheet B) of original 35mm colour slides taken by Robert Green during the same period. Sheet B also contains one slide taken by Robert's friend Keigh S King (1928-2019) who was the author of the book 'The Bendigo Tramways an illustrated history, published by the Australian Railway Historical Society Victorian Division Melbourne in February 1972; BHS Item no. 5052. The collection also includes one USB stick which contains images of all photographs described ...This collection contains eight archive sheets (Sheet 1 to Sheet 8) of strips of original 35mm black and white negatives of photographs taken by Robert green during the 1960s and early 1970s of the Bendigo State Electricty Commission of Victoria Tramways prior to their abandonment. The collection also includes two archive quality sheets (Sheet A and Sheet B) of original 35mm colour slides taken by Robert Green during the same period. Sheet B also contains one slide taken by Robert's friend Keigh S King (1928-2019) who was the author of the book 'The Bendigo Tramways an illustrated history, published by the Australian Railway Historical Society Victorian Division Melbourne in February 1972; BHS Item no. 5052. The collection also includes one USB stick which contains images of all photographs described above, except for one colour slide taken by Keith S Kings. Sixteen black and white prints from the images are also included.Robert Green Collection, this item contains 23 Black and White Negatives of the trams at various locations around Bendigo. Photos: 11147.5a Birney car decked out in advertising for the Bendigo Easter Fair 11147.5b Birney car decked out in advertising for the Bendigo Easter Fair heading to North Bendigo in Mcrae St 11147.5c Birney car decked out in advertising for the Bendigo Easter Fair heading to North Bendigo in Mcrae St passing No 17 and another tram approaching from the depot 11147.5d Birney car decked out in advertising for the Bendigo Easter Fair heading into the depot in Tramway Avenue 11147.5e No 18 and old shop front 11147.5f Tram Turning into Tramways Avenue from Mcrae St 11147.5g Three trams at the Golden Square Terminus in High Street 11147.5h No 18 tram in Mcrae Street passing by Tramways Avenue to North Bendigo 11147.5i No 21 returning to the Tramways Avenue Depot off Mcrae Street 11147.5j No 21 returning to the Tramways Avenue Depot off Mcrae Street 11147.5k No 21 returning to the Tramways Avenue Depot crossing the Back Creek 11147.5l No 21 returning to the Tramways Avenue Depot 11147.5m No 21 returning to the Tramways Avenue Depot with the scrubber tram on the left 11147.5n No 21 in the Tramways Avenue Depot 11147.5o Nos 18 and 17 pass at the Golden Square Terminus in High St 11147.5p No 17 on its way to the North Bendigo Terminus 11147.5q No 17 turns from the North Bendigo Terminus into Finn Street 11147.5r No 17 heading to the North Bendigo Terminus along Thunder Street 11147.5s No 17 at the North Bendigo Terminus off Finn Street 11147.5t Train heading from the Swan Hill direction to Bendigo off the Finn Street crossing 11147.5u No 25 heading to Golden Square 11147.5v No 25 turns from Weeroona Avenue into Caledonia Street 11147.5w The Easter Fair, intersection of Pall Mall and Williamson St with Myer Stores in the backgroundkeith s king, bendigo, trams, robert green -
 Bendigo Historical Society Inc.
Photograph - Robert Green Collection - Photos of Bendigo Tramways - Sheet 6 of 8, 1960s
... Victoria Tramways prior to their abandonment. The collection also includes two archive quality sheets (Sheet A and Sheet B) of original 35mm colour slides taken by Robert Green during the same period. Sheet B also contains one slide taken by Robert's friend Keigh S King (1928-2019) who was the author of the book 'The Bendigo Tramways an illustrated history, published by the Australian Railway Historical Society Victorian Division Melbourne in February 1972; BHS Item no. 5052. The collection also includes one USB stick which contains images of all photographs described...Victoria Tramways prior to their abandonment. The collection also includes two archive quality sheets (Sheet A and Sheet B) of original 35mm colour slides taken by Robert Green during the same period. Sheet B also contains one slide taken by Robert's friend Keigh S King (1928-2019) who was the author of the book 'The Bendigo Tramways an illustrated history, published by the Australian Railway Historical Society Victorian Division Melbourne in February 1972; BHS Item no. 5052. The collection also includes one USB stick which contains images of all photographs described ...This collection contains eight archive sheets (Sheet 1 to Sheet 8) of strips of original 35mm black and white negatives of photographs taken by Robert green during the 1960s and early 1970s of the Bendigo State Electricty Commission of Victoria Tramways prior to their abandonment. The collection also includes two archive quality sheets (Sheet A and Sheet B) of original 35mm colour slides taken by Robert Green during the same period. Sheet B also contains one slide taken by Robert's friend Keigh S King (1928-2019) who was the author of the book 'The Bendigo Tramways an illustrated history, published by the Australian Railway Historical Society Victorian Division Melbourne in February 1972; BHS Item no. 5052. The collection also includes one USB stick which contains images of all photographs described above, except for one colour slide taken by Keith S Kings. Sixteen black and white prints from the images are also included.Robert Green Collection, this item contains 33 Black and White Negatives of the trams at various locations around Bendigo. Photos: 11147.6a Two trams passing at the loop in Eaglehawk Road at the Philpot Street intersection 11147.6b Two trams passing at the loop in Eaglehawk Road at the Philpot Street intersection 11147.6c Two trams passing at the loop in Eaglehawk Road at the Philpot Street intersection 11147.6d Two trams leave the loop in Eaglehawk Road at the Philpot Street intersection 11147.6e No 18 heading out of Iron Bark to Long Gully along Eaglehawk Road 11147.6f No 25 Special head down View Street at the McKenzie Street intersection 11147.6g The No 25 Special from Eaglehawk arrives at the fountain 11147.h No 2 to Eaglehawk comes up View Street past the Infant Welfare Centre 11147.6i The Quarry Hill tram passes the Carpenter and Houston St intersection at the corner of the cemetery 11147.6j The Quarry Hill tram passes the Carpenter and Houston St intersection at the corner of the cemetery 11147.6k The Quarry Hill tram approached the terminus at the Cemetery gates 11147.6l The Quarry Hill tram at the terminus at the Cemetery gates picking up passengers 11147.6m The Quarry Hill tram at the terminus at the Cemetery gates picking up passengers 11147.6n The Quarry Hill tram at the terminus at the Cemetery gates picking up passengers 11147.6o Tram and large crown in front of the Eaglehawk Town Hall 11147.6p Tram and large crown in front of the Eaglehawk Town Hall 11147.6q Tram and large crown in front of the Eaglehawk Town Hall 11147.6q Two Trams and large crown in front of the Eaglehawk Town Hall 11147.6r Two Trams and large crown in front of the Eaglehawk Town Hall 11147.6s Passengers on the "Last Tram" 11147.6t Passengers on the "Last Tram" 11147.6u Passengers on the "Last Tram" 11147.6v Two trams leaving the depot crossing the Back Creek 11147.6w The Scrubber tram in the depot 11147.6x Birney Car 30 tram in the depot 11147.6y Birney Car 29 and two others arriving at the depot 11147.6z Birney Car 11 and two others arriving at the depot 11147.6aa No 11 Birney Car at the depot 11147.6ab No 28 Birney Car at the depot 11147.6ac Nos 29, 11 and 25 at the depot 11147.6ad Birney Car 28 arrives at the depot 11147.6ae Birney Cars Nos 30 and 29 in the depot 11147.6af The Scrubber Car at the depot 11147.6ag Four trams and one driver at the depot TMS Bendigo Tour 24 March 1968keith s king, bendigo, trams, robert green -
 Bendigo Historical Society Inc.
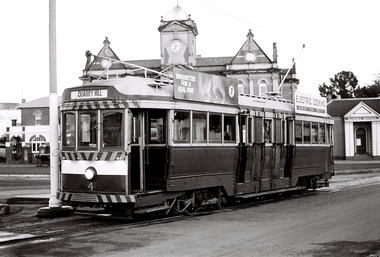
Photograph - Robert Green Collection - Photos of Bendigo Tramways - Sheet 4 of 8, 1960s
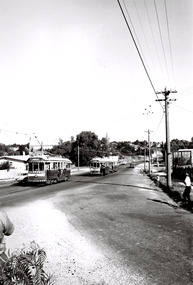
... Victoria Tramways prior to their abandonment. The collection also includes two archive quality sheets (Sheet A and Sheet B) of original 35mm colour slides taken by Robert Green during the same period. Sheet B also contains one slide taken by Robert's friend Keigh S King (1928-2019) who was the author of the book 'The Bendigo Tramways an illustrated history, published by the Australian Railway Historical Society Victorian Division Melbourne in February 1972; BHS Item no. 5052. The collection also includes one USB stick which contains images of all photographs described...Victoria Tramways prior to their abandonment. The collection also includes two archive quality sheets (Sheet A and Sheet B) of original 35mm colour slides taken by Robert Green during the same period. Sheet B also contains one slide taken by Robert's friend Keigh S King (1928-2019) who was the author of the book 'The Bendigo Tramways an illustrated history, published by the Australian Railway Historical Society Victorian Division Melbourne in February 1972; BHS Item no. 5052. The collection also includes one USB stick which contains images of all photographs described ...This collection contains eight archive sheets (Sheet 1 to Sheet 8) of strips of original 35mm black and white negatives of photographs taken by Robert green during the 1960s and early 1970s of the Bendigo State Electricty Commission of Victoria Tramways prior to their abandonment. The collection also includes two archive quality sheets (Sheet A and Sheet B) of original 35mm colour slides taken by Robert Green during the same period. Sheet B also contains one slide taken by Robert's friend Keigh S King (1928-2019) who was the author of the book 'The Bendigo Tramways an illustrated history, published by the Australian Railway Historical Society Victorian Division Melbourne in February 1972; BHS Item no. 5052. The collection also includes one USB stick which contains images of all photographs described above, except for one colour slide taken by Keith S Kings. Sixteen black and white prints from the images are also included.Robert Green Collection, this item contains 22 Black and White Negatives of the trams at various locations around Bendigo. Photos: 11147.4a Tram at Carpenter St Quarry Hill, Cemetery Gates Terminus 11147.4b Tram and Conductor at Carpenter St Quarry Hill, Cemetery Gates Terminus 11147.4c Overhead Pole, wires and tram stop sign; and end of section sign 11147.4d Overhead Pole, wires and tram stop sign; and end of section sign, in View Street 11147.4e Quarry Hill, Eaglehawk and Golden Square Trams meeting at the Fountain, Charing Cross 11147.4f Quarry Hill, Eaglehawk trams and overhead sign at the fountain roundabout 11147.4g Tram line Point at the Fountain 11147.4h All lines cross at the fountain 11147.4i Turning Caution sign at Tramways Avenue (to the depot) and McRae Street 11147.4j Trams stop by request sign 11147.4k No 4 at the intersection of Eaglehawk and Havilah Roads, Long Gully 11147.4l No 4 to Quarry Hill picking up passengers in Eaglehawk Road 11147.4m No 30 Birney Car heading to Golden Square 11147.4n Birney Car crossing the creek 11147.4o Birney Car No 30 leaving Golden Square in High Street 11147.4p No 3 heading to Eaglehawk 11147.4q No 25 heading to Quarry Hill in Carpenter St possibly 11147.4r Three trams at the loop in Carpenter St Quarry Hill 11147.4s Two trams at the Quarry Hill Terminus Carpenter St 11147.4t Two trams at Canterbury Park Eaglehawk 11147.4u Birney Car 29 Special at Eaglehawk Terminus 11147.4v Passing No 26 at Eaglehawkkeith s king, bendigo, trams, robert green -
 Bendigo Historical Society Inc.
Photograph - Robert Green Collection - Photos of Bendigo Tramways - Sheet 8 of 10, 1960s
... Victoria Tramways prior to their abandonment. The collection also includes two archive quality sheets (Sheet A and Sheet B) of original 35mm colour slides taken by Robert Green during the same period. Sheet B also contains one slide taken by Robert's friend Keigh S King (1928-2019) who was the author of the book 'The Bendigo Tramways an illustrated history, published by the Australian Railway Historical Society Victorian Division Melbourne in February 1972; BHS Item no. 5052. The collection also includes one USB stick which contains images of all photographs described...Victoria Tramways prior to their abandonment. The collection also includes two archive quality sheets (Sheet A and Sheet B) of original 35mm colour slides taken by Robert Green during the same period. Sheet B also contains one slide taken by Robert's friend Keigh S King (1928-2019) who was the author of the book 'The Bendigo Tramways an illustrated history, published by the Australian Railway Historical Society Victorian Division Melbourne in February 1972; BHS Item no. 5052. The collection also includes one USB stick which contains images of all photographs described ...This collection contains eight archive sheets (Sheet 1 to Sheet 8) of strips of original 35mm black and white negatives of photographs taken by Robert green during the 1960s and early 1970s of the Bendigo State Electricty Commission of Victoria Tramways prior to their abandonment. The collection also includes two archive quality sheets (Sheet A and Sheet B) of original 35mm colour slides taken by Robert Green during the same period. Sheet B also contains one slide taken by Robert's friend Keigh S King (1928-2019) who was the author of the book 'The Bendigo Tramways an illustrated history, published by the Australian Railway Historical Society Victorian Division Melbourne in February 1972; BHS Item no. 5052. The collection also includes one USB stick which contains images of all photographs described above, except for one colour slide taken by Keith S Kings. Sixteen black and white prints from the images are also included.Robert Green Collection, this item contains 22 Black and White Negatives of the trams at various locations around Bendigo. Photos: 11147.8a No 4 outside the Eaglehawk Town Hall 11147.8b No 7 at the North Bendigo Terminus 11147.8c No 18 passing the View Street and Rowan Street intersection 11147.8d No 24 and driver at the fountain 11147.8e No 7 at the fountain 11147.8f No 24 and at the fountain 11147.8g No 24 and driver at Eaglehawk 11147.8h Picking up passengers at North Bendigo Terminus 11147.8i Birney Car 30 in Finn Street North Bendigo 11147.8j No 30 has just crossed the Bendigo Creek in high St Golden Square 11147.8k No 30 has just crossed the Bendigo Creek in High St Golden Square and is passing No 2 11147.8l Nos 29 and 19 at the depot with two drivers 11147.8m No 29 comes up Pall Mall past the Williamson St intersection 11147.8n No 29 comes up Pall Mall 11147.8o No 29 at the Golden Square Terminus loop 11147.8p No 29 and another at the Golden Square Terminus 11147.8q The Pahran and Malvern Tramways Trust Logo 11147.8r Passing No 6 on the High St Loop 11147.8s Passing No 6 on the High St Loop, Sacred Heart Cathedral Spire being buit in the background 11147.8t At the Cemetery Gate Quarry Hill 11147.8u No 25 at the Bendigo Cemetery Terminus 11147.8v At the Quarry Hill Gates in Carpenter Streetkeith s king, bendigo, trams, robert green -
 Bendigo Historical Society Inc.
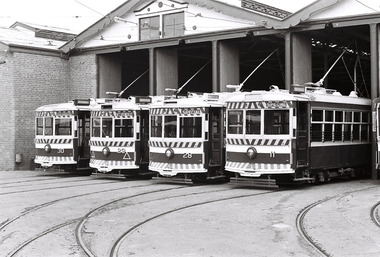
Photograph - Robert Green Collection - Photos of Bendigo Tramways - Sheet 2 of 8, 1960s
... Victoria Tramways prior to their abandonment. The collection also includes two archive quality sheets (Sheet A and Sheet B) of original 35mm colour slides taken by Robert Green during the same period. Sheet B also contains one slide taken by Robert's friend Keigh S King (1928-2019) who was the author of the book 'The Bendigo Tramways an illustrated history, published by the Australian Railway Historical Society Victorian Division Melbourne in February 1972; BHS Item no. 5052. The collection also includes one USB stick which contains images of all photographs described...Victoria Tramways prior to their abandonment. The collection also includes two archive quality sheets (Sheet A and Sheet B) of original 35mm colour slides taken by Robert Green during the same period. Sheet B also contains one slide taken by Robert's friend Keigh S King (1928-2019) who was the author of the book 'The Bendigo Tramways an illustrated history, published by the Australian Railway Historical Society Victorian Division Melbourne in February 1972; BHS Item no. 5052. The collection also includes one USB stick which contains images of all photographs described ...This collection contains eight archive sheets (Sheet 1 to Sheet 8) of strips of original 35mm black and white negatives of photographs taken by Robert green during the 1960s and early 1970s of the Bendigo State Electricty Commission of Victoria Tramways prior to their abandonment. The collection also includes two archive quality sheets (Sheet A and Sheet B) of original 35mm colour slides taken by Robert Green during the same period. Sheet B also contains one slide taken by Robert's friend Keigh S King (1928-2019) who was the author of the book 'The Bendigo Tramways an illustrated history, published by the Australian Railway Historical Society Victorian Division Melbourne in February 1972; BHS Item no. 5052. The collection also includes one USB stick which contains images of all photographs described above, except for one colour slide taken by Keith S Kings. Sixteen black and white prints from the images are also included.Robert Green Collection, this item contains 34 Black and White Negatives of the trams at various locations around Bendigo. Photos: 11147.2a No 30, 29, 28 and 11 Birney Cars lined up at the Depot 11147.2b No 30, 29, 28 and 11 Birney Cars lined up at the Depot 11147.2c No 30, 29, 28 and 11 Birney Cars lined up at the Depot 11147.2d No 30, 29, 28 and 11 Birney Cars lined up at the Depot 11147.2e No 30, 29, 28 and 11 Birney Cars lined up at the Depot 11147.2f No 30, 29, 28 Birney Cars lined up at the Depot 11147.2g No 30, 29, 28 and 11 Birney Cars lined up at the Depot 11147.2h No 30, 29, 28 and 11 Birney Cars lined up at the Depot 11147.2i No 30, 29, 28 and 11 Birney Cars and No 25 lined up at the Depot 11147.2j No 30, 29, 28 and 11 Birney Cars and No 25 lined up at the Depot 11147.2k No 28 and 11 Birney Cars lined up at the Depot 11147.2l No 30 Special leaves the depot watched by the photographer 11147.2m No 29 Special leaves the depot 11147.2n Driver and passenger inside a Birney Car 11147.2o Driver and passenger inside a Birney Car heading up Pall Mall 11147.2p The four Birney Cars in Carpenter Street, Quarry Hill Terminus at the Cemetery Gates 11147.2q The four Birney Cars in Carpenter Street, Quarry Hill Terminus at the Cemetery Gates 11147.2r The four Birney Cars in Carpenter Street, Quarry Hill Terminus at the Cemetery Gates 11147.2s The four Birney Cars in Carpenter Street, Quarry Hill Terminus at the Cemetery Gates 11147.2t The four Birney Cars at the Carpenter Street, Quarry Hill Loop 11147.2u No 28 Special Birney Car 11147.2v No 30 Special Birney Car 11147.2w The four Birney Cars at the fountain side by side getting reading to depart to Eaglehawk 11147.2x The four Birney Cars at Eaglehawk beside Canterbury Park 11147.2y The four Birney Cars at Eaglehawk beside Canterbury Park with the Drivers and the Inspector 11147.2z The four Birney Cars at Eaglehawk beside Canterbury Park 11147.2aa The four Birney Cars at Eaglehawk beside Canterbury Park 11147.2ab The four Birney Cars at Eaglehawk beside the town hall 11147.2ac Birney Car 28 passes 17 at the Long gully Manchester Arms Hotel Loop 11147.2ad No 21 and two others at the North Bendigo terminus 11147.2af Four trams heading to Golden Square in High Street 11147.2ag Four trams heading to Golden Square in High Street 11147.2ah Four trams heading at the Golden Square Terminus at Maple High Streetskeith s king, bendigo, trams, robert green -
 Bendigo Historical Society Inc.
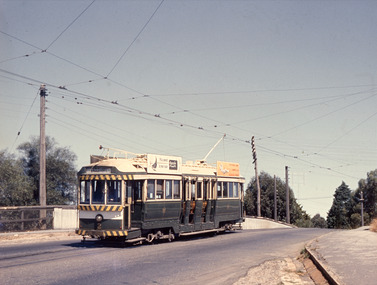
Photograph - Robert Green Collection - Photos of Bendigo Tramways - Sheet A of 10, 1972
... Victoria Tramways prior to their abandonment. The collection also includes two archive quality sheets (Sheet A and Sheet B) of original 35mm colour slides taken by Robert Green during the same period. Sheet B also contains one slide taken by Robert's friend Keigh S King (1928-2019) who was the author of the book 'The Bendigo Tramways an illustrated history, published by the Australian Railway Historical Society Victorian Division Melbourne in February 1972; BHS Item no. 5052. The collection also includes one USB stick which contains images of all photographs described...Victoria Tramways prior to their abandonment. The collection also includes two archive quality sheets (Sheet A and Sheet B) of original 35mm colour slides taken by Robert Green during the same period. Sheet B also contains one slide taken by Robert's friend Keigh S King (1928-2019) who was the author of the book 'The Bendigo Tramways an illustrated history, published by the Australian Railway Historical Society Victorian Division Melbourne in February 1972; BHS Item no. 5052. The collection also includes one USB stick which contains images of all photographs described ...This collection contains eight archive sheets (Sheet 1 to Sheet 8) of strips of original 35mm black and white negatives of photographs taken by Robert green during the 1960s and early 1970s of the Bendigo State Electricty Commission of Victoria Tramways prior to their abandonment. The collection also includes two archive quality sheets (Sheet A and Sheet B) of original 35mm colour slides taken by Robert Green during the same period. Sheet B also contains one slide taken by Robert's friend Keigh S King (1928-2019) who was the author of the book 'The Bendigo Tramways an illustrated history, published by the Australian Railway Historical Society Victorian Division Melbourne in February 1972; BHS Item no. 5052. The collection also includes one USB stick which contains images of all photographs described above, except for one colour slide taken by Keith S Kings. Sixteen black and white prints from the images are also included.Robert Green Collection, this item contains Colour Slides of the trams at various locations around Bendigo. Photos: 11147.9a No 2 to Eaglehawk leaves Carpenter Street, crosses the railway line and enters Mitchell Street 11147.9b Two Birney Cars ready to depart in Pall Mall 11147.9c Nos 30 and 28 Birney Cars ready to depart in Pall Mall 11147.9d No 30 to North Bendigo turns off Weeroona Avenue into Caledonia St at the Gas Works 11147.9e No 5 comes up View Street past Dudley House and the Masonic Hall 11147.9f No 28 Birney Car 11147.9g No 3 comes into Eaglehawk 11147.9h Nos 2 and 3 cross over at the Eaglehawk Road and Cuneen Streets Loop in Long Gully 11147.9j No 30 Birney Car crosses the Munday St and Pall Mall intersection heading for the fountain 11147.9k No 28 Birney Car comes down Nolan Street past the Lake Weeroona 11147.9l No 30 Birney Car in the darkness 11147.9m The Scrubber Car comes up Mitchell Street 11147.9n The Scrubber Car 11147.9o No 18 at Eaglehawk, Bendigo T.M.S of Vic. Ltd Photo, Sat 15 April 1972. Robert Green and John Fitzsimons holding "Last Tram Mail" 1/125 f8. Taken at 9am on the second last day of the trams.keith s king, bendigo, trams, robert green -
 Bendigo Historical Society Inc.
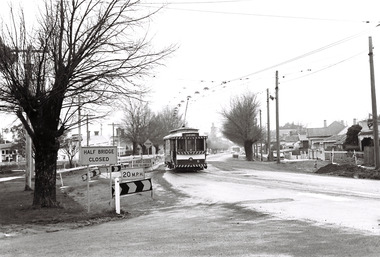
Photograph - Robert Green Collection - Photos of Bendigo Tramways - Sheet 7 of 8, 1960s
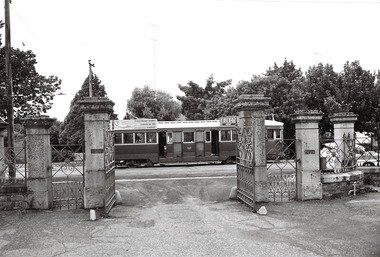
... Victoria Tramways prior to their abandonment. The collection also includes two archive quality sheets (Sheet A and Sheet B) of original 35mm colour slides taken by Robert Green during the same period. Sheet B also contains one slide taken by Robert's friend Keigh S King (1928-2019) who was the author of the book 'The Bendigo Tramways an illustrated history, published by the Australian Railway Historical Society Victorian Division Melbourne in February 1972; BHS Item no. 5052. The collection also includes one USB stick which contains images of all photographs described...Victoria Tramways prior to their abandonment. The collection also includes two archive quality sheets (Sheet A and Sheet B) of original 35mm colour slides taken by Robert Green during the same period. Sheet B also contains one slide taken by Robert's friend Keigh S King (1928-2019) who was the author of the book 'The Bendigo Tramways an illustrated history, published by the Australian Railway Historical Society Victorian Division Melbourne in February 1972; BHS Item no. 5052. The collection also includes one USB stick which contains images of all photographs described ...This collection contains eight archive sheets (Sheet 1 to Sheet 8) of strips of original 35mm black and white negatives of photographs taken by Robert green during the 1960s and early 1970s of the Bendigo State Electricty Commission of Victoria Tramways prior to their abandonment. The collection also includes two archive quality sheets (Sheet A and Sheet B) of original 35mm colour slides taken by Robert Green during the same period. Sheet B also contains one slide taken by Robert's friend Keigh S King (1928-2019) who was the author of the book 'The Bendigo Tramways an illustrated history, published by the Australian Railway Historical Society Victorian Division Melbourne in February 1972; BHS Item no. 5052. The collection also includes one USB stick which contains images of all photographs described above, except for one colour slide taken by Keith S Kings. Sixteen black and white prints from the images are also included.Robert Green Collection, this item contains 28 Black and White Negatives of the trams at various locations around Bendigo. Photos: 11147.7a No 6 to Golden Square in Mcrae Street 11147.7b No 21 to North Bendigo in Mcrae Street 11147.7c No 7 to North Bendigo in Mcrae Street 11147.7d No 7 to North Bendigo in Mcrae Street passes No 21 to Golden Square on the loop 11147.7e The Depot and Back Creek bridge 11147.7f The Depot and Back Creek bridge 11147.7g Nos 25, 23 and 30 in the depot 11147.7h The photographer in Thunder Street North Bendigo, railway line in the background 11147.7i No 21 coming up to the North Bendigo terminus in Thunder or Finn street 11147.7j No 21 leaving the North Bendigo terminus in Thunder or Finn street 11147.7k The Photographer in Thunder Street, North Bendigo 11147.7l No 21 in Thunder or Finn street 11147.7m No 21 in Thunder or Finn street 11147.7n No 17 in Eaglehawk 11147.7o No 17 in Eaglehawk 11147.7p No 26 at the top of Mitchell Street 11147.7q No 26 heading to Eaglehawk in the rain 11147.7r No 2 to Quarry Hill in the rain at the Manchester Arms Loop 11147.7s Passing Trams 11147.7t No 30 Birney Car to Quarry Hill in the rain at the Manchester Arms Loop 11147.7u No 7 to North Bendigo, the rowing Club in the background, Thunder Street 11147.7v No 7 turns into Finn Street from the North Bendigo Terminus 11147.7w The Birney Car turns into the North Bendigo Terminus from Finn Street 11147.7x The Birney Car turns into the North Bendigo Terminus from Finn Street 11147.7y Two trams at the North Bendigo Terminus 11147.7z No 24 approaches the Cemetery gates and horse hitching posts in Quarry Hill 11147.7aa The Cemetery and horse hitching posts in Quarry Hill 11147.7ab No 24 and horse hitching post in Quarry Hillkeith s king, bendigo, trams, robert green -
 Bendigo Historical Society Inc.
Photograph - Robert Green Collection - Photos of Bendigo Tramways - Sheet 1 of 8, 1960s
... Victoria Tramways prior to their abandonment. The collection also includes two archive quality sheets (Sheet A and Sheet B) of original 35mm colour slides taken by Robert Green during the same period. Sheet B also contains one slide taken by Robert's friend Keigh S King (1928-2019) who was the author of the book 'The Bendigo Tramways an illustrated history, published by the Australian Railway Historical Society Victorian Division Melbourne in February 1972; BHS Item no. 5052. The collection also includes one USB stick which contains images of all photographs described...Victoria Tramways prior to their abandonment. The collection also includes two archive quality sheets (Sheet A and Sheet B) of original 35mm colour slides taken by Robert Green during the same period. Sheet B also contains one slide taken by Robert's friend Keigh S King (1928-2019) who was the author of the book 'The Bendigo Tramways an illustrated history, published by the Australian Railway Historical Society Victorian Division Melbourne in February 1972; BHS Item no. 5052. The collection also includes one USB stick which contains images of all photographs described ...This collection contains eight archive sheets (Sheet 1 to Sheet 8) of strips of original 35mm black and white negatives of photographs taken by Robert green during the 1960s and early 1970s of the Bendigo State Electricty Commission of Victoria Tramways prior to their abandonment. The collection also includes two archive quality sheets (Sheet A and Sheet B) of original 35mm colour slides taken by Robert Green during the same period. Sheet B also contains one slide taken by Robert's friend Keigh S King (1928-2019) who was the author of the book 'The Bendigo Tramways an illustrated history, published by the Australian Railway Historical Society Victorian Division Melbourne in February 1972; BHS Item no. 5052. The collection also includes one USB stick which contains images of all photographs described above, except for one colour slide taken by Keith S Kings. Sixteen black and white prints from the images are also included.Robert Green Collection, this item contains 33 Black and White Negatives of the trams at various locations around Bendigo. Photos: 11147.1a and 11147.1b Tram on its way out of Long Gully along Mt Korong (Eaglehawk) Road towards Eaglehawk. Houses in the foreground, on the left is 245 Eaglehawk Road and on the right 241 Eaglehawk Road. 11147.1c Birney Car Tram on its way out of Long Gully along Mt Korong (Eaglehawk) Road towards Eaglehawk, looking back ove the Long Gully township. 11147.1d Birney Car Tram on its way out of Long Gully along Mt Korong (Eaglehawk) Road towards Eaglehawk. Houses in the foreground, on the left is 245 Eaglehawk Road and on the right 241 Eaglehawk Road. 11147.1e No 28 Birney Car Special 11147.1f No 28 Birney Car Special and No 2 possibly in Eaglehawk 11147.1g No 18 roars up Eaglehawk Road into Iron Bark 11147.1h Tram crossing the railway at Jobs Gully, on its way to Bendigo 11147.1i Tram crossing the railway at Jobs Gully, on its way to Eaglehawk 11147.1j Central Deborah Gold Mine 11147.1k The intersection of Reginald and Houston St, with the Cemetery on the left. 11147.1l Tram Stop on Pall Mall opposite Ezywalkins Conrner of Mitchell St 11147.1m Electrical Cable junction box 11147.1n Electrical Cable junction box 11147.1o No 18 at Canterbury Park Terminus Eaglehawk 11147.1p No 26 at the top of Mitchell St on its way to Quarry Hill 11147.1q Nos 26 and 18 at the Railway Station stop in Mitchell St 11147.1r No 18 coming down Mitchell St 11147.1s No 5 possibly in Carpenter St 11147.1t No 5 at the Cemetery Gates ready to depart the terminus 11147.1u No 5 at the Cemetery Gates ready to depart the terminus 11147.1v No 5 at the Cemetery Gates ready to depart the terminus 11147.1w Nos 18 and 5 crossover at the Fountain 11147.1x Nos 18 and 5 crossover at the Fountain 11147.1y Nos 18 and 5 crossover at the Fountain 11147.1z Heading into Long Gully past the Manchester Arms Hotel 11147.1aa No 5 loading passengers at the Eaglehawk Terminus next to Canterbury Park 11147.1ab Traffic conjestion at the loop on the way back to Bendigo 11147.1ac The Eaglehawk Terminus next to Canterbury Park 11147.1ad The Eaglehawk Terminus next to Canterbury Park 11147.1ae The Eaglehawk Terminus next to Canterbury Park 11147.1af The Eaglehawk Terminus next to Canterbury Parkkeith s king, bendigo, trams, robert green -
Bendigo Historical Society Inc.
Mixed media - Robert Green Collection - Photos of Bendigo Tramways - Black and White Prints, 1968
... Victoria Tramways prior to their abandonment. The collection also includes two archive quality sheets (Sheet A and Sheet B) of original 35mm colour slides taken by Robert Green during the same period. Sheet B also contains one slide taken by Robert's friend Keigh S King (1928-2019) who was the author of the book 'The Bendigo Tramways an illustrated history, published by the Australian Railway Historical Society Victorian Division Melbourne in February 1972; BHS Item no. 5052. The collection also includes one USB stick which contains images of all photographs described...Victoria Tramways prior to their abandonment. The collection also includes two archive quality sheets (Sheet A and Sheet B) of original 35mm colour slides taken by Robert Green during the same period. Sheet B also contains one slide taken by Robert's friend Keigh S King (1928-2019) who was the author of the book 'The Bendigo Tramways an illustrated history, published by the Australian Railway Historical Society Victorian Division Melbourne in February 1972; BHS Item no. 5052. The collection also includes one USB stick which contains images of all photographs described ...This collection contains eight archive sheets (Sheet 1 to Sheet 8) of strips of original 35mm black and white negatives of photographs taken by Robert green during the 1960s and early 1970s of the Bendigo State Electricty Commission of Victoria Tramways prior to their abandonment. The collection also includes two archive quality sheets (Sheet A and Sheet B) of original 35mm colour slides taken by Robert Green during the same period. Sheet B also contains one slide taken by Robert's friend Keigh S King (1928-2019) who was the author of the book 'The Bendigo Tramways an illustrated history, published by the Australian Railway Historical Society Victorian Division Melbourne in February 1972; BHS Item no. 5052. The collection also includes one USB stick which contains images of all photographs described above, except for one colour slide taken by Keith S Kings. Sixteen black and white prints from the images are also included.Robert Green Collection, this item 11147.12 contains 20 printed photos scanned from eight plastic archival sheets of black and white negatives, also one PDF Document entitled"Bendigo's Last Tram Mail" 11147.12v PDF The day before permanent closure of the Bendigo tramways on Sunday 16 April 1972, the Tramway Museum Society of Victoria Inc (TMSV) arranged for “Last Tram Mail” to be carried along the Eaglehawk line to simulate the once regular transport of mail around the city by tram. 5.5 x 3.5 Inch Photo Prints 11147.12a Print from Sheet 3 (11147.3ac) No 28 Birney Car Special heads down Pall Mall past the Court House Hotel 11147.12b Print from Sheet 8 (11147.8c) No 18 passing the View Street and Rowan Street intersection 11147.12c Print from Sheet 8 (11147.8u) No 25 at the Bendigo Cemetery Terminus 11147.12d Print from Sheet 5 (11147.5e) No 18 and old shop front 11147.12e Print from Sheet 7 (11147.7s) Passing Trams 11147.12f Print from Sheet 3 (11147.3s) Tram leaving the Eaglehawk Town Hall in the dark 11147.12g Print from Sheet 5 (11147.5m) No 21 returning to the Tramways Avenue Depot with the scrubber tram on the left 11147.12l Print from Sheet 6 (11147.6ag) Four trams and one driver at the depot TMS Bendigo Tour 24 March 1968. 11147.12m Print from Sheet 2 (11147.2ac) Birney Car 28 passes 17 at the Long gully Manchester Arms Hotel Loop TMS Bendigo Tour 24 March 1968 11147.12n Print from Sheet 2 (11147.2u) No 28 Special Birney Car on the Quarry Hill Line TMS Bendigo Tour 24 March 1968 11147.12o Print from Sheet 2 (11147.2v) No 30 Special Birney Car on the Quarry Hill Line TMS Bendigo Tour 24 March 1968 11147.12q Print from Sheet 2 (11147.2ab) The four Birney Cars at Eaglehawk beside the town hall TMS Bendigo Tour 24 March 1968 11147.12r Print from Sheet 6 (11147.6z) Birney Car 11 and two others arriving at the depot TMS Bendigo Tour 24 March 1968 11147.12s Print from Sheet 2 (11147.2t) The four Birney Cars at the Carpenter Street, Quarry Hill Loop TMS Bendigo Tour 24 March 1968 11147.12t Print from Sheet 2 (11147.2h) No 30, 29, 28 and 11 Birney Cars lined up at the Depot TMS Bendigo Tour 24 March 1968 11147.12u Print from Sheet 2 (11147.2ad) No 21 and two others at the North Bendigo terminus TMS Bendigo Tour 24 March 1968 8 x 10 Inch Photo Prints 11147.12h Print from Sheet 3 (11147.3ai) Birney Car Tram passes the School of Mines in McRae St heading to the fountain 11147.12i Print from Sheet 2 (11147.2a) No 30, 29, 28 and 11 Birney Cars lined up at the Depot 11147.12j Print from Sheet 2 (11147.2a) No 30, 29, 28 and 11 Birney Cars lined up at the Depot 11147.12k Print from Sheet 2 (11147.2a) No 30, 29, 28 and 11 Birney Cars lined up at the Depotkeith s king, bendigo, trams, robert green