Showing 67 items matching "quarry hotel"
-
 Bendigo Historical Society Inc.
Document - The Pitcher Dressers, W.G. O'Neill, Unknown
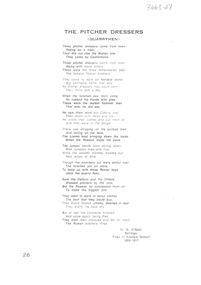
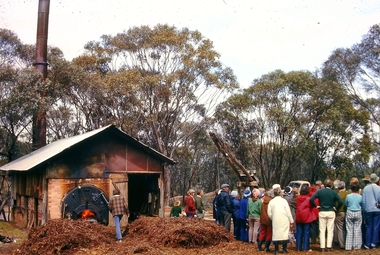
... ...Quarry Hotel...In the 1870s, Ingham built the Quarry Hotel which is now the crumbling ruins adjoining Ingham Road on the east side of the Campaspe River.. ...In the 1870s, Ingham built the Quarry Hotel which is now the crumbling ruins adjoining Ingham Road on the east side of the Campaspe River.. ...Axedale is well known for its Bluestone. Early on the quarries employed a large number of people. In the 1860’s Napthali Ingham selected land in Axedale and opened a bluestone quarry beside the river later known as Ingham Hill. The quarry produced dressed curbing and pitchers for use in Bendigo and Melbourne. This bluestone can be seen throughout Axedale in the churches, the bridge over the Campaspe River and guttering in the township. The quarry also supplied bluestone products further afield, for example road metal. Napthali Ingham, the owner of one of the first quarries in Axedale, arrived in Victoria from Lancashire, England, some time before 1860, and settled in Brunswick, Victoria. He may have been building his home in Ewen[sic] Street in 1860, at approximately 31 years of age, when he placed two advertisements in The Argus, October 10. One called for tenders for carting "upwards of 100 perches of rubbish to Sandridge." The other calls for tenders to supply "800 bushels of Geelong Roche Lime." His address, given for the purpose of the advertisements, is Ewen Street, Brunswick. There were a number of quarries and clay pits in Brunswick at this time and by July 9, 1861, Ingham was operating a quarry and contracting services to local councils and boroughs for road works, including Sydney Road. He also operated the True Briton Hotel in Ewen Street. Ingham continued his quarry works and business dealings in the Brunswick area for a few years and, around 1872, was contracting for the City of Bendigo. He eventually moved to Axedale, between Bendigo and Heathcote, where he took up land and opened a bluestone quarry on the east bank of the Campaspe River. As he had difficulty transporting bluestone to Bendigo, he wrote a letter to The Bendigo Advertiser, suggesting a tramway be laid between Sandhurst (Bendigo) and Axedale. Over the next ten years or so, he modified this suggestion to a rail line connecting Sandhurst, Axedale and Heathcote to the North East line at Seymour. This suggestion did not materialise in its entirety, but it eventually resulted in what became the Wandong, Heathcote and Sandhurst Rail Line, the first sections, Bendigo-Heathcote and Wandong-Kilmore, opening October 1, 1888. In the 1870s, Ingham built the Quarry Hotel which is now the crumbling ruins adjoining Ingham Road on the east side of the Campaspe River.. Its condition is worsening as time passes. Ingham intended to have a tramline constructed from his Axedale bluestone quarry to the new rail line. This also did not happen but he was successful in getting a wood siding provided at the location that is today's Hanson's Quarry. Evidence of the rail siding are still evident at the site in 2025. Ingham's quarry is now owned by Hansen Quarries Ingham died in 1909 and the rail line that grew out of his suggestion lasted until 1958 when it was closed from Bendigo to Heathcote. The Heathcote Junction section was closed in 1968. Another quarry was owned and operated by Brasier, Riley and Nelson. 'This well known firm of contractors have a most extensive plant and all the latest improved machinery required for the supply of kerbstone, pitchers, monumental work and dressed bluestone metal for road making. ('Bendigo & District, 1902') 1. One page typed poem, written by W.G. O'Neill, titled 'The Pitcher Dressers, (Quarrymen). The poem tells the story of three Rowan brothers who came to the Axedale Quarry: 'They came to work on Axedale stone, Big contracts came that way, As pitcher dressers they could earn, Their thirty bob a day.' 2. Three copies of newspaper articles relating to quarry work and employees attached to poem: information regarding Brasier, Riley and Nelson, contractors (Bendigo and District 1902); 'The Stone Quarry Grievance' (Bendigo Advertiser, 15 June, 1959, p2); 'A Restriction Upon Industry' (Bendigo Advertiser, 2 June, 1859). Article 'A Restriction Upon Industry" details the anomalies that exist between working the quartz reefs for gold and quarrying for building stone. The cost of obtaining a license to 'quarry stone is 50 pounds sterling which must be paid down in order to merely prospect the ground. Some people who took out a lease to work a reef were actually 'looking for building stone'. On bottom of poem, W.G. O'Neill, Bendigo. Pupil of Axedale School, 1908-1917.axedale, quarry, napthali ingham, pitchers, pitcher dressers, bluestone, campaspe river, quarry hotel, rowan brothers -
 Bendigo Historical Society Inc.
Document - HOTEL: AXEDALE, 26/11/1907
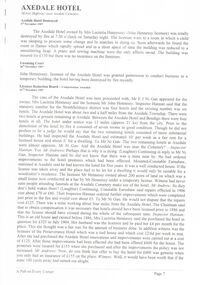
... Reference to the Axedale Hotel (2 1/2 miles from township, near cemetery); Drake's Campaspe Hotel (''Axedale Tavern''); Raglan Hotel; Acotts Hotel; Quarry Hotel. Documentation re destruction by fire of (the?) ...Reference to the Axedale Hotel (2 1/2 miles from township, near cemetery); Drake's Campaspe Hotel (''Axedale Tavern''); Raglan Hotel; Acotts Hotel; Quarry Hotel. Documentation re destruction by fire of (the?) ...Articles on hotels at Axedale- pages from ''A Pub on Every Corner'' (pages 7-10). Reference to the Axedale Hotel (2 1/2 miles from township, near cemetery); Drake's Campaspe Hotel (''Axedale Tavern''); Raglan Hotel; Acotts Hotel; Quarry Hotel. Documentation re destruction by fire of (the?) Axedale Hotel in 1907.axedale, history, axedale hotel, axedale hotel, mrs lucretia hennessey, john hennessy, mr e. j. ni gan, inspector hannon, preserverance hotel, thomas m. greilis, raglan hotel, acotts hotel, drakes campaspe hotel -
 Bendigo Historical Society Inc.
Newspaper - Bendigo Advertiser article
... Jane Hamilton applied for a licence for the Queen's Arms hotel in Quarry Hill in Dec. 1872. It also provided 8 rooms for boarding of gentlemen. ...The hotel mentioned is the Queen's Arms in Quarry Hill. Aileen and John Ellison Collection....History House 11 Mackenzie Street Bendigo goldfields Jane Hamilton applied for a licence for the Queen's Arms hotel in Quarry Hill in Dec. 1872. It also provided 8 rooms for boarding of gentlemen. ...Jane Hamilton applied for a licence for the Queen's Arms hotel in Quarry Hill in Dec. 1872. It also provided 8 rooms for boarding of gentlemen. Jane was the wife of James Hamilton jnr. who, until 1872, had been in partnership with his father, James snr. at Hamilton and Son, wholesale stationers and general merchants of Hargreaves St., Bendigo. At this time there was a conveyance five times a day between the Queen's Arms and the Shamrock hotel.A letter written to the Bendigo Advertiser by E.V. Gray; the letter was published on 09/06/1972. The letter is titled: "Plea to keep verandah of old Bendigo hotel". The hotel mentioned is the Queen's Arms in Quarry Hill. Aileen and John Ellison Collection.In pencil at the bottom 9/6/72 B'go Advertiserqueen's arms, bendigo hotel -
 Bendigo Historical Society Inc.
Document - National Trust Collection: retention of verandah to Queens Arms Hotel, 5 May & 3 July 1972
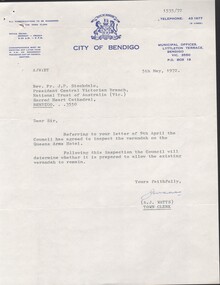
... National Trust - two letters regarding the retention of the verandah to the Queens Arms Hotel, Quarry Hill 3097.12A 5/05/1972 Town Clerk advising the National Trust (Bendigo Branch) that following a letter of 9th April Council will inspect the verandah to the Queens Arms Hotel and then advise whether it is prepared to allow the existing verandah to remain 3097.12B 3/07/1972 letter from the Licensee of the Queens Arms Hotel to the National Trust (Victorian Branch) requesting support (to request exemption of this verandah from the Bendigo Council's By-Law requiring its removal) to retain the existing verandah to the hotel...History House 11 Mackenzie Street Bendigo goldfields historic significant post verandahs removal of non-cantilever verandahs and replacement with cantilever verandahs National Trust - two letters regarding the retention of the verandah to the Queens Arms Hotel, Quarry Hill 3097.12A 5/05/1972 Town Clerk advising the National Trust (Bendigo Branch) that following a letter of 9th April Council will inspect the verandah to the Queens Arms Hotel and then advise whether it is prepared to allow the existing verandah to remain 3097.12B 3/07/1972 letter from the Licensee of the Queens Arms Hotel to the National Trust (Victorian Branch) requesting support (to request exemption of this verandah from the Bendigo Council's By-Law requiring its removal) to retain the existing verandah to the hotel Document National Trust Collection: retention of verandah to Queens Arms Hotel ...historic significant post verandahsNational Trust - two letters regarding the retention of the verandah to the Queens Arms Hotel, Quarry Hill 3097.12A 5/05/1972 Town Clerk advising the National Trust (Bendigo Branch) that following a letter of 9th April Council will inspect the verandah to the Queens Arms Hotel and then advise whether it is prepared to allow the existing verandah to remain 3097.12B 3/07/1972 letter from the Licensee of the Queens Arms Hotel to the National Trust (Victorian Branch) requesting support (to request exemption of this verandah from the Bendigo Council's By-Law requiring its removal) to retain the existing verandah to the hotelremoval of non-cantilever verandahs and replacement with cantilever verandahs -
 Ringwood and District Historical Society
Book, Burke & Hills: Canterbury Road Camberwell to Montrose, by Heathmont History Group - 2014
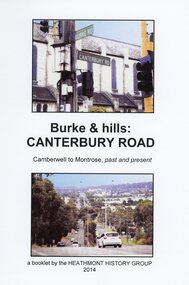
... Grand homes and churches at one end, major and minor shopping centres along the 25km, factories now where farms were, big box stores, fast food outlets, train stations, resrvoir, traffic, residential stretches, modern apartment blocks, parklands, child-minding centres, sporting ovals, a sewage farm, hotels, quarries, commercial developments, plant nurseries, a golf course, bridges, memorials, Asian food shops, telecommunication towers, bushland, creeks, crossroads, traffic lights, mansions, orchards, swamps ... ...Grand homes and churches at one end, major and minor shopping centres along the 25km, factories now where farms were, big box stores, fast food outlets, train stations, resrvoir, traffic, residential stretches, modern apartment blocks, parklands, child-minding centres, sporting ovals, a sewage farm, hotels, quarries, commercial developments, plant nurseries, a golf course, bridges, memorials, Asian food shops, telecommunication towers, bushland, creeks, crossroads, traffic lights, mansions, orchards, swamps ... ...Soft cover book of 40 pages with spiral wire spine. Compilation of images and descriptive timeline of the geology, geography and European settlement history of Canterbury Road.Soon after beginning at Burke Road Camberwell, Canterbury Road moves into the gentle hills of Canterbury, then on to Surrey Hills, Box Hill and Forest Hill. Further along past these three "hills" come three "monts" - Vermont, Heathmont and at its other end, Montrose, by then in the foothills of the Dandenongs. Grand homes and churches at one end, major and minor shopping centres along the 25km, factories now where farms were, big box stores, fast food outlets, train stations, resrvoir, traffic, residential stretches, modern apartment blocks, parklands, child-minding centres, sporting ovals, a sewage farm, hotels, quarries, commercial developments, plant nurseries, a golf course, bridges, memorials, Asian food shops, telecommunication towers, bushland, creeks, crossroads, traffic lights, mansions, orchards, swamps ... Delaneys Road, renamed Canterbury Road after a 19th century Victorian Governor, is a fascinating study in land use and history as suburban Melbourne has continually diversified and pushed outwards. Compiled by Heathmont History Group, Rita James, Les Prato, Betty Colbert, Jeff Leipold, Gerry Robinson (convenor). -
 Warrnambool and District Historical Society Inc.
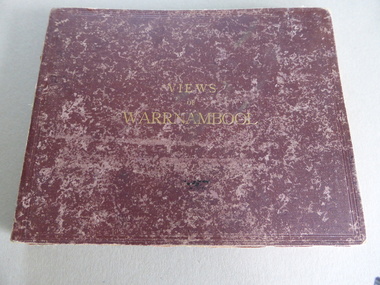
Album, Photographs Views of Warrnambool, c 1891
... Quarries and the Titan Crane on the Breakwater. The photographs have been taken and put in album form by the photographer Joseph Jordan. The advertisements of the hotels...Quarries and the Titan Crane on the Breakwater. The photographs have been taken and put in album form by the photographer Joseph Jordan. The advertisements of the hotels ...This album contains photographs of many Warrnambool buildings and scenes, including Proudfoot Boatsheds, St. John’s Church, Christ Church, Shelly Beach, Hopkins Falls, Sherwood gardens and buildings, Ozone Coffee Palace, Kepler Street, Sandstone Quarries and the Titan Crane on the Breakwater. The photographs have been taken and put in album form by the photographer Joseph Jordan. The advertisements of the hotels on the inside covers place the publication of the album to the years1891-2. We have another album similar to this but there are six photographs in this album (VC000799) that are not in the other album. These extra photographs are of the original gardens and buildings of Sherwood.This is a most important album as the photographs are clear and show a good cross-section of Warrnambool in the early 1890s. Some of the photographs are not represented in other collections (eg Sherwood gardens) and so are of vital historical significance. The advertisements are also of great use to researchers.This album has a brown hard cover and contains three pages of local advertisements and sixteen pages of photographs and 32 photographs back to back. The pages have been bound but some pages have come loose. There is a fold-out section of a 180 degree panorama of Warrnambool taken from Liebig Street hill. The edges of these pages have been taped.Front Cover- Views of Warrnamboolwarrnambool, views of warrnambool, photos of warrnambool -
 Emerald Museum & Nobelius Heritage Park
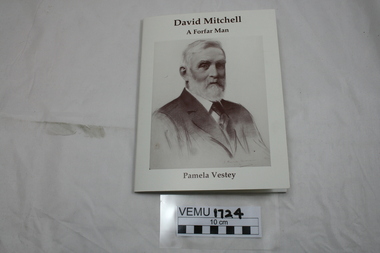
Book, David Mitchell, A Forfar Man by Pamela Vestey, 2014
... Quarries in Lilydale and manufactured the cement in Richmond. He became Shire President for Lillydale in 1883. Also he established a brickworks in Burnley St, Richmond. He was responsible for building PLC College in East Melbourne, Menzies Hotel...Quarries in Lilydale and manufactured the cement in Richmond. He became Shire President for Lillydale in 1883. Also he established a brickworks in Burnley St, Richmond. He was responsible for building PLC College in East Melbourne, Menzies Hotel ...David Mitchell was born near the town of Forfar, Scotland, became an apprentice to a stone mason and builder, then emigrated to Australia in 1853. In Melbourne, he set up a builder's yard in Burnley St, Richmond and later bought Cave Hill Limestone Quarries in Lilydale and manufactured the cement in Richmond. He became Shire President for Lillydale in 1883. Also he established a brickworks in Burnley St, Richmond. He was responsible for building PLC College in East Melbourne, Menzies Hotel, The Exhibition building and Scots Church. Although he was very wealthy in his own right, he is also known as the father of Dame Nellie Melba. White soft cover booklet with a large drawing of David Mitchell (1901) on the front. -
 Bendigo Historical Society Inc.
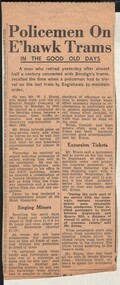
Document - BASIL MILLER COLLECTION: TRAMS, c1950s
... Hotel Shamrock. Wages for conductors in 1910, 1 pound 2/6 for 60 hours, Motormen received 1 pound 10. No windscreen in trams. No sick pay.Tram drivers had to attend broken trolley wires, repairs or replacements in controllers and general equipment, to rerail trams when derailed, adjust brakes. Welsh, Cornish and Irish miners often sang on the trams. Policemen had to travel on the last tram at night to maintain order. Tram ticket obtained from conductors. 'Passengers could travel between Eaglehawk and Quarry...Hotel Shamrock. Wages for conductors in 1910, 1 pound 2/6 for 60 hours, Motormen received 1 pound 10. No windscreen in trams. No sick pay.Tram drivers had to attend broken trolley wires, repairs or replacements in controllers and general equipment, to rerail trams when derailed, adjust brakes. Welsh, Cornish and Irish miners often sang on the trams. Policemen had to travel on the last tram at night to maintain order. Tram ticket obtained from conductors. 'Passengers could travel between Eaglehawk and Quarry ...Newspaper clipping. Clipping possibly from 1958. Policemen On Eaglehawk Trams. In the Good Old Days. A man who retired yesterday after almost half a century connected with the Bendigo's trams, recalled the time when a policeman had to travel on the last tram to Eaglehawk to maintain order. He was Mr Evans, began in 1910 as a conductor, became a motorman, then traffic inspector, appointed tramways superintendent in May, 1928. When he retires he will be in his 48th year of service.. Received callers wishing him well in his retirement, was besieged with telephone calls and telegrams in his office the S.E.C. buildings, received a presentation of a framed photograph of himself at work from the tramway inspectors and a presentation from the staff and employees. Complimentary dinner at the Hotel Shamrock. Wages for conductors in 1910, 1 pound 2/6 for 60 hours, Motormen received 1 pound 10. No windscreen in trams. No sick pay.Tram drivers had to attend broken trolley wires, repairs or replacements in controllers and general equipment, to rerail trams when derailed, adjust brakes. Welsh, Cornish and Irish miners often sang on the trams. Policemen had to travel on the last tram at night to maintain order. Tram ticket obtained from conductors. 'Passengers could travel between Eaglehawk and Quarry Hill, a distance of almost 11 miles, at a charge of sixpence return,' said Mr Evans. Combination tickets included return tram fares and admission to the theatre. The prices varied according to the theatre seats.bendigo trams, ram, policeman, conductor, superintendent 1928, motorman, began 1910, telegrams, sec buildings, repairs, ticket prices, singing miners, tram prices, sick pay -
 Bendigo Historical Society Inc.
Document - LONG GULLY HISTORY GROUP COLLECTION: HISTORICAL GUIDE TO BENDIGO
... Hotels Compiled by L C Bennetts, Eaglehawk Compiled by H Biggs, Noted Events Compiled by June Parry, The Bendigo Post Office Compiled by LC Bennetts, The Bendigo Goldfield. Introduction to Field and Guide to Some Famous Mines Compiled by A Richardson. Photos include: Pall Mall Bendigo, Ravenswood Homestead, An Early Battery at Kangaroo Flat, Historic High Street Golden Square, The Lonely Grave, Battery Tram c1888, Steam Tram c1892, Electric Tram c1903, The New Chum Railway Golden Square, United Hustlers and Redan Mine Sandhurst Road, Central Deborah Violet Street, Deborah Mine Quarry Hill, Deborah Mine 1000 ft level, First Motion Winding Engine at Central Deborah, Victoria Hill Area, and Looking south from New Chum Hill in 1890's. ...Hotels Compiled by L C Bennetts, Eaglehawk Compiled by H Biggs, Noted Events Compiled by June Parry, The Bendigo Post Office Compiled by LC Bennetts, The Bendigo Goldfield. Introduction to Field and Guide to Some Famous Mines Compiled by A Richardson. Photos include: Pall Mall Bendigo, Ravenswood Homestead, An Early Battery at Kangaroo Flat, Historic High Street Golden Square, The Lonely Grave, Battery Tram c1888, Steam Tram c1892, Electric Tram c1903, The New Chum Railway Golden Square, United Hustlers and Redan Mine Sandhurst Road, Central Deborah Violet Street, Deborah Mine Quarry Hill, Deborah Mine 1000 ft level, First Motion Winding Engine at Central Deborah, Victoria Hill Area, and Looking south from New Chum Hill in 1890's. ...Brochure with an invitation to visit Historical and Mining Museum in Mechanic's Institute, Eaglehawk. Drawing of poppet legs on the front with The Royal Historical Society of Victoria Bendigo Branch. Historical Guide to Bendigo including Self Tours of Bendigo's Famous Goldfields. Forward by John Hattam. Contributors are: H Biggs, Miss L J Parry, A Richardson, L C Bennetts and Edith Checcucci. Credits - The Bendigo Advertiser, Cambridge Press, Mines Department (Bendigo) and J R W Purves. Items include Bendigo Tramways Compiled by H Biggs, Early Bendigo Hotels Compiled by L C Bennetts, Eaglehawk Compiled by H Biggs, Noted Events Compiled by June Parry, The Bendigo Post Office Compiled by LC Bennetts, The Bendigo Goldfield. Introduction to Field and Guide to Some Famous Mines Compiled by A Richardson. Photos include: Pall Mall Bendigo, Ravenswood Homestead, An Early Battery at Kangaroo Flat, Historic High Street Golden Square, The Lonely Grave, Battery Tram c1888, Steam Tram c1892, Electric Tram c1903, The New Chum Railway Golden Square, United Hustlers and Redan Mine Sandhurst Road, Central Deborah Violet Street, Deborah Mine Quarry Hill, Deborah Mine 1000 ft level, First Motion Winding Engine at Central Deborah, Victoria Hill Area, and Looking south from New Chum Hill in 1890's. Also 11010.254, 255, 268, 288a, 288b, and 289.bendigo, history, long gully history group, the long gully history group - historical guide to bendigo, the royal historical society of victoria bendigo branch, historical and mining museum, mechanic's institute eaglehawk, librarian mechanic's institute, miss j parry, john hattam, h biggs, a richardson, l c bennetts, edith checcucci, bendigo advertiser, cambridge press, mines department (bendigo), j r w purves, mr a o'keefe, shire of marong, the sandhurst and eaglehawk tramway company, mr j taylor, mr j hanson, the bendigo tramway company, electric supply company, coliban water suply, juvenile industrial exhibition, geo lansell, cr a harkness, salvation army, vine and fruitgrowers association, decentralisation league, constable thomas ryan, miners association, art gallery, post office, miss broadfoot, bendigo hospital, opera company, bendigo development league, victorian women's franchise league, ana hall, the bendigonian, law courts, temperance hall, trades hall (old wardens court), roman catholic cathedral, shamrock hotel, bendigo philosophical society, old bendigonian society, bendigo fire brigade, bendigo volunteers to south african war, hawkins, porcupine inn, criterion hotel, royal hotel, bendigo hotel, black swan hotel, gillies bakery, hibernian hotel, sandhurst hotel, freemasons hotel, courthouse hotel, shamrock hotel, governor hotham, heffernan & crowley, new chum railway, victoria quartz, shenandoah, shamrock mine, hercules no 1 (originally pearl east), hercules new chum (late pearl), carlisle mine, mr arblaster, meurer, sandhurst bee, benevolent asylum, bendigo gas company, a lloyd, coliban water supply scheme, cr w v simons, eaglehawk council, j mouat, sir henry barkly, agricultural and horticultural exhibition, sandhurst and eaglehawk boroughs, cr john mcintyre, latham and watson's mine, galatea (model ship), st paul's church of england, rev g p despard, fine arts exhibition and exposition, bendigo rifle association, strathfieldsaye shire hall, corporate high school, bendigonian society, richard andrews, easter fair, g aspinall, j burnsides, sir h manners sutton, beehive stores, mining exchanges, bendigo water works, city family hotel, bendigo united friendly society medical institute and dispensary, benevolent asylum, jewish synagogue, masonic hall, school of mines, mr j h abbott, australian natives association, royal princess theatre, albion hall, central state school, high school, gravel hill state school, electricity commission, james mouat, warring natives, the rocks, joseph crook, gold discovery, marong district roads board, camp hotel, mr charles sherratt, city of bendigo, mt alexander north run, grice and heape, ravenswood, gibson and fenton, mrs john kennedy, mrs patrick farrel, mr j a paton, mr lachlan mclachlan, theatre royal, sir charles and lady hotham, harney's bridge, e j ennor, sandhurst fire brigade, the health of towns act, mr townsend, cornish & co, bendigo pottery, bendigo agricultural society, pike or pyke, baby health centre, sandhurst post office, government survey office, sandhurst trustees company, mr h b briston, savings bank, telegraph office, sir henry brougham lock, hon sir john nimmo, sandhurst public offices, the new prince of wales mine, new prince of wales no 2, the whip and jersey, lansell's big 180, new chum and victoria mine and battery, new chum railway, koch's pioneer, south new moon, catherine reef united, new moon, virginia mine, south belle vue, new chum railway, central nell gwynne, north nell gwynne, ironbark mine, new chum syncline, hercules, herculesl energetic, roberts & sons, harkness & co, horwoods, great southern, ulster, carlisle, cornish, new st mungo, duchess tribute, south devonshire, hopewell mine, saxby mine, mcnair & co, mr king, bourke and wills, sandhurst hotel, the dascombe nugget, victoria nugget, r r haverfield, ballerstedt, rae, wittscheibe, lazarus, cave and amos, bendigo amalgamated goldfields, bendigo mines limited, the deborah, north deborah, central deborah, the new red white and blue consolidated (big blue), union, lansell's new red white and blue 9later no 3 shaft), h harkness & co, thompson & co, central deborah, lansell's bendigo battery, north red white and blue, central red white and blue, roberts and sons, little 180 (originally lansell's 180 no 2 shaft), john brown knitwear factory, south ironbark originally victoria consols east shaft, ironbark (originally ironbark east shaft), manchester arms hotel, wattle gully mine chewton, hercules, old wheal-owl, central nell gwynne, gold mines hotel, bendigo city council, jack barker, the new chum syncline, the courier of the mines, telegraph office, bendigo cemetery, white hills cemetery, eaglehawk cemetery, kangaroo flat cemetery, new moon, suffolk united, north new moon, fortuna hustlers, buckell & jeffrey's, royal hustlers reserve no 2 (city and park shafts), jonathan harris, latham and watson, great hustlers, great extended hustlers, j hustler, latham, watson, tribute or pups shaft, bendigo's worst mining disaster, hustlers reef (old hustlers), hustlers reef no 1, lansell's comet, the old comet (cooper's claim), united hustlers and redan, comet hill state school, k k shaft, north or new hustlers (agnew hustler), johnson's no 3, south johnson's, lansell's sandhurst needle, cleopatra needle top, british american, collman and tacchi, south virginia, saddle reefs and spurs, pall mall bendigo, ravenswood homestead, an early battery at kangaroo flat, historic high street golden square, the lonely grave, battery tram c1888, steam tram c1892, electric tram c1903, teh new chum railway golden square, united hustlers and redan mine sandhurst road, central deborah violet street, deborah mine quarry hill, deborah mine 1000 ft level, first motion winding engine at central deborah, victoria hill area, looking south from new chum hill in 1890's -
 Bendigo Historical Society Inc.
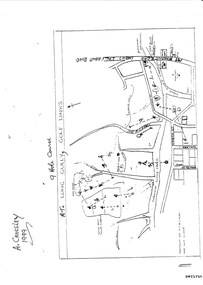
Document - LONG GULLY HISTORY GROUP COLLECTION: THE LONG GULLY GOLF LINKS
... Quarry Hill Golf Club... Bendigo Golf Club... Marong Gulf Club... Miss Colgan... Sacred Heart Cathedral Choir... Mechanics Institute... Rose of Australia Hotel...History House 11 Mackenzie Street Bendigo goldfields BENDIGO History long gully history group The Long Gully History Group - The Long Gully Golf Links A Crossley John Harvey Long Gully Rec Dai Gum San Reservation Quarry Hill Golf Club Bendigo Golf Club Marong Gulf Club Miss Colgan Sacred Heart Cathedral Choir Mechanics Institute Rose of Australia Hotel North Hercules and Energetic Mine Site Les Thomas tom Austen Pearl South Mullock Heap Doc Catford Clubs Wearne Pearl Mining Co's diggings Pearl South Pearl East Bill and Faye Osterfield Ellen Lee Osterfield Eaglehawk Gold Club Neangar Park Golf Club F M Fitzpatrick Kangaroo Flat Golf Club Long Gully Playground Pearl Sands Ennor Brothers Birchmore Brothers Shirley Harvey Belvoir Park Harold Ennor George Ennor Some history of the Long Gully Golf Links, a 9 Hole Course, by John Harvey. ...Some history of the Long Gully Golf Links, a 9 Hole Course, by John Harvey. First page has a map of the area showing where the holes are and different features. There is a description of the tees and the route taken around the course.Dates when the Eaglehawk, Neangar park, Kangaroo Flat Golf Clubs and the Long Gully Playground were opened.bendigo, history, long gully history group, the long gully history group - the long gully golf links, a crossley, john harvey, long gully rec, dai gum san reservation, quarry hill golf club, bendigo golf club, marong gulf club, miss colgan, sacred heart cathedral choir, mechanics institute, rose of australia hotel, north hercules and energetic mine site, les thomas, tom austen, pearl south mullock heap, doc catford, clubs wearne, pearl mining co's diggings, pearl south, pearl east, bill and faye osterfield, ellen lee osterfield, eaglehawk gold club, neangar park golf club, f m fitzpatrick, kangaroo flat golf club, long gully playground, pearl sands, ennor brothers, birchmore brothers, shirley harvey, belvoir park, harold ennor, george ennor -
 Mortlake and District Historical Society
Mt. Shadwell Bush Inn, photograph
... quarry. It did a great trade after if first became licensed ub 1855, when it provided a valuable service to the travelling public and to the increasing agricultural population of the area. At that time it contained three sitting rooms, several large reception rooms, fourteen bedrooms, a bar and two taprooms and was the first known hostelry in Mortlake. In 1863 a bluestone addition (probably done by local architect Andrew Kerr) increased the size of the hotel...quarry. It did a great trade after if first became licensed ub 1855, when it provided a valuable service to the travelling public and to the increasing agricultural population of the area. At that time it contained three sitting rooms, several large reception rooms, fourteen bedrooms, a bar and two taprooms and was the first known hostelry in Mortlake. In 1863 a bluestone addition (probably done by local architect Andrew Kerr) increased the size of the hotel ...This Mount Shadwell Bush Inn erected in 1854 was situated adjacent to one of the main routes to the diggings (Great Western Road), and was originally built from tufa stone obtained from a local quarry. It did a great trade after if first became licensed ub 1855, when it provided a valuable service to the travelling public and to the increasing agricultural population of the area. At that time it contained three sitting rooms, several large reception rooms, fourteen bedrooms, a bar and two taprooms and was the first known hostelry in Mortlake. In 1863 a bluestone addition (probably done by local architect Andrew Kerr) increased the size of the hotel to 23 rooms with a detached billiard room and ballroom, kitchen, servant's apartments, laundry, storeroom, 12 stalled stable, out office, and stock yards for travelling cattle. The present hotel with its 1928 rendered facade, has had an almost uninterrupted licence since 1855 -
 Phillip Island and District Historical Society Inc.
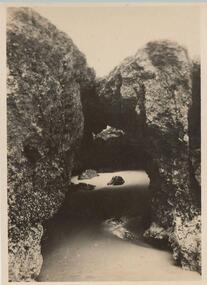
Photographs, Valentine's et al, Circa 1930
... quarry...cowes cenotaph, phillip island...cowes pier phillip island...cowes beach phillip island...the isle of wight hotel...Garthshore Stirling Home, was the vicar at the Anglican Church in Cowes - possibly in the early 1930's. forrest caves, phillip island wildlife - koalas the nobbies phillip island seal rocks phillip island granite quarries cape woolamai granite quarry cowes cenotaph, phillip island cowes pier phillip island cowes beach phillip island the isle of wight hotel cowes phillip island cowes anglican church vicarage,phillip island rev garthshore stirling home dorothy hurst 235-01 Forrest Cave, Phillip Island 235-02 & 03 Native Bear (Koala) 235-04 The Road to the Back Beach, Cowes. 235-05 A Glimpse Thro' the Ti-Tree, Cowes. 235-06 The Quarries, Cape Wollomai, Phillip Island 235-07 The Beach near the Nobbies, Phillip Island. 235-10 The Beach at Cowes, Phillip Island. ...A collection of photographs/postcards donated by Dorothy Hurst. Her grandfather, Rev. Garthshore Stirling Home, was the vicar at the Anglican Church in Cowes - possibly in the early 1930's.235-01. Black & White photograph of Forrest Caves, Phillip Island. 235-02 & 03. Black & White photographs (identical) of two koalas up a tree. 235-04. Black & White photograph of the road to the Back Beach, Phillip Island. 235-05. Black & White photograph of a view of Cowes Pier taken through the trees on the foreshore. 235-06. Black & White photograph of Cape Woolamai Granite quarrie with people on the granite and in a boat. 235-07. Black & White photograph of waves breaking over the rock possibly near the Nobbies, Phillip Island. 235-08. Black & White photograph of The Vicarage at Cowes, Phillip Island - 1930's 235-09. Black & White photograph of a coastal scene at Phillip Island. 235-10. Black & White photograph of a coastal scene of the beach at Cowes. 235-11. Black & White photograph of waves breaking over the rocks near The Nobbies. 235-12. Black & White photograph of The Nobbies with Seal Rocks faintly in the distance. 235-13. Black & White photograph of The Nobbies with Seal Rocks in the background. 235-14. Black & White photograph of The Isle of Wight Hotel in the background. Cenotaph in foreground with a crowd of people, portable organ/piano plus music stands, people standing, children and others sitting on grass for Anzac Day or Remembrance Day. Possibly 1920s from fashions.235-01 Forrest Cave, Phillip Island 235-02 & 03 Native Bear (Koala) 235-04 The Road to the Back Beach, Cowes. 235-05 A Glimpse Thro' the Ti-Tree, Cowes. 235-06 The Quarries, Cape Wollomai, Phillip Island 235-07 The Beach near the Nobbies, Phillip Island. 235-10 The Beach at Cowes, Phillip Island. Valentine's Series M4847forrest caves, phillip island, wildlife - koalas, the nobbies phillip island, seal rocks phillip island, granite quarries, cape woolamai granite quarry, cowes cenotaph, phillip island, cowes pier phillip island, cowes beach phillip island, the isle of wight hotel cowes phillip island, cowes anglican church vicarage,phillip island, rev garthshore stirling home, dorothy hurst -
 Eltham District Historical Society Inc
Photograph, Jim Connor, Main Road, Eltham, 14 Jan 2017
... The hotel was constructed of hard basaltic blue stone quarried in the Eltham district and cemented together with mud, and partly of bricks made at Eltham. ...The hotel was constructed of hard basaltic blue stone quarried in the Eltham district and cemented together with mud, and partly of bricks made at Eltham. ...The Eltham Hotel is the oldest continually operating hotel in the Eltham district. Initially referred to as the Little Eltham Hotel, it has been known as the Eltham Hotel since the 1850s through to present time with a very brief period as the Eltham Tavern in the late 1980s. Benjamin Oliver Wallis was a prominent Eltham resident, publican and Councillor during the second half of the nineteenth century. He owned the house that is now the Nillumbik Living and Learning Centre at 739 Main Road Eltham and one stage the Eltham Hotel. Wallis migrated to Melbourne in 1853 but his wife and children remained in Cornwall for a further 10 years. Later in 1853 Richard Warren engaged Wallis to build the Eltham Hotel and it opened in 1854. The hotel was constructed of hard basaltic blue stone quarried in the Eltham district and cemented together with mud, and partly of bricks made at Eltham. The Fountain of Friendship Hotel on the opposite side of Maria Street (Main Road) opened shortly after. The hotel was a well-known resting place for gold diggers during the gold rush at Woods’ Point and Warren would buy the gold from the diggers. In 1858 Warren fell into financial difficulties and had to sell the hotel. Wallis bought the hotel and obtained a publican’s licence in 1861. In the 1850s the Fountain had been the more popular hotel but after that the Eltham Hotel became more popular. It is understood that in about 1857 Wallis probably built the “Living and Learning house” for tanner John Pearson. In 1868 Pearson became bankrupt and Wallis acquired the house and he lived there until his death in 1896. For some of this time the house was in the name of Benjamin’s son Richard but he died in 1888 and ownership reverted to his father. Wallis was a member of the Eltham Jockey Club and in 1867 his wife Anna rode her horse Charlotte in the Annual Races. Anna was also an angler and is reported to have caught a large perch in the Yarra River. She died in 1887. On 16th September 1886 Wallis sold the hotel to Christopher Watson (Snr). Watson died in 1887 and the hotel passed to his son Christopher Watson (Jr) who owned it until his death in 1909 at which time his wife Emily took over the license. Upon her death, their son Herbert applied for the license in January 1915. In July 1925, Herbert Watson demolished the original building and, in its place, erected a modern hotel which remains the foundation of the present Eltham Hotel. The contractors at the time commented on how well the original building had been constructed. A description of the new building was detailed in the Advertiser newspaper of January 8, 1926: “The new building consists of. two stories. designed in English tavern style, and contains-all told, 24 rooms. On the second floor, in front uninviting the two gables is a deep balcony, which will be much appreciated by visitors. The lower story is wholly of brick, and the upper one of wood and fibrous cement plaster. The rooms are spacious and lofty, and the windows are large and of latest style, and light the rooms splendidly. The entrance hall is 8 feet wide. The bar is a very commodious room and is furnished in the most up-to-date and convenient manner. The dining room, a very attractive apartment, is 30 feet by 15 feet 6 inches, and the bar parlor is also a large and well furnished room. A large cellar, an indispensable adjunct to an hotel, has been excavated beneath the bar. On the upper story are 12 bedrooms, and among other conveniences are two bath rooms in which hot and cold water can be used. All the rooms have been supplied with the necessary appliances for electric lighting, which will be one of the progressive evidences which Eltham will shortly enjoy.” “In the yard a brick garage to accommodate three cars at once, has been erected. This, as well as the hotel, is roofed with tiles.” “From the front of the hotel (especially the balcony) a lovely view of the country west and, north may be obtained.” “It may be added that it Is intended to have an ornamental garden, a tennis court. and a kiosk in connection with the hotel, and the property will have a rustic fence round it.” The hotel has since undergone several modifications and extensionsTomorrow's history documented todayeltham, jim connor collection, main road, eltham gateway, eltham hotel, pitt street -
 Eltham District Historical Society Inc
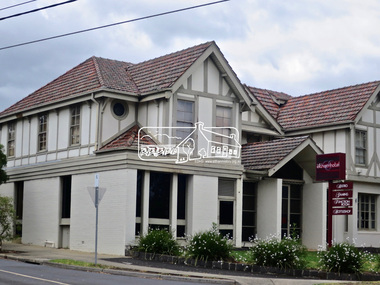
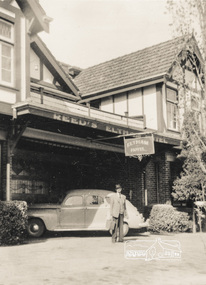
Photograph, Jim at "The Pub" Eltham; Reed's Eltham Hotel, c.1948
... The hotel was constructed of hard basaltic blue stone quarried in the Eltham district and cemented together with mud, and partly of bricks made at Eltham. ...The hotel was constructed of hard basaltic blue stone quarried in the Eltham district and cemented together with mud, and partly of bricks made at Eltham. ...Olive Elsie May Reed was licensee of the Eltham Hotel from April 1948 to January 1950. The Eltham Hotel is the oldest continually operating hotel in the Eltham district. Initially referred to as the Little Eltham Hotel, it has been known as the Eltham Hotel since the 1850s through to present time with a very brief period as the Eltham Tavern in the late 1980s. Benjamin Oliver Wallis was a prominent Eltham resident, publican and Councillor during the second half of the nineteenth century. He owned the house that is now the Nillumbik Living and Learning Centre at 739 Main Road Eltham and one stage the Eltham Hotel. Wallis migrated to Melbourne in 1853 but his wife and children remained in Cornwall for a further 10 years. Later in 1853 Richard Warren engaged Wallis to build the Eltham Hotel and it opened in 1854. The hotel was constructed of hard basaltic blue stone quarried in the Eltham district and cemented together with mud, and partly of bricks made at Eltham. The Fountain of Friendship Hotel on the opposite side of Maria Street (Main Road) opened shortly after. The hotel was a well-known resting place for gold diggers during the gold rush at Woods’ Point and Warren would buy the gold from the diggers. In 1858 Warren fell into financial difficulties and had to sell the hotel. Wallis bought the hotel and obtained a publican’s licence in 1861. In the 1850s the Fountain had been the more popular hotel but after that the Eltham Hotel became more popular. It is understood that in about 1857 Wallis probably built the “Living and Learning house” for tanner John Pearson. In 1868 Pearson became bankrupt and Wallis acquired the house and he lived there until his death in 1896. For some of this time the house was in the name of Benjamin’s son Richard but he died in 1888 and ownership reverted to his father. Wallis was a member of the Eltham Jockey Club and in 1867 his wife Anna rode her horse Charlotte in the Annual Races. Anna was also an angler and is reported to have caught a large perch in the Yarra River. She died in 1887. On 16th September 1886 Wallis sold the hotel to Christopher Watson (Snr). Watson died in 1887 and the hotel passed to his son Christopher Watson (Jr) who owned it until his death in 1909 at which time his wife Emily took over the license. Upon her death, their son Herbert applied for the license in January 1915. In July 1925, Herbert Watson demolished the original building and, in its place, erected a modern hotel which remains the foundation of the present Eltham Hotel. The contractors at the time commented on how well the original building had been constructed. A description of the new building was detailed in the Advertiser newspaper of January 8, 1926: “The new building consists of. two stories. designed in English tavern style, and contains-all told, 24 rooms. On the second floor, in front uninviting the two gables is a deep balcony, which will be much appreciated by visitors. The lower story is wholly of brick, and the upper one of wood and fibrous cement plaster. The rooms are spacious and lofty, and the windows are large and of latest style, and light the rooms splendidly. The entrance hall is 8 feet wide. The bar is a very commodious room and is furnished in the most up-to-date and convenient manner. The dining room, a very attractive apartment, is 30 feet by 15 feet 6 inches, and the bar parlor is also a large and well furnished room. A large cellar, an indispensable adjunct to an hotel, has been excavated beneath the bar. On the upper story are 12 bedrooms, and among other conveniences are two bath rooms in which hot and cold water can be used. All the rooms have been supplied with the necessary appliances for electric lighting, which will be one of the progressive evidences which Eltham will shortly enjoy.” “In the yard a brick garage to accommodate three cars at once, has been erected. This, as well as the hotel, is roofed with tiles.” “From the front of the hotel (especially the balcony) a lovely view of the country west and, north may be obtained.” “It may be added that it Is intended to have an ornamental garden, a tennis court. and a kiosk in connection with the hotel, and the property will have a rustic fence round it.” The hotel has since undergone several modifications and extensions Pages from a scrapbook belonging to Heather Jenkins (nee Cone) who lived as a child in the Police Residence at 728 Main Road, Eltham in the 1920s.Heather Jenkins was the daughter of Constable John Thomas Cone, Badge #3935 served at Eltham Police Station 1 May 1911 to 9 July 1922.Glued on a brown paper scrapbook page (torn from scrapbook) with 8 black and white/sepia photos of varying sizes, 1 newspaper clipping and one greeting card with printed sketch and handwritten captions in ink. On back of page is 1 black and white photo and a large newspaper clipping.eltham, eltham hotel, jim jenkins, reed's eltham hotel, olive elsie may reed -
 Eltham District Historical Society Inc
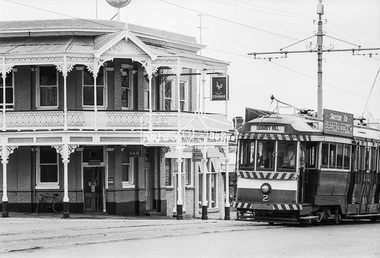
Photograph, Bendigo Tramways No. 2 en route from Quarry Hill outside the Victoria Hotel near the intersection of High Street at Victoria Street, Eaglehawk, January 1972, Jan 1972
... Bendigo Tramways No. 2 en route from Quarry Hill outside the Victoria Hotel near the intersection of High Street at Victoria Street, Eaglehawk, January 1972...bendigo, bendigo tramways no. 2, eaglehawk, eaglehawk mechanics institute, eaglehawk town hall, george coop collection, high street, loddon valley highway, milk bar, street new victoria hotel, Pub, quarry hill, sailors gully road, tram, victoria hotel...The Victoria Hotel is the present day New Victoria Hotel bendigo, bendigo tramways no. 2, eaglehawk, eaglehawk mechanics institute, eaglehawk town hall, george coop collection, high street, loddon valley highway, milk bar, street new victoria hotel, Pub, quarry hill, sailors gully road, tram, victoria hotel Digital TIFF file Scan of 35mm Ilford FP3 black and white negative transparency Bendigo Tramways No. 2 en route from Quarry Hill outside the Victoria Hotel near the intersection of High Street at Victoria Street, Eaglehawk, January 1972 Photograph George Coop George Coop ...Looking northwest across High Street, Eaglehawk at the intersection with Victoria Street. The Victoria Hotel is the present day New Victoria HotelDigital TIFF file Scan of 35mm Ilford FP3 black and white negative transparencybendigo, bendigo tramways no. 2, eaglehawk, eaglehawk mechanics institute, eaglehawk town hall, george coop collection, high street, loddon valley highway, milk bar, street new victoria hotel, pub, quarry hill, sailors gully road, tram, victoria hotel -
 Eltham District Historical Society Inc
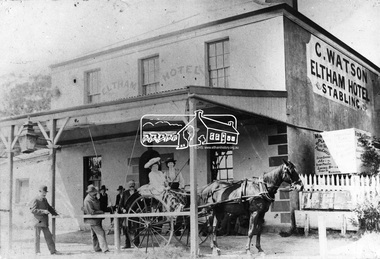
Photograph, Watson's Eltham Hotel, Maria Street, Eltham, c.1900
... The original founder, a Mr Warren. engaged a builder named Wallace, to erect the hotel, and being unable to finance it, the story goes, handed it over to Mr Wallace, who finished the job, and received the first licence. The building was constructed of hard basaltic blue stone, quarried in the Eltham district, and partly of bricks made at Eltham. ...The original founder, a Mr Warren. engaged a builder named Wallace, to erect the hotel, and being unable to finance it, the story goes, handed it over to Mr Wallace, who finished the job, and received the first licence. The building was constructed of hard basaltic blue stone, quarried in the Eltham district, and partly of bricks made at Eltham. ...Christoher Watson's Eltham Hotel, cnr Maria Street (Main Road) and Pitt Street, Eltham. Christopher Watson in centre (bareheaded). Reproduced on p60 of 'Pioneers & Painters' The hotel was constructed in the 1850s immediately following the discovery of gold in Victoria. The original founder, a Mr Warren. engaged a builder named Wallace, to erect the hotel, and being unable to finance it, the story goes, handed it over to Mr Wallace, who finished the job, and received the first licence. The building was constructed of hard basaltic blue stone, quarried in the Eltham district, and partly of bricks made at Eltham. At that time the town owned not only an hotel, but a flour mill, a brewery, a brickworks, and other important industries. The hotel was carried on for the benefit of the first owners for over 30 years and was then purchased by Mr Chris Watson. The hotel was in the early days a well-known resting place for the gold diggers during the gold rush at Woods' Point. A new hotel was erected on the same site by Mr H. Watson in 1925.This photo forms part of a collection of photographs gathered by the Shire of Eltham for their centenary project book,"Pioneers and Painters: 100 years of the Shire of Eltham" by Alan Marshall (1971). The collection of over 500 images is held in partnership between Eltham District Historical Society and Yarra Plenty Regional Library (Eltham Library) and is now formally known as the 'The Shire of Eltham Pioneers Photograph Collection.' It is significant in being the first community sourced collection representing the places and people of the Shire's first one hundred years.Digital imagechristopher watson, eltham, hotel, main road, maria street, pioneers and painters, pitt street, shire of eltham pioneers photograph collection, watson's hotel -
 Eltham District Historical Society Inc
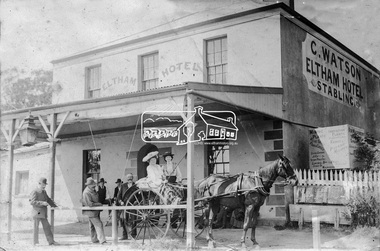
Photograph, Watson's Eltham Hotel, Maria Street, Eltham, c.1900
... The original founder, a Mr Warren. engaged a builder named Wallace, to erect the hotel, and being unable to finance it, the story goes, handed it over to Mr Wallace, who finished the job, and received the first licence. The building was constructed of hard basaltic blue stone, quarried in the Eltham district, and partly of bricks made at Eltham. ...The original founder, a Mr Warren. engaged a builder named Wallace, to erect the hotel, and being unable to finance it, the story goes, handed it over to Mr Wallace, who finished the job, and received the first licence. The building was constructed of hard basaltic blue stone, quarried in the Eltham district, and partly of bricks made at Eltham. ...Christoher Watson's Eltham Hotel, cnr Maria Street (Main Road) and Pitt Street, Eltham. Christopher Watson in centre (bareheaded). Reproduced on p60 of 'Pioneers & Painters' The hotel was constructed in the 1850s immediately following the discovery of gold in Victoria. The original founder, a Mr Warren. engaged a builder named Wallace, to erect the hotel, and being unable to finance it, the story goes, handed it over to Mr Wallace, who finished the job, and received the first licence. The building was constructed of hard basaltic blue stone, quarried in the Eltham district, and partly of bricks made at Eltham. At that time the town owned not only an hotel, but a flour mill, a brewery, a brickworks, and other important industries. The hotel was carried on for the benefit of the first owners for over 30 years and was then purchased by Mr Chris Watson. The hotel was in the early days a well-known resting place for the gold diggers during the gold rush at Woods' Point. A new hotel was erected on the same site by Mr H. Watson in 1925.Early photo of Eltham Hotel which has been on site in various forms since mid 1800sSepia photograph mounted on cardInscribed on back: "Property of Mr Albert Watson, 53 Yarra St, Heidelberg. Christopher Watson (bare headed) Given to Marion Huggett December 1977 c.1900 son of Watson Snr behind cart"christopher watson, eltham, eltham hotel, main road, maria street, pioneers and painters, pitt street, shire of eltham pioneers photograph collection, watson's hotel -
Bendigo Historical Society Inc.
Document - The Reynolds Family Records Collection (Folder 3 of 4) Bendigo Hotel Booklet, Abt 2005
... Quarry Hill. His firm was Jorgensen and Sons, mining contractors. He was a native of the Island of Alsen, Denmark. He left Denmark in the year 1861, embarking at Hamburg in a small sailing Ship. bendigo sandhurst peter jorgensen eleanor hinde eleanor reynolds eleanor opie reynolds collection bendigo hotels The four folders contain family history documents and photos of the descendants of Eleanor Hinde. ...Eleanor Hinde (1842-1902) was born in Lancashire England. In 1858, Eleanor married Richard Reynold in the Forest St Wesleyn Methodist Church in Sandhurst. They both gave their address as Sailors Gully Goldfields. They had seven children together. Richard was a skilled tradesman and after he died in 1872 from lung disease, Eleanor married Arculus Opie. Eleanor owned a property on the corner of Gladstone and Stanley Streets which later became an electrical substation. She sold poultry and eggs and preserves. One of Eleanor's sons, William John, married Anna (Annie) Jorgensen, and one of her daughters. Amelia, married Anna's brother Thomas Joynes Jorgensen. The Jorgensens founded and managed Jorgensen and Sons foundry and engineering works. Peter Jorgensen (1849-1914), was a mining contractor, he lived at, "Bro," Russell street, Quarry Hill. His firm was Jorgensen and Sons, mining contractors. He was a native of the Island of Alsen, Denmark. He left Denmark in the year 1861, embarking at Hamburg in a small sailing Ship. The four folders contain family history documents and photos of the descendants of Eleanor Hinde. This item contains the following documents: A seven page Bendigo Hotel Booklet - Trades Directory for Bendigo 1854 - Contains names of hotel, proprietor, and address.bendigo, sandhurst, peter jorgensen, eleanor hinde, eleanor reynolds, eleanor opie, reynolds collection, bendigo hotels -
 Bendigo Historical Society Inc.
Booklet - Central Deborah Gold Mine Underground Project, 20th June, 1986
... Hotel. present the opening of the Central Deborah Gold Mine Underground Project by Premier John Cain 20th June, 1986, featuring City Club Dancers. Contents include: 'The Legend of Golden Lady Deborah'; the 'Awakening of Deborah' and a description of the Central Deborah Goldmine. Listed are acknowledgements of assistance given by the City Family and City Club; Gillies; Sandhurst Dairies; McDonalds; Swan Breweries; 3BO;, Domenic House of Hair and Beauty; ESG Studios, Selex-Decal; Victoria Police Band; V-Line; Bendigo Timber; Stonemans; Alan Williams Sound; Radio Rentals; Waterfall Quarries; Arthur Holt; Bart N Print and Sandhurst Town. ...Hotel. present the opening of the Central Deborah Gold Mine Underground Project by Premier John Cain 20th June, 1986, featuring City Club Dancers. Contents include: 'The Legend of Golden Lady Deborah'; the 'Awakening of Deborah' and a description of the Central Deborah Goldmine. Listed are acknowledgements of assistance given by the City Family and City Club; Gillies; Sandhurst Dairies; McDonalds; Swan Breweries; 3BO;, Domenic House of Hair and Beauty; ESG Studios, Selex-Decal; Victoria Police Band; V-Line; Bendigo Timber; Stonemans; Alan Williams Sound; Radio Rentals; Waterfall Quarries; Arthur Holt; Bart N Print and Sandhurst Town. ...Two page booklet. On front cover: The Bendigo Trust in conjunction with the City Family Hotel. present the opening of the Central Deborah Gold Mine Underground Project by Premier John Cain 20th June, 1986, featuring City Club Dancers. Contents include: 'The Legend of Golden Lady Deborah'; the 'Awakening of Deborah' and a description of the Central Deborah Goldmine. Listed are acknowledgements of assistance given by the City Family and City Club; Gillies; Sandhurst Dairies; McDonalds; Swan Breweries; 3BO;, Domenic House of Hair and Beauty; ESG Studios, Selex-Decal; Victoria Police Band; V-Line; Bendigo Timber; Stonemans; Alan Williams Sound; Radio Rentals; Waterfall Quarries; Arthur Holt; Bart N Print and Sandhurst Town. central deborah gold mine, gold, opening of mine, john cain -
 Bendigo Historical Society Inc.
Slide - Peter Ellis Collection, the Whipstick and Eucalyptus Oil Production, Solomon Gully Reserve Quarry Hill, Quarry Hill Golf Course Extensions Some history of the Whipstick, 1970-1990
... solomon gully reserve quarry hill bendigo...Whipstick hotel...There is parking available off Burnside St (opposite Quarry Hill / Bendigo Lawn Cemetery). history bendigo peter ellis collection whipstick bendigo Bendigo State Forests eucalyptus oil solomon gully reserve quarry hill bendigo Whipstick hotel shamrock Magetti's Wallace Reef Wine Hall Whipstick Frederick the Great Mine Sebastian quarry hill golf course Peter Ellis Collection, t16 slides of the Whipstick and Eucalyptus Oil Production, Solomon Gully Reserve Quarry Hill, Quarry Hill Golf Course Extensions Some history of the Whipstick. ...When the numerous gold mines declined in production, the eucalyptus oil industry became an important source of work. The first eucalyptus oil producer in Bendigo was a chemist called Richard Sandner who operated a plant and refinery in Bridge Street from 1876. By 1900, many other distillers operated on the northern edge of Bendigo and in the Whipstick. In 1926, the Forest Commision established a eucalyptus distillery at Gunyah in Wellsford State Forest. See the Wellsford Forest Note for more information. Today, there are just two eucalypt distilleries operating in Bendigo. Most of the world’s eucalyptus oil is now produced overseas. SOLOMON GULLY CIRCUIT WALK - Solomon Gully Nature Conservation Reserve. Rangers say this is a great place to see heaps of Bendigo Waxflowers. A 1.5km, unsurfaced track. It is rough and steep in places, but suitable for families. Closed shoes with a good drip are recommend. The track is popular with families and runners. There is parking available off Burnside St (opposite Quarry Hill / Bendigo Lawn Cemetery).Peter Ellis Collection, t16 slides of the Whipstick and Eucalyptus Oil Production, Solomon Gully Reserve Quarry Hill, Quarry Hill Golf Course Extensions Some history of the Whipstick.history, bendigo, peter ellis collection, whipstick bendigo, bendigo state forests, eucalyptus oil, solomon gully reserve quarry hill bendigo, whipstick hotel shamrock, magetti's wallace reef wine hall, whipstick, frederick the great mine sebastian, quarry hill golf course -
 Bendigo Historical Society Inc.
Newspaper - JENNY FOLEY COLLECTION: WATERING HOLE
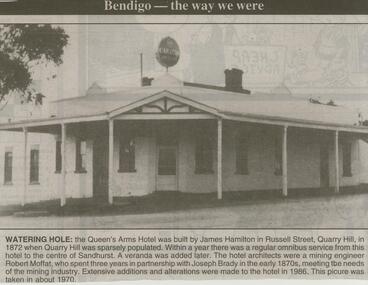
... Watering hole: the Queen's Arms Hotel was built by James Hamilton in Russell Street, Quarry Hill, in 1872 when Quarry Hill was sparsely populated. ...Watering hole: the Queen's Arms Hotel was built by James Hamilton in Russell Street, Quarry Hill, in 1872 when Quarry Hill was sparsely populated. ...Bendigo Advertiser ''The way we were'' from 2000. Watering hole: the Queen's Arms Hotel was built by James Hamilton in Russell Street, Quarry Hill, in 1872 when Quarry Hill was sparsely populated. Within a year there was a regular omnibus service from this hotel to the centre of Sandhurst. A veranda was added later. The hotel architects were a mining engineer Robert Moffat, who spent three years in partnership with Joseph Brady in the early 1870s, meeting the needs of the mining industry. Extensive additions and alterations were made to the hotel in 1986. This picture was taken in about 1970. The clip is in a folder.newspaper, bendigo advertiser, the way we were -
 Bendigo Historical Society Inc.
Document - BOOKLET: ACCENT ON AXEDALE
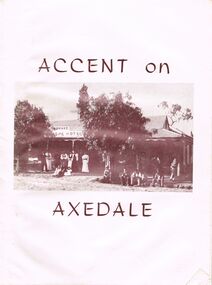
... O'Neill Bluestone Quarries Threshing Teams Hotels General Store and Post Office. ...Booklet: ''Accent on Axedale'', published by the Centenary and Back to Axedale Committee 1970. 36 pages with photographs. Chapters on: Early Settlement; Churches; Education; Police; Municipal Affairs; Commerce; Cemeteries; Race Course Reserve; The Railway (O'Keefe); Eppalock Weir; The Hall; The Wars; C.W.A; Camp Sites; C.F.A; Axedale Progress Association; Sport;Alfred Ruskin Publications. Freelance Press, 61-63 City South Melbourne. 3205axedale, history, early settlement, axedale sporting club, indoor bowls, axedale progress association, c.w.a., country fire association.eppalock weir, the railway, race course reserve, cemeteries, axedale farmers club, the pitcher dressers poem by w. g. o'neill, bluestone quarries, threshing teams, hotels, general store and post office. education, churches, early settlement. -
 Bendigo Historical Society Inc.
Document - DOCUMENT TITLED: NO MEAN CITY, 1960
... Quarry Hill... Back Creek... Duke of Edinburgh... Galatea... Queen Victoria... Shamrock Hotel...Goldfields Sandhurst Mr Wright Chief Commissioner Goldfields Ravenswood Sheep Run Burke & Wills Mr King Long Gully Ironbark Quarry Hill Back Creek Duke of Edinburgh Galatea Queen Victoria Shamrock Hotel Corporate High School Mr Aspinall The Camp Rosalind Park Mr Vahland Fortuna Coliban Scheme School of Mines Red Store Mayor Cr. ...''No Mean City'' (author George Doenau - written in 1960 - see last page for this - and maybe referenced in Marunari - see handwritten note on first page) Document consists of 36 typed pages covering Bendigo history with two final pages being handwritten. Covers the period from 1850s to 1901. Interesting coverage of history with a focus on council involvement. No references or bibliography.George Doenaubendigo, history, city history. the goldfields., bendigo history. goldfields, sandhurst, mr wright chief commissioner goldfields, ravenswood sheep run, burke & wills, mr king, long gully, ironbark, quarry hill, back creek, duke of edinburgh, galatea, queen victoria, shamrock hotel, corporate high school, mr aspinall, the camp, rosalind park, mr vahland, fortuna, coliban scheme, school of mines, red store, mayor cr. bayne, camp hill state school, juvenile industrial exhibition, sanders & finn, harneys bridge, new chum reef, ellesmere company, lansell's 222 claim, mr harkness, sir henry lock, mr cohn. -
 Bendigo Historical Society Inc.
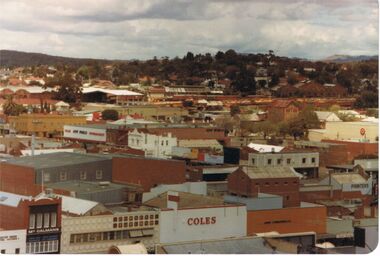
Photograph - VIEW FROM OLD BENDIGO POST OFFICE CLOCK TOWER LOOKING SOUTHWEST TOWARDS QUARRY HILL
... Quarry Hill. Names that appear on buildings are Coles, McCalmans, Bolton printers, New World Supermarket, Hopetoun hotel Target, and above these show buildings on the Bendigo Railway Station site....Hotel and Railway yards and buildings. View from old Bendigo Post Office Clock Tower South West in the direction of Quarry Hill. ...View from old Bendigo Post Office Clock Tower South West in the direction of Quarry Hill. Names that appear on buildings are Coles, McCalmans, Bolton printers, New World Supermarket, Hopetoun hotel Target, and above these show buildings on the Bendigo Railway Station site.bendigo, history, buildings/streetscapes, coles, mccalmans, printers (boltons), new world supermarket, target, hopetoun hotel, and railway yards and buildings. -
 Bendigo Historical Society Inc.
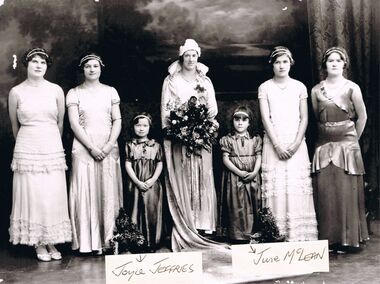
Photograph - PATRICIA COLES (NEE MCLEAN) COLLECTION: BENDIGO EASTER PARADE QUEEN COMPETITION 1930
... Quarry Hill hoteliers. On the right, June McLean, daughter of Nellie & Tom McLean, United Kingdom Hotel, Golden Square....Hotel. Photograph.The Patricia Coles (nee McLean) collection. Bendigo Easter Parade Queen Competition 1930. Copy of a black and white photograph. Four women and two small girls. The Easter Queen holds a large bouquet. The two small girls are identified. Joyce Jeffries, on the left, daughter of Mary & Joe Jeffries, Quarry ...Photograph.The Patricia Coles (nee McLean) collection. Bendigo Easter Parade Queen Competition 1930. Copy of a black and white photograph. Four women and two small girls. The Easter Queen holds a large bouquet. The two small girls are identified. Joyce Jeffries, on the left, daughter of Mary & Joe Jeffries, Quarry Hill hoteliers. On the right, June McLean, daughter of Nellie & Tom McLean, United Kingdom Hotel, Golden Square.bendigo, entertainment, easter parade queen competition, bendigo easter fair. bendigo easter parade queen compettion. mclean family of golden square. united kingdom hotel. -
 Bendigo Historical Society Inc.
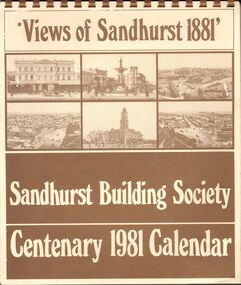
Document - SANDHURST BUILDING SOCIETY CENTENARY 1981 CALENDAR
... Buff Paper, Sepia Text & Illustrations 7 Pages Views of Sandhurst 1881 Calendar Images: Beehive Chambers and Mining Exchange Hotel, Pall Mall; panorama from Post Office Tower looking north to White Hills; Sandhurst Post Office Pall Mall; Sandhurst Railway Station (opened 1862) and Quarry Hill;Alexandra Fountain, Charing Cross, (opened 1881); panorama from Post Office Tower looking south to Golden Square....History House 11 Mackenzie Street Bendigo goldfields BENDIGO History sandhurst building society calendar Buff Paper, Sepia Text & Illustrations 7 Pages Views of Sandhurst 1881 Calendar Images: Beehive Chambers and Mining Exchange Hotel, Pall Mall; panorama from Post Office Tower looking north to White Hills; Sandhurst Post Office Pall Mall; Sandhurst Railway Station (opened 1862) and Quarry Hill;Alexandra Fountain, Charing Cross, (opened 1881); panorama from Post Office Tower looking south to Golden Square. ...Buff Paper, Sepia Text & Illustrations 7 Pages Views of Sandhurst 1881 Calendar Images: Beehive Chambers and Mining Exchange Hotel, Pall Mall; panorama from Post Office Tower looking north to White Hills; Sandhurst Post Office Pall Mall; Sandhurst Railway Station (opened 1862) and Quarry Hill;Alexandra Fountain, Charing Cross, (opened 1881); panorama from Post Office Tower looking south to Golden Square.bendigo, history, sandhurst building society calendar -
 Bendigo Historical Society Inc.
Photograph - PHOTOGRAPHS FROM BOOK - BENDIGO SCENES
... Charing Cross, Technical School, Bendigo private homes ( Lanstellstowe inc. ) c, Post Office, Law Courts,Shamrock Hotel, d, private homes, educational establishments of Bendigo, inc. High School, Central School, School of domestic arts, Quarry Hill School, Gravel Hill. ...Charing Cross, Technical School, Bendigo private homes ( Lanstellstowe inc. ) c, Post Office, Law Courts,Shamrock Hotel, d, private homes, educational establishments of Bendigo, inc. High School, Central School, School of domestic arts, Quarry Hill School, Gravel Hill. ...Pages from book (unknown) : a, RSL, Bendigo Hospital, Benevolent Asylum, b. Charing Cross, Technical School, Bendigo private homes ( Lanstellstowe inc. ) c, Post Office, Law Courts,Shamrock Hotel, d, private homes, educational establishments of Bendigo, inc. High School, Central School, School of domestic arts, Quarry Hill School, Gravel Hill. E, Convent of Mercy, St. Aidan's Orphanage, Bendigo, Municipal Stock Markets Bendigo. Pages are damaged and parts missing. Images appear to be approx. 1920's.bendigo, hospital -
 Bendigo Historical Society Inc.
Document - VICTORIA HILL - BENDIGO BRANCH HISTORICAL SOCIETY - MINE TOUR
... History House 11 Mackenzie Street Bendigo goldfields DOCUMENT Gold Victoria Hill Bendigo Branch Historical Society Mine Tour All Saints Church Joseph La Trobe Bendigo's First Hospital Sacred Heart Cathedral The Central Deborah Mine City Council Londonderry West Shaft New Red White and Blue Consolidated (Big Blue) A Roberts & Sons Big Deborah The New Golden Fleece New Chum Goldfields Central Wattle Gully Mine Chewton Virginia Consols Black's Quarries Coldstream Thompson's Engineering and Pipe Co Ltd Castlemaine New Chum Railway Mine Golden Square Methodist Church The Rocks E J Dunn Gold Monument Shamrock Mine Mt Alvernia Hospital J B Lazarus John Brown Knitwear Factory Gold fMines Hotel David Sterry New Chum Hill Fortuna Villa Geo Lansell Theodore Ballerstedt A H Q Survey Regiment Headquarters Old Chum Mine Central Nell Gwynne Rae's Open Cut Theodore Ballerstedt New Chum Syncline Little 180 Mine Victoria Quartz Wittcheibe's 'Jeweller's Shop' Adventure Advance Cinderella J N Macartney Bendigo Goldfields Registry 1870 Wm Rae Johnson's Devonshire Mine Snobs Hill Mine Ellenborough Mullock Heap Belmont Mullock Heap Sadowa St Mungo United Devonshire Mechanic's Institute Log Lock-Up Court House J B Watson Housing Commission Homes Hustlers Hill Latham and Watsons' The Great Extended Hustlers A Richardson Typed notes for a tour of the area. ...Typed notes for a tour of the area. Areas mentioned are: Hospital Hill, The Central Deborah Mine, New Chum Railway Mine, The Rocks, New Chum Hill, Victoria Hill, Central Nell Gwynne, Rae's Open Cut, Housing Commission Homes and Latham and Watson's. Description of machinery at the Central Deborah Mine, yields, dividends, depth of shafts and directions to get ot the various places is included.document, gold, victoria hill, bendigo branch historical society mine tour, all saints church, joseph la trobe, bendigo's first hospital, sacred heart cathedral, the central deborah mine, city council, londonderry west shaft, new red, white and blue consolidated (big blue), a roberts & sons, big deborah, the new golden fleece, new chum goldfields, central wattle gully mine chewton, virginia consols, black's quarries coldstream, thompson's engineering and pipe co ltd castlemaine, new chum railway mine, golden square methodist church, the rocks, e j dunn, gold monument, shamrock mine, mt alvernia hospital, j b lazarus, john brown knitwear factory, gold fmines hotel, david sterry, new chum hill, fortuna villa, geo lansell, theodore ballerstedt, a h q survey regiment headquarters, old chum mine, central nell gwynne, rae's open cut, theodore ballerstedt, new chum syncline, little 180 mine, victoria quartz, wittcheibe's 'jeweller's shop', adventure, advance, cinderella, j n macartney, bendigo goldfields registry 1870, wm rae, johnson's devonshire mine, snobs hill mine, ellenborough mullock heap, belmont mullock heap, sadowa, st mungo, united devonshire, mechanic's institute, log lock-up, court house, j b watson, housing commission homes, hustlers hill, latham and watsons', the great extended hustlers, a richardson -
 Ballarat Tramway Museum
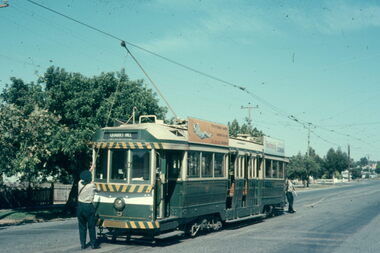
Slide - Bendigo trams - Quarry Hill - Eaglehawk route - set of 4, Warren Doubleday, 12/3/1970
... Set of four slides of Bendigo trams taken by Warren Doubleday on 27/3/1970 1 - tram 5 at Quarry Hill with the conductor raising the trolley pole. 2 - Tram 4 at the Eaglehawk terminus with the Town Hall Hotel behind. 3 - Tram 24 arriving at Eaglehawk 4 - trams 23 and 4 at the end of the double track, tram 23 has an Eaglehawk banner is running a special....Ballarat Tramway Museum South Gardens Reserve Wendouree Parade Ballarat Ballarat goldfields Set of four slides of Bendigo trams taken by Warren Doubleday on 27/3/1970 1 - tram 5 at Quarry Hill with the conductor raising the trolley pole. 2 - Tram 4 at the Eaglehawk terminus with the Town Hall Hotel behind. 3 - Tram 24 arriving at Eaglehawk 4 - trams 23 and 4 at the end of the double track, tram 23 has an Eaglehawk banner is running a special. ...Set of four slides of Bendigo trams taken by Warren Doubleday on 27/3/1970 1 - tram 5 at Quarry Hill with the conductor raising the trolley pole. 2 - Tram 4 at the Eaglehawk terminus with the Town Hall Hotel behind. 3 - Tram 24 arriving at Eaglehawk 4 - trams 23 and 4 at the end of the double track, tram 23 has an Eaglehawk banner is running a special.Yields information about the operation of trams Quarry Hill and Eaglehawk.Colour Slide - Kodak plastic mounts - set of 4Have the photographer's slide number written on them.bendigo, charing cross, tram 24, tram 5, eaglehawk, tram 23, quarry hill -
 Ballarat Tramway Museum
Slide - SECV Bendigo trams operations - set of 9, Warren Doubleday, 31/1/1972
... Set of 9 photos of Bendigo tramway operations taken on 31/1/1972: 1 - tram 3 on the Eaglehawk line for Quarry Hill 2 - Birney 29 on North Bendigo crossing bridge 3 - Charing Cross with trams 29, 6, 3 and 5 4 - Tram 29 at Golden Square with the Golden Square Hotel on the left 5 - tram 29 passing the Fire Station 6 - tram 29 on the North Bendigo line 7 - tram 6 passing the Cathedral 8 - tram 5 on its way to Quarry Hill 9 - tram 18 on its way to Eaglehawk ...Ballarat Tramway Museum South Gardens Reserve Wendouree Parade Ballarat Ballarat goldfields Set of 9 photos of Bendigo tramway operations taken on 31/1/1972: 1 - tram 3 on the Eaglehawk line for Quarry Hill 2 - Birney 29 on North Bendigo crossing bridge 3 - Charing Cross with trams 29, 6, 3 and 5 4 - Tram 29 at Golden Square with the Golden Square Hotel on the left 5 - tram 29 passing the Fire Station 6 - tram 29 on the North Bendigo line 7 - tram 6 passing the Cathedral 8 - tram 5 on its way to Quarry Hill 9 - tram 18 on its way to Eaglehawk Yields information about Bendigo tramways operations in Jan. 1972 tramways Bendigo tram 6 tram 18 tram 5 tram 29 tram 3 Have the photographer's slide number written on them. "2/72/25 to 34" Colour Slide - Kodak cardboard mounts - set of 9 Slide SECV Bendigo trams operations - set of 9 Warren Doubleday ...Set of 9 photos of Bendigo tramway operations taken on 31/1/1972: 1 - tram 3 on the Eaglehawk line for Quarry Hill 2 - Birney 29 on North Bendigo crossing bridge 3 - Charing Cross with trams 29, 6, 3 and 5 4 - Tram 29 at Golden Square with the Golden Square Hotel on the left 5 - tram 29 passing the Fire Station 6 - tram 29 on the North Bendigo line 7 - tram 6 passing the Cathedral 8 - tram 5 on its way to Quarry Hill 9 - tram 18 on its way to Eaglehawk Yields information about Bendigo tramways operations in Jan. 1972Colour Slide - Kodak cardboard mounts - set of 9Have the photographer's slide number written on them. "2/72/25 to 34"tramways, bendigo, tram 6, tram 18, tram 5, tram 29, tram 3