Showing 4942 items
matching shapes
-
 Cheese World Museum
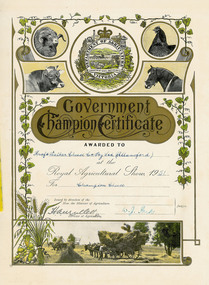
Certificate, Government Champion Certificate, 1951
Kraft-Walker Cheese Company commenced in Allansford in 1935 leasing the factory premises from Warrnambool Cheese and Butter Factory Company. Dairy companies entered competitions organised by the Dairy Industry Association and associated organisations and local agricultural societies to encourage improvement in products. Some of these awards are considered prestigious and highly regarded within the industry. The certificates were passed to Cheese World Museum by the factory management.This certificate was held by the factory management until transfer to Cheese World Museum. The certificate provides an insight into the dairy industry during the 1950s.Cream card certificate from Royal Agricultural Show has a plain line border on left, bottom and right side with inner border of green vine plant on left, top and right side. A sheaf of oats and a scene of haymaking complete the border design. The top of the certificate has the Department of Agriculture Victoria logo flanked by circular images of a sheep and cow on the left and a hen and horse on the right. The centre of the certificate has a gold shape overprinted with black.Government Champion Certificate/ Awarded to Kraft Walker Cheese Co Pty Ltd (Allansford) at the Royal Agricultural Show 1951/ for Champion Cheese/ Issued by direction of/Hon. the Minister for Agriculture/H A Mullett/ Director of Agriculture/ W J Park/ Judgesallansford, kraft walker cheese company, cheese manufacture, dairy awards, product awards, warrnambool cheese and butter factory company, kraft walker pty ltd, royal agricultural show, department of agriculture victoria, cheeses, cheese manufac, warrnambool cheese and butter -
 Flagstaff Hill Maritime Museum and Village
Functional object - Skylight frame, Alexander Stephen and Sons, 1869
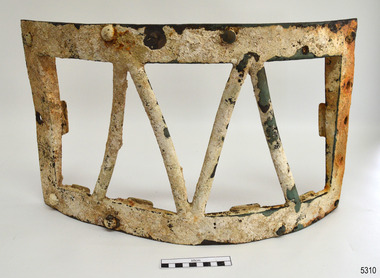
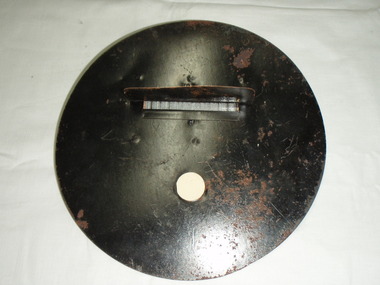
This skylight frame would have been fitted on the Newfield’s poop deck (or raised deck that forms the roof of a cabin at the aft or rear of the ship). It would have covered and protected a glass pane that allowed light to enter the area below desk. The glass pane from the skylight is missing. The Newfield was a three-masted iron and steel barque, built in Dundee, Scotland, in 1869 by Alexander Stephen and Sons. It was owned by the Newfield Ship Company in 1890 and later that year It was registered in Liverpool to owners Brownells and Co. The Newfield left Sharpness, Scotland, on 28th May 1892 with a crew of 25 under the command of Captain George Scott and on 1st June left Liverpool. She was bound for Brisbane, Australia, with a cargo of 1850 tons of fine rock salt. On the night of 28 August 1892, the Captain mistook the Cape Otway light for that of Cape Wickham (King Island) and altered tack to the north and east putting the vessel on a collision course with the Victorian coast. At around 3:40 am the Newfield struck rocks about 100 yards from shore, and 5 feet of water filled the holds immediately. The captain gave orders to lower the boats which caused a disorganised scramble for safety among the crew. The starboard lifeboat was cleared for lowering with two seamen and two apprentices in her, but almost as soon as she touched the water she was smashed to bits against the side of the vessel, and only one of the four reached safety ashore, able seaman McLeod. The rough sea made the job of launching lifeboats very difficult. The first two lifeboats launched by the crew were smashed against the side of the ship and some men were crushed or swept away. The third lifeboat brought eight men to shore. It capsized when the crew tried to return it to the ship for further rescue The rescue was a difficult operation. The Port Campbell Rocket Crew arrived and fired four rocket lines, none of which connected with the ship. Peter Carmody, a local man, volunteered to swim about one mile offshore to the ship with a line to guide the fourth and final lifeboat safely to shore. He was assisted by James McKenzie and Gerard Irvine. Seventeen men survived the shipwreck but the captain and eight of his crew perished. The Newfield remained upright on the reef with sails set for a considerable time as the wind slowly ripped the canvas to shreds and the sea battered the hull to pieces. The Marine Board inquiry found the wreck was caused by a "one-man style of navigation" and that the Captain had not heeded the advice of his crew. For his heroic efforts, Peter Carmody was awarded the Bramley-Moore medal by the Liverpool Shipwreck and Humane Society for Saving Life at sea on January 21st 1893. The medal and a letter of congratulations were donated to Flagstaff Hill Maritime Museum by Peter Carmody's granddaughter Norma Bracken and her son Stuart Bracken on 25th May 2006. Flagstaff Hill’s collection of artefacts from the Newfield is significant for its association with the shipwreck Newfield, which is listed on the Victorian Heritage Registry. The collection is additionally significant because of the medal awarded to a local man Peter Carmody. The Newfield collection historically also represents aspects of Victoria's shipping history and its association with the shipwreck.Skylight, frame only. The heavily encrusted brass framework has eight bolts around the long side, and four metal bars forming two ‘v’ shapes across the centre. The frame is, slightly concave towards the inner side. The shorter ends of the frame each have a ‘U’ shaped bracket attached in the centre. The shorter ends are wider on one end and taper towards the other end to about a quarter of the thickness. The frame was recovered from the wreck of the NEWFIELD.Noneflagstaff hill maritime museum, newfield ship wreck, alexander stephen & sons, brownells & co, captain george scott, great ocean road ship wreck, peter carmody, bramley-moore medal, liverpool shipwreck and humane society, skylight cover, skylight frame, ship fitting, light cover, newfield -
 Flagstaff Hill Maritime Museum and Village
Artwork, other - Window, circa 1928
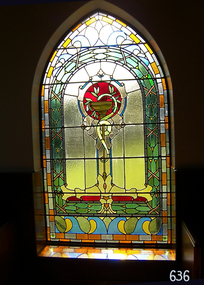
This religiously themed window is situated in the western (weather) wall of the St. Nicholas Mission to Seamen’s Church building in the Flagstaff Hill Maritime Village. It was crafted circa 1928. ABOUT THE WINDOW This window, once known as the Dr Connell Memorial Window, was a feature of an external wall adjacent to the Women’s Children’s Wards of Warrnambool Hospital. Honorary Doctors had played a significant role in the operation of the hospital between the years 1900 to 1939. One of these doctors was Dr. Connell, who passed away in 1928. The green glass plaque is also a registered object in Flagstaff Hill's Collection. Its inscription dedicates the window to Dr. Connell. The inscription reads: “A tribute to Egbert John Connell M.B.B.S. who for 30 years rendered devoted and valuable service to this institution. Obiit April 4th 1928 A.D." A paragraph in the book ‘A History of the Warrnambool Base Hospital’ by Forth and Yule describes the role of the Honorary Doctors - “At the start of the period the senior-part time medical officer was replaced by the junior resident medical officer and control of beds and the right to operate were given to the honorary medical officers...and these men dominated the Warrnambool medical world in the years before the Second World War.” Dr. Connell leased ‘Ambleside’, 192 Koroit Street, in the early 20th century, following Dr Teed who had previously run his medical practice there. In 1914 Dr Connell purchased the property and continued his private practice there until his death in 1928. He also took a prominent part in hospital work, both as physician and surgeon, and often acted as spokesmen for the Honorary Doctors. According to colleague Dr. Horace Holmes’ subsequent notes, it was after the close of the First World War, and the following years of the world-wide pneumonic influenza epidemic, that Dr. Connell himself contracted pneumonia and died. His family and friends then recognised his work by gifting the memorial window in his honour to the Hospital. By the mid-1970s the old wards at the hospital had been replaced and there was no obvious place for the window. Discussions between the previous and past Hospital managers, the Anglican Diocese, and Flagstaff Hill Planning Board, led to its installation in its present position in St Nicholas Seamen’s Church and the memorial plaque was later installed beside the window. St NICHOLAS SEAMEN’S CHURCH, Anglican Church Flagstaff Hill’s Mission to Seamen was opened in 1981. Its conception was partly motivated by the offer of Stained Glass Memorial Windows from the local Warrnambool and District Base Hospital, which was undergoing multi-storey development in the late 1960’s and early 1970’s. The Manager/Secretary at the time was keen to see the historical windows installed in an appropriate location. The chapel was designed by a local architectural draftsman in conjunction with members of the Planning Board of Flagstaff Hill, and built by Mr Leon Habel. The vision of the designers included the hope that the church be used for formal worship such as weddings and funeral, and for multi-denominational special services such as War commemorations. The design is based on the ‘Mission to Seamen’ buildings in both Portland and Port Melbourne. These types of buildings were often erected to house social and worshipful activities for seamen. The materials used in the building include sandstone recycled from nineteenth-century buildings demolished in Warrnambool and American slate tiles retrieved from the 1908 wreck of the FALLS OF HALLADALE. Most of the chapel furnishings came from the Williamstown Missions to Seamen, which was consecrated in 1946 but later decommissioned. These artefacts range from the altar cloth to the hymn board and include a visually stunning round stained glass widow called ‘Christ Guiding the Helmsman’. However the provenance of this particular artefact, large western window, is local. This stained glass memorial window is of local, historical and social significance, linking local history and heritage with one of Warrnambool's doctors, Dr. Egbert John Connell (d. 1928), who gave 30 years of dedicated, medical service to the local citizens.Stained glass leadlight window in Gothic arched metal frame with six horizontal reinforcing rods. Image depicts a golden flat-bowled baptismal font on a slender stand with foliage proceeding from it. The image is internally framed by a Roman arch of coloured glass and surrounding rectangular and breaking-wave shapes. (The window was previously known locally as the Dr. Connell Memorial Window and a plaque dedicated to Dr. Connell is catalogued separately. See Context notes for details.)flagstaff hill, warrnambool, shipwrecked coast, flagstaff hill maritime museum, maritime museum, shipwreck coast, flagstaff hill maritime village, great ocean road, chapel window, stained glass window, warrnambool and district base hospital, st nicholas mission to seamen’s church, williamstown mission to seamen, dr egbert connell, ambleside warrnambool, leon habel builder, falls of halladale slate, memorial window, commemorative window, dr connell -
 Flagstaff Hill Maritime Museum and Village
Instrument - Ship Log
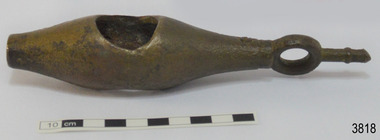
The ship's log part, called a fish, is likely to be from a mechanical taffrail log system. It was recovered from the wreck site of the barque, the 1840-1852 Grange. There are no marks on the fish to identify its maker or model. It is part of the John Chance Collection. This ‘fish’ is part of an early to mid-1800s ship's log. It would likely have been part of a taffrail log connected to a rotor (also called propeller, spinner) by a strong line, and the other end connected by a line to a dial mounted on the taffrail, or stern rail, at the stern of the vessel. As the propeller rotated through the water it would spin the log, which in turn would cause a number to register on the dial, showing the current speed in knots; one knot equals one nautical mile per hour. TAFFRAIL LOGS A taffrail log is a nautical instrument used for measuring the speed of a vessel, providing vital navigational information to be calculated, such as location and direction. A log has been used to measure the speed of a vessel since the 1500s. A simple piece of wood was tied to a long line and thrown into sea at the back of the vessel. The rope was knotted all along at equal distances apart. On a given signal the log line was pulled back into the vessels, the knots counted until the log came up, then the figures were calculated by a navigator In 1802 the first successful mechanical log available for general use was invented by Edward Massey. It had a rotor 'V' section connected to a recording mechanism. The water’s movement rotated the rotor, which intern sent the movement to the recorder. There are examples of this invention available to see in some of the maritime museums. Thomas Walker, nephew of Edward Massey, improved on Massey’s design, and Walker and his son took out a patent on the A1 Harpoon Log. In 1861. Both Massey and Walker continued to improve the designs of the taffrail log. New designs were still being introduced, even up to the 1950s. THE GRANGE, 1840-1858- The wooden barque ’Grange’ was a three-masted ship built in Scotland in 1840 for international and coastal trade. On March 22, 1858, the Grange set sail from Melbourne under Captain A. Alexander, carrying a cargo of ballast. The barque had left the Heads of Phillip Bay and was heading west along the Victorian coast towards Cape Otway. The ship struck Little Haley’s Reef at Apollo Bay due to a navigational error and was stuck on the rocks. The crew left the ship carrying whatever they could onto the beach. Eventually, the remains of the hull, sails and fittings were salvaged before the wreck of the Grange broke up about a month later. About 110 years later, in 1968, the wreck of the Grange was found by divers from the Underwater Explorers Club of Victoria. They were amazed to find a unique, six to nine pound carronade (type of small cannon) and a cannonball on the site. There have been no other similar carronades recorded. In that same year the anchor of the Grange was recovered by diver John Chance and Mal Brown. The ship’s log is significant historically as an example of hardware used when building wooden ships in the early to mid-19th century. The ship’s log is historically significant as an example of the work and trade of blacksmith. The ship’s log also has significant as it was recovered by John Chance, a diver from the wreck of the Grange in the 1968. Items that come from several wrecks along Victoria's coast have since been donated to the Flagstaff Hill Maritime Village’s museum collection by his family, illustrating this item’s level of historical value. The ship’s log is historically significant for its association with the 1840s wooden barque, the Grange. The Grange is an historical example of a Scottish built vessel used for international and coastal trader of both cargo and passengers in the mid-19th century. The Grange is an example of an early ship, designed with a wooden hull. It is significant as a ship still available to divers along the south coast of Victoria, for research and education purposes. The Grange is an example of a mid-19th century vessel that carried a weapon of defence onboard. Ship log fitting, called a fish; part of a brass navigational instrument, likely to be from a taffrail log. The metal is a tan colour and has rough surface with a sheen, and discolouration in places. Its basic shape is a hollow cylinder with ends tapering to a smaller size. In the centre there are opposing openings cut out, showing a rough texture inside. One end on the cylinder is closed with a ring and shank installed, fixed by an embedded screw through the end of the cylinder. There are no inscriptions.flagstaff hill, warrnambool, flagstaff hill maritime museum, maritime museum, shipwreck coast, flagstaff hill maritime village, great ocean road, west coast trader, apollo bay, mid-19th century shipwreck, the grange, scottish barque, little henty reef, captain a alexander, underwater explorers club of victoria, vhr 5297, coastal trader, wooden shipwreck, john chance, wooden ship, taffrail log, marine instrument, marine technology, navigation, nautical instrument, mechanical log, nautical navigation, navigation equipment, scientific instrument, ship log, ship log register, ship speed, taff rail log, patent log, towed log, taffrail log fish, edward massey, thomas walker -
 Bendigo Historical Society Inc.
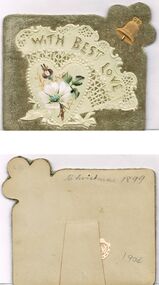
Ephemera - GREETING CARD, 1899
Greeting Card: Christmas Greeting Card rectangular in shape with Khaki Velvet background and a light green, fan shaped plastic like material with mouldings of 'With Best Love'' plus a heart with painted flower and a ladies shoe. Right hand top corner is a gold bell. The back has Christmas 1899 hand written and two slits for stand. Under the slit is a note in gold printing and Horse Shoe 'Wishing you a Joyous Christmas and poem. Box 625ephemera, mementoes, christmas, greeting card. christmas. -
 Bendigo Historical Society Inc.
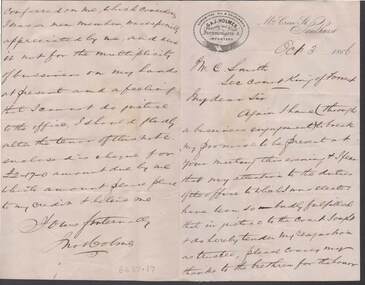
Document - ANCIENT ORDER OF FORESTERS NO. 3770 COLLECTION: CORRESPONDENCE
Letter written on paper with printed letterhead. The paper has a business logo in the top left corner: Gunsmiths, Oil & Colourmen. G. & J. Holmes. Wholesale and Retail. Ironmongers & Importers, All printed in a belt in an elliptical shape. Letter is from Jno Holmes, he wishes to resign as trustee because he feels he is not doing justice to the Court because of business commitments. He has enclosed a cheque for £2-17-0 to place to his credit.societies, aof, correspondence, ancient order of foresters no. 3770 collection - correspondence, g & j holmes, c smith, court king of the forest, jno holmes -
 Bendigo Historical Society Inc.
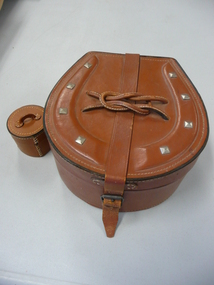
Accessory - LEATHER COLLAR CASE
Leather collar case in a horse-shoe shape (impressed leather 'shoe' with 'nails' on top). Top has stiched leather thin 'rope' in the form of a reef knot over the leather strap that closes the box. Hinged with single leather strap. Lining is a fine blue cotton material. A central circular leather stud box with leather handle has broken away from the internal base (due to very firm fitting lid to box?). 1920s-1930s?personal effects, containers, collars -
 Bendigo Historical Society Inc.
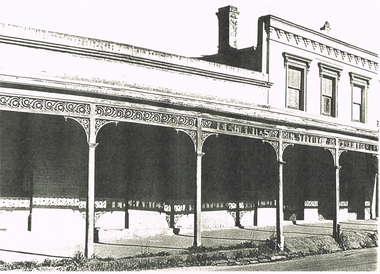
Photograph - LONG GULLY HISTORY GROUP COLLECTION: MECHANICS INSTITUTE FREE LIBRARY
Photocopy of Mechanics Institute Free Library printed on cream paper. The right hand side of the photo has two stories with decorative brickwork above the windows. To the left is single story. The veranda has ironlace at the top on one side and Mechanics Institute Free Library on the two story end. The veranda poles have have ironlace at the top corners and wooden shapes below. The wall under the veranda is very dark. Some plants are growing at the edge of the veranda.bendigo, history, long gully history group, the long gully history group - mechanics institute free library -
 Bendigo Historical Society Inc.
Accessory - MAGGIE BARBER COLLECTION: 24CT GOLD PLATE MIRROR, 1890's
Object. Rectangular in shape, 15 cms x 10.5 cms mirror frame, with a 17 cms handle. The mirror has a bevelled edge, and is backed with a deep cream linen fabric embroidered in a fine silk floral-spray petit pomt embroidery. The frame is marked 24 ct. GPL (24ct gold plate). The handle adjoins the mirror with three graduated circles, and three more circles, graduated in diameter, form a small ''knob''at the lower edge.24ct Gold Platedomestic equipment, gold, 24ct gold plate hand mirror -
 Bendigo Historical Society Inc.
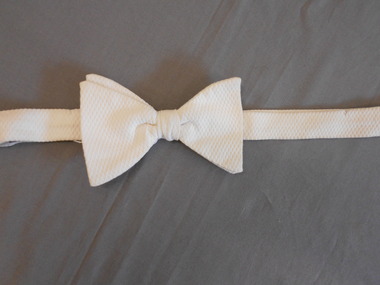
Clothing - JOHN FREDERICK HARPER COLLECTION: LODGE REGALIA- WHITE BOW TIE, 1950-1990's
Clothing. A textured weave, cotton bow, with two rectangular shapes - 9.5 cm x 6.0 cms, with a one cm loop at the centre, attached to a folded double cotton band, 2 cm x 34 cm long, which would fit under the collar of the Lodge shirt. A 1.5 cm diameter silver coloured metal loop at one end of the band, and a silver coloured hook at the opposite end of the band, would fasten the tie in position.costume, male, white cotton bow tie-lodge regalia -
 Bendigo Historical Society Inc.
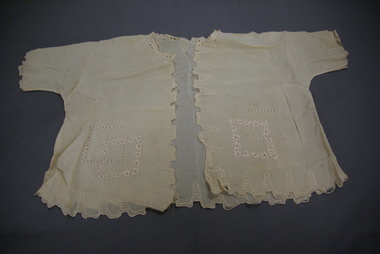
Clothing - CREAM SILK BABY'S JACKET OR BODICE, 1930 - 1940's
Fine cream silk. Round neckline, centre front opening (no fasteners ).All edges are featuring a cut out profile, almost giving a scalloped edge.These are outlined with shaped running - stitch embroidery, forming peaked shapes. Eyelet embroidery around the neckline, suggest there was once a ribbon tie around the neckline. Two interlocking squares on either side fronts are outlined with silk embroidery - one square floral, one square eyelets. Extended sleeves.costume, children's, jacket or bodice -
 Bendigo Historical Society Inc.
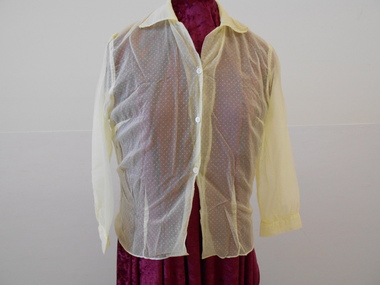
Clothing - LADIES LONG SLEEVED BLOUSE
Ladies yellow long sleeved blouse. See through nylon fabric with all over spot pattern. Fold over collar. Front opening with tree X 1 cm white plastic buttons. Horizontal darts at bustline on front. Vertical darts from lower hem- two at front and two at back to form shaping. Set in long sleeves with 4 cm cuffs, fastened with one X 1 cm white plastic button.costume, female, ladies yellow long sleeved blouse -
 Bendigo Historical Society Inc.
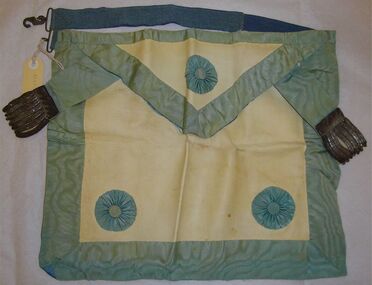
Textile - MASONIC APRON - CARL MUELLER
White leather Masonic Apron with pale blue ribbon border and a blue rosette in each corner. White leather flap at the top with blue border and a pale blue rosette. On each side of the flap is a ribbon with 7 metal spring like pieces coming from a number of small pieces on an angle. The back is line with blue silk. An elastic apron string with a metal hook in the shape of two entwined serpents? .The hook hooks into a catch on the other side.organization, club / society, masonic apron, masonic apron, carl mueller -
 Bendigo Historical Society Inc.
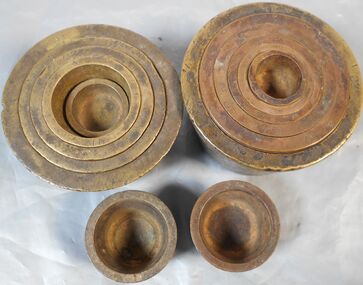
Tool - Nesting weights
Troy ounces are slightly heavier than avoirdupois ounces that we commonly use. 1 troy ounce equals roughly 1 1/8 ounces and is used for the weighing of precious metals and gems. It is believed that the troy ounce dates back to the 16th century to the town of Troyes in Frances. This was a major trading centre for Europe and a standardised for of weights was needed. One troy ounce equalled 480 grains of barley.Two Sets of Troy weights all circular and tapering to the bottom plus two individual weights - 1oz. One Complete set of Troy weights round in shape and tapering to bottom with six inner weights imprinted with 6oz, 4oz, 2oz, 1oz and nothing on two inner smaller ones.2nd set is incomplete with three inner crucibles next size is missing and then smallest size 6oz 4oz 2oz 1oz . Two individual weights 1oz.gold mining, gold mining crucibles, gold mining equipment, gold smelting -
 Tennis Australia
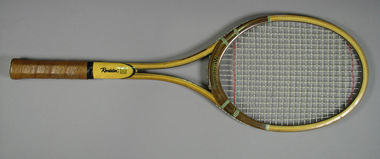
Racquet, Circa 1976
A Revelation Mercury tennis racquet, with an open throat/split shaft, ribbon whipping around shoulders, and a leather handle grip with X-formation perforations. Model name features across base of head. Revelation logo features along lower shaft, accompanied by trademark comprising of geometric shapes. 'F' trademark features on plastic butt cap. Materials: Wood, Nylon, Leather, Ink, Glue, Lacquer, Metal, Ribbon, Paint, Adhesive tape, Plastictennis -
 Tennis Australia
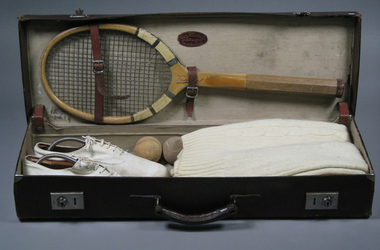
Lawn tennis set, Circa 1925
A Henry Murton case (.1); containing: a 'Tropical' wooden tennis racquet (.2); a pair of Slazenger tennis shoes (.3), bearing the initials 'JB'; tennis balls (.4 - .5); pants (.6); a sweater (.7); and a pair of Dunkleman shoe shapers (.8), scrated with the initials 'N J-B'. Materials: Metal, Leather, Plastic, Wood, Cloth, Wool, Canvas/Cotton, String, Gut, Cloth tape, Rubber, Felt, Glue, Lacquer, Paper, Inktennis -
 Melbourne Royal
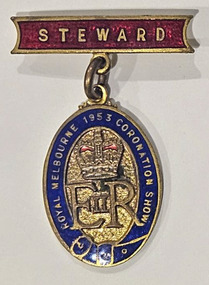
Badge, The Royal Agricultural Society of Victoria, 1953
In the 1953, the Show held a special Coronation Show in honour of the coronation of Queen Elizabeth II.A badge consisting of a badge attached to a pin, and an oval shape hanging from the bar. The base of the badge is gold with inserted colour in the obverse. The bar is rectangular with concave sides and red infill around text ("STEWARD"). The oval has a dark blue outline with gold text and a belt-design similar to the RASV Speed the Plough Logo. Inside the outline is mostly gold. The background is textured, and on top of that is a crown design with red colouring on the 'cushioning' and "E[II]R".[obverse bar] STEWARD [obverse oval] ROYAL MELBOURNE 1953 CORONATION SHOW / ER II [reverse oval] K.G. LUKE / MELB /1953 melbourne royal show, melbourne royal show, royal melbourne coronation show, queen elizabeth ii, badge, steward, officials, uniform -
 Bendigo Military Museum
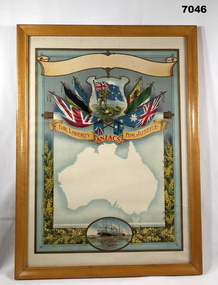
Certificate - CERTIFICATE, FRAMED, Goldsworthy & Davey Artists, WW1
Red print on Certificate template. "For Liberty ANZACS FOR JUSTICE". This is a blank certificate.Certificate - paper, red print on scroll, illustrated in colour - top to bottom, blank scroll; 2 soldiers and flag surrounded by 6 flags, silhouette in white of Australian map, oval shape with ship and troops. Further side decoration yellow and green wattle flowers and foliage. Pale blue background. Certificate template - possibly available to Shires and localities to customise as required. frame - timber, with varnish finish in natural tones, glass front and cardboard back.framed, ww1, certificate -
 Bendigo Historical Society Inc.
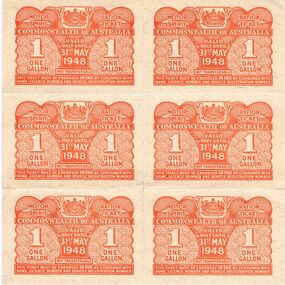
Ephemera - MISS G ALICE JONES COLLECTION: WWII ONE GALLON FUEL RATION TICKETS, 1948
Petrol rationing was gazetted in May 1941. Australia's lack of fuel storage options and the diversion of tankers bringing fuel here forced the government to begin rationing. Initially it was proposed that consumption should be reduced by 50% but this was modified to 1/3 reduction. People had to apply for a petrol licence and this was then used to obtain ration coupons. Initially coupons were issued on a 6 monthly basis but this was reduced to 2 monthly and allowed people roughly 2000 gallons per year. Coupons allowed for 1, 2, 5, 10, 44 and 100 gallon amounts depending on need. eg. private, commercial, farm use. Rationing was strictly enforced until 1942 but remained in effect until 1950.WWII One Gallon Fuel Tickets: 6 x cream card with blue flecks, perforated edges and red print. At the top in the centre is the Commonwealth Emblem and Motor Spirit Ration Ticket. Commonwealth Of Australia. Underneath is 1 One Gallon and Valid only until 31st May 1948. Not Transferable. This ticket must be endorsed in ink by consumer with name, licence number and vehicle registration number. The back ground is circle shapes with Department of Supply and Shipping.government, federal, fuel ration ticket -
 Bendigo Historical Society Inc.
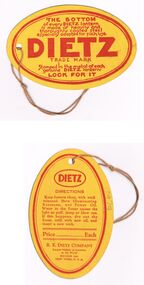
Memorabilia - DIETZ LANTERN LABEL
See Items 7545 & 7544Dietz Lantern Label: Orange label oval in shape with a pink cotton thread through a small hole for attaching. Red print with red border line around the label. The label reads *The bottom of every Dietz lantern is made of heavily and thoroughly coated steel especially adapted for such use. DIETZ. Trade Mark. Stamped in the metal of each genuine DIETZ lantern. Look for it. On the back DIETZ with a red oval border and how to care for the lantern. Box 625R. E. Dietz Company. Largest makers of Lanterns in the World. Founded 1840 New York. U.S.A.business, retail -
 Bendigo Military Museum
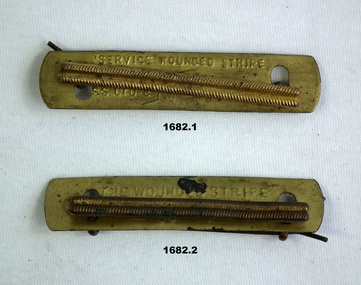
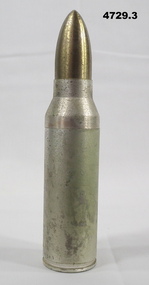
Uniform - VARIOUS AWARDS, CHEVRONS, EMPIRE WOUNDED & BADGE, 1.2) 1916-18. .3) 1914-18. .4.5) post WW1
Empire Wounded Stripes were introduced in 1916. Each time a soldier was wounded and taken out of the field he was entitled to a stripe. Worn on the left sleeve below the elbow on your uniform These items belonged to Frederick Campbell Moller No 2233 AIF. Refer1661.3, 1663P, 1680.3..1) .2) "Empire Wounded Stripes" metal, base plate with Stripe resembling gold braid fixed by two pins through the plate. .3) Rising Sun collar badge, blackened pressed brass with 2 lugs on rear. .4) RSL Membership badge, metal, enamelled, crown at top with two central figures. .5) Association Badge, 3rd Field Arty Brigade, copper wishbone shape and Field Artillery motif blue & red enamel..1) "Service Wounded Stripe" .2) "The Wounded Stripe" .3) "Australian commonwealth military forces" .4) "Returned Sailors, Soldiers Imperial League of Australia"numismatics - badges - military, metalcraft - brassware, wia, rsl, association -
 Bendigo Military Museum
Memorabilia - TRENCH ART, CIGARETTE LIGHTER AND ASHTRAY
Dean collection, refer Cat No 4575PThis assembly is in the shape of a small cannon shell with projectile. 1. The base is shaped like a cannon shell. Inside is a ring to butt your ashes. It is made of a metal, the coating of which is pock marked. 2. The centre piece is tapered from 5 cm down to 3 cm. Underneath it is the fuel charging socket. On top is the flint button and fire hole. 3, The nose cone is shaped like an A.P. projectile. It tapers from 3 cm to a point.The base of the shell has "CHNA 1953.9. 1-7".war, smoking -
 Port Fairy Historical Society Museum and Archives
Functional object - Headlamp Masks, 1940's
Used during WWII to dim headlights making them, hopefully, invisible from the air. These were used by Mr Claude Freckleton who lived on a farm outside of Port Fairy Pair headlamp masks, with shaded glass slit - Painted blackHow to fit "G J C" approved headlamp mask Remove glass from car headlamp & mark mask to the size and shape of glass centering the glass slit and celluloid insert. Cut mask with tin snips to fit the headlamp instead of glass with this side inward towards the globe. Adjust the headlamp downward 2 degrees from the perpendicular so that the light beam strikes the road 10 feet from the front of the car. * Important - Do not alter the angle of slits over slits.world war two, headlights, car, headlight covers -
 The Beechworth Burke Museum
Animal specimen - Black Shouldered Kite, Trustees of the Australian Museum, 1860-1880
The Black Shouldered Kite is commonly found throughout mainland Australia in grasslands and other open habitats. It is a raptor (bird of prey) that will eat mice and other small rodents. The species is monogamous and will find a mate by the male giving food to the female while both are in flight. It is sometimes confused with the letter-winged kite though there undercarriages when in flight are very different with the letter-winged showing the letter W or M and the black shouldered kite showing black wing tips with white towards its belly area. The feathers of this species when alive and in the wild are more white than this specimen. The iris is usually red in mature birds so this specimen may not have been a mature bird as its eyes are brown. However, this is difficult to ascertain because it is also possible that the taxidermist who replaced the original eyes with the current glass ones provided a colour which was not accurate to the age/species of the bird. This specimen is part of a collection of almost 200 animal specimens that were originally acquired as skins from various institutions across Australia, including the Australian Museum in Sydney and the National Museum of Victoria (known as Museums Victoria since 1983), as well as individuals such as amateur anthropologist Reynell Eveleigh Johns between 1860-1880. These skins were then mounted by members of the Burke Museum Committee and put-on display in the formal space of the Museum’s original exhibition hall where they continue to be on display. This display of taxidermy mounts initially served to instruct visitors to the Burke Museum of the natural world around them, today it serves as an insight into the collecting habits of the 19th century.This specimen is part of a significant and rare taxidermy mount collection in the Burke Museum. This collection is scientifically and culturally important for reminding us of how science continues to shape our understanding of the modern world. They demonstrate a capacity to hold evidence of how Australia’s fauna history existed in the past and are potentially important for future environmental research. This collection continues to be on display in the Museum and has become a key part to interpreting the collecting habits of the 19th century.This Black Shouldered Kite has a white face and front of body with a grey posterior from the top of its head to its tail. It has black on its wings/shoulders. Its face is white with its eyes delineated by small black apostrophe like shapes from the inner eye to the top of the eye. The specimen stands on a wooden perch and has a swing tag tied around its right leg. Its eye colour is brown rather than red, indicating it is not a mature specimen.9. / Black Shouldered Kite / See Catalogue, page 3 / taxidermy mount, taxidermy, animalia, burke museum, beechworth, australian museum, skin, reynell eveleigh johns, bird, black shouldered kite -
 Flagstaff Hill Maritime Museum and Village
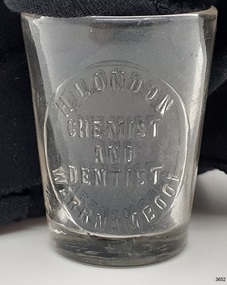
Container - Medicine Glass, W T & Co. (Whitall Tatum), late 19th Century to 1916
This medicine glass, or dose cup, was made for Mr. H. London, chemist and dentist, Warrnambool. His premises was at corner of Koroit and Liebig Streets, Warrnambool. The medicine glass has graduations on its side to measure doses of Teaspoon, Dessert Spoon and Tablespoon. It was donated by the family of Dr WR Angus of Warrnambool. The side seams and indented base of the glass, with the embossed lettering, show that it was produced in a three-piece mould, a method used in the late 19th and early 20th century. Mr H London was recorded in local newspaper articles from The Warrnambool Standard between 1885 to 1904. A further record in The Warrnambool Standard mentions Mr London, chemist, formerly of Warrnambool, as currently a chemist in Moore Street, Rochester. He was noted again in the Bendigo Advertiser in 1917. The maker, Whitall Tatum & Co, is clearly marked on the base of the bottle. The company was a well-known maker of prescription bottles. He used the brand "W. T. & Co". from Mid-1870's until the late 1880's, moulded into his glassware.This medicine glass is significant as an example of medical equipment that has a design still used today. It is also significant for its association with H London, a local Warrnambool chemist involved in the community and commerce of early 20th century in Warrnambool.Medicine glass or dose cup, c. 1916. Glass is a conical shape with inward sloping sides and a concave base. there are side seams and a concave base. Embossed inscriptions are on the glass, showing measurements in the imperial scale on one side , the owner's details are on the other side and the maker's details are on the base. Three horizontal lines are etched on the left of the measurements. The glass belonged to H. London, Chemist and Dentist, Warrnambool, and was made by Whitall Tatum & Co., U.S.A. The glass is part of the W R Angus Collection.On sides: "TABLE", "DESSERT", "TEA". "H LONDON / WARRNAMBOOL / CHEMIST AND DENTIST" On base: "W.T. & CO. / A.J. / U.S.A."flagstaff hill, warrnambool, shipwrecked coast, flagstaff hill maritime museum, maritime museum, shipwreck coast, flagstaff hill maritime village, great ocean road, dose cup, medicine glass, chemist, mdeical equipment, medicine, h. london, chemist and dentist, liegig st warrnambool, rochester, whitall tatum & co, w. t. & co., three-piece mould, w.r. angus -
 Flagstaff Hill Maritime Museum and Village
Marble Tile, circa 1878
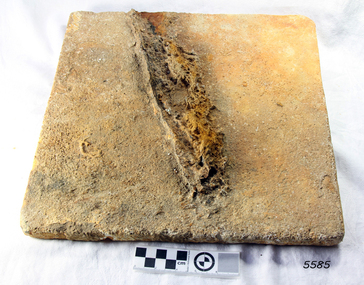
The artefact is a white marble tile raised from the wreck of the LOCH ARD (1878). The cargo manifest of the sunken vessel has the entry “Marble £400”. This is placed directly following the entry “Glass (604 cases)”. This conjunction suggests the marble tile was originally part of a consignment intended for use in a ‘high end’ residential or public building project in the gold and wool rich Colony of Victoria. Traditionally, white or cream marble was imported into Britain from the Mediterranean region of Europe, where beds of sedimentary limestone (calcium and magnesium carbonate) had been buried over a long geological period of time. Deep in the earth’s crust, it had been subjected to immense pressures and high temperatures, sufficient to completely re-crystallise the original deposits. Marble beds began as layers of sediment at the bottom of ancient tropical seas, forming from the skeletal remains of calcareous fossils, shell, and coral fragments. The metamorphic process of prolonged compression and heating recrystallised this skeletal material, destroying all signs of the original sedimentary fabric. The resulting ‘true’ marbles of, for example, White Carrara (Tuscany, Italy), Verdi (green) Antico (Thessaly, Greece), and Rouge (red) Languadoc (Carcassone, France), were highly prized in classical decoration (sculpture and friezes) and architecture (temples and arches). Marble was found in nineteenth century Australia, but in small, uneconomic deposits, not suitable for commercial quarrying. The comparative expense of imported marble restricted its use in colonial buildings to carved fireplaces and mantel pieces, or outdoor ornaments such as fountains, statuary and grave stones. If Carrara marble floor tiles were used, they were used sparingly, as an arresting feature in entrance halls for instance. However, most prominent private and public construction used timber flooring, waxed or ‘jappaned’, with carpet runners and rugs (for example the Austin’s Barwon Park Mansion, 1871), or laid tessellated and ceramic tiles of baked clay infused with colour (for example the Chirnside’s Werribee Park Mansion, 1878). HISTORY OF THE LOCH ARD The LOCH ARD belonged to the famous Loch Line which sailed many ships from England to Australia. Built in Glasgow by Barclay, Curdle and Co. in 1873, the LOCH ARD was a three-masted square rigged iron sailing ship. The ship measured 262ft 7" (79.87m) in length, 38ft (11.58m) in width, 23ft (7m) in depth and had a gross tonnage of 1693 tons. The LOCH ARD's main mast measured a massive 150ft (45.7m) in height. LOCH ARD made three trips to Australia and one trip to Calcutta before its final voyage. LOCH ARD left England on March 2, 1878, under the command of Captain Gibbs, a newly married, 29 year old. She was bound for Melbourne with a crew of 37, plus 17 passengers and a load of cargo. The general cargo reflected the affluence of Melbourne at the time. On board were straw hats, umbrella, perfumes, clay pipes, pianos, clocks, confectionary, linen and candles, as well as a heavier load of railway irons, cement, lead and copper. There were items included that intended for display in the Melbourne International Exhibition in 1880. The voyage to Port Phillip was long but uneventful. At 3am on June 1, 1878, Captain Gibbs was expecting to see land and the passengers were becoming excited as they prepared to view their new homeland in the early morning. But LOCH ARD was running into a fog which greatly reduced visibility. Captain Gibbs was becoming anxious as there was no sign of land or the Cape Otway lighthouse. At 4am the fog lifted. A man aloft announced that he could see breakers. The sheer cliffs of Victoria's west coast came into view, and Captain Gibbs realised that the ship was much closer to them than expected. He ordered as much sail to be set as time would permit and then attempted to steer the vessel out to sea. On coming head on into the wind, the ship lost momentum, the sails fell limp and LOCH ARD's bow swung back. Gibbs then ordered the anchors to be released in an attempt to hold its position. The anchors sank some 50 fathoms - but did not hold. By this time LOCH ARD was among the breakers and the tall cliffs of Mutton Bird Island rose behind the ship. Just half a mile from the coast, the ship's bow was suddenly pulled around by the anchor. The captain tried to tack out to sea, but the ship struck a reef at the base of Mutton Bird Island, near Port Campbell. Waves broke over the ship and the top deck was loosened from the hull. The masts and rigging came crashing down knocking passengers and crew overboard. When a lifeboat was finally launched, it crashed into the side of LOCH ARD and capsized. Tom Pearce, who had launched the boat, managed to cling to its overturned hull and shelter beneath it. He drifted out to sea and then on the flood tide came into what is now known as LOCH ARD Gorge. He swam to shore, bruised and dazed, and found a cave in which to shelter. Some of the crew stayed below deck to shelter from the falling rigging but drowned when the ship slipped off the reef into deeper water. Eva Carmichael had raced onto deck to find out what was happening only to be confronted by towering cliffs looming above the stricken ship. In all the chaos, Captain Gibbs grabbed Eva and said, "If you are saved Eva, let my dear wife know that I died like a sailor". That was the last Eva Carmichael saw of the captain. She was swept off the ship by a huge wave. Eva saw Tom Pearce on a small rocky beach and yelled to attract his attention. He dived in and swam to the exhausted woman and dragged her to shore. He took her to the cave and broke open case of brandy which had washed up on the beach. He opened a bottle to revive the unconscious woman. A few hours later Tom scaled a cliff in search of help. He followed hoof prints and came by chance upon two men from nearby Glenample Station three and a half miles away. In a state of exhaustion, he told the men of the tragedy. Tom returned to the gorge while the two men rode back to the station to get help. By the time they reached LOCH ARD Gorge, it was cold and dark. The two shipwreck survivors were taken to Glenample Station to recover. Eva stayed at the station for six weeks before returning to Ireland, this time by steamship. In Melbourne, Tom Pearce received a hero's welcome. He was presented with the first gold medal of the Royal Humane Society of Victoria and a £1000 cheque from the Victorian Government. Concerts were performed to honour the young man's bravery and to raise money for those who lost family in the LOCH ARD disaster. Of the 54 crew members and passengers on board, only two survived: the apprentice, Tom Pearce and the young woman passenger, Eva Carmichael, who lost all of her family in the tragedy. Ten days after the LOCH ARD tragedy, salvage rights to the wreck were sold at auction for £2,120. Cargo valued at £3,000 was salvaged and placed on the beach, but most washed back into the sea when another storm developed. The wreck of LOCH ARD still lies at the base of Mutton Bird Island. Much of the cargo has now been salvaged and some was washed up into what is now known as LOCH ARD Gorge. Cargo and artefacts have also been illegally salvaged over many years before protective legislation was introduced. One of the most unlikely pieces of cargo to have survived the shipwreck was a Minton porcelain peacock - one of only nine in the world. The peacock was destined for the Melbourne International Exhibition in 1880. It had been well packed, which gave it adequate protection during the violent storm. Today, the Minton peacock can be seen at the Flagstaff Hill Maritime Museum in Warrnambool. From Australia's most dramatic shipwreck it has now become Australia's most valuable shipwreck artefact and is one of very few 'objects' on the Victorian State Heritage Register. HISTORY OF THE LOCH ARD The LOCH ARD belonged to the famous Loch Line which sailed many ships from England to Australia. Built in Glasgow by Barclay, Curdle and Co. in 1873, the LOCH ARD was a three-masted square rigged iron sailing ship. The ship measured 262ft 7" (79.87m) in length, 38ft (11.58m) in width, 23ft (7m) in depth and had a gross tonnage of 1693 tons. The LOCH ARD's main mast measured a massive 150ft (45.7m) in height. LOCH ARD made three trips to Australia and one trip to Calcutta before its final voyage. LOCH ARD left England on March 2, 1878, under the command of Captain Gibbs, a newly married, 29 year old. She was bound for Melbourne with a crew of 37, plus 17 passengers and a load of cargo. The general cargo reflected the affluence of Melbourne at the time. On board were straw hats, umbrella, perfumes, clay pipes, pianos, clocks, confectionary, linen and candles, as well as a heavier load of railway irons, cement, lead and copper. There were items included that intended for display in the Melbourne International Exhibition in 1880. The voyage to Port Phillip was long but uneventful. At 3am on June 1, 1878, Captain Gibbs was expecting to see land and the passengers were becoming excited as they prepared to view their new homeland in the early morning. But LOCH ARD was running into a fog which greatly reduced visibility. Captain Gibbs was becoming anxious as there was no sign of land or the Cape Otway lighthouse. At 4am the fog lifted. A man aloft announced that he could see breakers. The sheer cliffs of Victoria's west coast came into view, and Captain Gibbs realised that the ship was much closer to them than expected. He ordered as much sail to be set as time would permit and then attempted to steer the vessel out to sea. On coming head on into the wind, the ship lost momentum, the sails fell limp and LOCH ARD's bow swung back. Gibbs then ordered the anchors to be released in an attempt to hold its position. The anchors sank some 50 fathoms - but did not hold. By this time LOCH ARD was among the breakers and the tall cliffs of Mutton Bird Island rose behind the ship. Just half a mile from the coast, the ship's bow was suddenly pulled around by the anchor. The captain tried to tack out to sea, but the ship struck a reef at the base of Mutton Bird Island, near Port Campbell. Waves broke over the ship and the top deck was loosened from the hull. The masts and rigging came crashing down knocking passengers and crew overboard. When a lifeboat was finally launched, it crashed into the side of LOCH ARD and capsized. Tom Pearce, who had launched the boat, managed to cling to its overturned hull and shelter beneath it. He drifted out to sea and then on the flood tide came into what is now known as LOCH ARD Gorge. He swam to shore, bruised and dazed, and found a cave in which to shelter. Some of the crew stayed below deck to shelter from the falling rigging but drowned when the ship slipped off the reef into deeper water. Eva Carmichael had raced onto deck to find out what was happening only to be confronted by towering cliffs looming above the stricken ship. In all the chaos, Captain Gibbs grabbed Eva and said, "If you are saved Eva, let my dear wife know that I died like a sailor". That was the last Eva Carmichael saw of the captain. She was swept off the ship by a huge wave. Eva saw Tom Pearce on a small rocky beach and yelled to attract his attention. He dived in and swam to the exhausted woman and dragged her to shore. He took her to the cave and broke open case of brandy which had washed up on the beach. He opened a bottle to revive the unconscious woman. A few hours later Tom scaled a cliff in search of help. He followed hoof prints and came by chance upon two men from nearby Glenample Station three and a half miles away. In a state of exhaustion, he told the men of the tragedy. Tom returned to the gorge while the two men rode back to the station to get help. By the time they reached LOCH ARD Gorge, it was cold and dark. The two shipwreck survivors were taken to Glenample Station to recover. Eva stayed at the station for six weeks before returning to Ireland, this time by steamship. In Melbourne, Tom Pearce received a hero's welcome. He was presented with the first gold medal of the Royal Humane Society of Victoria and a £1000 cheque from the Victorian Government. Concerts were performed to honour the young man's bravery and to raise money for those who lost family in the LOCH ARD disaster. Of the 54 crew members and passengers on board, only two survived: the apprentice, Tom Pearce and the young woman passenger, Eva Carmichael, who lost all of her family in the tragedy. Ten days after the LOCH ARD tragedy, salvage rights to the wreck were sold at auction for £2,120. Cargo valued at £3,000 was salvaged and placed on the beach, but most washed back into the sea when another storm developed. The wreck of LOCH ARD still lies at the base of Mutton Bird Island. Much of the cargo has now been salvaged and some was washed up into what is now known as LOCH ARD Gorge. Cargo and artefacts have also been illegally salvaged over many years before protective legislation was introduced. One of the most unlikely pieces of cargo to have survived the shipwreck was a Minton porcelain peacock - one of only nine in the world. The peacock was destined for the Melbourne International Exhibition in 1880. It had been well packed, which gave it adequate protection during the violent storm. Today, the Minton peacock can be seen at the Flagstaff Hill Maritime Museum in Warrnambool. From Australia's most dramatic shipwreck it has now become Australia's most valuable shipwreck artefact and is one of very few 'objects' on the Victorian State Heritage Register. The wreck of the LOCH ARD is of State significance — Victorian Heritage Register S417 Flagstaff Hill’s collection of artefacts from LOCH ARD is significant for being one of the largest collections of artefacts from this shipwreck in Victoria. It is significant for its association with the shipwreck, which is on the Victorian Heritage Register (VHR S417). The collection is significant because of the relationship between the objects, as together they have a high potential to interpret the story of the LOCH ARD. The LOCH ARD collection is archaeologically significant as the remains of a large international passenger and cargo ship. The LOCH ARD collection is historically significant for representing aspects of Victoria’s shipping history and its potential to interpret sub-theme 1.5 of Victoria’s Framework of Historical Themes (living with natural processes). The collection is also historically significant for its association with the LOCH ARD, which was one of the worst and best known shipwrecks in Victoria’s history. A square marble tile retrieved from the wreck of the LOCH ARD. Most of its surface is covered by a thin layer of limestone and marine growth encrustation that is stained rust-red. There is a piece of corroded iron encrusted at an oblique angle on the tile’s rear face. The tile is ‘rough-worked’, cut to shape and size, but not smoothed or polished. There is a companion tile in similar condition in the Flagstaff Hill collection. From visual observation of the original surface (at low magnification) the tile appears to be of white Carrara-type marble.flagstaff hill, warrnambool, shipwrecked coast, flagstaff hill maritime museum, maritime museum, shipwreck coast, flagstaff hill maritime village, great ocean road, loch line, loch ard, captain gibbs, eva carmichael, tom pearce, glenample station, mutton bird island, loch ard gorge, white marble, marble tile, carrara marble, colonial architecture, victorian building materials -
 Bendigo Military Museum
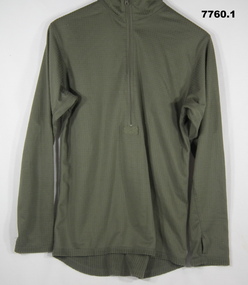
Uniform - THERMALS, UNDERWEAR - ARMY, Unknown
Thermals, top and pants, jungle green colour, polyester/spandex fabric, grid structure and fleece lining. Nylon and metal zipper. 1. Top - polo shirt shape with collar, long sleeves with thumb hole and half zipper front closure. Black colour polyester manufacturers label, back below collar. 2. Pants - Long Johns - elastic waistband, front fly opening, long legs. Manufacturers label, back below waistband - black colour polyester fabric.Manufacturers information on label - white and gold print. 1. "GEN111/ SIZE M/ LONG SLEEVED TOP/ LEVEL 2/ HELIKON.TEX.COM/ ART.ID: BL-UH2-PO/ STOCK NO. 9415-09-229-1357/ NATO SIZE 7585/ 9404/ ACCORDING TO U.S. ARMY / SPECIFICATION." 2. "GEN111/ SIZE M/ LONG-JOHNS/ LEVEL 2/ HELIKON.TEX.COM/ COMFORT DRY/ HELIKON-TEX.COM/ 95% POLYESTER 5% SPANDEX/ AVOID USE OF FABRIC SOFTENERS/ ART.ID: SP.UN2.PO/ STOCK NO. 9415-09-229-1357/ NATO SIZE 7585/ 9404/ ACCORDING TO U.S. ARMY / SPECIFICATION." "PO#1325" uniform, army, underwear, thermals -
 Bendigo Military Museum
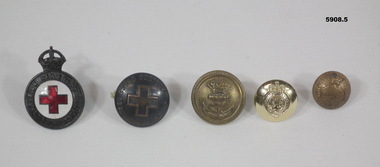
Accessory - BADGES, BUTTONS, 1) K G Luke Melbourne, possible WW1 to WW2
Items in collection re John D Gardiner No 2832, refer Cat No 5892.2 for his service details..1) Badge pressed metal, crown over round shape, centre has a Red Cross, raised lettering around outside. .2) Button, metal round with centre Red Cross, raised lettering around outside. .3) Button round gold colour, centre appears to be a naval symbol, no enscriptions. .4) Button, round plastic gold colour, centre has letters "E R". 5.) Button round metal, crown and map of Australia, raised lettering..2) Australian Red Cross Society" .3) Australian Military Forces"buttons, badges, red cross -
 Warrnambool and District Historical Society Inc.
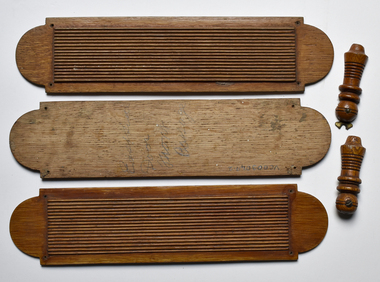
Functional object - Door plates and key hole covers
These items come from the house "BIRCHWOOD" in Koroit Street, Warrnambool belonging to Dr. Angus and family. Dr. William Roy Angus (1901-1970) practised in Warrnambool from 1939 to 1970. In his later years Dr. Angus was an important ophthalmologist. He was prominent in Warrnambool in both medical and community affairs. The Angus home "BIRCHWOOD" at 214 Koroit Street (the site of the Warrnambool Police station today) was noted for its beautiful garden, lawns and croquet court and used as a meeting place and entertainment centre for vice-regal personnel and community organisations.These items are of considerable interest as they are connected to a well known doctor in Warrnambool and a notable house..1,.2,.3 These are three wooden door plates with a fine ridged front and a curved top and base. They have four holes to be used with nails to attach to the door. .4, .5 These are two wooden key hole covers with half spherical shapes at the top, ridging and carving towards a tapered base. .4 has a brass circular plate at the back with two small decorations protruding at the top. The screw attaching it to the front is broken..5 As for .4 but the brass section is missing and the screw is intact..2 East side door, front passage. .3 West side door dr. angus warrnambool, birchwood warrnambool, door plates, key hole covers, warrnambool, warrnambool history -
 Warrnambool and District Historical Society Inc.
Badges, Stokes, Warrnambool Racing Club, 1950s
These badges were issued to members of the Warrnambool Racing Club in the 1950s. Horse race meetings have been held in Warrnambool since the early days of European settlement, with the Warrnambool Racing Club formed in 1854. Races have been held on the site of the present day racecourse since the late 1850s. Today the chief event on the Warrnambool racing calendar is the annual three-day May Racing Carnival, featuring the well-known Warrnambool Grand Annual Steeplechase. These badges are retained as examples of the badges of members of the Warrnambool Racing Club in the 1950s. They will be useful for display. .1A metal badge (roughly in the shape of a double triangle) with an image in blue, white, green and gold of a horse and jockey clearing a hurdle. The badge has gold lettering, a metal clip at the back and a metal ring at the top for attachment to a cord. .2 .3. As above except that the colourings of blue, red, green and red are differently placed .4 As above in .1 except that the colourings are black, brown and green .5 A round metal badge with the image as in .1 above, with the colourings being black, white and green. .1 Warrnambool Racing Club Not Transferable Season 1954-55 121 Stokes Melb. .2 Warrnambool Racing Club Not Transferable Season 1955-56 128 Stokes .3 Warrnambool Racing Club Not Transferable Season 1957-58 106 Stokes .4 Warrnambool Racing Club Not Transferable Season 1959-1960 95 Stokes Melb .5 Warrnambool Racing Club Not Transferable Season 1956-1957 123 Stokes warrnambool racing club, history of warrnambool