Showing 201 items
matching the precious
-
 Eltham District Historical Society Inc
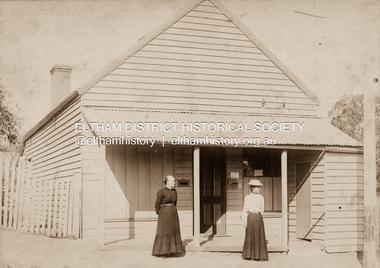
Photograph, Clark Bros, Eltham Post Office, c.1895
Hunniford's Eltham Post Office, Main Road near Bridge Street, Eltham, c.1895. Possibly Miss Anne (Annie) Hunniford, Post Mistress, on left. Annie was post mistress from the mid 1860s until her death in 1928. Photo taken by Clark Bros, 25 Thomas St, Windsor. Clark Bros operated from this address from c.1894 to 1914. Australia Post: Gold brought life to the township - Diamond Valley News, Tuesday July 2, 1985, p17 On February 1, 1854, the first Eltham Post Office was established, commencing an association between the township and the Postmaster-General's Department that has continued for 131 years. At that time, the number of permanent residents would have been fairly small, probably less than 200. The discovery of gold in June 1851, at Anderson’s Creek, some five miles away, and later at Caledonia Diggings, Queenstown (now known as St Andrews), about 14 miles to the north-east, brought large numbers of prospectors passing through the township, hopefully culling the creeks and gullies for the precious metal. This additional "floating population" brought a greater demand for supplies and for communication with the outside world, and so it helped in the development of Eltham. Today, Eltham is a thriving township. It boasts an excellent shopping centre, municipal offices, court house. post office and many other amenities. Eltham continued to develop at a leisurely pace. During 1860, a total of just over 8000 postal articles were handled at the Eltham Post Office. By 1862, the mail route was "to and from Melbourne by way of Eltham and Kangaroo Ground, three times a week, by coach". There was also a branch mail that operated between Eltham and Greensborough, three times weekly. This was also conveyed by coach. Some time between 1864 and 1868 the management of the post office passed from Thomas Hunniford to his daughter, Miss Anne Hunniford, who managed the Eltham Post Office until her death in 1928. A big improvement in communication was provided for Eltham residents when a telegraph office was established at the post office in 1877. During 1923 a manual telephone exchange was provided at Eltham, the first two subscribers being J.J. O’Connor and Eltham Police Station. In 1949 the manual exchange was replaced by an automatic exchange and there were some 150 subscribers. Following the death of postmistress Miss Anne Hunniford in 1928, B.M. Burgoyne was placed temporarily in charge of the office. In 1929, J. N. Burgoyne was appointed postmaster, and he in turn was succeeded by H. C. Burgoyne in 1951. The post office was moved to a new site in 1954, but continued under the charge of Mr Burgoyne. In January 1958 there was a further change of site when the post office was raised to official status and transferred to new premises in Main Rd. William Donoghue was acting postmaster when the new office was opened. In March 1958 Mr W.E. Tovey was appointed postmaster, followed by Douglas McG. Gilmour in 1959. William Donoghue was fully appointed in 1966 and Barry Reichelt followed in 1973, prior to the present postmaster, Peter Jolly in November 1982. Peter is a young man with 18 years' experience. He commenced his training as a postal clerk at the training school in Melbourne in 1968 and was promoted to postal clerk at the Brunswick Post Office in 1969. He was finally transferred as postmaster to Fawkner Post Office in 1980. He has been at Eltham Post Office for the past 2½ years. He is married with one child and lives in Montmorency. The Eltham Post Office employs a staff of 21, of whom seven are indoor staff, 12 are postmen and two are drivers. The postmen in Eltham have an uphill battle delivering mail because of the hilly terrain. Nine of the postmen deliver mail on motorbikes, and the two delivery vans are both four wheel drives. Eltham Post Office services basically a residential area, with deliveries to 5600 homes. This is growing at the rate of 600 homes every 18 months, i.e. about 32 homes per month. At the present rate we will need a new postman every 18 months.Sepia photograph mounted on cardpost office, eltham, main road, anne jane hunniford (1855-1928), clark bros. photo -
 Flagstaff Hill Maritime Museum and Village
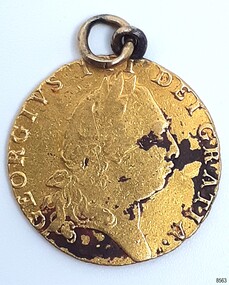
Currency - Guinea Coin, The Royal Mint, 1793 George III Spade Guinea, 1793
The coin was discovered by Julie Wilkins, a Victorian scuba diver who had already experienced more than 500 dives in Australia and overseas. She was holidaying in Peterborough, Victoria, and looking forward to discovering more about the famous Loch Ard ship, wrecked in June 1878 at Mutton Bird Island. The fast Glasgow-built clipper ship was only five years old when the tragedy occurred. There were 54 people on board the vessel and only two survived Julie's holiday photograph of Boat Bay reminds her of her most memorable dive. Submerged in the calm, flat sea, she was carefully scanning around the remains of the old wreck when, to her amazement, a gold coin and a small gold cross suddenly came up towards her. She excitedly cupped them in her hands, then stowed the treasures safely in her wetsuit and continued her dive. She soon discovered a group of brass carriage clock parts and some bottles of champagne. It was a day full of surprises. The items were easily recognisable, without any build-up of encrustations or concretion. Julie secretly enjoyed her treasures for twenty-four years then packed them up for the early morning train trip to Warrnambool. After a short walk to Flagstaff Hill Maritime Museum and Village, her photograph was taken as she handed over her precious find. She told her story to a local newspaper reporter, lunched a café in town then took the late afternoon train home. Her generous donation is now part of a vast collection of Loch Ard shipwreck artefacts, including the gold watch and the Minton Majolica model peacock. The coin is a British 1793 George III Gold Spade Guinea. It was already 83 years old when the Loch Ard had set sail. The loop and ring have been added, perhaps as a pendant, pocket watch accessory or similar purpose. It may have been worn for ‘good luck’ on the long journey to Australia, where ships had to carefully navigate the treacherous Bass’s Strait before arriving at their destination of Melbourne. Sadly, many met their fate on that short stretch of ocean aptly named the Shipwreck Coast. The coin is very recognisable even though it was exposed to the wrecking of the ship, its consequent movement, and the sea's turbulence. Its bent, scratched, buckled, split, dinted and worn condition is part of its story. The red-brown-black discolouration is similar to that found on other gold coins, sometimes called the ‘corrosion phenomena’. Studies suggest the possible cause is contaminants in the minting process reacting to the coins’ environment. The GEORGE III GOLD SPADE GUINEA: - The British Guinea was introduced in 1663 and was circulated until 1814. It was made of 22 carat gold, was 25 to 26 cm in diameter and weighed 8.35 grams. It had a value of 21 British shillings. The guinea coin ceased circulation after 1816 and was replaced by the one-pound note. However, the term ‘guinea’ continued to represent 21 shillings. King George (1738-1820) had six gold guinea designs minted during his reign from 1760 and 1820. Each of the six had different obverse portraits, all facing the right. There were three different reverse sides. The Spade Guinea was the fifth issue of the coin, introduced in 1787 and produced until 1799. The reverse shows a royal crown over a flat-topped shield with the Royal Arms of Great Britain, used in Scotland between 1714 and 1800. The shield images are, from left to right, top to bottom, the Arms of England and Scotland, the Arms of France, the Arms of Ireland, and the Arms of the House of Hanover. The Gold Guinea is also part of Australia’s history. It was the first coin mentioned in the announcement of Governor King of New South Wales his Australian Proclamation of a limited variety and denomination of coins accepted for use in the Australian Colony. The historic and decorative George III Spade Guinea has been reproduced for special collections of coins. However, replicas and imitations have also been made as souvenirs for tourists, as gaming tokens and chips for gamblers, and as ‘fake’ coins for profit. These coins differ in many ways; they may be only half the weight of the genuine coin. Often have a small stamp on the obverse with “COPY” or the manufacturer’s name or initials. Some have scalloped edges, some have dates that are different to the original dates of issue, and some even have text in Latin that translates as something very different to the original coin.The King George III Guinea was only produced from 1663 to 1814 and was the first English coin to be mechanically minted. The coin is the fifth edition of the King George III Guinea, the Spade Guinea, was only produced between 1787 and 1799. It is the only edition with this portrait of King George and the only one with the Royal Coat of Arms of Great Britain in Scotland on the reverse side. This edition was also the last guinea in circulation, because the sixth edition was reserved as the Military guinea. This edition of the Guinea is unique; This coin is the only guinea in our collection. It was minted in 1793, so it is now over 230 years old. The Gold Guinea is part of Australia’s history; it was the first coin in the list of coins for use in the Australian Colonies, mentioned by Governor King of New South Wales in his Australian Proclamation speech of 1800. The George III Spade Guinea was included in the Limited Edition Sherwood 12 Coin Collection of Notable Coinage of Australia. This coin is the only known guinea coin recovered from the wreck of the Loch Ard. It was already 85 years old when the ship was wrecked.Gold coin; British. 1793, King George III of the United Kingdom of Great Britain and Ireland (1760-1820), Spade Guinea. Yellow gold coin with gold metal loop mount and a gold ring through the loop. The design is the fifth issue of the George III Gold Guinea. The obverse relief is a portrait of George III facing right. Reverse relief is a crown above the Coats of Arms (1801-1816) of flat top spade-shaped shield divided into four quadrants that depict crowned lions, fleur de lies, a harp. These images are identified as, from left to right, top to bottom, England and Scotland, France, Ireland and Hanover. Inscriptions are minted around the rims of each side. The coin is dated 1793. Its surface has dark areas on both sides and the reed edge and surfaces are well worn. The loop mount is bent and the ring is buckled. The coin was recovered from the wreck of the ship Loch Ard.Obverse text; 'GEORGIVS III DEI GRATIA' (translates to George the Third, by the Grace of God) Obverse relief; (King George III bust, facing right, laurel wreath on head) Reverse text; 'M.B.E.ET.H.REX.F. D.B.ET.L.D. S.R.I.A.T.ET.E' '1793' (translates to: King of Great Britain, France and Ireland, Defender of the Faith, Duke of Brunswick and Lüneburg, Arch-Treasurer and Elector of the Holy Roman Empire) Reverse relief; a spade-shaped image i.e. (Crown with fleer de lies, above Shield with crowned lions in different postures, a harp, and other details)flagstaff hill maritime museum and village, warrnambool, great ocean road, shipwreck coast, royal mint, british coin, currency, guinea, military guinea, australian currency, british guinea, gold coin, spade guinea, king george iii, george iii, fifth portrait, arms of england and scotland, arms of france, arms of ireland, arms of the house of hanover, coins, gold coins, gold medallion, georgian era, 1793, numismatics, contamination phenomena, gold corrosion, good luck, lucky charm, pendant, lucky coin, trade, loch ard, wreck of the loch ard, 1878, mutton bird island, peterborough, scuba diver, 1980s, guinea coin, gold guinea, shipwreck artefact, relic, julie wilkins -
 Eltham District Historical Society Inc
Photograph, Hunniford’s Eltham Post Office, Main Road near Bridge Street, Eltham, c.1888
Sepia photograph of Hunniford’s Eltham Post Office, Main Road near Bridge Street, Eltham, c.1888 (Postmistress Anne Hunniford possibly on left). The building originally had a shingle roof. Anne Hamilton born 1814 Co Tyrone, Ireland married Michael Head Burgoyne (1820-1843) in 1839, Co. Tyrone, Ireland. They had two children, Charlotte Caroline (1840) and John James Thomas Neville (Londonderry, Ireland 1844) Whilst pregnant with John, husband Michael died. Following John’s birth, she emigrated to Victoria, Australia where she married Thomas Hunniford in 1854. Daughter Anne Jane Hunniford was born in Eltham in 1855. Anne (Annie) Jane Hunniford and John James Thomas Neville Burgoyne were half siblings. In the mid 1860s Annie Hunniford succeeded her father, Thomas Hunniford as Post Mistress for Eltham. Photo dated based on advertising on façade of the building by Annie’s half-brother, John James Thomas Burgoyne promotes his services as the area manager for John M’Ewan and Co, Auctioneers as well as him being agent for the National Mutual Life Association of Australasia, National Insurance Company of Australasia, Federal Mutual Livestock Association of Australasia, and as a House, Land, Estate, Insurance and Financial agent. This was the time period that he placed advertising for same in the local paper. Australia Post: Gold brought life to the township - Diamond Valley News, Tuesday July 2, 1985, p17 On February 1, 1854, the first Eltham Post Office was established, commencing an association between the township and the Postmaster-General's Department that has continued for 131 years. At that time, the number of permanent residents would have been fairly small, probably less than 200. The discovery of gold in June 1851, at Anderson’s Creek, some five miles away, and later at Caledonia Diggings, Queenstown (now known as St Andrews), about 14 miles to the north-east, brought large numbers of prospectors passing through the township, hopefully culling the creeks and gullies for the precious metal. This additional "floating population" brought a greater demand for supplies and for communication with the outside world, and so it helped in the development of Eltham. Today, Eltham is a thriving township. It boasts an excellent shopping centre, municipal offices, court house. post office and many other amenities. Eltham continued to develop at a leisurely pace. During 1860, a total of just over 8000 postal articles were handled at the Eltham Post Office. By 1862, the mail route was "to and from Melbourne by way of Eltham and Kangaroo Ground, three times a week, by coach". There was also a branch mail that operated between Eltham and Greensborough, three times weekly. This was also conveyed by coach. Some time between 1864 and 1868 the management of the post office passed from Thomas Hunniford to his daughter, Miss Anne Hunniford, who managed the Eltham Post Office until her death in 1928. A big improvement in communication was provided for Eltham residents when a telegraph office was established at the post office in 1877. During 1923 a manual telephone exchange was provided at Eltham, the first two subscribers being J.J. O’Connor and Eltham Police Station. In 1949 the manual exchange was replaced by an automatic exchange and there were some 150 subscribers. Following the death of postmistress Miss Anne Hunniford in 1928, B.M. Burgoyne was placed temporarily in charge of the office. In 1929, J. N. Burgoyne was appointed postmaster, and he in turn was succeeded by H. C. Burgoyne in 1951. The post office was moved to a new site in 1954, but continued under the charge of Mr Burgoyne. In January 1958 there was a further change of site when the post office was raised to official status and transferred to new premises in Main Rd. William Donoghue was acting postmaster when the new office was opened. In March 1958 Mr W.E. Tovey was appointed postmaster, followed by Douglas McG. Gilmour in 1959. William Donoghue was fully appointed in 1966 and Barry Reichelt followed in 1973, prior to the present postmaster, Peter Jolly in November 1982. Peter is a young man with 18 years' experience. He commenced his training as a postal clerk at the training school in Melbourne in 1968 and was promoted to postal clerk at the Brunswick Post Office in 1969. He was finally transferred as postmaster to Fawkner Post Office in 1980. He has been at Eltham Post Office for the past 2½ years. He is married with one child and lives in Montmorency. The Eltham Post Office employs a staff of 21, of whom seven are indoor staff, 12 are postmen and two are drivers. The postmen in Eltham have an uphill battle delivering mail because of the hilly terrain. Nine of the postmen deliver mail on motorbikes, and the two delivery vans are both four wheel drives. Eltham Post Office services basically a residential area, with deliveries to 5600 homes. This is growing at the rate of 600 homes every 18 months, i.e. about 32 homes per month. At the present rate we will need a new postman every 18 months.Sepia photograph (two copies plus two black and white enlargements)Shop originally had a shingle roofpost office, eltham, main road, anne jane hunniford (1855-1928), federal mutual live stock insurance association of australasia, federal mutual livestock association of australasia, john j burgoyne, john m'ewan and co. auctioneers, national insurance company of australasia, national mutual life association of australasia -
 Bendigo Historical Society Inc.
Document - A SOUVENIR OF 'THE GLAMOUR GIRLS' REVUE 'THEN AND NOW' 1944, 1944
A Souvenir of 'The Glamour Girls' Revue 'Then and Now' 1944. From Mr & Mrs C Clark. Page 1, Bendigo presents 'The Glamour Girls' in Their Hit Revue 'Then & Now' a Pot Pourri of Dances and Fun, Produced and created by the Team Spirit of Peggy Hinsley, Elaine O'Shea, Joan Albert, Gladys Jordon, Amba Harrington, Moira Knowles. Doris Clow, Betty Angel, Cath Mc Queenie, Thelma Cochrane, Mona Roberts. Under Direction of C Clark. Musical Direction, Edward Thomas. Accompaniste, Leila Camp, Vida Roberts. Violinists, Honor Allfrey, Edgar Jarrett. Drums, Frank Kennedy, Andy Beattie. Costumes, Tivoli Theatres. Page 3/ In lending your personality, your charm and your talent to help raise Funds for the Returned Soldiers' Relief Appeal, you have given not only to the soldiers, but to the Nation a great service. As the producer and originator of the 'Glamour Girl Revue' I wish to place on record my personal thanks to the noble part you have played in making this show the financial success it has proved to be. You will appreciate that no remuneration has given by the Committee for your services, with this decision I am sure you fully concur. I would however, like you to accept this souvenir as a small token of gratitude for the great pleasure it has given my wife and I to have been associated with each and everyone of you as a team. May we have future successes in our services to those in need. Yours truly, (signed) C Clark. Page 5/ Photograph of Mr and Mrs C Clark signed; Sincerely M & C Clark. Extra page has been added here and a black and white photograph of the cast on stage attached using photograph corners. Page 5/ Photo of Peggy. Page 7. Page 9 photo of Elaine. Page 11 photo Joan. Page 13 Gladys. Page 15 Amba. Page 17 Moira. Page 19 Doris. Page 21 Betty. Page 23 Cath. Page 25 Thelma. Page 27 Mona. Page 29 Autographs: Betty Angell, Thelma Crochrane, S M Grossmann, Vida Roberts, Mona Roberts, G E Thomas, J Albert, H M Allfrey, J J Monte, Elaine O'Shea, Andrew Beattie, Moira Knowle, Teen Armstrong, C M McQueenie, Peg Hainsly, Doris Blow, Amba Harrington, J N Armstrong, M Clark, C Clark (autographs in copy A only.) Page 31. ''1940 - Never have so many owed so much to so few.'' - Winston Churchill. A Friend Who Understands. You've shared the joys and troubles The Laughter and the tears, And you've given loyal friendship Through the Changing Varied years, Your voice has been beside me Whispering courage for the day, And you've helped and blessed and cheered me Making glad the uphill way, And of all the many blessings That have reached me from God's hands, There's no gift more sweet and precious Than the Friend - who understands. 1944 ''Never have so few needed so much from so many'' - Returned Soldiers' Relief Appeal. Copy A/ Inscription on front cover To 'YACK'. Signed on page 3, C Clark. Signed on page 5 Sincerely M & C Clark. Page 29 Autographs: Betty Angell, Thelma Crochrane, S M Grossmann, Vida Roberts, Mona Roberts, G E Thomas, J Albert, H M Allfrey, J J Monte, Elaine O'Shea, Andrew Beattie, Moira Knowle, Teen Armstrong, C M McQueenie, Peg Hainsly, Doris Blow, Amba Harrington, J N Armstrong, M Clark, C Clark. Orange ribbon is faded. Copy B/ markings: front cover - Royal Historical Society of Victoria Bendigo Branch stamp, sticker - D1729. Cover and white sticker with D1729 on top right corner. First 2 sheets are torn at top hole punch. Orange ribbon is worn at the back.program, theatre, the glamour girls, a souvenir of 'the glamour girls' revue 'then and now' 1944. from mr & mrs c clark. their hit revue 'then & now' a pot pourri of dances and fun, produced and created peggy hinsley, elaine o'shea, joan albert, gladys jordon, amba harrington, moira knowles. doris clow, betty angel, cath mc queenie, thelma cochrane, mona roberts. under direction of c clark. musical direction, edward thomas. accompaniste, leila camp, vida roberts. violinists, honor allfrey, edgar jarrett. drums, frank kennedy, andy beattie. costumes, tivoli theatres. raise funds for the returned soldiers' relief appeal. as the producer and originator my personal thanks to the part you have this show a success. no remuneration has given by for your services. accept this souvenir as a token of. c clark. photograph of mr and mrs c clark signed; sincerely m & c clark. black and white photograph of the cast, peggy, elaine, joan, gladys, amba, moira, doris, betty, cath, thelma, mona, autographs: betty angell, thelma crochrane, s m grossmann, vida roberts, mona roberts, g e thomas, j albert, h m allfrey, j j monte, elaine o'shea, andrew beattie, moira knowle, teen armstrong, c m mcqueenie, peg hainsly, doris blow, amba harrington, j n armstrong, m clark, c clark. 'yack'. -
 Flagstaff Hill Maritime Museum and Village
Domestic object - Bowl, Late 19th or early 20th Century
The Process of Making Pottery Decorating, Firing, Glazing, Making, Technical There is a rhythm and flow to clay. It can’t be done all at once! Even the making process! It can take weeks to get everything done, especially if you can only work on your pottery once a week! Even though we have three hour classes, it’s often just not enough time! Here is an overview of some of the processes so you have a bit more grasp on some of the technical stuff! Step One – Design There are SO many ideas out there for making stuff in clay! From delicate porcelain jewellery, through to heavy sculptural work and everything in between. Deciding your direction is sometimes not that easy – when you first start, try everything, you will naturally gravitate to the style that you enjoy! The options and variations are endless and can get a wee bit overwhelming too! Check in with me before you start to ensure your ideas will work, what order you might do things, how you could achieve the look you are seeking and any other technical data required! Step Two – Making Clay is thixotropic. This means that as you work with it, the clay first gets sloppier and wetter, before is begins to dry in the atmosphere. For most things, you simply can’t do all parts of the project at once. An example of work order might look like: Get last weeks work out from the shelves Prepare clay for today’s work – roll your clay, prepare balls for throwing, make the first stage of a pinch pot) Clean up last week’s work and put it on the shelf for bisque firing Check that you have any glazing to do – and do enough of it that you will have time to finish your main project Do the next step of your next project – there might be a further step that can’t be complete immediately, in that case, wrap your work well and put onto the shelves. Letting your work rest for a while can really help keep your work clean and professional looking. Many things require bagging under plastic to keep it ready for work the next week – put your name on the outside of the bag so you can find your work easily. We have stickers and markers. Consider how you want to decorate your work – coloured slip can be applied at a fairly wet stage (remembering that it will make your work even wetter!). Trying to apply slip to dry clay won’t work! If you want to do sgraffito – you will need to keep the work leather hard (a state of dryness where you can still work the clay with a little effort and a little water and care). Step Three – Drying Most of the time your work can go into the rack uncovered to let it dry out for the following week. If you want to continue forming or shaping you will need to double bag your work – put your work on a suitable sized bat and put the bat in a bag so the base of the bag is under the bat, then put another bag over the top of the work and tuck the top of the bag under the bat. If you want to trim (or turn) your thrown work the following week, it should also be double bagged. If your work is large, delicate, or of uneven thicknesses, you should lightly cover your work for drying. When considering the drying process, bare in mind the weather, humidity and wind! The hotter and dryer, the faster things dry and work can dry unevenly in the shelves – this can lead to cracking – another time to lightly cover your work for drying. Step Four – Trimming and Cleaning Up Your work is dry! It is called greenware now and it is at it’s most fragile! Handle everything with two hands. I often refer to soft hands – keep everything gentle and with your fingers spread as much as possible. Try to not pick up things like plates too much, and always with both hands! Before your work can be bisque fired it should be “cleaned up”. You work won’t go into the kiln if it has sharp edges – when glazed, sharp edges turn into razor blades! Use a piece of fly wire to rub the work all over – this will scratch a little so be light handed. Use a knife or metal kidney to scrape any areas that require a bit more dynamic treatment than the fly wire offers! Finally, a very light wipe over with a slightly damp sponge can help soften and soothe all of your edges and dags! Trimming thrown work: If you are planning to trim (or turn) your thrown work (and you should be), make sure you bag it well – your work should be leather hard to almost dry for easiest trimming. Use this step to finish the work completely – use a metal kidney to polish the surface, or a slightly damp sponge to give a freshly thrown look. Wipe the sponge around the rim after trimming, and check the inside of the pot for dags! Trimming slip cast work: Usually I will trim the rims of your work on the wheel the following day to make that stage easier, however you will still need to check your work for lumps and bumps. Last but not least – check that your name is still clearly on the bottom of your work. Step Five – Bisque Firing When the work is completely dry it can go into the bisque kiln. The bisque kiln is fired to 1000°C. This process burns off the water in the clay as well as some of the chemically bound water. The structure of the clay is not altered that much at this temperature. Inside the bisque kiln, the work is stacked a little, small bowl inside a larger bowl and onto a heavy plate. Smaller items like decorations or drink coasters might get stacked several high. Consideration is paid to the weight of the stack and shape of the work. A bisque kiln can fire about one and a half times the amount of work that the glaze kiln can fire. The firing takes about 10 hours to complete the cycle and about two days to cool down. Once it has been emptied the work is placed in the glaze room ready for you to decorate! Step Six – Glazing Decorating your work with colour can be a lot of fun – and time consuming! There are three main options for surface treatment at this stage: Oxide Washes Underglazes Glazes Washes and underglazes do not “glaze” the work – It will still need a layer of glaze to fully seal the clay (washes don’t need glaze on surfaces not designed for food or liquid as they can gloss up a little on their own). Underglazes are stable colourants that turn out pretty much how they look in the jar. They can be mixed with each other to form other colours and can be used like water colours to paint onto your work. Mostly they should have a clear glaze on top to seal them. Oxides are a different species – the pink oxide (cobalt) wash turns out bright blue for instance. They don’t always need a glaze on top, and some glazes can change the colour of the wash! The glazes need no other “glaze” on top! Be careful of unknown glaze interactions – you can put any combination of glaze in a bowl or on a plate, but only a single glaze on the outside of any vertical surface! Glazes are a chemical reaction under heat. We don’t know the exact chemicals in the Mayco glazes we use. I can guess by the way they interact with each other, however, on the whole, you need to test every idea you have, and not run the test on a vertical surface! Simply put, glaze is a layer of glass like substance that bonds with the clay underneath. Clay is made of silica, alumina and water. Glaze is made of mostly silica. Silica has a melting point of 1700°C and we fire to 1240°C. The silica requires a “flux” to help it melt at the lower temperature. Fluxes can be all sorts of chemicals – a common one is calcium – calcium has a melting point of 2500°C, however, together they both melt at a much lower temperature! Colourants are metal oxides like cobalt (blue), chrome (green through black), copper (green, blue, even red!), manganese (black, purple and pink) iron (red brown), etc. Different chemicals in the glaze can have dramatic effects. for example, barium carbonate (which we don’t use) turns manganese bright pink! Other elements can turn manganese dioxide brown, blue, purple and reddish brown. Manganese dioxide is a flux in and of itself as well. So, glazes that get their black and purple colours, often interact with other glazes and RUN! Our mirror black is a good example – it mixes really well with many glazes because it fluxes them – causes them to melt faster. It will also bring out many beautiful colours in the glazes because it’s black colouring most definitely comes from manganese dioxide! Glaze chemistry is a whole subject on it’s own! We use commercial Mayco glazes on purpose – for their huge range of colour possibilities, stability, cool interactions, artistic freedom with the ability to easily brush the glazes on and ease of use. We currently have almost 50 glazes on hand! A major project is to test the interactions of all glazes with each other. That is 2,500 test tiles!!!! I’m going to make the wall behind the wheels the feature wall of pretty colours! Step Seven – Glaze (Gloss or sometimes called “Glost”) Firing Most of the time this is the final stage of making your creation (but not always!) The glaze kiln goes to 1240°C. This is called cone 6, or midrange. It is the low end of stoneware temperatures. Stoneware clays and glazes are typically fired at cone 8 – 10, that is 1260 – 1290°C. The energy requirement to go from 1240°C to 1280°C is almost a 30% more! Our clay is formulated to vitrify (mature, turn “glass-like”) at 1240°, as are our glazes. A glaze kiln take around 12 hours to reach temperature and two to three days to cool down. Sometimes a third firing process is required – this is for decoration that is added to work after the glaze firing. For example – adding precious metals and lustres. this firing temperature is usually around 600 – 800°C depending upon the techniques being used. There are many students interested in gold and silver trims – we will be doing this third type of firing soon! After firing your work will be in the student finished work shelves. Remember to pay for it before you head out the door! There is a small extra charge for using porcelain clay (it’s more than twice the price of regular clay), and for any third firing process! Once your work has been fired it can not turn back into clay for millennia – so don’t fire it if you don’t like it! Put it in the bucket for recycling. https://firebirdstudios.com.au/the-process-of-making-pottery/ The bowl is an example of kitchenware used in the 19th century and still in use today.Bowl white ceramic. Crack on side. Badly stained.Backstamp very faint and unable to be read.flagstaff hill, warrnambool, shipwrecked-coast, flagstaff-hill, flagstaff-hill-maritime-museum, maritime-museum, shipwreck-coast, flagstaff-hill-maritime-village, mixing bowl, food preparation, kitchen equipment, ceramic -
 Flagstaff Hill Maritime Museum and Village
Domestic object - Bowl
The Process of Making Pottery Decorating, Firing, Glazing, Making, Technical There is a rhythm and flow to clay. It can’t be done all at once! Even the making process! It can take weeks to get everything done, especially if you can only work on your pottery once a week! Even though we have three hour classes, it’s often just not enough time! Here is an overview of some of the processes so you have a bit more grasp on some of the technical stuff! Step One – Design There are SO many ideas out there for making stuff in clay! From delicate porcelain jewellery, through to heavy sculptural work and everything in between. Deciding your direction is sometimes not that easy – when you first start, try everything, you will naturally gravitate to the style that you enjoy! The options and variations are endless and can get a wee bit overwhelming too! Check in with me before you start to ensure your ideas will work, what order you might do things, how you could achieve the look you are seeking and any other technical data required! Step Two – Making Clay is thixotropic. This means that as you work with it, the clay first gets sloppier and wetter, before is begins to dry in the atmosphere. For most things, you simply can’t do all parts of the project at once. An example of work order might look like: Get last weeks work out from the shelves Prepare clay for today’s work – roll your clay, prepare balls for throwing, make the first stage of a pinch pot) Clean up last week’s work and put it on the shelf for bisque firing Check that you have any glazing to do – and do enough of it that you will have time to finish your main project Do the next step of your next project – there might be a further step that can’t be complete immediately, in that case, wrap your work well and put onto the shelves. Letting your work rest for a while can really help keep your work clean and professional looking. Many things require bagging under plastic to keep it ready for work the next week – put your name on the outside of the bag so you can find your work easily. We have stickers and markers. Consider how you want to decorate your work – coloured slip can be applied at a fairly wet stage (remembering that it will make your work even wetter!). Trying to apply slip to dry clay won’t work! If you want to do sgraffito – you will need to keep the work leather hard (a state of dryness where you can still work the clay with a little effort and a little water and care). Step Three – Drying Most of the time your work can go into the rack uncovered to let it dry out for the following week. If you want to continue forming or shaping you will need to double bag your work – put your work on a suitable sized bat and put the bat in a bag so the base of the bag is under the bat, then put another bag over the top of the work and tuck the top of the bag under the bat. If you want to trim (or turn) your thrown work the following week, it should also be double bagged. If your work is large, delicate, or of uneven thicknesses, you should lightly cover your work for drying. When considering the drying process, bare in mind the weather, humidity and wind! The hotter and dryer, the faster things dry and work can dry unevenly in the shelves – this can lead to cracking – another time to lightly cover your work for drying. Step Four – Trimming and Cleaning Up Your work is dry! It is called greenware now and it is at it’s most fragile! Handle everything with two hands. I often refer to soft hands – keep everything gentle and with your fingers spread as much as possible. Try to not pick up things like plates too much, and always with both hands! Before your work can be bisque fired it should be “cleaned up”. You work won’t go into the kiln if it has sharp edges – when glazed, sharp edges turn into razor blades! Use a piece of fly wire to rub the work all over – this will scratch a little so be light handed. Use a knife or metal kidney to scrape any areas that require a bit more dynamic treatment than the fly wire offers! Finally, a very light wipe over with a slightly damp sponge can help soften and soothe all of your edges and dags! Trimming thrown work: If you are planning to trim (or turn) your thrown work (and you should be), make sure you bag it well – your work should be leather hard to almost dry for easiest trimming. Use this step to finish the work completely – use a metal kidney to polish the surface, or a slightly damp sponge to give a freshly thrown look. Wipe the sponge around the rim after trimming, and check the inside of the pot for dags! Trimming slip cast work: Usually I will trim the rims of your work on the wheel the following day to make that stage easier, however you will still need to check your work for lumps and bumps. Last but not least – check that your name is still clearly on the bottom of your work. Step Five – Bisque Firing When the work is completely dry it can go into the bisque kiln. The bisque kiln is fired to 1000°C. This process burns off the water in the clay as well as some of the chemically bound water. The structure of the clay is not altered that much at this temperature. Inside the bisque kiln, the work is stacked a little, small bowl inside a larger bowl and onto a heavy plate. Smaller items like decorations or drink coasters might get stacked several high. Consideration is paid to the weight of the stack and shape of the work. A bisque kiln can fire about one and a half times the amount of work that the glaze kiln can fire. The firing takes about 10 hours to complete the cycle and about two days to cool down. Once it has been emptied the work is placed in the glaze room ready for you to decorate! Step Six – Glazing Decorating your work with colour can be a lot of fun – and time consuming! There are three main options for surface treatment at this stage: Oxide Washes Underglazes Glazes Washes and underglazes do not “glaze” the work – It will still need a layer of glaze to fully seal the clay (washes don’t need glaze on surfaces not designed for food or liquid as they can gloss up a little on their own). Underglazes are stable colourants that turn out pretty much how they look in the jar. They can be mixed with each other to form other colours and can be used like water colours to paint onto your work. Mostly they should have a clear glaze on top to seal them. Oxides are a different species – the pink oxide (cobalt) wash turns out bright blue for instance. They don’t always need a glaze on top, and some glazes can change the colour of the wash! The glazes need no other “glaze” on top! Be careful of unknown glaze interactions – you can put any combination of glaze in a bowl or on a plate, but only a single glaze on the outside of any vertical surface! Glazes are a chemical reaction under heat. We don’t know the exact chemicals in the Mayco glazes we use. I can guess by the way they interact with each other, however, on the whole, you need to test every idea you have, and not run the test on a vertical surface! Simply put, glaze is a layer of glass like substance that bonds with the clay underneath. Clay is made of silica, alumina and water. Glaze is made of mostly silica. Silica has a melting point of 1700°C and we fire to 1240°C. The silica requires a “flux” to help it melt at the lower temperature. Fluxes can be all sorts of chemicals – a common one is calcium – calcium has a melting point of 2500°C, however, together they both melt at a much lower temperature! Colourants are metal oxides like cobalt (blue), chrome (green through black), copper (green, blue, even red!), manganese (black, purple and pink) iron (red brown), etc. Different chemicals in the glaze can have dramatic effects. for example, barium carbonate (which we don’t use) turns manganese bright pink! Other elements can turn manganese dioxide brown, blue, purple and reddish brown. Manganese dioxide is a flux in and of itself as well. So, glazes that get their black and purple colours, often interact with other glazes and RUN! Our mirror black is a good example – it mixes really well with many glazes because it fluxes them – causes them to melt faster. It will also bring out many beautiful colours in the glazes because it’s black colouring most definitely comes from manganese dioxide! Glaze chemistry is a whole subject on it’s own! We use commercial Mayco glazes on purpose – for their huge range of colour possibilities, stability, cool interactions, artistic freedom with the ability to easily brush the glazes on and ease of use. We currently have almost 50 glazes on hand! A major project is to test the interactions of all glazes with each other. That is 2,500 test tiles!!!! I’m going to make the wall behind the wheels the feature wall of pretty colours! Step Seven – Glaze (Gloss or sometimes called “Glost”) Firing Most of the time this is the final stage of making your creation (but not always!) The glaze kiln goes to 1240°C. This is called cone 6, or midrange. It is the low end of stoneware temperatures. Stoneware clays and glazes are typically fired at cone 8 – 10, that is 1260 – 1290°C. The energy requirement to go from 1240°C to 1280°C is almost a 30% more! Our clay is formulated to vitrify (mature, turn “glass-like”) at 1240°, as are our glazes. A glaze kiln take around 12 hours to reach temperature and two to three days to cool down. Sometimes a third firing process is required – this is for decoration that is added to work after the glaze firing. For example – adding precious metals and lustres. this firing temperature is usually around 600 – 800°C depending upon the techniques being used. There are many students interested in gold and silver trims – we will be doing this third type of firing soon! After firing your work will be in the student finished work shelves. Remember to pay for it before you head out the door! There is a small extra charge for using porcelain clay (it’s more than twice the price of regular clay), and for any third firing process! Once your work has been fired it can not turn back into clay for millennia – so don’t fire it if you don’t like it! Put it in the bucket for recycling. https://firebirdstudios.com.au/the-process-of-making-pottery/ This bowl is an example of kitchenware used in the 19th century and still in use today.Bowl white ceramic plain that has two sets of edging around lip. Inside bowl has plaster designed to look like cooking mixture.flagstaff hill, warrnambool, shipwrecked-coast, flagstaff-hill, flagstaff-hill-maritime-museum, maritime-museum, shipwreck-coast, flagstaff-hill-maritime-village, kitchen equipment, ceramic -
 Flagstaff Hill Maritime Museum and Village
Domestic object - Bowl, J & G Meakin, Late 19th or early 20th Century
The Process of Making Pottery Decorating, Firing, Glazing, Making, Technical There is a rhythm and flow to clay. It can’t be done all at once! Even the making process! It can take weeks to get everything done, especially if you can only work on your pottery once a week! Even though we have three hour classes, it’s often just not enough time! Here is an overview of some of the processes so you have a bit more grasp on some of the technical stuff! Step One – Design There are SO many ideas out there for making stuff in clay! From delicate porcelain jewellery, through to heavy sculptural work and everything in between. Deciding your direction is sometimes not that easy – when you first start, try everything, you will naturally gravitate to the style that you enjoy! The options and variations are endless and can get a wee bit overwhelming too! Check in with me before you start to ensure your ideas will work, what order you might do things, how you could achieve the look you are seeking and any other technical data required! Step Two – Making Clay is thixotropic. This means that as you work with it, the clay first gets sloppier and wetter, before is begins to dry in the atmosphere. For most things, you simply can’t do all parts of the project at once. An example of work order might look like: Get last weeks work out from the shelves Prepare clay for today’s work – roll your clay, prepare balls for throwing, make the first stage of a pinch pot) Clean up last week’s work and put it on the shelf for bisque firing Check that you have any glazing to do – and do enough of it that you will have time to finish your main project Do the next step of your next project – there might be a further step that can’t be complete immediately, in that case, wrap your work well and put onto the shelves. Letting your work rest for a while can really help keep your work clean and professional looking. Many things require bagging under plastic to keep it ready for work the next week – put your name on the outside of the bag so you can find your work easily. We have stickers and markers. Consider how you want to decorate your work – coloured slip can be applied at a fairly wet stage (remembering that it will make your work even wetter!). Trying to apply slip to dry clay won’t work! If you want to do sgraffito – you will need to keep the work leather hard (a state of dryness where you can still work the clay with a little effort and a little water and care). Step Three – Drying Most of the time your work can go into the rack uncovered to let it dry out for the following week. If you want to continue forming or shaping you will need to double bag your work – put your work on a suitable sized bat and put the bat in a bag so the base of the bag is under the bat, then put another bag over the top of the work and tuck the top of the bag under the bat. If you want to trim (or turn) your thrown work the following week, it should also be double bagged. If your work is large, delicate, or of uneven thicknesses, you should lightly cover your work for drying. When considering the drying process, bare in mind the weather, humidity and wind! The hotter and dryer, the faster things dry and work can dry unevenly in the shelves – this can lead to cracking – another time to lightly cover your work for drying. Step Four – Trimming and Cleaning Up Your work is dry! It is called greenware now and it is at it’s most fragile! Handle everything with two hands. I often refer to soft hands – keep everything gentle and with your fingers spread as much as possible. Try to not pick up things like plates too much, and always with both hands! Before your work can be bisque fired it should be “cleaned up”. You work won’t go into the kiln if it has sharp edges – when glazed, sharp edges turn into razor blades! Use a piece of fly wire to rub the work all over – this will scratch a little so be light handed. Use a knife or metal kidney to scrape any areas that require a bit more dynamic treatment than the fly wire offers! Finally, a very light wipe over with a slightly damp sponge can help soften and soothe all of your edges and dags! Trimming thrown work: If you are planning to trim (or turn) your thrown work (and you should be), make sure you bag it well – your work should be leather hard to almost dry for easiest trimming. Use this step to finish the work completely – use a metal kidney to polish the surface, or a slightly damp sponge to give a freshly thrown look. Wipe the sponge around the rim after trimming, and check the inside of the pot for dags! Trimming slip cast work: Usually I will trim the rims of your work on the wheel the following day to make that stage easier, however you will still need to check your work for lumps and bumps. Last but not least – check that your name is still clearly on the bottom of your work. Step Five – Bisque Firing When the work is completely dry it can go into the bisque kiln. The bisque kiln is fired to 1000°C. This process burns off the water in the clay as well as some of the chemically bound water. The structure of the clay is not altered that much at this temperature. Inside the bisque kiln, the work is stacked a little, small bowl inside a larger bowl and onto a heavy plate. Smaller items like decorations or drink coasters might get stacked several high. Consideration is paid to the weight of the stack and shape of the work. A bisque kiln can fire about one and a half times the amount of work that the glaze kiln can fire. The firing takes about 10 hours to complete the cycle and about two days to cool down. Once it has been emptied the work is placed in the glaze room ready for you to decorate! Step Six – Glazing Decorating your work with colour can be a lot of fun – and time consuming! There are three main options for surface treatment at this stage: Oxide Washes Underglazes Glazes Washes and underglazes do not “glaze” the work – It will still need a layer of glaze to fully seal the clay (washes don’t need glaze on surfaces not designed for food or liquid as they can gloss up a little on their own). Underglazes are stable colourants that turn out pretty much how they look in the jar. They can be mixed with each other to form other colours and can be used like water colours to paint onto your work. Mostly they should have a clear glaze on top to seal them. Oxides are a different species – the pink oxide (cobalt) wash turns out bright blue for instance. They don’t always need a glaze on top, and some glazes can change the colour of the wash! The glazes need no other “glaze” on top! Be careful of unknown glaze interactions – you can put any combination of glaze in a bowl or on a plate, but only a single glaze on the outside of any vertical surface! Glazes are a chemical reaction under heat. We don’t know the exact chemicals in the Mayco glazes we use. I can guess by the way they interact with each other, however, on the whole, you need to test every idea you have, and not run the test on a vertical surface! Simply put, glaze is a layer of glass like substance that bonds with the clay underneath. Clay is made of silica, alumina and water. Glaze is made of mostly silica. Silica has a melting point of 1700°C and we fire to 1240°C. The silica requires a “flux” to help it melt at the lower temperature. Fluxes can be all sorts of chemicals – a common one is calcium – calcium has a melting point of 2500°C, however, together they both melt at a much lower temperature! Colourants are metal oxides like cobalt (blue), chrome (green through black), copper (green, blue, even red!), manganese (black, purple and pink) iron (red brown), etc. Different chemicals in the glaze can have dramatic effects. for example, barium carbonate (which we don’t use) turns manganese bright pink! Other elements can turn manganese dioxide brown, blue, purple and reddish brown. Manganese dioxide is a flux in and of itself as well. So, glazes that get their black and purple colours, often interact with other glazes and RUN! Our mirror black is a good example – it mixes really well with many glazes because it fluxes them – causes them to melt faster. It will also bring out many beautiful colours in the glazes because it’s black colouring most definitely comes from manganese dioxide! Glaze chemistry is a whole subject on it’s own! We use commercial Mayco glazes on purpose – for their huge range of colour possibilities, stability, cool interactions, artistic freedom with the ability to easily brush the glazes on and ease of use. We currently have almost 50 glazes on hand! A major project is to test the interactions of all glazes with each other. That is 2,500 test tiles!!!! I’m going to make the wall behind the wheels the feature wall of pretty colours! Step Seven – Glaze (Gloss or sometimes called “Glost”) Firing Most of the time this is the final stage of making your creation (but not always!) The glaze kiln goes to 1240°C. This is called cone 6, or midrange. It is the low end of stoneware temperatures. Stoneware clays and glazes are typically fired at cone 8 – 10, that is 1260 – 1290°C. The energy requirement to go from 1240°C to 1280°C is almost a 30% more! Our clay is formulated to vitrify (mature, turn “glass-like”) at 1240°, as are our glazes. A glaze kiln take around 12 hours to reach temperature and two to three days to cool down. Sometimes a third firing process is required – this is for decoration that is added to work after the glaze firing. For example – adding precious metals and lustres. this firing temperature is usually around 600 – 800°C depending upon the techniques being used. There are many students interested in gold and silver trims – we will be doing this third type of firing soon! After firing your work will be in the student finished work shelves. Remember to pay for it before you head out the door! There is a small extra charge for using porcelain clay (it’s more than twice the price of regular clay), and for any third firing process! Once your work has been fired it can not turn back into clay for millennia – so don’t fire it if you don’t like it! Put it in the bucket for recycling. https://firebirdstudios.com.au/the-process-of-making-pottery/This bowl was made by renowned pottery company J & G Meakin of England. The firm was established in the mid-1800's. The bowl is an example of kitchenware used in the 19th century and still in use today.Bowl; white ceramic, round and tapering inwards towards base. Made by J and G Meakin England.On base, 'Ironstone China Reg SOL 391413' with symbolflagstaff hill, flagstaff hill maritime museum and village, warrnambool, maritime museum, maritime village, great ocean road, shipwreck coast, mixing bowl, food preparation, j & g meakin, pottery, stoke-on-trent, kitchen equipment, ceramic -
 Flagstaff Hill Maritime Museum and Village
Domestic object - Plate
The Process of Making Pottery Decorating, Firing, Glazing, Making, Technical There is a rhythm and flow to clay. It can’t be done all at once! Even the making process! It can take weeks to get everything done, especially if you can only work on your pottery once a week! Even though we have three hour classes, it’s often just not enough time! Here is an overview of some of the processes so you have a bit more grasp on some of the technical stuff! Step One – Design There are SO many ideas out there for making stuff in clay! From delicate porcelain jewellery, through to heavy sculptural work and everything in between. Deciding your direction is sometimes not that easy – when you first start, try everything, you will naturally gravitate to the style that you enjoy! The options and variations are endless and can get a wee bit overwhelming too! Check in with me before you start to ensure your ideas will work, what order you might do things, how you could achieve the look you are seeking and any other technical data required! Step Two – Making Clay is thixotropic. This means that as you work with it, the clay first gets sloppier and wetter, before is begins to dry in the atmosphere. For most things, you simply can’t do all parts of the project at once. An example of work order might look like: Get last weeks work out from the shelves Prepare clay for today’s work – roll your clay, prepare balls for throwing, make the first stage of a pinch pot) Clean up last week’s work and put it on the shelf for bisque firing Check that you have any glazing to do – and do enough of it that you will have time to finish your main project Do the next step of your next project – there might be a further step that can’t be complete immediately, in that case, wrap your work well and put onto the shelves. Letting your work rest for a while can really help keep your work clean and professional looking. Many things require bagging under plastic to keep it ready for work the next week – put your name on the outside of the bag so you can find your work easily. We have stickers and markers. Consider how you want to decorate your work – coloured slip can be applied at a fairly wet stage (remembering that it will make your work even wetter!). Trying to apply slip to dry clay won’t work! If you want to do sgraffito – you will need to keep the work leather hard (a state of dryness where you can still work the clay with a little effort and a little water and care). Step Three – Drying Most of the time your work can go into the rack uncovered to let it dry out for the following week. If you want to continue forming or shaping you will need to double bag your work – put your work on a suitable sized bat and put the bat in a bag so the base of the bag is under the bat, then put another bag over the top of the work and tuck the top of the bag under the bat. If you want to trim (or turn) your thrown work the following week, it should also be double bagged. If your work is large, delicate, or of uneven thicknesses, you should lightly cover your work for drying. When considering the drying process, bare in mind the weather, humidity and wind! The hotter and dryer, the faster things dry and work can dry unevenly in the shelves – this can lead to cracking – another time to lightly cover your work for drying. Step Four – Trimming and Cleaning Up Your work is dry! It is called greenware now and it is at it’s most fragile! Handle everything with two hands. I often refer to soft hands – keep everything gentle and with your fingers spread as much as possible. Try to not pick up things like plates too much, and always with both hands! Before your work can be bisque fired it should be “cleaned up”. You work won’t go into the kiln if it has sharp edges – when glazed, sharp edges turn into razor blades! Use a piece of fly wire to rub the work all over – this will scratch a little so be light handed. Use a knife or metal kidney to scrape any areas that require a bit more dynamic treatment than the fly wire offers! Finally, a very light wipe over with a slightly damp sponge can help soften and soothe all of your edges and dags! Trimming thrown work: If you are planning to trim (or turn) your thrown work (and you should be), make sure you bag it well – your work should be leather hard to almost dry for easiest trimming. Use this step to finish the work completely – use a metal kidney to polish the surface, or a slightly damp sponge to give a freshly thrown look. Wipe the sponge around the rim after trimming, and check the inside of the pot for dags! Trimming slip cast work: Usually I will trim the rims of your work on the wheel the following day to make that stage easier, however you will still need to check your work for lumps and bumps. Last but not least – check that your name is still clearly on the bottom of your work. Step Five – Bisque Firing When the work is completely dry it can go into the bisque kiln. The bisque kiln is fired to 1000°C. This process burns off the water in the clay as well as some of the chemically bound water. The structure of the clay is not altered that much at this temperature. Inside the bisque kiln, the work is stacked a little, small bowl inside a larger bowl and onto a heavy plate. Smaller items like decorations or drink coasters might get stacked several high. Consideration is paid to the weight of the stack and shape of the work. A bisque kiln can fire about one and a half times the amount of work that the glaze kiln can fire. The firing takes about 10 hours to complete the cycle and about two days to cool down. Once it has been emptied the work is placed in the glaze room ready for you to decorate! Step Six – Glazing Decorating your work with colour can be a lot of fun – and time consuming! There are three main options for surface treatment at this stage: Oxide Washes Underglazes Glazes Washes and underglazes do not “glaze” the work – It will still need a layer of glaze to fully seal the clay (washes don’t need glaze on surfaces not designed for food or liquid as they can gloss up a little on their own). Underglazes are stable colourants that turn out pretty much how they look in the jar. They can be mixed with each other to form other colours and can be used like water colours to paint onto your work. Mostly they should have a clear glaze on top to seal them. Oxides are a different species – the pink oxide (cobalt) wash turns out bright blue for instance. They don’t always need a glaze on top, and some glazes can change the colour of the wash! The glazes need no other “glaze” on top! Be careful of unknown glaze interactions – you can put any combination of glaze in a bowl or on a plate, but only a single glaze on the outside of any vertical surface! Glazes are a chemical reaction under heat. We don’t know the exact chemicals in the Mayco glazes we use. I can guess by the way they interact with each other, however, on the whole, you need to test every idea you have, and not run the test on a vertical surface! Simply put, glaze is a layer of glass like substance that bonds with the clay underneath. Clay is made of silica, alumina and water. Glaze is made of mostly silica. Silica has a melting point of 1700°C and we fire to 1240°C. The silica requires a “flux” to help it melt at the lower temperature. Fluxes can be all sorts of chemicals – a common one is calcium – calcium has a melting point of 2500°C, however, together they both melt at a much lower temperature! Colourants are metal oxides like cobalt (blue), chrome (green through black), copper (green, blue, even red!), manganese (black, purple and pink) iron (red brown), etc. Different chemicals in the glaze can have dramatic effects. for example, barium carbonate (which we don’t use) turns manganese bright pink! Other elements can turn manganese dioxide brown, blue, purple and reddish brown. Manganese dioxide is a flux in and of itself as well. So, glazes that get their black and purple colours, often interact with other glazes and RUN! Our mirror black is a good example – it mixes really well with many glazes because it fluxes them – causes them to melt faster. It will also bring out many beautiful colours in the glazes because it’s black colouring most definitely comes from manganese dioxide! Glaze chemistry is a whole subject on it’s own! We use commercial Mayco glazes on purpose – for their huge range of colour possibilities, stability, cool interactions, artistic freedom with the ability to easily brush the glazes on and ease of use. We currently have almost 50 glazes on hand! A major project is to test the interactions of all glazes with each other. That is 2,500 test tiles!!!! I’m going to make the wall behind the wheels the feature wall of pretty colours! Step Seven – Glaze (Gloss or sometimes called “Glost”) Firing Most of the time this is the final stage of making your creation (but not always!) The glaze kiln goes to 1240°C. This is called cone 6, or midrange. It is the low end of stoneware temperatures. Stoneware clays and glazes are typically fired at cone 8 – 10, that is 1260 – 1290°C. The energy requirement to go from 1240°C to 1280°C is almost a 30% more! Our clay is formulated to vitrify (mature, turn “glass-like”) at 1240°, as are our glazes. A glaze kiln take around 12 hours to reach temperature and two to three days to cool down. Sometimes a third firing process is required – this is for decoration that is added to work after the glaze firing. For example – adding precious metals and lustres. this firing temperature is usually around 600 – 800°C depending upon the techniques being used. There are many students interested in gold and silver trims – we will be doing this third type of firing soon! After firing your work will be in the student finished work shelves. Remember to pay for it before you head out the door! There is a small extra charge for using porcelain clay (it’s more than twice the price of regular clay), and for any third firing process! Once your work has been fired it can not turn back into clay for millennia – so don’t fire it if you don’t like it! Put it in the bucket for recycling. https://firebirdstudios.com.au/the-process-of-making-pottery/Ceramics have evolved over thousands of years.White earthenware dinner plate. Crazing evident all over.Backstamped ‘Made in England S LTD’flagstaff hill, warrnambool, shipwrecked-coast, flagstaff-hill, flagstaff-hill-maritime-museum, maritime-museum, shipwreck-coast, flagstaff-hill-maritime-village, ceramics, tableware -
 Flagstaff Hill Maritime Museum and Village
Domestic object - Plate, Johnson Bros
The Process of Making Pottery Decorating, Firing, Glazing, Making, Technical There is a rhythm and flow to clay. It can’t be done all at once! Even the making process! It can take weeks to get everything done, especially if you can only work on your pottery once a week! Even though we have three hour classes, it’s often just not enough time! Here is an overview of some of the processes so you have a bit more grasp on some of the technical stuff! Step One – Design There are SO many ideas out there for making stuff in clay! From delicate porcelain jewellery, through to heavy sculptural work and everything in between. Deciding your direction is sometimes not that easy – when you first start, try everything, you will naturally gravitate to the style that you enjoy! The options and variations are endless and can get a wee bit overwhelming too! Check in with me before you start to ensure your ideas will work, what order you might do things, how you could achieve the look you are seeking and any other technical data required! Step Two – Making Clay is thixotropic. This means that as you work with it, the clay first gets sloppier and wetter, before is begins to dry in the atmosphere. For most things, you simply can’t do all parts of the project at once. An example of work order might look like: Get last weeks work out from the shelves Prepare clay for today’s work – roll your clay, prepare balls for throwing, make the first stage of a pinch pot) Clean up last week’s work and put it on the shelf for bisque firing Check that you have any glazing to do – and do enough of it that you will have time to finish your main project Do the next step of your next project – there might be a further step that can’t be complete immediately, in that case, wrap your work well and put onto the shelves. Letting your work rest for a while can really help keep your work clean and professional looking. Many things require bagging under plastic to keep it ready for work the next week – put your name on the outside of the bag so you can find your work easily. We have stickers and markers. Consider how you want to decorate your work – coloured slip can be applied at a fairly wet stage (remembering that it will make your work even wetter!). Trying to apply slip to dry clay won’t work! If you want to do sgraffito – you will need to keep the work leather hard (a state of dryness where you can still work the clay with a little effort and a little water and care). Step Three – Drying Most of the time your work can go into the rack uncovered to let it dry out for the following week. If you want to continue forming or shaping you will need to double bag your work – put your work on a suitable sized bat and put the bat in a bag so the base of the bag is under the bat, then put another bag over the top of the work and tuck the top of the bag under the bat. If you want to trim (or turn) your thrown work the following week, it should also be double bagged. If your work is large, delicate, or of uneven thicknesses, you should lightly cover your work for drying. When considering the drying process, bare in mind the weather, humidity and wind! The hotter and dryer, the faster things dry and work can dry unevenly in the shelves – this can lead to cracking – another time to lightly cover your work for drying. Step Four – Trimming and Cleaning Up Your work is dry! It is called greenware now and it is at it’s most fragile! Handle everything with two hands. I often refer to soft hands – keep everything gentle and with your fingers spread as much as possible. Try to not pick up things like plates too much, and always with both hands! Before your work can be bisque fired it should be “cleaned up”. You work won’t go into the kiln if it has sharp edges – when glazed, sharp edges turn into razor blades! Use a piece of fly wire to rub the work all over – this will scratch a little so be light handed. Use a knife or metal kidney to scrape any areas that require a bit more dynamic treatment than the fly wire offers! Finally, a very light wipe over with a slightly damp sponge can help soften and soothe all of your edges and dags! Trimming thrown work: If you are planning to trim (or turn) your thrown work (and you should be), make sure you bag it well – your work should be leather hard to almost dry for easiest trimming. Use this step to finish the work completely – use a metal kidney to polish the surface, or a slightly damp sponge to give a freshly thrown look. Wipe the sponge around the rim after trimming, and check the inside of the pot for dags! Trimming slip cast work: Usually I will trim the rims of your work on the wheel the following day to make that stage easier, however you will still need to check your work for lumps and bumps. Last but not least – check that your name is still clearly on the bottom of your work. Step Five – Bisque Firing When the work is completely dry it can go into the bisque kiln. The bisque kiln is fired to 1000°C. This process burns off the water in the clay as well as some of the chemically bound water. The structure of the clay is not altered that much at this temperature. Inside the bisque kiln, the work is stacked a little, small bowl inside a larger bowl and onto a heavy plate. Smaller items like decorations or drink coasters might get stacked several high. Consideration is paid to the weight of the stack and shape of the work. A bisque kiln can fire about one and a half times the amount of work that the glaze kiln can fire. The firing takes about 10 hours to complete the cycle and about two days to cool down. Once it has been emptied the work is placed in the glaze room ready for you to decorate! Step Six – Glazing Decorating your work with colour can be a lot of fun – and time consuming! There are three main options for surface treatment at this stage: Oxide Washes Underglazes Glazes Washes and underglazes do not “glaze” the work – It will still need a layer of glaze to fully seal the clay (washes don’t need glaze on surfaces not designed for food or liquid as they can gloss up a little on their own). Underglazes are stable colourants that turn out pretty much how they look in the jar. They can be mixed with each other to form other colours and can be used like water colours to paint onto your work. Mostly they should have a clear glaze on top to seal them. Oxides are a different species – the pink oxide (cobalt) wash turns out bright blue for instance. They don’t always need a glaze on top, and some glazes can change the colour of the wash! The glazes need no other “glaze” on top! Be careful of unknown glaze interactions – you can put any combination of glaze in a bowl or on a plate, but only a single glaze on the outside of any vertical surface! Glazes are a chemical reaction under heat. We don’t know the exact chemicals in the Mayco glazes we use. I can guess by the way they interact with each other, however, on the whole, you need to test every idea you have, and not run the test on a vertical surface! Simply put, glaze is a layer of glass like substance that bonds with the clay underneath. Clay is made of silica, alumina and water. Glaze is made of mostly silica. Silica has a melting point of 1700°C and we fire to 1240°C. The silica requires a “flux” to help it melt at the lower temperature. Fluxes can be all sorts of chemicals – a common one is calcium – calcium has a melting point of 2500°C, however, together they both melt at a much lower temperature! Colourants are metal oxides like cobalt (blue), chrome (green through black), copper (green, blue, even red!), manganese (black, purple and pink) iron (red brown), etc. Different chemicals in the glaze can have dramatic effects. for example, barium carbonate (which we don’t use) turns manganese bright pink! Other elements can turn manganese dioxide brown, blue, purple and reddish brown. Manganese dioxide is a flux in and of itself as well. So, glazes that get their black and purple colours, often interact with other glazes and RUN! Our mirror black is a good example – it mixes really well with many glazes because it fluxes them – causes them to melt faster. It will also bring out many beautiful colours in the glazes because it’s black colouring most definitely comes from manganese dioxide! Glaze chemistry is a whole subject on it’s own! We use commercial Mayco glazes on purpose – for their huge range of colour possibilities, stability, cool interactions, artistic freedom with the ability to easily brush the glazes on and ease of use. We currently have almost 50 glazes on hand! A major project is to test the interactions of all glazes with each other. That is 2,500 test tiles!!!! I’m going to make the wall behind the wheels the feature wall of pretty colours! Step Seven – Glaze (Gloss or sometimes called “Glost”) Firing Most of the time this is the final stage of making your creation (but not always!) The glaze kiln goes to 1240°C. This is called cone 6, or midrange. It is the low end of stoneware temperatures. Stoneware clays and glazes are typically fired at cone 8 – 10, that is 1260 – 1290°C. The energy requirement to go from 1240°C to 1280°C is almost a 30% more! Our clay is formulated to vitrify (mature, turn “glass-like”) at 1240°, as are our glazes. A glaze kiln take around 12 hours to reach temperature and two to three days to cool down. Sometimes a third firing process is required – this is for decoration that is added to work after the glaze firing. For example – adding precious metals and lustres. this firing temperature is usually around 600 – 800°C depending upon the techniques being used. There are many students interested in gold and silver trims – we will be doing this third type of firing soon! After firing your work will be in the student finished work shelves. Remember to pay for it before you head out the door! There is a small extra charge for using porcelain clay (it’s more than twice the price of regular clay), and for any third firing process! Once your work has been fired it can not turn back into clay for millennia – so don’t fire it if you don’t like it! Put it in the bucket for recycling. https://firebirdstudios.com.au/the-process-of-making-pottery/Ceramics have evolved over thousands of years.A white earthenware side plate with a gadroon edge. Has water marks and chips on front.‘Johnson Bros England Reg No 15587’flagstaff hill, warrnambool, shipwrecked-coast, flagstaff-hill, flagstaff-hill-maritime-museum, maritime-museum, shipwreck-coast, flagstaff-hill-maritime-village, johnson bros, ceramics, tableware -
 Flagstaff Hill Maritime Museum and Village
Domestic object - Plate, Alfred Meakin
The Process of Making Pottery Decorating, Firing, Glazing, Making, Technical There is a rhythm and flow to clay. It can’t be done all at once! Even the making process! It can take weeks to get everything done, especially if you can only work on your pottery once a week! Even though we have three hour classes, it’s often just not enough time! Here is an overview of some of the processes so you have a bit more grasp on some of the technical stuff! Step One – Design There are SO many ideas out there for making stuff in clay! From delicate porcelain jewellery, through to heavy sculptural work and everything in between. Deciding your direction is sometimes not that easy – when you first start, try everything, you will naturally gravitate to the style that you enjoy! The options and variations are endless and can get a wee bit overwhelming too! Check in with me before you start to ensure your ideas will work, what order you might do things, how you could achieve the look you are seeking and any other technical data required! Step Two – Making Clay is thixotropic. This means that as you work with it, the clay first gets sloppier and wetter, before is begins to dry in the atmosphere. For most things, you simply can’t do all parts of the project at once. An example of work order might look like: Get last weeks work out from the shelves Prepare clay for today’s work – roll your clay, prepare balls for throwing, make the first stage of a pinch pot) Clean up last week’s work and put it on the shelf for bisque firing Check that you have any glazing to do – and do enough of it that you will have time to finish your main project Do the next step of your next project – there might be a further step that can’t be complete immediately, in that case, wrap your work well and put onto the shelves. Letting your work rest for a while can really help keep your work clean and professional looking. Many things require bagging under plastic to keep it ready for work the next week – put your name on the outside of the bag so you can find your work easily. We have stickers and markers. Consider how you want to decorate your work – coloured slip can be applied at a fairly wet stage (remembering that it will make your work even wetter!). Trying to apply slip to dry clay won’t work! If you want to do sgraffito – you will need to keep the work leather hard (a state of dryness where you can still work the clay with a little effort and a little water and care). Step Three – Drying Most of the time your work can go into the rack uncovered to let it dry out for the following week. If you want to continue forming or shaping you will need to double bag your work – put your work on a suitable sized bat and put the bat in a bag so the base of the bag is under the bat, then put another bag over the top of the work and tuck the top of the bag under the bat. If you want to trim (or turn) your thrown work the following week, it should also be double bagged. If your work is large, delicate, or of uneven thicknesses, you should lightly cover your work for drying. When considering the drying process, bare in mind the weather, humidity and wind! The hotter and dryer, the faster things dry and work can dry unevenly in the shelves – this can lead to cracking – another time to lightly cover your work for drying. Step Four – Trimming and Cleaning Up Your work is dry! It is called greenware now and it is at it’s most fragile! Handle everything with two hands. I often refer to soft hands – keep everything gentle and with your fingers spread as much as possible. Try to not pick up things like plates too much, and always with both hands! Before your work can be bisque fired it should be “cleaned up”. You work won’t go into the kiln if it has sharp edges – when glazed, sharp edges turn into razor blades! Use a piece of fly wire to rub the work all over – this will scratch a little so be light handed. Use a knife or metal kidney to scrape any areas that require a bit more dynamic treatment than the fly wire offers! Finally, a very light wipe over with a slightly damp sponge can help soften and soothe all of your edges and dags! Trimming thrown work: If you are planning to trim (or turn) your thrown work (and you should be), make sure you bag it well – your work should be leather hard to almost dry for easiest trimming. Use this step to finish the work completely – use a metal kidney to polish the surface, or a slightly damp sponge to give a freshly thrown look. Wipe the sponge around the rim after trimming, and check the inside of the pot for dags! Trimming slip cast work: Usually I will trim the rims of your work on the wheel the following day to make that stage easier, however you will still need to check your work for lumps and bumps. Last but not least – check that your name is still clearly on the bottom of your work. Step Five – Bisque Firing When the work is completely dry it can go into the bisque kiln. The bisque kiln is fired to 1000°C. This process burns off the water in the clay as well as some of the chemically bound water. The structure of the clay is not altered that much at this temperature. Inside the bisque kiln, the work is stacked a little, small bowl inside a larger bowl and onto a heavy plate. Smaller items like decorations or drink coasters might get stacked several high. Consideration is paid to the weight of the stack and shape of the work. A bisque kiln can fire about one and a half times the amount of work that the glaze kiln can fire. The firing takes about 10 hours to complete the cycle and about two days to cool down. Once it has been emptied the work is placed in the glaze room ready for you to decorate! Step Six – Glazing Decorating your work with colour can be a lot of fun – and time consuming! There are three main options for surface treatment at this stage: Oxide Washes Underglazes Glazes Washes and underglazes do not “glaze” the work – It will still need a layer of glaze to fully seal the clay (washes don’t need glaze on surfaces not designed for food or liquid as they can gloss up a little on their own). Underglazes are stable colourants that turn out pretty much how they look in the jar. They can be mixed with each other to form other colours and can be used like water colours to paint onto your work. Mostly they should have a clear glaze on top to seal them. Oxides are a different species – the pink oxide (cobalt) wash turns out bright blue for instance. They don’t always need a glaze on top, and some glazes can change the colour of the wash! The glazes need no other “glaze” on top! Be careful of unknown glaze interactions – you can put any combination of glaze in a bowl or on a plate, but only a single glaze on the outside of any vertical surface! Glazes are a chemical reaction under heat. We don’t know the exact chemicals in the Mayco glazes we use. I can guess by the way they interact with each other, however, on the whole, you need to test every idea you have, and not run the test on a vertical surface! Simply put, glaze is a layer of glass like substance that bonds with the clay underneath. Clay is made of silica, alumina and water. Glaze is made of mostly silica. Silica has a melting point of 1700°C and we fire to 1240°C. The silica requires a “flux” to help it melt at the lower temperature. Fluxes can be all sorts of chemicals – a common one is calcium – calcium has a melting point of 2500°C, however, together they both melt at a much lower temperature! Colourants are metal oxides like cobalt (blue), chrome (green through black), copper (green, blue, even red!), manganese (black, purple and pink) iron (red brown), etc. Different chemicals in the glaze can have dramatic effects. for example, barium carbonate (which we don’t use) turns manganese bright pink! Other elements can turn manganese dioxide brown, blue, purple and reddish brown. Manganese dioxide is a flux in and of itself as well. So, glazes that get their black and purple colours, often interact with other glazes and RUN! Our mirror black is a good example – it mixes really well with many glazes because it fluxes them – causes them to melt faster. It will also bring out many beautiful colours in the glazes because it’s black colouring most definitely comes from manganese dioxide! Glaze chemistry is a whole subject on it’s own! We use commercial Mayco glazes on purpose – for their huge range of colour possibilities, stability, cool interactions, artistic freedom with the ability to easily brush the glazes on and ease of use. We currently have almost 50 glazes on hand! A major project is to test the interactions of all glazes with each other. That is 2,500 test tiles!!!! I’m going to make the wall behind the wheels the feature wall of pretty colours! Step Seven – Glaze (Gloss or sometimes called “Glost”) Firing Most of the time this is the final stage of making your creation (but not always!) The glaze kiln goes to 1240°C. This is called cone 6, or midrange. It is the low end of stoneware temperatures. Stoneware clays and glazes are typically fired at cone 8 – 10, that is 1260 – 1290°C. The energy requirement to go from 1240°C to 1280°C is almost a 30% more! Our clay is formulated to vitrify (mature, turn “glass-like”) at 1240°, as are our glazes. A glaze kiln take around 12 hours to reach temperature and two to three days to cool down. Sometimes a third firing process is required – this is for decoration that is added to work after the glaze firing. For example – adding precious metals and lustres. this firing temperature is usually around 600 – 800°C depending upon the techniques being used. There are many students interested in gold and silver trims – we will be doing this third type of firing soon! After firing your work will be in the student finished work shelves. Remember to pay for it before you head out the door! There is a small extra charge for using porcelain clay (it’s more than twice the price of regular clay), and for any third firing process! Once your work has been fired it can not turn back into clay for millennia – so don’t fire it if you don’t like it! Put it in the bucket for recycling. https://firebirdstudios.com.au/the-process-of-making-pottery/Ceramics have evolved over thousands of years.Earthenware dessert plate, cream colour. Made by Alfred Meakin, England. Backstamped ‘Alfred Meakin England’. flagstaff hill, warrnambool, shipwrecked-coast, flagstaff-hill, flagstaff-hill-maritime-museum, maritime-museum, shipwreck-coast, flagstaff-hill-maritime-village, alfred meakin, ceramics, earthenware, kitchenware -
 Flagstaff Hill Maritime Museum and Village
Domestic object - Jug
The Process of Making Pottery Decorating, Firing, Glazing, Making, Technical There is a rhythm and flow to clay. It can’t be done all at once! Even the making process! It can take weeks to get everything done, especially if you can only work on your pottery once a week! Even though we have three hour classes, it’s often just not enough time! Here is an overview of some of the processes so you have a bit more grasp on some of the technical stuff! Step One – Design There are SO many ideas out there for making stuff in clay! From delicate porcelain jewellery, through to heavy sculptural work and everything in between. Deciding your direction is sometimes not that easy – when you first start, try everything, you will naturally gravitate to the style that you enjoy! The options and variations are endless and can get a wee bit overwhelming too! Check in with me before you start to ensure your ideas will work, what order you might do things, how you could achieve the look you are seeking and any other technical data required! Step Two – Making Clay is thixotropic. This means that as you work with it, the clay first gets sloppier and wetter, before is begins to dry in the atmosphere. For most things, you simply can’t do all parts of the project at once. An example of work order might look like: Get last weeks work out from the shelves Prepare clay for today’s work – roll your clay, prepare balls for throwing, make the first stage of a pinch pot) Clean up last week’s work and put it on the shelf for bisque firing Check that you have any glazing to do – and do enough of it that you will have time to finish your main project Do the next step of your next project – there might be a further step that can’t be complete immediately, in that case, wrap your work well and put onto the shelves. Letting your work rest for a while can really help keep your work clean and professional looking. Many things require bagging under plastic to keep it ready for work the next week – put your name on the outside of the bag so you can find your work easily. We have stickers and markers. Consider how you want to decorate your work – coloured slip can be applied at a fairly wet stage (remembering that it will make your work even wetter!). Trying to apply slip to dry clay won’t work! If you want to do sgraffito – you will need to keep the work leather hard (a state of dryness where you can still work the clay with a little effort and a little water and care). Step Three – Drying Most of the time your work can go into the rack uncovered to let it dry out for the following week. If you want to continue forming or shaping you will need to double bag your work – put your work on a suitable sized bat and put the bat in a bag so the base of the bag is under the bat, then put another bag over the top of the work and tuck the top of the bag under the bat. If you want to trim (or turn) your thrown work the following week, it should also be double bagged. If your work is large, delicate, or of uneven thicknesses, you should lightly cover your work for drying. When considering the drying process, bare in mind the weather, humidity and wind! The hotter and dryer, the faster things dry and work can dry unevenly in the shelves – this can lead to cracking – another time to lightly cover your work for drying. Step Four – Trimming and Cleaning Up Your work is dry! It is called greenware now and it is at it’s most fragile! Handle everything with two hands. I often refer to soft hands – keep everything gentle and with your fingers spread as much as possible. Try to not pick up things like plates too much, and always with both hands! Before your work can be bisque fired it should be “cleaned up”. You work won’t go into the kiln if it has sharp edges – when glazed, sharp edges turn into razor blades! Use a piece of fly wire to rub the work all over – this will scratch a little so be light handed. Use a knife or metal kidney to scrape any areas that require a bit more dynamic treatment than the fly wire offers! Finally, a very light wipe over with a slightly damp sponge can help soften and soothe all of your edges and dags! Trimming thrown work: If you are planning to trim (or turn) your thrown work (and you should be), make sure you bag it well – your work should be leather hard to almost dry for easiest trimming. Use this step to finish the work completely – use a metal kidney to polish the surface, or a slightly damp sponge to give a freshly thrown look. Wipe the sponge around the rim after trimming, and check the inside of the pot for dags! Trimming slip cast work: Usually I will trim the rims of your work on the wheel the following day to make that stage easier, however you will still need to check your work for lumps and bumps. Last but not least – check that your name is still clearly on the bottom of your work. Step Five – Bisque Firing When the work is completely dry it can go into the bisque kiln. The bisque kiln is fired to 1000°C. This process burns off the water in the clay as well as some of the chemically bound water. The structure of the clay is not altered that much at this temperature. Inside the bisque kiln, the work is stacked a little, small bowl inside a larger bowl and onto a heavy plate. Smaller items like decorations or drink coasters might get stacked several high. Consideration is paid to the weight of the stack and shape of the work. A bisque kiln can fire about one and a half times the amount of work that the glaze kiln can fire. The firing takes about 10 hours to complete the cycle and about two days to cool down. Once it has been emptied the work is placed in the glaze room ready for you to decorate! Step Six – Glazing Decorating your work with colour can be a lot of fun – and time consuming! There are three main options for surface treatment at this stage: Oxide Washes Underglazes Glazes Washes and underglazes do not “glaze” the work – It will still need a layer of glaze to fully seal the clay (washes don’t need glaze on surfaces not designed for food or liquid as they can gloss up a little on their own). Underglazes are stable colourants that turn out pretty much how they look in the jar. They can be mixed with each other to form other colours and can be used like water colours to paint onto your work. Mostly they should have a clear glaze on top to seal them. Oxides are a different species – the pink oxide (cobalt) wash turns out bright blue for instance. They don’t always need a glaze on top, and some glazes can change the colour of the wash! The glazes need no other “glaze” on top! Be careful of unknown glaze interactions – you can put any combination of glaze in a bowl or on a plate, but only a single glaze on the outside of any vertical surface! Glazes are a chemical reaction under heat. We don’t know the exact chemicals in the Mayco glazes we use. I can guess by the way they interact with each other, however, on the whole, you need to test every idea you have, and not run the test on a vertical surface! Simply put, glaze is a layer of glass like substance that bonds with the clay underneath. Clay is made of silica, alumina and water. Glaze is made of mostly silica. Silica has a melting point of 1700°C and we fire to 1240°C. The silica requires a “flux” to help it melt at the lower temperature. Fluxes can be all sorts of chemicals – a common one is calcium – calcium has a melting point of 2500°C, however, together they both melt at a much lower temperature! Colourants are metal oxides like cobalt (blue), chrome (green through black), copper (green, blue, even red!), manganese (black, purple and pink) iron (red brown), etc. Different chemicals in the glaze can have dramatic effects. for example, barium carbonate (which we don’t use) turns manganese bright pink! Other elements can turn manganese dioxide brown, blue, purple and reddish brown. Manganese dioxide is a flux in and of itself as well. So, glazes that get their black and purple colours, often interact with other glazes and RUN! Our mirror black is a good example – it mixes really well with many glazes because it fluxes them – causes them to melt faster. It will also bring out many beautiful colours in the glazes because it’s black colouring most definitely comes from manganese dioxide! Glaze chemistry is a whole subject on it’s own! We use commercial Mayco glazes on purpose – for their huge range of colour possibilities, stability, cool interactions, artistic freedom with the ability to easily brush the glazes on and ease of use. We currently have almost 50 glazes on hand! A major project is to test the interactions of all glazes with each other. That is 2,500 test tiles!!!! I’m going to make the wall behind the wheels the feature wall of pretty colours! Step Seven – Glaze (Gloss or sometimes called “Glost”) Firing Most of the time this is the final stage of making your creation (but not always!) The glaze kiln goes to 1240°C. This is called cone 6, or midrange. It is the low end of stoneware temperatures. Stoneware clays and glazes are typically fired at cone 8 – 10, that is 1260 – 1290°C. The energy requirement to go from 1240°C to 1280°C is almost a 30% more! Our clay is formulated to vitrify (mature, turn “glass-like”) at 1240°, as are our glazes. A glaze kiln take around 12 hours to reach temperature and two to three days to cool down. Sometimes a third firing process is required – this is for decoration that is added to work after the glaze firing. For example – adding precious metals and lustres. this firing temperature is usually around 600 – 800°C depending upon the techniques being used. There are many students interested in gold and silver trims – we will be doing this third type of firing soon! After firing your work will be in the student finished work shelves. Remember to pay for it before you head out the door! There is a small extra charge for using porcelain clay (it’s more than twice the price of regular clay), and for any third firing process! Once your work has been fired it can not turn back into clay for millennia – so don’t fire it if you don’t like it! Put it in the bucket for recycling. https://firebirdstudios.com.au/the-process-of-making-pottery/The form of the jug has been in use for many centuries.Stoneware jug. Two tone brown glaze with pierced lip behind spout. Spout chipped.None.flagstaff hill, warrnambool, shipwrecked-coast, flagstaff-hill, flagstaff-hill-maritime-museum, maritime-museum, shipwreck-coast, flagstaff-hill-maritime-village, jug, ceramic jug -
 The Beechworth Burke Museum
Photograph - Photograph - Reproduction
This photo depicts a man standing next to a large piece of mining equipment identified as a hydraulic chisel (alternative name: drifter dill or power rock drill). This piece of machinery was used in mining to place holes in the walls of a mine which were then filled with dynamite or other explosives for rock blasting or to make holes for plug and feather quarrying. The additional tools to the right of the photograph and in front of the machinery can be identified as either picks or as feather and wedges, the latter of which were used to split stone drilled by the hydraulic or power chisel. Depending on the date of the photograph, which is not provided, this chisel was either powered by electricity or by hydraulics. The following is written on the drill "R.C. FORD'S PATENT No91 / MELBOURNE VICTORIA 1879". The man depicted in this photograph wears a wide brim hat, a loose fitting white shirt and loose pants. He wears boots and has a medium sized dark beard. This attire, along with his locality in the mine and proficiency with the mining equipment, identifies this man as a miner working in this particular, but unidentified, mine. It depicts an instance of hydraulic chiseling which makes this photograph valuable for the study of mining techniques from a date c1880.The search for gold is ingrained into the history of Victoria and therefore, images like this one which portray the types of machinery used in mining can reveal important information for technology and highlight the methods used to break apart the earth in order to obtain access to gold and other precious materials during the period this photograph was captured. Further research into RC Ford can potentially reveal even further information pertaining to this photograph. This image is of important historical significance for its ability to convey information about the methods and machinery used to access gold or mine more in general. It also highlights the size of machinery at the time and allows us to compare this to the size of the person standing besides the machinery to better understand the manpower which would have been required to use and set-up this macinery.A black and white rectangular reproduced photograph printed on matte photographic paper.Reverse: 7816/ copy 1/3gold, sluicing, gold sluicing, hydraulic sluicing, gold and tin mine, mining, gold mining, beechworth, burke museum, melbourne, victoria, hat, mining machinery, machinery, r. c. ford -
 Warrnambool and District Historical Society Inc.
Book - Diary, Diaries of John Ward Vol 1 & Vol 2
They are the handwritten history of Methodism in Warrnambool (produced in the 1930s?) by John Ward, and early settler, North Warrnambool shopkeeper and an ex-councillor and mayor. The books contain over 100 original photographs of people connected to the Methodist Church, both clerical and lay, including women, and other Warrnambool photographs. There is also much written material on all the people connected to the church. The books were given to Warrnambool & District Historical Society Inc in March 2013 by the Uniting Church together with DVD with a digital copy of the photographs and a typed copy of the writings. [Elizabeth O'Callaghan, March 2013]Exercise books: History of Methodism in Warrnambool by John Ward Cat No: WARR These two black exercise books are most precious as they are of high historical significance. They provide an insight into the social and spiritual history of the methodists in Warrnambool Vol 1: 265pp Vol 2: 180pphistory of methodism in warrnambool, john ward -
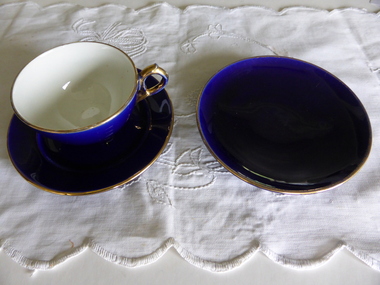 Warrnambool and District Historical Society Inc.
Crockery, Blue Cup Saucer and Plate, 1920s
This cup, saucer and plate are part of a tea set. It was given by Eva Carmichael, a survivor of the ship Loch Ard which was wrecked near Port Campbell in 1878, to Jane Shields, the young woman who supported her while she was recovering from her ordeal at Glenample homestead at Princetown. The two women remained friends after Eva Carmichael returned to her home in Britain and was married. Jane Shields also married and it was when her daughter visited Eva in England that she was given the tea set to take back home to her mother. Jane died in 1932 and Eva died in 1934 and the tea set was inherited by Jane’s daughters. In 1975 Jane’s daughter, Mrs Ann Fuller, donated a cup, saucer and plate to the Warrnambool and District Historical Society. The handle of the cup was mended. These items (cup, saucer and plate) are of high significance as they are closely connected to the wreck of the Loch Ard, and one of the two survivors, Eva Carmichael. Memorabilia connected to Eva Carmichael are precious and rare. These china items (cup, saucer and plate) are coloured royal blue and gold. .1 The cup has a gilt rim on the cup edge and base. There is a small crack on the side of the cup and the handle has been broken and mended. .2 The saucer is glazed on both sides with a small fault in the middle. It has a gilt band on the inner rim. .3 The plate is glazed on both sides with some evidence of scratching on the plate surface. It has a gilt edge. wreck of the loch ard, jane osborne (nee shields), eva carmichael, shipwreck coast history, bone china cup saucer and plate -
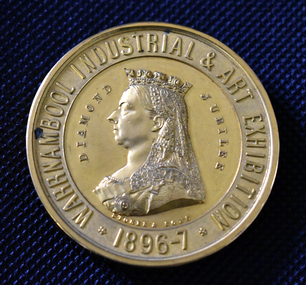 Warrnambool and District Historical Society Inc.
Medal - Warrnambool Industrial and Art Exhibition Medallion and Box
This medallion was awarded by the Commissioners of the Warrnambool Industrial & Art Exhibition to ten boys from the Kew Asylum who sent handmade items (basketware, matwork etc ) for display at the Education Court of the Exhibition. The Warrnambool Industrial & Art Exhibition, held in Warrnambool from December 1896 to March 1897, partly to commemorate Queen Victoria's Diamond Jubilee, was a signal event in Warrnambool's history, with one report suggesting that over 70,000 people attended the various activities held over these months. These included concerts, operas, displays, business stands, sporting events and competitions. The earliest surviving voice recordings made in Australia were produced in Warrnambool at this Exhibition and there were various other 'firsts'. The medallion awarded to the boys at the Asylum for the high quality of their work, was made by the Melboune firm of Stokes and Sons who had a stall and machinery at the Exhibition and made small souvenir Exhibition coins on the spot for visitors to buy. As well as the gold medallion the boys were also given by the Commissioners some small souvenirs to the total value of 12 shillings. This medallion is of great historical value as it is a precious and rare memento of the 1896-7 Warrnambool Industrial & Art Exhibition, an important event in Warrnambool's history..1 A round gilt-bronze medallion with a bust image of Queen Victoria and lettering on one side and a laurel wreath and lettering on the other side .2 A square black box with a metal hinge and clasp. The inside is lined with dark blue satin and silk and has a sunken area to hold a medallion. The maker's name is printed in gold lettering on the inside top of the lid.Warrnambool Industrial & Art Exhibition 1896-7 Diamond Jubilee Awarded to Idiot Asylum Kew For excellence of Workmanship Basket & Matwork & Photos of Asylum Stokes & Sons Medallists Melbournewarrnambool industrial & art exhibition, kew asylum medallion, medallion, 19th c exhibition warrnambool, warrnambool, warrnambool history -
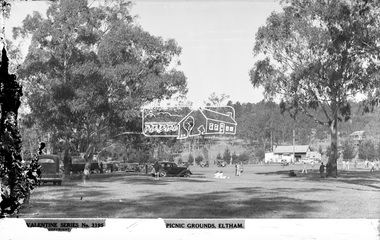 Eltham District Historical Society Inc
Photograph, The Rose Stereograph Company, Picnic Grounds. Eltham, Vic, c.1939
View looking north along present day Hohnes Road in Eltham Lower Park towards the intersection of Old Eltham Road and Main Road. Picnickers have pulled up in their cars and are enjoying a game of cricket being played on the oval. This glass plate negative was used to manufacture postcards (1:1 printing) for commercial sale by the Rose Sterograph Company and its subsidiaries. George Rose founded the Rose Stereograph Company in 1880 and was joined by Herbert (Bert) Cutts in the early 20th Century. The pair formed a lifetime working partnership and strong personal friendship. Assisted by George’s two sons, Herbert George and Walter, and later by Neil Cutts, the Rose Stereograph Company continued its operations for more than 140 years. The company was initially built on stereographs, but as cinema took over and stereographs fell out of fashion, the Rose Stereograph Company developed Australia’s first commercially viable photographic postcard business. Specialising in postcards of iconic historical moments and significant landmarks, The Rose Stereograph Company became a staple of the Australian travel industry.This remarkable collection of glass plate negatives, transparencies, and postcards – arguably Australia’s most significant photography collection outside of public hands – has been passed down through the generations, surviving war, relocation, and the harsh Victorian climate. The historic Rose Stereograph collection is the culmination of George Rose’s dream of capturing and preserving precious moments in time and remains the legacy of the Rose and Cutts families. It is with great sadness that the Cutts family says goodbye to a collection that spans five generations and 140 years. The Cutts family understands that for these historically important pieces to rest with one family is to deny others the pleasure of their custodianship.Glass Plate Negative Size: 9.2 x 13.9 cmPicnic Grounds, Eltham, Valentine Series No. 3195, Copyrighteltham lower park, cricket, cars, buildings, electricity lines, lower plenty, eltham, postcard, travel, picnic ground, rose stereograph company, valentine series postcard, glass plate negative, peter and elizabeth pidgeon collection -
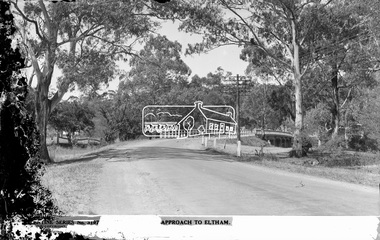 Eltham District Historical Society Inc
Negative - Photograph postcard, The Rose Stereograph Company, Approach To Eltham, c.1939
Looking east along the unsealed main road heading into Eltham across the concrete bridge over the Diamond Creek circa 1939. The original wooden bridge was destroyed by flood waters in 1924. This glass plate negative was used to manufacture postcards (1:1 printing) for commercial sale by the Rose Sterograph Company and its subsidiaries. George Rose founded the Rose Stereograph Company in 1880 and was joined by Herbert (Bert) Cutts in the early 20th Century. The pair formed a lifetime working partnership and strong personal friendship. Assisted by George’s two sons, Herbert George and Walter, and later by Neil Cutts, the Rose Stereograph Company continued its operations for more than 140 years. The company was initially built on stereographs, but as cinema took over and stereographs fell out of fashion, the Rose Stereograph Company developed Australia’s first commercially viable photographic postcard business. Specialising in postcards of iconic historical moments and significant landmarks, The Rose Stereograph Company became a staple of the Australian travel industry.This remarkable collection of glass plate negatives, transparencies, and postcards – arguably Australia’s most significant photography collection outside of public hands – has been passed down through the generations, surviving war, relocation, and the harsh Victorian climate. The historic Rose Stereograph collection is the culmination of George Rose’s dream of capturing and preserving precious moments in time and remains the legacy of the Rose and Cutts families. It is with great sadness that the Cutts family says goodbye to a collection that spans five generations and 140 years. The Cutts family understands that for these historically important pieces to rest with one family is to deny others the pleasure of their custodianship.Glass Plate Negative Size: 9 x 14 cmApproach to Eltham, Valentine Series No. 3197, Copyrightbuildings, electricity lines, eltham, postcard, travel, rose stereograph company, valentine series postcard, main road bridge, glass plate negative, main road, peter and elizabeth pidgeon collection, diamond creek (creek), eltham south, rose stereograph -
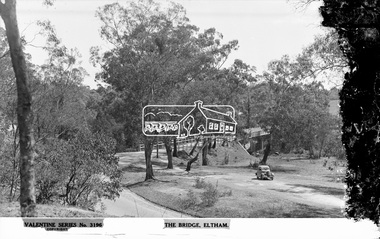 Eltham District Historical Society Inc
Negative - Photograph, The Rose Stereograph Company, The Bridge, Eltham, c.1939
Looking west across the Main Road Bridge over the Diamond Creek at Eltham, c.1939. The car in the foreground, possibly the photographer's, is a Ford Model C Ten built by Ford UK between 1934 and 1937. The Model C was released in Australia in 1935. The Ford Model C Ten is a car that was built by Ford UK between 1934 and 1937. The Model C was released in Australia in 1935 https://en.wikipedia.org/wiki/Ford_Model_C_Ten This glass plate negative was used to manufacture postcards (1:1 printing) for commercial sale by the Rose Sterograph Company and its subsidiaries. George Rose founded the Rose Stereograph Company in 1880 and was joined by Herbert (Bert) Cutts in the early 20th Century. The pair formed a lifetime working partnership and strong personal friendship. Assisted by George’s two sons, Herbert George and Walter, and later by Neil Cutts, the Rose Stereograph Company continued its operations for more than 140 years. The company was initially built on stereographs, but as cinema took over and stereographs fell out of fashion, the Rose Stereograph Company developed Australia’s first commercially viable photographic postcard business. Specialising in postcards of iconic historical moments and significant landmarks, The Rose Stereograph Company became a staple of the Australian travel industry.This remarkable collection of glass plate negatives, transparencies, and postcards – arguably Australia’s most significant photography collection outside of public hands – has been passed down through the generations, surviving war, relocation, and the harsh Victorian climate. The historic Rose Stereograph collection is the culmination of George Rose’s dream of capturing and preserving precious moments in time and remains the legacy of the Rose and Cutts families. It is with great sadness that the Cutts family says goodbye to a collection that spans five generations and 140 years. The Cutts family understands that for these historically important pieces to rest with one family is to deny others the pleasure of their custodianship.Glass Plate Negative Size: 9 x 13.9 cmThe Bridge, Eltham, Valentine Series No. 3196, Copyrightpeter and elizabeth pidgeon collection, bridge, cars, diamond creek (creek), eltham, eltham south, ford model c ten, glass plate negative, main road, main road bridge, motor vehicles, postcard, rose stereograph, rose stereograph company, valentine series postcard -
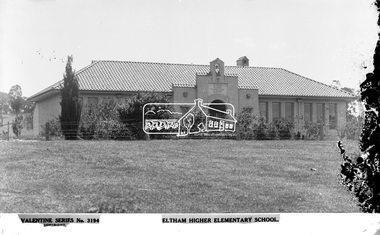 Eltham District Historical Society Inc
Photograph, The Rose Stereograph Company, Eltham Higher Elementary School, c.1939
View looking west towards the Eltham High School circa 1939 from what is now the present day oval on Bell Street. The school was officially opened in October 1928 at which point there were no trees or shrubs in front. This glass plate negative was used to manufacture postcards (1:1 printing) for commercial sale by the Rose Sterograph Company and its subsidiaries. George Rose founded the Rose Stereograph Company in 1880 and was joined by Herbert (Bert) Cutts in the early 20th Century. The pair formed a lifetime working partnership and strong personal friendship. Assisted by George’s two sons, Herbert George and Walter, and later by Neil Cutts, the Rose Stereograph Company continued its operations for more than 140 years. The company was initially built on stereographs, but as cinema took over and stereographs fell out of fashion, the Rose Stereograph Company developed Australia’s first commercially viable photographic postcard business. Specialising in postcards of iconic historical moments and significant landmarks, The Rose Stereograph Company became a staple of the Australian travel industry.This remarkable collection of glass plate negatives, transparencies, and postcards – arguably Australia’s most significant photography collection outside of public hands – has been passed down through the generations, surviving war, relocation, and the harsh Victorian climate. The historic Rose Stereograph collection is the culmination of George Rose’s dream of capturing and preserving precious moments in time and remains the legacy of the Rose and Cutts families. It is with great sadness that the Cutts family says goodbye to a collection that spans five generations and 140 years. The Cutts family understands that for these historically important pieces to rest with one family is to deny others the pleasure of their custodianship.Glass Plate Negative Size: 9.1 x 13.9 cmEltham Higher Elementary School, Valentine Series No. 3194, Copyrighteltham, postcard, travel, rose stereograph company, valentine series postcard, glass plate negative, eltham high school, eltham higher elementary school, peter and elizabeth pidgeon collection -
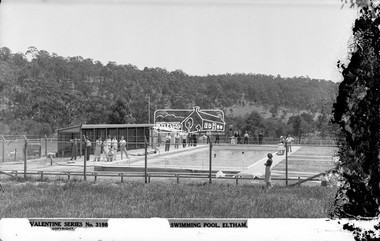 Eltham District Historical Society Inc
Negative - Photograph, The Rose Stereograph Company, Swimming Pool, Eltham, c.1939
Eltham swimming pool was opened in December 1936. It was located adjacent to Central Park. The small children's pool in the foreground was opened in November 1938. This glass plate negative was used to manufacture postcards (1:1 printing) for commercial sale by the Rose Sterograph Company and its subsidiaries. George Rose founded the Rose Stereograph Company in 1880 and was joined by Herbert (Bert) Cutts in the early 20th Century. The pair formed a lifetime working partnership and strong personal friendship. Assisted by George’s two sons, Herbert George and Walter, and later by Neil Cutts, the Rose Stereograph Company continued its operations for more than 140 years. The company was initially built on stereographs, but as cinema took over and stereographs fell out of fashion, the Rose Stereograph Company developed Australia’s first commercially viable photographic postcard business. Specialising in postcards of iconic historical moments and significant landmarks, The Rose Stereograph Company became a staple of the Australian travel industry.This remarkable collection of glass plate negatives, transparencies, and postcards – arguably Australia’s most significant photography collection outside of public hands – has been passed down through the generations, surviving war, relocation, and the harsh Victorian climate. The historic Rose Stereograph collection is the culmination of George Rose’s dream of capturing and preserving precious moments in time and remains the legacy of the Rose and Cutts families. It is with great sadness that the Cutts family says goodbye to a collection that spans five generations and 140 years. The Cutts family understands that for these historically important pieces to rest with one family is to deny others the pleasure of their custodianship.Glass Plate Negative Size: 9 x 13.9 cmSwimming Pool, Eltham, Valentine Series No. 3198, Copyrighteltham, postcard, travel, rose stereograph company, valentine series postcard, glass plate negative, central park, eltham central park, swimming pool, peter and elizabeth pidgeon collection -
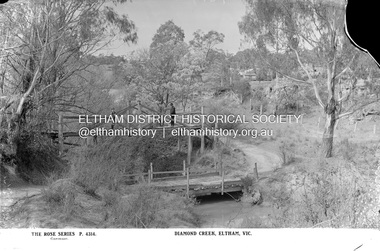 Eltham District Historical Society Inc
Negative - Photograph, The Rose Stereograph Company, Diamond Creek, Eltham, Vic, c.1919
Shows two bridge crossings over the Diamond Creek in Diamond Street, Eltham. The upper pedestrian crossing provided continual access for foot traffic during times of flood. The railway came to Eltham in 1901, the Eltham Railway Station is visible in the distance as well as a wooden bodied Tait (Red Rattler) First Class train carriage. The Tait train was first introduced in 1910 as a steam locomotive hauled carriage and in 1919 electric motor carriages were introduced however the line to Heidelberg was not electrified till 1921 and to Eltham in April 1923. The Railway General Store on Main Road is visible beyond the station and was built by Luther Haley in 1902. It was the first shop in the present day shopping centre. It was later known as lloyd's stopre (1917-1920) followed by a succession of six other owners until purchased by Eric Staff in 1939. This glass plate negative was used to manufacture postcards (1:1 printing) for commercial sale by the Rose Sterograph Company and its subsidiaries. George Rose founded the Rose Stereograph Company in 1880 and was joined by Herbert (Bert) Cutts in the early 20th Century. The pair formed a lifetime working partnership and strong personal friendship. Assisted by George’s two sons, Herbert George and Walter, and later by Neil Cutts, the Rose Stereograph Company continued its operations for more than 140 years. The company was initially built on stereographs, but as cinema took over and stereographs fell out of fashion, the Rose Stereograph Company developed Australia’s first commercially viable photographic postcard business. Specialising in postcards of iconic historical moments and significant landmarks, The Rose Stereograph Company became a staple of the Australian travel industry.This remarkable collection of glass plate negatives, transparencies, and postcards – arguably Australia’s most significant photography collection outside of public hands – has been passed down through the generations, surviving war, relocation, and the harsh Victorian climate. The historic Rose Stereograph collection is the culmination of George Rose’s dream of capturing and preserving precious moments in time and remains the legacy of the Rose and Cutts families. It is with great sadness that the Cutts family says goodbye to a collection that spans five generations and 140 years. The Cutts family understands that for these historically important pieces to rest with one family is to deny others the pleasure of their custodianship.Glass Plate Negative Size: 9 x 13.9 cmDiamond Creek, Eltham, Vic., The Rose Series P. 4314, Copyrighteltham, postcard, travel, rose stereograph company, glass plate negative, rose series postcard, tait train, eltham railway station, railway store, staffs general store, diamond creek, diamond street bridge, lloyd's general store, railway station, peter and elizabeth pidgeon collection -
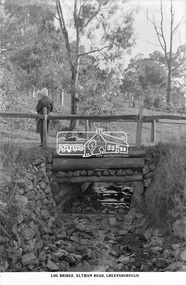 Eltham District Historical Society Inc
Photograph, The Rose Stereograph Company, Log Bridge, Eltham Road. Greensborough, c.1920
A woman stands at the end of a log bridge over a creek looking towards the south along the unsealed roadway. The sun illuminates her back. She is wearing a woollen knit beanie with edges rolled up, dark jacket and skirt, full length dark stockings and slip on dark leather shoes with raised heel, typical of the early 1920s. The creek is possibly feeding into the Karingal Yalloc. The direction of the road based on shadows is northwest as is the Eltham Road to Greensborough (present day Sherbourne, Karingal and St Helena roads). The creek is falling to the foreground so from south west to the north east, possibly feeding into the Karingal Yalloc, somewhere near presenet day Ramptons Road Reserve. This glass plate negative was used to manufacture postcards (1:1 printing) for commercial sale by the Rose Sterograph Company and its subsidiaries. George Rose founded the Rose Stereograph Company in 1880 and was joined by Herbert (Bert) Cutts in the early 20th Century. The pair formed a lifetime working partnership and strong personal friendship. Assisted by George’s two sons, Herbert George and Walter, and later by Neil Cutts, the Rose Stereograph Company continued its operations for more than 140 years. The company was initially built on stereographs, but as cinema took over and stereographs fell out of fashion, the Rose Stereograph Company developed Australia’s first commercially viable photographic postcard business. Specialising in postcards of iconic historical moments and significant landmarks, The Rose Stereograph Company became a staple of the Australian travel industry.This remarkable collection of glass plate negatives, transparencies, and postcards – arguably Australia’s most significant photography collection outside of public hands – has been passed down through the generations, surviving war, relocation, and the harsh Victorian climate. The historic Rose Stereograph collection is the culmination of George Rose’s dream of capturing and preserving precious moments in time and remains the legacy of the Rose and Cutts families. It is with great sadness that the Cutts family says goodbye to a collection that spans five generations and 140 years. The Cutts family understands that for these historically important pieces to rest with one family is to deny others the pleasure of their custodianship.Glass Plate Negative Size: 9.2 x 13.8 cmLog Bridge, Eltham Road, Greensborougheltham, postcard, travel, rose stereograph company, glass plate negative, creek, eltham road, greensborough, karingal road, karingal yallock, log bridge, sherbourne road, st helena road, women's fashion, rampton's road reserve, peter and elizabeth pidgeon collection -
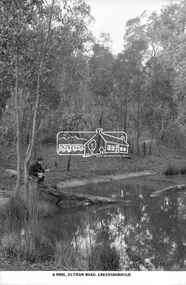 Eltham District Historical Society Inc
Photograph, The Rose Stereograph Company, A Pool, Eltham Road, Greensborough, c.1920
A boy of about ten years of age sits on the end of a fallen tree, which is resting in a natural pool in bushland. He is holding a stick gazing into the pool waters. He appears to be dressed in a schoolboy's uniform with close fitting short peaked cap, dark scarf or long sleeved jumper with polo neck and what appears to be a logo on the left breast, the ends of the sleeves turned over, dark shorts and dark long socks with ankle height lace up leather boots. The pool is located on the Eltham Road to Greensborough (present day Sherbourne, Karingal and St Helena roads) and is possibly part of the Karingal Yalloc somewhere near present day Ramptons Road Reserve. This glass plate negative was used to manufacture postcards (1:1 printing) for commercial sale by the Rose Sterograph Company and its subsidiaries. George Rose founded the Rose Stereograph Company in 1880 and was joined by Herbert (Bert) Cutts in the early 20th Century. The pair formed a lifetime working partnership and strong personal friendship. Assisted by George’s two sons, Herbert George and Walter, and later by Neil Cutts, the Rose Stereograph Company continued its operations for more than 140 years. The company was initially built on stereographs, but as cinema took over and stereographs fell out of fashion, the Rose Stereograph Company developed Australia’s first commercially viable photographic postcard business. Specialising in postcards of iconic historical moments and significant landmarks, The Rose Stereograph Company became a staple of the Australian travel industry.This remarkable collection of glass plate negatives, transparencies, and postcards – arguably Australia’s most significant photography collection outside of public hands – has been passed down through the generations, surviving war, relocation, and the harsh Victorian climate. The historic Rose Stereograph collection is the culmination of George Rose’s dream of capturing and preserving precious moments in time and remains the legacy of the Rose and Cutts families. It is with great sadness that the Cutts family says goodbye to a collection that spans five generations and 140 years. The Cutts family understands that for these historically important pieces to rest with one family is to deny others the pleasure of their custodianship.Glass Plate Negative Size: 9 x 14 cmA Pool, Eltham Road, Greensborougheltham, postcard, travel, rose stereograph company, glass plate negative, eltham road, greensborough, karingal road, karingal yallock, sherbourne road, st helena road, rampton's road reserve, schoolboy, peter and elizabeth pidgeon collection -
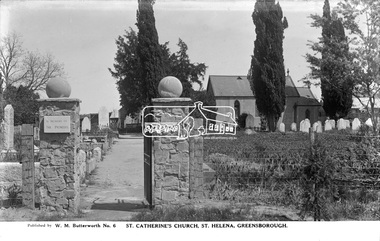 Eltham District Historical Society Inc
Photograph, The Rose Stereograph Company, St. Katherine's Church, St Helena. Greensborough, c.1936
View of St Katherine's Church from the Memorial Gate which were dedicated Saturday, September 12, 1936 "In Memory of The Pioneers". A prominent gravestone for the Mapleton and Ellis families visible to the far left of the path. This glass plate negative was used to manufacture postcards (1:1 printing) for commercial sale by the Rose Sterograph Company and its subsidiaries. George Rose founded the Rose Stereograph Company in 1880 and was joined by Herbert (Bert) Cutts in the early 20th Century. The pair formed a lifetime working partnership and strong personal friendship. Assisted by George’s two sons, Herbert George and Walter, and later by Neil Cutts, the Rose Stereograph Company continued its operations for more than 140 years. The company was initially built on stereographs, but as cinema took over and stereographs fell out of fashion, the Rose Stereograph Company developed Australia’s first commercially viable photographic postcard business. Specialising in postcards of iconic historical moments and significant landmarks, The Rose Stereograph Company became a staple of the Australian travel industry.This remarkable collection of glass plate negatives, transparencies, and postcards – arguably Australia’s most significant photography collection outside of public hands – has been passed down through the generations, surviving war, relocation, and the harsh Victorian climate. The historic Rose Stereograph collection is the culmination of George Rose’s dream of capturing and preserving precious moments in time and remains the legacy of the Rose and Cutts families. It is with great sadness that the Cutts family says goodbye to a collection that spans five generations and 140 years. The Cutts family understands that for these historically important pieces to rest with one family is to deny others the pleasure of their custodianship.Glass Plate Negative Size: 9 x 14 cmSt. Catherine's Church, St Helena, Greensborough, Published by W. M. Butterworth No. 6postcard, travel, rose stereograph company, glass plate negative, greensborough, st helena, w. m. butterworth, st katherine's church, memorial gate, mapleton, ellis, mediterranean cypress, peter and elizabeth pidgeon collection -
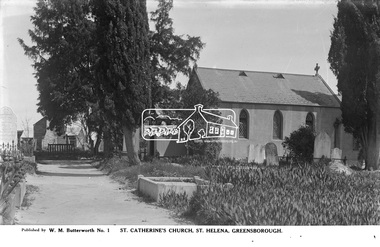 Eltham District Historical Society Inc
Photograph, The Rose Stereograph Company, St. Katherine's Church, St Helena. Greensborough, c.1936
View of St Katherine's Church from the path inside the Memorial Gate. Also visible several Mediterranean Cypress trees. A prominent gravestone for the Mapleton and Ellis families visible to the far left of the path. This glass plate negative was used to manufacture postcards (1:1 printing) for commercial sale by the Rose Sterograph Company and its subsidiaries. George Rose founded the Rose Stereograph Company in 1880 and was joined by Herbert (Bert) Cutts in the early 20th Century. The pair formed a lifetime working partnership and strong personal friendship. Assisted by George’s two sons, Herbert George and Walter, and later by Neil Cutts, the Rose Stereograph Company continued its operations for more than 140 years. The company was initially built on stereographs, but as cinema took over and stereographs fell out of fashion, the Rose Stereograph Company developed Australia’s first commercially viable photographic postcard business. Specialising in postcards of iconic historical moments and significant landmarks, The Rose Stereograph Company became a staple of the Australian travel industry.This remarkable collection of glass plate negatives, transparencies, and postcards – arguably Australia’s most significant photography collection outside of public hands – has been passed down through the generations, surviving war, relocation, and the harsh Victorian climate. The historic Rose Stereograph collection is the culmination of George Rose’s dream of capturing and preserving precious moments in time and remains the legacy of the Rose and Cutts families. It is with great sadness that the Cutts family says goodbye to a collection that spans five generations and 140 years. The Cutts family understands that for these historically important pieces to rest with one family is to deny others the pleasure of their custodianship.Glass Plate Negative Size: 9.2 x 14 cmSt. Catherine's Church, St Helena, Greensborough, Published by W. M. Butterworth No. 1postcard, travel, rose stereograph company, glass plate negative, greensborough, st helena, w. m. butterworth, st katherine's church, memorial gate, mapleton, ellis, mediterranean cypress, peter and elizabeth pidgeon collection -
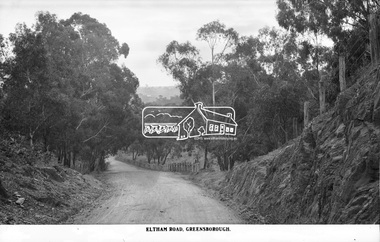 Eltham District Historical Society Inc
Photograph, The Rose Stereograph Company, Eltham Road. Greensborough, c.1936
Believed to be looking east along Eltham Road towards Eltham from around the top of the hill near the present day Andrew Yandell Habitat Reserve. Eltham Road, Greensborough followed what is now St Helena Road from Main Road Greensborough running into Karingal Drive and Sherbourne Road finishing at Bridge Street, Eltham. It was renamed sometime between 1968 and 1970. This glass plate negative was used to manufacture postcards (1:1 printing) for commercial sale by the Rose Sterograph Company and its subsidiaries. George Rose founded the Rose Stereograph Company in 1880 and was joined by Herbert (Bert) Cutts in the early 20th Century. The pair formed a lifetime working partnership and strong personal friendship. Assisted by George’s two sons, Herbert George and Walter, and later by Neil Cutts, the Rose Stereograph Company continued its operations for more than 140 years. The company was initially built on stereographs, but as cinema took over and stereographs fell out of fashion, the Rose Stereograph Company developed Australia’s first commercially viable photographic postcard business. Specialising in postcards of iconic historical moments and significant landmarks, The Rose Stereograph Company became a staple of the Australian travel industry.This remarkable collection of glass plate negatives, transparencies, and postcards – arguably Australia’s most significant photography collection outside of public hands – has been passed down through the generations, surviving war, relocation, and the harsh Victorian climate. The historic Rose Stereograph collection is the culmination of George Rose’s dream of capturing and preserving precious moments in time and remains the legacy of the Rose and Cutts families. It is with great sadness that the Cutts family says goodbye to a collection that spans five generations and 140 years. The Cutts family understands that for these historically important pieces to rest with one family is to deny others the pleasure of their custodianship.Glass Plate Negative Size: 9 x 13.9 cmEltham Road, Greensboroughpostcard, travel, rose stereograph company, glass plate negative, greensborough, cutting, eltham road, karingal drive, st helena road, peter and elizabeth pidgeon collection -
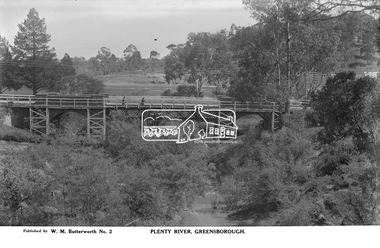 Eltham District Historical Society Inc
Photograph, The Rose Stereograph Company, Plenty River, Greensborough, c.1939
View looking northwest along the Plenty River towards the original bluestone Greensborough Bridge (since demolished). A timber pedestrian footbridge added after construction is visible with two people crossing. In the distance is a wide flat verge, now present day Carter Reserve and on the far side seven men digging and a set of terraced steps dug out in the earth bank. Present day Pioneer Reserve is to the right of the river in foreground. This glass plate negative was used to manufacture postcards (1:1 printing) for commercial sale by the Rose Sterograph Company and its subsidiaries. George Rose founded the Rose Stereograph Company in 1880 and was joined by Herbert (Bert) Cutts in the early 20th Century. The pair formed a lifetime working partnership and strong personal friendship. Assisted by George’s two sons, Herbert George and Walter, and later by Neil Cutts, the Rose Stereograph Company continued its operations for more than 140 years. The company was initially built on stereographs, but as cinema took over and stereographs fell out of fashion, the Rose Stereograph Company developed Australia’s first commercially viable photographic postcard business. Specialising in postcards of iconic historical moments and significant landmarks, The Rose Stereograph Company became a staple of the Australian travel industry.This remarkable collection of glass plate negatives, transparencies, and postcards – arguably Australia’s most significant photography collection outside of public hands – has been passed down through the generations, surviving war, relocation, and the harsh Victorian climate. The historic Rose Stereograph collection is the culmination of George Rose’s dream of capturing and preserving precious moments in time and remains the legacy of the Rose and Cutts families. It is with great sadness that the Cutts family says goodbye to a collection that spans five generations and 140 years. The Cutts family understands that for these historically important pieces to rest with one family is to deny others the pleasure of their custodianship.Glass Plate Negative Size: 9 x 14 cmPlenty River, Greensborough, Published by W. M. Butterworh No. 2postcard, travel, rose stereograph company, glass plate negative, greensborough, carter reserve, footbridge, greensborough bridge, main road, plenty river, w. m. butterworth, pioneer reserve, construction, peter and elizabeth pidgeon collection -
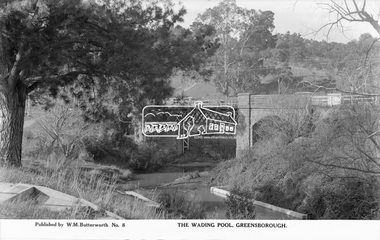 Eltham District Historical Society Inc
Photograph, The Rose Stereograph Company, The Wading Pool, Greensborough, c.1939
View looking northeast across the wading pool set into the Plenty River towards the original bluestone Greensborough Bridge (since demolished). A timber pedestrian footbridge added after construction is visible on the far side of the bridge through the arch and beyond to the hillside which is now present day Pioneer Reserve. This glass plate negative was used to manufacture postcards (1:1 printing) for commercial sale by the Rose Sterograph Company and its subsidiaries. George Rose founded the Rose Stereograph Company in 1880 and was joined by Herbert (Bert) Cutts in the early 20th Century. The pair formed a lifetime working partnership and strong personal friendship. Assisted by George’s two sons, Herbert George and Walter, and later by Neil Cutts, the Rose Stereograph Company continued its operations for more than 140 years. The company was initially built on stereographs, but as cinema took over and stereographs fell out of fashion, the Rose Stereograph Company developed Australia’s first commercially viable photographic postcard business. Specialising in postcards of iconic historical moments and significant landmarks, The Rose Stereograph Company became a staple of the Australian travel industry.This remarkable collection of glass plate negatives, transparencies, and postcards – arguably Australia’s most significant photography collection outside of public hands – has been passed down through the generations, surviving war, relocation, and the harsh Victorian climate. The historic Rose Stereograph collection is the culmination of George Rose’s dream of capturing and preserving precious moments in time and remains the legacy of the Rose and Cutts families. It is with great sadness that the Cutts family says goodbye to a collection that spans five generations and 140 years. The Cutts family understands that for these historically important pieces to rest with one family is to deny others the pleasure of their custodianship.Glass Plate Negative Size: 9.1 x 14 cmThe Wading Pool, Greensborough, Published by W. M. Butterworh No. 8postcard, travel, rose stereograph company, glass plate negative, greensborough, footbridge, greensborough bridge, main road, plenty river, w. m. butterworth, pioneer reserve, wading pool, peter and elizabeth pidgeon collection -
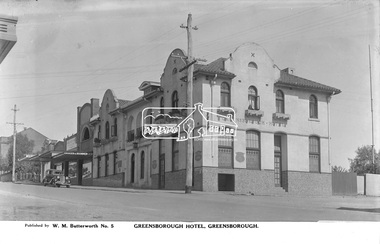 Eltham District Historical Society Inc
Photograph, The Rose Stereograph Company, Greensborough Hotel, Greensborough, c.1938
View looking west across Main Road towards the Greensborough Hotel built 1925 and adjoining shops. A Ford Model Y 4dr Saloon Registration 83-961 is parked in Main Road outside the shops. Visible are Ryan Bros Butchers, State Electricity Commission of Victoria, Dispensing Chemist, Ray Trinham Grocer & Ironmonger Ryan Bros Butchers sold their shop to new owners in December 1938. This glass plate negative was used to manufacture postcards (1:1 printing) for commercial sale by the Rose Sterograph Company and its subsidiaries. George Rose founded the Rose Stereograph Company in 1880 and was joined by Herbert (Bert) Cutts in the early 20th Century. The pair formed a lifetime working partnership and strong personal friendship. Assisted by George’s two sons, Herbert George and Walter, and later by Neil Cutts, the Rose Stereograph Company continued its operations for more than 140 years. The company was initially built on stereographs, but as cinema took over and stereographs fell out of fashion, the Rose Stereograph Company developed Australia’s first commercially viable photographic postcard business. Specialising in postcards of iconic historical moments and significant landmarks, The Rose Stereograph Company became a staple of the Australian travel industry.This remarkable collection of glass plate negatives, transparencies, and postcards – arguably Australia’s most significant photography collection outside of public hands – has been passed down through the generations, surviving war, relocation, and the harsh Victorian climate. The historic Rose Stereograph collection is the culmination of George Rose’s dream of capturing and preserving precious moments in time and remains the legacy of the Rose and Cutts families. It is with great sadness that the Cutts family says goodbye to a collection that spans five generations and 140 years. The Cutts family understands that for these historically important pieces to rest with one family is to deny others the pleasure of their custodianship.Glass Plate Negative Size: 9 x 13.9 cmGreensborough Hotel, Greensborough, Published by W. M. Butterworth No. 5postcard, travel, rose stereograph company, glass plate negative, greensborough, main road, w. m. butterworth, greensborough hotel, ford model y 4 dr saloon, dispensing chemist, grocer and ironmonger, ray trinham, ryan bros butchers, state electricity commission of victoria, peter and elizabeth pidgeon collection -
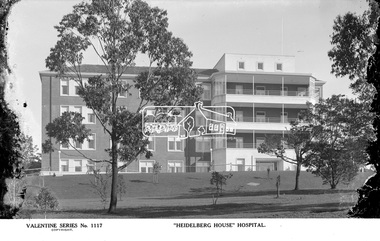 Eltham District Historical Society Inc
Photograph, The Rose Stereograph Company, "Heidelberg House" Hospital, c.1938
View looking across a treed landscape lawn towards the new 'Heidelberg House' at the Austin Hospital, which was opened in 1939. This glass plate negative was used to manufacture postcards (1:1 printing) for commercial sale by the Rose Sterograph Company and its subsidiaries. George Rose founded the Rose Stereograph Company in 1880 and was joined by Herbert (Bert) Cutts in the early 20th Century. The pair formed a lifetime working partnership and strong personal friendship. Assisted by George’s two sons, Herbert George and Walter, and later by Neil Cutts, the Rose Stereograph Company continued its operations for more than 140 years. The company was initially built on stereographs, but as cinema took over and stereographs fell out of fashion, the Rose Stereograph Company developed Australia’s first commercially viable photographic postcard business. Specialising in postcards of iconic historical moments and significant landmarks, The Rose Stereograph Company became a staple of the Australian travel industry.This remarkable collection of glass plate negatives, transparencies, and postcards – arguably Australia’s most significant photography collection outside of public hands – has been passed down through the generations, surviving war, relocation, and the harsh Victorian climate. The historic Rose Stereograph collection is the culmination of George Rose’s dream of capturing and preserving precious moments in time and remains the legacy of the Rose and Cutts families. It is with great sadness that the Cutts family says goodbye to a collection that spans five generations and 140 years. The Cutts family understands that for these historically important pieces to rest with one family is to deny others the pleasure of their custodianship.Glass Plate Negative Size: 9 x 14 cm"Heidelberg House" Hospital, Velentine Series No. 1117, Copyrightpostcard, travel, rose stereograph company, glass plate negative, ray trinham, austin hospital, heidelberg house, valentine series postcard, heidelberg, peter and elizabeth pidgeon collection