Showing 8613 items
matching pall mall.
-
 Bendigo Historical Society Inc.
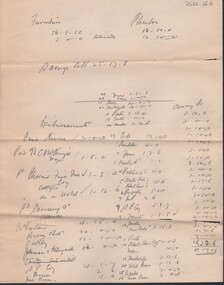
Document - CONNELLY, TATCHELL, DUNLOP COLLECTION: ACCOUNTS ESTATE OF ESTHER ISABELL CANNING, 1893 - 1894
... McFarlane James, Tailor, 64 Pall Mall, Bendigo. Original letterhead..., 64 Pall Mall, Bendigo. Original letterhead states Gray St ...Document. Various legal papers. 1 - 1893 - Draft Inventory, Probate Jurisdiction in the Will of Canning Esther Isabell, late of Golden Square, Hotel Keeper. An inventory of her Real Estate and Personal Estate. 2 - 1893 - Account from McFarlane James, Tailor, 64 Pall Mall, Bendigo. Original letterhead states Gray St Hamilton - crossed out. Account to Canning Mr. 3 - 1894 - Phoenix Fire Office of London Insurance. Receipt for Cottage - High Street. 4 - Pencilled notes concerning Canning Disbursements. 5 - 1894 - Account to Canning Mr from Budden William, Wholesale Coffee and Spice Merchant, Sandhurst Steam Coffee Works, Williamson St Bendigo. 6 - 1893 - Letter to Connelly and Tatchell from McFarlane James, Tailor and Outfitter written on Dr to J McFarlane sheet. Mentions that McFarlane's wife has a certain amount of money to pay to Hunter Mr for licence of the Golden Age Hotel, Golden Square. 7 - 1893 - Letter to Connelly and Tatchell from the Cohn Bros, Victoria Brewery Company (Limited), Cohn Magnus, Manager. Re Golden Age Hotel (taking of furniture at Valuation). 8 - 1894 - Probate in the Will of Canning Esther Isabell stating that she had real estate valued at 760 pounds and personal estate valued at 172 pounds and 3 pence at the time of her death on 26 Nov 1893. Executors of her Will - Stone Henry, Sheepwash Creek, Eucalyptus manufacturer and Tatchell George Henry, Williamson Street, Bendigo, Solicitor. 9 - 1894 - Court summons. Gourley Mary Ann, Defendant to Gourley Mary Ann of Bendigo for rates on property at High Street. Attached receipt from City of Bendigo from Teague Thos. H - Asst. Rate Collector. Other names:- Stone Henry, Tatchell George Henry, Gourley Mary Ann, Teague Thos. H. City of Bendigo.cottage, miners, connelly, tatchell and dunlop, canning esther isabell, mcfarlane james, canning mr, phoenix fire office of london insurance, budden william, sandhurst steam coffee works, hunter mr, cohn bros, victoria brewery co. (ltd), cohn magnus, golden age hotel -
 Ballarat Tramway Museum
Slide - 35mm slide/s - set of 12, 28 Feb. 1972
... . 1207.5 - No. 2 crossing Pall Mall to enter Charing Cross ex.... 1207.5 - No. 2 crossing Pall Mall to enter Charing Cross ex ...Set of 12 transparencies taken on 28/2/1972 on Kodak mounts. 1207.1 - Bendigo 26 and 2 at Charing Cross. 26 en route for Eaglehawk, 2 for Quarry Hill. Has the Colonial Mutual Life, Armstrong Tyre Service, and Australian Mutual Provident Society buildings and a Cohns Drinks ad. in the background. 1207.2 - as for 1207.1 but with Alexandra fountain in the foreground. 1207.3 - No. 2 in Mitchell St. heading for Quarry Hill. Photo taken after tram has passed photographer. Has buildings on either side of Mitchell St. in the background, including the Plaza Theatre. 1207.4 - No. 6 en route for Golden Square departing Charing Cross. Has the RACV and ANZ bank in the background. 1207.5 - No. 2 crossing Pall Mall to enter Charing Cross ex Quarry Hill, with the Fountain Plaza in the background. 1207.6 - No. 6 arriving Charing Cross ex Golden Square with No. 21 alongside. No. 21 has the SEC ad. 'Everything's fine in my all electric kitchen.' Has the City Family Hotel and the Fountain Plaza shopping centre in the background. 1207.7 - No. 5 at Charing Cross en route for Quarry Hill with No. 2 behind. No. 2 has two SEC roof ads, 'Everything s fine in my all electric kitchen' and 'Electricity best for cooking'. RACV building in the background. Tram crews are discussing the day in the front of the tram. 1207. 8 - No. 21 in High St. Bendigo with the Cathedral in the background. No. 21 has two SEC roof ads, 'Everything's fine in my all electric kitchen' and 'Electricity best for cooking'. 1207.9 - No. 6 in High St. Bendigo with the Cathedral in the background. 1207.10 - No. 6 in High St. Bendigo, just past Wattle St. Photo taken after the tram has passed the photographer from within the Highway Car Sales yard. 1207.11 - No. 26 bound for Eaglehawk at the end of the double track in View St., note signal contactors, tram stop and section signs mounted on pole. 1207.12 - No. 26 turning from View St. into Barnard St.Information written on in blue ink and date stamped on purple ink. 1207. 1- "Nos. 26 and 2 at Charing Cross." 1207.2 - "Nos. 26 and 2 at Charing Cross." 1207.3 - "No. 2 in Mitchell St. just after leaving Charing Cross." 1207.4 - "No.6 leaving Charing Cross for Golden Square." 1207.5 - "No. 2 arriving at Charing Cross from Quarry Hill." 1207.6 - "No. 21 waits at Charing Cross as No. 6 arrives from Golden Square." 1207.7 - "No 5 at Charing Cross with No. 2 lurking behind." 1207.8 - "No. 21 in High St. at cnr of Wattle St." 1207.9 - "No. 6 in High St. at cnr of Wattle St." 1207.10 - "No. 6 in High St. between Wattle and Vine Sts." 1207.11 - "No. 26 at end of double track in View St. near Barnard. St. 1207.12 - "No. 26 seen at dusk turning from View St. into Barnard St."tramways, trams, bendigo, charing cross, high st, view st., tram 2, tram 5, tram 6, tram 21, tram 26 -
 Ballarat Tramway Museum
Slide - 35mm slide/s - set of 32, 25/02/1971 12:00:00 AM
... of the rails in the photograph. 1201.13 - No. 7 and 21 in Pall Mall... in Pall Mall at Charing Cross with No. 5 in the background. Taken ...Set of 31 transparencies taken on 25/2/1972 on Kodak mounts. 1201.1 - Bendigo No. 26 in Bond St. just after leaving Long Gully en route for Quarry Hill. Has Norris Supermarket in background. Has two SEC roof ads. 1201.2 - No. 26 climbing View St. from Charing Cross en route to Eaglehawk. Has ANZ bank and AMOCO service station in background. 1201.3 - as for 1201.3, but after tram has passed photographer. Has buildings west of Mackenzie St. in photograph. 1201.4 - Tram stop and centre of the road pole with two "CARS STOP BY REQUEST" signs mounted on pole at the corner of Mackenzie St. 1201.5 - same position as for 1201.3, but with No. 5 descending the street. 1201.6 - same position as for 1201.2, but with No. 5 descending the street. Photo taken after tram has passed photographer. 1201.7 - No. 7 in Nolan St. from across the park at Lake Weeroona. 1201.8 - No. 7 entering McCrae St from Nolan St. - distant view. Note "TRAM "sign on left hand side under tree and overhead in McCrae St. from former track that once was in this street. 1201.9 - No. 7 in High St. with Cathedral in background. Tram en route to North Bendigo. Note scaffolding around Cathedral main spire area. 1201.10 - No. 7 crossing Bendigo Creek bridge in High St. near Golden Square. Has a Caltex Service station in the background. 1201.11 - No. 7 at Golden Square terminus with Sunburst Fruit Juices and a Peters Ice cream delivery vans alongside. 1201.12 - as for 1201.11 but photo taken from behind tram, with the end of the rails in the photograph. 1201.13 - No. 7 and 21 in Pall Mall at Charing Cross with No. 5 in the background. Taken some distance away from the location. 1201.14 - No. 7 at Golden Square terminus, taken a short distance from the tram terminus. Shows Milk Bar on right hand side and the hotel on the left hand side. Taken from the south side of the roadway. 1201.15 - as from 1201.14 but taken from the north side of the roadway. 1201.16 - No 5 waiting at California Gully loop. Distant photo showing surrounds 1201.17 - No. 5 en route for Quarry Hill crossing No. 26 at California Gully. 1201.18 - No. 26 at Eaglehawk terminus with Eaglehawk Town Hall and Post Office in background. 1201.19 - No. 21 arriving at Charing Cross en route to North Bendigo. Has Alexandra Fountain in the background, ANZ bank RACV building, and other buildings on the north side of Pall Mall or Nolan St. 1201.20 - No. 26 en route for Quarry Hill at Charing Cross, with crew standing by front door. Has Colonial Mutual life building, Armstrong Tyre Service (Firestone) and a sign for Cohns Drinks in the background. 1201.21 - as for 1201.20 but with No. 5 en route to Eaglehawk now in photograph. 1201.22 - No. 26 at Quarry Hill terminus. 1201.23 - No. 26 at Quarry Hill terminus, view of front portion of tram only from a gate at the Bendigo cemetery. 1201.24 - Track at the end of the Quarry Hill line showing the point blades of the former "Y" terminus and the overhead for this. 1201.25 - No. 2 at the Quarry Hill terminus, looking along the former Trackwork. 1201.26 - as for 1201.25 1201.27 - number not used. 1201.28 - Golden Square terminus from some distance from the actual terminus, showing the Warning sign "TRAM" for motorists from the south. No. 7 at the terminus. 1201.29 - No. 7 passing through the Golden Square shopping centre. Numerous cars and pedestrians. Tram en route for North Bendigo. 1201.30 - No. 7 in High St. Golden Square, en route for North Bendigo. Photo taken after tram has passed photographer. 1201.31 - No. 7 in High St. just past Wattle St. with the Cathedral in the background. Tram has two SEC roof ads good side on photo, 'Everything's fine in my all electric kitchen' and 'Electrical cooking - clean, quick, economical'. 1201.32 - No. 7 in High St. nearing Wattle St. Has Cathedral in the background. Photo taken after tram has passed photographer.Information written on in black ink and date stamped on purple ink. 1201.1 - "No. 26 in Bond St just after leaving Long Gully" 1201.2 - "No. 26 climbing View St. from Charing Cross" 1201.3 - "No. 26 ascending View St. from Charing Cross (At Mackenzie St.)" 1201.4 - "View St. & Mackenzie St." 1201.5 - "No. 5 in View St. near Mackenzie St." 1201.6 - "No. 5 in View St. nearing Charing Cross." 1201.7 - "No. 7 in Nolan St. seen from Lake Weeroona Park." 1201.8 - "No. 7 entering McRae St. from Nolan St. Note "TRAM" warning sign on left. 1201.9 - "No. 7 in High St. passing Short St." 1201.10 - "No. 7 crossing Bendigo Creek bridge in High St. near Golden Square." 1201.11 - "No. 7 at Golden Square terminus" 1201.12 - "No. 7 at Golden Square terminus" 1201.13 - "No 7, 21 and 5 at Charing Cross" 1201.14 - "No. 7 at Golden Square terminus" 1201.15 - "No. 7 at Golden Square terminus" 1201.16 - "No 5 waiting at California Gully loop." 1201.17 - "Nos. 5 and 26 crossing at California Gully loop" 1201.18 - "No. 26 at Eaglehawk terminus" 1201.19 - "No. 21 arriving at Charing Cross from Golden Square" 1201.20 - "No. 26 at Charing Cross" 1201.21 - "Nos. 5 and 26 at Charing Cross." 1201.22 - "No. 26 at Quarry Hill terminus" 1201.23 - "No. 26 at Quarry Hill terminus seen through the gates of the Bendigo Cemetery." 1201.24 - "Quarry Hill terminus showing remains for former double track layout abandoned before 1964." 1201.25 - "No. 2 at Quarry Hill terminus" 1201.26 - "No. 2 at Quarry Hill terminus" 1201.28 - "The Southern approach to Golden Square with No. 7 standing at the terminus, "TRAM" warning sign on the left. 1201.29 - "No. 7 passing through Golden Square Shopping Centre" 1201.30 - "No. 7 in High St. Golden Square" 1201.31 - "No. 7 in High St. passing Wattle St." 1201.32 - "No. 7 in High St. nearing Wattle St."tramways, trams, bendigo, bond st., view st., nolan st., high st., eaglehawk, california gully, charing cross, quarry hill, trackwork, tram 2, tram 5, tram 7, tram 21, tram 26 -
 Ballarat Tramway Museum
Album - Postcards & Photographs - Vic Solomons and others - Australian Tramways, 2023
... Melbourne 56 Post Card Pall Mall from Charing Cross Bendigo Unknown... Melbourne 56 Post Card Pall Mall from Charing Cross Bendigo Unknown ...Contains 184 images of postcards and photographs collected primarily by Vic Solomons of Sydney, with others from the collection of Wal Jack and Warren Doubleday. Covers almost all of Australia's tramway systems. 1 Post Card Hay St Perth Looking East No 3 Unknown Perth 2 Post Card Cars 30 & 90 both on Route 19 pass in Barrack St looking South Perth WA 1935.02.18 Perth 3 Post Card Hay St Looking East Perth WA Unknown Perth 4 Post Card William St Perth WA Unknown Perth 5 Post Card Perth from Shaftsbury Hotel Unknown Perth 6 Post Card Hay St Perth WA Looking East Unknown Perth 7 Post Card Barrack St Perth Unknown Perth 8 Post Card Murray Views No 3 High St Showing Town Hall Fremantle WA Unknown Fremantle 9 Post Card High St Fremantle WA Unknown Fremantle 10 Post Card View of Bolder City Golden Mile in the Background (Section No 1) 1908.08.20 Kalgoolie 11 Post Card Hannan St Kalgoolie 1900.08.19 Kalgoolie 12 Post Card Hannan St Kalgoolie WA (No 2) Unknown Kalgoolie 13 Post Card Intersection Hannan & Maritana Sts Kalgoolie WA Unknown Kalgoolie 14 Post Card Hannan St Kalgoolie Unknown Kalgoolie 15 Post Card Lane Street Bolder City Unknown Kalgoolie 16 Post Card Hobart Double Deck Tram Unknown Hobart 17 Post Card Macquarie St Hobart Unknown Hobart 18 Photo Liverpool Street Hobart Unknown Hobart 19 Photo Hobart 21 Unknown Hobart 20 Photo Hobart 14 in Elizabeth St Hobart Unknown Hobart 21 Post Card Macquarie St Hobart Unknown Hobart 22 Post Card Macquarie St Hobart Tas Unknown Hobart 23 Photo Double Decker Tram 3 at G.P.O. Hobart Tas No 31 Unknown Hobart 24 Post Card Double Decker Tram 19 Hobart Tas A B Series No 24 Unknown Hobart 25 Photo Hobart Municipal Tramways Tas No 95 Unknown Hobart 26 Post Card Elizabeth St Hobart Unknown Hobart 27 Post Card Elizabeth St Hobart Unknown Hobart 28 Post Card Elizabeth St Hobart Unknown Hobart 29 Post Card Elizabeth St Hobart Tas Unknown Hobart 30 Post Card HMT 21 with crew at Beach Road Terminus Unknown Hobart 31 Post Card HMT 9 & another with crew at Beach Road Terminus. Front cover photo of Destination GPO 1921.01.00 Hobart 32 Post Card Cascade Road and Mount Wellington Hobart Unknown Hobart 33 Post Card Elizabeth St Hobart Unknown Hobart 34 Post Card Elizabeth St Hobart Unknown Hobart 35 Post Card Elizabeth St Hobart 1915.04.07 Hobart 36 Post Card Macquarie St Hobart Tas Unknown Hobart 37 Post Card Macquarie St showing Post Office Hobart 1908.03.12 Hobart 38 Post Card Hobart Municipal Tramways 21 Unknown Hobart 39 Post Card Elizabeth St Hobart Tas Unknown Hobart 40 Post Card Liverpool Street Hobart Unknown Hobart 41 Post Card Electric Tram Launceston Tas 446 W J Little Photo 1919.02.08 Launbceston 42 Post Card Launceston Tram no 3 1911.08.30 Launbceston 43 Post Card Launceston Tram no 3 passes tram No 1 Unknown Launbceston 44 Post Card Tram 6 at Trevallyn a popular suburb Launceston Tasmania Unknown Launbceston 45 Post Card Tram 7 at Trevallyn Road Terminus Launceston Tasmania Unknown Launbceston 46 Post Card Tram 4 in Brisbane St Launceston Unknown Launbceston 47 Post Card Tram 9 in Brisbane St Launceston Tasmania Unknown Launbceston 48 Post Card Camerom Street Launceston Tasmania Unknown Launbceston 49 Post Card Murray Views No 15 Jetty Road Glenelg Terminus 1962-02-08 Adelaide 50 Post Card Bay Tram at Jetty Road Terminus Glenelg SA Unknown Adelaide 51 Post Card Tram 3 in King William Street Adelaide S Aust Unknown Adelaide 52 Post Card Valentine Series No 3065 The Old Horse Tram Victor Harbour Unknown Victor Harbour 53 Post Card Bourke Street Melbourne with Cable Car Looking East 1904.04.25 Melbourne 54 Post Card Opening of New Electric Tramway Elsternwick 1913-11-13 Melbourne 55 Post Card Cable trams in Clarendon St Sth Melb Unknown Melbourne 56 Post Card Pall Mall from Charing Cross Bendigo Unknown Bendigo 57 Post Card Tram 4 & 7 pass at The Fountain and Mitchell Street Bendigo Vic Rose Series P 3198 Unknown Bendigo 58 Post Card M&MTB 133 at Charing Cross bound for Eaglehawk Bendigo Vic Murray Views No 45 Unknown Bendigo 59 Post Card Pall Mall Bendigo Vic Unknown Bendigo 60 Post Card Charing Cross & Mitchell St Bendigo Trams passing 1919.00.00 Bendigo 61 Post Card Pall Mall Looking East Unknown Bendigo 62 Post Card Electric Trams and City Hotel Bendigo Vic Unknown Bendigo 63 Post Card Moorabool Street Geelong V 23 Unknown Geelong 64 Post Card Murray Views No 3 Moorabool Street Geelong Vic Unknown Geelong 65 Post Card The Rose Series P 2487 Ryrie Street Geelong Vic Unknown Geelong 66 Post Card Southern Cross Series 2696 Ryrie Stret Geelong Vic Unknown Geelong 67 Post Card The Rose Series P 1490 Ryrie Street Geelong Vic 1920-03-04 Geelong 68 Post Card Valentine Series No 1568 Lower Sturt Street Ballarat Unknown Ballarat 69 Post Card Rose Series P 1710 Sturt Street Ballarat Victoria Unknown Ballarat 70 Post Card Sturt Street Ballarat Victoria Unknown Ballarat 71 Post Card Horse Tram In Sturt Street Ballarat 1905.11.10 Ballarat 72 Post Card Sturt Street Ballarat Looking North-West Unknown Ballarat 73 Post Card Shoppes Square Sturt Street Ballarat Looking North Unknown Ballarat 74 Post Card Junction Sturt and Lydiard Streets Ballarat 1909-09-01 Ballarat 75 Post Card The Electric Supply Co Souvenir Tram Ticket No 3085of the opening of Electric System August 18 1905 1905.08.18 Ballarat 76 Post Card Sturt Street Ballarat Victoria 1907.11.25 Ballarat 77 Post Card Off to the Gardens Electric Tram Ballarat Unknown Ballarat 78 Post Card Sturt Street Ballarat 1907.04.16 Ballarat 79 Post Card Sturt Street Ballarat Looking East Electric tram with Double Deck Trailer 1911.04.17 Ballarat 80 Post Card Sturt Street Ballarat Looking East Unknown Ballarat 81 Post Card Sturt Street Ballarat Looking West 1911.03.01 Ballarat 82 Post Card Town Hall and Sturt Street Ballarat Unknown Ballarat 83 Post Card Lydiard Street Ballarat 1906.11.23 Ballarat 84 Post Card Looking North along Adelaide Street from George Street Brisbane Sidues Series No 764 Unknown Brisbane 85 Post Card Looking South along Queen Street from the Creek Street Intersection Brisbane Qld Sirues Series No 1379 Unknown Brisbane 86 Post Card George Street from near Supreme Court Brisbane Unknown Brisbane 87 Post Card Queen and Eagle Streets Brisbane 1907.07.04 Brisbane 88 Post Card Queen Street showing His Majesty’s Theatre Brisbane Unknown Brisbane 89 Post Card Queen Street Treasury Building 1908.01.20 Brisbane 90 Post Card G P O and Queen Street Brisbane Unknown Brisbane 91 Post Card Queen Street Brisbane Looking from Wharf Street Unknown Brisbane 92 Post Card Customs House Brisbane 1905.02.16 Brisbane 93 Post Card Queen St Brisbane 1905.09.16 Brisbane 94 Post Card Queen St Brisbane 1907.11.19 Brisbane 95 Post Card Treasury Buildings Brisbane Unknown Brisbane 96 Post Card Queen and Eagle Streets Brisbane Unknown Brisbane 97 Post Card The Valley Corner Brisbane Unknown Brisbane 98 Post Card Brisbane Queen Street opposite General Post Office Unknown Brisbane 99 Post Card North Quay and Milton Beach Brisbane Q Unknown Brisbane 100 Post Card Victoria Bridge Brisbane South Side 1907.08.14 Brisbane 101 Post Card Victoria Bridge Brisbane Unknown Brisbane 102 Post Card Breakfast Creek Bridge Brisbane Q Unknown Brisbane 103 Post Card Melbourne Street Station South Brisbane Queensland Unknown Brisbane 104 Post Card General Post Office Queen Street Brisbane 1955.09.23 Brisbane 105 Post Card Customs House Brisbane 1904.11.04 Brisbane 106 Post Card Queen St Brisbane 1919.11.00 Brisbane 107 Post Card Queen St Brisbane Sidues Series No 627 Unknown Brisbane 108 Post Card Creek Street Brisbane Queensland Unknown Brisbane 109 Post Card Customs House and Garden Reach Brisbane Queensland 1910.00.08 Brisbane 110 Post Card Queen and Creek Streets Brisbane 1909.06.07 Brisbane 111 Post Card Queensland National Bank andd Queen Street Brisbane Queensland Unknown Brisbane 112 Post Card Queen Street and Treasury Buildings Brisbane 0000.09.07 Brisbane 113 Post Card Queen Street showing “Courier” Buildings Brisbane Unknown Brisbane 114 Post Card Intersection George & Roma Streets Brisbane Q 1916.05.11 Brisbane 115 Post Card Adelaide Street Brisbane Q Unknown Brisbane 116 Post Card G P O Queen Street Brisbane Q Unknown Brisbane 117 Post Card Treasury Building Brisbane 1906.03-20 Brisbane 118 Post Card Queen and Eagle Streets Brisbane 1907.02.01 Brisbane 119 Post Card Queen St Brisbane Unknown Brisbane 120 Post Card Queen St Brisbane Q Unknown Brisbane 121 Post Card Victoria Bridge Brisbane 1906.07.30 Brisbane 122 Post Card An Unusual View showing Head of Queen Street Victoria Bridge & South SideSuburbs Brisbane Q Unknown Brisbane 123 Post Card Petries Bight Brisbane Q Unknown Brisbane 124 Post Card South End Victoria Bridge Brisbane Q Unknown Brisbane 125 Post Card Customs House Brisbane Unknown Brisbane 126 Post Card Photo of toastrack car circa 1910 Unknown Brisbane 127 Post Card Treasury Buildings Brisbane Unknown Brisbane 128 Post Card East Street Rockhampton with Steam Tram & trailer Unknown Rockhampton 129 Post Card Post Office Rockhampton with steam tram Unknown Rockhampton 130 Post Card East Street Rockhampton with Steam Trams Rose Series P 7154 Unknown Rockhampton 131 Post Card William Street Rockhampton Rose Series P 7156 Unknown Rockhampton 132 Post Card Central East Street Rockhampton Q with Steam Trams Unknown Rockhampton 133 Photo Sturt St Ballarat Unknown Ballarat 134 Photo Bridge Street Ballarat Unknown Ballarat 135 Post Card George St Sydney Unknown Sydney 136 Post Card Elizabeth St Sydney Unknown Sydney 137 Post Card Railway Square Unknown Sydney 138 Post Card Sydney Harbor Bridge - pending receipt 139 Post Card Kings Cross - Mowbray Series with description on rear from C Roy G Field Unknown Sydney 140 Post Card Kings Cross - Mowbray Series with description on rear from C Roy G Field Unknown Sydney 141 Post Card Central Railway Station Sydney - Rose Series P6033 1954-01-26 Sydney 142 Post card William Street Darlinghurst looking towards City - Rose Series P6602 unknown Sydney 143 Post Card Circular Quay Sydney - Rose Series P6680 Unknown Sydney 144 Post Card View at Manly NSW - Rose Series B1003 Unknown Sydney 145 Post Card Hunter St Newcastle NSW - Rose Series P7843 Unknown Newcastle 146 Post Card Bank Corner Newcastle NSW - Mowbray Series No. 155 Unknown Newcastle 147 Post Card Hunter St Newcastle NSW Unknown Newcastle 148 Post Card Criterion Hotel Hunter St Newcastle NSW Unknown Newcastle 149 Photo Horse tram at Newtown Station 1894 to 1898 - PTC photo c1894 Newtown 150 Photo Steam tram motor No 3 at Railway Square 1879 1879 Sydney 151 Photo Railway steam tram c1900 with a horse drawn double deck bus c1900 Sydney 152 Photo Steam motor 5A and doubled deck bus Unknown Sydney 153 Photo Steam motor 53A with detail notes on rear 1922 Sydney 154 Photo Cable tram set at Milsons Point ferry terminal c1900 Sydney 155 Photo Early Sydney electric car - Ocean St - Rose Bay Unknown Sydney 156 Photo George St looking souoth c1905 c1905 Sydney 157 Photo Tram 165 at Circular Quay Unknown Sydney 158 Photo Tramcar ferry or transporter at The Spit Unknown Sydney 159 Photo tram 882 George St at Marti Place, 1937 1937 Sydney 160 Photo Tram 826 Railway Sq area Unknown Sydney 161 Photo Railway Sq in background, Broadway with double decker bus and toastrack car late 1930s Sydney 162 Photo Coupled St Pitt St? - photo Ben Parle Feb. 1950 Sydney 163 Photo Electric tram No. 2 - North Sydney with side trolley pole running Unknown Sydney 164 Photo George St - Horden's Corner Unknown Sydney 165 Photo George St at Martin Place c1920 Sydney 166 Photo Castlereagh St Sydney c1928 c1928 Sydney 167 Photo Railway Sqare c1920 c1920 Sydney 168 Photo Darling St Countereweight Unknown Sydney 169 Photo Trolley bus depot Unknown Sydney 170 Photo Trolley bus No. 14 Unknown Sydney 171 Photo Newcastle Railway Station with steam tram - Wharf Road?? Unknown Newcastle 172 Photo High St West Maitland - steam tram Unknown Maitland 173 Photo High St West Maitland - steam tram Unknown Maitland 174 Post Card Argent St near tram terminal Broken Hill NSW c1900 Broken Hill 175 postcard Argent St looking south Broken Hill - with Ken Magor's notes on rear Unknown Broken Hill 176 Photo Toronto - steam tram 61A Unknown Toronto 177 Photo 124A trial run 1911? Sutherland - Cronulla line 1911 Sutherland 178 Photo 103A at a tram stop Unknown Sydney 179 Photo Cable tram set at Crows Nest terminus grip car 12, trailer 22 Unknown Sydney 180 Photo Cable tram Queens Square Sydney 1903 Sydney 181 Photo cars 2078 and 2077 Chatswood late 1950s Sydney 182 Photo car 1877 Balmain area late 1950s Sydney 183 Photo Trolley bus - Rockdale destination Late 1950s Sydney 184 Photo Broken Hill steam tram - motor 18A North Tram Unknown Broken Hill 185 Photo Millars Point Sydney NSW - ferry/tram interchange, unknown Sydney All items imaged including the rear or back where there was writing of information. All files stored on the Museum's Photo Collections directory. Demonstrates through the medium of many images, Australian tramway systems and Ballarat's place in them.Album - heavy card covers, plastic lined with postcard or 6x4 photo sleeves.australia, tramways, postcards, photographs, steam trams, horse trams, cable trams, trolley buses -
 Ballarat Tramway Museum
Slide - 35mm slide/s - set of 24, 20/05/1971 12:00:00 AM
... the east side of Pall Mall in the background. 1195.3 - No 21 ex... and other buildings along the east side of Pall Mall ...Set of 24 transparencies taken on 20/5/1971 on Kodak mounts. 1195.1 - Bendigo 19 arriving at Charing Cross en route to North Bendigo with Fountain Plaza and the City Family Hotel in the background. No. 19 has two roof ads for the SEC. -'Electricity better for cooking' and 'Everything's under control in my all electric kitchen' 1195.2 - as above, but standing at the Charing cross stop, with the Beehive Stores and other buildings along the east side of Pall Mall in the background. 1195.3 - No 21 ex Golden Square crossing View St. trackwork in front of No. 25 waiting to depart for Quarry Hill. No.21 has two roof ads (as for No.19 in 1195.1) and No.25 has one SEC roof ad and another. Ezywalkin sign in the background, and Fountain Plaza. 1195.4 - as for 1195.3, but after 21 has arrived and 25 left for Quarry Hill. Has Ezywalkin store and the Beehive store in the background. 1195.5 - No. 5 at the Eaglehawk terminus. Photo taken with a cannon in foreground looking along High St. Eaglehawk. Has shops on the west side of High St. in the background. 1195.6 - No. 5 at the Eaglehawk terminus, close up of the rear of the tram - note tow bar arrangement. Has destination of Quarry Hill. 1195.7-Nos.25 and 5 crossing at the Thorpe St. Loop, California Gully. No. 25 bound for Eaglehawk (has SEC Briquette and electric cooking roof ads) and 5 en route for Quarry Hill with a SEC and Cinzano roof ad. 1195.8 - as for 1195.7, but after trams have passed each other. Has Borough Auto Service building in the background. 1195.9 - No. 5 in Mt Korong Road, towards Bamard Street, photo taken after tram has passed photographer. 1195.10 - No. 30 at the Golden Square terminus with the Milk Bar on the right hand side of the photograph. 1195.11 - No. 30 inbound at Fire Station Loop, High St. Golden Square. Has old fire station in the background. Passengers are boarding the tramcar. 1195.12 - No. 30 in High St, bound for North Bendigo between Vine and Wattle Streets. 1195.13 - No. 5 bound for Eaglehawk waits at Iron Bark Gully Loop, at Hayes St. 1195.14 - No. 5 and No. 2 crossing at Iron Bark Gully Loop. 1195.15 - No. 5 bound for Eaglehawk leaving the Manchester Loop, Long gully. 1195.16 - No. 5 passing William Street, Long Gully en route to Eaglehawk. 1195.17 - No. 5 just before the California Gully Crossing Loop. 1195.18 - Nos. 5 and 26 crossing at California Gully crossing Loop. No. 5 heading to Eaglehawk, 26, Quarry Hill. 1195.19 - No. 5 in High St. Eaglehawk with Bob Moyle's Victoria Hotel and the TAB in the background. 1195.20 - No. 5 in High St. Eaglehawk approaching the terminus. Photo taken after the tram has passed the photographer. Has Foodland store and J. Best Fruit supply in the background, along with Eaglehawk Town Hall. 1195.21 - No. 5 at the Eaglehawk terminus, photo taken along seldom used track along High St. 1195.22 - as for 1195.22 - but at the very end of the track. 1195.23 - No. 5 en route for Quarry Hill climbs High St. Eaglehawk with the Victoria Hotel and Eaglehawk Town Hall in the background. 1195.24 - No. 5 and 25 crossing at Jobs Gully Loop. Note 25 has a black on white destination roll, while No. 5 has a white on black destination roll. Information written on in black ink and date stamped on purple ink. 1195.1 - "No. 19 arrives at Charing Cross Bendigo from Golden Square" 1195.2 - "No. 19 about to leave Charing Cross for North Bendigo" 1195.3 - "No. 25 awaiting departure for Quarry Hill, watches No. 21 arrive at Charring Cross from Golden Square" 1195.4 - "No. 21 on North Bendigo service and No. 25 on Quarry Hill run await departure at Charing Cross" 1195.5 - "No. 5 at Eaglehawk terminus" 1195.6 - "No. 5 at Eaglehawk terminus" 1195.7 - "Nos. 5 and 25 crossing at Thorpe St. Loop, California". 1195.8 - "Nos. 25 and 5 crossing Thorpe St. Loop, California Gully". 1195.9 - "No. 5 descending Mt Korong Rd. towards Bamard St." 1195.10 - "Birney car No. 30 at Golden Square terminus" 1195.11 - "Birney car No. 30 in High Street near Thistle Street (Fire Station Loop)" 1195.12 - "No. 30 in High St. between vine and Wattle Streets" 1195.13 - "No. 25 at Hayes Street Loop Iron Bark". 1195.14 - "Nos. 2 and 5 crossing at Hayes Street Loop Iron Bark" 1195.15 - "No. 5 at Manchester Loop opposite Havilah Road, Long Gully" 1195.16 - "No. 5 passing William Street, Long Gully". 1195.17 - "No. 5 at California Gully" 1195,18 - "Nos. 26 and 5 at Thorpe St. Loop, California Gully". 1195.19 - "No. 5 in High St. Eaglehawk". 1195.20 - "No. 5 approaching Eaglehawk terminus" 1195.21 - "No. 5 at Eaglehawk terminus" 1195.22 - "No. 5 at Eaglehawk terminus" 1195.23 - "No. 5 in High St. Eaglehawk" tramways, trams, bendigo, charing cross, eaglehawk, california gully, golden square, iron bark gully, jobs gully, tram 2, tram 5, tram 19, tram 21, tram 25, tram 26, tram 30 -
 Bendigo Historical Society Inc.
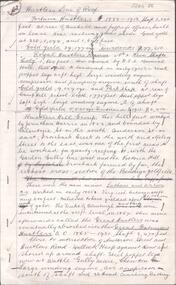
Document - Hustlers, Sheepshead and Deborah lines of reef
... shafts 'City" 860 feet, now covered by R.S.L. building Pall Mall... by R.S.L. building Pall Mall, steel poppet legs 60 ft high ...Albert Richardson was a mining historian who wrote widely on the mines of the Bendigo Goldfield. The park opposite the Goldmines Hotel in Marong Road, is named in his honour. Five page document, hand written by Albert Richardson on lined foolscap and edited with cross-outs and insertions, . The mines along the Hustlers line of reef and the Sheepshead line of reef are described. Mines listed on Hustlers line of reef: Fortuna Hustlers (1888 - 1913), shaft 2,240 feet at rear of Buckell and Jeffrey's offices; Royal Hustlers Reserve No. 2 - two shafts 'City" 860 feet, now covered by R.S.L. building Pall Mall, steel poppet legs 60 ft high and 'Park Shaft" at rear of Camp Hill School, 1,775 feet, steel poppet legs 60 feet high; Hustlers Hill Group first worked by Jonathan Harris in 1853 and bounded by Valentine, Anderson and Ironbark Creek to the north and Milroy Street to the east, one of first areas worked for quartz reefing. It with Garden Gully line west and Victoria Hill Ironbark, formed by far the richest cross section of the Bendigo Goldfield. Great Extended Hustlers (1865-1921) close to intersection of Anderson Street and Hustlers Road, mullock heap against road and shored up around shaft, steel poppet legs now at Wattle Gully mine, Chewton, large winding machine, air compressor south of shaft and 36 head crushing battery. Hustlers Reef (Old Hustlers) and Hustlers Reef No. 1, two shafts, main 2,210 feet, about 220 yards east of Moran Street and against Fenton Street. , No. 1 shaft 1,140 feet and about 155 yards east of Moran Street. Lansell's Comet, Lightining Hill line, 2.100 feet, on Comet Hill approx 70 yards west of Holmes Road, near Comet Creek, steel poppet legs. United Hustlers and Redan (1876-1918), main Redan, 1,830 feet about 155 yards west of Sandhurst Roead, in line with Comet Hill State School, this hill known as Redan Hill. North, or New Hustlers, once known as Agnew Hustlers, wooden poppet legs, south side, Kneebone Street, Eaglehawk. Derby line, Johnson's No. 3, South Johnson's (east shaft of Collman and Tacchi) 439 feet on west wide of Woods Street, south of Wetherall Street. Paddy's Gully Line, south to north, some shafts - Lansell's 'Sandhurst" ('Needle") Eaglehawk Road shaft 2,425 feet, about 50 yards east of Needle Loops, a brick square sided chimney with Cleopatra Needle top. British American, 789 feet, just south of Holdsworth Road. Collman and Tacchi, main shaft 2,588 feet, 60 yards west of Eaglehawk Road, California Gully. Deborah Line of Reef, The Deborah (1932-1954) shaft 2.017 feet, west of Adams Road and south of Abel Street, Quarry Hill. North Deborah (1937 - 1954) shaft 1,151 feet, Breen Street, Quarry Hill, steel poppet legs. Central Deborah (1939-1954) shaft 1,347 feet Sheepshead line of reef, Lansell's South Red, White and Blue, shaft 2,124 feet, north east of Bellevue Road and 220 yards east of Adams Road. The New Red, White and Blue Consolidated (Big Blue) main shaft 2,416 feet. Lansell's Bendigo Battery 105 head, north of 'Big Blue" on his freehold lease, commenced crushing on 24th February 1895. After closing was erected as the Showground's Industrial Hall, July 1926. North Red, White and Blue, burnt down February 1926, new company 1934, closed 1938. Document is part of the Albert Richardson Collection of Bendigo mining history. bendigo, gold mining, deborah line of reef, sheepshead line of reef, hustlers line of reef, royal hustlers reserve mine, hustlers hill group of mines, great extended hustlers, hustlers reef no. 1, lightning hill line, old comet, collman and tacchi, lansell's comet, north deborah, central deborah, dhrrpdhrsf linr og trrg, new red, white and blue consolidated mine, big blue, lansell's bendigo battery, north red, white and blue mine, albert richardson collection -
 Bendigo Historical Society Inc.
Document - SPECIMEN COTTAGE COLLECTION: VARIOUS DOCUMENTS
... Joseph and Co. Pall Mall, Sandhurst and Melbourne with special... Joseph and Co. Pall Mall, Sandhurst and Melbourne with special ...Various documents in plastic folders. The topics are: 1) Photocopy of an article titled Saunders' Victoria House. Also a map of the Saunders residence in High Street. 2) Article titled What I saw in gaol July 1889 (written by Gilbert Rule). 3) Eleven pages essay: H. M. Prison Bendigo after a short history of the prison there are details of several criminal cases. Also brochure H.M. Prison Bendigo 1861-2006, Official decommissioning ceremony 5 January 2006. 4) The Temple Builders, talk by Alex H. Stone 10th May, 1998. 5) The German contribution to early Bendigo by Frank Cusack. 6) Children's games played during and prior to the great depression, Interviews conducted by James Lerk. People interviewed are: Stella Banfield, Mary Pickles, Geoff Newman, Vel Newman, Joan O'Donahue, Peg Schlotterlein, James Gallagher, Jack Larkin, Ken Maes. 7) Email from Hans Tracksdorf to Andy Walker and Ana Hilson updating on the Charlton Building at 60-62 Mundy Street, June 2015, several coloured photos attached. 8) Notes on the family of Elizabeth Ann Butler. 9) The Amy Castles story, a narrative on the life of the singer Amy Castles. Also a booklet ''I lived for the art'' The story of Amy Castles concert program. 10) Harcourt Valley Heritage & Tourist Centre ''Granite houses of Faraday and Harcourt'' by George Milford, March 2010. 11) The story of Knipe's castle and the man who built it, John Hanlon Knipe. A paper presented by Mrs. Edith Lunn 2nd April, 1987. Also some photographs of graves and various documents. 12) Report: Victorian Heritage database place details 15/07/2014 former Kahland winery and cellars. Also two coloured photographs from Tony Robinson' s walk around Bendigo, Kahland street - Lynden house built 1873 wine cellar. 13) several letters from James and Dinah Jeal to their parents detailing their travels on the goldfields dates from 1855 to 1865. 14) Photocopy of a six pages hand written letter to a Walter Edis (?) in England from a J. Wharton (?) from Woodstock on Loddon, detailing his boat trip to Melbourne and the train trip to Marong where he is working. Letter dated July 9th, 1923. 15) The history of T.C. Watts & Son, real estate agents in Bendigo by Edith Lunn. September 30th, 2000. 16) Medals created by Messrs Joseph and Co. Pall Mall, Sandhurst and Melbourne with special reference to ''Champion Medals'' created for the Bendigo Rifles and other Victorian forces. 1858 to 1885. Compiled by Angus Pearson December 2012. 17) Talk by Jim Evans at September 202 meeting of the Bendigo Historical Society. The Inimitable Charles Thatcher, colonial minstrel. 18) Six pages typewritten document titled: C.R. Thatcher, the local songster. Date and author unknown. 19) Music sheet. The Chinaman. Thatcher's colonial songs as written and sung by Charles Robert Thatcher during the goldrushes in the Shamrock hotel, Bendigo. 20) Heidi Teague young historian award two pages detailing the criteria for the award, a newspaper obituary for Heidi Teague and a twenty five pages transcribe interview of Heidi Teague, Heidi was interviewed by Ines Tyson and transcribed by Carol Woolman in 2009. 21) Photograph of Richard Bertram Taylor in military uniform, Richard was killed in action in WWI. Also a brief family history 22) Six pages typewritten letter from John Stuart, Assistant Surgeon Royal Navy to chief Secretary The Honourable C. Haines dated Sandhurst 27th May, 1857 regarding Chinese protectorate. 23) Eight pages biography with photos of Sister Clara Stewart. 24) Two pages biography on John Boyd Watson (and sons) by Rob Upson 25) History of Alick Wilkinson & other grocers 1930 onwards. Compiled by Vernon and Garran Wilkinson. -
 Bendigo Historical Society Inc.
Document - Arthur J. Pattison, 1962
... who served in the Boer War. The Boer War Memeorial in Pall... who served in the Boer War. The Boer War Memeorial in Pall ...South African (Boer) War Memorial Bendigo The monument commemorates those who died in service or were killed in action while serving in the South African (Boer) War. It is a bronze statue of a soldier on a granite base. There was a large assemblage on the afternoon of 11th November, when the ceremony of unveiling the soldiers' memorial statue was performed by Brigadier-General Gordon in the presence of a muster of branches of the defence forces. The statue, which is in bronze, is mounted on a massive granite base, on the foot of which is the following inscription: — "Bendigo's tribute to the memory of the Australian soldiers who, in the South African war of 1899 - 1902 gave their lives for Queen and Empire. The statue was modelled by Mr.J. Walker, a young Bendigonian, who has been studying for two or three years under Mr. A. T. Woodward art instructor at the local school of mines. Leader (Melbourne), 19 November 1904. Ola Cohn recalled in her autobiography meeting John Walker as a sculpture student at the Bendigo School of Mines and that he had later received the commission for the Boer War Memorial although she neglects to mention its location. John Walker worked as a sculptor in both Bendigo and West Brunswick before turning to chicken farming in the Bendigo suburb of White Hills. John Walker born in Bendigo and first studied sculpture at the Bendigo School of Art. Walker then went to England to study at the Royal College of Art London, and in Paris at the Collarossi and Julian Academies. The photo of A. T. Pattinson was taken by George Leake Massingham, a professional photographer, who had seven children, one of whom died at birth. After arriving in Australia from England, he established himself as a travelling photographer, an occupation he continued after his marriage. He travelled throughout country Queensland, Victoria and New South Wales, setting up studios along the way. The family ended up moving with him, travelling to Sydney, Narrandera, Bendigo, Newtown, Geelong and Deniliquin.Correspondence re Boer War Memorial Bendigo Boer War Memorial Bendigo Letters and photo from and to Mrs Wilson, eldest daughter of Mr Arthur T. Pattinson who was a model for the Boer War sculpture. 10570.1a A restored black and white photo of Trooper Arthur T. Pattinson by BHS Volunteers 10570.1b The original photo as sent by Mrs Wilson to Harold Curnow (Bendigo Historical Society) in 1962. The photo is mount on heavy brown cardboard and has an old catalogue number of "P680" inscribed on it. The cardboard is torn and held together with sticky tape. On the front in italics is printed G.L. Massingham, Bendigo. 10570.1c Notes on the rear of the photo from Mrs Wilson state "that the photo is of Arthur T. Pattinson (Rusty), an Australian Light Horse trooper who served in the Boer War. The Boer War Memeorial in Pall Mall Bendigo represents a trooper on guard. The sculpture was Jack Walker who used Pattinson as a model; and it is regarded as an excellent likeness." 10570.1d A letter from Harold Curnow back to Mrs Wilson on Jan 4th 1963 acknowledging receipt of the photo and a letter received, noting the significance of the historical information. 10570.1e Handwritten letter 29/11/1962 from Mrs Wilson to Mr Curnow introducing herself as Mr Pattinson's eldest daughter and answering the letter he wrote to her father. She mentions the bad health of her parents. Arthur modelled for the statue at least two to three times per week in a studio on the top floor of a building in Bull St. He was the original model to the best of her knowledge. Another model possibly Mr P. Handmear may have sat as a model for renovations (*). The rifle was a light horse rifle issued to Pattinson as he was still serving in 1904. Arthur and Handmear were boys together and very close. * Note - the plaster model was repaired prior to casting in metal. 10570.1f An obituary notice : 18/11/64 "On Nov 17 at Frankston, Emma, wife of the late A. T. Pattinson (Rusty), late of Bendigo. 10570.1g Letter Nov 20th 1962 from Harold Curnow to Mr Arthur T. Pattinson, Kent St., Mornington, Vic. The Letter Below: "Dear Mr Pattinson, Last week your brother, Brit., whom I have known for many yers, supplied the Bendigo Advertiser with some interesting information regarding your role as the model for the late Jack Walker when he was making the statue for the Boer War Memorial here. Yesterday however, another claimant to the distinction of being the model was advanced in the Bendigo Advertiser by Mr Richard Marshall, of Moran Street, Bendigo who said that the soldier's model was Phillip Handmear. I understand that your brother has sent the newspaper cuttings on to you. When he called to see me yesterday, he suggested that I write to you for further particulars. Can you recall the discussion you had with Jack Walker when he approached you about acting as the model and do you remember how many times you posed for him, and whether the work was done in the house, in the yard, or in one of the outbuildings at Moran Street? In short, any details at all. At this point in time we are considering an interesting facet in Bendigo's history, so any seemingly unimportant incidents could really be useful if we knew about them. Have you any old newspaper cuttings mentioning your name in connection with the memorial? Do you remember and remarks that passed between you and Jack walker during the long sessions you must have put in on this work? This could be very important. And do tyou recall where the rifle cam from? Did you or Jack Walker borrow it from the military authorities? Back in 1934 Jack Walker recalled having had to pull the plaster model down and remake it when he discovered it was slightly off-balance and was slowly toppling forward. He told me he had to get his model to pose again. Do you know anything about this? Could it have been that he got Mr. Handmear in for the final stage of the work? That, of course, would apply only if you were not available. Incidentally, I never heard of Mr Hardmear until I saw his name in yesterday's "Advertiser". In any case I intended contacting your brother or you to enquire whether any member of your fmily has an old photograph of you in your Boer War uniform, that is, one taken about the time of or just after the Boer War. I am sure that members of the Bendigo Branch of the Royal Historical Society would be most interested to see it. I hope you will have the time and inclination to consider the many points I have raised in this letter because the subject has aroused a lot of interest in Bendigo. Hoping you are well and quite as active as you wish, I remain, with all good wishes, Yours sincerely, Harold Curnow". history, soldiers' memorial bendigo, boer war memorial bendigo, arthur pattinson, john (jack walker) -
 Bendigo Historical Society Inc.
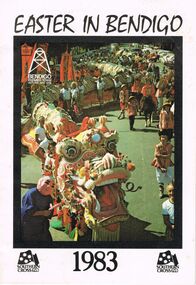
Document - EASTER IN BENDIGO, OFFICIAL PROGRAM, 28 March 1983
... , Pall Mall, Mitchell Street, Hargreaves Street and Williamson..., Pall Mall, Mitchell Street, Hargreaves Street and Williamson ...Easter in Bendigo, Official Program1983. Premier Town Victoria 1982-85. Easter In Bendigo '83 Welcome to the 1983 Easter Fair. This is a special time for Bendigo. . . The Fair has a long history bating back to 1871. . . Bendigo Base Hospital, Home and Hospital for the Aged or Benevolent Asylum. . . Back in the 1800s. Gone are the days of the ladies' Fancy Bazaar, Fat Baby Contest, Greasy Pig Chase. . . Many old traditions remain. . . Bendigo's links with the Chinese community go back to the dates when the first settlers arrived seeking gold. The Chinese took a very active part in the fist Fair. . . Monday Procession has always been the most famous as many old photographs show. Some of these photos date back before the turn of the century. In those days many people made the journey to Bendigo by train from Melbourne or by horse and buggy from outlying districts.. . ''Sun Loong'', or ''New Dragon''. . . Horse and Harness Parade a great success each tear attracted an immense variety of horses and horse drawn vehicles. . . Torchlight Procession on Sunday Sports Carnival Fireworks. . . Easter Monday requires precise planning and discipline if it is to run smoothly. A volunteer committee meets through the year to see that this happens. The Popular Girl Contest was introduced in 1930, the four main Streets of Bendigo, Pall Mall, Mitchell Street, Hargreaves Street and Williamson Street (formerly View Street), sponsored a popular girl by means of fund raising events. Winner was announced from the Shamrock Hotel balcony Easter Saturday night by the Mayor of Bendigo. The contest is still being held. . . The Shamrock Hotel now fully restored and reopened. . . Sunday night special ceremony, in time for the winning Popular Girl to take pride of place in the Procession. . . The accent is on the cycling. The Easter sports Carnival dates back to the beginning of the Fair in 1871, seven years before the start of the famous Stawell Gift. Sid. Paterson, Hubert Opperman. . . Golden Mile Wheelrace, the final on Monday night. AFT Amateur Madison, woodchopping, boomerang throwing and gala fireworks Sunday and Monday. This year for the first time the Golden Mile goes Pro/Am, an Open event for the first time. This could see the first clash between Danny Clark and Kenrick Tucker. Hopefully Michael Grenda, Tony Hughes, Michael Turtur will also be starters against leading professionals, Terry Hammond, Murray Hall and Ross Forster. The Golden Mile has been conducted every year since 1956 when it was won by John McDonough. Ron Grenda (Tas) won in 1959, Barry Waddell was the first scratchman to win in 1962 and Frank McCaig (Bendigo) has won the event three times in 1963/5/7. The event carries total prize money of $3000 making it (with Wangaratta Wheelrace) the richest Wheelrace in Provincial Victoria. . . Newly completed Hargreaves Mall being a focus for all this activity. . . Rotary Art Show and Easter Fair Society amalgamated their art shows resulting in a combined exhibition of outstanding quality, since then the Rotary Club has added the Antique Fair. The Handcraft Bazaars, a more sophisticated version of the bazaars of old, offers. . . The Bathtub Derby at Lake Weeroona, Music Festival at Queen Elizabeth Oval. . . Easter Fair of 1871 was almost washed out. . . Necessary top abandon the ''Golden Mile'' Wheelrace on two occasions 1960 & 1979. . . 1983 Official Programme, Good Friday April 1, Saturday April 2, Sunday April 3, Monday April 4, Tuesday April 5. . . Holy Week Ecumenical Services: . . The Chinese And The Bendigo Easter Fair, 3 pages on the history of the chinese involvment in the Bendigo Easter Fair. . . A Little Of Dragons: brief history on chinese and dragons. Sun Loong, Yar Loong. The Birth Of A Dragon: In China a story of the birth of a Dragon. . . Such Trial was set a group of Bendigo Businessmen led by Mr A Guy and comprising MR C Michelsen, Mr L Chon, Mr J Granter, Mr J Henderson, Mr B Andres. In 1969 they formed the ''Loong 100 Committee''. The purpose of the committee was to purchase a dragon to replace the ageing Loong, from donations raised. But who could build a worthy successor to the Great Loong? In Hong Kong a 47 year old dragon builder whose traditions and craft came from the famous dragon building city of Fat Shan on the Pearl River, near Canton where Loong was born. Mr Law On created the famous Sun Loong in his tiny 4x4 metre workshop in Hong Kong. . . 1970 Sun Loong was blessed and brought to life by 101 year old Mr James Lew, dotting his eyes with chicken blood. . . To Awaken A Dragon Dragons tend to sleep a lot and are quiet deaf. . . The Dragon is blessed and fed with pomolo leaves then the process of wakening begins with drums. . . 5000 crackers. The Easter Monday Chinese Procession have a long and varied history in China. The Bendigo Procession is no exception to this. In recent years much research has gone into . . The Procession may be divided into six sections. . . Dragon built in 1969 First Displayed in 1970, length-300ft plus, Extra 100ft added in 1980, number carrying: Head 1 plus 5 releifs, Neck 3, Body 52 plus 52 reliefs, head weight 63 lbs. tail weight 36 lbs.. Scales 4,500 approx. Mirrors 90,000 fins 50, beads 30,000 approx. . . Conclusion. . . Advertisements: Bendigo Pottery, Square Deal Cars, Bob Bell of Borough Bricklaying Pty Ltd, Pinups Wine Bar, Cumberland Hotel, Manchester Arms Hotel, British & American Hotel, Langley Hall BYO Restaurant, White Horse Hotel, Ascot Lodge Caravan Park, The Lemonade Factory, The Pepper Pot, M & M J Meade Mobil, Lakeview Motor Inn Restaurant, Truffles Restaurant, Marong Hotel, 4 Penny Dark BYO Restaurant, Chaplin's Coffee Shoppe, Copper Pot Restaurant, Skins of Australia, Central Deborah Gold Mine, Chris Wall Auto Sales, Brian Boru Hotel, The Green Carnation, Sandhurst Town, Dragon Court BYO Chinese Restaurant, Australian Fixed Trust Investors Services Ltd., The Mohair Farm, Bendigo Model Railroaders, Mexican Kitchen Restaurant, BP Super Shops, Coke, Southern Cross TV8.event, easter fair, bendigo easter fair society, easter in bendigo, official program1983. premier town victoria 1982-85. easter bendigo '83 welcome to the 1983 easter fair. this is a special time for bendigo. . . the fair has a long history bating back to 1871. . . bendigo base hospital, home and hospital for the aged or benevolent asylum. . . back in the 1800s ladies' fancy bazaar, fat baby contest, greasy pig chase. . . many old traditions. . . bendigo's links with chinese the first settlers arrived seeking gold. the chinese took a very active part in the fist fair. . . monday procession the most famous as many photographs show, the turn of the century. many people journey to bendigo from melbourne & from outlying districts.. . ''sun loong'', or ''new dragon''. . . horse and harness parade an immense variety of horses, horse drawn vehicles. . . torchlight procession on sunday sports carnival fireworks. . . easter monday precise planning and discipline to run smoothly. a volunteer committee meets through the year. the popular girl contest introduced in 1930, sponsored a popular girl by means of fund raising events. winner announced from shamrock hotel balcony easter saturday night by the mayor. . . the shamrock hotel now reopened. . . sunday night special ceremony, in time for the winning popular girl to take pride in the procession. . . accent is on the cycling. the easter sports carnival dates back to fair in 1871, seven years before stawell gift. sid. paterson, hubert opperman. . . golden mile wheelrace, final on monday night. aft amateur madison, woodchopping, boomerang throwing, gala fireworks sunday& monday. for the first time golden mile goes pro/am. danny clark and kenrick tucker. michael grenda, tony hughes, michael turtur will also be starters against leading professionals, terry hammond, murray hall and ross forster. the golden mile has been conducted every year since 1956, won john mcdonough. ron grenda (tas) won 1959, barry waddell the first scratchman to win 1962, frank mccaig (bendigo) has won 1963/5/7. prize money of $3000 making it (with wangaratta wheelrace) the richest wheelrace in provincial victoria. . . newly completed hargreaves mall. . . rotary art show and easter fair society amalgamated art shows, antique fair. handcraft bazaars, . . the bathtub derby lake weeroona, music festival queen elizabeth oval. . . easter fair of 1871 was almost washed out. . . necessary top abandon the ''golden mile'' wheelrace on two occasions 1960 & 1979. . . 1983 official programme, good friday april 1, saturday april 2, sunday april 3, monday april 4, tuesday april 5. . . holy week ecumenical services: . . chinese and the bendigo easter fair, . dragons: brief history. sun loong, yar loong. in china a story of the birth of a dragon. . . bendigo businessmen mr a guy, mr c michelsen, mr l chon, mr j granter, mr j henderson, mr b andres. 1969 formed ''loong 100 committee'' purchase a dragon to replace ageing loong, donations raised. build successor great loong? hong kong dragon builder traditions craft came from dragon building city fat shan on the pearl river, canton where loong was born. mr law on created the famous sun loong in his tiny 4x4 metre workshop in hong kong. . . 1970 sun loong was blessed and brought to life by 101 year old mr james lew, dotting his eyes with chicken blood. . . to awaken a dragon dragons tend to sleep a lot and are quiet deaf. . .dragon is blessed fed with pomolo leaves wakening begins with drums. . . 5000 crackers. the easter monday chinese procession have a long and varied history in china. the bendigo procession is no exception to this. in recent years much research has gone into… procession may be divided into six sections. dragon 1969 first displayed in 1970, length-300ft plus, extra 100ft added in 1980, number carrying: head 1 plus 5 releifs, neck 3, body 52 plus 52 reliefs, head weight 63 lbs. tail 36 lbs.. scales 4, 500 approx. mirrors 90, 000 fins 50, beads 30, 000 approx. advertisements: bendigo pottery, square deal cars, bob bell of borough bricklaying pty ltd, pinups wine bar, cumberland hotel, manchester arms hotel, british & american hotel, langley hall byo restaurant, white horse hotel, ascot lodge caravan park, the lemonade factory, the pepper pot, m & m j meade mobil, lakeview motor inn restaurant, truffles restaurant, marong hotel, 4 penny dark byo restaurant, chaplin's coffee shoppe, copper pot restaurant, skins of australia, central deborah gold mine, chris wall auto sales, brian boru hotel, the green carnation, sandhurst town, dragon court byo chinese restaurant, australian fixed trust investors services ltd., mohair farm, bendigo model railroaders, mexican kitchen restaurant, bp super shops, coke, southern cross tv8. -
 Melbourne Tram Museum
Album - Charles Craig - part 1 of 2, 1950s to 1970s
... sill car at Charing Cross CC217 Bendigo one man bogie Pall Mall... sill car at Charing Cross CC217 Bendigo one man bogie Pall Mall ...Photo - see pdf file for further information. Number Brief Description CC1 S178 at Elsternwick level crossing track works CC2 Building East Preston Depot 1955 CC3 Camberwell depot – post WW2 – lots of trams and a black cat CC4 W2 584 and SW6 958 northbound – Chapel St and Brighton Road CC5 W2 357 – southbound, Chapel St Brighton Road CC6 Pascoe Vale Road, Raceday working – note the signal CC7 The Preston Workshops - The Argus, post WW2, 223, 647 et al CC8 923 or is it 922 being built at Preston – The Argus photo - CC8A 832 being positioned onto trucks at Preston after an overhaul – Argus Photo – see also CC306 CC9 Footscray depot` CC10 W5 797 in St Kilda Road during track works – 1950s CC11 W2 457 at Kew Post Office CC12 Wellington Parade – W2 432, 492 and 337 – special event CC13 Swan St line up of trams – football? Or other special event – Sinclair’s bus on the right side. CC14 W2 630 being washed at a depot – The Argus photo CC15 Royal Park line at Flemington Road – W2 355 and W5 786 CC16 Nicholson St track construction from a tram cab CC17 T181 on tour at Gordon St CC18 T181 on Maribyrnong Bridge CC19 Ditto at River St just off bridge CC20 As for CC18 CC21 At Raleigh Rd CC22 T181 at Footscray depot CC23 Track construction, Nicholson, just north of Gertrude CC24 Commissioning overhead Bourke St tram 988 CC25 Queens Parade – 997 and 994 CC26 Swapping trolley wheel to skid – commissioning CC27 Track construction in Gertrude St CC28 985 in Queens Parade running special CC29 997 in Queens Parade CC30 1033 at North Fitzroy – AETA Special CC31 Bourke St at Elizabeth St – has passengers on board CC32 W6 985, 996 Queens Parade, Mk 3 bus 333 CC33 As above CC34 Showing construction at Nicholson & Gertrude – Bourke St CC35 W2 223 on Burnley temporary bridge – VR track expansion CC36 W5 823 – ditto CC37 Tram on old bridge prior to removal CC38 W2 433 on temporary bridge with new bridge beams and old track CC39 Looking down showing temporary single track – Swan St CC40 Tait train passing under tram bridge CC41 SW6 on single line – off loading CC42 W2 547 at City Road Junction CC43 City Road Jtn – 1969 – 596 and 771 CC44 City Road Jtn – 1969 – 596 and 771 (same as CC45 438 in Flinders St CC46 355 somewhere CC47 552 somewhere CC47A 364 at Preston Workshops? CC48 W2 334 on Traverser – Preston Workshops CC49 Wellington pade – large line up of trams, c1950 925, and 611 CC50 W2 493 Franklin st – advertising for Savings Certificates CC51 Possibly 551 with advertising for fund raising for Blind institute CC52 249 at Hawthorn – Riversdale Junction – with a Tally Ho and Village Fair Aux. board CC53 MMTB Postcard of 511 CC54 Wattle Park terminus with Single line warning sign CC55 Wattle Park Duplication CC56 36 at Domain Junction – 833 CC57 36 at Domain Junction CC58 36 at Domain Junction with 810 and 833 CC59 36 in Swanston by Flinders St Station CC60 36 in Spencer St at A’Beckett CC61 36 crossing Collins St CC62 36 crossing Collins St CC63 36 northbound in St Kilda Road with Shrine in background CC64 36 northbound in Swanston St at Flinders St CC65 Postcard – Ballarat 36 in Domain Road CC66 Postcard - Stampshow – Hawthorn Horse tram CC67 Postcard - Stampshow – Peace cable tram CC68 Postcard - 1041 and cable car set 1 at Preston CC69 Postcard - Colins & Elizabeth – greetings from old Melbourne CC70 Postcard - Cable car set at Preston CC71 Postcard - Twentyman’s cable cars CC72 Postcard - Nu-color-vue – horse tram 256 CC73 Cable car set – Market & Flinders CC74 Cable trams at Twentymans’ in their shed CC75 Cable tram track at Bourke & Spencer prior to removal CC76 Cable tram bogie at Preston Workshops – used as a dolly CC77 Cable trams at Twentymans’ CC78 Postcard - Valentines – Bourke looking west from Swanston CC79 Postcard - Rose 3938 – Bourke at Swanston – the Leviathan building CC80 Postcard - Valentines – Elizabeth St looking south from Collins – No. 19 CC81 Postcard - Rose P4765 – Bourke St Melbourne CC82 Postcard - Rose 4090 – cable tram passing Parliament house CC83 Postcard - Valentines – GPO Elizabeth St CC84 Interior of cable trailer with clothing on a set CC85 Elizabeth St looking north CC86 Cigarette card - Collins St No. 41- WD HO Wills CC87 Postcard - Rialto building with cable set CC88 Postcard - Valentines - Swanston at Flinders looking north CC89 CC90 Q 150 Hanna St – dated on rear CC91 176 turning – photo ex Alan Jungworth CC92 161 on Princes Bridge – minimum fare 4d sign and Inspector CC93 459 at Point Ormond CC94 158 at Gordon St – side on view CC95 X 217 in Swanston St CC96 X 217 in Swanston St with an East Brighton destination CC97 T177 CC98 T177 Peel St – no destination roll – being transferred? CC99 X1 462 in Glenhuntly Road to Point Ormond CC100 X1 462 in Glenhuntly Road to Elsternwick Rly Station CC101 X1 462 in Glenhuntly Road to Point Ormond CC102 Q 150 Hanna St CC103 190 at Camberwell Depot CC104 T182 at Footscray CC105 X1 466 and W2 at Footscray CC106 190 at Camberwell Depot CC107 X1 467 Barkly St Footscray CC108 X2 679 turning into William St from La Trobe St CC109 X2 677 Glenhuntly Road with Point Ormond Destination CC110 Postcard T180 CC111 Postcard format – X1 467 on a truck – see also CC178 CC112 Postcard format – X1 467 at Wantirna South CC113 Q200 and SW6 896 at Thornbury – has labels on rear CC114 T177, Ballarat Road – has labels on rear CC115 T178 at Point Ormond CC116 Postcard X1 465 and 466 CC117 Postcard – X2 676 CC118 Postcard – TMSV X2 217 CC119 810 on temporary bridging – 24-12-67 CC120 W2 575 – Queens Parade junction in, still temporary bridging, substation under construction CC121 Forming Queens Parade Junction base slab CC122 W2 596 prior to tramway works – all tracks still in position CC123 It’s a mass of reinforcing – bridging being formed CC124 Looking north with substation being built CC125 Looking east with some rather tight curves, Wellington St still in use CC126 SW6 958 ex Wellington St with all tracks and signal box and buildings. CC127 Victoria Pde at Gisborne looking east – at least 4 cars CC128 SW6 893? With dash canopy lights and SW6 862 and a man with a newspaper CC129 SW6 894 on the S curves, with tram in Wellington St CC130 Similar photo CC131 W2 564 turning into Wellington St – the concrete tracks are not that old CC132 W2 552 running out of Wellington St CC133 W5 732 from Fitzroy St into St Kilda Road with next iteration in position – very wonky CC134 W5 764 turning into Fitzroy St CC135 SW6 947 turning from Wellington St CC136 W2 586 running out of High St CC137 W2 500 turning into Wellington St CC138 W2 543 in Wellington St inbound CC139 L103 with St Kilda Junction destination, and a tower truck on right CC140 Workmen – new track in Queensway in use CC141 Ditto CC142 L103 in Queensway, and another car in bound CC143 Looking east along Wellington St which has been taken out of use. Also a MMTB Roller CC144 W5 824 and a W2 and all types of wobbly temporary track CC145 W2 354 to High St CC146 Sw6 947 on the S bends CC147 W2 500 looking north – tram on the S bends CC148 SW6 896 leaving the S bend CC149 W2 357 and a MMTB City bus with trees/gardens on the side CC150 W5 817 Elliot Ave – see also CC302 CC151 W2 552 – note the large trolley bridge CC152 W2 550 at depot or workshops CC153 1B truck CC154 SW2 432 CC155 W2 155 at Glenhuntly CC156 SW6 937 on AETA tour? CC157 X2 677 on Footscray service – Ballarat Rd? CC158 W2 641 – High St Kew? CC159 SW6 847 – Power St Hawthorn CC160 Simpson St – big line up CC161 W2 546 truck No. 1? CC162 W2s at Glenhuntly depot CC163 No. 15 truck under 899 CC164 206 and other junk at Preston Workshops CC165 W in Swanston St Melbourne – Rose series card CC166 Y1 613 Batman Ave?? or William St at Collins CC167 Tram plans CC168 X 217 Swanston St – see also 95 and 96 CC169 217 in Swanston St – same as 95 CC169A 192 in St Kilda Road at Princes bridge CC170 192 in St Kilda Road at Princes bridge CC171 Bendigo 3 arriving Malvern depot – being unloaded CC172 Ditto CC173 T180 at a depot CC174 X1 463 wheel set CC175 C30 – dog car side view – close up CC176 C30 dog car CC177 206 and 30 at Preston Workshops CC178 X1 467 on a truck – see CC111 also CC179 42 CC180 42 at a depot, no destination box CC181 W2 556 1A type truck CC182 Flinders St Station – Rose Series CC183 W7 1035 Spring – Nicholson St CC184 W7 1022 MMTB Post Card CC185 Adelaide 178 – has on rear – R. Lilburn 4/82 CC186 Adelaide 175 – has on rear – R. Lilburn 4/82 CC187 Y1 610 on AETA tour CC188 Y1 610 on AETA tour with large group – Point Ormond CC189 AETA display – has GH55-32 in pencil on rear CC190 AETA display – has GH55-29 in pencil on rear CC191 Y1 610 on AETA tour with large group – Point Ormond CC192 VR 53 at Footscray CC193 VR cars 40 and 34 at Elwood wash dock CC194 W7 1024 as the 1970 Christmas tram CC195 Geelong – loading a set of 22E trucks CC196 Geelong 10 and 23 running an AETA special CC197 Geelong – AETA special CC198 Geelong 7 at Junction CC199 Geelong 10, in the city CC200 Geelong 33 with Belmont destination CC201 Geelong 15 Eastern Park destination 29-3-1948 CC202 Geelong 23 at Railway Station – 29-3-1948 CC203 Geelong 23 at Railway Station – 29-3-1948 CC204 Geelong – loading a bogie tram CC205 Geelong – loading a bogie tram CC206 Geelong 40 – loaded on truck CC207 Geelong 40 – on jacks CC208 Geelong 40 on jacks – 19 behind CC209 Geelong 38 with two workers on either side CC210 – 214 Australian Historic Tramways stamp folder and set CC215 Bendigo 17 at depot – has dup JBS on rear CC216 Bendigo 20, 29 bogie and straight sill car at Charing Cross CC217 Bendigo one man bogie Pall Mall CC218 Bendigo – Bogie 23, other cars and welding truck at depot CC219 Bendigo 7 with Quarry Hill destination CC220 Bendigo 21 with Lake Weerona destination CC221 ESCo 18 Ballarat CC222 Ballarat bogie 22 on AETA special CC223 Ditto CC224 Ballarat 34 at Stones Corner – R Lilburn CC225 Ballarat 15 in Bridge St – R Lilburn CC226 Ballarat 40 at Gardens – R Lilburn CC227 Ballarat 37 running out of depot – R Lilburn CC228 Postcard – Valentines – Sturt St with loaded horse tram trailer CC229 AETA Geelong tram tour ticket – 29-3-1948 CC230 Postcard – Geelong – Valentine 2114 – T&G building CC231 Postcard – PMTT ! – High St Malvern CC232 Postcard – Empire – Glenferrie Road, Malvern at Wattletree Rd CC233 Postcard Y469, MMTB CC234 Postcard Z2 Spring St CC235 Postcard – Z1 MMTB CC236 Postcard – Stamp Show W1 431 CC237 Postcard – Stamp show B2005 CC238 Postcard – Stamp show W6 982 CC239 Postcard – Valentines 1264 – Johnstone Park with tram in distance CC240 Postcard – Rose 10711 – Swanston and Lonsdale – Hospital and W232 CC241 Postcard – Rose 4827 – Fitzroy St St Kilda W2 362 and 548 CC242 Postcard – Valentines – 939 – St Kilda War Memorial, W and a R? CC243 Postcard – Valentines – 572 – St Kilda War Memorial, W 413 and 140? CC244 Postcard – Valentines – 938 – Uper and Lower Esplanade – L 104 CC245 Postcard – St Kilda Rd at Princes Bridge Y1 and W CC246 Postcard – Biscay BG82 – W5 814 - CC247 Postcard – Biscay 796112 – Bourke St looking west CC248 Postcard – Biscay 796109 – Bourke St looking east CC249 Postcard – Biscay 2AUS58 – Z5 Bourke St CC250 Postcard – Biscay BG 249 – Swanston St CC251 Postcard – National View – St Kilda Rd – shrine and Prince Henrys W2 405 CC252 Postcard – Nu color vue – 11 ML 156 – St Kilda Rd CC253 Postcard – Nu color vue – 11 ML 153 – Swanston St CC254 Postcard – Nu Color vue – Collins St 442 CC255 Postcard – Pitt card – Adelaide – H 364 at Victoria St CC256 Postcard – SPER L/P 154 CC257 Postcard – BTMS – 550 CC258 Postcard – SPER – Brisbane 295 CC259 Adelaide 131 at Burnside – has R Lilburn on card, c1911 CC260 Adelaide 194 CC261 Adelaide 235, with two crew, The News photo CC262 Rockhampton, outside post office – has source of photo details CC263 Sydney – 2086 and 2062 arriving Circular Quay CC264 Sydney – P class – Pitt St? CC265 Sydney – 1610 at Circular Quay CC266 Brisbane 99 and 468 CC267 Sydney with bridge behind CC268 Steam tram Paramatta Park – 103 CC269 Sydney – Museum Station =- Elizabeth St CC270 Sydney – weed burner 137S at a loop Demonstrates the work of Charles Craig in photography and collection of prints.Assembled album in a black presentation folder of 270 photographs from the Charles Craig Collection - 86 sleeves - part 1 of 2. All photographs have been scanned and placed on the Museum's G drive. A list of all photographs with details where possible has been compiled. Victorian Provincial, Launceston, Hobart and Sydney tram photos have been transferred to other Museums, image files retained.melbourne, tramways, tramcars, trams, charles craig, st kilda junction, trackworks -
 Bendigo Military Museum
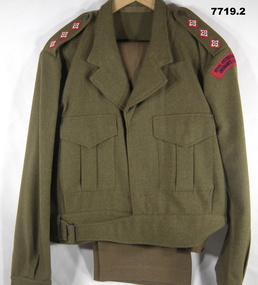
Uniform - JACKET, TROUSERS, BATTLE DRESS, ARMY, 1. 1977 2. 1968
... Bendigo Military Museum 37 - 39 Pall Mall Bendigo ...Uniform issued to "LOCKYER" 114493.Jacket - khaki colour wool serge fabric, Battle dress style, belted at waist with metal buckle. Dark green plastic buttons. Collar, shoulder epaulettes, two front pockets with concealed button down flap and sleeve cuffs. Shoulder epaulettes - rank three pips, red, cream and brown embroidery for Captain. Shoulder sleeve insignia, red fabric with dark blue embroidered lettering. "ROYAL AUSTRALIAN ARMY/ ORDNANCE CORPS". Green colour cotton twill fabric pocket and waist lining, manufacturers white cor=tton label inside pocket lining. 2. Trousers - khaki colour wool serge fabric, Battle Dress style, with fob pocket, two side pockets, one back pocket with concealed button down flap. Green colour polyester fabric lining with manufacturers white cotton label inside on back pocket, 6 button fly. Manufacturers information on labels - black ink print. 1. "A.G.C.F./ VIC 1977/^ /8405.66.025.6423/ SIZE OF CHEST/ SIZE 109/ 112PR/ YARRA FALLS 69/ BATCH, 21657/ DRY CLEAN ONLY/ CREASE UPPER/ HALF OF LAPELS ONLY/ NO./ NAME" Handwritten - blue ink pen - "LOCKYER/ 114493". 2. CONWAY BROS. PTY LTD/ ADELAIDE ^ 1968/ CLASS 8405-66-025-6199/ Y.F. PP2/ SIZE & WAIST 41PR/ MATCHING JACKET 43/44 P.R. / Dry Clean only/ Repress on original seams/ Creases set by Si-ro-set./ mending patch attached/ NAME/ ARMY NO." Handwritten black ink pen "LOCKYER/ 114493"uniform, army, battle dress, lockyer -
 Bendigo Military Museum
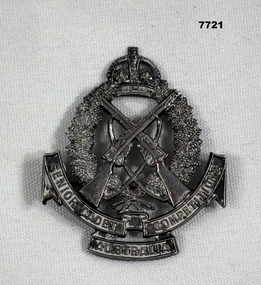
Badge - ARMY CADET BADGE, 1913-14
... Bendigo Military Museum 37 - 39 Pall Mall Bendigo ...Part of the "Leo Reoch Cohn" Collection. See Catalogue No. 5527.2 for his service record.Silver coloured metal badge featuring crossed rifles below a King's Crown. Rifles surrounded by a wreath featuring wattle flowers. Below rifles is a anner with lettering. Pin fastener soldered on back.Lettering on banner: "SENIOR CADET COMPETITIONS, AUSTRALIA" Stamped on back: CADET L. COHN, H.COY, 68th BATTN, BRIGADE SERIES, 1913-14.army cadet, rifle shoooting, badge, leo reoch cohn -
 Bendigo Military Museum
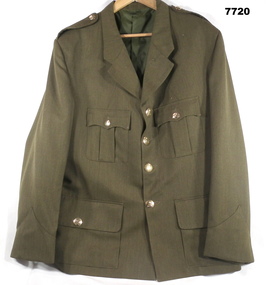
Uniform - JACKET, SERVICE DRESS, ARMY, 1989/90
... Bendigo Military Museum 37 - 39 Pall Mall Bendigo ...Uniform issued to "LOCKYER" 114493.Jacket - khaki colour wool/polyester fabric. Service dress style, gold colour plastic buttons with metal shank and split ring. Buttons have raised emblem of Queens crown, crossed swords and Kangaroo. Royal Australian Army. Collar, shoulder epaulettes, four front pockets, top two with button and two metal studs on flap, lower button down flap. Green colour polyester fabric lining with white cotton manufacturers labels inside right.Manufacturers information on labels - black ink print faded to light grey/blue. "RUSS JOHNSTON/ -TAILOR- /VIC^ 1989/90/ DEN 8405-66-019-8188/ DRYCLEAN ONLY/ REPRESS USING IRON AND DAMP CLOTH/ OR MEDIUM TO HOT STEAM IRON/ CREASE UPPER HALF OF LAPELS ONLY" "REGIMENTAL NO./NAME" Handwritten, blue ink pen "LOCKYER". uniform, army, service dress, lockyer -
 Bendigo Military Museum
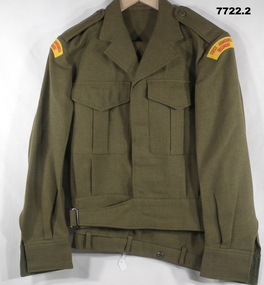
Uniform - JACKET, TROUSERS, BATTLE DRESS, ARMY, 1978-80
... Bendigo Military Museum 37 - 39 Pall Mall Bendigo ...Name on label - uniform issued to; 1. "GITTINS" 331103" 2. "J.J. SMITH"1. Jacket - khaki colour wool serge fabric. battle dress style, belted at waist with metal buckle. Dark green plastic buttons. Collar, shoulder epaulettes, two front pockets with concealed button down flap and sleeve cuffs. Shoulder sleeve insignia, red cotton embroidered lettering on yellow colour fabric - "FIRST ARMOURED REGIMENT". Green colour cotton fabric lining to waistband. White cotton manufacturers label inside left pocket. 2. Trousers - Khaki colour wool serge fabric. Battle dress style with fob pocket, two side pockets, one back pocket with button down flap. Green colour polyester fabric lining to pockets, cotton fabric lining to waistband. Metal zipper fly,Manufacturers information on labels - black ink print. 1. "A.G.C.F."/VIC. 1980/^ /8405.66.025.6406/SIZE OF CHEST/ SIZE 89/91R/ AWM 87/ BATCH 15/ DRY CLEAN ONLY/ CREASE UPPER/ HALF OF LAPELS ONLY/ NO./ NAME" Handwritten - black ink pen "331103/GITTINS". 2. A.G.C.F./VIC 1978/^/8405-66--025-6187/ AWM 1969/ BATCH 18/ SIZE WAIST 76s/ DRY CLEAN ONLY/ CREASES SET/ BY SIRO SET/ MENDING PATCH ATTACHED" Handwritten = black ink pen "J.J. SMITH".uniform, army, battle dress, gittins, smith -
 Bendigo Military Museum
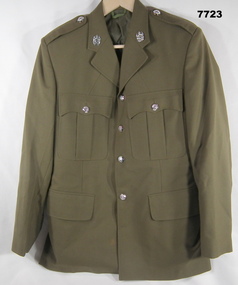
Uniform - JACKET, SERVICE DRESS, ARMY, 1990
... Bendigo Military Museum 37 - 39 Pall Mall Bendigo ...Jacket - khaki colour, wool/polyester fabric, Service Dress style. Silver colour plastic buttons with shank and metal split ring. Buttons have raised emblem, with Armoured Corps Badge logo. Collar, shoulder epaulettes, four front pockets, top two with buttons and two metal press studs on flap, lower with flap. Two lapel badges, metal, Armoured Corps Badge logo. Green colour polyester fabric lining with white polyester fabric manufacturers label, inside left.Manufacturers information on labels - black ink print, "ADI/ VIC 1990^ / 8405.66.019.8465/ SIZE 102. 5R/ MATCHING TRS/ SIZE 87.5R/ SHADE NO. D/ ARMY NO/ NAME" "DRY CLEANING ONLY/ RE-PRESS USING IRON AND/ DAMP CLOTH OR MEDIUM/ TO HOT STEAM IRON/ CRESE UPPER HALF OF LAPELS ONLY".uniform, army, service dress, gittins -
 Bendigo Military Museum
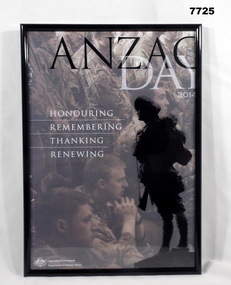
Poster - POSTER, ANZAC DAY, FRAMED, 2014
... Bendigo Military Museum 37 - 39 Pall Mall Bendigo ...Poster - paper, black and white print with foreground silhouette of a statue of a soldier with background muted colour photograph of a group of soldiers. Frame - moulded black plastic with glass front and MDF Board backing; with metal clips.Lettering on poster "ANZAC/ DAY/ 2014/ HONOURING/ REMEMBERING/ THANKING/ RENEWING"framed accessories, poster, anzac day -
 Bendigo Military Museum
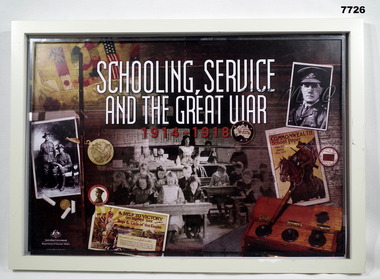
Poster - POSTER, ANZAC DAY, FRAMED
... Bendigo Military Museum 37 - 39 Pall Mall Bendigo ...Poster, paper with white and red print. Montage in colour and black and white print of a collection of photographs, posters and postcards from WW1. Frame - cream enamel paint on timber frame with glass front and black cardboard backing with stand.Lettering on poster. "SCHOOLING, SERVICE/ AND THE GREAT WAR/ 1914-1918".framed accessories, poster, anzac day -
 Bendigo Military Museum
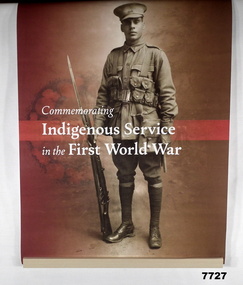
Poster - POSTER, ANZAC DAY
... Bendigo Military Museum 37 - 39 Pall Mall Bendigo ...Poster - paper, with white print, foreground full length black and white portrait photograph of an indigenous soldier. Background muted red to brown colours. Frame - top and bottom, timber slats adhered to the poster paper with top hanging string.Lettering on Poster. "Commemorating Indigenous Service in the First World War".framed accessories, poster, anzac day -
 Bendigo Military Museum
Uniform - JACKET, TROUSERS, SHIRT, BATTLE DRESS, ARMY, 2. 1990 3. 1988
... Bendigo Military Museum 37 - 39 Pall Mall Bendigo ...Uniform issued to "P. Green" No. 32045731. Jacket, Khaki colour wool serge fabric. Battle Dress style, belted at the waist with metal buckle. Dark green plastic buttons. Collar, shoulder epaulettes, two front pockets with concealed button down flap, sleeve cuffs. Green colour cotton twill fabric lining to waistband. Manufacturers white cotton fabric label - left pocket lining. Removeable tag on inside collar. 2. Trousers, khaki colour wool serge fabric. Battle Dress style with fob pocket, two side pockets, one back pocket with concealed button down flap. Dark green plastic buttons, metal zipper fly. Manufacturers white cotton fabric label - back pocket lining. Green colour polyester lining. 3. Shirt, Khaki colour cotton/polyester long sleeves, with shoulder epaulettes and cream plastic buttons. Two front pockets with button down flaps. Manufacturers white cotton fabric label inside back below collar.Manufacturers information on labels - black ink print. 1. "ADI P/L/ VICTORIA/ 1990/ ^ / 8405-66-025- 6418/BATCH P/ SIZE 102/104L/ ARMY NO./ NAME/DRY CLEAN ONLY/ CREASE UPPER/ HALF OF LAPELS ONLY" 2. "ADI P/L/ SUB-4 VIC 1990/ ^ / 8405-66-025-6183/ BATCH S/ SIZE 84R W.84/ DRY CLEAN ONLY/ RE-PRESS ON ORIGINAL/CREASES SET BY/ SI-RO SET/ MENDING PATCH ATTACHED/ ARMY NO/ NAME" 3. " A.G.C.F./ 1988/ ^/ SIZE 40/84/ 8405-66-088-7098/ SERVICE NO./ NAME/ DO NOT BOIL OR WRING/ MACHINE WASHABLE/ DRIP DRY/ IRON LIGHTLY/ WITH WARM IRON" Handwritten - blue ink pen "3204573/Green" uniform, army, battle dress, p. green -
 Bendigo Military Museum
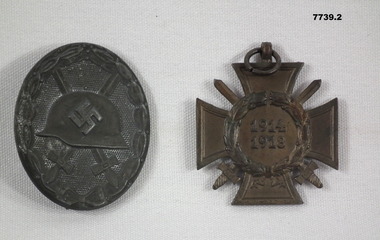
Badge - BADGES, GERMAN, WW1
... Bendigo Military Museum 37 - 39 Pall Mall Bendigo ...1. Badge awarded to soldiers wounded in action during WW2. 2. Honour Cross or Hindenburg Cross created in 1934 to commemorate service of German people during WW1. Under Hitler was the only official service decoration to be worn.1. Original egg shaped WW2 wound badge. Edges have flower garland. In middle is a German Infantry helmet with a Swastika over two crossed swords. Dark grey metal and pin on back. 2. Replica of WW1 German Honour Cross. Brown metallic badge with two crossed swords over a cross (Hindenburg Cross). A ring on top to hang on a ribbon 1914-1918. In centre of Circle of flowers.1. Nil other than a Swastika on a hat. 2. "1914", "1918" on front. honour cross, wound badge, german, ww2/ww1 -
 Bendigo Military Museum
Sign - STEEL SIGN, ROYAL AUSTRALIAN ENGINEERS CONSTRUCTION SQUADRON, c.2022
... Bendigo Military Museum 37 - 39 Pall Mall Bendigo ...21st Construction Squadron is part of the 6th Engineering Regiment based at Amberley and is drawn mainly from Regular Army.White Square steel sign with hole in each corner on front and image of a fighting rooster (red and yellow) over the number 21 in purple. Surrounded by two concentric circles with the identification of the unit also in purple. All wrapped in clear plastic on back a stamp saying who made the steel. Some codes and dates.Front - "Royal Australian Engineers - Construction Squadron". Back - Stamp "Steel made by Bluescope CC38A Z47910. 22 Sep 2022 8..." Twice.sign, royal australian engineers -
 Bendigo Military Museum
Plaque - PLAQUE, BLANK
... Bendigo Military Museum 37 - 39 Pall Mall Bendigo ...Souvenir Plaque from Australian War Memorial.Small wooden brown shield with a gold plastic Rising Sun Emblem with a crown in the centre and The Australian Army at the bottom. on the back is a plastic fold out stand attached by two screws.Rising Sun Emblem has "THE AUSTRALIAN ARMY".plaque, souvenir -
 Bendigo Military Museum
Uniform - SLOUCH HAT, c.1942
... Bendigo Military Museum 37 - 39 Pall Mall Bendigo ...Iconic design Australian Slouch hat worn by Australian Soldiers.Brown Felt hat, size 7, light brown material band around crown. Stud on left side to button on rim. Black Australian Rising Sun Badge on left side. Inside leather rim around crown.Inside says "N.121 - Fur Felt - 7 -1942"slouch hat, ww2 -
 Bendigo Military Museum
Uniform - SLOUCH HAT
... Bendigo Military Museum 37 - 39 Pall Mall Bendigo ...Australian Army Issued Slouch Hat.Brown woollen fur felt hat. Pale brown material wrapped around outside of rim. Gold clip attaching left side of hat to crown. Gold colour Rising Sun Emblem on left side but not official Army Emblem. Inside size 61, makers label, cleaning instructions. Black leather rim sewn on the inside of crown.Inside "100% fine wool felt" "Made in Australia" "Size 61" .uniform, slouch hat, army -
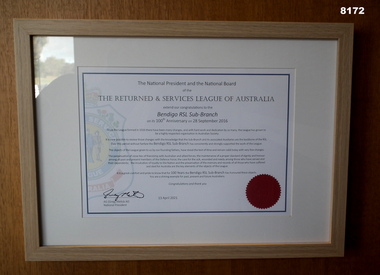 Bendigo Military Museum
Certificate - CERTIFICATE FRAMED, 100 YEARS BENDIGO RSL, 13.4.2021
... Bendigo Military Museum 37 - 39 Pall Mall Bendigo ...The Certificate relates to The Bendigo RSL/Bendigo District RSL being 100 years old on 28th September 2016. The certificate talks about the Objects of the League and changes over the years. The League itself was formed in 1916. Refer Cat No’s 8000.2, 8019, 8020, 8073P. This item is on display in the Foyer entrance to the Bendigo District RSL Sub Branch Inc Havilah Road.Framed Certificate, frame is light brown timber, certificate has a white overlay, the certificate is white background with all print in black, there is a faint background section of the RSL Badge in colour on the left hand side, bottom RH side is a red seal. Certificate is signed and dated.Main heading is, “The Returned & Services League of Australia”. Signed by the National President of the RSL, “Greg Melick AO - 13 April 2021”brsl, smirsl, bdrslinc, certificate, 100 years -
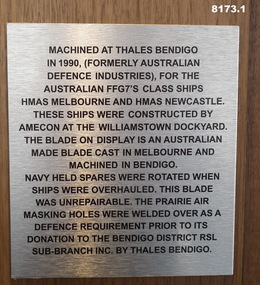 Bendigo Military Museum
Equipment - SHIPS PROPELLAR RAN, C.1990
... Bendigo Military Museum 37 - 39 Pall Mall Bendigo ...This a large item as per the dimensions. Due to the placement behind a large glass cabinet makes getting a decent image due to all the background light and other material. The plaque goes a long way to an explanation. This item is on display in the front Foyer entrance of the Bendigo District RSL Sub Branch in Havilah Road. Refer also Cat No 8177 for propellor and shaft..1) Plaque silver colour with black writing re the details of the making of this ships propellor for the RAN. .2) Typical propellor blade shape with a round base with countersunk holes in for attachment to the main ships system.brsl, smirsl, bdrslinc, propellor -
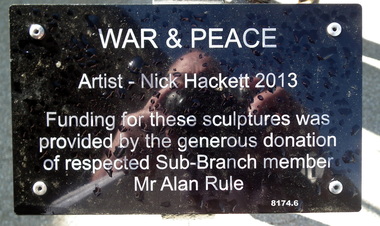 Bendigo Military Museum
Sculpture - WAR & PEACE FIGURES, C.2013
... Bendigo Military Museum 37 - 39 Pall Mall Bendigo ...This display is situated on the RH side of the front entrance to the Bendigo District RSL in Havilah RoadSix metal sculptures representing the. Australian Army, Navy, Airforce, Women in the Forces over time during War & Peace. Consists of 4 figures standing, 1 kneeling with a child standing. Plaque black colour on a stand with white text re the Artist and Donor. The dimension shown is an average of the standing figures.As per the photo of the plaque.brsl, smirsl, bdrslinc, sculpture -
 Bendigo Military Museum
Sculpture - WOODEN STATUE, Unknown
... Bendigo Military Museum 37 - 39 Pall Mall Bendigo ...There is a story to this carving, its history and making, this is being put together. The item is on display in the front lounge entrance to the Bendigo District RSL Havilah Road.Hand carved statue brown colours representing an Australian soldier with a rifle in the “Rest on your Arms” position. The carving shows one bandolier, side pack and bayonet, the helmet is a real steel one with chin strap.brsl, smirsl, bdrslinc, statue -
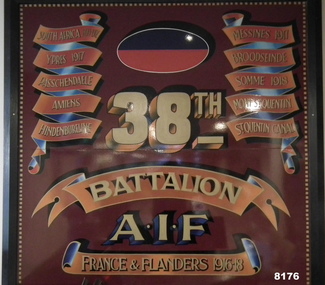 Bendigo Military Museum
Honour Board - 38th BN BATTLE HONOURS, Unknown
... Bendigo Military Museum 37 - 39 Pall Mall Bendigo ...This board shows there are 7 Battle Honours which includes South Africa 1898 - 1902. This is due to Lineage pre the formation of the 38th BN in June 1916 in Bendigo. Refer Cat No 4435 for the actual 38th Bn Colours. This item is on display in the rear foyer entrance of the Bendigo District RSL in Havilah Road. Refer Cat No 8141P for the history of donation and placement across the RSL.Large board with brown/red background with ornate edge all round, each side are the Battle Honours of the Battalion in scroll formation, at the top central is the Colour Patch of the Battalion, the “38th” under that then”Battalion AIF”, at the bottom in a scroll is “France & Flanders 1916 - 18”brsl, smirsl, bdrslinc, 38th, battle honours -
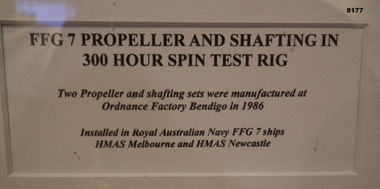 Bendigo Military Museum
Photograph - PHOTOGRAPH, FRAMED, C.1986
... Bendigo Military Museum 37 - 39 Pall Mall Bendigo ...This item is on display in the Bistro area of the Bendigo District RSL Havilah Road. Refer Cat No 8173.2 for an actual propellor in the same venue. Due to the position and light a good photo was not possible.Framed colour photo, brown timber frame with photo in a white inset, the photo shows a ships shaft and propellors under going a 300 hour spin test inthe Ordnance Factory Bendigo, under the photo is a description detail of the test procedure, where built and for which RAN ships.brsl, smirsl, bdrslinc