Showing 176 items matching "tramcar part"
-
 Melbourne Tram Museum
Slide - Set of 3, Tramway Museum Society of Victoria (TMSV), Riversdale Road & Power St Hawthorn, Nov. 1973
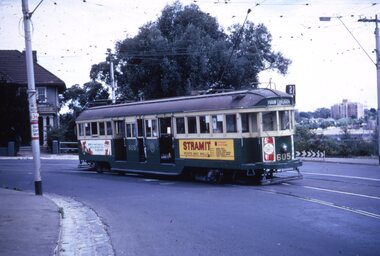
Set of three colour slides of the corner of Power St and Hawthorn. The track was reconstructed to realign the roadway as part of roadworks to eliminate a sharp curve at the intersection in Nov. 1973 1 - W2 605 turning from Power St into Riversdale Road before reconstruction of the corner. Shows the location of the tram stop. Slide no. MP120 2 - SW6 879 turns from Power St into Riversdale Rd with works underway. Slide No. MP154 3 - W2 380 at the revised intersection following the work to reconstruct the corner. Slide No. 98. The intersection has since been reconstructed and the crossover relocated. Yields information about the corner of Power St, Riversdale Road, Wallen Road Hawthorn.Kodachrome colour slides, cardboard mount, duplicate.Has a number in pencil and stamped "Tramways Museum Society Victoria" on rear.tramcars, wallen road, power st, riversdale road, riversdale junction, roadworks, tram 605, tram 879, tram 380 -
 Melbourne Tram Museum
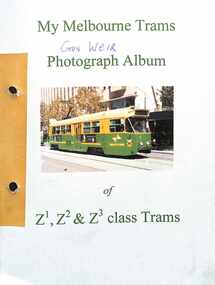
Album, Gus Weir, My Melbourne Trams - Z1, Z2 & Z3 class trams, 1980 to 2011
Compiled by Gus Weir of the Wellington Tramway Museum, former Wellington tram driver. Comprises some 70 double-sided album sheets for photographs of Melbourne Z1, Z2 and Z3 class trams. Scanned into 6 parts as pdf files. Many photos taken at Domain Interchange, Swanston Walk, Bourke St, St Kilda Road, Elizbeth St and La Trobe St. Photos by Gus himself during Melbourne visits with some by B R Symons, D W Jones, and Michael P Hawkins Part 1 - Introduction - Z1, 1, 2, 3, 4, 5, 7, 9, 10, 14, 19 & 22. Part 2 - Z1, 28, 31, 34, 37, 39, 49, 43, 45, 47, 49, 50, 52, 54, 56, 58, 59, 61, 63, 65, 71, 70, 73, 80, 81, 84, 85, 86, 87, 89, 93 & 95. Part 3 - Z1 & Z2 & Z3 - 96, 100, 101, 108, 112, 113, 114, 115, 116, 117, 120, 122, 123, 125, 126, 128, 199, 136, 137 & 138 Part 4 - Z3 138, 139, 148, 150, 151, 154, 157, 155, 158 (Royal Tram), 160, 163, 164, 166, 167, 168, 169, 170 & 173 Part 5 - Z3 175, 176. 178, 179, 181, 182, 185, 186, 187, 193, 194, 196, 197, 199, 201, 203, & 204 Part 6 - Z3 204, 205, 208, 209, 211, 217, 219, 220, 222, 223, 224, 225, 226, 228, 229 & 230, Yields detailed information about Melbourne trams from 1980 to 2011Set of 70 album sheets most with four photos - some blanks to allow for further photos. Each photo has a label on the rear, with details of the photograph location, photographer and date. An insert label on each page gives tram number, location and date. See last image file - Gus Weir Obituary - Wellington Tramway Museum 2019.tramways, tramcars, albums, z1 class, z2 class, z3 class, melbourne, mmtb, the met, ptc, yarra trams, swanston trams, m>tram, domain junction, swanston st, bourke st -
 Melbourne Tram Museum
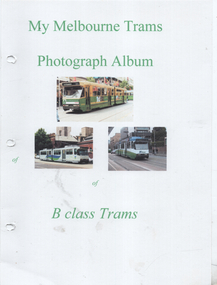
Album, Gus Weir, My Melbourne Trams - B class trams, 1990 to 2011
Compiled by Gus Weir of the Wellington Tramway Museum, former Wellington tram driver. Comprises some 44 double-sided album sheets for photographs of Melbourne B class trams. Scanned into 4 parts as pdf files. Many photos taken at Domain Interchange, Swanston Walk, Bourke St, St Kilda Road, Elizbeth St, docklands, St Vincents Plaza, and La Trobe St. Photos by Gus himself during Melbourne visits. Part 1 - Introduction - B1 - 2001, 2002, B2 2003, 2005, 2009, 2010, 2027, 2010, 2012, 2014, 2106, 2026, 2027, 2032 & 2034. Part 2 - B2 2036, 2037, 2040, 2041, 2042, 2045, 2047, 2048, 2049, 2051, 2052, 2055, 2060, 2063, 2067, 2119, 2068, 2069, 2077 & 2078 Part 3 - B2 2078, 2085, 2087, 2093, 2094, 2047, 2049, 2100, 2101, 2103, 2089, 2114, 2104, 2105, 2106, 2108, 2109 & 2111. Part 4 - B2 2112, 2115, 2117, 2120, 2123, 2125. 2126, 2131 & 2132.Yields detailed information about Melbourne trams from 1990 to 2011Set of 44 album sheets most with four photos within a PerforMore spring clip album, heavy card covers, plastic cover with a Negative pocket, and some blanks to allow for further photos. Each photo has a label on the rear, with details of the photograph's location, photographer, and date. An insert label on each page gives the tram number, location, and date.tramways, tramcars, albums, melbourne, mmtb, the met, ptc, yarra trams, swanston trams, m>tram, domain junction, swanston st, bourke st, elizabeth st, b class, b1 class -
 Melbourne Tram Museum
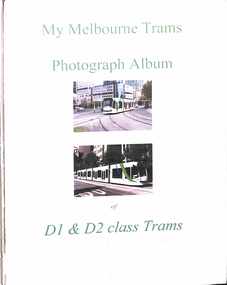
Album, Gus Weir, My Melbourne Trams - D1 & D2 class trams, 2002 to 2012
Compiled by Gus Weir of the Wellington Tramway Museum, former Wellington tram driver. Comprises some 43 double-sided album sheets for photographs of Melbourne D1 & D2 class trams. Scanned into 4 parts as pdf files. Many photos taken at Domain Interchange, Swanston Walk, Bourke St, St Kilda Road, Port Junction, Elizbeth St, docklands, Swanston Walk, St Vincents Plaza, Toorak, and La Trobe St. Photos by Gus himself during Melbourne visits. Part 1 - Introduction - D1 3501, 3502, 3503, 3504, 3505, 3506, 3508, 3510, 3511, 3512, 3513 Part 2 - D1 3513, 3514, 3515, 3516, 3517, 3519, 3521, 3522, 3523, 3524, 3525, 2526, 3529, 3530 Part 3 - D1 3531, 3534, 3536, 3537, 3538, D2 5001, 5002, 5003, 5103, 5004, 5005, 5006, 5007, 5008, 5016, 5010 Part 4 - D2 5010, 5011, 5013, 5014, 5015, 5016, 5017, 5018, 5019, 5020, 5021Yields detailed information about Melbourne trams from 2002 to 2012Set of 43 album sheets generally with four photos within a bound album, heavy brown card covers, plastic cover with a Negative pocket, and some blanks to allow for further photos. Each photo has a label on the rear, with details of the photograph's location, photographer, and date. An insert label on each page gives the tram number, location, and date.tramways, tramcars, albums, melbourne, yarra trams, m>tram, domain junction, swanston st, bourke st, elizabeth st, d1 class, d2 class -
 Melbourne Tram Museum
Photograph - Z28 Flinders St - Swanston St, late 1980s
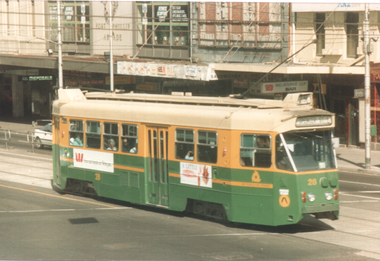
Photo of Z28 (Spencer St, route 75) in Flinders St after crossing Swanston St. The tram has The Met logos, an advert for Westpac Bank. In the background is part of Young & Jackson Hotel and the Port Phillip Arcade. Photo taken from Princes Gate Plaza.Yields information about Melbourne trams late 1980s.Colour photograph with paper parts on rear.melbourne, tramways, tramcars, flinders st, z class, tram 28, route 75, trams -
 Melbourne Tram Museum
Photograph - Malvern tram depot, 8/12/1994
Photo of the front of the "new shed" or the northern part of Malvern Tram depot with Z and W class trams in the view.Yields information about Malvern Depot in 1994.Colour photograph printed on Kodak paper.melbourne, tramways, tramcars, malvern depot, z class trams -
 Melbourne Tram Museum
Administrative record - Minute Book - Digital Image, Melbourne & Brunswick Coburg Tramway Trust, 1914 to 1917
Minute book of the Trust, scanned in 10 parts - 187 pages along with many typed pages of accounts, The minutes detail the various events, contracts and construction of the various tram lines and issues encountered such as trackwork problems. Part 1 - 21/3/1914 to 21/8/1914 Part 2 - 16/9/1914 to 29/1/1915 Part 3 - 12/2/1915 to 4/6/1915 Part 4 - 18/6/1915 to 1/10/1915 Part 5 - 8/10/1915 to 11/2/1916 Part 6 - 15/2/1916 to 23/5/1916 Part 7 - Yields information about the activities of the MBCTTDigital image - scan of the Melbourne & Brunswick Coburg Tramway Trust Minute Book. tramways, trams, mbctt, minutes, tramcars -
 Melbourne Tram Museum
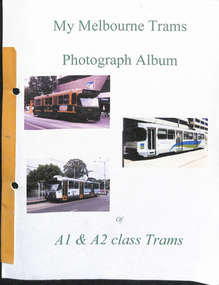
Album, Gus Weir, My Melbourne Trams - A1 & A2 class trams, 1991 to 2012
Compiled by Gus Weir of the Wellington Tramway Museum, former Wellington tram driver. Comprises some 33 double-sided album sheets for photographs of Melbourne A1 & A2 class trams. Scanned into 3 parts as pdf files. Many photos taken in the City area, Kew Junction, Port Junction, Port Melbourne, Hawthorn Bridge, Mont Albert, Docklands Photos by Gus himself during Melbourne visits. Part 1 - cover - A1 231, 232, 233, 236, 237, 238, 239, 240, 243, 246 Part 2 - A1 246, 248, 255, 256, 257, 258, A2 259. 260, 261, 262, 263, 264, 268, 269, 275, 278, 280, 282, 283, 284, 286 and 287 Part 3 - A2 288, 291, 292, 293, 294, 295, 296, 298, & 300 Yields detailed information about Melbourne trams from 1991 to 2012Set of 33 album sheets generally with four photos within a bound album, with many blanks to allow for further photos. Each photo has a label on the rear, with details of the photograph's location, photographer, and date. An insert label on each page gives the tram number, location, and date.tramways, tramcars, albums, melbourne, yarra trams, m>tram, kew, docklands, cbd, kew junction, port melbourne, port junction, a1 class, a2 class -
 Melbourne Tram Museum
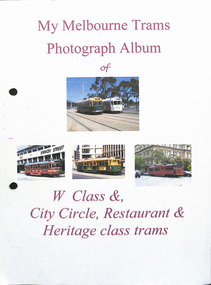
Album, Gus Weir, My Melbourne Trams - W class, City Circle, Restaurant & Heritage trams, 1967 to 2012
Compiled by Gus Weir of the Wellington Tramway Museum, former Wellington tram driver. Comprises some 42 double-sided album sheets for photographs of Melbourne - W class, City Circle, Restaurant & Heritage trams. - Scanned into 4 parts as pdf files. Many photos taken in the City area, Some photos by M Hawkins. Part 1 - cover - logos - MMTB, The Met, PTC, Swanston Trams, M>Tram, Yarra Trams, PTC, 11W, cable dummy, V214, W2 262. 380., 384, 431, 442, 504, 510 and X2 676. Part 2 -W2 512, W5 729, 721, 727, 728, 731, 753, 758, 760, 777, 780, 808, 823, 824, 842, SW5 856, 842, 853, 854 SW6 866, 862, SW5 728, SW6 871, 888, 890, 891, 899. 900, 896,905, 907, 909, 910, 919, 909 and VR 53, Part 3 - W6 884, W7 1002, 1000, 1020,W6 991, 998, 982, 982, 975, 983, 974, 975, 962, 972, SW6 957, 961, 957, SW5 728, SW6 954, 951, 951, Restaurant trams 935, 939. 938, 939, and 937 Psrt 4 - W7 1020, 1000, 1002, 1015, 1021, 1024, 1026, 1034, 1031, 1036, 1039, Yields detailed information about Melbourne trams from 1967 to 2012Set of 42 album sheets generally with four photos within a bound album, with many blanks to allow for further photos. Each photo has a label on the rear, with details of the photograph's location, photographer, and date. An insert label on each page gives the tram number, location, and date.tramways, tramcars, albums, melbourne, yarra trams, logos, w2 class, w5 class, sw5 class, sw6 class, w6 class, w7 class, restaurant tram, city circle, mmtb, the met, ptc, m>trams, swanston trams, x2 class. -
 Melbourne Tram Museum
Book, Hawthorn Tramways Trust (HTT), "Instructions to Motormen in Electric Car Driving", 1918
Book - dark red Rexene covers, with 16 pages (four sheets) centre stapled inside, titled "Instructions to Motormen in Electric Car Driving", published by the Hawthorn Tramways trust giving 76 questions and answers Q&A to driving and operating electric tramcars. Published by HTT July 1918 and authorised by Struan Robertson Engineer and General Manger. 2nd copy - part of McComb collection, in the HTT file added 27-9-2016Has number "227" on inside of front cover in red ink.trams, tramways, hawthorn tramways trust, htt, instructions, motormen, controllers -
 Melbourne Tram Museum
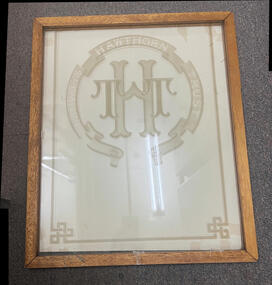
Memorabilia - Framed HTT window glass, Duncan & Fraser, c1916
Etched glass panel from the sliding saloon door of a Hawthorn Tramways Trust (HTT) Tramcar with a wooden surround or frame. The saloon doors on HTT trams were fitted with this style of panel. Manufacture of the glass was arranged by the Adelaide-based builder of HTT tramcars, Duncan and Fraser.Demonstrates the logo of the HTT etched into the glass part of a saloon door.Wooden framed etched glass panel with HTT logo and name. Frame secured with wood screws and nails and varnished.htt, logos, doors, glass, duncan and fraser -
 Melbourne Tram Museum
Photograph - Dummy and staff outside Brunswick Car Shed, c1926
Photograph shows Dummy or Grip Car on run-out track outside Brunswick Car Shed in Sydney Road, Brunswick. Lined up in the foreground along the side of the Dummy are approx 20 tram crew and other staff, most in assorted uniforms with unbuttoned jackets. While the photo's reproduction is poor, the destination board reads 'H. B. Railway' (Hobson's Bay Railway) once located at the Flinders and Elizabeth Streets terminus. This early railway became part of the Victorian Railways in 1878, well before the opening of the Brunswick cable line in 1887 and this photograph c1890. Photo from C B Thomas collection.Yields information about Brunswick Car Shed and Sydney RoadBlack and white photograph with notes on rear.In ink "8" and "K McC"tramcars, tramways, cable trams, dummy, grip car, hobsons bay railway, elizabeth street, flinders street, brunswick car shed, sydney road -
 Melbourne Tram Museum
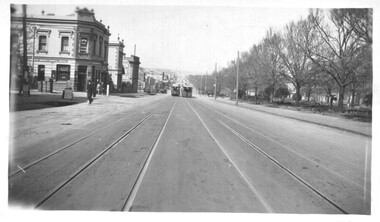
Photograph - Cable trams Victoria Parade Collingwood, c1923
The photograph shows Victoria Parade Collingwood looking east just before Cambridge St, with two cable trams in the view. Shows the layout of Victoria Parade with the cable trams in the centre of the northern part of the road. In the view is the Baden Powell Hotel. Same hand writing on the rear as item 8279.Yields information about Victoria Parade c1923. Black and white photo with hand written notes on the rear. Printed on Kodak paper."Melbourne cable trams about 1923"tramcars, tramways, cable trams, victoria parade -
 Melbourne Tram Museum
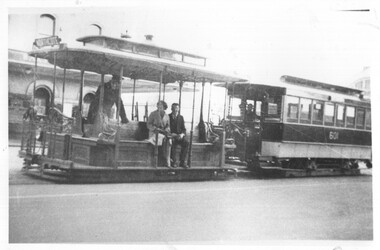
Photograph - Awaiting departure from Bourke St - cable trailer 601, c1939
Photograph shows cable trailer 601 and grip car at the Bourke St terminus. The trams have the destination of Northcote. In the background is part of the MTOCo Head Office. Photo from the CB Thomas Collectioin, c1939. Trailer 601 was the last built cable trailer; built by the MMTB in 1923.Yields information about the Bourke St terminus in 1939.Black and white photograph with notes on rear.In ink "17" and "K McC"tramcars, tramways, cable trams, bourke st, tram 601 -
 Melbourne Tram Museum
Photograph - Sorrento tram at the Back Beach
Photograph shows the Sorrento steam tram locomotive at the Back Beach station, date and photographer unknown.Yields information about Sorrento tramway and its locomotives.Small black and white print with note on rear.in part "Sorrento steam" in ink.tramcars, tramways, steam engines, sorrento -
 Melbourne Tram Museum
Photograph - Dummy and staff outside Brunswick Car Shed, c1890
Photograph shows Dummy or Grip Car on run-out track outside Brunswick Car Shed in Sydney Road, Brunswick. Lined up in the foreground along the side of the Dummy are approx 20 tram crew and other staff, most in assorted uniforms with unbuttoned jackets. While the photo's reproduction is poor, the destination board reads 'H. B. Railway' (Hobson's Bay Railway) once located at the Flinders and Elizabeth Streets terminus. This early railway became part of the Victorian Railways in 1878, well before the opening of the Brunswick cable line in 1887 and this photograph c1890. Photo from C B Thomas collection.Yields information about Brunswick Car Shed and Sydney RoadBlack and white photograph with notes on rear.In ink "8" and "K McC"tramcars, tramways, cable trams, dummy, grip car, hobsons bay railway, elizabeth street, flinders street, brunswick car shed, sydney road -
 Melbourne Tram Museum
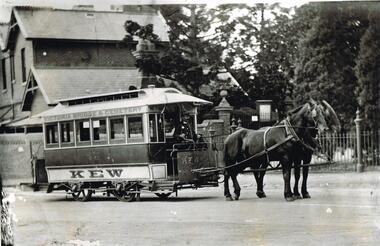
Photograph - Kew Horse tram at Kew Cemetery, Melbourne Tramway & Omnibus Co. Limited, c1900
Photo of a horse tram at the Kew Cemetery terminus with a uniformed MTOC. employee, two horses and the Cemetery buildings in the background. Has Victoria Bridge & Cemetery written on the side of the tram. 2nd copy added with different crop. Photo from the Collection of the Department of Infrastructure now with the Public Records Office - image number H1. Note: this photo is now out of copyright and was not an original VR photograph, but one copied from another source and collected as their Heritage series. From an email from Rod Atkins 29/7/2019: This Stevenson six widow saloon horse tram No 46 is fairly standard. The horse cars did not have wheel skirts like the cable trams 6 and 8 window cars. Sitting at the terminus in High Street at Parkhill Road at the gates of the Boroondara General Cemetery ready for its return trip to Richmond. The tram is being run one man. Note the location of gates, pay as you enter the front step. The driver has a conductors bag around his neck and waist. No conductor present in the photo. His uniform is classic Company issue. He is wearing a Tunic and vest! And early issue cap with a white band. Date: around circa 1900 as the clock tower, brick wall and cast iron fence are all in place and the car number is faded out. I have seen a photo of a tram there with no clock tower from around the opening of the line. Yields information about the Kew Horse tram and its tramcars.Black and white photograph with source notes on rear.Has part of the Department of Infrastructure copy right stamp on rear and number in ink on rear and "1-5"trams, tramways, horse trams, kew, mto co, cemetery, uniforms -
 Melbourne Tram Museum
Photograph - Car Wash Road
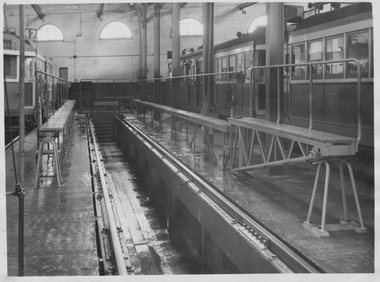
Photograph of vacant tramcar wash road facility, presumably at Kew Depot. Three W2 class trams are partially shown on adjacent roads, one displaying route number 47 (City to Kew Depot). Several semi-circular windows are shown high on the rear wall. Along both sides of the vacant road are narrow 40 cm wide platforms approx 60 cms above the car shed floor with safety rails attached. An open pit sits between the two platforms. A water hose pipe appears in the foreground and all surfaces appear wet. With a tram was positioned between these platforms, part of the platform could be swung across the front of the tram to facilitate its washing. Yields information about maintenance facilities inside tram shed. Black and white photograph with ink stamp on rearInk stamp reads "43 51 Sutcliffe Pty Ltd, Commercial Photographers, 94 Elizabeth Street, Melbourne, Cent. 1500" wash road, w2 class, kew depot, route 47, semi-circular windows -
 Ballarat Tramway Museum
Administrative Record - Meeting Minutes, State Electricity Commission of Victoria (SECV), "Tramway Maintenance Minutes of 4th Annual Conference April 26, 1954 and May 1, 1954", 1954
Yields information and demonstrates SEC Meeting minutes about discussions between the three Provincial operators about tramcars and operations.Minutes - 36 duplicated foolscap sheets pinned with a folding clip in top left hand corner - titled "Tramway Maintenance Minutes of 4th Annual Conference April 26, 1954 and May 1, 1954", in the Ballarat and the Melbourne offices Topics covered - cleaning of trams, tracks, track surface repairs, sleepers, car renovation, painting, flooring, notes on a Ballarat Field inspection, disinfecting blinds, electrical systems, truck maintenance, castings, maintenance costs, trolley wheels, oils and greases, alternation to Maximum Traction trams, spare part, fatigue of axles, accidents, track cleaners, shedmen, union claims,, amenities and a summary of actions. Each item where relevant looks back at the actions from the previous conference. Has a list of attendees. trams, tramways, minutes, sec, geelong, ballarat, bendigo, tramcar equipment, maintenance, trackwork, overhead, painting, trolley wheels, motors, one man trams, employees -
 Melbourne Tram Museum
Postcard - notecard - W3 667 Flinders St, Pixie Moon cards, c2020
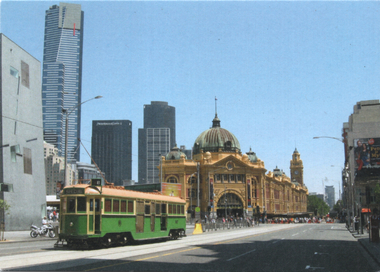
Card shows W3 667 in Flinders St on its way to Flinders St station, for its part of the filming of The Pacific, Feb. 2008. Demonstrates the use of a historic photo on a note card by Pixie Moon Cards.Folded card, blank inside, printed on recycled paper - No. PMR622tramways, tramcars, flinders st station, tram 667, w3 class, flinders st, trams -
 Ballarat Tramway Museum
Document, Electric Supply Co of Vic. (ESCo), "Instructions to Recruit Motormen", 1936
Single or front sheet of a set of notes titled "Instructions to Recruit Motormen", with a note that it was copied 10/2/1936 - has the heading of Electric Supply Co. of Vic. The document gives a description of the equipment fitted to a tram and its purpose. Most likely prepared for early ESCo tramcars, prior to the arrival of trams ex Melbourne. Only the first sheet of a multipage document has survived.Yields information and demonstrates ESCo information provided to motormen as part of their training.Single foolscap sheet, typed carbon copy.ballarat, trams, tramways, motormen, training, esco, equipment. -
 Ballarat Tramway Museum
Photograph - Framed canvas Scrubber No. 8, Hugh Ballment, 1950s
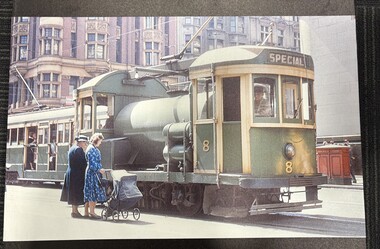
Image of MMTB Scrubber tram No. 8 northbound in Elizaberth St at the corner with Collins St. Has a W2 in the background. The tram was strengthed during 1961 by adding bracing between the cabs. Two ladies one with a pram are waiting at the safety zone. Based on the dresses of the ladies and pram, most likely mid to late 1950s. Note the large letter box or receiving pillar with a crown behind the tram. The tram is now part of the Museum's fleet and is used for rail/track maintenance. Yields information about scrubber tram 8, later 8W working in Elizabeth St Melbourne.Framed canvas colour photograph on a wooden frame with a hanging hook on the rear.tram 8, elizabeth st, collins st, tramways, tramcars -
 Ballarat Tramway Museum
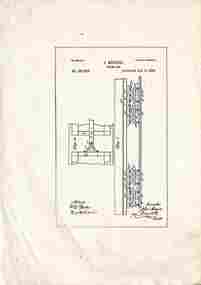
Drawing - "J Menzies - Tram car", J Menzies, 1886
Drawing - part of a patent, for the wheel set of a tram - dated 5/10/1886 - part of set of 5 drawings.Yields information about a patent for a wheelset of a tramcar.Drawing titled "J Menzies - Tram car" copied onto an A4 sheet.tranways, patents, tramcars, wheels -
 Melbourne Tram Museum
Photograph - W class 307 and crew, 1924-1928
Photograph shows W class 307 standing on slightly curved track displaying destination "Victoria Bridge" and no route number box attached. The uniformed motorman and conductor stand on the roadway next to the front driver's cab where the trolley pole has been tied down. The conductor wears his coin bag and the driver is holding the tram's key and air brake handle. An elderly male passenger with coat stands at the drop-centre doorway and other passengers are inside. The car body of W 307 was built by Holden Motor Body Builders in South Australia in 1924 as part of a large contract to build W class trams. Victoria Bridge was the termini of both the Collins Street and Victoria Parade cable tram that closed in 1929 and the Mont Albert electric tram from Union Road, via Whitehorse Road and Kew Junction. Perhaps this photograph is of the Mont Albert terminus although the curved track suggests otherwise.Yields information about early W class tramcars . Black and white photograph with penciled dates on rearPencil writing reads "Between 2/9/24 & 19/3/28" trolley pole, drop-centre, w class, tram 307, victoria bridge, route number box, key, air brake handle, car body, holden motor body builders, mont albert, termini -
 Melbourne Tram Museum
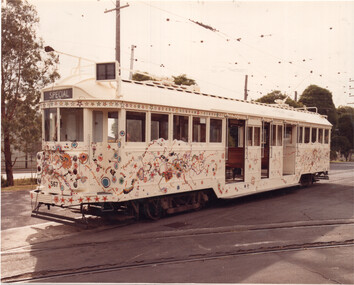
Photograph - Transporting Art tram 567 - Paul Mason, April 1982
The photo is of tram 567 painted by Paul Mason for the Transport Art trams project, April 1982 following its launch.Yields information about tram 567 painted by Paul Mason as part of the Transporting Art project.Colour print with hand written notes on the rear.In pencil, "567 Paul Mason, in service Sth Melbourne 23/4/1982"tramways, transporting art, tramcars, tram 567 -
 Melbourne Tram Museum
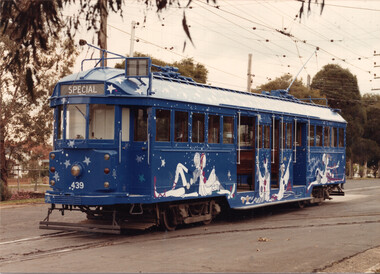
Photograph - Transporting Art tram 439 - Stewart Merritt, 1982
The photo is of tram 439 painted by Stewart Merritt for the Transport Art trams project, 1982 following its launch.Yields information about tram 439 painted by Stewart Merritt as part of the Transporting Art project.Colour print with hand written notes on the rear.In pencil, "439 Stewart Merritt"tramways, transporting art, tramcars, tram 439