
Showing 2055 items matching " kitchen "
-
 Flagstaff Hill Maritime Museum and Village
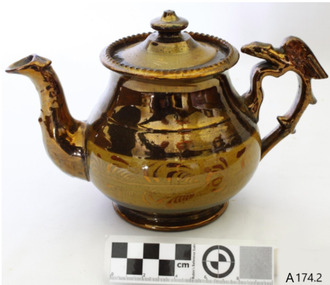
Ceramic - Teapot, First half of the 20th century
... The teapot at this time cannot be associated with a historical event, person, or place, provenance regards manufacture is unknown, item assessed as a collection asset given it was produced before 1950. warrnambool flagstaff-hill flagstaff-hill-maritime-museum maritime-museum shipwreck-coast flagstaff-hill-maritime-village teapot tea set kitchen ware ceramic Lusterware Pottery Staffordshire UK Pottery Finishes None Teapot ceramic ornate copper lusterware abstract floral design handle has a protruding sculptured bird for thumb grip. ...Lusterware is a type of pottery or porcelain with a metallic glaze that gives the effect of iridescence. The technique on pottery was first developed in Mesopotamia (modern Iraq) in the early 9th century. It is produced by metallic oxides in an overglaze finish, which is given a second firing at a lower temperature in a "muffle kiln", or a reduction kiln, excluding oxygen. The Lusterware effect is a final coating applied over the ceramic glaze, and fixed by a light second firing, applying small amounts of metallic compounds (generally of silver or copper) mixed with something to make it paintable (clay or ochre). This is then fired in a reducing atmosphere at a temperature high enough to "soften" the glaze from the first firing, and break down the metallic compounds, leaving a very thin ("perhaps 10 or 20 atoms thick") layer that is fused with the main glaze, but is mainly metal. Lusterware normally only uses one colour per piece, and the range is limited a "gold" derived from silver compounds was historically the most common. The process has always been expensive and rather unpredictable, always requiring two firings, and often the use of expensive materials such as silver and platinum. The very thin layer of luster is often delicate, and many types of Lusterware are easily damaged by scratching removing the metallic layer, or by contact with acids. Lusterware has therefore always been for display and occasional use, although by the 19th century it could be relatively cheap. Many pieces show the luster effect only working correctly on parts of the surface, or not at all. An item probably made in Staffordshire UK where this type of pottery was popular in the late 19th century by unknown pottery as the subject item has no marks. The teapot at this time cannot be associated with a historical event, person, or place, provenance regards manufacture is unknown, item assessed as a collection asset given it was produced before 1950.Teapot ceramic ornate copper lusterware abstract floral design handle has a protruding sculptured bird for thumb grip. Nonewarrnambool, flagstaff-hill, flagstaff-hill-maritime-museum, maritime-museum, shipwreck-coast, flagstaff-hill-maritime-village, teapot, tea set, kitchen ware, ceramic, lusterware, pottery, staffordshire uk, pottery finishes -
 Flagstaff Hill Maritime Museum and Village
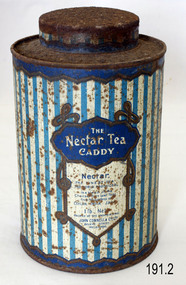
Container - Tea Container, J Marsh & Sons (Tin Container Fabricators), 1900-1940
... Tin, "Choicest Nectar Tea" is an example of retail packaging, for domestic goods, the tin was made by J Marsh and Sons, Melbourne, for John Connell & Co Ltd, Melbourne, Victoria, Australia, 1900-1940 Item at this time cannot be associated with an historical event, person or place, provenance is unknown, item assessed as a collection asset. flagstaff hill warrnambool flagstaff hill maritime museum maritime museum shipwreck coast flagstaff hill maritime village great ocean road tea canister tea caddy tea tin container kitchen storage food storage food nectar tea john connell melbourne J March & Sons John Connell & Co Ltd On label "The Nectar Tea Caddy" and "Nectar, the finest tea the world produces, is a blend of the Choicest Pure Leafed Teas from the Gardens of Ceylon, India, Java" Container; tea caddy for "Nectar Tea" brand, 1 lb. ...Tin, "Choicest Nectar Tea" is an example of retail packaging, for domestic goods, the tin was made by J Marsh and Sons, Melbourne, for John Connell & Co Ltd, Melbourne, Victoria, Australia, 1900-1940Item at this time cannot be associated with an historical event, person or place, provenance is unknown, item assessed as a collection asset.Container; tea caddy for "Nectar Tea" brand, 1 lb. Packed by John Connell and Co Ltd, Melbourne. Blue and white vertical stripe decoration. On label "The Nectar Tea Caddy" and "Nectar, the finest tea the world produces, is a blend of the Choicest Pure Leafed Teas from the Gardens of Ceylon, India, Java"flagstaff hill, warrnambool, flagstaff hill maritime museum, maritime museum, shipwreck coast, flagstaff hill maritime village, great ocean road, tea canister, tea caddy, tea tin, container, kitchen storage, food storage, food, nectar tea, john connell, melbourne, j march & sons, john connell & co ltd -
 Flagstaff Hill Maritime Museum and Village
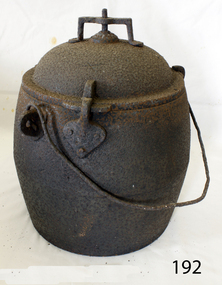
Domestic object - Pressure Cooker, T & C Clarke and Co Ltd, Late 19th to early 20th century
... The item is significant as it was used as a domestic kitchen item to cook food safely without the concern that the metal interior may contain lead or arsenic as earlier cooking utensils had. flagstaff hill warrnambool shipwrecked coast flagstaff hill maritime museum maritime museum shipwreck coast flagstaff hill maritime village great ocean road pressure cooker cook ware cooking pot clarke and co T & C Clarke and Co. on base & size 2 1/2 gallon Pressure cooker, cast iron , pressure vent on top. ...T. & C. Clark & Company Limited was based at Shakespeare Foundry in Wolverhampton England and was founded in 1795 by Thomas and Charles Clark. The company grew to be one of the largest iron foundries in Wolverhampton and were pioneering in the manufacture of enamelled cast iron cookware and sanitary wares. The company's product range included thousands of items, both domestic and industrial. T. & C. Clark were pioneers in the use of enamelled cast ironware, after taking out a patent in 1839 guaranteeing their products to be free of lead or arsenic. The company became the largest employer in Wolverhampton employing between 600 to 700 people.The item is significant as it was used as a domestic kitchen item to cook food safely without the concern that the metal interior may contain lead or arsenic as earlier cooking utensils had. Pressure cooker, cast iron , pressure vent on top. Removable lid held down by 3 riveted heart shaped clips where they join the base. Metal drop down carry handle.T & C Clarke and Co. on base & size 2 1/2 gallonflagstaff hill, warrnambool, shipwrecked coast, flagstaff hill maritime museum, maritime museum, shipwreck coast, flagstaff hill maritime village, great ocean road, pressure cooker, cook ware, cooking pot, clarke and co -
 Flagstaff Hill Maritime Museum and Village
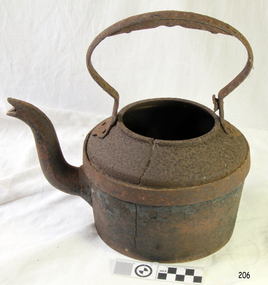
Domestic object - Kettle, T & C Clarke and Co Ltd, 1880-1900
... The item is significant as it was used as a domestic kitchen item to boil water safely without the concern that the metal may contain lead or arsenic as earlier cooking utensils had. flagstaff hill warrnambool shipwrecked coast flagstaff hill maritime museum flagstaff hill maritime village great ocean road kettle cooking pot cook ware kitchen ware cast iron kettle t c clark ltd T and C Clark and Co, London. ...T. & C. Clark & Company Limited was based at Shakespeare Foundry in Wolverhampton England and was founded in 1795 by Thomas and Charles Clark. The company grew to be one of the largest iron foundries in Wolverhampton and were pioneering in the manufacture of enamelled cast iron cookware and sanitary wares. The company's product range included thousands of items, both domestic and industrial. T. & C. Clark were pioneers in the use of enamelled cast ironware, after taking out a patent in 1839 guaranteeing their products to be free of lead or arsenic. The company became the largest employer in Wolverhampton employing between 600 to 700 people.The item is significant as it was used as a domestic kitchen item to boil water safely without the concern that the metal may contain lead or arsenic as earlier cooking utensils had. Cast Iron Kettle no lidT and C Clark and Co, London. No. 2, 5 pints capacityflagstaff hill, warrnambool, shipwrecked coast, flagstaff hill maritime museum, flagstaff hill maritime village, great ocean road, kettle, cooking pot, cook ware, kitchen ware, cast iron kettle, t c clark ltd -
 Flagstaff Hill Maritime Museum and Village
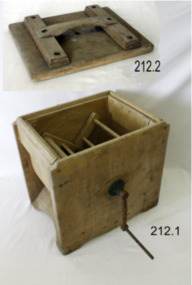
Domestic object - Butter Churn, Late 19th to early 20th century
... An item used to make butter in a domestic situation by turning a handle until the cream inside has turned to butter. flagstaff hill warrnambool shipwrecked coast flagstaff hill maritime museum flagstaff hill maritime village great ocean road churn butter churn wooden churn butter making food dairy kitchen utensil Handle marked 28204 no other marks to indicate manufacturer or date of production Butter churn, wooden, lid pieces screwed or nailed together. ...A butter churn is a device used to convert cream into butter. This is done through a mechanical process, frequently via a pole inserted through the lid of the churn, or via a crank used to turn a rotating device inside the churn. The use of butter is mentioned in biblical works and the earliest butter churn vessels belonging to Beersheba culture in Israel were found in Bir Abu Matar going back to Chalcolithic period between 6500–5500 BC. The butter churn in Europe may have existed as early as the 6th century AD, In the European tradition, the butter churn was primarily a device used by women, and the churning of butter was an essential responsibility along with other household chores. In earlier traditions of butter making, nomadic cultures placed milk in skin bags and produced butter either by shaking the bag manually, or possibly by attaching the bag to a pack animal, and producing butter simply through the movement of the animal. An item used to make butter in a domestic situation by turning a handle until the cream inside has turned to butter.Butter churn, wooden, lid pieces screwed or nailed together. Brass bearing on side with iron turning handle.Handle marked 28204 no other marks to indicate manufacturer or date of productionflagstaff hill, warrnambool, shipwrecked coast, flagstaff hill maritime museum, flagstaff hill maritime village, great ocean road, churn, butter churn, wooden churn, butter making, food, dairy, kitchen utensil -
 Flagstaff Hill Maritime Museum and Village
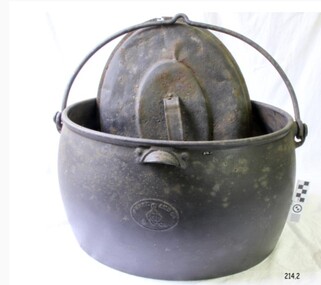
Domestic object - Cooking pot and lid, T & C Clark, 1880-1910
... The item is significant as it was used as a domestic kitchen or camp fire item used to cook food safely without the concern that the metal may contain lead or arsenic as earlier cooking utensils had. ...T & C Clark & Company Limited, based at Shakespeare Foundry, was founded in 1795 by Thomas and Charles Clark and grew to be one of the largest iron foundries in Wolverhampton. The firm was the pioneers of Enamelled Cast ironware and the founder Charles Clerk went on to became mayor of Wolverhampton in 1860 after also serving as a Councilor, Alderman, and later Chief Magistrate. The company exhibited many products at the International Exhibition of 1862 at South Kensington, alongside the gardens of the Royal Horticultural Society. The company was also awarded the silver medal for its products at the International Paris Exhibition in 1878. The company's product range included thousands of items, both domestic and industrial. T & C Clark pioneered the use of enamelled cast ironware, after taking out a patent in 1839 guaranteed to be free of lead or arsenic. In the late 1940s and 1950s the company produced acid-resisting enamelled cast iron boiling pans; steam-jacketed pans; stills; square and rectangular tanks; open and closed mixing vessels; flanged pipes; bends and tees; laboratory equipment; small scale plant; evaporating bowls; beakers; sulphonates; and glass-lined mild steel tanks for beer, mineral water, and food. The company is listed as enamelled chemical plant manufacturers in Kelly's 1962 Wolverhampton Directory, but within a few years, the company had ceased trading.The item is significant as it was used as a domestic kitchen or camp fire item used to cook food safely without the concern that the metal may contain lead or arsenic as earlier cooking utensils had. T C Clark innervates the first manufacturing process of cast iron cook ware to have enamel lining in his products to alleviate the possibility of lead or arsenic contamination of food.Oval cast iron boiler or cooking pot, with lid, pot is oval shaped lid is dented and handle buckled.Inscription on base "Clark & Co Patent", "Best Quality", "9 Gallons" and a Trade Mark of a "C" inside two triangles to side of potflagstaff hill, warrnambool, shipwrecked coast, flagstaff hill maritime museum, flagstaff hill maritime village, great ocean road, cooking pot, stew pot, food, kitchen utensil, shakespeare foundry, tc clark -
 Flagstaff Hill Maritime Museum and Village
Container - Tin, Fred Walker Cresco Foods, 1910
... The history of Fred Walker gives insight into how many food brands in Australia now that we take for granted had his involvement in their early beginnings. flagstaff hill warrnambool shipwrecked coast flagstaff hill maritime museum flagstaff hill maritime village great ocean road container food container kitchen ware Flaked Rice Cresco Palm Flaked Rice Tin Fred Walker Dehydrated Food Palm Flaked Rice manufactured by the Cresco Co. ...Fred Walker 1884 – 1935 was an Australian businessman and founder of Fred Walker & Co. first in Hong Kong, then in Melbourne as the Fred Walker Company. He also set up Kraft Walker Cheese Co. in partnership with American businessman James L. Kraft in 1926, to market Kraft's patented method of processing cheese in Australia. Fred Walker & Co. is best known for creating Vegemite, a yeast extract-based food spread and Australian cultural icon. Kraft Walker Cheese Co. Is best known for manufacturing a cheese known as Red Coon around 1931, which later became known as Coon cheese. He founded the Fred Walker Company at 54 William Street and later moving to Flinders Street in 1911. This company specialised in canned foods, especially dairy products, exporting them to Asia. It manufactured Red Feather canned foods including butter and cheese from around 1910. He also went on to created Cresco Food Co. for his younger brother, which was the first factory to manufacture "flaked food" or dehydrated food products in Australia.A significant item that catalogues the start of dehydrated food production and sale in Australia was initiated by an Australian businessman and well-known entrepreneur. The history of Fred Walker gives insight into how many food brands in Australia now that we take for granted had his involvement in their early beginnings. Large cylindrical tin with push on lid, painted label on the sides in maroon, black gold and dark fawn colours with text.Palm Flaked Rice manufactured by the Cresco Co. Limited Melbourne Australiaflagstaff hill, warrnambool, shipwrecked coast, flagstaff hill maritime museum, flagstaff hill maritime village, great ocean road, container, food container, kitchen ware, flaked rice, cresco, palm flaked rice, tin, fred walker, dehydrated food -
 Flagstaff Hill Maritime Museum and Village
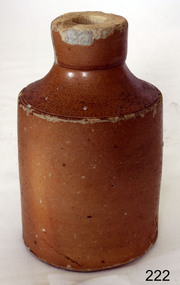
Ceramic - Stoneware Bottle, Doulton Lambeth, Circa 1870 - 1890
... An early utilitarian stoneware item made by a well-known company that specialised in making salt-glazed items that later earned a reputation for making stoneware art objects. flagstaff hill warrnambool shipwrecked coast flagstaff hill maritime museum flagstaff hill maritime village great ocean road stoneware stoneware jar doulton lambeth kitchen ware salt glazed Stamp impressed into clay on edge "(2)32 / Doulton / Lambeth" Ink bottle, brown salt glazed stoneware with narrow mouth tamped Doulton Lambeth cork missing. ...The Royal Doulton company began as a partnership between John Doulton, Martha Jones, and John Wattis an English ceramic and home accessories manufacturer founded in 1815. Operating originally in Vauxhall, London, later moving to Lambeth, in 1882 it opened a factory in Burslem, Stoke-on-Trent, in the centre of English pottery. The business was specialised in making salt-glazed stoneware articles, including utilitarian or decorative bottles, jugs and jars, much of it intended for inns and pubs. The backbone of the business was a wide range of utilitarian wares, mostly stone wares, including storage jars, tankards and the like, and later extending to pipes for drains, lavatories and other bathroom ceramics. From 1853 to 1902 its wares were marked Doulton & Co., then from 1902, when a royal warrant was given, Royal Doulton. The company always made some more decorative items, initially still mostly stoneware, and from the 1860s the firm made considerable efforts to get a reputation for design, in which it was largely successful, as one of the first British makers of art pottery. Initially, this was done through artistic stoneware's made in Lambeth, but in 1882 the firm bought a Burslem factory, which was mainly intended for making bone china table wares and decorative items. An early utilitarian stoneware item made by a well-known company that specialised in making salt-glazed items that later earned a reputation for making stoneware art objects.Ink bottle, brown salt glazed stoneware with narrow mouth tamped Doulton Lambeth cork missing. Stamp impressed into clay on edge "(2)32 / Doulton / Lambeth" flagstaff hill, warrnambool, shipwrecked coast, flagstaff hill maritime museum, flagstaff hill maritime village, great ocean road, stoneware, stoneware jar, doulton lambeth, kitchen ware, salt glazed -
 Flagstaff Hill Maritime Museum and Village
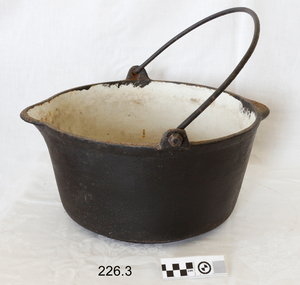
Domestic object - Cooking Pot, T & C Clarke and Co Ltd, 1840 to 1900
... The items are significant as they were used as domestic kitchen items to cook food safely without the concern that the metal may contain lead or arsenic as earlier cooking utensils had. ...T. & C. Clark & Company Limited was based at Shakespeare Foundry in Wolverhampton England and was founded in 1795 by Thomas and Charles Clark. The company grew to be one of the largest iron foundries in Wolverhampton and were pioneering in the manufacture of enamelled cast iron cookware and sanitary wares. The company's product range included thousands of items, both domestic and industrial. T. & C. Clark were pioneers in the use of enamelled cast ironware, after taking out a patent in 1839 guaranteeing their products to be free of lead or arsenic. The company became the largest employer in Wolverhampton employing between 600 to 700 people.The items are significant as they were used as domestic kitchen items to cook food safely without the concern that the metal may contain lead or arsenic as earlier cooking utensils had. This is due to the enamel lining pioneered by TC Clark Pot set; set of three pots. Iron pots, enamelled on the inside with a pouring lip and capacity label on each pot. Pot set a capacity label on each pot. Three pots in set labelled 17 qts and 14 qts on base and flat spot opposite lip - handle for pouring. 12 qts is missing flagstaff hill, warrnambool, shipwrecked coast, flagstaff hill maritime museum, maritime museum, shipwreck coast, flagstaff hill maritime village, great ocean road, pot set, cooking pot, pouring pot, cook ware -
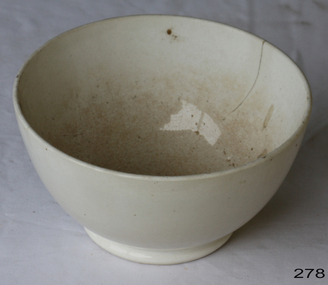 Flagstaff Hill Maritime Museum and Village
Domestic object - Bowl, Late 19th or early 20th Century
... Flagstaff Hill Warrnambool Shipwrecked-coast Flagstaff-Hill Flagstaff-Hill-Maritime-Museum Maritime-Museum Shipwreck-coast Flagstaff-Hill-Maritime-Village Mixing Bowl Food Preparation Kitchen Equipment Ceramic Backstamp very faint and unable to be read. ...The Process of Making Pottery Decorating, Firing, Glazing, Making, Technical There is a rhythm and flow to clay. It can’t be done all at once! Even the making process! It can take weeks to get everything done, especially if you can only work on your pottery once a week! Even though we have three hour classes, it’s often just not enough time! Here is an overview of some of the processes so you have a bit more grasp on some of the technical stuff! Step One – Design There are SO many ideas out there for making stuff in clay! From delicate porcelain jewellery, through to heavy sculptural work and everything in between. Deciding your direction is sometimes not that easy – when you first start, try everything, you will naturally gravitate to the style that you enjoy! The options and variations are endless and can get a wee bit overwhelming too! Check in with me before you start to ensure your ideas will work, what order you might do things, how you could achieve the look you are seeking and any other technical data required! Step Two – Making Clay is thixotropic. This means that as you work with it, the clay first gets sloppier and wetter, before is begins to dry in the atmosphere. For most things, you simply can’t do all parts of the project at once. An example of work order might look like: Get last weeks work out from the shelves Prepare clay for today’s work – roll your clay, prepare balls for throwing, make the first stage of a pinch pot) Clean up last week’s work and put it on the shelf for bisque firing Check that you have any glazing to do – and do enough of it that you will have time to finish your main project Do the next step of your next project – there might be a further step that can’t be complete immediately, in that case, wrap your work well and put onto the shelves. Letting your work rest for a while can really help keep your work clean and professional looking. Many things require bagging under plastic to keep it ready for work the next week – put your name on the outside of the bag so you can find your work easily. We have stickers and markers. Consider how you want to decorate your work – coloured slip can be applied at a fairly wet stage (remembering that it will make your work even wetter!). Trying to apply slip to dry clay won’t work! If you want to do sgraffito – you will need to keep the work leather hard (a state of dryness where you can still work the clay with a little effort and a little water and care). Step Three – Drying Most of the time your work can go into the rack uncovered to let it dry out for the following week. If you want to continue forming or shaping you will need to double bag your work – put your work on a suitable sized bat and put the bat in a bag so the base of the bag is under the bat, then put another bag over the top of the work and tuck the top of the bag under the bat. If you want to trim (or turn) your thrown work the following week, it should also be double bagged. If your work is large, delicate, or of uneven thicknesses, you should lightly cover your work for drying. When considering the drying process, bare in mind the weather, humidity and wind! The hotter and dryer, the faster things dry and work can dry unevenly in the shelves – this can lead to cracking – another time to lightly cover your work for drying. Step Four – Trimming and Cleaning Up Your work is dry! It is called greenware now and it is at it’s most fragile! Handle everything with two hands. I often refer to soft hands – keep everything gentle and with your fingers spread as much as possible. Try to not pick up things like plates too much, and always with both hands! Before your work can be bisque fired it should be “cleaned up”. You work won’t go into the kiln if it has sharp edges – when glazed, sharp edges turn into razor blades! Use a piece of fly wire to rub the work all over – this will scratch a little so be light handed. Use a knife or metal kidney to scrape any areas that require a bit more dynamic treatment than the fly wire offers! Finally, a very light wipe over with a slightly damp sponge can help soften and soothe all of your edges and dags! Trimming thrown work: If you are planning to trim (or turn) your thrown work (and you should be), make sure you bag it well – your work should be leather hard to almost dry for easiest trimming. Use this step to finish the work completely – use a metal kidney to polish the surface, or a slightly damp sponge to give a freshly thrown look. Wipe the sponge around the rim after trimming, and check the inside of the pot for dags! Trimming slip cast work: Usually I will trim the rims of your work on the wheel the following day to make that stage easier, however you will still need to check your work for lumps and bumps. Last but not least – check that your name is still clearly on the bottom of your work. Step Five – Bisque Firing When the work is completely dry it can go into the bisque kiln. The bisque kiln is fired to 1000°C. This process burns off the water in the clay as well as some of the chemically bound water. The structure of the clay is not altered that much at this temperature. Inside the bisque kiln, the work is stacked a little, small bowl inside a larger bowl and onto a heavy plate. Smaller items like decorations or drink coasters might get stacked several high. Consideration is paid to the weight of the stack and shape of the work. A bisque kiln can fire about one and a half times the amount of work that the glaze kiln can fire. The firing takes about 10 hours to complete the cycle and about two days to cool down. Once it has been emptied the work is placed in the glaze room ready for you to decorate! Step Six – Glazing Decorating your work with colour can be a lot of fun – and time consuming! There are three main options for surface treatment at this stage: Oxide Washes Underglazes Glazes Washes and underglazes do not “glaze” the work – It will still need a layer of glaze to fully seal the clay (washes don’t need glaze on surfaces not designed for food or liquid as they can gloss up a little on their own). Underglazes are stable colourants that turn out pretty much how they look in the jar. They can be mixed with each other to form other colours and can be used like water colours to paint onto your work. Mostly they should have a clear glaze on top to seal them. Oxides are a different species – the pink oxide (cobalt) wash turns out bright blue for instance. They don’t always need a glaze on top, and some glazes can change the colour of the wash! The glazes need no other “glaze” on top! Be careful of unknown glaze interactions – you can put any combination of glaze in a bowl or on a plate, but only a single glaze on the outside of any vertical surface! Glazes are a chemical reaction under heat. We don’t know the exact chemicals in the Mayco glazes we use. I can guess by the way they interact with each other, however, on the whole, you need to test every idea you have, and not run the test on a vertical surface! Simply put, glaze is a layer of glass like substance that bonds with the clay underneath. Clay is made of silica, alumina and water. Glaze is made of mostly silica. Silica has a melting point of 1700°C and we fire to 1240°C. The silica requires a “flux” to help it melt at the lower temperature. Fluxes can be all sorts of chemicals – a common one is calcium – calcium has a melting point of 2500°C, however, together they both melt at a much lower temperature! Colourants are metal oxides like cobalt (blue), chrome (green through black), copper (green, blue, even red!), manganese (black, purple and pink) iron (red brown), etc. Different chemicals in the glaze can have dramatic effects. for example, barium carbonate (which we don’t use) turns manganese bright pink! Other elements can turn manganese dioxide brown, blue, purple and reddish brown. Manganese dioxide is a flux in and of itself as well. So, glazes that get their black and purple colours, often interact with other glazes and RUN! Our mirror black is a good example – it mixes really well with many glazes because it fluxes them – causes them to melt faster. It will also bring out many beautiful colours in the glazes because it’s black colouring most definitely comes from manganese dioxide! Glaze chemistry is a whole subject on it’s own! We use commercial Mayco glazes on purpose – for their huge range of colour possibilities, stability, cool interactions, artistic freedom with the ability to easily brush the glazes on and ease of use. We currently have almost 50 glazes on hand! A major project is to test the interactions of all glazes with each other. That is 2,500 test tiles!!!! I’m going to make the wall behind the wheels the feature wall of pretty colours! Step Seven – Glaze (Gloss or sometimes called “Glost”) Firing Most of the time this is the final stage of making your creation (but not always!) The glaze kiln goes to 1240°C. This is called cone 6, or midrange. It is the low end of stoneware temperatures. Stoneware clays and glazes are typically fired at cone 8 – 10, that is 1260 – 1290°C. The energy requirement to go from 1240°C to 1280°C is almost a 30% more! Our clay is formulated to vitrify (mature, turn “glass-like”) at 1240°, as are our glazes. A glaze kiln take around 12 hours to reach temperature and two to three days to cool down. Sometimes a third firing process is required – this is for decoration that is added to work after the glaze firing. For example – adding precious metals and lustres. this firing temperature is usually around 600 – 800°C depending upon the techniques being used. There are many students interested in gold and silver trims – we will be doing this third type of firing soon! After firing your work will be in the student finished work shelves. Remember to pay for it before you head out the door! There is a small extra charge for using porcelain clay (it’s more than twice the price of regular clay), and for any third firing process! Once your work has been fired it can not turn back into clay for millennia – so don’t fire it if you don’t like it! Put it in the bucket for recycling. https://firebirdstudios.com.au/the-process-of-making-pottery/ The bowl is an example of kitchenware used in the 19th century and still in use today.Bowl white ceramic. Crack on side. Badly stained.Backstamp very faint and unable to be read.flagstaff hill, warrnambool, shipwrecked-coast, flagstaff-hill, flagstaff-hill-maritime-museum, maritime-museum, shipwreck-coast, flagstaff-hill-maritime-village, mixing bowl, food preparation, kitchen equipment, ceramic -
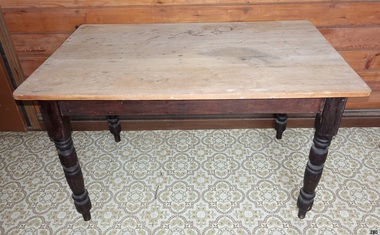 Flagstaff Hill Maritime Museum and Village
Furniture - Table
... https://en.wikipedia.org/wiki/Table_(furniture) The table is one of the most important items of furniture used in the home, including the kitchen. flagstaff hill warrnambool shipwrecked-coast flagstaff-hill flagstaff-hill-maritime-museum maritime-museum shipwreck-coast flagstaff-hill-maritime-village Table Kitchen furniture None Table wooden with 4 wooden turned legs and unvarnished raw wood top Furniture Table ...Some very early tables were made and used by the Ancient Egyptians around 2500 BC, using wood and alabaster. They were often little more than stone platforms used to keep objects off the floor, though a few examples of wooden tables have been found in tombs. Food and drinks were usually put on large plates deposed on a pedestal for eating. The Egyptians made use of various small tables and elevated playing boards. The Chinese also created very early tables in order to pursue the arts of writing and painting, as did people in Mesopotamia, where various metals were used. The Greeks and Romans made more frequent use of tables, notably for eating, although Greek tables were pushed under a bed after use. The Greeks invented a piece of furniture very similar to the guéridon. Tables were made of marble or wood and metal (typically bronze or silver alloys), sometimes with richly ornate legs. Later, the larger rectangular tables were made of separate platforms and pillars. The Romans also introduced a large, semicircular table to Italy, the mensa lunata. Plutarch mentions use of "tables" by Persians. Furniture during the Middle Ages is not as well known as that of earlier or later periods, and most sources show the types used by the nobility. In the Eastern Roman Empire, tables were made of metal or wood, usually with four feet and frequently linked by x-shaped stretchers. Tables for eating were large and often round or semicircular. A combination of a small round table and a lectern seemed very popular as a writing table. In western Europe, the invasions and internecine wars caused most of the knowledge inherited from the classical era to be lost. As a result of the necessary movability, most tables were simple trestle tables, although small round tables made from joinery reappeared during the 15th century and onward. In the Gothic era, the chest became widespread and was often used as a table. Refectory tables first appeared at least as early as the 17th century, as an advancement of the trestle table; these tables were typically quite long and wide and capable of supporting a sizeable banquet in the great hall or other reception room of a castle. https://en.wikipedia.org/wiki/Table_(furniture)The table is one of the most important items of furniture used in the home, including the kitchen.Table wooden with 4 wooden turned legs and unvarnished raw wood topNone flagstaff hill, warrnambool, shipwrecked-coast, flagstaff-hill, flagstaff-hill-maritime-museum, maritime-museum, shipwreck-coast, flagstaff-hill-maritime-village, table, kitchen furniture -
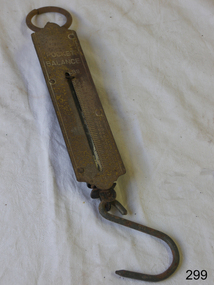 Flagstaff Hill Maritime Museum and Village
Equipment - Balance Scale, Rebure Germany, 1930s
... Flagstaff Hill Warrnambool Flagstaff-Hill-Maritime-Museum Maritime-Museum Shipwreck-coast Flagstaff-Hill-Maritime-Village Spring Balance Scale Rebure Scale Company Rebure Germany Domestic Item Kitchen Weighing Scale Rebure Pocket Balance. ...A mass produced utilitarian item made for domestic use, there is no history or manufacturing provenance currently available.The subject item at this time cannot be associated with an historical event or person It is believed the item was manufactured in Germany pre World War ll, in the 1930s, as other examples from the period are on a number of internet sale & auction sites. This item is regarded as a collectors piece however information and company history regards the manufacturer "Rebure" has not yet been established. Balance spring scale elongated brass graduation scale to 100 Lbs hook at one end and a ring the otherRebure Pocket Balance. Made in Germany measures from 0 to 100LBSflagstaff hill, warrnambool, flagstaff-hill-maritime-museum, maritime-museum, shipwreck-coast, flagstaff-hill-maritime-village, spring balance scale, rebure scale company, rebure germany, domestic item, kitchen weighing scale -
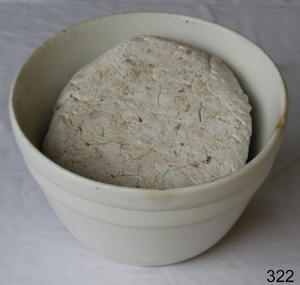 Flagstaff Hill Maritime Museum and Village
Domestic object - Bowl
... Flagstaff Hill Warrnambool Shipwrecked-coast Flagstaff-Hill Flagstaff-Hill-Maritime-Museum Maritime-Museum Shipwreck-coast Flagstaff-Hill-Maritime-Village Kitchen Equipment Ceramic Bowl white ceramic plain that has two sets of edging around lip. ...The Process of Making Pottery Decorating, Firing, Glazing, Making, Technical There is a rhythm and flow to clay. It can’t be done all at once! Even the making process! It can take weeks to get everything done, especially if you can only work on your pottery once a week! Even though we have three hour classes, it’s often just not enough time! Here is an overview of some of the processes so you have a bit more grasp on some of the technical stuff! Step One – Design There are SO many ideas out there for making stuff in clay! From delicate porcelain jewellery, through to heavy sculptural work and everything in between. Deciding your direction is sometimes not that easy – when you first start, try everything, you will naturally gravitate to the style that you enjoy! The options and variations are endless and can get a wee bit overwhelming too! Check in with me before you start to ensure your ideas will work, what order you might do things, how you could achieve the look you are seeking and any other technical data required! Step Two – Making Clay is thixotropic. This means that as you work with it, the clay first gets sloppier and wetter, before is begins to dry in the atmosphere. For most things, you simply can’t do all parts of the project at once. An example of work order might look like: Get last weeks work out from the shelves Prepare clay for today’s work – roll your clay, prepare balls for throwing, make the first stage of a pinch pot) Clean up last week’s work and put it on the shelf for bisque firing Check that you have any glazing to do – and do enough of it that you will have time to finish your main project Do the next step of your next project – there might be a further step that can’t be complete immediately, in that case, wrap your work well and put onto the shelves. Letting your work rest for a while can really help keep your work clean and professional looking. Many things require bagging under plastic to keep it ready for work the next week – put your name on the outside of the bag so you can find your work easily. We have stickers and markers. Consider how you want to decorate your work – coloured slip can be applied at a fairly wet stage (remembering that it will make your work even wetter!). Trying to apply slip to dry clay won’t work! If you want to do sgraffito – you will need to keep the work leather hard (a state of dryness where you can still work the clay with a little effort and a little water and care). Step Three – Drying Most of the time your work can go into the rack uncovered to let it dry out for the following week. If you want to continue forming or shaping you will need to double bag your work – put your work on a suitable sized bat and put the bat in a bag so the base of the bag is under the bat, then put another bag over the top of the work and tuck the top of the bag under the bat. If you want to trim (or turn) your thrown work the following week, it should also be double bagged. If your work is large, delicate, or of uneven thicknesses, you should lightly cover your work for drying. When considering the drying process, bare in mind the weather, humidity and wind! The hotter and dryer, the faster things dry and work can dry unevenly in the shelves – this can lead to cracking – another time to lightly cover your work for drying. Step Four – Trimming and Cleaning Up Your work is dry! It is called greenware now and it is at it’s most fragile! Handle everything with two hands. I often refer to soft hands – keep everything gentle and with your fingers spread as much as possible. Try to not pick up things like plates too much, and always with both hands! Before your work can be bisque fired it should be “cleaned up”. You work won’t go into the kiln if it has sharp edges – when glazed, sharp edges turn into razor blades! Use a piece of fly wire to rub the work all over – this will scratch a little so be light handed. Use a knife or metal kidney to scrape any areas that require a bit more dynamic treatment than the fly wire offers! Finally, a very light wipe over with a slightly damp sponge can help soften and soothe all of your edges and dags! Trimming thrown work: If you are planning to trim (or turn) your thrown work (and you should be), make sure you bag it well – your work should be leather hard to almost dry for easiest trimming. Use this step to finish the work completely – use a metal kidney to polish the surface, or a slightly damp sponge to give a freshly thrown look. Wipe the sponge around the rim after trimming, and check the inside of the pot for dags! Trimming slip cast work: Usually I will trim the rims of your work on the wheel the following day to make that stage easier, however you will still need to check your work for lumps and bumps. Last but not least – check that your name is still clearly on the bottom of your work. Step Five – Bisque Firing When the work is completely dry it can go into the bisque kiln. The bisque kiln is fired to 1000°C. This process burns off the water in the clay as well as some of the chemically bound water. The structure of the clay is not altered that much at this temperature. Inside the bisque kiln, the work is stacked a little, small bowl inside a larger bowl and onto a heavy plate. Smaller items like decorations or drink coasters might get stacked several high. Consideration is paid to the weight of the stack and shape of the work. A bisque kiln can fire about one and a half times the amount of work that the glaze kiln can fire. The firing takes about 10 hours to complete the cycle and about two days to cool down. Once it has been emptied the work is placed in the glaze room ready for you to decorate! Step Six – Glazing Decorating your work with colour can be a lot of fun – and time consuming! There are three main options for surface treatment at this stage: Oxide Washes Underglazes Glazes Washes and underglazes do not “glaze” the work – It will still need a layer of glaze to fully seal the clay (washes don’t need glaze on surfaces not designed for food or liquid as they can gloss up a little on their own). Underglazes are stable colourants that turn out pretty much how they look in the jar. They can be mixed with each other to form other colours and can be used like water colours to paint onto your work. Mostly they should have a clear glaze on top to seal them. Oxides are a different species – the pink oxide (cobalt) wash turns out bright blue for instance. They don’t always need a glaze on top, and some glazes can change the colour of the wash! The glazes need no other “glaze” on top! Be careful of unknown glaze interactions – you can put any combination of glaze in a bowl or on a plate, but only a single glaze on the outside of any vertical surface! Glazes are a chemical reaction under heat. We don’t know the exact chemicals in the Mayco glazes we use. I can guess by the way they interact with each other, however, on the whole, you need to test every idea you have, and not run the test on a vertical surface! Simply put, glaze is a layer of glass like substance that bonds with the clay underneath. Clay is made of silica, alumina and water. Glaze is made of mostly silica. Silica has a melting point of 1700°C and we fire to 1240°C. The silica requires a “flux” to help it melt at the lower temperature. Fluxes can be all sorts of chemicals – a common one is calcium – calcium has a melting point of 2500°C, however, together they both melt at a much lower temperature! Colourants are metal oxides like cobalt (blue), chrome (green through black), copper (green, blue, even red!), manganese (black, purple and pink) iron (red brown), etc. Different chemicals in the glaze can have dramatic effects. for example, barium carbonate (which we don’t use) turns manganese bright pink! Other elements can turn manganese dioxide brown, blue, purple and reddish brown. Manganese dioxide is a flux in and of itself as well. So, glazes that get their black and purple colours, often interact with other glazes and RUN! Our mirror black is a good example – it mixes really well with many glazes because it fluxes them – causes them to melt faster. It will also bring out many beautiful colours in the glazes because it’s black colouring most definitely comes from manganese dioxide! Glaze chemistry is a whole subject on it’s own! We use commercial Mayco glazes on purpose – for their huge range of colour possibilities, stability, cool interactions, artistic freedom with the ability to easily brush the glazes on and ease of use. We currently have almost 50 glazes on hand! A major project is to test the interactions of all glazes with each other. That is 2,500 test tiles!!!! I’m going to make the wall behind the wheels the feature wall of pretty colours! Step Seven – Glaze (Gloss or sometimes called “Glost”) Firing Most of the time this is the final stage of making your creation (but not always!) The glaze kiln goes to 1240°C. This is called cone 6, or midrange. It is the low end of stoneware temperatures. Stoneware clays and glazes are typically fired at cone 8 – 10, that is 1260 – 1290°C. The energy requirement to go from 1240°C to 1280°C is almost a 30% more! Our clay is formulated to vitrify (mature, turn “glass-like”) at 1240°, as are our glazes. A glaze kiln take around 12 hours to reach temperature and two to three days to cool down. Sometimes a third firing process is required – this is for decoration that is added to work after the glaze firing. For example – adding precious metals and lustres. this firing temperature is usually around 600 – 800°C depending upon the techniques being used. There are many students interested in gold and silver trims – we will be doing this third type of firing soon! After firing your work will be in the student finished work shelves. Remember to pay for it before you head out the door! There is a small extra charge for using porcelain clay (it’s more than twice the price of regular clay), and for any third firing process! Once your work has been fired it can not turn back into clay for millennia – so don’t fire it if you don’t like it! Put it in the bucket for recycling. https://firebirdstudios.com.au/the-process-of-making-pottery/ This bowl is an example of kitchenware used in the 19th century and still in use today.Bowl white ceramic plain that has two sets of edging around lip. Inside bowl has plaster designed to look like cooking mixture.flagstaff hill, warrnambool, shipwrecked-coast, flagstaff-hill, flagstaff-hill-maritime-museum, maritime-museum, shipwreck-coast, flagstaff-hill-maritime-village, kitchen equipment, ceramic -
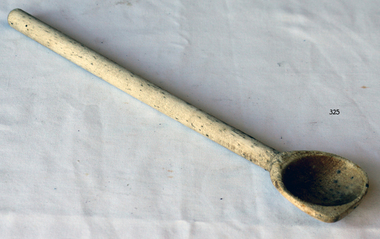 Flagstaff Hill Maritime Museum and Village
Domestic object - Spoon
... The spoon is an example of kitchen utensils made and used in colonial Australia. ...Wooden spoons were common utensils in colonial days and are still used today. The spoon is an example of kitchen utensils made and used in colonial Australia.Spoon wooden blonde, rod handle, oval shape base with flat top flagstaff hill, flagstaff hill maritime museum and village, warrnambool, maritime museum, maritime village, great ocean road, shipwreck coast, spoon, wooden spoon, kitchen utensil, cooking utensil -
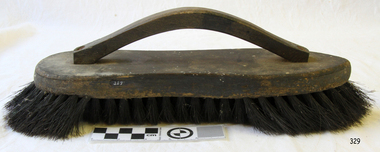 Flagstaff Hill Maritime Museum and Village
Domestic object - Brush
... Flagstaff Hill Flagstaff Hill Maritime Museum and Village Warrnambool Maritime Museum Maritime Village Great Ocean Road Shipwreck Coast cast iron stove oven range stove brush blackening brush cooking kitchen equipment wood fired stove Stove brush, wooden with wooden raised handle and black bristles. ...This stove brush is shaped to fit into grooves and crevices on a cast iron stove range and fenders. A brush like this would be used in the 19th and early 290th centuries to apply a blackening agent to the metal to clean and preserve it would be polished to make it look more attractive.This object is significant as an example of an item in common use in the 19th and early 20th centuries.Stove brush, wooden with wooden raised handle and black bristles. The bristles at the ends of the brush are longer than in the centre, and flare outwards. The brush' is rounded at one end and pointed at the other.flagstaff hill, flagstaff hill maritime museum and village, warrnambool, maritime museum, maritime village, great ocean road, shipwreck coast, cast iron stove, oven range, stove brush, blackening brush, cooking, kitchen equipment, wood fired stove -
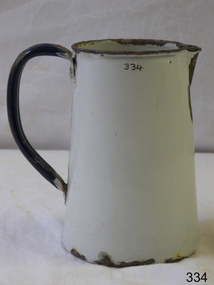 Flagstaff Hill Maritime Museum and Village
Domestic object - Jug, Late 19th or early 20th Century
... Flagstaff Hill Flagstaff Hill Maritime Museum and Village Warrnambool Maritime Museum Maritime Village Great Ocean Road Shipwreck Coast jug enamel jug kitchen equipment liquid storage beverage preparation None. ...This enamel jug is a basic design that was common to households in the 19th and early 20th centuries. Enamelware dates back to 1760 in Germany.This object is significant as an example of an item in common use in the 19th and early 20th centuries.White metal enamel jug, white with navy blue handle and rim. Tapered cylindrical shape, with a pouring lip.None.flagstaff hill, flagstaff hill maritime museum and village, warrnambool, maritime museum, maritime village, great ocean road, shipwreck coast, jug, enamel jug, kitchen equipment, liquid storage, beverage preparation -
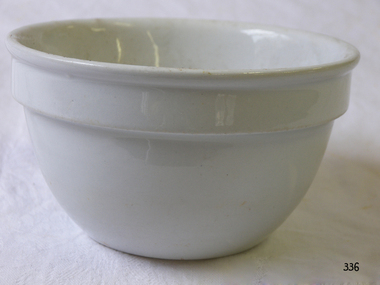 Flagstaff Hill Maritime Museum and Village
Domestic object - Bowl, J & G Meakin, Late 19th or early 20th Century
... Flagstaff Hill Flagstaff Hill Maritime Museum and Village Warrnambool Maritime Museum Maritime Village Great Ocean Road Shipwreck Coast mixing bowl food preparation J & G Meakin pottery Stoke-on-Trent kitchen equipment Ceramic On base, 'Ironstone China Reg SOL 391413' with symbol Bowl; white ceramic, round and tapering inwards towards base. ...The Process of Making Pottery Decorating, Firing, Glazing, Making, Technical There is a rhythm and flow to clay. It can’t be done all at once! Even the making process! It can take weeks to get everything done, especially if you can only work on your pottery once a week! Even though we have three hour classes, it’s often just not enough time! Here is an overview of some of the processes so you have a bit more grasp on some of the technical stuff! Step One – Design There are SO many ideas out there for making stuff in clay! From delicate porcelain jewellery, through to heavy sculptural work and everything in between. Deciding your direction is sometimes not that easy – when you first start, try everything, you will naturally gravitate to the style that you enjoy! The options and variations are endless and can get a wee bit overwhelming too! Check in with me before you start to ensure your ideas will work, what order you might do things, how you could achieve the look you are seeking and any other technical data required! Step Two – Making Clay is thixotropic. This means that as you work with it, the clay first gets sloppier and wetter, before is begins to dry in the atmosphere. For most things, you simply can’t do all parts of the project at once. An example of work order might look like: Get last weeks work out from the shelves Prepare clay for today’s work – roll your clay, prepare balls for throwing, make the first stage of a pinch pot) Clean up last week’s work and put it on the shelf for bisque firing Check that you have any glazing to do – and do enough of it that you will have time to finish your main project Do the next step of your next project – there might be a further step that can’t be complete immediately, in that case, wrap your work well and put onto the shelves. Letting your work rest for a while can really help keep your work clean and professional looking. Many things require bagging under plastic to keep it ready for work the next week – put your name on the outside of the bag so you can find your work easily. We have stickers and markers. Consider how you want to decorate your work – coloured slip can be applied at a fairly wet stage (remembering that it will make your work even wetter!). Trying to apply slip to dry clay won’t work! If you want to do sgraffito – you will need to keep the work leather hard (a state of dryness where you can still work the clay with a little effort and a little water and care). Step Three – Drying Most of the time your work can go into the rack uncovered to let it dry out for the following week. If you want to continue forming or shaping you will need to double bag your work – put your work on a suitable sized bat and put the bat in a bag so the base of the bag is under the bat, then put another bag over the top of the work and tuck the top of the bag under the bat. If you want to trim (or turn) your thrown work the following week, it should also be double bagged. If your work is large, delicate, or of uneven thicknesses, you should lightly cover your work for drying. When considering the drying process, bare in mind the weather, humidity and wind! The hotter and dryer, the faster things dry and work can dry unevenly in the shelves – this can lead to cracking – another time to lightly cover your work for drying. Step Four – Trimming and Cleaning Up Your work is dry! It is called greenware now and it is at it’s most fragile! Handle everything with two hands. I often refer to soft hands – keep everything gentle and with your fingers spread as much as possible. Try to not pick up things like plates too much, and always with both hands! Before your work can be bisque fired it should be “cleaned up”. You work won’t go into the kiln if it has sharp edges – when glazed, sharp edges turn into razor blades! Use a piece of fly wire to rub the work all over – this will scratch a little so be light handed. Use a knife or metal kidney to scrape any areas that require a bit more dynamic treatment than the fly wire offers! Finally, a very light wipe over with a slightly damp sponge can help soften and soothe all of your edges and dags! Trimming thrown work: If you are planning to trim (or turn) your thrown work (and you should be), make sure you bag it well – your work should be leather hard to almost dry for easiest trimming. Use this step to finish the work completely – use a metal kidney to polish the surface, or a slightly damp sponge to give a freshly thrown look. Wipe the sponge around the rim after trimming, and check the inside of the pot for dags! Trimming slip cast work: Usually I will trim the rims of your work on the wheel the following day to make that stage easier, however you will still need to check your work for lumps and bumps. Last but not least – check that your name is still clearly on the bottom of your work. Step Five – Bisque Firing When the work is completely dry it can go into the bisque kiln. The bisque kiln is fired to 1000°C. This process burns off the water in the clay as well as some of the chemically bound water. The structure of the clay is not altered that much at this temperature. Inside the bisque kiln, the work is stacked a little, small bowl inside a larger bowl and onto a heavy plate. Smaller items like decorations or drink coasters might get stacked several high. Consideration is paid to the weight of the stack and shape of the work. A bisque kiln can fire about one and a half times the amount of work that the glaze kiln can fire. The firing takes about 10 hours to complete the cycle and about two days to cool down. Once it has been emptied the work is placed in the glaze room ready for you to decorate! Step Six – Glazing Decorating your work with colour can be a lot of fun – and time consuming! There are three main options for surface treatment at this stage: Oxide Washes Underglazes Glazes Washes and underglazes do not “glaze” the work – It will still need a layer of glaze to fully seal the clay (washes don’t need glaze on surfaces not designed for food or liquid as they can gloss up a little on their own). Underglazes are stable colourants that turn out pretty much how they look in the jar. They can be mixed with each other to form other colours and can be used like water colours to paint onto your work. Mostly they should have a clear glaze on top to seal them. Oxides are a different species – the pink oxide (cobalt) wash turns out bright blue for instance. They don’t always need a glaze on top, and some glazes can change the colour of the wash! The glazes need no other “glaze” on top! Be careful of unknown glaze interactions – you can put any combination of glaze in a bowl or on a plate, but only a single glaze on the outside of any vertical surface! Glazes are a chemical reaction under heat. We don’t know the exact chemicals in the Mayco glazes we use. I can guess by the way they interact with each other, however, on the whole, you need to test every idea you have, and not run the test on a vertical surface! Simply put, glaze is a layer of glass like substance that bonds with the clay underneath. Clay is made of silica, alumina and water. Glaze is made of mostly silica. Silica has a melting point of 1700°C and we fire to 1240°C. The silica requires a “flux” to help it melt at the lower temperature. Fluxes can be all sorts of chemicals – a common one is calcium – calcium has a melting point of 2500°C, however, together they both melt at a much lower temperature! Colourants are metal oxides like cobalt (blue), chrome (green through black), copper (green, blue, even red!), manganese (black, purple and pink) iron (red brown), etc. Different chemicals in the glaze can have dramatic effects. for example, barium carbonate (which we don’t use) turns manganese bright pink! Other elements can turn manganese dioxide brown, blue, purple and reddish brown. Manganese dioxide is a flux in and of itself as well. So, glazes that get their black and purple colours, often interact with other glazes and RUN! Our mirror black is a good example – it mixes really well with many glazes because it fluxes them – causes them to melt faster. It will also bring out many beautiful colours in the glazes because it’s black colouring most definitely comes from manganese dioxide! Glaze chemistry is a whole subject on it’s own! We use commercial Mayco glazes on purpose – for their huge range of colour possibilities, stability, cool interactions, artistic freedom with the ability to easily brush the glazes on and ease of use. We currently have almost 50 glazes on hand! A major project is to test the interactions of all glazes with each other. That is 2,500 test tiles!!!! I’m going to make the wall behind the wheels the feature wall of pretty colours! Step Seven – Glaze (Gloss or sometimes called “Glost”) Firing Most of the time this is the final stage of making your creation (but not always!) The glaze kiln goes to 1240°C. This is called cone 6, or midrange. It is the low end of stoneware temperatures. Stoneware clays and glazes are typically fired at cone 8 – 10, that is 1260 – 1290°C. The energy requirement to go from 1240°C to 1280°C is almost a 30% more! Our clay is formulated to vitrify (mature, turn “glass-like”) at 1240°, as are our glazes. A glaze kiln take around 12 hours to reach temperature and two to three days to cool down. Sometimes a third firing process is required – this is for decoration that is added to work after the glaze firing. For example – adding precious metals and lustres. this firing temperature is usually around 600 – 800°C depending upon the techniques being used. There are many students interested in gold and silver trims – we will be doing this third type of firing soon! After firing your work will be in the student finished work shelves. Remember to pay for it before you head out the door! There is a small extra charge for using porcelain clay (it’s more than twice the price of regular clay), and for any third firing process! Once your work has been fired it can not turn back into clay for millennia – so don’t fire it if you don’t like it! Put it in the bucket for recycling. https://firebirdstudios.com.au/the-process-of-making-pottery/This bowl was made by renowned pottery company J & G Meakin of England. The firm was established in the mid-1800's. The bowl is an example of kitchenware used in the 19th century and still in use today.Bowl; white ceramic, round and tapering inwards towards base. Made by J and G Meakin England.On base, 'Ironstone China Reg SOL 391413' with symbolflagstaff hill, flagstaff hill maritime museum and village, warrnambool, maritime museum, maritime village, great ocean road, shipwreck coast, mixing bowl, food preparation, j & g meakin, pottery, stoke-on-trent, kitchen equipment, ceramic -
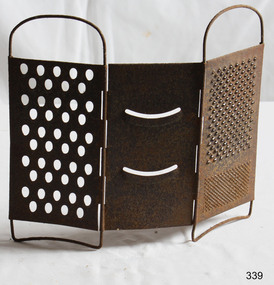 Flagstaff Hill Maritime Museum and Village
Domestic object - Grater
... https://www.cheeseprofessor.com/blog/antique-cheese-graters The grater has been used for hundreds of years and has proved its worth in the kitchen throughout history. flagstaff hill warrnambool shipwrecked-coast flagstaff-hill flagstaff-hill-maritime-museum maritime-museum shipwreck-coast flagstaff-hill-maritime-village Grater None. ...François Boullier of France and Isaac Hunt of England both took credit for inventing the cheese grater in the 1540s. Ingredient supplies, mainly milk, ebbed and flowed in both France and England, as they have in the United States during this coronavirus pandemic. Boullier originally aimed to use up an overabundance of cheese in Paris. An avoidance of meat led French farmers to convert their meat herds (often boys) to dairy-producers (girls), which led to more milk and even too much milk, which led to a market flooded with cheese. Boullier made his first cheese grater out of pewter to grate hard, sometimes dried out cheeses, which turned them into a sort of condiment. Pewter is known as a rather soft metal, and Boullier’s original grater is reportedly on display in a museum in Le Havre, France. Isaac Hunt wanted to stretch cheese due to a shortage in England, so he grated and melted it for Welsh rarebit and other dishes. Grating cheese allowed more even distribution of the cheese to melt it in cooking and still does. During the Great Depression of the 1930s, Philadelphia cheesemonger and entrepreneur Jeffrey Taylor also wanted to stretch cheese for to bulk up cheese features, including vegetables, to make them look like more filling food during difficult economic times. Taylor read about Boullier’s invention and made his own by sharpening the holes of a metal shower drain. For the last century, many companies have tried to improve the cheese grater and invent a new “latest” one that we all must-have. Graters are now made of all sorts of materials including bamboo, wood, and various metals. Some are decorated with clowns’ heads, some are shaped like plastic frogs, while others bear knuckle protectors. They vary in size, shape, and function. Grating slots come with different angles and shapes of slots and can grate everything from zucchini, onions and cheese, to cooked eggs, coconut, potatoes, cabbage, and lemon and orange peel, and possibly even create wood shavings. Smaller graters grate ginger and garlic. https://www.cheeseprofessor.com/blog/antique-cheese-gratersThe grater has been used for hundreds of years and has proved its worth in the kitchen throughout history.Grater metal (3 parts) Tripartite with hinges for folding.None.flagstaff hill, warrnambool, shipwrecked-coast, flagstaff-hill, flagstaff-hill-maritime-museum, maritime-museum, shipwreck-coast, flagstaff-hill-maritime-village, grater -
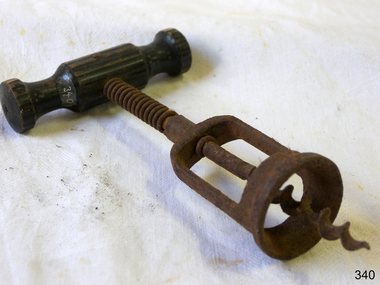 Flagstaff Hill Maritime Museum and Village
Domestic object - Corkscrew
... Flagstaff Hill Flagstaff Hill Maritime Museum and Village Warrnambool Maritime Museum Maritime Village Great Ocean Road Shipwreck Coast corkscrew beverages kitchen equipment bottle opener None. Winged corkscrew with a T-shaped wooden handle, metal spring and worm-wheel screw section. ...The design of the corkscrew may have been derived from the gun worm, which was a device from at least the early 1630s, used by men to remove unspent charges from a musket's barrel in a similar fashion. The corkscrew is possibly an English invention, due to the tradition of beer and cider, and the 'Treatise on Cider' by John Worlidge in 1676 describes "binning of tightly corked cider bottles on their sides", although the earliest reference to a corkscrew is, "steel worm used for the drawing of Corks out of Bottles" from 1681. In 1795, the first corkscrew patent was granted to the Reverend Samuel Henshall, in England. The clergyman affixed a simple disc, now known as the Henshall Button, between the worm and the shank. The disc prevents the worm from going too deep into the cork, forces the cork to turn with the turning of the crosspiece, and thus breaks the adhesion between the cork and the neck of the bottle. The disc is designed and manufactured slightly concave on the underside, which compresses the top of the cork and helps keep it from breaking apart. The winged corkscrew, sometimes called a cork extractor, butterfly corkscrew, owl corkscrew, Indian corkscrew, or angel corkscrew, has two levers, one on either side of the worm. As the worm is twisted into the cork, the levers are raised. Pushing down the levers draws the cork from the bottle in one smooth motion. The most common design has a rack and pinion connecting the levers to the body. The head of the central shaft is frequently modified to form a bottle opener, or foil cutter, increasing the utility of the device. Corkscrews of this design are particularly popular in household use. In 1880, William Burton Baker was issued British Patent No. 2950 for his double lever corkscrew, with both levers sliding onto the upper end of the shank. The first American patent was in 1930 granted to the Italian Domenico Rosati who emigrated to Chicago, Illinois, to work as bartender before prohibition. Rosati's design had an exposed rack and pinion mechanism. Such design was adapted by other brands as the wine-market grew in popularity. The winged owl version, with two side-plates covering the rack and pinion mechanism, was first designed and manufactured in 1932 by the Spanish industrial designer David Olañeta for his brand BOJ and was later adopted by others, such as the 1936 US Patent No. 98,968 by Richard Smythe marked HOOTCH-OWL https://en.wikipedia.org/wiki/CorkscrewThis object is significant as an example of an item in common use in the 19th and early 20th centuries, and that was developed further in the 1930s.Winged corkscrew with a T-shaped wooden handle, metal spring and worm-wheel screw section.None.flagstaff hill, flagstaff hill maritime museum and village, warrnambool, maritime museum, maritime village, great ocean road, shipwreck coast, corkscrew, beverages, kitchen equipment, bottle opener -
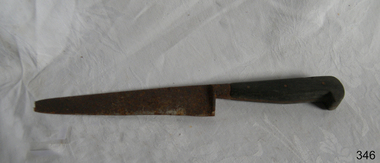 Flagstaff Hill Maritime Museum and Village
Domestic object - Knife
... Flagstaff Hill Warrnambool Shipwrecked-coast Flagstaff-Hill Flagstaff-Hill-Maritime-Museum Maritime-Museum Shipwreck-coast Flagstaff-Hill-Maritime-Village Kitchen knife Food preparation Knife; wooden handle and shaped metal blade with serrated cutting edge. ...This knife would have been used for food preparation.Knife; wooden handle and shaped metal blade with serrated cutting edge.flagstaff hill, warrnambool, shipwrecked-coast, flagstaff-hill, flagstaff-hill-maritime-museum, maritime-museum, shipwreck-coast, flagstaff-hill-maritime-village, kitchen knife, food preparation -
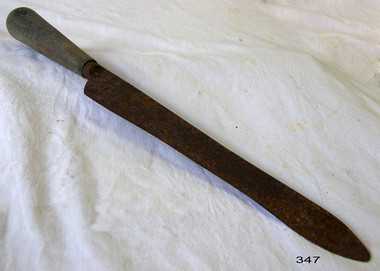 Flagstaff Hill Maritime Museum and Village
Domestic object - Knife
... Flagstaff Hill Warrnambool Shipwrecked-coast Flagstaff-Hill Flagstaff-Hill-Maritime-Museum Maritime-Museum Shipwreck-coast Flagstaff-Hill-Maritime-Village Knife Kitchen Equipment Dining None. Carving knife with wooden handle and rusted slender metal blade. ...From the early days of our race, the knife represented one of the first and most important tools that enabled rise of our technology, military, culture, science and all other things that brought us to this point of modern civilisation. As a vital tool for survival, combat, construction and food preparation, the knife quickly became the most basic tool from which all others were born. In those ancient times, 500,000 years ago, sharpened stones started slowly evolving, becoming more and more like their modern counterpart. Before the time when fire enabled the melting of the various metals, and forging them into modern knives, their stone counterparts received several visual upgrades. Double bladed knives were most popular, and their wooden or stone hilts were decorated with animal skins and feathers. Those knives represented a great deal of pride for the warriors and elders who owned them, and that tradition continued to be practised with the arrival of the Bronze Age. The appearance of metallurgy brought the ability to create knives from softer types of metal. Even though knives from bronze did not provide durability over longer periods of time [easily dulled, and susceptible to corrosion), their sharpness and slim designed proved to be superior to any stone knife tool. As the centuries went on, iron and then steel became commonplace across the entire world. Knives created from those materials were much more durable and easier to maintain their sharpness after prolonged use. During medieval times in Europe, steel metallurgy managed to evolve knives from small single or double-bladed edges to larger sizes - swords, spears and axes. Even with all those advancements, the use of knives as an eating utensil continued to be used in some small circles. Even as early as the 15th century, wealthy circles of people started carrying personal knives, intended for double use - both eating and defending against threats. During those times the host were not obliged to provide their guest with any kind of eating utensil in addition to plates, so wealthy males used their eating knives for cutting their own meals, and the meals of nearby female guests. Slim double-bladed knives were good for cutting and piercing foods. As the use of forks became widespread in the whole of Europe by the late 17th century, most people used this kind of small knife on a regular basis (a combination of two knives, one for stabilising and other for cutting the meal). http://www.eatingutensils.net/history-of-cutlery/knife-history/The knife is one of the most important items that has enabled the development of civilisation over thousands of years.Carving knife with wooden handle and rusted slender metal blade.None.flagstaff hill, warrnambool, shipwrecked-coast, flagstaff-hill, flagstaff-hill-maritime-museum, maritime-museum, shipwreck-coast, flagstaff-hill-maritime-village, knife, kitchen equipment, dining -
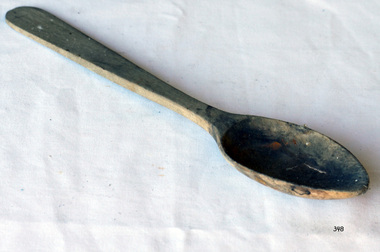 Flagstaff Hill Maritime Museum and Village
Domestic object - Spoon
... Flagstaff Hill Warrnambool Shipwrecked-coast Flagstaff-Hill Flagstaff-Hill-Maritime-Museum Maritime-Museum Shipwreck-coast Flagstaff-Hill-Maritime-Village wooden spoon food preparation baking equipment kitchen utensil Spoon, wooden, blonde colour. ...An example of baking equipment used in Victorian times and still used to day.Spoon, wooden, blonde colour. Spoon section tapers to rounded point and handle is flat and shaped.flagstaff hill, warrnambool, shipwrecked-coast, flagstaff-hill, flagstaff-hill-maritime-museum, maritime-museum, shipwreck-coast, flagstaff-hill-maritime-village, wooden spoon, food preparation, baking equipment, kitchen utensil -
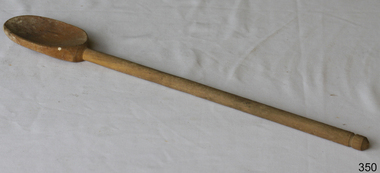 Flagstaff Hill Maritime Museum and Village
Domestic object - Spoon
... The spoon is an example of a utensils used in the kitchen in Victorian times and still used today. ...The spoon is an example of a utensils used in the kitchen in Victorian times and still used today.Spoon, wooden, blonde with oval spoon and rod handleflagstaff hill, warrnambool, shipwrecked-coast, flagstaff-hill, flagstaff-hill-maritime-museum, maritime-museum, shipwreck-coast, flagstaff-hill-maritime-village, spoon, wooden spoon, kitchen utensil, baking equipment -
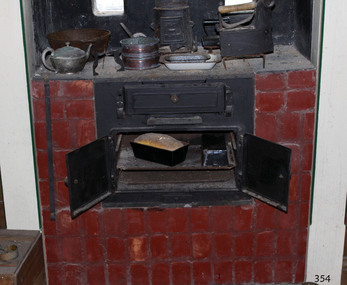 Flagstaff Hill Maritime Museum and Village
Domestic object - Stove, Cox and Rizzetti Stove Works, ca. 1918-1930s
... This Planet No 3 stove is an uncommon example of cooking equipment used in kitchens in the early 20th century, as the firebox is above the oven rather than beside it. ...Cast iron stoves burn solid fuel such as wood or coal, and are used for cooking and warmth. The stoves have a firebox with a grate where the fuel is burned. The hot air flows through flues and baffles that heat the stove top and the oven. Before cast iron stoves were invented, cooking and heating were carried out in outdoor open fires, and later, in fireplaces inside the home. In 1642 the first cast iron stove was manufactured in Lynn, Massachusetts, where molten cast iron was poured into a sand mould to make rectangular plates that were then joined together to make a box. Benjamin Franklin invented the more efficient Pennsylvania stove in 1744, and this efficient design is still used today. After the mid-19th century cast iron stoves were produced with burners in different positions, giving varied temperatures, so a wide variety of foods could be cooked at the same time at the most suitable heat, from slow cooking to baking scones. In contemporary times people the new wood-burning stoves had to meet the anti-pollution standards now in place to protect our environment. By the 1920s gas cookers were being introduced for domestic use, and by the 1930s electric home cookers were being offered to householders. PLANET STOVES In August 1925 the firm Cox and Rizzetti, Stove Works, and also Sydney Road, South Melbourne, advertised in the Brunswick and Coburg Leader of November 11, 1925 as "formerly with Harnwell and Sons" and as "specialists in solid cast iron Planet stoves ... which merit an inspection from builders and householders". The firm continued in business and was mentioned as sponsors in the King Island News in 1971. Harnwell and Sons was listed in the Victorian Government Gazette of 1894. It is curious that the firm was mentioned in an article in the Sunrasia Daily of June 14, 1934 titled 'Planet Stoves' as a manufacturer of Planet Stoves. This Planet No 3 stove is an uncommon example of cooking equipment used in kitchens in the early 20th century, as the firebox is above the oven rather than beside it. The cast iron combustion stove is significant as part of the evolution of domestic cooking. Previously cooking was mostly carried out in outdoors in open fires, and later in fireplaces indoors. Cast iron stoves are still used today and have additional features such as thermostats to monitor and maintain temperature, water heating pipes connected, and environmentally approved anti-pollution fittings. Stove; a compact, blackened cast iron combustion cooker, installed within a fireplace and enclosed by bricks on both sides. The upright rectangular stove has a flat top with three round, removable cook plates and a flue connected at the back. The front has three doors with round knob handles; a swing-down firebox door above a sliding ashtray, and two side-hinged oven doors above a sliding opening. Inside on the side walls are two pairs of runners. Behind the pair of doors is an oven with two pairs of rails and two removable metal shelves. The stove has cast inscriptions on the chimney flue and on the front of the right hand side stove door. The model of the stove is The Planet No 3, made in Melbourne.Chimney flue, "[within rectangle] THE / PLANET" Stove door, "(within oval) PLANET / No 3"flagstaff hill, flagstaff hill maritime museum and village, warrnambool, maritime museum, maritime village, great ocean road, shipwreck coast, stove, cast iron stove, combustion stove, wood-burning stove, wood stove, wood oven, solid fuel stove, cooker, the planet, planet, planet no. 3, kitchen equipment, baking, domestic cooking, cooking equipment, food preparation, planet stove, planet cooker, cooking range, slow combustion stove, antique, range cooker, cox and rizzetti, harnwell and sons, melbourne manufacturer -
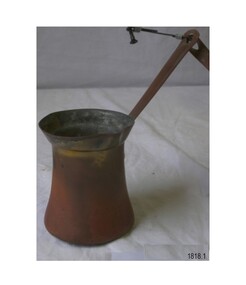 Flagstaff Hill Maritime Museum and Village
Domestic object - Coffee Pot, 1950s
... This coffee pot is an example of kitchen equipment used for both food and beverage preparation. ...During the mid-to-late 19th century, migrants from Greece and Arabia, as well as from many other countries, landed in Australia, contributing to the rich and diverse culture of Australia. This coffee pot is an example of that culture. In Greece and Arabia, and later in Lebanon, traditional coffee is prepared in a long-handled coffee pot called a "rakwe". The coffee is poured directly from the rakwe into a small cup usually adorned with a decorative pattern called a Finjan. A coffee maker like this multi-purpose pot is used for brewing tea, melting butter, boiling water, and cooking sauces and soups.This coffee pot is an example of kitchen equipment used for both food and beverage preparation. Coffee pots of similar design are still available from stores today.Lebanese coffee pot; a long-handled copper pot, cylindrical with a concave middle, slightly flared base and a flared lip. It was made in Lebanon and includes a stamped inscription.Stamped: "5"warrnambool, shipwreck coast, flagstaff hill, flagstaff hill maritime museum, flagstaff hill maritime village, coffee rakwe, rakwe, coffee pot, coffee maker, arabic, turkish, laeanese, beverage, multi-purpose pot, coffee brewing, cooking, drinking, kitchen equipment -
 Flagstaff Hill Maritime Museum and Village
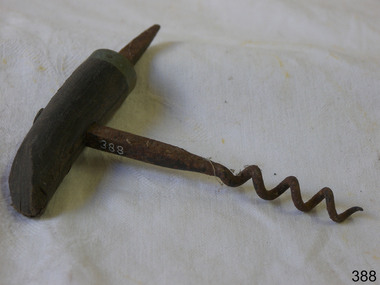
Domestic object - Corkscrew
... Flagstaff Hill Warrnambool Shipwrecked-coast Flagstaff-Hill Flagstaff-Hill-Maritime-Museum Maritime-Museum Shipwreck-coast Flagstaff-Hill-Maritime-Village Corkscrew Beverages Kitchen Equipment Bottle Opener None. Metal corkscrew with wooden handle that is partly broken. ...The design of the corkscrew may have been derived from the gun worm, which was a device from at least the early 1630s, used by men to remove unspent charges from a musket's barrel in a similar fashion. The corkscrew is possibly an English invention, due to the tradition of beer and cider, and the 'Treatise on Cider' by John Worlidge in 1676 describes "binning of tightly corked cider bottles on their sides", although the earliest reference to a corkscrew is, "steel worm used for the drawing of Corks out of Bottles" from 1681. In 1795, the first corkscrew patent was granted to the Reverend Samuel Henshall, in England. The clergyman affixed a simple disc, now known as the Henshall Button, between the worm and the shank. The disc prevents the worm from going too deep into the cork, forces the cork to turn with the turning of the crosspiece, and thus breaks the adhesion between the cork and the neck of the bottle. The disc is designed and manufactured slightly concave on the underside, which compresses the top of the cork and helps keep it from breaking apart. In its traditional form, a corkscrew is simply a steel screw attached to a perpendicular handle, made of wood or some other material. The user grips the handle and screws the metal point into the cork, until the helix is firmly embedded, then a vertical pull on the corkscrew extracts the cork from the bottle. The handle of the corkscrew allows for a commanding grip to ease removal of the cork. https://en.wikipedia.org/wiki/CorkscrewThis object is significant as an example of an item in common use since the late 17th century.Metal corkscrew with wooden handle that is partly broken. Has metal steel spike to create a starting point for the use of the corkscrew. Very rusty. None.flagstaff hill, warrnambool, shipwrecked-coast, flagstaff-hill, flagstaff-hill-maritime-museum, maritime-museum, shipwreck-coast, flagstaff-hill-maritime-village, corkscrew, beverages, kitchen equipment, bottle opener -
 Flagstaff Hill Maritime Museum and Village
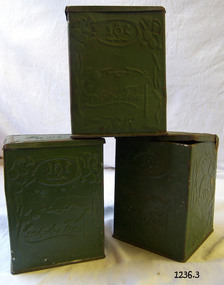
Container - Kitchen Canister set
... flagstaff hill warrnambool shipwrecked-coast flagstaff-hill flagstaff-hill-maritime-museum maritime-museum shipwreck-coast flagstaff-hill-maritime-village Canister (3) metal for "Griffiths Teas" Hinged lid and relief decorative pattern painted green. Container Kitchen Canister set ...Canister (3) metal for "Griffiths Teas" Hinged lid and relief decorative pattern painted green.flagstaff hill, warrnambool, shipwrecked-coast, flagstaff-hill, flagstaff-hill-maritime-museum, maritime-museum, shipwreck-coast, flagstaff-hill-maritime-village -
![Domestic object - Teapot, Swan [brand] teapot, 1950s](/media/collectors/4f729f5697f83e03086015b8/items/651283de0b409840e2f1495e/item-media/65128df1024d309e0c2e7897/item-fit-380x285.jpg?cb=6) Greensborough Historical Society
Greensborough Historical SocietyDomestic object - Teapot, Swan [brand] teapot, 1950s
... Commonly used 4 cup aluminium teapot with lid, Bakelite handle and knob. teapots kitchen equipment "Swan Brand Made in England 4 cups" engraved on base Four cup tea pot with lid; bakelite handle and knob. ...Commonly used 4 cup aluminium teapot with lid, Bakelite handle and knob.Four cup tea pot with lid; bakelite handle and knob."Swan Brand Made in England 4 cups" engraved on baseteapots, kitchen equipment -
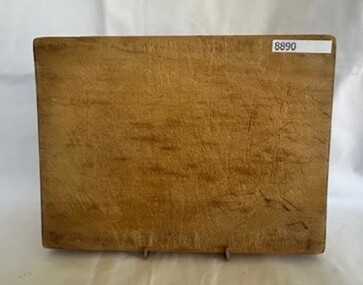 Greensborough Historical Society
Domestic object - Chopping Board, Wooden cutting board, 1900s
... Chopping board petts family kitchen equipment Small wooden rectangular board. ...Board owned and used by Norma and Jim Petts, long standing residents of Greenhill Road, Greensborough 1951-2000.Small wooden rectangular board. Worn (concave in centre)chopping board, petts family, kitchen equipment -
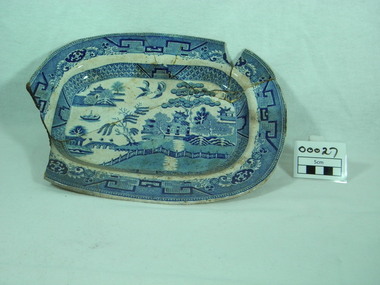 Bright & District Historical Society operating the Bright Museum
Plate
... Artifact from an area that reportedly had a population of 5,000 during the goldrush of 1850s but now virtually a deserted and overgrown valley. kitchen ware flat crockery willow ware buckland allens makers stamp on back, crown above sash with letters, J ? ...Found at Allen's Flat on the Buckland Goldfield, site of Allen and Farleys Store which was traded during the 1850s through to the 1860s. Site of reported violence during the Buckland Riot in 1857.Artifact from an area that reportedly had a population of 5,000 during the goldrush of 1850s but now virtually a deserted and overgrown valley. oval, blue and white willow ware design, crockerymakers stamp on back, crown above sash with letters, J ? ? ?, behive underneath, partly surrounded by a laurel ? wreath. Numeral 3 adjacent to the makers stampkitchen ware, flat, crockery, willow ware, buckland, allens
