Showing 323 items matching "구글 유입seo(TG:e10838).ned"
-
 Stawell Historical Society Inc
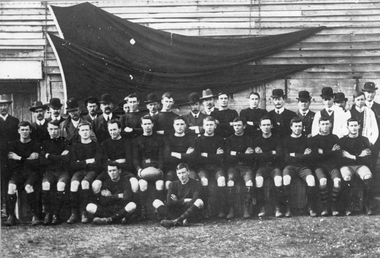
Photograph, Stawell Football Club -- Premiers Wimmera League 1909
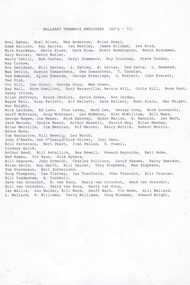
Stawell Football Club Team Premiers Wimmera League 1909. Photograph taken when a match played at Dunolly - between Dunolly and Stawell Premiers of Wimmera League, and Dunolly Premiers of Maryborough District League. Stawell winning by 5 points in 1909.Black and white photograph of a group of sports people. Three rows of people in sporting uniforms others in civilian dress with bowler hats. Taken against a background of a wooden building which has two large pennants hanging on it.BACK ROW (L to R) Alf Clearson, Bill Wilson, (Secretary S.F. C.), Fritz Thomson, Tom Mullins, Geo. Oliver (President 1910), Mat. Newton, Harry Peck, Ned. Walton, Tom Hunter, Gus. Mahnke, Bill McCullough, Bob Claringbold (President S.F.C. 1909), Frank Derry, Jim Wyatt, Roy Nettle, Jack Allison, Eddy Thomas, Hughie Dalziel, Dr. Fox, Archie Gilchrist, C. Murrells, Bill Tiddy. SECOND ROW, George (Piggy) Arnott, Herb Chester, Hughie Sparks, Paddy Doyle, Arthur Parsons (Captain) Bill Earle, Gordon Scriviner, Bert Crouch, Edgar Heal, Bert Errington, Fred Crouch, jack Thompson. FRONT ROW Ark Williams, Jackie Jackson or George Baylie. Match played at Dunolly between Dunolly and Stawell. Stawell Premiers of Wimmera League and Dunolly Premiers of Maryborough District League. Stawell winning by 5 points 1909.stawell sport -
 Kew Historical Society Inc
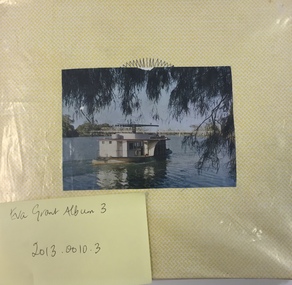
Album - Photographs of heritage sites in Victoria, Eva Grant, 1964-66
Eva Grant was a member of the Kew Historical Society. Three albums in the collection were created by her, this one, the third created between 1964 and 1966. They were donated to the Society by her daughter in 2010. Each of the albums includes photographs and newspaper cuttings collected on her travels to historic places in South East Australia in the 1950s and 1960s. Particular structures photographed in this album include: Barnawatha (Vic.) - The Hermitage | Beveridge (Vic.) - Stone cottage where Ned Kelly was born. | Brighton - St Andrew’s Church graveyard. | Chiltern (Vic.) - lake view [missing] | Cowes (Vic.) - ‘Broadwater’ [originally home of Henty-Wilson family], demolished 1965; Bell of the Speke wreck; Edward’s tree. | Euroa (Vic.) - Habbies Howe | Fairfield (Vic.) - Dight’s Falls; John Dight. | Fernshawe (Vic.) - Queen Mary tree. | Jolimont (Vic.) - Old railway tunnel linking the first Government House (1964); Sign identifying location of first Government House. | Kew (Vic.) - Cairn at Dight’s Falls; Canoe tree, Bowyer Avenue. | Kyneton - De Grave’s Flour Mill - “C”. | Maldon (Vic.) - Chinese oven; Macarthur’s House; Maldon’s oldest resident; Chinese graves x 2; [Beehive Chimney]. | Marysville (Vic.) - Centenary cairn | Mitcham (Vic.), Mud brick house x 2, Deep Creek Road. | Melbourne (Vic.) - St Paul’s Cathedral [renovation] (1964); Wreckers at Damman’s Corner, cnr Bourke and Collins Streets (1964); Princess Gate project x 2 (1964); Colonial Storekeeper’s building on cnr King and Bourke Streets (1966); Early observatory 1861-3; the Honey Memorial. | Mt Oberon (Vic.) - [obsolete] radio telephone dish. | Seymour (Vic.) - Habres (sic) House x 3.| Swan Hill (Vic.) - Major Mitchell’s Cairn (12/1964); Headstone of Andrew Beverage AM (12/1964). | Templestowe (Vic.) - Finn’s Hotel. | Thornton (Vic.) - Eildon Station. | Werribee (Vic.) - Chirnside Memorial [Presbyterian] Church; gaslight beside church | Location unknown, but possibly Swan Hill - Brick house; Wooden bullock dray. | Location unknown - Headstone of John Furlonge 1835.Important record of significant heritage properties in Victoria, many of which have since been demolished.30 page spirex bound drawing book including photographs and newspaper articles of historic buildings in Victoria. The front cover has a picture of a steam boat. The cover is encased in plastic. A number items in the album are annotated with written commentary by Eva Grant who compiled the album. Annotations and transcriptions by Eva Grant on most imageseva grant, photograph albums, heritage places - victoria -
 Ballarat Tramway Museum
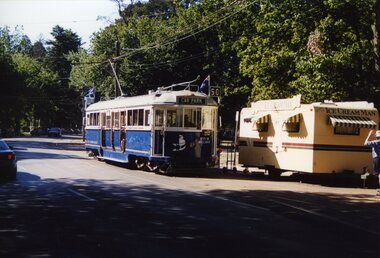
Photograph - Colour Photograph/s - set of 28, Warren Doubleday, 11/03/2002 12:00:00 AM
Set of 28 photographs of the operation of the BTM during the Begonia Festival, including the loading of the Horse Tram for Melbourne on Sunday 10/3/2002, operation in Melbourne on 11/3/2002 and reloading in Bourke St. Taken by Warren Doubleday, on Kodak paper. 2013.1 - Tram 671, Wendouree Parade, 10/3/2002 at Depot Junction .2 - 33 at Loop .3 - 40 and 33 south of the loop, heading for Carlton St. .4 - ditto .5 - 671 returning to the loop from St. Aidans Drive .6 - 40 returning to the loop from Carlton St. .7 - 33 ditto .8 - Loading horse tram at Depot Junction - Alastair Reither .9 - ditto .10 - in St. Kilda Road, 11/3/2002 at about 7.30am .11 - ditto .12 - Tram in Moomba parade, 11/3/2002 - Reg Smith, Len Millar - horse Bear. .13 - ditto .14 - ditto .15 - ditto, after passing with the Ned Kelly's. .16 - ditto - and John Clowes on rear platform .17 - the line up near Bourke St. with V214 behind the horse tram - "Tram Stop Ahead" sign .18 - the line up from Bourke St. with Hawthorn 8 alongside. .19 - Being photographed - Arthur Cook, Roma Cook, Merle Clowes and John Clowes with other visitors .20 - ditto .21 - Malcolm tram, and BTM ten in the background .22 - BTM and Sydney Tramway Museum tent in the City Square area. .23 - Pushing the horse tram across Bourke St. - John Clowes. .24 - Loaded back on the Crane Heavy Haulage (Associated Towing) truck, looking north along Swanston St. .25 - ditto .26 - ditto, general scene in Swanston St. .27 - The towing truck and tram .28 - Hawthorn 8 and Milan 1692 crossing Bourke St. Negatives held on file with documents list.horse trams, depot junction, moomba, gardens loop, swanston st, tram 1, tram 33, tram 40, tram 671, tram 8, tram 214, tram 1692 -
 The Beechworth Burke Museum
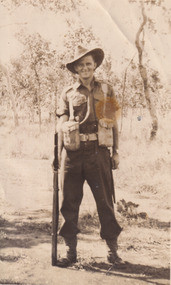
Photograph, c.1914
This photograph depicts a soldier, credited on the reverse as Fred Foster. The young man is dressed in military attire and is standing tall with a gun beside him. He is located in the Australian bush and the date of the photograph is unknown. Frederick “Fred” Arthur Foster was nephew to famous Bushranger Edward “Ned” Kelly. He was born on the 15th of March 1889 in Forbes, New South Wales. He was the eldest son of Catherine “Kate” Kelly and William Henry “Bricky” Foster. After the death of his mother in October of 1898 from apparent drowning, Foster (then aged 9) was raised by his grandmother Ellen Kelly (née Quinn) at Eleven Mile Creek in Victoria. On the 29th of June 1915, 26 year old Foster travelled to Melbourne, Victoria and enlisted in the Australian Army. He was a Private in the 17th Infantry Battalion (originally C.Company, 47th battalion). He previously was attached to the 55th Battalion but transferred in 1916. Prior to enlisting in the army, Foster worked as a Bee Keeper and served in the 16th Light Horse regiment at Benalla. Foster had blue eyes, brown hair and was of Presbyterian faith. On the 28th of February 1917, Foster travelled to France aboard SS “Golden Eagle”. He was killed in action in Lagnicourt, France on the 15th of April 1917 at 28 years old. The Battle in Lagnicourt France, on the Western Front, occurred from the 1st of March to the 30th of April of 1917 and was the location of fierce fighting between Germany and the British Empire. Germany became aware of a weakness they had along the Hindenburg Line, one of these weaknesses was located in Lagnicourt which is a small village in Northern France. Therefore, the Germans decided to launch a counter-attack in this area on the 15th of April at dawn. During this fight, German forces captured several batteries of the 1st Australian Division’s artillery but the Australians led a strong counter-attack by four of their battalions and recaptured the village and most of the guns from the German forces. German forces were forced into a premature withdrawal. This battle was not undertaken in typical WW1 “trench” style warfare. Instead, the battle was up on the ground in what was described as “old open style warfare”. In this battle, slightly more than 1000 casualties were Australian, with 300 of these prisoners of war. German forces suffered a loss of over 2300 casualties with 360 taken captive. Foster was one of 43 in his regiment who died, 87 were wounded and 51 reported missing. Foster was buried at location in Lagnicourt and whilst the grave was initially marked, it is now unknown. Foster’s service, alongside those who fell at Lagnicourt, is commemorated at the Australian National Memorial in Villers-Bretonneux, France along with other national Australian memorial sites.Photography played an important part in World War 1. Photographs of men in their military uniforms served as propaganda during the Great War to reassure civilians back at home of the military prowess of their nation and the bravery of their men. It did this while hiding the true horrors which faced the men in battle. These photographs, which includes those taken at home prior to embarking overseas like Fred Foster’s, act as censored memory for those who have lost a loved one at war. It enables families to remember their relatives in their youth and standing proudly rather than having to face the actual danger and horror which faced these men at the front line. The battle of Lagnicourt France was a victory for the European Empire and therefore, men who lost their lives protecting their countries became heroes and were awarded posthumous medals for their service. Photos of soldiers in their uniforms, were undertaken by men like Foster, so their families would be able to retain their memories and likeness before they embarked for war. Many men were killed or horribly wounded so these images were important for reminding families about their sons/ husbands/ brothers/ cousins and friends. This photo is a part of the Burke Museum Kelly album which includes numerous photographs relating to the Kelly Gang. As the son of Kate Kelly and William “Bricky” Foster, Fred Foster is an important part of the Kelly story after the execution of Edward “Ned” Kelly which has information it can impart relating to the history of the family after 1880. Whilst an important element of the Kelly Album, Foster’s photograph is also historically important in its own right for its connection to the Great War and the experiences of a soldier at the Western Front.Original sepia rectangular photograph developed on matte photographic paper, unmounted.Reverse: (Top right corner of reverse:) FRED FOSTER/ (Top centre of reverse:) Kate Kelly's son.kelly album, fred foster, kate kelly, photograph, australian soldier, the kelly gang, australian bush, burke museum, sepia photo, gum trees, family of the kelly gang, world war i, langnicourt, france, great war, 1917, ned kelly, frederick foster, william "bricky" foster, ellen kelly, military history, australian military -
 Eltham District Historical Society Inc
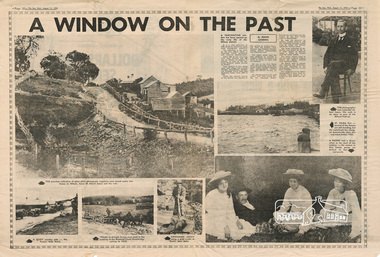
Newspaper - Newsclipping, Roger Sanders, A WINDOW ON THE PAST, 11 Aug 1976
Published in "The Sun", Wednesday, August 11, 1976, pp 38-39 [Text of article:] A WINDOW ON THE PAST by Roger Sanders. A fascinating window has been opened on the early life of the Eltham district. It is a rare collection of 3,000 perfectly preserved glass plate photograph negatives. The collection is the work of the late Albert Jones, a Diamond Creek orchardist and amateur photographer. About 500 of the negatives have been printed and 100 are on display at Gallery 4, Eltham, as part of the Eltham Festival, which started on Friday. They capture in fine detail rural and village life around Eltham, Hurstbridge, Kangaroo Ground, Yarra Glen and Diamond Valley from 1900 to 1930. While the natural beauty of the district was painted in this period by Arthur Streeton (later Sir Arthur), Tom Roberts and Charles Conder, among others, photography was relatively new. Yet Albert Jones used the new medium to compile a weighty album of pioneers at work, at home, at sport and on holidays. He was at the first Yarra Glen race meeting, early Diamond Valley football matches and photographed soldiers from the district leaving for war. He photographed early gold mines, men with horses laying the Diamond Creek-Hurstbridge rail track and the arrival of the first steam train at Hurstbridge. He took his cameras on holiday around Victoria and the collection includes scenes from St. Kilda and Portsea and many country towns. The Jones collection of negatives was found by Mr A. J. "Ned" Spark, of Balwyn, under a house he bought from Mr Jones' widow. The plates almost went to the tip with a pile of rubbish before Mr Spark realised their potential value. Mr Spark, who is retired, will continue the identification and recording of the photographs when he returns from holidays. The exhibition of the Jones' photographs is open each afternoon until August 21 at Gallery 4, 1016 Main Rd., Eltham. [Captions of photographs included in article:] • The priceless collection of glass plate negatives were found under this house in Eltham [actually Wattle Glen], home of Albert Jones and his wife. • A quiet country pub - Panton Hills Hotel. • Teams of draught horses were used in the building of the Diamond Creek-Hurstbridge railway in 1910. • Chinaman Jimmy using a gold cradle in Wattle Glen Gully. • The photographer and orchardist Albert Jones. His work is on show as part of the Eltham Festival • St Kilda Pier – several of the houses are still standing, but the waterfront has changed dramatically since this was taken before 1920. • A picnic was a dressy affair at the start of the century – the women in this family group are decked in lace and pearls.Newspaper articlealbert jones, golden glen, wattle glen -
 The Beechworth Burke Museum
Photograph - Carte de Visite, James Bray, 1870
This photograph was taken in c.1870 and depicts Aaron Sherrtt who is best known for his involvements with, and eventual assassination by, the Kelly gang. He stands upright in the image with his arm leaning on a podium which reaches his hip. He is wearing an outfit for which he was infamous. Richard Warren, son of the proprietor of the Ovens and Murray Advertiser once stated that “anyone seeing [Aaron] coming down Ford Street would ask, “Who the hell’s this? Some advance agent for the circus?”’. The outfit Aaron wore for this particular photoshoot is reminiscent of this quote. He wears an unusual spotted shirt with a waistcoat and a sash is tied at his waist. He wears boots which turn up slightly at the toes. The hat is a “pork pie” hat which is worn in the typical “Greta Mob” style with the chinstrap under the nose. Aaron Sherritt was born in 1854 in Prahran, Melbourne, to Irish Protestant parents John and Anne. Sherritt stood at 5 foot 10. He had hazel eyes, dark brown hair and pale olive skin. Sherritt was childhood friends with Kelly Gang member, Joe Byrne, having previously attended the same school. Both men had a reputation for stealing horses and on one occasion, after stealing and butchering a cow, Sherritt and Byrne were convicted to six months in Beechworth Gaol (1876). Sherritt, along with Byrne, were reportedly recruited by Ned Kelly in 1877 in stealing stock; however, Sherritt never became a fully-fledged member of the Kelly Gang. Nevertheless, Sherritt scouted for the Kelly Gang in 1878. He later struck a deal with the police (specifically, with Chief Commissioner Standish) to save Joe Byrne's life in exchange for leading the police to the other members of the Gang. From then on, Aaron Sherritt lived the dangerous life of a double agent, providing police with what is assumed today to have been outdated or incorrect information in return for money. On the 26th of June 1880, Aaron Sherritt was murdered in the Woolshed Valley. He was approximately 23-25 years old at death. This event marked the start of the Kelly gang’s last days. Sherritt was murdered by Byrne in front of his wife, 15 year old and heavily pregnant Ellen “Belle” Sherritt and her mother Ellen Barry. Also in the Sherritt dwelling on this particular night were four policemen. The intention behind Sherritt’s murder was for the police to send word to Melbourne that the Kelly gang had murdered Sherritt and a police train would be sent to Glenrowan where the rest of the Kelly gang were waiting. This plan did not go as predicted and ultimately the Kelly gang fell at Glenrowan in 1880. This photograph was taken by James Bray who worked as a professional photographer in Camp Street Beechworth from 1870-1891. He was one of four men who photographed the Kelly Gang after the siege in Glenrowan in 1880. He is also renowned for his previous work photographing members of the Kelly gang. This photograph is part of the Burke Museum "Kelly album" which includes a significant collection of photographs and artefacts connected to Ned Kelly and the Kelly Gang. Ned Kelly and his gang have become ingrained in Australian popular culture and thus many museums, art galleries and private collections house material connected to the Kelly story which allows the events and people to be researched and interpreted. Artefacts and photographs pertaining to the Kelly gang are particularly valuable for Australian museums. This particular photograph is significant for its connection to Beechworth photographer James Bray who is responsible for many images depicting members of the Kelly Gang. The photograph is also of artistic significance as an example of a Carte de Viste dating to 1880 and it's connection to Aaron Sherritt.Sepia rectangular photograph printed on card. Obverse: J.E.Bray./ Photo/ Beechworth Reverse: Portrait & Landscape/ Photographer 5/ Aaron Sherritt J E Bray Signature Beechworth/ Victoria Beware (almost erased out) Negatives Kept. Copies 5I/.Each May/ Be Had By Forwarding Name And Address/ Accompanied With Remittance To/ The Amount Of Order/ Photographs Coloured In Water Colours 10237. kelly album, woolshed valley, 1870s, kelly gang, joe byrne, ned kelly, aaron sherritt, james bray, beechworth, burke museum -
 Bendigo Military Museum
Photograph - Royal Australian Survey Corps - Map Production Processes, c1990
This is a collection of 20 photographs of Royal Australian Survey Corps phases of map production at the School of Military Survey, Bonegilla, the Army Survey Regiment, Bendigo, and the Army Map Depot, Bandiana circa 1990. Colour photos are on 35mm slide film and were scanned at 96 dpi. They are part of the Army Survey Regiment’s Collection. Photo .1P was probably taken on a survey station overlooking Lake Hume near Albury-Wodonga. The field party occupying the survey station was likely from a Map Control Survey course conducted by the School of Military Survey, Bonegilla. This survey station was part of a geodetic network used in field survey training and RASvy’s Lake Hume Test Range. Photos .3P to .16P were taken at the Army Survey Regiment, Bendigo and photos .17P & .18P were taken at the Army Map Depot, Bandiana. Photo .19P depicts a map of RASvy’s ARA units before the disbandment of 5th Field Survey Squadron, Perth and 2nd Field Survey Squadron, Sydney in 1990. This is a collection of 20 photographs of map production processes taken at the School of Military Survey, Bonegilla, the Army Survey Regiment, Bendigo, and the Army Map Depot, Bandiana circa 1990. Colour photos are on 35mm slide film and were scanned at 96 dpi. They are part of the Army Survey Regiment’s Collection. Photo .2P is printed on photographic and scanned at 300 dpi. .1) – Photo, colour, c1980s. Geodetic Surveying: AN/PRR-14 Geoceiver antenna on hill surrounding Lake Hume. Series 3 Land Rover, field party tent and survey station beacon in background. .2) – Photo, black & white, c1980s. Geodetic Surveying: AN/PRR-14 Geoceiver antennas set up at the School of Military Survey, Bonegilla, Victoria. .3) – Photo, colour, c1990. Aerotriangulation: Wild PUG4 point transfer device, SSGT Bruce Hammond. .4) – Photo, colour, c1990. Aerotriangulation: Zeiss (Jena) Stecometer, SSGT Bruce Hammond. .5) – Photo, colour, c1990. Aerotriangulation: computer tape maintenance, SSGT Noel McNamara. .6) – Photo, colour, c1990. AUTOMAP 2: computer tape maintenance, SPR Nadine (Paul) Read. .7) - Photo, colour, c1990s. AUTOMAP 2: Optronics 4040 scanning/film output in Lithographic Squadron, SGT Sherri (Dally) Burke. .8) - Photo, colour, c1990s. AUTOMAP 2: Benson verification plotter output, SPR Nadine (Paul) Read. .9) – Photo, colour, c1990. Aerotriangulation: data management, SGT Neil ‘Ned’ Kelly. .10) & .11) - Photo, colour, c1990s. AUTOMAP 2: Wild B8 Aviograph stereoplotter Feature Extraction, unidentified technician. .12) - Photo, colour, c1990s. AUTOMAP 2: Graphic Edit Workstation, SPR Nadine (Paul) Read. .13) - Photo, colour, c1990s. AUTOMAP 2: Graphic Edit Workstation, SPR Dawn Hoadley. .14) & .15) - Photo, colour, c1990s. AUTOMAP 2: Graphic Edit Workstation, unidentified technician. .16) – Photo, colour, c1990s. Heidelberg Speedmaster 102 computer-controlled five colour lithographic offset printing press. .17) & .18) – Photo, colour, c1990s. Army Map Depot, unidentified storeman, Bandiana. .19) – Photo, colour, c1990. RASvy ARA Unit Locations before disbandment of field units in Perth and Sydney. .20) – Photo, colour, c1990. Set of overlapping aerial photography..1P, .3P to .20P - Some equipment is identified on the frame of the 35mm slides.royal australian survey corps, rasvy, army survey regiment, army svy regt, fortuna, asr, school of military survey, army map depot -
 Eltham District Historical Society Inc
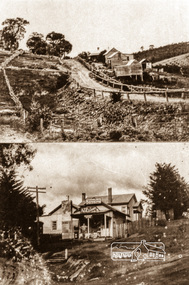
Negative - Photograph, Albert Jones, 'Golden Glen' at Wattle Glen and the Wattle Glen General Store, c.1910
Top photo: The property 'Golden Glen', home of photographer, Albert Jones. At the right of the photo is an apple orchard over the other side of Watery Gully creek. The middle building in the photo is still standing, located on Wattle Glen - Kangaroo Ground Road between Pretty Hill Lane and Millers Road (Melway 271 A6) but on the opposite side of the road. Bottom photo: The Wattle Glen General Store in this photo was located at the same intersection as the present Wattle Glen General Store (cnr of Reynolds Road and Kangaroo Ground Road) but on the diagonally opposite corner. [Comment from Valda via Victorian Collections June 11, 2018] "The addition to the store on the left, and the building at the back, were not part of the store/post office owned by the Keenan's. They were added by Mr and Mrs Alan (Janet) Frencham's in the ?mid-1950s." See also EDHS_03112: See Ref: EDHS_03112 A WINDOW ON THE PAST by Roger Sanders, The Sun, Wednesday, Auguist 11, 1976, pp 38-39 A fascinating window has been opened on the early life of the Eltham district. It is a rare collection of 3,000 perfectly preserved glass plate photograph negatives. The collection is the work of the late Albert Jones, a Diamond Creek orchardist and amateur photographer. About 500 of the negatives have been printed and 100 are on display at Gallery 4, Eltham, as part of the Eltham Festival," which started on Friday. They capture in fine detail rural and village life around Eltham, Hurstbridge, Kangaroo Ground, Yarra Glen and Diamond Valley from 1900 to 1930. While the natural beauty of the district was painted in this period by Arthur Streeton (later Sir Arthur), Tom Roberts and Charles Conder, among others, photography was relatively new. Yet Albert Jones used the new medium to compile a weighty album of pioneers at work, at home, at sport and on holidays. He was at the first Yarra Glen race meeting, early Diamond Valley football matches and photographed soldiers from the district leaving for war. He photographed early gold mines, men with horses laying the Diamond Creek-Hurstbridge rail track and the arrival of the first steam train at Hurstbridge. He took his cameras on holiday around Victoria and the collection includes scenes from St. Kilda and Portsea and many country towns. The Jones collection of negatives was found by Mr A. J. "Ned" Spark, of Balwyn, under a house he bought from Mr Jones' widow. The plates almost went to the tip with a pile of rubbish before Mr Spark realised their potential value. Mr Spark, who is retired, will continue the identification and recording of the photographs when he returns from holidays. The exhibition of the Jones' photographs is open each afternoon until August 21 at Gallery 4, 1016 Main Rd., Eltham. Photographs included in article: • The priceless collection of glass plate negatives were found under this house in Eltham [actually Wattle Glen], home of Albert Jones and his wife. • A quiet country pub - Panton Hills Hotel. • Teams of draught horses were used in the building of the Diamond Creek-Hursbridge railway in 1910. • Chinaman Jimmy using a gold cradle in Wattle Glen Gully. • The photographer and orchardist Albert Jones. His work is on show as part of the Eltham Festival • St Kilda Pier – several of the houses are still standing, but the waterfront has changed dramatically since this was taken before 1920. • A picnic was a dressy affair at the start of the century – the women in this family group are decked in lace and pearls.Roll of 35mm colour negative film, 4 stripsKodak Safety 5035albert jones, golden glen, shops, wattle glen -
 Ballarat Tramway Museum
Document - List, Wayne Kell, "Ballarat Tramways Employees (60's - 71)", 2020
Yields information the employees of the SEC from about the 1960's through to closure. Not known if completely accurate.List - typed A4 sheet titled "Ballarat Tramways Employees (60's - 71)", prepared by Wayne Kell. Lists employees in alphabetical order images: .1 - jpg scan of the sheet .2 - pdf of the list in a single vertical column .3 - word document in the image files Noel Aghan Noel Allen Max Anderson Brian Anwyl Adam Balloch Ray Barrow Ian Bentley James Billman Les Bird Mick Blackman Kevin Blake Dave Blaw Brett Boddington Kevin Brookman Gary Butler Kevin Butler Marty Cahill Bob Carter Daryl Chambers R oy Courtney Steve Crosby Ray Curnow Ron Davidson Bill Davies S. Davies W. Davies T Ed Davis L. Denmead Max Devlin Austin Domaschenz Des Domaschenz T. Dunstan Ted Edmunds Allen Edwards George Etheridge D. Everett John Everett Ted Fish Vic Gill Ian Grant George Gray Max Green Ray Hall Norm Hamilton Rory Herauville Bernie Hill Colin Hill Norm Hunt Danny Irvine Allan Jeffreys Bruce Jenkins David Jones Ron Jordan Wayne Kell Alan Kellett Alf Kellett Dave Kellett Noel Klein Hec Knight Ron Knight Mick Laidlaw Ed Lake Stan Lakey Herb Lee George Long Norm Lorensini Geoff McErvale Doug McGregor Leo McMahon Alec McWilliam Bill Maes George Magee Jim Maher Mick Mahoney Andre Malins B. Mannion Les Mark Jack Marone Jackie Mason Arthur Maxwell Harold May Allan Meaney Brian Melville Jim Menzies Alf Mercer Barry Morris Robert Morris Bruce Munn Tom Nancarrow Bill Newell Les North John O’Keefe Dan O’Leary Dick Oliver Joel Owen Eric Patterson Bert Peart Ivan Pellas D. Powell Lindsay Quick Arthur Reed Bill Retallick Rex Rewell Howard Reynolds Neil Robe Ned Romeo Vin Ryan Rick Rykers Bill Segrave John Schmidt Charles Scicluna David Skewes Harry Smerdon Brian Smith Roy Smith Bill Spicer Tony Stephens Max Stephens Tom Stevenson Neil Sutherland Doug Thompson Ian Tierney Ian Trenfield John Truscott Bill Trusler Bill Tuddenham A. Turnbull Dave van Oorschot E. van Rooy Harry van Oorschot Henk van Oorschot Bill van Oorschot Gerry van Rooy Harry van Rooy Ian Wallis Lou Walker Bill Ward Geoff Ward Vin Webb Bill Wellard L. Wellard R. Williams Terry Williams Doug Wiseman Edward Wrightlists, employees, personnel, ballarat, crews -
 Eltham District Historical Society Inc
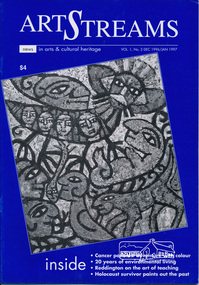
Journal, Peter Doughtery, ArtStreams: News in arts and cultural heritage; Vol. 1, No. 2, Dec 1996/Jan 1997, 1996
Vol. 1, No. 2 Dec 1996/Jan 1997 CONTENTS ADVENTURE WITH COLOUR Teenage cancer patients challenge their illness with art 3 CD REVIEWS New music by local musicians 5 LIVE AND LET LIVE 20 years of environmental living 6 AUSTRALIA REVISITED Artist Charles Reddington ponders live 30 years on 8 POETRY REVIEW Anne Delaney looks at new work by Jennifer Harrison and Jordie Albiston 11 PHOTOGRAPHY Katherine Jones aims at hard edges 16 IMAGES FROM A DARK PAST Holocaust survivor paints out a traumatic part of his life 18 MORALITY OF JUSTICE The Truth Game - a play by Ray Mooney 21 ART FROM THE HEART An exhibition that crosses boundaries 22 SHORT STORY New story from an emerging writer 25 ART IN THE CEMETERY Darebin launches a new project to decorate its new mausoleum 28 LISTINGS Artists, performers and galleries 29 KEYWORDS 895 Main Road, 1994 Moet et Chandon Fellowship, Adventure with Colour, Alan Bonney, Alan Constable, Alun Leach-Jones, Amada Laming, Anne Connor & Associates, Anne Delaney, Anthony Day, Art Streams Magazine, Artist-in-residence, Arts by the Waters, Arts project Australia, Auschwitz, Banyule Jazz Festival, Barbara Veheary, Bend of Islands Conservation Association (BICA), Bend of Islands Estate, Bend of Islands, Bill Downing, Bulleen Art & Garden Centre, Bulleen Nursery, Caffe Poco, Carlton Courthouse Theatre, Catani Boulevard, Catherine Oxley Reserve, Charles Reddington, Charlie Dowley, Cheryl Daye, Chris McAuliffe, Clifton Pugh, Colin Lanceley, Cornelia Selover, Creativitie et Handicap Mental (CREAHM), Cynthia Hardman, Cyril Tawney, Damian Eyre, Daniel Lillford, Danuta Michalska, Darebin Arts and Entertainment Centre, Darebin City Council, Department of Fine Arts, Donald Campbell, Dora Zable, Dorothy Berry, dunmoochin, E.H. Cameron, Edward (Ned) Haughton, Edward Car, Elizabeth Vercoe, Eltham High School, Eltham Living and Learning Centre, Environmental Living Zone (ELZ), Eric Bogle, Eucalypso, Felix Tuszynski, Food For All Seasons, Frank Hodgkinson, Fulli Andrinopoulos, Gallery of Georges of Collins Street, Gallery of Slavic Art, Glen Agnes Bend of Islands Estate, Glen Agnes Estate, Gongflers drive, Greg O'Leary, Harold (Jimmy) Fuller, Helen O'Grady Children's Drama Academy, Henley Road, Ian Doolan Hamilton, Ian Gawler, Inside Out/Outside In, Ironbark Road, Janice McBride, Jennifer Harrison, Jennifer McGregor, Jessie Agnes Haughton, Jimmy Pike, Joan Blakey, John Mackay Northe, John Rasmussen, Jordie Albiston, Julian Martin, Kangaroo Ground, Katherine Jones, Kelvin Heffernan, Kew Coattage, Kitty Ginter, Lavita Mossop, Les darcy, Les Gyori, Life with Jane, Lorraine Larter, Luc Boulange, Luciana Giardina, Manningham Artspace, Manningham City Council, Mariann Moxon, Mark Capozzi, Mark Chapman, Mark Wilkinson, Maxine Ryder, Melbourne Police Pipe Band, Mick Woiwod, Mike O'Rourke, Monica Burns, Montsalvat, Myra Hilgendorf, Nancye Ball, Page family, Pam Crohan, Pam Dougherty, Poetry, Preston Public Cemetery, Ray Mooney, Richard Haese, Robert Hughes, Robyn Kirkpatrick, Roger Lemke, Ron Hanson, Sandra Harvey, Shire of Eltham Office site, Shire of Healesville, Shire of Nillumbik, Shire Offices, Sounds by the Waters, Stelio Costa, Steven Tynan, Steven Worrell, Stewart Whiffin, Sue Howard, Sue Whiffin, Sugarloaf Reservoir, Sydney Ball, The Art of Australia, The Mews, The Truth Game, Tom Fantl, Tony Inglese, Tuszynski Survey Exhibition, University of Melbourne, Valerio Ciccone, victorian artists supplies, Watson Creek Bridge, Watsons Creek, Wayne Marnell, Woody Guthrie, Yarra Brae Dam, Yarra River"Peter Dougherty has been involved in the local art scene for many years. As publisher and editor of the arts magazine Artstreams, his comments on the various branches of the arts are widely respected. His "The Arts" column in the Diamond Valley Leader presents a brief summary for a much wider cross section of the local community. Peter also operates his own gallery and the Artstreams Cafe at the St Andrews market. Peter has a wealth of knowledge about present day and historical aspects of local art and artists." - Eltham District Historical Society Newsletter No. 161, March 2005Colour front and back cover with feature articles and literary pieces with photographs and advertisements printed in black and white. 36 pages, 30 cm. Vol. 1, no. 1 (Nov. 1996) - Vol. 10, no. 5 (summer ed. 2005/06) art streams, feliz tuszynski, elizabeth vercoe, eucalypso, bend of islands, charles reddington, jennifer harrison, jordie albiston, katherine jones, anne bonney, mick woiwood, anne connor, anne delaney, ray mooney, pam dougherty, arts project australia, lavita mossop, preston public cemetery, helen o'grady children's drama academy, bulleen nursery -
 Bendigo Military Museum
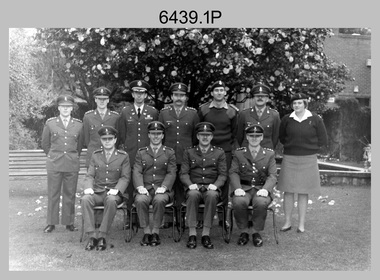
Photograph - Army Survey Regiment Group Photos, Fortuna Villa, Bendigo, 1989
This is a set of seven photographs of personnel posted to the Army Survey Regiment in 1989. These formal group photos of three of of the four Squadrons, Officers, and Warrant Officers/Sergeants were probably taken after a CO’s Parade. There were no photos of Headquarters Squadron in this set of negatives. LTCOL John Winzar was the CO of the Army Survey Regiment from 1987 to 1989 and WO1 Neville Stone was the RSM from 1988 to 1990. This is a set of seven photographs of personnel posted to the Army Survey Regiment, Fortuna Villa, Bendigo Victoria in 1989. The photographs are on 35mm negative film and were scanned at 96 dpi. They are part of the Army Survey Regiment’s Collection. .1) to .2) - Photo, black & white, 1989. Officers Mess: Back row L to R: CAPT Roger Hancock, CAPT Graeme Wastell, unidentified US Exchange officer, CAPT John Greenwell, MAJ Owen Moss, MAJ Terry Edwards, unidentified nursing officer. Front row L to R: 2IC MAJ Rob McHenry, MAJ Laurie Newton, CO LTCOL John Winzar, ADJT CAPT Greg Tolcher. .3) - Photo, black & white, 1989. Senior appointments: L to R: RSM WO1 Neville Stone, CO LTCOL John Winzar, 2IC MAJ Rob McHenry, ADJT CAPT Greg Tolcher. .4) - Photo, black & white, 1989. SGTs Mess: Back row L to R: WO2 Steve Hansen, SGT Bob Garritty, SGT Steve Gloster, SGT Trevor Poll, unidentified, SSGT Brad Peppler, SGT Noel McNamara, SGT Mick Ferris, SSGT Peter Mustart, SGT Steve Burke, SGT Frank Lenane unidentified (x2), WO2 Bill Jones. 3rd row L to R: SGT Bruce Hammond, WO2 Neil ‘Ned’ Kelly, SSGT Jeff Willey, unidentified, SGT Chris Edwards, SSGT Dennis Learmonth, SSGT Rick van der Bom, SGT Paul Hopes, SSGT Kevin Boehm, SGT Graham Johnston, SGT Peter ‘Jack’ Elverd, SGT Russ Mollenhauer, WO2 Ian ‘Rock’ Thistleton, SGT Martin Evans. 2nd row L to R: unidentified (x2), WO2 Pat Lumsden, SGT Doug Carswell, WO2 Adrian ‘Charlie’ Creedy, SGT Greg Anderson, SGT Mick Minchin, SSGT Phil ‘Fred’ Smalley, SSGT Andy Boath, SGT John ‘Stormy’ Tempest, SGT Roger Rees, SGT Paul ‘Hutch’ Hunter, SGT Bob Bright, SGT Brian Collings. WO2 Rob Bogumil. Front row L to R: WO2 Ralph Chant, WO1 Allan Adsett, WO1 Rowan Gillies, WO1 Stu Thaxter, WO1 Peter Presser, RSM WO1 Neville Stone, WO2 Barry Lutwyche OAM, WO1 Russell ‘Rusty’ Williams, WO1 Stevo Hinic, WO1 Trevor Osborne, WO2 Alan Bunn, WO2 George Graham. .5) - Photo, black & white, 1989. Cartographic Squadron: Back row L to R: CPL Greg Hilson, SPR Chris Wride, SPR Stuart Adrain, SPR Charmian McKean, CPL Raelene (Munting) Brodie, CPL Craig Kellet, SPR Ian Brown, SPR Steve Salvestro, SPR Mick Duggan, SPR Steve Dee, CPL John Martin, SPR Toni Wright, SPR De Madge. 3rd row L to R: SPR Bob Bousfield, CPL Allan Choat, SPR Steve Wainwright, CPL Damian Killeen, SPR Peter Smyth, CPL Brendon McKinless, SPR Geoff Steegrestra, CPL Peter Johnson, SPR Lee Palfrey, SGT Graham Johnson, SPR Malcolm Oliver, LCPL Sandy Dee, SPR Grant Davis. 2nd row L to R: CPL Dave Murphy, SPR Tony Jackson, SPR Dick Crawford, SPR Danilo Cesconetto, CPL Jeff Le-Fevre, SPR Bruce Graham, CPL Mark Donnelly, SPR Gayle Humphrey, SPR Jodi Seath, SPR Nadine (Paul) Read, SPR Di (Thomas) Soutar, SPR Caroline Wyatt, CPL Barry Hogan, CPL John Reid, SPR Chris Wynn. Front row L to R: SGT Bob Bright, SGT Doug Carswell, SGT Paul ‘Hutch’ Hunter, SGT Martin Evans, SSGT Rick van der Bom, WO2 Adrian ‘Charlie’ Creedy, WO1 Stevo Hinic, OC CAPT John Greenwell, WO1 Colin Cuskelly, WO2 Ian ‘Rock’ Thistleton, SSGT Dennis Learmonth, SGT Paul ‘Fluff’ Cheater, SGT Brian Collings. .6) - Photo, black & white, 1989. Air Survey Squadron: Back row L to R: CPL Andy Love, CPL Glyn Mattock, SPR Peter Murphy, SPR John ‘Doc’ Commons, SGT Noel McNamara, SGT Steve Gloster, SPR Neil ‘Tex’ Houston, SPR Peter Coles, CPL Ian Nelson, SPR David Lankshear. 3rd row L to R: CPL Noel Brinsmead, SPR Steve Wegener, CPL Peter Peterson, CPL Max Watson, SPR Jeanette Dury-Lane, SPR Simone Rodgers, SPR Derek Percival, SPR Stuart Midgley, SPR Vaughn Ralston, CPL Darren Wilkinson, SGT Frank Downie. 2nd row L to R: SPR Darren Scott, SPR Frank Savy, SPR Stuart Bowd, SPR Ailsa (Sorby) Miller, SPR Phuc ‘Charlie’ Tran, SPR Paula (Golding) Brinsmead, CPL Chris ‘Charlie’ Brown, CPL Steve Coulson, SPR Chris Woodman, SPR Shane Torrens, CPL Greg Gilbert, unidentified. Front row L to R: SGT Paul Hopes, SGT Roger Rees, SSGT Phil ‘Fred’ Smalley, WO2 Barry Lutwyche OAM, WO1 Peter Presser, WO1 Russell ‘Rusty’ Williams, OC MAJ Laurie Newton, WO2 Neil ‘Ned’ Kelly, SSGT Andy Boath, SGT Peter ‘Jack’ Elverd, SGT Mick Ferris, SGT Bruce Hammond. .7) - Photo, black & white, 1989. Lithographic Squadron: Back row L to R: SPR Andrew Arman, SPR Colin Yeats, CPL Warren ‘Waldo’ Shirley, SPR Michelle Evans, SPR Shona Hastie, CPL Paul Baker, SPR Graeme Spong. 3rd row L to R: SPR Mark McCullogh, CPL John ‘Flash’ Anderson, CPL Peter Dillon, SPR Ross Anza, CPL Peter Breukel, CPL Kevin ‘Chuck’ Berry, SPR Doug Whiteside, SPR Damien Cole, SGT Frank Lenane. 2nd row L to R: CPL Graeme Priestley, SPR Gavin McLean, CPL Stuart Ridge, SPR Gary Lord, SPR Janet Murray, SPR Ken Labouchardiere, CPL Ken Peters, CPL Mick ‘Buddha’ Ellis, SPR Darren ‘Barney’ Maher, SPR Greg Howell. Front row L to R: SGT Bob Garritty, SSGT Jeff Willey, WO1 Trevor Osborne, WO2 Rob Bogumil, OC MAJ Terry Edwards, WO2 Bill Jones, WO2 Steve Egan, SGT Keith Quinton, SGT Steve Burke..1P to .7P – no annotationsroyal australian survey corps, rasvy, army survey regiment, army svy regt, fortuna, asr, litho sqn -
 Victorian Harness Racing Heritage Collection at Lord's Raceway Bendigo
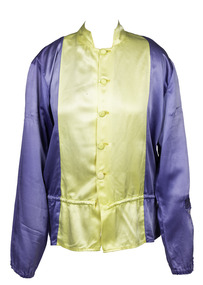
Clothing - Race colours, Jack Hargreaves, 13/8/21
Jack Hargreaves drove Adaptor to win the 1969 Bendigo Cup. Jack Hargreaves, who died on December 6 at the Bendigo Hospital aged 77, trained and drove countless winners during a 34-year harness racing career in which he became one of the true icons of the sport. Born John Henry Hargreaves in Wedderburn on December 3, 1926, harness racing was always in his blood. His father, Hughie, was a successful driver and trainer who raced horses all over Victoria. Jack drove his first winner at the age of 16 at Woodend. He lived on the family farm at Kuracca, near Wedderburn, until the age of 22, when he then married Elvie Stephenson from Fentons Creek. He and Elvie went on to have four children - Helen (now 53), Judi (51), Roslyn (49) and John (45). They are grandparents of 15 and great-grandparents of two. After spending two years at Tallarook where he worked on a sheep property, Jack and Elvie then moved to Korong Vale, where Jack set up his own training stable. He kept about 20 horses at a time at his Korong Vale stable, training and racing all of them for 26 years at his property. His greatest moment was the 1969 Miracle Mile, when he drove Adaptor to victory. Adaptor would later be sold to America for the then highest figure paid for an export horse - about $250,000. He also notched up many wins in country pacing cups, including Bendigo, Geelong, Maryborough, Kilmore and St Arnaud. During his career, Jack built a reputation of being a fine judge of pace and he consistently brought out the best in some difficult horses. His natural ability led to him being crowned Bendigo's leading driver for the season on two occasions. But an accident at Mildura on November 26, 1976 - just days before his 50th birthday - led to his driving career being cut short prematurely. Jack sustained head injuries after he was trampled by another horse after being tipped out of his sulky while driving Go Ned. He was regaining his senses and sitting up in the middle of the track when the horse went straight over him. The hoof of the horse came down between his left ear and skullcap, shattering that part of his skull. In the weeks following the accident, Jack underwent lengthy operations in Melbourne, to firstly clear splinters of bone from his brain. He then had a piece of bone removed from one of his ribs to cover a hole in his skull. He was left with injuries that were described as being similar to those of a person who had suffered a stroke. Months of physiotherapy and speech therapy followed in Melbourne and later Bendigo, before he was finally allowed to go hone in August, 1977 - almost one year after the accident. After losing part of his speech in the accident, Jack learned to communicate using his hands. "It became second-nature to us that we could read his hand signals and most of the people in the harness racing world could, too," Jack's daughter, Judi Bond, said."He learned his own way to communicate with people."While Jack was no longer able to continue his passion of driving competitively, he would still take the reins at the training track when given a chance to by his fellow drivers.He also continued to breed horses. "He was a skilled horseman, a good farrier and horses were the love of his life," Judi said. Two years after the accident, Jack and Elvie built a house in Wedderburn, directly above the trotting track. "That was so in the early days after his accident he could still see what was going on at the track," Judi said. "Everyday, he would watch the trainers . . . he'd watch what they were up to on the track."Jack was able to sit in his loungeroom and look out through large glass doors with a "grandstand" view of Leg 5 races, trials and training at the trotting track. Jack's love of harness racing filtered through to his children, with both Judi and John having careers as drivers. Judi drove for 10 years, finishing in 1978, but she continues to breed horses. Judi won the first women's race where bets were allowed to be made when she drove Youdini to victory at the Melbourne Showgrounds track in 1974.Blue with yellow vertical panelbendigo cup, adaptor, horse, jack hargreaves, bhrc, bendigo harness racing club, lords raceway, j hargreaves -
 Bendigo Military Museum
Photograph - Flag Day - Army Survey Regiment Verses School of Military Survey, Latchford Barracks, Bonegilla, 1990
These 34 photographs were taken at Flag Day, an annual sports competition between the Army Survey Regiment and the School of Military Survey (SMS) at Latchford Barracks, Bonegilla in May 1990. The two RASvy units took turns each year to host the event. The day competition usually comprised basketball, cross country, golf, sailing, squash softball, tennis, touch football, tug-of-war and volleyball. The evening competition often included darts, carpet bowls, hookey, quoits and snooker. The Flag handover and speeches were held in SMS’s Café Slater recreation/morning tea area. It is not clear which RA Svy unit was the winner.This is a set of 34 photographs were taken at Flag Day, an annual sports competition between the Army Survey Regiment (ASR) and the School of Military Survey (SMS) at Latchford Barracks, Bonegilla in May 1990. There are more photographs available on colour negatives and 35mm positive proofs. The photo proofs were printed on photographic paper and are part of the Army Survey Regiment’s Collection. The 35mm colour negatives photographs were scanned at 96 dpi. .1) - Photo, colour, 1990, ASR Tug-of-war team. Back row L to R: unidentified, Geoff Ford, Ken Slater, unidentified, Anthony Hesling. Front row L to R: Mick Hogan, Mick Duggan, Damien Killeen, unidentified, Guenther Ebenwaldner. .2) - Photo, colour, 1990, ASR Tug-of-war team. L to R: Geoff Ford, unidentified (x2). .3) - Photo, colour, 1990, ASR volleyball team L to R: unidentified (x4), Phuc Tran, Guenther Ebenwaldner, unidentified (x4), Neil Taylor. .4) - Photo, colour, 1990, ASR volleyball team L to R: unidentified (x2), Neil Taylor. .5) - Photo, colour, 1990, ASR volleyball team L to R: unidentified, Phuc Tran, Guenther Ebenwaldner, Barry Hogan -spiking. SMS volleyball team L to R: unidentified (x2), Rod Skidmore, unidentified (x2). .6) - Photo, colour, 1990, ASR volleyball team Neil Taylor – serving, L to R: unidentified, Guenther Ebenwaldner, unidentified. .7) - Photo, colour, 1990, ASR volleyball team Phuc Tran – serving. .8) - Photo, colour, 1990, ASR volleyball team unidentified – serving. .9) - Photo, colour, 1990, ASR volleyball team L to R: Guenther Ebenwaldner – serving, unidentified. .10) - Photo, colour, 1990, L to R: SMS volleyball team, all unidentified. ASR volleyball team L to R: Greg Howell, Richard Arman, Rachel (Stanford) Scott, SPR Caroline (Wyatt) Evans, Tracy Tillman, unidentified SMS team member. .11) - Photo, colour, 1990, L to R: ASR volleyball team L to R: Neil Taylor, Guenther Ebenwaldner, unidentified (x2), Tracy Tillman – No.13, Barry Hogan – No.1, Richard Arman, Greg Howell, SPR Rachel (Stanford) Scott, SPR Caroline (Wyatt) Evans. .12) - Photo, colour, 1990, L to R: Bob Thrower, Rod Skidmore – No.5, unidentified referee, Guenther Ebenwaldner, Neil Taylor. .13) - Photo, colour, 1990, L to R: unidentified (x2), Rod Skidmore – No.5, unidentified, unidentified referee, unidentified, Guenther Ebenwaldner – No.2, Phuc Tran - No.8, Neil Taylor - No.9., .14) - Photo, colour, 1990, L to R: unidentified – serving, Neil Taylor. .15) - Photo, colour, 1990, L to R: unidentified (x2), Bob Thrower – No. 2, unidentified referee, Phuc Tran, unidentified, Barry Hogan – No.1, Guenther Ebenwaldner – No.2, unidentified. .16) - Photo, colour, 1990, L to R: unidentified, unidentified referee, unidentified, Neil Taylor - No.9, Guenther Ebenwaldner – No.2, unidentified. .17) - Photo, colour, 1990, L to R: Tracy Tillman, SPR Rachel (Stanford) Scott, SPR Caroline (Wyatt) Evans, Phuc Tran. .18) - Photo, colour, 1990, L to R: Guenther Ebenwaldner – serving, Barry Hogan. .19) - Photo, colour, 1990, L to R: unidentified – serving, unidentified. .20) - Photo, colour, 1990, ASR volleyball team L to R: unidentified, Guenther Ebenwaldner, SPR Caroline (Wyatt) Evans – No. 20, unidentified (x2), Richard Arman No.11, unidentified, Barry Hogan – No.1, Tracy Tillman – No.13, Neil Taylor, Rachel (Stanford) Scott, Phuc Tran. .21) - Photo, colour, 1990, SMS volleyball team, L to R: Rod Skidmore Bob Thrower, remainder unidentified. ASR volleyball team L to R: unidentified, Rachel (Stanford) Scott, Barry Hogan, Greg Howell, unidentified, Guenther Ebenwaldner, unidentified, Phuc Tran, Neil Taylor, Richard Arman. .22) - Photo, colour, 1990, SMS volleyball team, L to R: unidentified Rod Skidmore – No. 5, Bob Thrower, remainder unidentified. .23) - Photo, colour, 1990, ASR basketball team, L to R: unidentified (x3), Dave Longbottom. .24) & .25) - Photo, colour, 1990, Presentations. L to R: CAPT Brian Sloan, ASR RSM WO1 Neville Stone, SPR Frank Savy, WO2 Neil ‘Ned’ Kelly. .26) - Photo, colour, 1990, Presentations. L to R: CAPT Brian Sloan, ASR RSM WO1 Neville Stone, SPR Frank Savy, SPR Marcus Seecamp, WO2 Neil ‘Ned’ Kelly, SMS RSM WO1 Greg Francis-Wright, remainder unidentified. .27) - Photo, colour, 1990, Presentations. L to R: SPR Frank Savy, SPR Andrew Morrison-Evans – with flag, unidentified, SPR Derek Percival– with flag, SPR Dawn Hoadley, ASR CO LTCOL Rene van den Tol, CAPT Brian Sloan, ASR RSM WO1 Neville Stone, unidentified. .28) - Photo, colour, 1990, Presentations. L to R: ASR CO LTCOL Rene van den Tol, unidentified, SPR Derek Percival– with flag, SPR Dawn Hoadley, unidentified, ASR RSM WO1 Neville Stone, SMS CO LTCOL Harry Hansen. .29) - Photo, colour, 1990, Presentations. L to R: ASR CO LTCOL Rene van den Tol, SMS CO LTCOL Harry Hansen, SPR Dawn Hoadley, ASR RSM WO1 Neville Stone, unidentified, SGT Ian Fitzgerald, WO2 Tony Clark, WO2 Harald Mai. .30) - Photo, colour, 1990, Presentations. L to R: unidentified, SPR Derek Percival, ASR CO LTCOL Rene van den Tol, ASR RSM WO1 Neville Stone, SMS CO LTCOL Harry Hansen, CPL Kevin ‘Chuck’ Berry, SGT Ian Fitzgerald, WO2 Tony Clark, WO2 Harald Mai, unidentified. .31) - Photo, colour, 1990, Presentations. L to R: SPR Marcus Seecamp, SPR Dawn Hoadley, ASR CO LTCOL Rene van den Tol, unidentified, SMS CO LTCOL Harry Hansen, CPL Kevin ‘Chuck’ Berry, ASR RSM WO1 Neville Stone, SMS RSM WO1 Greg Francis-Wright, SGT Ian Fitzgerald. .32) - Photo, colour, 1990, Presentations. L to R: SPR Dawn Hoadley, ASR CO LTCOL Rene van den Tol, unidentified, SMS CO LTCOL Harry Hansen, ASR RSM WO1 Neville Stone, SMS RSM WO1 Greg Francis-Wright, SGT Ian Fitzgerald, CPL Barry Hogan, remainder unidentified. .33) - Photo, colour, 1990, Presentations. Those identified L to R: CPL Raelene Munting, CPL Peter Swandale, SGT Paul Baker, WO1 Gordon Lowery, SPR Caroline (Wyatt) Evans, SMS CO LTCOL Harry Hansen, WO2 Alan Glanville, CPL Michelle Griffith, SGT Peter Peterson, WO1 Russell ‘Rusty’ Williams, WO1 Colin Cuskelly, CPL Peter McCurdy, WO2 Steve Egan, SSGT Doug Carswell, WO1 Bill Jones, WO2 Rob Bogumil, SPR Andrew Morrison-Evans. .34) - Photo, colour, 1990, Presentations. Those identified L to R: SMS CO LTCOL Harry Hansen, SPR Anthony Hesling CPL Peter Swandale, SGT Paul Baker, CPL Tony Bestall, SPR Shane ‘Smily’ Campbell. .1P to .36P – no annotationsroyal australian survey corps, rasvy, army survey regiment, army svy regt, fortuna, asr, flag day, school of military survey -
 Bendigo Military Museum
Photograph - Army Survey Regiment Open Day - Map Production, Fortuna, Bendigo, 1990
These 35 photographs were taken at an Army Survey Regiment Open Day at Fortuna Villa, Bendigo on the 24th of February 1990. This occasion was one of several events held to commemorate the 75th anniversary of the formation of the Royal Australian Survey Corps. Although historical tours of Fortuna occurred on a regular basis, this was the first technical open day since 1972. The Royal Australian Survey Corps recognised that an Open Day was the best way for the local community in Bendigo to gain an insight into the unit’s important role as Defence’s map production agency, its technical equipment, and its economic importance to Bendigo. It also gave them an opportunity to tour through historic Fortuna Villa. This occasion is covered in more detail in page 143 of Valerie Lovejoy’s book 'Mapmakers of Fortuna – A history of the Army Survey Regiment’ ISBN: 0-646-42120-4. Refer to items 6434.27P and 6436.18P for more photos of the Open Day taken inside Fortuna, the garden areas and production areas of Lithographic Squadron. Photo prints of some of these photos were scanned and catalogued in items 6247.30P and 6291.6P.These 35 photographs were taken at an Army Survey Regiment Open Day held at Fortuna, Bendigo on the 24th of February 1990. The 35mm colour and black & white negatives photographs were scanned at 96 dpi and are part of the Army Survey Regiment’s Collection. .1) - Photo, black & white, 1990. CPL Neale ‘Tex’ Houston with visitors in Aerotriangulation Section. .2) - Photo, black & white, 1990. L to R: MAJ Peter Clark and WO2 Neil ‘Ned’ Kelly with visitors in Aerotriangulation Section. .3) - Photo, black & white, 1990. SGT Bruce Hammond with visitors in Aerotriangulation Section. .4) - Photo, colour, 1990. SGT Bruce Hammond with visitors in Aerotriangulation Section. .5) - Photo, colour, 1990. SGT Steve Gloster with visitors in Aerotriangulation Section. .6) - Photo, colour, 1990. L to R: CPL Noel Brinsmead and CPL Darren Wilkinson with visitors in Aerotriangulation Section. .7) - Photo, colour, 1990. L to R: CPL Noel Brinsmead with visitors in Aerotriangulation Section. .8) - Photo, colour, 1990. MAJ Peter Clark with visitors in Aerotriangulation Section. .9) - Photo, colour, 1990. CPL Mark Lander with visitors in Plotting Section. .10) - Photo, colour, 1990. SSGT Andy Boath with visitors in Plotting Section. .11) - Photo, colour, 1990. SPR Stuart Bowd with visitors in Plotting Section. .12) - Photo, colour, 1990. CAPT Roger Hancock with visitors in Plotting Section. .13) & .14) - Photo, colour, 1990. AUTOMAP 2 - CPL Peter Peterson with visitors. .15) - Photo, colour, 1990, AUTOMAP 2 - L to R: SSGT Graham Johnston, SPR Grant Davis with civilian visitors. .16) - Photo, colour, 1990, AUTOMAP 2 - L to R: CPL Steve McGuiness, SSGT Graham Johnston with civilian visitors. .17) - Photo, colour, 1990, AUTOMAP 2 - civilian visitors. .19) - Photo, colour, 1990, AUTOMAP 2 - L to R: unidentified, SPR Tony Jackson, CPL Mark Westbrook, SSGT Bob Bright, with civilian visitors. .20) - Photo, colour, 1990, AUTOMAP 2 - L to R: WO2 Adrian ‘Charlie’ Creedy, CPL Mark Westbrook, SPR Mick Duggan with civilian visitors. .21) - Photo, colour, 1990, AUTOMAP 2 - L to R: SPR Mick Duggan, CO LTCOM Rene van den Tol, SSGT Bob Bright, CPL Mark Westbrook with civilian visitors. .22) - Photo, colour, 1990, AUTOMAP 2 - L to R: SPR Damien Nolan, unidentified, SPR Peter Smyth with civilian visitors. .23) - Photo, black & white, 1990, AUTOMAP 2 - L to R: SPR Peter Smyth, CAPT Steve Hledik, SGT Martin Evans, MAJ Neil Taylor with civilian visitors. .24) - Photo, black & white, 1990, AUTOMAP 2 - L to R: SPR Mick Duggan, CPL Mark Westbrook with civilian visitors. .25) - Photo, black & white, 1990, AUTOMAP 2 – LCPL Sandy Winn with civilian visitor. .26) - Photo, black & white, 1990. Display of digital storage media. .27) & .28) - Photo, colour, 1990. Cartography - SPR Ian Baldwin with civilian visitors. .29) - Photo, black & white, 1990. Cartography - SPR Ian Baldwin with civilian visitors. .30) - Photo, black & white, 1990. Cartography - SGT Sherri (Dally) Burke with civilian visitors. .31) - Photo, colour, 1990. Cartography - L to R: SGT Sherri (Dally) Burke, SSGT Dennis Learmonth with civilian visitors. .32) - Photo, colour, 1990. Cartography – SGT Barry Hogan with civilian visitors. .33) & .34) - Photo, colour, 1990. Cartography – CPL Dan Cirsky with civilian visitors. .35) - Photo, colour, 1990. Cartography – L to R: SPR Jeanette (Lane) Dury-Lane, CPL Diane (Thomas) Soutar with civilian visitors..1P to .35P – no annotationsroyal australian survey corps, rasvy, army survey regiment, army svy regt, fortuna, asr, automap 2 -
 Flagstaff Hill Maritime Museum and Village
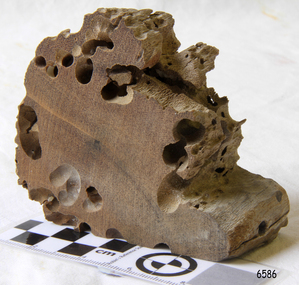
Memorabilia - Wood Sample, about 1871
The American wooden ship Eric the Red was named after the Icelandic Viking Eric 'the Red-Haired' Thorvaldsson, who was the first European to reach the shores of North America in 980 A.D. The ship Eric the Red was owned by the Sewall family of Bath, Maine, between 1873 and 1877 it operated in the coal trade between Britain and America. It then operated on the South American guano/ nitrates trade, before again trading between Europe and New York. On this voyage the Eric the Red had been chartered to carry a full cargo of American merchandise including many exhibits bound for the international exhibition to be held in Melbourne in 1880. Eighty-five days out from New York with 23 crew and two passengers, the Eric the Red approached Cape Otway nearing the end of its long voyage. At 1 am on 4 September the weather was hazy with a moderate north-westerly wind, Captain Jacques Allen had all sail set except for the mizzen-royal and the cross jack sails doing 8 knots, and was steering by the light to keep 5-6 miles offshore and clear of Otway Reef. Returning to the deck after consulting his charts the ship bumped as it ran onto the Otway Reef. It struck a second time and then a heavy sea carried away the wheel ropes and the man at the wheel. A third bump carried away the rudder, and shortly after this the ship completely broke up - within twelve minutes it had disappeared but for floating wreckage and cargo. Captain Jacques Allen recounted that: "The mizzen topmast fell with all the rigging, but strange to say, not a man was hurt by it, although they were all standing about. As soon as I found out there was no hope I said to Ned Sewell, the owner's son, and the third mate on board "Stick to me, and hang on to this mizzen mast". I peeled off everything I had on except my drawers thinking I would be able to swim better without my clothes; and Sewell and myself, clinging to the mast, were washed overboard...It was a fearful sea; I have never seen anything like it". Attempting to swim to a more substantial raft of wreckage, and losing touch with young Sewell in the process, Captain Allen struck out: " Just as I left the spar my drawers got down my legs, and entangled them, and down I went. I managed to clear one of my legs and on coming up I managed to get hold of some floating timber. There was a clear space of water between this timber and the deck, except for the spare royal yard, and I again started, but the surf struck me and I went over and over. I managed to get hold of the spare yard, and after holding on to it for some time I managed to get to the deck. When I was pulled on to it I could not move, being so numb and cramped with the cold. The men had some blankets and other things which they had got from the passengers' room in the deck house, and they wrapped me in these. Shortly after I got onto the wreck we made out the steamer's lights, and as soon as she was within hearing distance the men haled. This must have been about half-past four the Captain of the Dawn sent two of his boats to cruise about, and at daylight, they picked us up off the wreck. We had drifted about four miles from the reef where the ship struck, all those who were rescued were more or less bruised. One man had two or three ribs broken, and another had some fingers crushed off. My left foot is very much hurt, and I am black and blue from head to foot. I never knew such ten minutes as that of the wreck, and I thought the time had come for me to 'hand in my checks'. The ship was worth about £15,000, and neither it nor the freight was insured one dollar". (Argus 14/9/1880). Three of the crew and one of the passengers had been swept away and drowned. Fortunately for those clinging to the remains of the shattered hull and floating wreckage, the steamer SS Dawn passed close by and the crew heard the distressed cries of the survivors. Boats were lowered and the survivors were rescued. The Dawn stayed in the area for several hours searching for more survivors. One body was found washed up at Cape Otway and was buried in the lighthouse cemetery. The captain and crew of the Dawn later received rewards and thanks from the United States consul for their efforts. The hull and cargo were sold for £410, and large rafts of floating wreckage and cargo washed up all over the Victorian coast. A section of the hull lies buried in the sand at the Parker River beach, an anchor is on the rocks at Point Franklin, a second anchor is on display at the Cape Otway lighthouse and parts of the ship are on display at Bimbi Park and the Apollo Bay museum. Various wreckage is located in a concentration off Point Franklin, but suitable diving conditions are rare due to waves and strong currents. At the time of the wreck parts of its were salvaged and used in the construction of houses and sheds around Apollo Bay, including Milford House (since burnt down in bush fires), which had furniture and fittings from the ship, and the dining room floor made out of its timbers. A ketch the Apollo was also built from its timbers and subsequently used in Tasmanian waters.The Eric the Red is historically significant as one of Victoria's major 19th-century shipwrecks. The wreck led to the provision of an additional warning light placed below the Cape Otway lighthouse to alert mariners to the location of Otway Reef. The site is archaeologically significant for its remains of a large and varied cargo and ship's fittings being scattered over a wide area. The site is recreationally and aesthetically significant as it is one of the few sites along this coast where tourists can visit identifiable remains of a large wooden shipwreck and for its location set against the background of Cape Otway, Bass Strait, and the Cape Otway lighthouse. (Victorian Heritage Database Registration Number S 239, Official Number 8745 USA) Wood sample from the wreck of the ship Eric the Red the wood is dark in colour and is very light in weight. Noneflagstaff hill, warrnambool, shipwrecked-coast, flagstaff-hill, flagstaff-hill-maritime-museum, maritime-museum, shipwreck-coast, flagstaff-hill-maritime-village, shipwreck-artefact, eric-the-red, zaccheus-allen, sewall, 1880, melbourne-exhibition, cape-otway, otway-reef, wood-sample, s.s.-dawn -
 Bendigo Military Museum
Photograph - Army Survey Regiment Group Photos, Fortuna Villa, Bendigo, 1990
This is a set of 11 photographs of personnel posted to the Army Survey Regiment in 1990. These formal group photos of three of the four Squadrons, Officers, and Warrant Officers/Sergeants were probably taken after CO’s Parades. Although photo .11P is part of this set of negatives, it was taken on another occasion as the SGTs Mess personnel were in summer uniforms. Photos of Lithographic Squadron from this set of negatives are catalogued in item 6441.15P. LTCOL John Winzar was the CO of the Army Survey Regiment from 1987 to 1989 and WO1 Neville Stone was the RSM from 1988 to 1990.This is a set of 11 photographs of personnel posted to the Army Survey Regiment, Fortuna Villa, Bendigo Victoria on the 1st of October 1990. The photographs are on 35mm negative film and were scanned at 96 dpi. They are part of the Army Survey Regiment’s Collection. .1) to .2) - Photo, black & white, 1990. Senior appointments: L to R: RSM WO1 Neville Stone, CO LTCOL Rene van den Tol, 2IC MAJ Duncan Burns, ADJT CAPT Peter Parkes. .3) - Photo, black & white, 1990. Officers Mess: Back row L to R: back row L to R: LT Craig Hersant, LT Greg Tolcher, LT Martin Lyons, LT Steve Hledik, LT Derek Bell, LT Simon Buckpitt. Centre row L to R: CAPT Roger Greenwell, CAPT Dave McLachlan, ADJT CAPT Peter Parkes, unidentified UK exchange officer, CAPT Noel ‘Nesty’ Coulthard. Front row L to R: CAPT John South, MAJ Bob Coote, MAJ Neil Taylor, CO LTCOL Rene van den Tol, 2IC MAJ Duncan Burns, MAJ Peter Clark, MAJ Ray Redman. .4) - Photo, black & white, 1990. SGTs Mess: Back row L to R: SGT Max Watson, unidentified, SGT Martin Evans, SSGT Graham Johnston, SGT Brian Fauth, SGT Ian Fitzgerald, unidentified, SGT Mick Minchin, SGT Kim Reynolds, SGT Peter Imeson, SGT Brian Paul, SSGT John Phillips, SGT Keith Quinton, unidentified (x2), SSGT Noel McNamara, SGT Paul Hopes, SGT Brendan McKinless. 3rd row L to R: SSGT Di Chalmers, SGT Bob Bright, SGT Doug Carswell, WO2 Steve Egan, unidentified, SSGT Garry Drummond, SGT Steve Burke, SSGT Russ Mollenhauer, SGT Paul Cheater, SGT Sandy Craig, SSGT Peter Mustart, SGT Roger Rees, SGT Paul Leskovec CSM, unidentified, SGT John Shephard, SGT Frank Downie, SSGT Bruce Hammond, unidentified. 2nd row L to R: WO2 Jeff Willey, WO2 Barry Lutwyche OAM, WO2 Rob Bogumil, WO2 Rhys De Laine, WO2 Ted Burgess, WO2 Wayne Rothwell, WO2 Steve Hansen, WO2 Keith Fenton RE UK Exchange, SGT Chris Edwards, SGT Russ Mollenhauer, unidentified, SGT Greg Else, unidentified, SSGT Bob Garritty, SSGT Greg Byers, WO2 Pat Lumsden, WO2 George Graham, WO2 Mick Hogan, SGT Sherri (Dally) Burke. Front row L to R: WO1 Trevor Osborne, WO1 Colin Cuskelly, WO1 Bob Rogister, WO1 Allan Hancox, WO1 Bill Jones, 2IC MAJ Duncan Burns, RSM WO1 Neville Stone, WO2 Neil ‘Ned’ Kelly, WO1 Ken Slater, WO1 Rowan Gillies, WO1 Graham Ragless, WO1 Gary Warnest, WO2 Adrian ‘Charlie’ Creedy. .5) - Photo, black & white, 1990. Air Survey Squadron: Back row L to R: SPR Mark Linwood, SPR Trevor Roddam, CPL Noel Brinsmead, CPL Mark Lander, SGT Frank Downie, CPL Sandy Craig. 3rd row L to R: SPR Steve Rundle, SPR Cameron Gee OAM, CPL Darren Wilkinson, CPL Dave Longbottom, CPL Max Watson, SPR Shane Torrens, SGT Paul Hopes, SPR Chris Woodman. 2nd row L to R: SGT John Shephard, SPR Paul Boulton, SPR Stuart Bowd, SPR Paula (Golding) Brinsmead, SPR Joanne Otto, CPL Steve Coulson, SPR Steve Linane, CPL Chris ‘Charlie’ Brown. Front row L to R: SSGT Bruce Hammond, WO2 Barry Lutwyche OAM, LT Craig Hersant, WO1 Allan Hancox, MAJ Peter Clark, LT Simon Buckpitt, WO2 Neil ‘Ned’ Kelly, SSGT SSGT Noel McNamara. .6) - Photo, black & white, 1990. Headquarters Squadron: Back row L to R: unidentified (x2), SPR Wolfgang Hofbauer, SGT Chris Edwards, CPL Pat Drury, SSGT John Phillips, unidentified, CPL Graeme Priestley, unidentified (x2), SGT Paul Leskovec CSM, LCPL Richard Arman. 4th row L to R: unidentified, SGT Ian Fitzgerald, unidentified (x2), LCPL Bob Sheppard, unidentified (x2), CPL John ‘Flash’ Anderson, SPR Todd Reynolds, SGT Keith Quinton, CPL Roger Pearson, unidentified, WO1 Bob Rogister. 3rd row L to R: WO2 Wayne Rothwell, SSGT Peter Mustart, SPR Eric Nicholson, unidentified, SGT Paul Cheater, unidentified, SGT Wolfgang Thun, unidentified (x2), CPL Paul Richards, SGT Mick Minchin, unidentified. 2nd row L to R: unidentified, SPR Kasey Northausen, unidentified, CPL Michelle Griffith, unidentified (x3), SPR Tracy Tillman, unidentified (x4), WO2 Steve Hansen. Front row L to R: WO1 Rowan Gillies, WO1 Colin Cuskelly, CAPT Noel ‘Nesty’ Coulthard, CAPT Roger Hancock, WO1 Ken Slater, MAJ Ray Redman, MAJ John South, unidentified UK exchange officer, WO2 Ted Burgess, WO2 George Graham, unidentified civilian. .7) & .8) - Photo, black & white, 1990. Cartographic Squadron: Back row L to R: Back row L to R: SGT Greg Else, CPL Perry Burt, SSGT Graham Johnston, CPL Mick McConnell, 3rd row L to R: SGT Bob Bright, SGT Doug Carswell, SPR Marcus Seecamp, CPL John Gilbert. 2nd row L to R: SGT Martin Evans, SPR Sandy Winn, SPR Jeanette Drury-Lane, SPR Simone Rodgers, Front row L to R: SPR Guenther Ebenwaldner, WO2 Pat Lumsden, LT Steve Hledik. .9) - Photo, black & white, 1990. Cartographic Squadron: Back row L to R: SGT Greg Else, CPL Perry Burt, SSGT Graham Johnston, CPL Mick McConnell, unidentified, SPR Mark Linwood, SPR Lee Palfrey, SPR John ‘Doc’ Commons, SPR Chris Wynn, SPR Mick Duggan, CPL Peter Johnson, SPR Allan Blake, CPL Damian Killeen, SPR Grant Davis, SPR Simon Reynolds, SPR Peter Smyth. 3rd row L to R: SPR Guenther Ebenwaldner, SGT Bob Bright, SGT Doug Carswell, SPR Marcus Seecamp, CPL John Gilbert, SPR Gordon Santo, SPR Frank Savy, SPR Chris Woodman, SSGT Greg Byers, SPR David Lankshear, SSGT Bob Garritty, CPL Craig Kellet, CPL Darren Maher, CPL Barry Hogan, CPL Dan Cirsky, SPR Bob Bousfield. 2nd row L to R: SGT Martin Evans, CPL John Reid, SPR Sandy Winn, SPR Jeanette Drury-Lane, SPR Simone Rodgers, SPR Cam Bramich, SPR Ailsa (Sorby) Miller, SPR Nadine (Paul) Read, SPR Jodi Seath, SGT Sherri (Dally) Burke, SPR Di (Thomas) Soutar, SPR Dawn Hoadley, CPL Raelene (Munting) Brodie, SPR Jo (Innes) Thun? SPR Damian Nolan. Front row L to R: WO2 Pat Lumsden, LT Steve Hledik, LT Derek Bell, CAPT Dave McLachlan, MAJ Neil Taylor, WO1 Graham Raglass, WO1 Gary Warnest, WO2 Mick Hogan, WO2 Adrian ‘Charlie’ Creedy. .10) - Photo, black & white, 1990. Cartographic Squadron leadership: Back row L to R: CAPT Dave McLachlan, LT Derek Bell, LT Steve Hledik, WO2 Pat Lumsden, WO2 Mick Hogan, WO2 Adrian ‘Charlie’ Creedy. WO1 Gary Warnest. Front row L to R: MAJ Neil Taylor, WO1 Graham Raglass. .11) - Photo, black & white, 1990. SGTs Mess: Back row L to R: WO2 Jeff Willey, unidentified, SGT Brian Fauth, unidentified, SGT Sandy Craig, unidentified, SGT Paul Leskovec CSM, SSGT John Phillips, unidentified, SGT Martin Evans, SGT Steve Burke, SGT Brendan McKinless, SGT Chris Edwards. 3rd row L to R: SGT Brian Paul, unidentified, SSGT Bob Garritty, SSGT Greg Byers, SGT Kim Reynolds, SGT John Reid, unidentified, SSGT Rick van der Bom, SGT Dale Hudson, unidentified, SGT John ‘Stormy’ Tempest, SGT Keith Quinton, SGT Greg Else. 2nd row L to R: WO2 Rob Bogumil, unidentified, WO2 Adrian ‘Charlie’ Creedy, WO2 George Graham, WO2 Wayne Rothwell, WO2 Pat Lumsden, WO2 Mick Flynn, WO2 Ted Burgess, unidentified, SSGT Dennis Learmonth, SGT Bob Bright, WO2 Steve Hansen, WO2 Rhys De Laine. Front row L to R: unidentified, WO1 Trevor Osborne, WO1 Bill Jones, WO1 Colin Cuskelly, MAJ Ray Redman, RSM WO1 Neville Stone, WO1 Stu Thaxter, WO2 Mick Hogan, WO1 Bob Rogister, WO1 Ken Slater, WO1 Gary Warnest..1P to .11P – no annotationsroyal australian survey corps, rasvy, army survey regiment, army svy regt, fortuna, asr -
 Flagstaff Hill Maritime Museum and Village
Functional object - Ship's Wheel, 1871 or earlier
The ship building company E. & A. Sewall, from Bath, Maine, USA, built many ships that had wheels with the same decorative, starburst pattern on them as this particular wheel segment, including the Eric the Red. The wheel was manufactured by their local Bath foundry, Geo. Moulton & Co. and sold to the Sewall yard for $100, according to the construction accounts of the vessel. Eric the Red was a wooden, three masted clipper ship. She had 1,580 tons register and was the largest full-rigged ship built at Bath, Maine, USA in 1871. She was built and registered by Arthur Sewall, later to become the partnership E. & A. Sewall, and was the 51st ship built by this company. The annually-published List of Merchant Vessels of the U.S. shows that Bath was still the home port of Eric the Red in 1880. The vessel was named after the Viking discoverer, Eric the Red, who was the first European to reach the shores of North America (in 980AD). The ship Eric the Red at first traded in coal between America and Britain, and later traded in guano nitrates from South America. In 1879 she was re-metalled and was in first class condition. On 10th June 1880 (some records say 12th June) Eric the Red departed New York for Melbourne and then Sydney. She had been commissioned by American trade representatives to carry a special cargo of 500 exhibits (1400 tons) - about a quarter to a third of America’s total exhibits - from America for the U.S.A. pavilion at Melbourne’s first International Exhibition. The exhibits included furniture, ironmongery, wines, chemicals, dental and surgical instruments, paper, cages, bronze lamp trimmings, axles, stamped ware, astronomical and time globes, samples of corn and the choicest of leaf tobacco. Other general cargo included merchandise such as cases of kerosene and turpentine, brooms, Bristol's Sarsaparilla, Wheeler and Wilson sewing machines, Wheeler’s thresher machine, axe handles and tools, cases of silver plate, toys, pianos and organs, carriages and Yankee notions. The Eric the Red left New York under the command of Captain Z. Allen (or some records say Captain Jacques Allen) and 24 other crew including the owner’s son third mate Ned Sewall. There were 2 saloon passengers also. On 4th September 1880 the ship had been sailing for an uneventful 85 days and the voyage was almost at its end. Eric the Red approached Cape Otway in a moderate north-west wind and hazy and overcast atmosphere. Around 1:30am Captain Allen sighted the Cape Otway light and was keeping the ship 5-6 miles offshore to stay clear of the hazardous Otway Reef. However he had badly misjudged his position. The ship hit the Otway Reef about 2 miles out to sea, south west of the Cape Otway light station. Captain Allen ordered the wheel to be put ‘hard up’ thinking that she might float off the reef. A heavy sea knocked the man away from the wheel, broke the wheel ropes and carried away the rudder. The sea swamped the lifeboats, the mizzenmast fell, with all of its rigging, then the mainmast fell and the ship broke in two. Some said that the passenger Vaughan, who was travelling for his health and not very strong, was washed overboard and never seen again. The ship started breaking up. The forward house came adrift with three of the crew on it as well as a longboat, which the men succeeded in launching and keeping afloat by continually bailing with their sea boots. The captain, the third mate (the owner’s son) and others clung to the mizzenmast in the sea. Then the owner’s son was washed away off the mast. Within 10 minutes the rest of the ship was in pieces, completely wrecked, with cargo and wreckage floating in the sea. The captain encouraged the second mate to swim with him to the deckhouse where there were other crew but the second mate wouldn’t go with him. Eventually the Captain made it to the deckhouse and the men pulled him up. At about 4:30am the group of men on the deckhouse saw the lights of a steamer and called for help. At the same time they noticed the second mate and the other man had drifted nearby, still on the spur, and pulled them both onto the wreck. The coastal steamer Dawn was returning to Warrnambool from Melbourne, its sailing time different to its usual schedule. Cries were heard coming from out of the darkness. Captain Jones sent out two life boats, and fired off rockets and blue lights to illuminate the area. They picked up the three survivors who were in the long boat from Eric the Red. Two men were picked up out of the water, one being the owner’s son who was clinging to floating kerosene boxes. At daylight the Dawn then rescued the 18 men from the floating portion of the deckhouse, which had drifted about 4 miles from where they’d struck the reef. Shortly after the rescue the deckhouse drifted onto breakers and was thrown onto rocks at Point Franklin, about 2 miles east of Cape Otway. Captain Jones had signalled to Cape Otway lighthouse the number of the Eric the Red and later signalled that there was a wreck at Otway Reef but there was no response from the lighthouse. The captain and crew of the Dawn spent several more hours searching unsuccessfully for more survivors, even going back as far as Apollo Bay. On board the Dawn the exhausted men received care and attention to their needs and wants, including much needed clothing. Captain Allen was amongst the 23 battered and injured men who were rescued and later taken to Warrnambool for care. Warrnambool’s mayor and town clerk offered them all hospitality, the three badly injured men going to the hospital and others to the Olive Branch Hotel, then on to Melbourne. Captain Allen’s leg injury prevented him from going ashore so he and three other men travelled on the Dawn to Portland. They were met by the mayor who also treated them all with great kindness. Captain Allen took the train back to Melbourne then returned to America. Those saved were Captain Z. Allen (or Jacques Allen), J. Darcy chief mate, James F. Lawrence second mate, Ned Sewall third mate and owner’s son, John French the cook, C. Nelson sail maker, Clarence W. New passenger, and the able seamen Dickenson, J. Black, Denis White, C. Herbert, C. Thompson, A. Brooks, D. Wilson, J. Ellis, Q. Thompson, C. Newman, W. Paul, J. Davis, M. Horenleng, J. Ogduff, T. W. Drew, R. Richardson. Four men had lost their lives; three of them were crew (Gus Dahlgreen ship’s carpenter, H. Ackman steward, who drowned in his cabin, and George Silver seaman) and one a passenger (J. B. Vaughan). The body of one of them had been found washed up at Cape Otway and was later buried in the lighthouse cemetery; another body was seen on an inaccessible ledge. Twelve months later the second mate James F. Lawrence, from Nova Scotia, passed away in the Warrnambool district; an obituary was displayed in the local paper. The captain and crew of the Dawn were recognised by the United States Government in July 1881 for their humane efforts and bravery, being thanked and presented with substantial monetary rewards, medals and gifts. Neither the ship, nor its cargo, was insured. The ship was worth about £15,000 and the cargo was reportedly worth £40,000; only about £2,000 worth had been recovered. Cargo and wreckage washed up at Apollo Bay, Peterborough, Port Campbell, Western Port and according to some reports, even as far away as the beaches of New Zealand. The day after the wreck the government steam ship Pharos was sent from Queenscliff to clear the shipping lanes of debris that could be a danger to ships. The large midship deckhouse of the ship was found floating in a calm sea near Henty Reef. Items such as an American chair, a ladder and a nest of boxes were all on top of the deckhouse. As it was so large and could cause danger to passing ships, Captain Payne had the deckhouse towed towards the shore just beyond Apollo Bay. Between Apollo Bay and Blanket Bay the captain and crew of Pharos collected Wheeler and Wilson sewing machines, nests of boxes, bottles of Bristol’s sarsaparilla, pieces of common American chairs, axe handles, a Wheelers’ Patent thresher and a sailor’s trunk with the words “A. James” on the front. A ship’s flag-board bearing the words “Eric the Red” was found on the deckhouse; finally those on board the Pharos had the name of the wrecked vessel. During this operation Pharos came across the government steamer Victoria and also a steamer S.S. Otway, both of which were picking up flotsam and wreckage. A whole side of the hull and three large pieces of the other side of the hull, with some of the copper sheathing stripped off, had floated on to Point Franklin. Some of the vessels yards and portions of her masts were on shore. The pieces of canvas attached to the yards and masts confirmed that the vessel had been under sail. The beach there was piled with debris several feet high. There were many cases of Diamond Oil kerosene, labelled R. W. Cameron and Company, New York. There were also many large planks of red pine, portions of a small white boat and a large, well-used oar. Other items found ashore included sewing machines (some consigned to ‘Long and Co.”) and notions, axe and scythe handles, hay forks, wooden pegs, rolls of wire (some branded “T.S” and Co, Melbourne”), kegs of nails branded “A.T. and Co.” from the factory of A. Field and Son, Taunton, Massachusetts, croquet balls and mallets, buggy fittings, rat traps, perfumery, cutlery and Douay Bibles, clocks, bicycles, chairs, a fly wheel, a cooking stove, timber, boxes, pianos, organs and a ladder. (Wooden clothes pegs drifted in for many years). There seemed to be no personal luggage or clothing. The Pharos encountered a long line, about one and a half miles, of floating wreckage about 10 miles off land, south east of Cape Otway, and in some places about 40 feet wide. It seemed that more than half of it was from Eric the Red. The ship’s crew rescued 3 cases that were for the Melbourne Exhibition and other items from amongst the debris. There were also chairs, doors, musical instruments, washing boards, nests of trunks and fly catchers floating in the sea. Most of the goods were saturated and smelt of kerosene. A section of the hull lies buried in the sand at Parker River Beach. An anchor with chain is embedded in the rocks east of Point Franklin and a second anchor, thought to be from Eric the Red, is on display at the Cape Otway light station. (There is a photograph of a life belt on the verandah of Rivernook Guest House in Princetown with the words “ERIC THE RED / BOSTON”. This is rather a mystery as the ship was registered in Bath, Maine, USA.) Parts of the ship are on display at Bimbi Park Caravan Park and at Apollo Bay Museum. Flagstaff Hill Maritime Village also has part of the helm (steering wheel), a carved wooden sword (said to be the only remaining portion of the ship’s figurehead; further research is currently being carried out), a door, a metal rod, samples of wood and a medal for bravery. Much of the wreckage was recovered by the local residents before police and other authorities arrived at the scene. Looters went to great effort to salvage goods, being lowered down the high cliff faces to areas with little or no beach to collect items from the wreckage, their mates above watching out for dangerous waves. A Tasmanian newspaper reports on a court case in Stawell, Victoria, noting a man who was caught 2 months later selling tobacco from the wreckage of Eric the Red. Some of the silverware is still treasured by descendants of Mr Mackenzie who was given these items by officials for his help in securing the cargo. The gifts included silver coffee and tea pots, half a dozen silver serviette rings and two sewing machines. The wreck and cargo were sold to a Melbourne man who salvaged a quantity of high quality tobacco and dental and surgical instruments. Timbers from the ship were salvaged and used in the construction of houses and sheds around Apollo Bay, including a guest house, Milford House (since burnt down in bushfires), which had furniture, fittings and timber on the dining room floor from the ship. A 39.7 foot long trading ketch, the Apollo, was also built from its timbers by Mr Burgess in 1883 and subsequently used in Tasmanian waters. It was the first attempt at ship building in Apollo bay. In 1881 a red light was installed about 300 feet above sea level at the base of the Cape Otway lighthouse to warn ships when they were too close to shore; It would not be visible unless a ship came within 3 miles from it. This has proved to be an effective warning. The State Library of Victoria has a lithograph in its collection depicting the steamer Dawn and the shipwrecked men, titled. "Wreck of the ship Eric the Red, Cape Otway: rescue of the crew by the Dawn". “The Eric the Red is historically significant as one of Victoria's major 19th century shipwrecks. (Heritage Victoria Eric the Red; HV ID 239) The wreck led to the provision of an additional warning light placed below the Cape Otway lighthouse to alert mariners to the location of Otway Reef. The site is archaeologically significant for its remains of a large and varied cargo and ship's fittings being scattered over a wide area. The site is recreationally and aesthetically significant as it is one of the few sites along this coast where tourists can visit identifiable remains of a large wooden shipwreck, and for its location set against the background of Cape Otway, Bass Strait, and the Cape Otway lighthouse.“ (Victorian Heritage Database Registration Number S239, Official Number 8745 USA) Segment of a ship's wheel, or helm, from the wreck of the sailing ship Eric the Red. The wheel part is an arc shape from the outer rim of the wheel and is made up of three layers of timber. The centre layer is a dark, dense timber and is wider than the two outer layers, which are less dense and lighter in colour. The wheel segment has a vertically symmetrical, decorative copper plate inlaid on the front. The plate has a starburst pattern; six stars decorate it, each at a point where there is a metal fitting going through the three layers of timber to the rear side of the wheel. On the rear each of the six fittings has an individual copper star around it. The edges of the helm are rounded and bevelled, polished to a shine in a dark stain. Around each of the stars, front and back, the wood is a lighter colour, as though the metal in that area being polished frequently. The length of the segment suggests that it has probably come from a wheel or helm that had ten spokes. (Ref: F.H.M.M. 16th March 1994, 239.6.610.3.7. Artefact Reg No ER/1.)flagstaff hill, warrnambool, shipwrecked-coast, flagstaff-hill, flagstaff-hill-maritime-museum, maritime-museum, shipwreck-coast, flagstaff-hill-maritime-village, ship's-wheel, eric-the-red, helm, shei's wheel, ship's steering wheel -
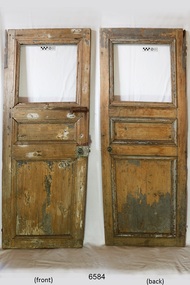 Flagstaff Hill Maritime Museum and Village
Furniture - Door, 1871 or earlier
The wooden door was salvaged from the wreck of the sailing ship Eric the Red, which was a wooden, three masted clipper ship. Eric the Red was the largest full-rigged ship built at Bath, Maine, USA in 1871, having had a 1,580 tons register. She was built and registered by Arthur Sewall, later to become the partnership E. & A. Sewall, the 51st ship built by this company. The annually-published List of Merchant Vessels of the U.S. shows Bath was still the home port of Eric the Red in 1880. The vessel was named after the Viking discoverer, Eric the Red, who was the first European to reach the shores of North America (in 980AD). The ship Eric the Red at first traded in coal between America and Britain, and later traded in guano nitrates from South America. In 1879 she was re-metalled and was in first class condition. On 10th June 1880 (some records say 12th June) Eric the Red departed New York for Melbourne and then Sydney. She had been commissioned by American trade representatives to carry a special cargo of 500 exhibits (1400 tons) – about a quarter to a third of America’s total exhibits - from America for the U.S.A. pavilion at Melbourne’s first International Exhibition. The exhibits included furniture, ironmongery, wines, chemicals, dental and surgical instruments, paper, cages, bronze lamp trimmings, axles, stamped ware, astronomical and time globes, samples of corn and the choicest of leaf tobacco. Other general cargo included merchandise such as cases of kerosene and turpentine, brooms, Bristol's Sarsaparilla, Wheeler and Wilson sewing machines, Wheeler’s thresher machine, axe handles and tools, cases of silver plate, toys, pianos and organs, carriages and Yankee notions. The Eric the Red left New York under the command of Captain Z. Allen (or some records say Captain Jacques Allen) and 24 other crew including the owner’s son third mate Ned Sewall. There were 2 saloon passengers also. The ship had been sailing for an uneventful 85 days and the voyage was almost at its end. On 4th September 1880 the Eric the Red approached Cape Otway with a moderate north-west wind and hazy and overcast atmosphere. Around 1:30am Captain Allen sighted the Cape Otway light and was keeping the ship 5-6 miles offshore to stay clear of the hazardous Otway Reef. However he had badly misjudged his position. The ship hit the Otway Reef about 2 miles out to sea, south west of the Cape Otway light station. He ordered the wheel to be put ‘hard up’ thinking that she might float off the reef. A heavy sea knocked the man away from the wheel, broke the wheel ropes and carried away the rudder. The sea swamped the lifeboats. The mizzenmast fell, with all of its rigging, then the mainmast also fell and the ship broke in two. Some said that the passenger Vaughan, who was travelling for his health and not very strong, was washed overboard and never seen again. The ship started breaking up. The forward house came adrift with three of the crew on it as well as a longboat, which the men succeeded in launching and keeping afloat by continually bailing with their sea boots. The captain, the third mate (the owner’s son) and others clung to the mizzenmast in the sea. Then the owner’s son was washed away off the mast. Within 10 minutes the rest of the ship was in pieces, completely wrecked, with cargo and wreckage floating in the sea. The captain encouraged the second mate to swim with him to the deckhouse where there were other crew but the second mate wouldn’t go with him. Eventually the Captain made it to the deckhouse and the men pulled him up. At about 4:30am the group of men on the deckhouse saw the lights of a steamer and called for help. At the same time they noticed the second mate and the other man had drifted nearby, still on the spur, and pulled them both onto the wreck. The coastal steamer Dawn was returning to Warrnambool from Melbourne, its sailing time different to its usual schedule. Captain Jones sent out two life boats, and fired off rockets and blue lights to illuminate the area. They picked up the three survivors who were in the long boat from Eric the Red. Two men were picked up out of the water, one being the owner’s son who was clinging to floating kerosene boxes. At daylight the Dawn then rescued the 18 men from the floating portion of the deckhouse, which had drifted about 4 miles from where they’d struck the reef. Shortly after the rescue the deckhouse drifted onto breakers and was thrown onto rocks at Point Franklin, about 2 miles east of Cape Otway. Captain Jones had signalled to Cape Otway lighthouse the number of the Eric the Red and later signalled that there was a wreck at Otway Reef but there was no response from the lighthouse. The captain and crew of the Dawn spent several more hours searching unsuccessfully for more survivors, even going back as far as Apollo Bay. On board the Dawn the exhausted men received care and attention to their needs and wants, including much needed clothing. Captain Allen was amongst the 23 battered and injured men who were rescued and later taken to Warrnambool for care. Warrnambool’s mayor and town clerk offered them all hospitality, the three badly injured men going to the hospital for care and others to the Olive Branch Hotel, then on to Melbourne. Captain Allen’s leg injury prevented him from going ashore so he and three other men travelled on the Dawn to Portland. They were met by the mayor who also treated them all with great kindness. Captain Allen took the train back to Melbourne then returned to America. Those saved were Captain Z. Allen (or Jacques Allen), J. Darcy chief mate, James F. Lawrence second mate, Ned Sewall third mate and owner’s son, John French the cook, C. Nelson sail maker, Clarence W. New passenger, and the able seamen Dickenson, J. Black, Denis White, C. Herbert, C. Thompson, A. Brooks, D. Wilson, J. Ellis, Q. Thompson, C. Newman, W. Paul, J. Davis, M. Horenleng, J. Ogduff, T. W. Drew, R. Richardson. Four men had lost their lives; three of them were crew (Gus Dahlgreen ship’s carpenter, H. Ackman steward, who drowned in his cabin, and George Silver seaman) and one a passenger (J. B. Vaughan). The body of one of them had been found washed up at Cape Otway and was later buried in the lighthouse cemetery; another body was seen on an inaccessible ledge. Twelve months later the second mate James F. Lawrence, from Nova Scotia, passed away in the Warrnambool district; an obituary was displayed in the local paper. The captain and crew of the Dawn were recognised by the United States Government in July 1881 for their humane efforts, being thanked and presented with substantial monetary rewards, medals and gifts. Neither the ship, nor its cargo, was insured. The ship was worth about £15,000 and the cargo was reportedly worth £40,000; only about £2,000 worth had been recovered. Cargo and wreckage washed up at Apollo Bay, Peterborough, Port Campbell, Western Port and according to some reports, even as far away as the beaches of New Zealand. The day after the wreck the government steam ship Pharos was sent from Queenscliff to clear the shipping lanes of debris that could be a danger to ships. The large midship deckhouse of the ship was found floating in a calm sea near Henty Reef. Items such as an American chair, a ladder and a nest of boxes were all on top of the deckhouse. As it was so large and could cause danger to passing ships, Captain Payne had the deckhouse towed towards the shore just beyond Apollo Bay. Between Apollo Bay and Blanket Bay the captain and crew of Pharos collected Wheeler and Wilson sewing machines, nests of boxes, bottles of Bristol’s sarsaparilla, pieces of common American chairs, axe handles, a Wheelers’ Patent thresher and a sailor’s trunk with the words “A. James” on the front. A ship’s flag-board bearing the words “Eric the Red” was found on the deckhouse; finally those on board the Pharos had the name of the wrecked vessel. During this operation Pharos came across the government steamer Victoria and also a steamer S.S. Otway, both of which were picking up flotsam and wreckage. A whole side of the hull and three large pieces of the other side of the hull, with some of the copper sheathing stripped off, had floated on to Point Franklin. Some of the vessels yards and portions of her masts were on shore. The pieces of canvas attached to the yards and masts confirmed that the vessel had been under sail. The beach there was piled with debris several feet high. There were many cases of Diamond Oil kerosene, labelled R. W. Cameron and Company, New York. There were also many large planks of red pine, portions of a small white boat and a large, well-used oar. Other items found ashore included sewing machines (some consigned to ‘Long and Co.”) and notions, axe and scythe handles, hay forks, wooden pegs, rolls of wire (some branded “T.S” and Co, Melbourne”), kegs of nails branded “A.T. and Co.” from the factory of A. Field and Son, Taunton, Massachusetts, croquet balls and mallets, buggy fittings, rat traps, perfumery, cutlery and Douay Bibles, clocks, bicycles, chairs, a fly wheel, a cooking stove, timber, boxes, pianos, organs and a ladder. (Wooden clothes pegs drifted in for many years). There seemed to be no personal luggage or clothing. The Pharos encountered a long line, about one and a half miles, of floating wreckage about 10 miles off land, south east of Cape Otway, and in some places about 40 feet wide. It seemed that more than half of it was from Eric the Red. The ship’s crew rescued 3 cases that were for the Melbourne Exhibition and other items from amongst the debris. There were also chairs, doors, musical instruments, washing boards, nests of trunks and fly catchers floating in the sea. Most of the goods were saturated and smelt of kerosene. A section of the hull lies buried in the sand at Parker River Beach. An anchor with chain is embedded in the rocks east of Point Franklin and a second anchor, thought to be from Eric the Red, is on display at the Cape Otway light station. (There is a photograph of a life belt on the verandah of Rivernook Guest House in Princetown with the words “ERIC THE RED / BOSTON”. This is rather a mystery as the ship was registered in Bath, Maine, USA.) Parts of the ship are on display at Bimbi Park Caravan Park and at Apollo Bay Museum. Flagstaff Hill Maritime Village also has part of the helm (steering wheel), a carved wooden sword (said to be the only remaining portion of the ship’s figurehead; further research is currently being carried out), a door, a metal rod and samples of wood. Much of the wreckage was recovered by the local residents before police and other authorities arrived at the scene. Looters went to great effort to salvage goods, being lowered down the high cliff faces to areas with little or no beach to collect items from the wreckage, their mates above watching out for dangerous waves. A Tasmanian newspaper reports on a court case in Stawell, Victoria, noting a man who was caught 2 months later selling tobacco from the wreckage of Eric the Red. Some of the silverware is still treasured by descendants of Mr Mackenzie who was given these items by officials for his help in securing the cargo. The gifts included silver coffee and tea pots, half a dozen silver serviette rings and two sewing machines. The wreck and cargo were sold to a Melbourne man who salvaged a quantity of high quality tobacco and dental and surgical instruments. Timbers from the ship were salvaged and used in the construction of houses and sheds around Apollo Bay, including a guest house, Milford House (since burnt down in bushfires), which had furniture, fittings and timber on the dining room floor from the ship. A 39.7 foot long trading ketch, the Apollo, was also built from its timbers by Mr Burgess in 1883 and subsequently used in Tasmanian waters. It was the first attempt at ship building in Apollo bay. In 1881 a red light was installed about 300 feet above sea level at the base of the Cape Otway lighthouse to warn ships when they were too close to shore; It would not be visible unless a ship came within 3 miles from it. This has proved to be an effective warning. The State Library of Victoria has a lithograph in its collection depicting the steamer Dawn and the shipwrecked men, titled. "Wreck of the ship Eric the Red, Cape Otway: rescue of the crew by the Dawn". “The Eric the Red is historically significant as one of Victoria's major 19th century shipwrecks. (Heritage Victoria Eric the Red; HV ID 239) The wreck led to the provision of an additional warning light placed below the Cape Otway lighthouse to alert mariners to the location of Otway Reef. The site is archaeologically significant for its remains of a large and varied cargo and ship's fittings being scattered over a wide area. The site is recreationally and aesthetically significant as it is one of the few sites along this coast where tourists can visit identifiable remains of a large wooden shipwreck, and for its location set against the background of Cape Otway, Bass Strait, and the Cape Otway lighthouse.“ (Victorian Heritage Database Registration Number S239, Official Number 8745 USA) Door from the wreck of the ship Eric the Red. The wooden singular rectangular door includes three insert panel sections. The top section is square shaped and is missing its panel or glass. The centre timber panel is about a third of the height of the top panel and the bottom timber panel is approximately equal in height to the total height of the two upper panels. The door fastenings include both a metal door latch and traditional door bolt. They are both attached to the front right hand side of the door. The bolt is just below the top panel, and the door latch is in approximately the centre of that side. The door latch has a round mark where a handle could have been attached. The wood of the door has scraping marks in a semi-circle around the door latch where the latch has swung around on its one remaining fastening and grazed the surface. There is a metal hinge at the top section of the door on the opposite side to the latch. The painted surface has been scraped back to expose the wood. The door is shorter than the average height of a person. On the reverse of the door there are lines on the panels, just inside their edges, is what appears to be pencil. The door is not aligned straight but is skew to centre.warrnambool, flagstaff hill, flagstaff hill maritime village, maritime museum, shipwreck coast, great ocean road, shipwreck artefact, eric the red, jaques allen, sewall, 1880, melbourne exhibition 1880, cape otway, otway reef, victorian shipwreck, bass strait, eric-the-red, door -
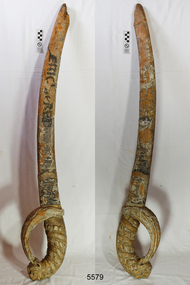 Flagstaff Hill Maritime Museum and Village
Decorative object - Sword, 1871 or earlier
This wooden sword is said to “possibly be the only remaining part of the figurehead from the sailing ship Eric the Red.” It was previously part of the collection of the old Warrnambool Museum and the entry in its inventory says “Wooden sword, portion of the figurehead, held by “Eric the Red” at the bow.” A large part of the ship’s hull was found on the rocks and a figurehead may have been attached or washed up on the shore. The shipping records for E. & A. Sewall, the builders, owners and managers of Eric the Red, are now preserved in the Maine Maritime Museum. There is no photograph on record of Eric the Red but photographs of other ships built around that time by the same company show that these did not have figureheads, and there is no record found of a figurehead for Eric the Red being ordered or paid for. Further research is being carried out. The ship building company E. & A. Sewall, from Bath, Maine, USA, built Eric the Red, a wooden, three masted clipper ship. She had 1,580 tons register and was the largest full-rigged ship built at Bath, Maine, USA in 1871. She was built and registered by Arthur Sewall, later to become the partnership E. & A. Sewall, and was the 51st ship built by this company. The annually-published List of Merchant Vessels of the U.S. shows that Bath was still the home port of Eric the Red in 1880. The vessel was named after the Viking discoverer, Eric the Red, who was the first European to reach the shores of North America (in 980AD). The ship Eric the Red at first traded in coal between America and Britain, and later traded in guano nitrates from South America. In 1879 she was re-metalled and was in first class condition. On 10th June 1880 (some records say 12th June) Eric the Red departed New York for Melbourne and then Sydney. She had been commissioned by American trade representatives to carry a special cargo of 500 exhibits (1400 tons) - about a quarter to a third of America’s total exhibits - from America for the U.S.A. pavilion at Melbourne’s first International Exhibition. The exhibits included furniture, ironmongery, wines, chemicals, dental and surgical instruments, paper, cages, bronze lamp trimmings, axles, stamped ware, astronomical and time globes, samples of corn and the choicest of leaf tobacco. Other general cargo included merchandise such as cases of kerosene and turpentine, brooms, Bristol's Sarsaparilla, Wheeler and Wilson sewing machines, Wheeler’s thresher machine, axe handles and tools, cases of silver plate, toys, pianos and organs, carriages and Yankee notions. The Eric the Red left New York under the command of Captain Z. Allen (or some records say Captain Jacques Allen) and 24 other crew including the owner’s son third mate Ned Sewall. There were 2 saloon passengers also. On 4th September 1880 the ship had been sailing for an uneventful 85 days and the voyage was almost at its end. Eric the Red approached Cape Otway in a moderate north-west wind and hazy and overcast atmosphere. Around 1:30am Captain Allen sighted the Cape Otway light and was keeping the ship 5-6 miles offshore to stay clear of the hazardous Otway Reef. However he had badly misjudged his position. The ship hit the Otway Reef about 2 miles out to sea, south west of the Cape Otway light station. Captain Allen ordered the wheel to be put ‘hard up’ thinking that she might float off the reef. A heavy sea knocked the man away from the wheel, broke the wheel ropes and carried away the rudder. The sea swamped the lifeboats, the mizzenmast fell, with all of its rigging, then the mainmast fell and the ship broke in two. Some said that the passenger Vaughan, who was travelling for his health and not very strong, was washed overboard and never seen again. The ship started breaking up. The forward house came adrift with three of the crew on it as well as a longboat, which the men succeeded in launching and keeping afloat by continually bailing with their sea boots. The captain, the third mate (the owner’s son) and others clung to the mizzenmast in the sea. Then the owner’s son was washed away off the mast. Within 10 minutes the rest of the ship was in pieces, completely wrecked, with cargo and wreckage floating in the sea. The captain encouraged the second mate to swim with him to the deckhouse where there were other crew but the second mate wouldn’t go with him. Eventually the Captain made it to the deckhouse and the men pulled him up. At about 4:30am the group of men on the deckhouse saw the lights of a steamer and called for help. At the same time they noticed the second mate and the other man had drifted nearby, still on the spur, and pulled them both onto the wreck. The coastal steamer Dawn was returning to Warrnambool from Melbourne, its sailing time different to its usual schedule. Cries were heard coming from out of the darkness. Captain Jones sent out two life boats, and fired off rockets and blue lights to illuminate the area. They picked up the three survivors who were in the long boat from Eric the Red. Two men were picked up out of the water, one being the owner’s son who was clinging to floating kerosene boxes. At daylight the Dawn then rescued the 18 men from the floating portion of the deckhouse, which had drifted about 4 miles from where they’d struck the reef. Shortly after the rescue the deckhouse drifted onto breakers and was thrown onto rocks at Point Franklin, about 2 miles east of Cape Otway. Captain Jones had signalled to Cape Otway lighthouse the number of the Eric the Red and later signalled that there was a wreck at Otway Reef but there was no response from the lighthouse. The captain and crew of the Dawn spent several more hours searching unsuccessfully for more survivors, even going back as far as Apollo Bay. On board the Dawn the exhausted men received care and attention to their needs and wants, including much needed clothing. Captain Allen was amongst the 23 battered and injured men who were rescued and later taken to Warrnambool for care. Warrnambool’s mayor and town clerk offered them all hospitality, the three badly injured men going to the hospital and others to the Olive Branch Hotel, then on to Melbourne. Captain Allen’s leg injury prevented him from going ashore so he and three other men travelled on the Dawn to Portland. They were met by the mayor who also treated them all with great kindness. Captain Allen took the train back to Melbourne then returned to America. Those saved were Captain Z. Allen (or Jacques Allen), J. Darcy chief mate, James F. Lawrence second mate, Ned Sewall third mate and owner’s son, John French the cook, C. Nelson sail maker, Clarence W. New passenger, and the able seamen Dickenson, J. Black, Denis White, C. Herbert, C. Thompson, A. Brooks, D. Wilson, J. Ellis, Q. Thompson, C. Newman, W. Paul, J. Davis, M. Horenleng, J. Ogduff, T. W. Drew, R. Richardson. Four men had lost their lives; three of them were crew (Gus Dahlgreen ship’s carpenter, H. Ackman steward, who drowned in his cabin, and George Silver seaman) and one a passenger (J. B. Vaughan). The body of one of them had been found washed up at Cape Otway and was later buried in the lighthouse cemetery; another body was seen on an inaccessible ledge. Twelve months later the second mate James F. Lawrence, from Nova Scotia, passed away in the Warrnambool district; an obituary was displayed in the local paper. The captain and crew of the Dawn were recognised by the United States Government in July 1881 for their humane efforts and bravery, being thanked and presented with substantial monetary rewards, medals and gifts. Neither the ship, nor its cargo, was insured. The ship was worth about £15,000 and the cargo was reportedly worth £40,000; only about £2,000 worth had been recovered. Cargo and wreckage washed up at Apollo Bay, Peterborough, Port Campbell, Western Port and according to some reports, even as far away as the beaches of New Zealand. The day after the wreck the government steam ship Pharos was sent from Queenscliff to clear the shipping lanes of debris that could be a danger to ships. The large midship deckhouse of the ship was found floating in a calm sea near Henty Reef. Items such as an American chair, a ladder and a nest of boxes were all on top of the deckhouse. As it was so large and could cause danger to passing ships, Captain Payne had the deckhouse towed towards the shore just beyond Apollo Bay. Between Apollo Bay and Blanket Bay the captain and crew of Pharos collected Wheeler and Wilson sewing machines, nests of boxes, bottles of Bristol’s sarsaparilla, pieces of common American chairs, axe handles, a Wheelers’ Patent thresher and a sailor’s trunk with the words “A. James” on the front. A ship’s flag-board bearing the words “Eric the Red” was found on the deckhouse; finally those on board the Pharos had the name of the wrecked vessel. During this operation Pharos came across the government steamer Victoria and also a steamer S.S. Otway, both of which were picking up flotsam and wreckage. A whole side of the hull and three large pieces of the other side of the hull, with some of the copper sheathing stripped off, had floated on to Point Franklin. Some of the vessels yards and portions of her masts were on shore. The pieces of canvas attached to the yards and masts confirmed that the vessel had been under sail. The beach there was piled with debris several feet high. There were many cases of Diamond Oil kerosene, labelled R. W. Cameron and Company, New York. There were also many large planks of red pine, portions of a small white boat and a large, well-used oar. Other items found ashore included sewing machines (some consigned to ‘Long and Co.”) and notions, axe and scythe handles, hay forks, wooden pegs, rolls of wire (some branded “T.S” and Co, Melbourne”), kegs of nails branded “A.T. and Co.” from the factory of A. Field and Son, Taunton, Massachusetts, croquet balls and mallets, buggy fittings, rat traps, perfumery, cutlery and Douay Bibles, clocks, bicycles, chairs, a fly wheel, a cooking stove, timber, boxes, pianos, organs and a ladder. (Wooden clothes pegs drifted in for many years). There seemed to be no personal luggage or clothing. The Pharos encountered a long line, about one and a half miles, of floating wreckage about 10 miles off land, south east of Cape Otway, and in some places about 40 feet wide. It seemed that more than half of it was from Eric the Red. The ship’s crew rescued 3 cases that were for the Melbourne Exhibition and other items from amongst the debris. There were also chairs, doors, musical instruments, washing boards, nests of trunks and fly catchers floating in the sea. Most of the goods were saturated and smelt of kerosene. A section of the hull lies buried in the sand at Parker River Beach. An anchor with chain is embedded in the rocks east of Point Franklin and a second anchor, thought to be from Eric the Red, is on display at the Cape Otway light station. (There is a photograph of a life belt on the verandah of Rivernook Guest House in Princetown with the words “ERIC THE RED / BOSTON”. This is rather a mystery as the ship was registered in Bath, Maine, USA.) Parts of the ship are on display at Bimbi Park Caravan Park and at Apollo Bay Museum. Flagstaff Hill Maritime Village also has part of the helm (steering wheel), a carved wooden sword (said to be the only remaining portion of the ship’s figurehead; further research is currently being carried out), a door, a metal rod, samples of wood and a medal for bravery. Much of the wreckage was recovered by the local residents before police and other authorities arrived at the scene. Looters went to great effort to salvage goods, being lowered down the high cliff faces to areas with little or no beach to collect items from the wreckage, their mates above watching out for dangerous waves. A Tasmanian newspaper reports on a court case in Stawell, Victoria, noting a man who was caught 2 months later selling tobacco from the wreckage of Eric the Red. Some of the silverware is still treasured by descendants of Mr Mackenzie who was given these items by officials for his help in securing the cargo. The gifts included silver coffee and tea pots, half a dozen silver serviette rings and two sewing machines. The wreck and cargo were sold to a Melbourne man who salvaged a quantity of high quality tobacco and dental and surgical instruments. Timbers from the ship were salvaged and used in the construction of houses and sheds around Apollo Bay, including a guest house, Milford House (since burnt down in bushfires), which had furniture, fittings and timber on the dining room floor from the ship. A 39.7 foot long trading ketch, the Apollo, was also built from its timbers by Mr Burgess in 1883 and subsequently used in Tasmanian waters. It was the first attempt at ship building in Apollo bay. In 1881 a red light was installed about 300 feet above sea level at the base of the Cape Otway lighthouse to warn ships when they were too close to shore; It would not be visible unless a ship came within 3 miles from it. This has proved to be an effective warning. The State Library of Victoria has a lithograph in its collection depicting the steamer Dawn and the shipwrecked men, titled. "Wreck of the ship Eric the Red, Cape Otway: rescue of the crew by the Dawn".The Eric the Red is historically significant as one of Victoria's major 19th century shipwrecks. (Heritage Victoria Eric the Red; HV ID 239) The wreck led to the provision of an additional warning light placed below the Cape Otway lighthouse to alert mariners to the location of Otway Reef. The site is archaeologically significant for its remains of a large and varied cargo and ship's fittings being scattered over a wide area. The site is recreationally and aesthetically significant as it is one of the few sites along this coast where tourists can visit identifiable remains of a large wooden shipwreck, and for its location set against the background of Cape Otway, Bass Strait, and the Cape Otway lighthouse. (Victorian Heritage Database Registration Number S239, Official Number 8745 USA)This carved wooden sword, recovered from the Eric the Red, is possibly the only portion of the figurehead recovered after the wreck. There are spirals carved from the base of the handle to the top of the sword. The hilt of the sword is a lion’s head holding its tail in its mouth, the tail forming the handle. The blade of the sword has engraved patterns on it. Tiny particles of gold leaf and dark blue paint fragments can be seen between the carving marks. There are remnants of yellowish-orange and crimson paint on the handle. At some time after the sword was salvaged the name of the ship was hand painted on the blade in black paint. The tip of the sword has broken or split and the remaining part is charcoal in appearance. On both the tip and the base of the handle are parts made where the sword could have been joined onto the figurehead There is a white coating over some areas of the sword, similar to white lead putty used in traditional shipbuilding. The words “ERIC the RED” have been hand painted on the blade of the sword in black paint sometime after it was salvaged.flagstaff hill, flagstaff hill maritime museum and village, warrnambool, maritime museum, maritime village, great ocean road, shipwreck coast, sword, wooden sword, eric the red, carved sword, figurehead, snake head on sword -
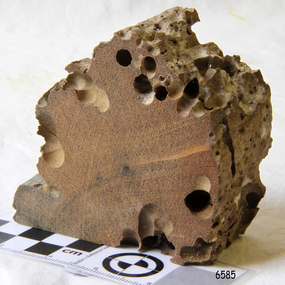 Flagstaff Hill Maritime Museum and Village
Wood Sample, about 1871
This piece of timber from the ship Eric the Red has been eaten through by the marine animals called Teredo Worms, sometimes called sea worms or ‘termites of the sea’. The worms bore holes into wood that is immersed in sea water and bacteria inside the worms digest the wood. Shipbuilders tried to prevent this problem by using coatings of tar, wax, lead or pitch. In the 18th and 19th centuries the outside of their ships were sheathed in copper or a combination of copper and zinc (called Muntz metal) and would be re-metalled periodically to ensure the sheathing would remain effective. In more recent times the ships are protected with a toxic coating. The American ship Eric the Red was a wooden, three masted clipper ship. She had 1,580 tons register and was the largest full-rigged ship built at Bath, Maine, USA in 1871. She was built and registered by Arthur Sewall, later to become the partnership E. & A. Sewall, the 51st ship built by this company. The annually-published List of Merchant Vessels of the U.S. shows Bath was still the home port of Eric the Red in 1880. The vessel was named after the Viking discoverer, Eric ‘the Red-haired’ Thorvaldsson , who was the first European to reach the shores of North America (in 980AD). The ship Eric the Red at first traded in coal between America and Britain, and later traded in guano nitrates from South America. In 1879 she was re-metalled and was in first class condition. On 10th June 1880 (some records say 12th June) Eric the Red departed New York for Melbourne and then Sydney. She had been commissioned by American trade representatives to carry a special cargo of 500 exhibits (1400 tons) – about a quarter to a third of America’s total exhibits - for the U.S.A. pavilion at Melbourne’s first International Exhibition. The exhibits included furniture, ironmongery, wines, chemicals, dental and surgical instruments, paper, cages, bronze lamp trimmings, axles, stamped ware, astronomical and time globes, samples of corn and the choicest of leaf tobacco. Other general cargo included merchandise such as cases of kerosene and turpentine, brooms, Bristol's Sarsaparilla, Wheeler and Wilson sewing machines, Wheeler’s thresher machine, axe handles and tools, cases of silver plate, toys, pianos and organs, carriages and Yankee notions. The Eric the Red left New York under the command of Captain Zaccheus Allen (or some records say Captain Jacques Allen) and 24 other crew including the owner’s son third mate Ned Sewall. There were also 2 saloon passengers on board. The ship had been sailing for an uneventful 85 days and the voyage was almost at its end. As Eric the Red approached Cape Otway there was a moderate north-west wind and hazy and overcast atmosphere. On 4th September 1880 at about 1:30am Captain Allen sighted the Cape Otway light and was keeping the ship 5-6 miles offshore to stay clear of the hazardous Otway Reef. However he had badly misjudged his position. The ship hit the Otway Reef about 2 miles out to sea, south west of the Cape Otway light station. Captain Allen ordered the wheel to be put ‘hard up’ thinking that she might float off the reef. The sea knocked the helmsman away from the wheel, broke the wheel ropes and carried away the rudder. The lifeboats were swamped, the mizzenmast fell, with all of its rigging, then the mainmast also fell and the ship broke in two. Some said that the passenger Vaughan, who was travelling for his health and not very strong, was washed overboard and never seen again. The ship started breaking up. The forward house came adrift with three of the crew on it as well as a longboat, which the men succeeded in launching and keeping afloat by continually bailing with their sea boots. The captain, the third mate (the owner’s son) and others clung to the mizzenmast in the sea. Then the owner’s son was washed away off the mast. Within 10 minutes the rest of the ship was in pieces, completely wrecked, with cargo and wreckage floating in the sea. The captain encouraged the second mate to swim with him to the deckhouse where there were other crew but the second mate wouldn’t go with him. Eventually the Captain made it to the deckhouse and the men pulled him up. At about 4:30am the group of men on the deckhouse saw the lights of a steamer and called for help. At the same time they noticed the second mate and the other man had drifted nearby, still on the spur, and pulled them both onto the wreck. The coastal steamer SS Dawn was returning to Warrnambool from Melbourne, its sailing time different to its usual schedule. She was built in 1876 and bought by the Portland and Belfast Steam Navigation Co. in 1877. At the time of this journey she was commanded by Captain Jones, and was sailing between Melbourne and Portland via Warrnambool. The provedore of the Dawn, Benjamin Lear, heard cries of distress coming through the portholes of the saloon. He gave the alarm and the engines were stopped. Cries could be heard clearly, coming from the land. Captain Jones sent out crew in two boats, and fired off rockets and blue lights to illuminate the area. They picked up the three survivors who were in the long boat from Eric the Red. Two men were picked up out of the water, one being the owner’s son who was clinging to floating kerosene boxes. At daylight the Dawn then rescued the 18 men from the floating portion of the deckhouse, which had drifted about 4 miles from where they’d struck the reef. Shortly after the rescue the deckhouse drifted onto breakers and was thrown onto rocks at Point Franklin, about 2 miles east of Cape Otway. Captain Jones had signalled to Cape Otway lighthouse the number of the Eric the Red and later signalled that there was a wreck at Otway Reef but there was no response from the lighthouse. The captain and crew of the Dawn spent several more hours searching unsuccessfully for more survivors, even going back as far as Apollo Bay. On board the Dawn the exhausted men received care and attention to their needs and wants, including much needed clothing. Captain Allen was amongst the 23 battered and injured men who were rescued and later taken to Warrnambool for care. Warrnambool’s mayor and town clerk offered them all hospitality, the three badly injured men going to the hospital for care and others to the Olive Branch Hotel, then on to Melbourne. Captain Allen’s leg injury prevented him from going ashore so he and three other men travelled on the Dawn to Portland. They were met by the mayor who also treated them all with great kindness. Captain Allen took the train back to Melbourne then returned to America. Those saved were Captain Zaccheus Allen (or Jacques Allen), J. Darcy chief mate, James F. Lawrence second mate, Ned Sewall third mate and owner’s son, John French the cook, C. Nelson sail maker, Clarence W. New passenger, and the able seamen Dickenson, J. Black, Denis White, C. Herbert, C. Thompson, A. Brooks, D. Wilson, J. Ellis, Q. Thompson, C. Newman, W. Paul, J. Davis, M. Horenleng, J. Ogduff, T. W. Drew, R. Richardson. Four men had lost their lives; three of them were crew (Gus Dahlgreen ship’s carpenter, H. Ackman steward, who drowned in his cabin, and George Silver seaman) and one a passenger (J. B. Vaughan). The body of one of them had been found washed up at Cape Otway and was later buried in the lighthouse cemetery; another body was seen on an inaccessible ledge. Twelve months later the second mate James F. Lawrence, from Nova Scotia, passed away in the Warrnambool district; an obituary was displayed in the local paper. Neither the ship, nor its cargo, was insured. The ship was worth about £15,000 and the cargo was reportedly worth £40,000; only about £2,000 worth had been recovered. Cargo and wreckage washed up at Apollo Bay, Peterborough, Port Campbell, Western Port and according to some reports, even as far away as the beaches of New Zealand. The day after the wreck the government steam ship Pharos was sent from Queenscliff to clear the shipping lanes of debris that could be a danger to ships. The large midship deckhouse of the ship was found floating in a calm sea near Henty Reef. Items such as an American chair, a ladder and a nest of boxes were all on top of the deckhouse. As it was so large and could cause danger to passing ships, Captain Payne had the deckhouse towed towards the shore just beyond Apollo Bay. Between Apollo Bay and Blanket Bay the captain and crew of Pharos collected Wheeler and Wilson sewing machines, nests of boxes, bottles of Bristol’s sarsaparilla, pieces of common American chairs, axe handles, a Wheelers’ Patent thresher and a sailor’s trunk with the words “A. James” on the front. A ship’s flag-board bearing the words “Eric the Red” was found on the deckhouse; finally those on board the Pharos had the name of the wrecked vessel. During this operation Pharos came across the government steamer Victoria and also a steamer S.S. Otway, both of which were picking up flotsam and wreckage. A whole side of the hull and three large pieces of the other side of the hull, with some of the copper sheathing stripped off, had floated on to Point Franklin. Some of the vessels yards and portions of her masts were on shore. The pieces of canvas attached to the yards and masts confirmed that the vessel had been under sail. The beach there was piled with debris several feet high. There were many cases of Diamond Oil kerosene, labelled R. W. Cameron and Company, New York. There were also many large planks of red pine, portions of a small white boat and a large, well-used oar. Other items found ashore included sewing machines (some consigned to ‘Long and Co.”) and notions, axe and scythe handles, hay forks, wooden pegs, rolls of wire (some branded “T.S” and Co, Melbourne”), kegs of nails branded “A.T. and Co.” from the factory of A. Field and Son, Taunton, Massachusetts, croquet balls and mallets, buggy fittings, rat traps, perfumery, cutlery and Douay Bibles, clocks, bicycles, chairs, a fly wheel, a cooking stove, timber, boxes, pianos, organs and a ladder. (Wooden clothes pegs drifted in for many years). There seemed to be no personal luggage or clothing. The Pharos encountered a long line, about one and a half miles, of floating wreckage about 10 miles off land, south east of Cape Otway, and in some places about 40 feet wide. It seemed that more than half of it was from Eric the Red. The ship’s crew rescued 3 cases that were for the Melbourne Exhibition and other items from amongst the debris. There were also chairs, doors, musical instruments, washing boards, nests of trunks and fly catchers floating in the sea. Most of the goods were saturated and smelt of kerosene. A section of the hull lies buried in the sand at Parker River Beach. An anchor with chain is embedded in the rocks east of Point Franklin and a second anchor, thought to be from Eric the Red, is on display at the Cape Otway light station. (There is a photograph of a life belt on the verandah of Rivernook Guest House in Princetown with the words “ERIC THE RED / BOSTON”. This is rather a mystery as the ship was registered in Bath, Maine, USA.) Parts of the ship are on display at Bimbi Park Caravan Park and at Apollo Bay Museum. Flagstaff Hill Maritime Village also has part of the helm (steering wheel), a carved wooden sword (said to be the only remaining portion of the ship’s figurehead; further research is currently being carried out), a door, a metal rod, several samples of wood and a medal for bravery, awarded to Nelson Johnson, a crew member of the S.S. Dawn by the U.S. President, for the rescue of the crew. Much of the wreckage was recovered by the local residents before police and other authorities arrived at the scene. Looters went to great effort to salvage goods, being lowered down the high cliff faces to areas with little or no beach to collect items from the wreckage, their mates above watching out for dangerous waves. A Tasmanian newspaper reports on a court case in Stawell, Victoria, noting a man who was caught 2 months later selling tobacco from the wreckage of Eric the Red. Some of the silverware is still treasured by descendants of Mr Mackenzie who was given these items by officials for his help in securing the cargo. The gifts included silver coffee and tea pots, half a dozen silver serviette rings and two sewing machines. A Mr G.W. Black has in his possession a medal and a purse that were awarded to his father, another Dawn crew member who was part of the rescue team. The medal is inscribed and named “To John Black ….” (from “Shipwrecks” by Margaret E. Mackenzie, 3rd edition, published 1964). The wreck and cargo were sold to a Melbourne man who salvaged a quantity of high quality tobacco and dental and surgical instruments. Timbers from the ship were salvaged and used in the construction of houses and sheds around Apollo Bay, including a guest house, Milford House (since burnt down in bushfires), which had furniture, fittings and timber on the dining room floor from the ship. A 39.7 foot long trading ketch, the Apollo, was also built from its timbers by Mr Burgess in 1883 and subsequently used in Tasmanian waters. It was the first attempt at ship building in Apollo bay. In 1881 a red light was installed about 300 feet above sea level at the base of the Cape Otway lighthouse to warn ships when they were too close to shore; It would not be visible unless a ship came within 3 miles from it. This has proved to be an effective warning. Nelson Johnson, recipient of the medal for bravery, married Elizabeth Howard in 1881 and they had 10 children. They lived in South Melbourne, Victoria. Nelson died in 1922 in Fitzroy Victoria, age 66. In 1895 the owners of the S.S. Dawn, the Portland and Belfast Steam Navigation Co., wound up and sold out to the Belfast Company who took over the Dawn for one year before selling her to Howard Smith. She was condemned and sunk in Suva in 1928. The State Library of Victoria has a lithograph in its collection depicting the steamer Dawn and the shipwrecked men, titled. "Wreck of the ship Eric the Red, Cape Otway: rescue of the crew by the Dawn".The wood (timber) sample is listed on the Collections Australia Database, Heritage Victoria, number 239 00010 A “The Eric the Red is historically significant as one of Victoria's major 19th century shipwrecks. (Heritage Victoria Eric the Red; HV ID 239) The wreck led to the provision of an additional warning light placed below the Cape Otway lighthouse to alert mariners to the location of Otway Reef. The site is archaeologically significant for its remains of a large and varied cargo and ship's fittings being scattered over a wide area. The site is recreationally and aesthetically significant as it is one of the few sites along this coast where tourists can visit identifiable remains of a large wooden shipwreck, and for its location set against the background of Cape Otway, Bass Strait, and the Cape Otway lighthouse.“ (Victorian Heritage Database Registration Number S239, Official Number 8745 USA) Wood sample from the wreck of the ship Eric the Red. Triangular shaped, full of sea worm (Teredo worm) holes. The wood is dark in colour and is very light in weight.flagstaff hill, warrnambool, shipwrecked-coast, flagstaff-hill, flagstaff-hill-maritime-museum, maritime-museum, shipwreck-coast, flagstaff-hill-maritime-village, shipwreck-artefact, eric-the-red, zaccheus-allen, sewall, 1880, melbourne-exhibition, cape-otway, otway-reef, wood-sample, s.s.-dawn -
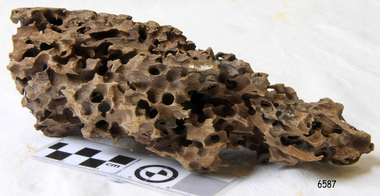 Flagstaff Hill Maritime Museum and Village
Wood Sample, About 1871
This piece of timber from the ship Eric the Red has been eaten through by the marine animals called Teredo Worms, sometimes called sea worms or ‘termites of the sea’. The worms bore holes into wood that is immersed in sea water and bacteria inside the worms digest the wood. Shipbuilders tried to prevent this problem by using coatings of tar, wax, lead or pitch. In the 18th and 19th centuries the outside of their ships were sheathed in copper or a combination of copper and zinc (called Muntz metal) and would be re-metalled periodically to ensure the sheathing would remain effective. In more recent times the ships are protected with a toxic coating. The American ship Eric the Red was a wooden, three masted clipper ship. She had 1,580 tons register and was the largest full-rigged ship built at Bath, Maine, USA in 1871. She was built and registered by Arthur Sewall, later to become the partnership E. & A. Sewall, the 51st ship built by this company. The annually-published List of Merchant Vessels of the U.S. shows Bath was still the home port of Eric the Red in 1880. The vessel was named after the Viking discoverer, Eric ‘the Red-haired’ Thorvaldsson , who was the first European to reach the shores of North America (in 980AD). The ship Eric the Red at first traded in coal between America and Britain, and later traded in guano nitrates from South America. In 1879 she was re-metalled and was in first class condition. On 10th June 1880 (some records say 12th June) Eric the Red departed New York for Melbourne and then Sydney. She had been commissioned by American trade representatives to carry a special cargo of 500 exhibits (1400 tons) – about a quarter to a third of America’s total exhibits - for the U.S.A. pavilion at Melbourne’s first International Exhibition. The exhibits included furniture, ironmongery, wines, chemicals, dental and surgical instruments, paper, cages, bronze lamp trimmings, axles, stamped ware, astronomical and time globes, samples of corn and the choicest of leaf tobacco. Other general cargo included merchandise such as cases of kerosene and turpentine, brooms, Bristol's Sarsaparilla, Wheeler and Wilson sewing machines, Wheeler’s thresher machine, axe handles and tools, cases of silver plate, toys, pianos and organs, carriages and Yankee notions. The Eric the Red left New York under the command of Captain Zaccheus Allen (or some records say Captain Jacques Allen) and 24 other crew including the owner’s son third mate Ned Sewall. There were also 2 saloon passengers on board. The ship had been sailing for an uneventful 85 days and the voyage was almost at its end. As Eric the Red approached Cape Otway there was a moderate north-west wind and hazy and overcast atmosphere. On 4th September 1880 at about 1:30am Captain Allen sighted the Cape Otway light and was keeping the ship 5-6 miles offshore to stay clear of the hazardous Otway Reef. However he had badly misjudged his position. The ship hit the Otway Reef about 2 miles out to sea, south west of the Cape Otway light station. Captain Allen ordered the wheel to be put ‘hard up’ thinking that she might float off the reef. The sea knocked the helmsman away from the wheel, broke the wheel ropes and carried away the rudder. The lifeboats were swamped, the mizzenmast fell, with all of its rigging, then the mainmast also fell and the ship broke in two. Some said that the passenger Vaughan, who was travelling for his health and not very strong, was washed overboard and never seen again. The ship started breaking up. The forward house came adrift with three of the crew on it as well as a longboat, which the men succeeded in launching and keeping afloat by continually bailing with their sea boots. The captain, the third mate (the owner’s son) and others clung to the mizzenmast in the sea. Then the owner’s son was washed away off the mast. Within 10 minutes the rest of the ship was in pieces, completely wrecked, with cargo and wreckage floating in the sea. The captain encouraged the second mate to swim with him to the deckhouse where there were other crew but the second mate wouldn’t go with him. Eventually the Captain made it to the deckhouse and the men pulled him up. At about 4:30am the group of men on the deckhouse saw the lights of a steamer and called for help. At the same time they noticed the second mate and the other man had drifted nearby, still on the spur, and pulled them both onto the wreck. The coastal steamer SS Dawn was returning to Warrnambool from Melbourne, its sailing time different to its usual schedule. She was built in 1876 and bought by the Portland and Belfast Steam Navigation Co. in 1877. At the time of this journey she was commanded by Captain Jones, and was sailing between Melbourne and Portland via Warrnambool. The provedore of the Dawn, Benjamin Lear, heard cries of distress coming through the portholes of the saloon. He gave the alarm and the engines were stopped. Cries could be heard clearly, coming from the land. Captain Jones sent out crew in two boats, and fired off rockets and blue lights to illuminate the area. They picked up the three survivors who were in the long boat from Eric the Red. Two men were picked up out of the water, one being the owner’s son who was clinging to floating kerosene boxes. At daylight the Dawn then rescued the 18 men from the floating portion of the deckhouse, which had drifted about 4 miles from where they’d struck the reef. Shortly after the rescue the deckhouse drifted onto breakers and was thrown onto rocks at Point Franklin, about 2 miles east of Cape Otway. Captain Jones had signalled to Cape Otway lighthouse the number of the Eric the Red and later signalled that there was a wreck at Otway Reef but there was no response from the lighthouse. The captain and crew of the Dawn spent several more hours searching unsuccessfully for more survivors, even going back as far as Apollo Bay. On board the Dawn the exhausted men received care and attention to their needs and wants, including much needed clothing. Captain Allen was amongst the 23 battered and injured men who were rescued and later taken to Warrnambool for care. Warrnambool’s mayor and town clerk offered them all hospitality, the three badly injured men going to the hospital for care and others to the Olive Branch Hotel, then on to Melbourne. Captain Allen’s leg injury prevented him from going ashore so he and three other men travelled on the Dawn to Portland. They were met by the mayor who also treated them all with great kindness. Captain Allen took the train back to Melbourne then returned to America. Those saved were Captain Zaccheus Allen (or Jacques Allen), J. Darcy chief mate, James F. Lawrence second mate, Ned Sewall third mate and owner’s son, John French the cook, C. Nelson sail maker, Clarence W. New passenger, and the able seamen Dickenson, J. Black, Denis White, C. Herbert, C. Thompson, A. Brooks, D. Wilson, J. Ellis, Q. Thompson, C. Newman, W. Paul, J. Davis, M. Horenleng, J. Ogduff, T. W. Drew, R. Richardson. Four men had lost their lives; three of them were crew (Gus Dahlgreen ship’s carpenter, H. Ackman steward, who drowned in his cabin, and George Silver seaman) and one a passenger (J. B. Vaughan). The body of one of them had been found washed up at Cape Otway and was later buried in the lighthouse cemetery; another body was seen on an inaccessible ledge. Twelve months later the second mate James F. Lawrence, from Nova Scotia, passed away in the Warrnambool district; an obituary was displayed in the local paper. Neither the ship, nor its cargo, was insured. The ship was worth about £15,000 and the cargo was reportedly worth £40,000; only about £2,000 worth had been recovered. Cargo and wreckage washed up at Apollo Bay, Peterborough, Port Campbell, Western Port and according to some reports, even as far away as the beaches of New Zealand. The day after the wreck the government steam ship Pharos was sent from Queenscliff to clear the shipping lanes of debris that could be a danger to ships. The large midship deckhouse of the ship was found floating in a calm sea near Henty Reef. Items such as an American chair, a ladder and a nest of boxes were all on top of the deckhouse. As it was so large and could cause danger to passing ships, Captain Payne had the deckhouse towed towards the shore just beyond Apollo Bay. Between Apollo Bay and Blanket Bay the captain and crew of Pharos collected Wheeler and Wilson sewing machines, nests of boxes, bottles of Bristol’s sarsaparilla, pieces of common American chairs, axe handles, a Wheelers’ Patent thresher and a sailor’s trunk with the words “A. James” on the front. A ship’s flag-board bearing the words “Eric the Red” was found on the deckhouse; finally those on board the Pharos had the name of the wrecked vessel. During this operation Pharos came across the government steamer Victoria and also a steamer S.S. Otway, both of which were picking up flotsam and wreckage. A whole side of the hull and three large pieces of the other side of the hull, with some of the copper sheathing stripped off, had floated on to Point Franklin. Some of the vessels yards and portions of her masts were on shore. The pieces of canvas attached to the yards and masts confirmed that the vessel had been under sail. The beach there was piled with debris several feet high. There were many cases of Diamond Oil kerosene, labelled R. W. Cameron and Company, New York. There were also many large planks of red pine, portions of a small white boat and a large, well-used oar. Other items found ashore included sewing machines (some consigned to ‘Long and Co.”) and notions, axe and scythe handles, hay forks, wooden pegs, rolls of wire (some branded “T.S” and Co, Melbourne”), kegs of nails branded “A.T. and Co.” from the factory of A. Field and Son, Taunton, Massachusetts, croquet balls and mallets, buggy fittings, rat traps, perfumery, cutlery and Douay Bibles, clocks, bicycles, chairs, a fly wheel, a cooking stove, timber, boxes, pianos, organs and a ladder. (Wooden clothes pegs drifted in for many years). There seemed to be no personal luggage or clothing. The Pharos encountered a long line, about one and a half miles, of floating wreckage about 10 miles off land, south east of Cape Otway, and in some places about 40 feet wide. It seemed that more than half of it was from Eric the Red. The ship’s crew rescued 3 cases that were for the Melbourne Exhibition and other items from amongst the debris. There were also chairs, doors, musical instruments, washing boards, nests of trunks and fly catchers floating in the sea. Most of the goods were saturated and smelt of kerosene. A section of the hull lies buried in the sand at Parker River Beach. An anchor with chain is embedded in the rocks east of Point Franklin and a second anchor, thought to be from Eric the Red, is on display at the Cape Otway light station. (There is a photograph of a life belt on the verandah of Rivernook Guest House in Princetown with the words “ERIC THE RED / BOSTON”. This is rather a mystery as the ship was registered in Bath, Maine, USA.) Parts of the ship are on display at Bimbi Park Caravan Park and at Apollo Bay Museum. Flagstaff Hill Maritime Village also has part of the helm (steering wheel), a carved wooden sword (said to be the only remaining portion of the ship’s figurehead; further research is currently being carried out), a door, a metal rod, several samples of wood and a medal for bravery, awarded to Nelson Johnson, a crew member of the S.S. Dawn by the U.S. President, for the rescue of the crew. Much of the wreckage was recovered by the local residents before police and other authorities arrived at the scene. Looters went to great effort to salvage goods, being lowered down the high cliff faces to areas with little or no beach to collect items from the wreckage, their mates above watching out for dangerous waves. A Tasmanian newspaper reports on a court case in Stawell, Victoria, noting a man who was caught 2 months later selling tobacco from the wreckage of Eric the Red. Some of the silverware is still treasured by descendants of Mr Mackenzie who was given these items by officials for his help in securing the cargo. The gifts included silver coffee and tea pots, half a dozen silver serviette rings and two sewing machines. A Mr G.W. Black has in his possession a medal and a purse that were awarded to his father, another Dawn crew member who was part of the rescue team. The medal is inscribed and named “To John Black ….” (from “Shipwrecks” by Margaret E. Mackenzie, 3rd edition, published 1964). The wreck and cargo were sold to a Melbourne man who salvaged a quantity of high quality tobacco and dental and surgical instruments. Timbers from the ship were salvaged and used in the construction of houses and sheds around Apollo Bay, including a guest house, Milford House (since burnt down in bushfires), which had furniture, fittings and timber on the dining room floor from the ship. A 39.7 foot long trading ketch, the Apollo, was also built from its timbers by Mr Burgess in 1883 and subsequently used in Tasmanian waters. It was the first attempt at ship building in Apollo bay. In 1881 a red light was installed about 300 feet above sea level at the base of the Cape Otway lighthouse to warn ships when they were too close to shore; It would not be visible unless a ship came within 3 miles from it. This has proved to be an effective warning. Nelson Johnson, recipient of the medal for bravery, married Elizabeth Howard in 1881 and they had 10 children. They lived in South Melbourne, Victoria. Nelson died in 1922 in Fitzroy Victoria, age 66. In 1895 the owners of the S.S. Dawn, the Portland and Belfast Steam Navigation Co., wound up and sold out to the Belfast Company who took over the Dawn for one year before selling her to Howard Smith. She was condemned and sunk in Suva in 1928. The State Library of Victoria has a lithograph in its collection depicting the steamer Dawn and the shipwrecked men, titled. "Wreck of the ship Eric the Red, Cape Otway: rescue of the crew by the Dawn".The wood (timber) sample is listed on the Collections Australia Database, Heritage Victoria, number 239 00010 A “The Eric the Red is historically significant as one of Victoria's major 19th century shipwrecks. (Heritage Victoria Eric the Red; HV ID 239) The wreck led to the provision of an additional warning light placed below the Cape Otway lighthouse to alert mariners to the location of Otway Reef. The site is archaeologically significant for its remains of a large and varied cargo and ship's fittings being scattered over a wide area. The site is recreationally and aesthetically significant as it is one of the few sites along this coast where tourists can visit identifiable remains of a large wooden shipwreck, and for its location set against the background of Cape Otway, Bass Strait, and the Cape Otway lighthouse.“ (Victorian Heritage Database Registration Number S239, Official Number 8745 USA) Wood sample from the wreck of the ship Eric the Red. Oblong shaped, full of sea worm (Teredo worm) holes. The wood is dark in colour and is very light in weight. flagstaff hill, warrnambool, shipwrecked-coast, flagstaff-hill, flagstaff-hill-maritime-museum, maritime-museum, shipwreck-coast, flagstaff-hill-maritime-village, shipwreck-artefact, eric-the-red, zaccheus-allen, sewall, 1880, melbourne-exhibition, cape-otway, otway-reef, wood-sample, s.s.-dawn -
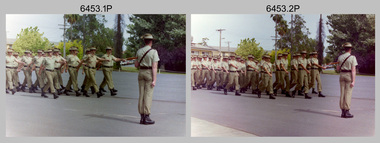 Bendigo Military Museum
Photograph - Officer Commissioning and CO’s Handover Parade, Army Survey Regiment, Fortuna Villa, Bendigo, 1992
This is a set of 28 photographs taken at a CO’s Parade at the Army Survey Regiment, Fortuna, Bendigo in 1992. On this parade WO1 Bill Jones received his commission and by promotion to Captain from CO LTCOL Rene van den Tol. Command of the unit was handed over to LTCOL Rob McHenry. It is probable the commissioning and handover ceremonies occurred on the CO’s Parade. LTCOL Rene van den Tol was CO from 1989 to 1992 and LTCOL Rob McHenry was CO from 1992 to 1993.This is a set of 28 photographs taken at a CO’s Parade at the Army Survey Regiment, Fortuna, Bendigo in 1992. The colour photographs are on 35mm negative film and scanned at 96 dpi. They are part of the Army Survey Regiment’s Collection. .1) - Photo, colour, 1992. Headquarters Squadron marches past RSM WO1 Graham Ragless. .2) - Photo, colour, 1992. Cartographic Squadron marches past RSM WO1 Graham Ragless. L to R: unidentified personnel, WO2 Steve Hansen, CPL Roger Pearson, WO1 Gary Warnest, SSGT Dennis Learmonth, SSGT Greg Else, CPL Ian Bowes, SGT Stuart Symonds. .3) - Photo, colour, 1992. Lithographic Squadron marches past RSM WO1 Graham Ragless. L to R: unidentified personnel, WO1 Steve Egan, LCPL John Bragg, unidentified personnel, WO2 Rob Bogumil, unidentified personnel, SPR Corey Hill. .4) - Photo, colour, 1992. Air Survey Squadron marches past RSM WO1 Graham Ragless. L to R: unidentified personnel, WO1 Allan Hancox, SSGT Wolfgang Thun, unidentified personnel, WO2 Neil ‘Ned’ Kelly, unidentified personnel, SGT Dave Longbottom, SGT Brian Johnson. .5) - Photo, colour, 1992. Cartographic Squadron. L to R: unidentified personnel, SGT Stuart Symonds, CPL Col McInnes, CAPT Mary Anne Martinek in foreground, SPR Jodi Seith, unidentified personnel, SPR Avril (Bray) Lloyd. .6) - Photo, colour, 1992. Air Survey Squadron. L to R: unidentified officer, SSGT Bruce Hammond, SPR Tracy Tillman, SPR Rachel (Stanford) Scott, SPR Paula (Golding) Brinsmead, SGT Graeme Reany, unidentified officer in foreground, unidentified personnel, CPL Steve Coulson. .7) - Photo, colour, 1992. Cartographic Squadron inspection. L to R: RSM WO1 Graham Ragless, unidentified, OC MAJ Graeme Wastell, CO LTCOL Rene van den Tol, unidentified personnel, CPL Col McInnes, SPR Jodi Seith, SPR Avril (Bray) Lloyd. CPL Steve Ellis, SPR Ian Brown, SPR Andrew Lazdovskis. .8) - Photo, colour, 1992. Cartographic Squadron inspection. L to R: OC MAJ Graeme Wastell, CO LTCOL Rene van den Tol, SPR Avril (Bray) Lloyd, CPL Steve Ellis, SPR Ian Brown, SPR Andrew Lazdovskis, SPR Adrian Taylor, unidentified, SPR Mick Knight, SPR Dawn Hoadley, CPL Craig Kellet. .8) to .12) - Photo, colour, 1992. Officer Commissioning Ceremony. L to R: CO LTCOL Rene van den Tol, WO1 Bill Jones promoted to Captain. .13) - Photo, colour, 1992. Officer Commissioning Ceremony. L to R: ADJT CAPT Geoff Ford, RSM WO1 Graham Ragless, CO LTCOL Rene van den Tol, WO1 Bill Jones promoted to Captain. .14) - Photo, colour, 1992. Officer Commissioning Ceremony. WO1 Bill Jones promoted to Captain. .15) - Photo, colour, 1992. Commanding Officer Handover. CO LTCOL Rene van den Tol delivers speech. .16) to .17) - Photo, colour, 1992. Commanding Officer Handover. R to L: CO LTCOL Rene van den Tol hands over to incoming CO LTCOL Rob McHenry. .18) - Photo, colour, 1992. Commanding Officer Handover. L to R: RSM WO1 Graham Ragless, ADJT CAPT Geoff Ford, CO LTCOL Rob McHenry. .19) - Photo, colour, 1992. Commanding Officer Handover. L to R: ADJT CAPT Geoff Ford, RSM WO1 Graham Ragless, CO LTCOL Rob McHenry. .20) - Photo, colour, 1992. Cartographic Squadron marches off parade ground. L to R: OC MAJ Graeme Wastell, unidentified officer, CAPT Greg Oaten, LT Matt Jackson, CAPT Mary Anne Martinek, SPR Mick Knight. .21) & .22) - Photo, colour, 1992. Cartographic Squadron marches off parade ground. .23) - Photo, colour, 1992. Lithographic Squadron marches off parade ground. L to R: OC Bob Coote, unidentified officer, SPR Scott Cameron, unidentified officer, SSGT Russ Mollenhauer, SGT Brian Fauth. .24) - Photo, colour, 1992. Lithographic Squadron marches off parade ground. L to R: LCPL Janet Murray, unidentified, SPR Mick Muzeen, Allison (Ottaway) Wooldrage, SGT Keith Quinton, SGT Frank Lenane, SGT Laurie Justin, SGT Dale Hudson, LCPL John Bragg, unidentified, SGT Kim Reynolds, SPR Corey Hill, SPR Andrew Arman, SPR Ross Anza, WO1 Peter Coombes. .25) - Photo, colour, 1992. Parade guests. L to R: unidentified guests, MAJ Peter Jensen. .26) - Photo, colour, 1992. Parade guests. L to R: unidentified guests, CAPT Doug Arman, unidentified guests. .27) - Photo, colour, 1992. Parade personnel march off. L to R: unidentified, WO2 Ted Burgess, WO1 Ken Slater. .28) - Photo, colour, 1992. Parade personnel. L to R: unidentified, SPR Allan Blake..1P to .28P – There are no annotations.royal australian survey corps, rasvy, army survey regiment, army svy regt, fortuna, asr -
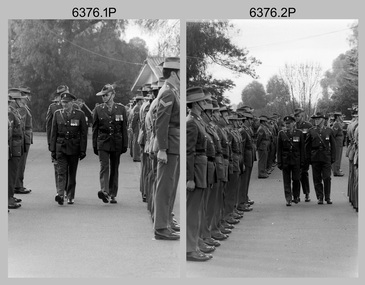 Bendigo Military Museum
Photograph - Army Survey Regiment – Corps Day Parade and Defence Force Service Medal Presentations, Fortuna Villa, Bendigo, 1987
This set of 18 photographs were taken at a Corps Day Parade held at the Army Survey Regiment, Bendigo in July 1987. The Parade Commander was CO LTCOL Don Swiney MBE, and the Reviewing Officer was the Colonel Commandant (honorary appointment) of the Survey Corps - COL Clem Sargent (Retd). The Corps Day Parade was held to commemorate the 72nd anniversary of the formation of the Royal Australian Survey Corps. These photos comprise inspections of the Regiment’s four squadrons, presentations of the Defence Force Service Medal in recognition of 15 years of efficient remunerated service to SSGT Phil Meagher and SGT Wayne Rothwell; and formal group photos of each of the four Squadrons, Officers, and Warrant Officers/Sergeants. See Item 6375.36P for additional photographs taken at the start of the Corps Day Parade, drill movements of the four Squadrons forming up on the parade ground and the formal arrival of the Reviewing Officer.This is a set of 18 photographs of a Corps Day Parade held at the Army Survey Regiment, Fortuna, Bendigo in July 1987. The black & white photographs are on 35mm negative film and are part of the Army Survey Regiment’s Collection. The photographs were scanned at 96 dpi. .1) - Photo, black & white, July 1987. Headquarters Squadron inspection. L to R: unidentified (x3), COL COMDT COL Clem Sargent, CO LTCOL Don Swiney MBE (obscured), OC MAJ Roger Rix. .2) - Photo, black & white, July 1987. Lithographic Squadron inspection. L to R: unidentified, CPL Brian Paul, CPL Gary Tremain, CPL Warren ‘Waldo’ Shirley, unidentified, CPL Stuart Ridge, SSGT Rob Bogumil, SSGT Steve Egan. CPL Roy Hicks, unidentified, COL COMDT COL Clem Sargent, CO LTCOL Don Swiney MBE, OC MAJ Mick Byrne, remainder unidentified. .3) - Photo, black & white, July 1987. Air Survey Squadron inspection. L to R: OC Daryl Hockings CSM, COL COMDT COL Clem Sargent, CO LTCOL Don Swiney MBE, SGT Graham Johnson, unidentified (x4), SGT Lyn Johnson, CPL Steve Rundle, SGT Wayne Rothwell, SGT Bruce Hammond, SGT Barrie Craymer, SPR Brett Parkin .4) - Photo, black & white, July 1987. Cartographic Squadron inspection. L to R: OC MAJ Bob McHenry, COL COMDT COL Clem Sargent, CO LTCOL Don Swiney MBE, CPL Rod Skidmore, SSGT Phil Meagher, SPR Craig Kellet, unidentified, CPL Col McInnes, SPR Nick Cowan, unidentified, CPL Jeff Le-Fevre, SPR Richard Arman, CPL Dan Cirsky, SPR Tom Bloxham, CPL Peter Johnson, unidentified. .5) - Photo, black & white, July 1987. Presentation of Defence Force Service Medal. L to R: WO2 Andy Wilson, COL COMDT COL Clem Sargent, MAJ Terry Edwards, SSGT Phil Meagher, CAPT John South (background). .6) - Photo, black & white, July 1987. Presentation of Defence Force Service Medal. L to R: COL COMDT COL Clem Sargent, SGT Wayne Rothwell, SSGT Phil Meagher, MAJ Roger Rix (background). .7) - Photo, black & white, July 1987. Corp Day Parade guests. L to R: MAJ Duncan Burns, SPR Dianne (Thomas) Soutar, unidentified guests, CPL Kevin ‘Chuck’ Berry, CPL Graeme Priestley, unidentified guests. .8) - Photo, black & white, July 1987. Corp Day Parade guests. L to R: unidentified guests, George Austen, SPR Dianne (Thomas) Soutar, Bob Mason, unidentified guests, CPL Graeme Priestley, unidentified guests, SGT Terry Danger, unidentified guests, CO LTCOL Don Swiney MBE (facing away), COL COMDT COL Clem Sargent. .9) & .10) - Photo, black & white, July 1987. L to R: unidentified guest, COL COMDT COL Clem Sargent, CO LTCOL Don Swiney MBE. .11) - Photo, black & white, July 1987. L to R: unidentified guests, 2IC MAJ Terry Edwards, ADJT CAPT Andrew McLeod. .12) - Photo, black & white, July 1987. WO1 Bob ‘Stretch’ Hayden. .13) - Photo, black & white, July 1987. Lithographic Squadron. Back Row L to R: CPL Paul Baker, CPL Greg Rowe, CPL Kerron South, CPL Stuart Ridge, SPR Rob Jones, CPL Laurie Justin, unidentified, SPR Geoff Webb, unidentified (x2) SPR Shona Hastie, SPR Trevor King, LCPL John Bateman, CPL Ken Peters, CPL Roy Hicks. Middle Row L to R: CPL Brian Paul, unidentified (x2), CPL Jim Ash, CPL Dale Hudson, CPL Gary Tremain, unidentified, LCPL Daryl South, CPL Graham Hales, SPR Bob Bousfield, CPL John ‘Flash’ Anderson, CPL Peter Dillon, CPL Peter Swandale, SPR Colin Yeats, CPL Lance Strudwick. Front Row L to R: CPL Warren ‘Waldo’ Shirley, SGT Gary Kerr, SGT Brian Fauth, SGT Graham Johnston, SSGT Steve Egan, WO2 Bill Jones, OC MAJ Mick Byrne, WO2 Ralph Chant, SSGT Rob Bogumil, unidentified UK exchange, SGT Alan Virtue, SGT Jeff Willey. .14) - Photo, black & white, July 1987. Headquarters Squadron. Back Row L to R: CPL Bob Thrower, PTE Mark Twiss, unidentified (x3), LCPL Bob Sheppard, unidentified, SGT Ian Belmont, SPR Peter Coles, SPR Tracy (Parker) Ash, CPL Steve McGuinness, SGT Bob Garritty, unidentified officer. Middle Row L to R: WO1 Doug Arman, WO2 Kevin Macquire, W01 Noel ‘Nesty’ Coulthard, WO1 Allan Adsett, WO2 Andy Wilson, CPL David Jobe, SGT Kevin Boehm, unidentified (x3), SSGT Greg Gilbert, WO2 George Graham, WO2 Dave Miles, WO2 Ted Burgess, WO1 Ken Slater. Front Row L to R: WO1 Bob ‘Stretch’ Hayden, CAPT Peter ‘Blue’ Blaskett, CAPT Bob Williams, ADJT CAPT Andrew McLeod, 2IC MAJ Terry Edwards, Acting RSM WO1 Dave Thompson, CO LTCOL Don Swiney MBE, OC MAJ Roger Rix, WO2 Alan Bunn, MAJ Duncan Burns, CAPT John South, LT Vicky Thompson, WO1 Peter Warwick. .15) - Photo, black & white, July 1987. Air Survey Squadron. Back Row L to R: SGT Lyn Johnson, CPL John ‘Toad’ Smith, SGT Roger Rees, SGT Wayne Rothwell, CPL Roger Pearson, SPR Leah (Hoffman) Peppler, unidentified, SPR Christine Gordon, SPR Jodi Bowman, SGT Paul Leskovec CSM, SPR Tony Jackson, CPL John Reid, unidentified, SPR Avril (Bray) Lloyd? SPR Diane (Thomas) Soutar, SSGT Brian Collings. Middle Row L to R: unidentified, SGT John ‘Stormy’ Tempest, CPL Perry Burt, SPR Rick Millar, CPL Graeme Priestley, SGT Bruce Hammond, CPL Max Watson, SPR Brett Parkin, SPR Peter Ball, CPL Dick Warsing, SPR Sue (Foote) Bourne, SPR Sandy Wynn, CPL Steve Hill OAM CSM, CPL Steve Rundle, CPL Andy Mallon, SPR Stafford Lester, SPR Steve Moss, CPL Rod Burton. Front Row L to R: SGT Ken Talbot-Smith, SSGT Phil Boyle, SSGT Max Coletti, WO2 Peter Tangey, LT Brian Sloan, WO1 Stevo Hinic, OC Maj Daryl Hockings CSM, CAPT Laurie Newton, WO1 Denis Marshall, SSGT Neil ‘Ned’ Kelly, SSGT Dennis McCarthy, SSGT Adrian ‘Charlie’ Creedy, SGT Barry Craymer, SSGT John ‘Shep’ Shephard. .16) - Photo, black & white, July 1987. Cartographic Squadron. Back Row L to R: unidentified, SPR Michelle Griffith, unidentified, SPR Raelene Munting, unidentified, SPR Ailsa (Sorby) Miller, SPR Kasey Northausen, CPL Lorraine (Daly) Talbot-Smith, SGT John Bettridge, SPR Richard Arman, CPL Colin McInnes, CPL Mick ‘Buddha’ Ellis, SPR Mark Donnelly, CPL Steve Coulson, LCPL Rick Millar, CPL Jeff Le-Fevre. 3rd Row L to R: CPL Paul Trent, unidentified, CPL Brian Johnson, CPL Peter Johnson, CPL Rod Skidmore, SPR Chad Hardwick, LCPL John Lane, LCPL Ken Dempster, unidentified CPL Dan Cirsky, SPR Ross Collishaw, SPR Craig Kellet, CPL Greg Sulman, SPR Tom Bloxham, SPR Ben Lucas. 2nd Row L to R: SPR Jim Humphrey, CPL Pat Drury-Lane, SPR Max Shaw, SPR Barry Hogan, unidentified, CPL David Murphy, SPR Ian Hill, SPR Bruce Graham, CPL Greg Honan, SPR Nick Cowan, CPL Steve Throssel, SPR Ben Tarasenko. Front Row L to R: SGT Eddy Jacobs, SGT Phil Smalley, SGT Rick Van der Bom, SSGT Phil Meagher, SSGT Allan Brown, WO1 Colin Cuskelly, WO2 Pat Lumsden, OC MAJ Bob McHenry, unidentified officer, WO2 Neville Stone, SSGT Ian ‘Rock’ Thistleton, SGT Martin Evans, SGT Terry Danger, SGT Bob Bright. .17) - Photo, black & white, July 1987. Sergeants Mess. Back Row L to R: SGT Graham Johnston, SGT Brian Fauth, SGT Gary Kerr, SGT Alan Virtue, SSGT Rob Bogumil, SSGT Brian Collings, SGT Roger Rees, SGT Phil Smalley, SGT Rick Van der Bom, SGT Martin Evans, SGT Bob Garritty, SSGT Phil Boyle, SGT John ‘Stormy’ Tempest, SSGT Allan Brown, SSGT Max Coletti, SSGT Neil ‘Ned’ Kelly, SSGT Dennis McCarthy. 3rd Row L to R: SGT Bruce Hammond, SGT Wayne Rothwell, SGT Eddy Jacobs, unidentified UK exchange, SSGT Steve Egan, SGT Bob Bright, SSGT Ian ‘Rock’ Thistleton, SGT Paul Leskovec CSM, SGT Barry Craymer, SSGT Greg Gilbert, SGT Kevin Boehm, Terry Danger, SGT Ken Talbot-Smith, WO2 Ted Burgess. 2nd Row L to R: WO2 Ralph Chant, WO2 Andy Wilson, WO2 Bill Jones, WO2 Alan Bunn, SGT John Bettridge, SSGT Adrian ‘Charlie’ Creedy, SGT Lyn Johnson, SSGT Phil Meagher, SSGT John ‘Shep’ Shephard, WO2 Kevin Macquire, WO2 Peter Tangey, WO2 Dave Miles, WO2 George Graham, WO2 Pat Lumsden, SGT Ian Belmont. Front Row L to R: WO1 Colin Cuskelly, Acting RSM WO1 Dave Thompson, WO1 Denis Marshall, 2IC MAJ Terry Edwards, WO1 Peter Warwick, CO LTCOL Don Swiney MBE, WO2 Neville Stone, WO1 Bob ‘Stretch’ Hayden, , W01 Noel ‘Nesty’ Coulthard, WO1 Stevo Hinic, WO1 Ken Slater, WO1 Allan Adsett. .18) - Photo, black & white, July 1987. Officers Mess. Back Row L to R: CAPT Laurie Newton, LT Brian Sloan, unidentified officer, CAPT John South, CAPT Peter ‘Blue’ Blaskett, CAPT Bob Williams, LT Vicky Thompson, unidentified officer, CAPT Andrew McLeod. Front Row L to R: MAJ Daryl Hockings CSM, MAJ Mick Byrne, MAJ Bob McHenry, COL COMDT COL Clem Sargent, CO LTCOL Don Swiney MBE, MAJ Terry Edwards, MAJ Roger Rix, MAJ Duncan Burns. .1P to .18P – There are no personnel identified.royal australian survey corps, rasvy, army survey regiment, army svy regt, fortuna, asr -
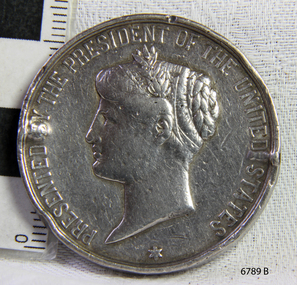 Flagstaff Hill Maritime Museum and Village
Award - Medal, Nelson Johnson, November 1880
This medal for bravery, for rescue of the crew from the shipwreck “Eric the Red” on 4th September 1880, was awarded to one of the crew of the steamer S.S. Dawn by the President of the United States in July 1881. The medal is engraved with the name “Nelson Johnson” (the anglicised version of his Swedish name Neils Frederick Yohnson). It was donated to Flagstaff Hill Maritime Village in 2013 by Nelson’s granddaughter. Nelson had migrated from Sweden to Sydney in 1879. The next year in 1880, aged 24, he was a seaman on the steamship Dawn and involved in the rescue of the survivors of the Eric the Red. Nelson Johnson was a crew member of the S.S. Dawn and was one of the rescue team in the dinghy in the early morning of September 4th 1880. Medals were awarded to the Captain and crew of the S.S. Dawn by the President of the United States, through the Consul-general (Mr Oliver M. Spencer), in July 1881 “ … in recognition of their humane efforts in rescuing the 23 survivors of the American built wooden sailing ship, the Eric the Red, on 4th September 1880.” The men were also presented with substantial monetary rewards and gifts. The city of Warrnambool’s care of the survivors was also mentioned by the President at the presentation, saying that “the city hosted and supported the crew ‘most graciously’. Previously, a week after the shipwreck, the Australian Government had also conveyed its thanks to the Captain and crew of the S.S. Dawn “Captain Griffith Jones, S.S. Dawn, The Hon. Mr Clark desires that the thanks of the Government should be conveyed to you for the prompt, persevering and seamanlike qualities displayed by you, your officers and crew in saving the number of lives you did on the occasion referred to. The hon. The Commissioner has also been pleased to award you a souvenir in commemoration of the occasion, and a sum of 65 pounds to be awarded to your officers and crew according to annexed scale. I am, &c, W Collins Rees, for and in the absence of the Chief Harbour Master.” The Awards are as follows: - Crew of DAWN'S lifeboat-Chief Officer, Mr G. Peat, 15 pounds; boat's crew-G. Sterge, A.B., 5 pounds; T. Hammond, A.B., 5 pounds; J. Black, A.B., 5 pounds; H. Edwards, A.B., 5 pounds. Dinghy's Crew-Second Officer, Mr Christie, 10 pounds; boat's crew -F. Lafer, A.B., 5 pounds; W. Johnstone, A.B., 5 pounds; Mr Lear, provedore, 5 pounds; Mr Dove, purser, 5 pounds. Captain Jones receives a piece of plate. (from “Wreck of the ship Eric the Red” by Jack Loney) The medal’s history, according to the Editor of ‘E-Sylum’ (the newsletter of The Numismatic Bibliomania Society “… appears to be an example of an 1880 State Department medal, catalogued as LS-3 (page 322 of R. W. Julian's book, Medals of the United States Mint: The First Century 1792-1892). The reverse is mostly blank for engraving, surrounded by a thin wreath. It was designed by George Morgan, chief engraver for the Philadelphia Mint, and struck in gold, silver and bronze. The one pictured here (in The Standard newspaper, 2nd July 2013) appears to be silver.” The following is an account of the events which led to the awarding of this medal. The American ship Eric the Red was a wooden, three-masted clipper ship. She had 1,580 tons register and was the largest full-rigged ship built at Bath, Maine, USA in 1871. She was built and registered by Arthur Sewall, later to become the partnership E. & A. Sewall, the 51st ship built by this company. The annually-published List of Merchant Vessels of the U.S. shows Bath was still the home port of Eric the Red in 1880. The vessel was named after the Viking discoverer, Eric ‘the Red-haired’ Thorvaldsson, who was the first European to reach the shores of North America (in 980AD). The ship Eric the Red at first traded in coal between America and Britain, and later traded in guano nitrates from South America. In 1879 she was re-metalled and was in first-class condition. On 10th June 1880 (some records say 12th June) Eric the Red departed New York for Melbourne and then Sydney. She had been commissioned by American trade representatives to carry a special cargo of 500 exhibits (1400 tons) – about a quarter to a third of America’s total exhibits - for the U.S.A. pavilion at Melbourne’s first International Exhibition. The exhibits included furniture, ironmongery, wines, chemicals, dental and surgical instruments, paper, cages, bronze lamp trimmings, axles, stamped ware, astronomical and time globes, samples of corn and the choicest of leaf tobacco. Other general cargo included merchandise such as cases of kerosene and turpentine, brooms, Bristol's Sarsaparilla, Wheeler and Wilson sewing machines, Wheeler’s thresher machine, axe handles and tools, cases of silver plate, toys, pianos and organs, carriages and Yankee notions. The Eric the Red left New York under the command of Captain Zaccheus Allen (or some records say Captain Jacques Allen) and 24 other crew including the owner’s son third mate Ned Sewall. There were also 2 saloon passengers on board. The ship had been sailing for an uneventful 85 days and the voyage was almost at its end. As Eric the Red approached Cape Otway there was a moderate north-west wind and a hazy and overcast atmosphere. On 4th September 1880 at about 1:30 am Captain Allen sighted the Cape Otway light and was keeping the ship 5-6 miles offshore to stay clear of the hazardous Otway Reef. However, he had badly misjudged his position. The ship hit the Otway Reef about 2 miles out to sea, southwest of the Cape Otway light station. Captain Allen ordered the wheel to be put ‘hard up’ thinking that she might float off the reef. The sea knocked the helmsman away from the wheel, broke the wheel ropes and carried away the rudder. The lifeboats were swamped, the mizzenmast fell, with all of its riggings, then the mainmast also fell and the ship broke in two. Some said that the passenger Vaughan, who was travelling for his health and not very strong, was washed overboard and never seen again. The ship started breaking up. The forward house came adrift with three of the crew on it as well as a longboat, which the men succeeded in launching and keeping afloat by continually bailing with their sea boots. The captain, the third mate (the owner’s son) and others clung to the mizzenmast in the sea. Then the owner’s son was washed away off the mast. Within 10 minutes the rest of the ship was in pieces, completely wrecked, with cargo and wreckage floating in the sea. The captain encouraged the second mate to swim with him to the deckhouse where there were other crew but the second mate wouldn’t go with him. Eventually, the Captain made it to the deckhouse and the men pulled him up. At about 4:30 am the group of men on the deckhouse saw the lights of a steamer and called for help. At the same time, they noticed the second mate and the other man had drifted nearby, still on the spur, and pulled them both onto the wreck. The coastal steamer SS Dawn was returning to Warrnambool from Melbourne, and its sailing time was different to its usual schedule. She was built in 1876 and bought by the Portland and Belfast Steam Navigation Co. in 1877. At the time of this journey, she was commanded by Captain Jones and was sailing between Melbourne and Portland via Warrnambool. The provedore the Dawn, Benjamin Lear, heard cries of distress coming through the portholes of the saloon. He gave the alarm and the engines were stopped. Cries could be heard clearly, coming from the land. Captain Jones sent out crew in two boats and fired off rockets and blue lights to illuminate the area. They picked up the three survivors who were in the long boat from Eric the Red. Two men were picked up out of the water, one being the owner’s son who was clinging to floating kerosene boxes. At daylight, the Dawn then rescued the 18 men from the floating portion of the deckhouse, which had drifted about 4 miles from where they’d struck the reef. Shortly after the rescue the deckhouse drifted onto breakers and was thrown onto rocks at Point Franklin, about 2 miles east of Cape Otway. Captain Jones had signalled to Cape Otway lighthouse the number of the Eric the Red and later signalled that there was a wreck at Otway Reef but there was no response from the lighthouse. The captain and crew of the Dawn spent several more hours searching unsuccessfully for more survivors, even going back as far as Apollo Bay. On board the Dawn the exhausted men received care and attention to their needs and wants, including much-needed clothing. Captain Allen was amongst the 23 battered and injured men who were rescued and later taken to Warrnambool for care. Warrnambool’s mayor and town clerk offered them all hospitality, the three badly injured men going to the hospital for care and others to the Olive Branch Hotel, then on to Melbourne. Captain Allen’s leg injury prevented him from going ashore so he and three other men travelled on the Dawn to Portland. They were met by the mayor who also treated them all with great kindness. Captain Allen took the train back to Melbourne then returned to America. Those saved were Captain Zaccheus Allen (or Jacques Allen), J. Darcy chief mate, James F. Lawrence second mate, Ned Sewall third mate and owner’s son, John French the cook, C. Nelson sail maker, Clarence W. New passenger, and able seamen Dickenson, J. Black, Denis White, C. Herbert, C. Thompson, A. Brooks, D. Wilson, J. Ellis, Q. Thompson, C. Newman, W. Paul, J. Davis, M. Horenleng, J. Ogduff, T. W. Drew, R. Richardson. Four men had lost their lives; three of them were crew (Gus Dahlgreen ship’s carpenter, H. Ackman steward, who drowned in his cabin, and George Silver seaman) and one a passenger (J. B. Vaughan). The body of one of them had been found washed up at Cape Otway and was later buried in the lighthouse cemetery; another body was seen on an inaccessible ledge. Twelve months later the second mate James F. Lawrence, from Nova Scotia passed away in the Warrnambool district; an obituary was displayed in the local paper. Neither the ship nor its cargo was insured. The ship was worth about £15,000 and the cargo was reportedly worth £40,000; only about £2,000 worth had been recovered. Cargo and wreckage washed up at Apollo Bay, Peterborough, Port Campbell, Western Port and according to some reports, even as far away as the beaches of New Zealand. The day after the wreck the government steamship Pharos was sent from Queenscliff to clear the shipping lanes of debris that could be a danger to ships. The large midship deckhouse of the ship was found floating in a calm sea near Henty Reef. Items such as an American chair, a ladder and a nest of boxes were all on top of the deckhouse. As it was so large and could cause danger to passing ships, Captain Payne had the deckhouse towed towards the shore just beyond Apollo Bay. Between Apollo Bay and Blanket Bay, the captain and crew of Pharos collected Wheeler and Wilson sewing machines, nests of boxes, bottles of Bristol’s sarsaparilla, pieces of common American chairs, axe handles, a Wheelers’ Patent thresher and a sailor’s trunk with the words “A. James” on the front. A ship’s flag-board bearing the words “Eric the Red” was found on the deckhouse; finally, those on board the Pharos had the name of the wrecked vessel. During this operation, Pharos came across the government steamer Victoria and also a steamer S.S. Otway, both of which were picking up flotsam and wreckage. A whole side of the hull and three large pieces of the other side of the hull, with some of the copper sheathing stripped off, had floated onto Point Franklin. Some of the vessels' yards and portions of her masts were on shore. The pieces of canvas attached to the yards and masts confirmed that the vessel had been under sail. The beach there was piled with debris several feet high. There were many cases of Diamond Oil kerosene, labelled R. W. Cameron and Company, New York. There were also many large planks of red pine, portions of a small white boat and a large, well-used oar. Other items found ashore included sewing machines (some consigned to ‘Long and Co.”) and notions, axe and scythe handles, hay forks, wooden pegs, rolls of wire (some branded “T.S” and Co, Melbourne”), kegs of nails branded “A.T. and Co.” from the factory of A. Field and Son, Taunton, Massachusetts, croquet balls and mallets, buggy fittings, rat traps, perfumery, cutlery and Douay Bibles, clocks, bicycles, chairs, a fly wheel, a cooking stove, timber, boxes, pianos, organs and a ladder. (Wooden clothes pegs drifted in for many years). There seemed to be no personal luggage or clothing. The Pharos encountered a long line, about one and a half miles, of f locating wreckage about 10 miles off land, southeast of Cape Otway, and in some places about 40 feet wide. It seemed that more than half of it was from Eric the Red. The ship’s crew rescued 3 cases that were for the Melbourne Exhibition and other items from amongst the debris. There were also chairs, doors, musical instruments, washing boards, nests of trunks and flycatchers floating in the sea. Most of the goods were saturated and smelt of kerosene. A section of the hull lies buried in the sand at Parker River Beach. An anchor with a chain is embedded in the rocks east of Point Franklin and a second anchor, thought to be from Eric the Red, is on display at the Cape Otway light station. (There is a photograph of a life belt on the verandah of Rivernook Guest House in Princetown with the words “ERIC THE RED / BOSTON”. This is rather a mystery as the ship was registered in Bath, Maine, USA.) Parts of the ship are on display at Bimbi Park Caravan Park and at Apollo Bay Museum. Flagstaff Hill Maritime Village also has part of the helm (steering wheel), a carved wooden sword (said to be the only remaining portion of the ship’s figurehead; further research is currently being carried out), a door, a metal rod, samples of wood and this medal awarded for the rescue of the crew. Much of the wreckage was recovered by the local residents before police and other authorities arrived at the scene. Looters went to great effort to salvage goods, being lowered down the high cliff faces to areas with little or no beach to collect items from the wreckage, their mates above watching out for dangerous waves. A Tasmanian newspaper reports on a court case in Stawell, Victoria, noting a man who was caught 2 months later selling tobacco from the wreckage of Eric the Red. Some of the silverware is still treasured by descendants of Mr Mackenzie who was given these items by officials for his help in securing the cargo. The gifts included silver coffee and teapots, half a dozen silver serviette rings and two sewing machines. A Mr G.W. Black has in his possession a medal and a purse that was awarded to his father, another Dawn crew member who was part of the rescue team. The medal is similarly inscribed and named “To John Black ….” (from “Shipwrecks” by Margaret E. Mackenzie, 3rd edition, published 1964). The wreck and cargo were sold to a Melbourne man who salvaged a quantity of high-quality tobacco and dental and surgical instruments. Timbers from the ship were salvaged and used in the construction of houses and shed around Apollo Bay, including a guest house, Milford House (since burnt down in bushfires), which had furniture, fittings and timber on the dining room floor from the ship. A 39.7-foot-long trading ketch, the Apollo, was also built from its timbers by Mr Burgess in 1883 and subsequently used in Tasmanian waters. It was the first attempt at shipbuilding in Apollo Bay. In 1881 a red light was installed about 300 feet above sea level at the base of the Cape Otway lighthouse to warn ships when they were too close to shore; It would not be visible unless a ship came within 3 miles from it. This has proved to be an effective warning. Nelson Johnson married Elizabeth Howard in 1881 and they had 10 children, the father of the medal’s donor being the youngest. They lived in 13 Tichbourne Place, South Melbourne, Victoria. Nelson died in 1922 in Fitzroy Victoria, age 66. In 1895 the owners of the S.S. Dawn, the Portland and Belfast Steam Navigation Co., wound up and sold out to the Belfast Company who took over the Dawn for one year before selling her to Howard Smith. She was condemned and sunk in Suva in 1928. The State Library of Victoria has a lithograph in its collection depicting the steamer Dawn and the shipwrecked men, titled. "Wreck of the ship Eric the Red, Cape Otway: rescue of the crew by the Dawn". The medal for bravery is associated with the ship the “The Eric the Red which is historically significant as one of Victoria's major 19th century shipwrecks. (Heritage Victoria Eric the Red; HV ID 239) The wreck led to the provision of an additional warning light placed below the Cape Otway lighthouse to alert mariners to the location of Otway Reef. The site is archaeologically significant for its remains of a large and varied cargo and ship's fittings being scattered over a wide area. The site is recreationally and aesthetically significant as it is one of the few sites along this coast where tourists can visit identifiable remains of a large wooden shipwreck, and for its location set against the background of Cape Otway, Bass Strait, and the Cape Otway lighthouse.“ (Victorian Heritage Database Registration Number S239, Official Number 8745 USA) This medal was awarded to Nelson Johnson by the U.S. President for bravery in the rescue of the Eric the Red crew. The obverse of the round, solid silver medal has an inscription around the rim. In the centre of the medal is the head of Liberty to the left, hair in a bun, with a sprig of leaves in the top left of a band around her head. There is a 6-pointed star below the portrait, between the start and end of the inscription. There are two raised areas on the rim, horizontally opposite each other, from the edge to just below the lettering and coinciding with the holes drilled in the edge. Slightly right of the top is a round indentation in the rim. The reverse has a wreath of leaves as a border, joined at the bottom by a ribbon bow. In the centre of the medal is an inscription, decorated with 3-pronged design and dots. The edge is plain with 2 small, rough and uneven holes horizontally opposite to each other, as though they had been used for mounting the medal at some stage. The medal has a matte finish on both sides and is slightly pitted and scratched.“PRESENTED BY THE PRESIDENT OF THE UNITED STATES” around the perimeter of the obverse of the medal. “TO / Nelson Johnson, / seaman of the British, / str “Dawn”, for bravery, / at risk of life, / in / rescuing the crew of / the American Ship / “Eric the Red.” “M” on obverse, truncation of the portraitwarrnambool, flagstaff hill, flagstaff hill maritime village, maritime museum, shipwreck coast, great ocean road, shipwreck artefact, eric the red, zaccheus allen, sewall, 1880, melbourne exhibition, cape otway, otway reef, victorian shipwreck, medal, nelson johnson, neils frederick yohnson, s.s. dawn, george morgan, hero -
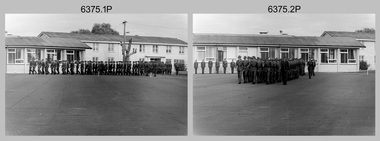 Bendigo Military Museum
Photograph - Army Survey Regiment – Corps Day Parade and Defence Force Service Medal Presentations, Fortuna Villa, Bendigo, 1987
This set of 36 photographs were taken at a Corps Day Parade held at the Army Survey Regiment, Bendigo on the 1st of July 1987. The Parade Commander was CO LTCOL Don Swiney MBE, and the Reviewing Officer was the Colonel Commandant (honorary appointment) of the Survey Corps - COL Clem Sargent (Retd). The Corps Day Parade was held to commemorate the 72nd anniversary of the formation of the Royal Australian Survey Corps. It was an occasion for great celebration at the Regiment. After 45 years in Bendigo, its future was finally secure. At the traditional anniversary parade, the Colonel Commandant COL Clem Sargent praised the efforts of the Regiment and led the soldiers in three cheers for the record production of the previous 12 months. More information is provided in page 140 of Valerie Lovejoy’s book 'Mapmakers of Fortuna – A history of the Army Survey Regiment’ ISBN: 0-646-42120-4. This set of photos cover the start of the Corps Day Parade, drill movements of the four Squadrons forming up on the parade ground and the formal arrival of the Reviewing Officer. See Item 6376.18P for additional photographs taken at the Corps Day Parade, comprising inspections of the Regiment’s four squadrons, presentations of the Defence Force Service Medal in recognition of 15 years of efficient remunerated service to SSGT Phil Meagher and SGT Wayne Rothwell; and formal group photos of each of the four Squadrons, Officers, and Warrant Officers/Sergeants.This is a set of 36 photographs of a Corps Day Parade held at the Army Survey Regiment, Fortuna, Bendigo in July 1987. The black & white photographs are on 35mm negative film and are part of the Army Survey Regiment’s Collection. The photographs were scanned at 96 dpi. .1) - Photo, black & white, July 1987. Unidentified personnel marching onto parade ground. .2) - Photo, black & white, July 1987. Squadrons marching on parade ground. 1st rank L to R: LCPL Ken Dempster, unidentified (x2), WO2 Neville Stone, remainder unidentified. .3) - Photo, black & white, July 1987. Right file L to R: WO2 George Graham, WO2 Dave Miles, remainder unidentified. .4) - Photo, black & white, July 1987. L to R: WO1 Stevo Hinic, 1st rank – unidentified, CPL Max Watson, unidentified, WO2 Peter Tangey. .5) - Photo, black & white, July 1987. L to R: WO2 Ralph Chant, CPL Gary Drummond, SGT Gary Kerr, unidentified, CPL Dale Hudson, unidentified, LCPL Daryl South, CPL Kerron South, CPL Peter Dillon, SGT Brian Fauth, SGT Graham Johnston, CPL Peter Swandale, CPL Jim Ash, unidentified, CPL Gary Tremain, unidentified, unidentified UK exchange, unidentified WO1 Ken Slater, WO1 Doug Arman. .6) - Photo, black & white, July 1987. L to R: WO2 Alan Bunn, CPL Bob Thrower, SGT Kevin Boehm, CPL Peter Coles, CPL John ‘JJ’ Smith, CPL Laurie Justin, LCPL Bob Sheppard, CPL Steve McGuiness, SGT Bob Garritty, SPR Jim Humphrey, unidentified (x2), SSGT Greg Gilbert, unidentified, WO2 George Graham. .7) - Photo, black & white, July 1987. L to R: CPL Rod Skidmore, SSGT Phil Meagher, WO1 Colin Cuskelly, unidentified, CPL Colin McInnes, unidentified, CPL Jeff Le Fe-Fevre, SPR Richard Arman, CPL Dan Cirsky, CPL Michelle Griffith, LCPL Tom Bloxham, SPR Ailsa (Sorby) Miller, CPL Peter Johnson, unidentified, LCPL Ken Dempster, unidentified (x2), WO2 Neville Stone. .8) - Photo, black & white, July 1987. L to R: CPL Bob Thrower, unidentified (x2), SGT Kevin Boehm, CPL Peter Coles, SGT John ‘Stormy’ Tempest, CPL John ‘JJ’ Smith, unidentified CPL Laurie Justin, unidentified, WO2 Alan Bunn, unidentified (x2), LCPL Bob Sheppard, unidentified, CPL Steve McGuiness, unidentified, SGT Bob Garritty, unidentified, SPR Jim Humphrey. .9) - Photo, black & white, July 1987. Foreground – Acting RSM WO1 Dave Thompson, background L to R: MAJ Daryl Hockings CSM, CAPT Bob Williams, CAPT Laurie Newton, ADJT CAPT Andrew McLoud, MAJ Bob McHenry, CAPT Peter ‘Blue’ Blaskett, MAJ Mick Byrne, MAJ Roger Rix. .10) - Photo, black & white, July 1987. Officers ready to take posts. Background L to R: MAJ Daryl Hockings CSM, CAPT Bob Williams, CAPT Laurie Newton, ADJT CAPT Andrew McLoud, MAJ Bob McHenry, CAPT Peter ‘Blue’ Blaskett, MAJ Mick Byrne, MAJ Roger Rix, LT Vicky Thompson, Foreground – 2IC MAJ Terry Edwards, Acting RSM WO1 Dave Thompson, WO2 Alan Bunn, CPL Bob Thrower, SGT Kevin Boehm, CPL Peter Coles, CPL John ‘JJ’ Smith, CPL Laurie Justin, LCPL Bob Sheppard. .11) to .13) - Photo, black & white, July 1987. Officers ready to take posts. L to R: MAJ Daryl Hockings CSM, CAPT Bob Williams, CAPT Laurie Newton, ADJT CAPT Andrew McLoud, MAJ Bob McHenry, CAPT Peter ‘Blue’ Blaskett, MAJ Mick Byrne, MAJ Roger Rix, LT Vicky Thompson, CAPT John South. .14) - Photo, black & white, July 1987. L to R: WO2 Alan Bunn, MAJ Roger Rix. .15) - Photo, black & white, July 1987. L to R: unidentified personnel, CAPT Laurie Newton, unidentified, CAPT Bob William, MAJ Mick Byrne, WO2 Dave Miles. .16) &.17) - Photo, black & white, July 1987. L to R: 2IC MAJ Terry Edwards handing Parade over to CO LTCOL Don Swiney MBE. .18) - Photo, black & white, July 1987. Arrival of Reviewing Officer- COL COMDT COL Clem Sargent. Saluted by CPL Kevin ‘Chuck’ Berry. .19) - Photo, black & white, July 1987. Arrival of Reviewing Officer- COL COMDT COL Clem Sargent. Saluted by CPL Kevin ‘Chuck’ Berry. MAJ Duncan Burns on right departing vehicle. .20) - Photo, black & white, July 1987, Reviewing Officer - COL COMDT COL Clem Sargent returning salute from CO LTCOL Don Swiney MBE. .21) - Photo, black & white, July 1987, Headquarters Squadron approaching the Dias. L to R: CAPT John South, unidentified, MAJ Roger Rix, unidentified, SPR Tracy (Parker) Ash, unidentified, T Vicky Thompson, CPL Bob Thrower, SGT Kevin Boehm, CPL Peter Coles, CPL John ‘JJ’ Smith, CPL Laurie Justin, LCPL Bob Sheppard, remainder partially obscured, CO LTCOL Don Swiney MBE, COL COMDT COL Clem Sargent. .22) - Photo, black & white, July 1987, Headquarters Squadron’s MAJ Roger Rix salutes the Reviewing Officer. L to R: CAPT John South, MAJ Roger Rix, unidentified, SPR Tracy (Parker) Ash, unidentified, Vicky Thompson, CPL Bob Thrower, SGT Kevin Boehm, CPL Peter Coles, CPL John ‘JJ’ Smith, CPL Laurie Justin, LCPL Bob Sheppard, CPL Steve McGuiness, SGT Bob Garritty, SPR Jim Humphrey, WO2 George Graham. .23) - Photo, black & white, July 1987, Headquarters Squadron’s MAJ Roger Rix salutes the Reviewing Officer. L to R: CAPT John South, MAJ Roger Rix, unidentified, SPR Tracy (Parker) Ash, unidentified, Vicky Thompson, CPL Bob Thrower, SGT Kevin Boehm, CPL Peter Coles, CPL John ‘JJ’ Smith, CPL Laurie Justin, LCPL Bob Sheppard, CPL Steve McGuiness, SGT Bob Garritty, SPR Jim Humphrey, WO2 George Graham, CO LTCOL Don Swiney MBE, COL COMDT COL Clem Sargent, .24) - Photo, black & white, July 1987, Headquarters Squadron continues past the Dias. L to R: unidentified (x3), Vicky Thompson, unidentified, CPL Bob Thrower, SGT Kevin Boehm, CPL Peter Coles, CPL John ‘JJ’ Smith, CPL Laurie Justin, LCPL Bob Sheppard, CPL Steve McGuiness, SGT Bob Garritty, SPR Jim Humphrey, WO2 George Graham. .25) - Photo, black & white, July 1987, Army Survey Regiment senior officers and Air Survey Squadron approaching the Dias. L to R: 2IC MAJ Terry Edwards, ADJT CAPT Andrew McLeod, OC MAJ Daryl Hockings CSM, acting RSM WO1 Dave Thompson, centre file marker CPL Max Watson, right marker CPL Perry Burt, CAPT Bob Williams, remainder unidentified, CO LTCOL Don Swiney MBE, COL COMDT COL Clem Sargent. .26) - Photo, black & white, July 1987, Army Survey Regiment senior officers and Air Survey Squadron salute the Reviewing Officer. L to R: 2IC MAJ Terry Edwards, ADJT CAPT Andrew McLeod, OC MAJ Daryl Hockings CSM, acting RSM WO1 Dave Thompson, centre file marker CPL Max Watson, right marker CPL Perry Burt, CAPT Bob Williams, remainder unidentified, CO LTCOL Don Swiney MBE, COL COMDT COL Clem Sargent. .27) - Photo, black & white, July 1987, Army Survey Regiment senior officers and Air Survey Squadron salute the Reviewing Officer. L to R: 2IC MAJ Terry Edwards, ADJT CAPT Andrew McLeod, unidentified, OC MAJ Daryl Hockings CSM, acting RSM WO1 Dave Thompson, unidentified, SGT Barrie Craymer, CAPT Bob Williams, centre file marker CPL Max Watson, right marker CPL Perry Burt, remainder unidentified, CO LTCOL Don Swiney MBE, COL COMDT COL Clem Sargent. .28) - Photo, black & white, July 1987, Air Survey Squadron salutes the Reviewing Officer. L to R: CPL Steve Hill OAM CSM, unidentified, SSGT Neil ‘Ned’ Kelly, WO2 Peter Tangey, WO1 Dennis Marshall. Followed by Lithographic Squadron L to R: SGT Graham Johnston, SGT Bryan Fauth, CPL Jim Ash, CPL Peter Swandale, CPL Roy Hicks, remainder unidentified. .29) - Photo, black & white, July 1987, Lithographic Squadron’s MAJ Mick Byrne salutes the Reviewing Officer. L to R: WO1 Dennis Marshall (Air Svy Sqn), SGT Graham Johnston, SGT Bryan Fauth, MAJ Mick Byrne, CPL Jim Ash, CPL Peter Swandale, unidentified (x2), CPL Lance Strudwick, CPL John ‘Flash’ Anderson, SGT Alan Virtue, CPL Greg Rowe, unidentified (x2), CPL Graham Hales, unidentified, CPL Paul Baker, SPR Colin Yeats, unidentified, WO1 Ken Slater, WO1 Doug Arman. .30) to .31) - Photo, black & white, July 1987, Lithographic Squadron’s MAJ Mick Byrne salutes the Reviewing Officer. L to R: SGT Graham Johnston, SGT Bryan Fauth, MAJ Mick Byrne, CPL Jim Ash, CPL Peter Swandale, unidentified (x2), CPL Lance Strudwick, CPL John ‘Flash’ Anderson, SGT Alan Virtue, CPL Greg Rowe, unidentified (x2), CPL Graham Hales, unidentified, CPL Paul Baker, SPR Colin Yeats, unidentified, WO1 Ken Slater, WO1 Doug Arman. .32) to .35) - Photo, black & white, July 1987, Cartographic Squadron’s MAJ Bob McHenry salutes the Reviewing Officer. L to R: MAJ Bob McHenry, CAPT Peter ‘Blue Blaskett, left file L to R: SPR Ross Collishaw, SPR Ben Lucas, centre file L to R: SGT Martin Evans, SSGT Ian ‘Rock’ Thistleton, SGT Eddy Jacobs, right file L to R: CPL Rod Skidmore, SSGT Phil Meagher, SPR Craig Kellet, unidentified, CPL Col McInnes, SPR Nick Cowan, unidentified, CPL Jeff Le-Fevre, SPR Richard Arman, CPL Dan Cirsky, SPR Tom Bloxham, CPL Peter Johnson, unidentified, LCPL Kenne Dempster. .36) - Photo, black & white, July 1987, Reviewing Officer - COL COMDT COL Clem Sargent returns salute..1P to .36P – There are no personnel identified.royal australian survey corps, rasvy, army survey regiment, army svy regt, fortuna, asr -
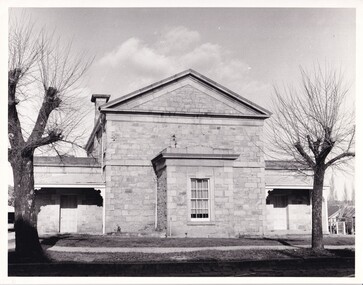 The Beechworth Burke Museum
Photograph, c1970
The Beechworth Historic Courthouse is a living history museum in Victoria, Australia. Built in 1858, it has been in continuous service for 131 years and is currently home to a unique collection of artifacts, including its original furniture and fittings. The Courthouse Law Library is also recognised as being of outstanding national significance with many rare books held in the collection. The courthouse was built in 1858 and is located in the centre of the Beechworth Historic Precinct. It was built from granite with a double height gabled courtroom with the entrance via a central projecting porch. The building was classified in 1959 as part of Group Classification (B2615)with Forests Office, Lands Office, Police Lock-up & Police Station. The Courthouse is a significant site in Australia’s legal history because it was the location of more than 40 trials and hearings for the Kelly Gang and their sympathisers.This a rectangular, black and white photograph, unmounted.Reverse Ministry of Tourism, Melbourne1850s beechworth, beechworth courthouse, ned kelly, 1800s beechworth, kelly gang, beechworth historic courthouse, 1858, kelly trials, daniel kelly, dan kelly, edward kelly, ellen kelly, elizabeth scott, the first woman hanged in victoria, colony of victoria, 1863, domestic violence related murder -
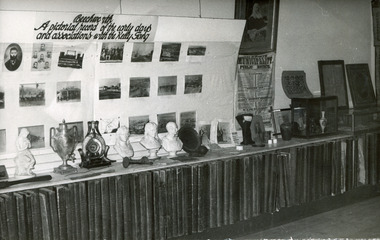 The Beechworth Burke Museum
Photograph, unknown
This photograph was taken in the Burke Museum c1970 and depicts an exhibition about the Kelly Gang. This photograph is of social significance due to its connection with the Burke Museum as well as the Kelly Gang. The Kelly Gang story is integral to the formation of an Australian identity and highlights the Irish oppression during the 1800s. Ned Kelly is an Australian icon, mythologised in Australian literature, art, folklore and history, and the Kelly Gang story permeates Australia's national consciousness. The Burke Museum is significant here also, as the image shows the importance of the Kelly Story to the Beechworth area and local identity. This photograph is also of research potential due to the great interest in the Kelly Gang history in Australia, and also for its presentation of a historical museum exhibition in Beechworth.Black and white, rectangular photograph, printed on photographic paperObverse: Beechworth/a pictorial record of the early days/and associations with the Kelly Gang Reverse: BMA03314 1997.3125/Agfaned kelly, kelly gang, burke museum, australia, museum, display, photograph, pictorial record, beechworth municipality, beechworth, exhibit, bust, clock, urn, vase, painting -
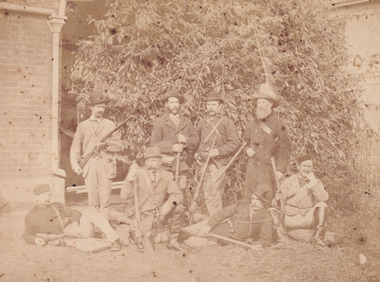 The Beechworth Burke Museum
Photograph
According to the Victorian Patents Office Copyright Collection (VPOCC) index, Barnes' image was first published on July 3, 1880. Many of the photographs taken by William Barnes concerned with the Kelly Gang were registered with the VPOCC which has ensured their survival in the State Library of Victoria today. Thus image includes the depiction of Sergeant Arthur Loftus Maule Steele (kneeling in front row) surrounded by seven other men. These men are identified as belonging to the Wangaratta police who played a key part in the destruction of the Kelly Gang at Glenrowan. These men could include Constables Causey, Montiford, Patrick Healey, Walsh, William Moore, Dixon and James Dwyer. It is also suggested that the individual standing back right (in the dark coat) is Constable Hugh Bracken, a key figure in the Glenrowan Siege. The police in this image display their firearms in a manner which reflects photographs of hunters, an element which was typical for this period. This photograph is part of the Burke Museum "Kelly album" which includes a significant collection of photographs and artefacts connected to Ned Kelly and the Kelly Gang. Ned Kelly and his gang have become ingrained in Australian popular culture and thus many museums, art galleries and private collections house material connected to the Kelly story which allows the events and people to be researched and interpreted. Artefacts and photographs pertaining to the Kelly gang are particularly valuable for Australian museums. This particular photograph is significant for its connection to Wangaratta photographer William Barnes who is responsible for having taken and registered many images depicting members of the Kelly gang. The photograph is also of artistic significance as an example of a photograph dating to 1880. This image depicts members of the Wangaratta police shortly after the defeat of the Kelly gang at Glenrowan. This photograph has the capacity to provide important information about the police who took part in Glenrowan 1880 and depicts key figures like Sergeant Steele.Sepia photograph taken by professional photographer William Edward Barnes (1941-1916) in June of 1880. The photo depicts a contingent of Wangaratta police who were at the capture of the Kelly gang at Glenrowan on the 28th of June 1880. This group of eight men are photographed standing in front of foliage and between the sides of two brick structures. Four men stand upright behind four other men who are depicted in either a sitting, semi-lying or kneeling position.W.E.Barnes / photographer / Wangaratta / BMM8085 Police responsible / for Kelly's capture / (D.S. not there)kelly album, glenrowan, police, wangaratta police, ned kelly, ned kelly glenrowan, william barnes, photography, 1880, australian history, police photograph, sargent steele, sergeant steele -
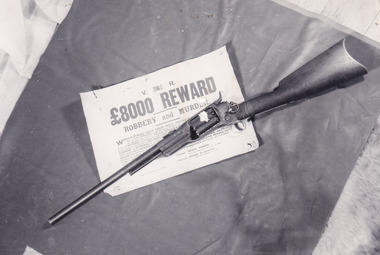 The Beechworth Burke Museum
Photograph
In this image a Colt 1855 Revolving Rifle is placed upon a sign detailing an £8,000 reward for robbery and murder. Writing on the rear of the photograph identifies the rifle as having belonged to Joe Byrne. In colonial Victoria, the Colt brand firearm was highly popular. They began their popularity in the goldfields of the early 1850s. Individuals, particularly those coming to Victoria with prior experience in the goldfield, brought with them a means of self-defence because of the prevalence of assault and robbery on the goldfields. In the 1860s, the Colt firearm became popular among the Victorian Police force. It was decided in June 1864 by Chief Commissioner of Police, Frederick Standish that the Colt revolvers were far more practical, being of simpler construction and therefore, more easily cleaned and less dangerous than the revolvers used prior to this: the Adams and Kerr firearms. The Colt revolver remained in use in regional districts of Victoria as late as the early 1880 when they were used at the Kelly siege at Glenrowan. The £8,000 reward was issued in 1879 after the Kelly Gang committed numerous bank robberies at Euroa and Jerilderie. In the year prior, the Kelly Gang murdered three policemen at Stringybark Creek. This resulted in the creation of the “Felon’s Apprehension Act 1878” which enabled an individual, whether a part of the Police force or civilian, to shoot a declared outlaw on sight. After the bank robberies, the Police force of NSW and Victoria increased the existing reward to this £8,000 amount.This photograph is significant for what it can potentially reveal about the Kelly Gang and firearms made in this period. The rifle in the image is a Colt Revolving Rifle which was known to have been used by the Victorian Police force from the early 1850s to the late 1880s. It is also known that the Kelly Gang stole police rifles which they used to practise with and so the identification of the rifle as having belonged to Joe Byrne is of significant importance to researchers studying the firearms of the Kelly Gang. More research is needed to solidify the connection of this particular weapon to Byrne other than the handwritten note on the back of the photograph. The Burke Museum Beechworth is home to a significant collection of photographs connected to Ned Kelly and the Kelly Gang. Photographs like this one are valuable for what they can potentially reveal about the Kelly Gang and the Police force during this period. Alongside the study of the other images, photographs from this collection have the ability to further expand current knowledge on this period of Australian history. There is also the capability to provide an analysis of how these firearms and Kelly memorabilia have been received in the past. It could be beneficial to undertake a close study of the use history and reception of these artefacts within the museum context.Black and white rectangular reproduced photograph printed on matte photographic paperReverse: 10268 / Joe Byrne's / Riflekelly album, ned kelly, kelly gang, joe byrne, rewards, outlaw, criminals, bushrangers, colt, police, firearm, beechworth, reward, felon's apprehension act 1878, 1880, glenrowan, colt revolver, revolving rifle, 8000 pound reward, jerilderie, euroa, beechworth goldfield -
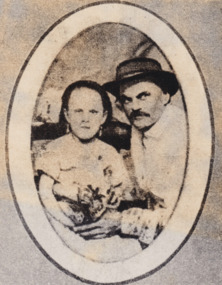 The Beechworth Burke Museum
Photograph, Before 1918
Depicted is James Ashton (also known as Jim Ashton), a circus proprietor, crouched beside a seated small girl (or a lady with dwarfism). The two are dressed in formal attire, James is wearing a wide-brimmed hat, and together with the girl holding a small bouquet of flowers.James Ashton was the son of James Henry Ashton. James Henry Ashton founded Ashton Circus in the early 1800s, well before Federation. For over 160 years Ashton Circus has travelled to both regional towns and big cities, bringing joy to the people of Australia. Generations of the Ashtons crossed desserts and flooded rivers, drove over snow-covered mountains, fended off bushrangers, and even ventured where there were no roads to reach the communities that have loved and inspired our family of performers for over a century. People came from all around to enjoy Ashton Circus. In the 1800s, Ned Kelly watched our show on a number of occasions and even enjoyed tea with the performers after the show. The Ashton Family has grown and changed over eight generations since James Henry Ashton started his circus. Our family continues this great tradition, proud that we still bring affordable family entertainment to our fellow Australians. Today, the 4th, 5th, 6th, 7th and 8th generations of the Ashton family are still on tour, operating three individual circuses throughout Australia- each of having grown from the same roots.Black and white oval reproduced photograph printed on rectangular paper mounted on cardboardObverse: Jim Ashton was the first generation in Aus-/ tralia. His father came out in the 1840's and/ established a circus that toured the country. (printed)/ Reverse: 1997.2560 (in pencil)/ about 1860 (in blue pen)/ A02560 (in pencil)/entertainment album, burke museum, beechworth, circus, ashton circus, james ashton, jim ashton