
Showing 182 items matching "hand lead"
-
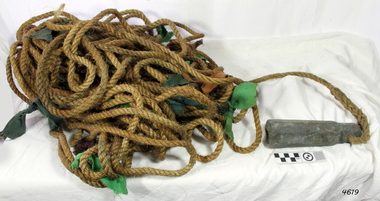 Flagstaff Hill Maritime Museum and Village
Equipment - Lead line
... ...hand lead...The lead line or hand lead is a simple navigational instrument used as a depth finder to measure the depth of water under the ship’s keel and to take samples of the sea bed. ...The lead line or hand lead is a simple navigational instrument used as a depth finder to measure the depth of water under the ship’s keel and to take samples of the sea bed. ...The lead line or hand lead is a simple navigational instrument used as a depth finder to measure the depth of water under the ship’s keel and to take samples of the sea bed. The long line may be marked at regular intervals with tags of different coloured and textured fabric, such as rope, leather and cloth. Each tag was a code to represent a certain depth. The leadsman’s eyes and hands could distinguish the depth easily as he drew in the lead line, day or night and in poor weather conditions. A standard set of codes for the tags was used so that the depth of the sea could be easily and quickly read. The measurement used was a Fathom, which equals 1.83 metres. The codes were: - 2 fathoms = 2 strips of leather 3 fathoms = 3 strips of leather 5 fathoms = white duck fabric 7 fathoms = red bunting fabric 10 fathoms = leather with a hole 13 fathoms = blue serge fabric 15 fathoms = white duck fabric 17 fathoms = red bunting 20 fathoms = 2 knots The lead weight could be between 7 -14 pounds (3.5 – 6.5kg) and the rope would be approximately 25 fathoms (45m). The hollowed-out end of the weight would hold a stick substance such as tallow or wax, which would pick up samples from the sea bed which would show whether the vessel was close to, or far away from, the shore. The leadsman would stand at the front of the vessel and cast the lead line into the sea. When it hit bottom he would note the tag marker nearest the surface of the water and call out his finding. Then he would haul it up again and examine the kind of matter that adhered to the end of the weight, whether it be sand, mud, gravel, or the colour of it. This information would be given to the ship’s helmsman or navigator and would help indicate the proximity to the land.This handheld lead is an example of early marine navigational equipment used by sailors to travel the seas to measure the depth of the water and sample the nature of the seabed. It helps to understand the history and progress made from the very basic to the sophisticated technology of today.Lead line, sounding line or depth finder. The long length of rope has a heavy lead weight attached to the end. Coloured fabric tags are tied onto the rope at regular intervals, representing different depths. The concave base of weight holds sticky substances such as tallow or beeswax, providing an adhesive surface to collect samples of sea bed like sand, shells or pebbles. flagstaff hill, warrnambool, shipwrecked coast, flagstaff hill maritime museum, maritime museum, shipwreck coast, flagstaff hill maritime village, lead line, depth finder, hand lead, sounding lin, leadsmane, navigation instrument, leadline, hand lead line -
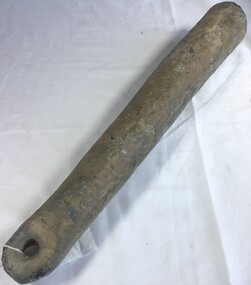 Queenscliffe Maritime Museum
Functional object - Sounding Lead and bottle
... ...sounding lead...hand...The wreck of William Salthouse has been the site of several maritime archaeological investigations as well as experimental in situ conservation efforts. shipwrecks salvaged items william salthouse sounding lead hand made bottle 'No.2' on bottle Large sounding lead and handmade bottle recovered from the wreck of the William Salthouse [lost on 28 November 1841] Functional object Sounding Lead and bottle ...Collected by person in the 1960s before amnesty. Recovered from the wreck of the William SalthouseWilliam Salthouse was the first merchant vessel to sail with a cargo of merchandise from the British Dominion of Canada to British Colonies of Australia. The ship was lost on 28 November 1841 while attempting to enter Port Phillip Heads en-route to Melbourne Harbour. The wreck of William Salthouse has been the site of several maritime archaeological investigations as well as experimental in situ conservation efforts.Large sounding lead and handmade bottle recovered from the wreck of the William Salthouse [lost on 28 November 1841]'No.2' on bottleshipwrecks, salvaged items, william salthouse, sounding lead, hand made bottle -
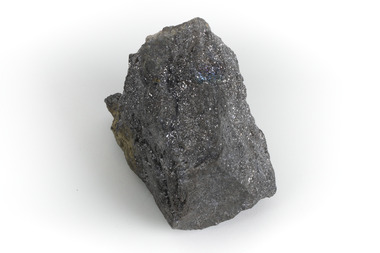 The Beechworth Burke Museum
Geological specimen - Galena Chalcopyrite, Unknown
... A grey, solid hand-sized lead sulfide mineral with a silver metallic luster....Many of these specimens were sent to research and collecting organisations across Australia, including the Burke Museum, to educate and encourage further study. burke museum beechworth geological geological specimen galena galena chalcopyrite chalcopyrite broken hill bhp bhp mining broken hill mine mine australia mine lead lead mine A grey, solid hand-sized lead sulfide mineral with a silver metallic luster. ...Galena Chalcopyrite is the earth's primary ore of lead and is mined from a large number of deposits in many countries. It is also an important source of silver. Galena Chalcopyrite is one of the most abundant and widely distributed sulfide minerals across the world. The mineral is found in igneous and metamorphic rocks in medium- to low-temperature hydrothermal veins. This specific specimen was recovered from the mines in Broken Hill, New South Wales. The mines in Broken Hill were first established after Charles Rasp discovered a large amount of silver-lead-zinc ore-body in the area in 1883. BHP (Broken Hill Proprietary) mining company was then established in 1885 and quickly became the lead in Australia's mining industry after they began excavating and exporting the country's largest amount of lead, silver, and zinc. This feat generated over $100 billion in wealth for the company.Galena Chalcopyrite is signifiant as it represents the catalyst for the rise of Australia's most influential mining companies - BHP. The mineral was one of the first to be mined in the country and after being made into lead, was used for a variety of things such as paint, batteries, ammunition, and plumbing materials before it was known to be harmful to humans. This specimen is part of a larger collection of geological and mineral specimens collected from around Australia (and some parts of the world) and donated to the Burke Museum between 1868-1880. A large percentage of these specimens were collected in Victoria as part of the Geological Survey of Victoria that begun in 1852 (in response to the Gold Rush) to study and map the geology of Victoria. Collecting geological specimens was an important part of mapping and understanding the scientific makeup of the earth. Many of these specimens were sent to research and collecting organisations across Australia, including the Burke Museum, to educate and encourage further study. A grey, solid hand-sized lead sulfide mineral with a silver metallic luster.burke museum, beechworth, geological, geological specimen, galena, galena chalcopyrite, chalcopyrite, broken hill, bhp, bhp mining, broken hill mine, mine, australia mine, lead, lead mine -
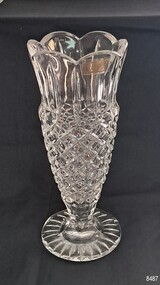 Flagstaff Hill Maritime Museum and Village
Decorative object - Vase, ca. 1970s
... It reflects vases produced in the late 19th and early 20th century when hand-cut lead Crystalware was popular in England. ...Vase; clear hand-cut glass, 24 per cent lead crystal. The vase is wide at the top with a scalloped edge. ...On the label: "MADE IN POLAND" "Violetta" "Hand cut 24 % lead crystal" "(R)" within a circle...It reflects vases produced in the late 19th and early 20th century when hand-cut lead Crystalware was popular in England. ...This beautiful hand-cut crystal vase was made in Poland by Violetta Crystal Glassworks. Its design is decorative and functional. It reflects vases produced in the late 19th and early 20th century when hand-cut lead Crystalware was popular in England. The lead content in the glass makes the glass softer and easier to hand-cut. The crystal clear glass sparkles in the light. Crystalware was kept for special occasions such as weddings and religious events. The Violetta Crystal Glassworks was founded in 1864 by Franz Losky, at the district of in Stronie Śląskie. Its original name was Oransko-Nassawska Glassworks, then later named Oranienhütte. The Glassworks came under Poland's rule after World War II. In 1950 it was subject to the Central Board of the Glass Industry and Precious Ceramics, with its seat in Sosnowiec, and the Glassworks was called United Glassworks of the Lower Silesia Region – State Crystal Glassworks in Stronie Śląskie.In 1953 it began exporting its products. In 1970 the name was changed to Violetta Crystal Glassworks in the Polish district of Stronie Śląskie. The firm became the major exporter of Polish glass. From 1992, structural changes in the company resulted in the loss of production, which stopped altogether in May, 2008. Minex CEI SA bought the plant in 2011 and operated it until the end of 2018.This hand-cut lead crystal vase design reflects that of vases produced in the late-19th and early-20th centuries. It is representative of decorative domestic items used during that era, particularly for important and special occasions such as weddings and religious events. Crystalware was cherished for its beauty. The vase is also significant for its association with the renowned Violetta Crystal Glassworks established in 1864 by Franz Losky, which was at one time the greatest exporter of hand-cut crystal made in Poland.Vase; clear hand-cut glass, 24 per cent lead crystal. The vase is wide at the top with a scalloped edge. It tapers inwards to a round foot. A clear rectangular label with gold text is attached. It is branded Violetta hand-cut crystal, made in Poland. On the label: "MADE IN POLAND" "Violetta" "Hand cut 24 % lead crystal" "(R)" within a circleflagstaff hill maritime village, shipwreck coast, flagstaff hill, warrnambool, flagstaff hill museum and village, domestic object, decorative object, functional object, vase, crystal vase, cut glass vase, hand-cut glass, violetta, violetta glassworks, polish glassworks, made in poland, vase with scalloped edge, crystal glassworks, franz losky, oransko-nassawska glassworks, oranienhütte, stronie śląskie, hand-cut crystal, crystalware -
 Glenelg Shire Council Cultural Collection
Functional object - Hand held fishing lines, n.d
... Two hand-held 'lead lines', modernised with nylon line instead of green cord. ...Two hand-held 'lead lines', modernised with nylon line instead of green cord. ...Two hand-held 'lead lines', modernised with nylon line instead of green cord. Used to take the fishing line deeper when fishing for mid to lower level feeding fish. Identifying numbers: 7558a, b -
 Flagstaff Hill Maritime Museum and Village
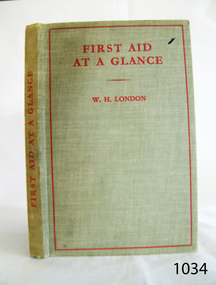
Book - Reference Medical/First Aid, William H. London, First Aid At A Glance, 1939
... Dr W R Angus The front paste down paper has the name "Claire Skirron" hand written in lead pencil...Dr W R Angus The front paste down paper has the name "Claire Skirron" hand written in lead pencil Hard cover book, First Aid at a Glance Author: William H. ...Published on the eve of World War II in 1939, First Aid at a Glance is a compact, highly practical emergency manual. Designed as a concise summary for quick reference during crisis situations, it covers core civil defence and emergency medical topics such as the treatment of wounds, severe bleeding, and shock. Other subjects covered in this publication are fracture immobilisation and bandaging techniques, resuscitation and drowning intervention, and the management of casualties in public, industrial, or home settings.Hard cover book, First Aid at a Glance Author: William H. London Publisher: Angus & Robertson, Sydney, Australia Date: 1939 Further Information: Green cloth covered hardback volume with title in rednon-fictionPublished on the eve of World War II in 1939, First Aid at a Glance is a compact, highly practical emergency manual. Designed as a concise summary for quick reference during crisis situations, it covers core civil defence and emergency medical topics such as the treatment of wounds, severe bleeding, and shock. Other subjects covered in this publication are fracture immobilisation and bandaging techniques, resuscitation and drowning intervention, and the management of casualties in public, industrial, or home settings.flagstaff hill, warrnambool, shipwrecked-coast, flagstaff-hill, flagstaff-hill-maritime-museum, maritime-museum, shipwreck-coast, flagstaff-hill-maritime-village, first aid at a glance, book, william london, w.r. angus -
 Bendigo Military Museum
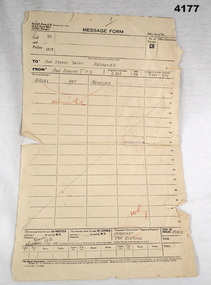
Document - MESSAGE FORM
... Message details hand written in grey lead pencil, corrections and comments in red coloured pencil. ...Message details hand written in grey lead pencil, corrections and comments in red coloured pencil. ...The message relates to Bibles not being received. Part of the Frederick Gardner Davey DFC No 410533 RAAF collection. Refer Cat No 3536P for his service record.RAAF Message form A 22 printed in black ink on cream paper. Message details hand written in grey lead pencil, corrections and comments in red coloured pencil. On the rear Flight information is hand written in grey lead pencil, corrections and comments in red coloured pencil. message form, document, raaf -
 Surrey Hills Historical Society Collection
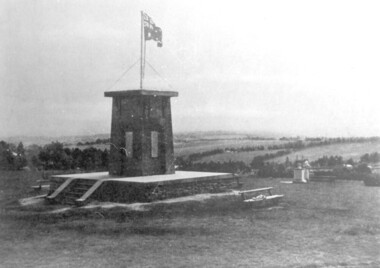
photograph, Ken Hall, Beckett Park Soldiers War Memorial c1932, c1980
... On the rear: Copy 1: "1153 Repeat of No 164" in top left hand corner in lead pencil in Jocelyn Hall's hand. ...Copy 2: "1153 Repeat of No 164" in top left hand corner in lead pencil in Jocelyn Hall's hand and "Soldiers War Memorial / Beckett Park / Erected 1918" in blue biro centre right. ...Copy negative by Ken Hall from a c1933 City of Camberwell brochure. The original appears to have had a crease mark across it as this is evident on both copies.Black and white photo of the First World War memorial erected on the high point in Beckett Park, Balwyn. Taken with the memorial in the foreground and looking to the south-west. The Australian flag is flying on top of the monument and in the background are rows of trees dividing largely clear land.On the rear: Copy 1: "1153 Repeat of No 164" in top left hand corner in lead pencil in Jocelyn Hall's hand. Copy 2: "1153 Repeat of No 164" in top left hand corner in lead pencil in Jocelyn Hall's hand and "Soldiers War Memorial / Beckett Park / Erected 1918" in blue biro centre right.first world war, war memorial, beckett park -
Clunes Museum
Book, Stockland Press, Handbook for Woolgrowers issued by the Australian Wool Board
... Hand written in lead pencil A. P. Clunes Hand written in black ink "Add The Secretary, Australian Wool Board, 416 Collins Street. ...McKinnon australian wool board handbook for wool growers Handbook for Woolgrowers issued by the Australian Wool Board Hand written in lead pencil A. P. Clunes Hand written in black ink "Add The Secretary, Australian Wool Board, 416 Collins Street. ...Handbook for Woolgrowers issued by the Australian Wool BoardBlack leather cover, 88 pages of original text, 2 x brass screws to bind, further pages have been issued by the Wool Board and have been added at a later date. Drench "recipe" for worms in sheep, hand written in black ink, is attached to page 55 by a dressmaker's pin, 2 pages.Handbook for Woolgrowers issued by the Australian Wool Boardaustralian wool board, handbook for wool growers -
 Surrey Hills Historical Society Collection
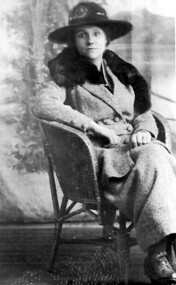
Photograph, Mary Sneddon
... "Mary Sneddon" - Robin da Costa-Adams' hand in grey lead pencil. "nee Bird) / (wife of Wm Sneddon" in black ink in Jocelyn Hall's hand....(miss) mary bird, (mrs) mary sneddon, william sneddon "Mary Sneddon" - Robin da Costa-Adams' hand in grey lead pencil. "nee Bird) / (wife of Wm Sneddon" in black ink in Jocelyn Hall's hand. ...Mary was married to William Sneddon who was a postman in Surrey Hills for many years. His father James ran an estate agency in Surrey Hills which had been established by his father, also James, in the 1880s. William married Mary nee Bird in 1903 at his father's home. They lived at 'Cliburn' 14 Suffolk Road, named after Cliburn, Westmorland (later Cumbria) where Mary's mother, Mary Coulston came from. According to the donor, all their homes were given this name. WIlliam and Mary had the following children: Jim (James 3rd) b 1905, Balwyn Jack (John William) b. 1908, Camberwell Norman Alexander b 1910, Camberwell Alan Coulson b 1914, Surrey Hills Jean Isabel b 1916, Surrey Hills Douglas Haig b 1918, Surrey Hills. William and Mary are buried in Box Hill Cemetery: P-061-0033. The donor Robin da Costa-Adams is related to the Sneddon family through her first marriage. Formal sepia photo of Mary Sneddon seated in a studio or against a backdrop provided by a travelling photographer. "Mary Sneddon" - Robin da Costa-Adams' hand in grey lead pencil. "nee Bird) / (wife of Wm Sneddon" in black ink in Jocelyn Hall's hand.(miss) mary bird, (mrs) mary sneddon, william sneddon -
 Bendigo Historical Society Inc.
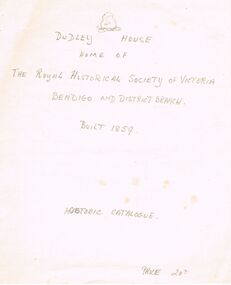
Document - LYDIA CHANCELLOR COLLECTION: DUDLEY HOUSE HISTORIC CATALOGUE
... Price 20c. Hand written in grey lead....Price 20c. Hand written in grey lead. Document LYDIA CHANCELLOR COLLECTION: DUDLEY HOUSE HISTORIC CATALOGUE ...A white sheet of paper folded in half and titled '' Dudley House Home of The Royal Historical Society of Victoria Bendigo and District Branch. Built 1859. Historic Catalogue.'' Price 20c. Hand written in grey lead.buildings, commercial, dudley house, lydia chancellor, collection, buildings, history, royal historical society of victoria. bendigo and dictrict branch, dudley house, bendigo -
 Bendigo Historical Society Inc.
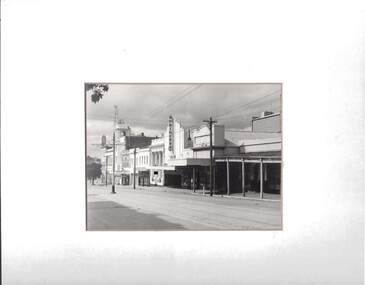
Photograph - VIEW STREET, BENDIGO, 1963 ?
... Doney is hand written in grey lead at lower right corner . On back of mount '38'...Doney is hand written in grey lead at lower right corner . On back of mount '38' Photograph VIEW STREET, BENDIGO ...Black and white photograph of western aspect of View Street, Bendigo, showing tramway to Eaglehawk, T. & G. insurance building, National Mutual, printery, fire hydrant. A. Doney is hand written in grey lead at lower right corner . On back of mount '38'A. Doneyplace, streetscape, view street -
Clunes Museum
Pamphlet - BROCHURE, Shire of Talbot & Clunes, Clunes Walking Tour, 1988
... 50c hand written in lead pencil on front page Ramsay House 13 hand written in pencil on front page Text? ...Map Clunes Walking Tour 50c hand written in lead pencil on front page Ramsay House 13 hand written in pencil on front page Text? ...Folded black and white brochure with 56 points of interest, Clunes town map on reverse of brochure, image of Clunes Town Hall on front of brochure Multiple Copies50c hand written in lead pencil on front page Ramsay House 13 hand written in pencil on front page Text? Clunes Cemetery hand written in biro on front page Hand written in biro, Richard Ford built the bungalow he did not live there, he lived in Smith Street this is an error in the conservation studymap, clunes walking tour -
 Bendigo Historical Society Inc.
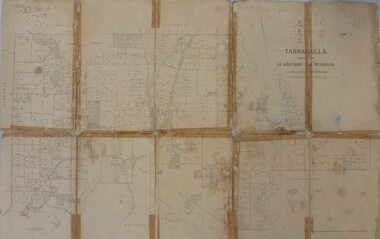
Map - JACK FLYNN MAP COLLECTION: GLADSTONE AND BENDIGO - TARNAGULLA, 13th May 1922
... The front page is of red card with white tape along the spine to hold it together, top half Tarnagulla is hand written in black lead on a label with blue trim....The front page is of red card with white tape along the spine to hold it together, top half Tarnagulla is hand written in black lead on a label with blue trim. ...Map 388. Counties of Gladstone and Bendigo a Map of Tarnagulla with Kingower, Glenalbyn, Inglewood, Waanyarra and Laanecoorie boarding. The map is in poor condition and in several pieces. It has been previously taped together. The front page is of red card with white tape along the spine to hold it together, top half Tarnagulla is hand written in black lead on a label with blue trim.By Authority A.J. Mullett, Government Printer, Melbourne. Photo-Lithographed at the Department of Lands and Survey, Melbourne by W.J. Butson. 13.5.22map, bendigo, tarnagulla, tarnagulla, kingower, glenalbyn, laanecoorie, inglewood. -
 Bendigo Historical Society Inc.
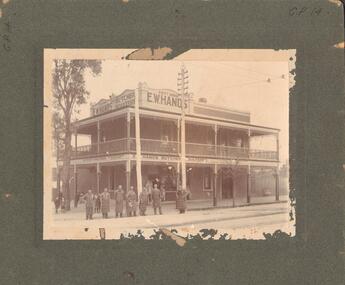
Photograph - E.W. HANDS, BUTCHER, 1902-04
... 'Hands 1204 fsp' IN BALL POINT PEN. 'Hands' in lead pencil. (2), 'Royal Historical society of Victoria, Bendigo Branch' Circular stamp on back of photo. 71% reduction copy in plastic bag....'Hands 1204 fsp' IN BALL POINT PEN. 'Hands' in lead pencil. (2), 'Royal Historical society of Victoria, Bendigo Branch' Circular stamp on back of photo. 71% reduction copy in plastic bag. ...Black and white photograph on green mount. Two storey brick building with verandahs, parapet. Eight men wearing striped aprons standing at front. Six children at bottom left. Meat carcasses hanging in doorway. Electricity pole. Pole on corner. Tree at L. Tram wires. Inscriptions: in image - on building 'EST. 1859, EW Hands, Butcher, Poulterer', Refrigerating Chamber on the premises'. On back - hand written in ball point pen 'EW Hands Butcher Shop, Crn Barnard and Forest Sts., Bendigo. Period about 1902-04. 'Note carcasses of meat hanging in open doorway on the footpath'. 'Hands 1204 fsp' IN BALL POINT PEN. 'Hands' in lead pencil. (2), 'Royal Historical society of Victoria, Bendigo Branch' Circular stamp on back of photo. 71% reduction copy in plastic bag.buildings, commercial, ew hands, butcher -
 Kiewa Valley Historical Society
Envelope - OHMS Examination Papers Only, 1916
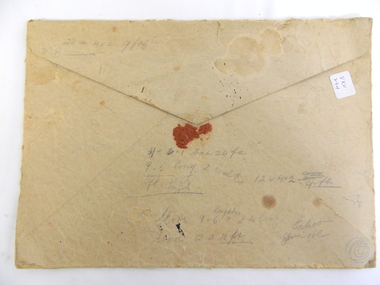
... Addressed to: The Head Teacher / School No" 3403 / Mongan's Bridge / Via Dederang" (" to " hand written in grey lead on ruled line) At bottom left of envelope: 0 x2 and underneath M x2 / Education Department / Melbourne. ...Addressed to: The Head Teacher / School No" 3403 / Mongan's Bridge / Via Dederang" (" to " hand written in grey lead on ruled line) At bottom left of envelope: 0 x2 and underneath M x2 / Education Department / Melbourne. ...In 1916 students were examined by the Victorian Education Department and not by the local school. This included small rural schools and involved mail delivery.Mongan's Bridge was a small, remote, rural school in the Kiewa Valley.Large brown thick cardboard envelope with traditional triangle flap for opening and broken red seal. Yellow/brown with black writing and x2 pale green 3d stamps on the top right-hand corner (green kangaroo inside white map of Australia). In black writing: OHMS Examination Papers Only / Not to be Opened till 9 am on 21-11-1916. Addressed to: The Head Teacher / School No" 3403 / Mongan's Bridge / Via Dederang" (" to " hand written in grey lead on ruled line) At bottom left of envelope: 0 x2 and underneath M x2 / Education Department / Melbourne. On back: Seemingly unrelated and hard to read writing and figures.On Back: Seemingly unrelated and hard to read writing and figures. education, mongan's bridge school, teacher, examinations, australian stamps, assessment in the primary school -
 Flagstaff Hill Maritime Museum and Village
Leisure object - Toy Soldier, circa 1878
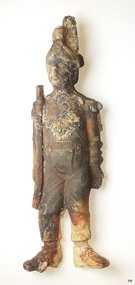
... lead toy soldiers. These innovations were designed to make sets of toy soldiers more affordable for middle and lower-class children, extending the market beyond the intricately made and hand-crafted replicas that were the preserve of the rich in the eighteenth century. ...lead toy soldiers. These innovations were designed to make sets of toy soldiers more affordable for middle and lower-class children, extending the market beyond the intricately made and hand-crafted replicas that were the preserve of the rich in the eighteenth century. ...The toy soldier is a relic from the shipwreck of the LOCH ARD in 1878. It has a companion piece in the Flagstaff Hill collection. The toy soldier is unpainted, but the style of uniform, and the weapons carried (a musket and a basket-handled cutlass), indicate it is a representation of the Napoleonic Wars period from the beginning of the nineteenth century. Mass-produced toy soldiers made of cast metal (lead or tin) became popular during the 1800s. Heyde of Germany manufactured silhouette-shaped flat toy soldiers early in the century. Mignot of France released three-dimensional solid figures and later around 1893 W. Britain, a toy company became known for its die-cast lead toy soldiers. These innovations were designed to make sets of toy soldiers more affordable for middle and lower-class children, extending the market beyond the intricately made and hand-crafted replicas that were the preserve of the rich in the eighteenth century. Wooden military figures, specially carved and unpainted ones, were therefore not particularly common at the time when the Loch Ard foundered on Victoria’s southwest coast. Mignot was the first to sell unpainted soldiers, leaving their customers to fill in the colours according to their own patriotic preferences. It is, therefore, possible the two figures in the Flagstaff Hill collection were part of a new set intended for sale, rather than part of a passenger’s existing collection. Loch Ard History: The Loch Ard got its name from ”Loch Ard” a loch that lies to the west of Aberfoyle, and the east of Loch Lomond. It means "high lake" in Scottish Gaelic. The vessel belonged to the famous Loch Line which sailed many vessels from England to Australia. The Loch Ard was built in Glasgow by Barclay, Curle & Co. in 1873, the vessel was a three-masted square-rigged iron sailing ship that measured 79.87 meters in length, 11.58 m in width, and 7 m in depth with a gross tonnage of 1693 tons with a mainmast that measured a massive 45.7 m in height. Loch Ard made three trips to Australia and one trip to Calcutta before its fateful voyage. Loch Ard left England on March 2, 1878, under the command of 29-year-old Captain Gibbs, who was newly married. The ship was bound for Melbourne with a crew of 37, plus 17 passengers. The general cargo reflected the affluence of Melbourne at the time. Onboard were straw hats, umbrellas, perfumes, clay pipes, pianos, clocks, confectionery, linen and candles, as well as a heavier load of railway irons, cement, lead and copper. There were other items included that were intended for display in the Melbourne International Exhibition of 1880. The voyage to Port Phillip was long but uneventful. Then at 3 am on June 1, 1878, Captain Gibbs was expecting to see land. But the Loch Ard was running into a fog which greatly reduced visibility. Captain Gibbs was becoming anxious as there was no sign of land or the Cape Otway lighthouse. At 4 am the fog lifted and a lookout aloft announced that he could see breakers. The sheer cliffs of Victoria's west coast came into view, and Captain Gibbs realised that the ship was much closer to them than expected. He ordered as much sail to be set as time would permit and then attempted to steer the vessel out to sea. On coming head-on into the wind, the ship lost momentum, the sails fell limp and Loch Ard's bow swung back towards land. Gibbs then ordered the anchors to be released in an attempt to hold their position. The anchors sank some 50 fathoms - but did not hold. By this time the ship was among the breakers and the tall cliffs of Mutton Bird Island rose behind. Just half a mile from the coast, the ship's bow was suddenly pulled around by the anchor. The captain tried to tack out to sea, but the ship struck a reef at the base of Mutton Bird Island, near Port Campbell. Waves subsequently broke over the ship and the top deck became loosened from the hull. The masts and rigging came crashing down knocking passengers and crew overboard. When a lifeboat was finally launched, it crashed into the side of Loch Ard and capsized. Tom Pearce, who had launched the boat, managed to cling to its overturned hull and shelter beneath it. He drifted out to sea and then on the flood tide came into what is now known as Lochard Gorge. He swam to shore, bruised and dazed, and found a cave in which to shelter. Some of the crew stayed below deck to shelter from the falling rigging but drowned when the ship slipped off the reef into deeper water. Eva Carmichael a passenger had raced onto the deck to find out what was happening only to be confronted by towering cliffs looming above the stricken ship. In all the chaos, Captain Gibbs grabbed Eva and said, "If you are saved Eva, let my dear wife know that I died like a sailor". That was the last Eva Carmichael saw of the captain. She was swept off the ship by a huge wave. Eva saw Tom Pearce on a small rocky beach and yelled to attract his attention. He dived in and swam to the exhausted woman and dragged her to shore. He took her to the cave and broke the open case of brandy which had washed up on the beach. He opened a bottle to revive the unconscious woman. A few hours later Tom scaled a cliff in search of help. He followed hoof prints and came by chance upon two men from nearby Glenample Station three and a half miles away. In a complete state of exhaustion, he told the men of the tragedy. Tom then returned to the gorge while the two men rode back to the station to get help. By the time they reached Loch Ard Gorge, it was cold and dark. The two shipwreck survivors were taken to Glenample Station to recover. Eva stayed at the station for six weeks before returning to Ireland by steamship. In Melbourne, Tom Pearce received a hero's welcome. He was presented with the first gold medal of the Royal Humane Society of Victoria and a £1000 cheque from the Victorian Government. Concerts were performed to honour the young man's bravery and to raise money for those who lost family in the disaster. Of the 54 crew members and passengers on board, only two survived: the apprentice, Tom Pearce and the young woman passenger, Eva Carmichael, who lost her family in the tragedy. Ten days after the Lochard tragedy, salvage rights to the wreck were sold at auction for £2,120. Cargo valued at £3,000 was salvaged and placed on the beach, but most washed back into the sea when another storm developed. The wreck of Lochard still lies at the base of Mutton Bird Island. Much of the cargo has now been salvaged and some items were washed up into Lochard Gorge. Cargo and artefacts have also been illegally salvaged over many years before protective legislation was introduced in March 1982. One of the most unlikely pieces of cargo to have survived the shipwreck was a Minton majolica peacock- one of only nine in the world. The peacock was destined for the Melbourne 1880 International Exhibition. It had been well packed, which gave it adequate protection during the violent storm. Today the Minton peacock can be seen at the Flagstaff Hill Maritime Museum in Warrnambool. From Australia's most dramatic shipwreck, it has now become Australia's most valuable shipwreck artifact and is one of very few 'objects' on the Victorian State Heritage Register.The toy soldier represents a 19th-century child's interest in military history. The item is one of two toy soldiers recovered from the Loch Ard in Flagstaff Hill's collection. The shipwreck of the Loch Ard is of significance for Victoria and is registered on the Victorian Heritage Register ( S 417). Flagstaff Hill has a varied collection of artefacts from Loch Ard and its collection is significant for being one of the largest accumulations of artefacts from this notable Victorian shipwreck of which the subject items are a small part. The collections of objects give us a snapshot of how we can interpret the story of this tragic event. The collection is also archaeologically significant as it represents aspects of Victoria's shipping history, allowing us to interpret Victoria's social and historical themes. Through is associated with the worst and best-known shipwreck in Victoria's history.An unpainted, cream-coloured toy soldier, recovered from the Loch Ard. The figure wears a Napoleonic Wars-era uniform, a plumed helmet, a short jacket with tails, bib-front trousers with button closure, straps crossed at the front and back, and epaulettes. The figure is in marching posture with one foot extended forward, and is bearing a musket at the slope-arms position, with a sabre or cutlass slung behind. It is unable to stand on its own. There are reddish-brown and orange-brown stains on the head and body. The body has seams along both sides that are uneven at the lower leg. There is a hole in the back and the inside is hollow. The material has a rough texture.flagstaff hill, warrnambool, flagstaff hill maritime museum, shipwreck coast, flagstaff hill maritime village, great ocean road, loch ard, toy soldier, napoleonic uniforms, military toy, moulded soldier -
 Flagstaff Hill Maritime Museum and Village
Equipment - Pump, circa 1930's - 1940's
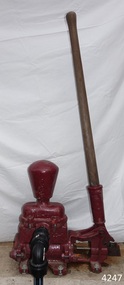
... Hand Pump. In 1942 another advertisement advised that a representative for a fire-fighting equipment supplier was visiting the western district of Victoria. The company could now supply double-action two-spray Ajax pumps at lower prices than similar pumps the district had recently purchased from Adelaide. McPHERSON’S FOUNDER and COMPANY TIMELINE 1860 – Thomas McPherson, a Scottish immigrant (c. 1853 ), founded McPherson’s in Melbourne, supplying pig iron (lead...Hand Pump. In 1942 another advertisement advised that a representative for a fire-fighting equipment supplier was visiting the western district of Victoria. The company could now supply double-action two-spray Ajax pumps at lower prices than similar pumps the district had recently purchased from Adelaide. McPHERSON’S FOUNDER and COMPANY TIMELINE 1860 – Thomas McPherson, a Scottish immigrant (c. 1853 ), founded McPherson’s in Melbourne, supplying pig iron (lead ...This pump is an Ajax Type L2 Series A model, made and sold by McPherson’s Pty Ltd of Melbourne circa 1930’s to 1940’s, is a mechanical, hand operated, constant flow pressure pump. It would have been used to pump fluids from one area to another, for example from a dam to a tank or used as a bilge pump on a small vessel, mounted on the vessel’s bulkhead, floor or deck. This type of hand pump is sometimes called a ‘Reciprocating Suction Pump’. It has a mechanical pumping action of the lever moves the piston inside the pump up and down. The water is lifted from below the pump through the inlet pipe and into the pump’s cylinder. This action causes the lower valve to close and the piston’s valve opens and the pressure within the pump forces the water out of the pump through the exit pipe. The limitation of this type of pump is that it can only raise the water a maximum of about 7 metres from beneath the ground and yields 24-26 Litres per minute. This type of pump could be used for many purposes such as pumping water or fuel. McPherson’s 1940’s advertisement proclaims “For all jobs on the land – irrigation, spraying, tank, plumbing, fire-fighting – there’s a suitable “Ajax” pump. Send us the details of you pumping problem. Our Expert’s advice will help you choose the right pump – the one that will give you most years of PROFITABLE PUMPING.” (The Australasian (Melbourne) Sat. 26th October 1940.) McPherson’s Pty Ltd, the manufacturer, advertised a similar pump to this one in The Australasian (Melbourne) in 1936, calling it the Ajax Double Acting Hand Pump. In 1942 another advertisement advised that a representative for a fire-fighting equipment supplier was visiting the western district of Victoria. The company could now supply double-action two-spray Ajax pumps at lower prices than similar pumps the district had recently purchased from Adelaide. McPHERSON’S FOUNDER and COMPANY TIMELINE 1860 – Thomas McPherson, a Scottish immigrant (c. 1853 ), founded McPherson’s in Melbourne, supplying pig iron (lead ingots imported as ballast in ships) to local manufacturers. 1882 – Thomas McPherson established a warehouse in Collins St Melbourne and included tools, steam fittings and machinery in his wares. The business expanded to include steam saw mills and became known as Thomas McPherson and Sons (William Murray and Edward). 1888 – Thomas passed away and his sons inherited the business. In 1896 William Murray became the sole proprietor after his brother Edward’s death. 1900 – The firm expanded, establishing Acme Bolt Company to manufacture nuts and bolts. 1912 – McPhersons Pty Ltd established a machinery warehouse and showroom in 554-556 Collins St Melbourne. McPherson’s went on to establish branches in Sydney (1911), Adelaide (1921) and Perth (1930) 1917 - McPherson’s supplied ‘dog spikes’ for the transcontinental railway, running from Eastern to Western Australia. 1918 – A tool works set up in Kensington, Melbourne, manufacturing Macson lathes and made machine tools that previously had to be imported. 1924 – The Bolt Works was transferred to a new building in Melbourne. McPhersons began making pumps. 1929 – McPherson retired. His son (Sir) William Edward McPherson (known as ‘WE’), was born in Hawthorne, Melbourne, in 1898. After his education he began work in his father’s Melbourne hardware and machinery business He took over as governing director when his father retired. 1929-1932 – McPherson’s supplied thousands of tons of rivets from its Richmond (Melbourne) Bolt Works for the construction of the Sydney Harbour Bridge. 1936 – McPherson’s Pty Ltd is advertising Ajax Pumps in newspapers 1934 – McPhersons purchased the property adjoining the warehouse in Collins Street, and during 1935-1936 built a new office and showrooms on the site of 546-445 Collins St. 1939 - McPherson’s acquired the Tool Equipment Co. Pty. Ltd and Associated Machine Tools Australia Pty Ltd was formed to separate McPherson’s machine-tool manufacturing and merchandising interests. 1939 – Ajax Pump Works, a foundry and pump manufacturing plant, was established in Tottenham, Melbourne, and the Ajax Bolt and Rivet Co Pty Ltd began manufacturing in New Zealand. 1944 - McPherson’s became a public company, McPherson’s Ltd. 1948 - The Ajax Pump Foundry opened at Kyneton, Victoria and in the post war years it grew to became a large manufacturer. 1980’s – Ajax Pumps brochure lists the address as 6 Buckhurst St, South Melbourne, Vic 3205 with the Telephone number 03 669 3588 1988 - Ajax Pumps acquired the Forrers Company, which was established in 1921. Manufacturing in Ipswich, Queensland, specialising in submersible sewage pumps. 1991 – KSB Ajax was formed, bringing together the companies KSB and Ajax Pumps 1993 – Manufacturing was moved to state-of-the-art premises in Tottenham, Victoria 2001 - The Forrers facility was moved to Tottenham. 2007 - Company name KSB Ajax Pumps was changed to KSB Australia Pty Ltd. 2009 - KSB Australia opened a branch in Townsville, Queensland. 2011 - KSB Australia moved to its dedicated Water and Waste Water Competence Centre in Bundamba, Queensland. DISPLAY OF THIS AJAX PUMP This pump was installed at Flagstaff Hill Maritime Village as part of a working display in the village by the Friends of Flagstaff Hill, in acknowledgement of the dedicated involvement of one of its long serving members, Bob Crossman. The display was officially opened 31st March 2018 and incorporates a restored Furphy Tank and Water Pipe Stand. The pump is used to draw water from the lake, through the water stand pipe and into the reconditioned Furphy Tank. This Ajax pump made by McPherson’s Pty Ltd is significant for its association with McPherson’s, a prominent manufacturer of hardware in Victoria. McPherson’s is famous for supplying ‘dog-spikes’ for the transcontinental railway (eastern to western Australia, 1917) and rivets for the Sydney Harbour Bridge (1929-1932). The Ajax pump is also of significance because of its association with McPherson’s Governing Director (Sir) William McPherson, former premier and treasurer in Victoria 1928-1929. The former McPherson’s Pty Ltd building in Collins Street Melbourne is now on the Victorian Heritage Register VHR H0942 This pump is representative of mechanical pumps popular in the early to mid-1900’s and still used today. Hand operated pressure pump, double acting. Cast metal case, painted red, with steel hose attachments and long metal lever. Pump is bolted to wooden plank. Model of pump is AJAX, Type L2, Series A pump. Embossed on lower section of pump "L2 - 10", "L2 - -1", "AJAX" “(?) –2-1” Embossed on lower handle “3-7” “L – 4” Embossed on attached plate “FOR SPARE PARTS / TYPE L2 / SERIES A / PUMP ASSEMBLED BY T R” Manufactured by McPherson’s Pty Ltd of Melbourne circa 1930’s - 1940’s.flagstaff hill, warrnambool, flagstaff hill maritime museum, shipwreck coast, flagstaff hill maritime village, great ocean road, ajax pump works tottenham melbourne, ajax pump factory kyneton, william edward mcpherson, thomas mcpherson of melbourne, mcpherson’s pty ltd melbourne, acme bolt company, tool equipment co. pty. ltd, associated machine tools australia pty ltd, ajax bolt and rivet co. pty ltd new zealand, forrers company ipswich queensland, ksb ajax pumps, ksb australia pty ltd, macson lathes, tool manufacturer early to mid- 20th century, ajax double acting hand pump, ajax type l2 series a pump, qisjax pumps, water pump 1940’s, fuel pump 1940’s, hand operated constant flow pressure pump, reciprocating suction pump, agricultural hand pump, plumber’s hand pump, portable hand pump -
 Federation University Historical Collection
Booklet - Exercise Book, Sebastopol Mines and Socialism
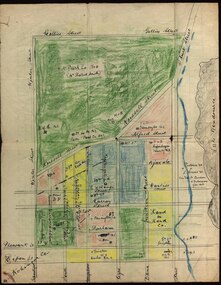
... hand company...tannery ground...ballarat freehold company...rough and ready company...park company...inkerman alluvial lead...Sebastopol is a suburb of Ballarat. william robertson new lady don company kohinor company leviathon company newington copenhagen company hand in hand company tannery ground ballarat freehold company rough and ready company park company inkerman alluvial lead band & albion consols gravel pits lead robert gay sebastopol mines ballarat east alluvial dalton's flat canadian gully red streak montezuma company great republic company golden point gravel pits j. hardy scott's boot shop lady don company cgt Handwritten pages .1) Black notebook with red spine .2) hand drawn map showing location of Sebastopol mines Sebastopol Mines and Socialism Booklet Exercise Book William Robertson ...Sebastopol is a suburb of Ballarat..1) Black notebook with red spine .2) hand drawn map showing location of Sebastopol minesHandwritten pageswilliam robertson, new lady don company, kohinor company, leviathon company, newington, copenhagen company, hand in hand company, tannery ground, ballarat freehold company, rough and ready company, park company, inkerman alluvial lead, band & albion consols, gravel pits lead, robert gay, sebastopol mines, ballarat east, alluvial, dalton's flat, canadian gully, red streak, montezuma company, great republic company, golden point, gravel pits, j. hardy, scott's boot shop, lady don company, cgt -
 Federation University Historical Collection
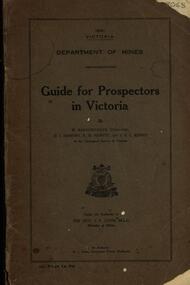
Book, Guide for Prospectors in Victoria, 1931, 1931
... lead, Malybdenite, tungsten ores, manganese, platinum, osmiridium and iron. Chapter heading s include: working alluvial deposits, equipment, geology of Victoria, gold deposits, quartz reefs, indicators, economic minerals, assistance to prospectors, Miners' Right, mining bye-law, mining leases, forest regulations and glossary. Descriptions are given of a god dish, puddling tub, cradle, puddling machine, ground sluicing, boring, windlass, whim, hand...lead, Malybdenite, tungsten ores, manganese, platinum, osmiridium and iron. Chapter heading s include: working alluvial deposits, equipment, geology of Victoria, gold deposits, quartz reefs, indicators, economic minerals, assistance to prospectors, Miners' Right, mining bye-law, mining leases, forest regulations and glossary. Descriptions are given of a god dish, puddling tub, cradle, puddling machine, ground sluicing, boring, windlass, whim, hand ...The handbook was intended for those with little experience who wanted to prospect of fossick.Grey soft covered book of 90 pages. Includes fold out map of a portion of Victoria showing auriferous areas and mineral localities. Also show Counties of Victoria and localities of minerals such as tin, antimony, copper, silver lead, Malybdenite, tungsten ores, manganese, platinum, osmiridium and iron. Chapter heading s include: working alluvial deposits, equipment, geology of Victoria, gold deposits, quartz reefs, indicators, economic minerals, assistance to prospectors, Miners' Right, mining bye-law, mining leases, forest regulations and glossary. Descriptions are given of a god dish, puddling tub, cradle, puddling machine, ground sluicing, boring, windlass, whim, hand dollying, sweeping, California pump, and wing dam.mining, baragwanath, gold, prospector, geology, quartz reefs, alluvial deposits, indicators, victorian goldfields, miners rights, mining leases, forest regulations, sluicing, sluice box, puddling machine, miner's cradle, whim, whip, california pump, gold nuggets, saddle reef, ballarat indicators, state batteries -
 Federation University Historical Collection
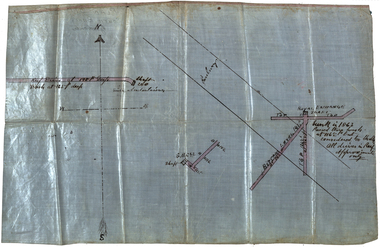
Plan, South Australasian Shaft and Royal Exchange Shaft plan
... It is assumed these shafts are on the Berry Lead near Creswick. new australasian royal exchange berry lead richard squire plans mining squire south berry consul mining leases cgt Hand drawn plans of the South Berry Consuls Shaft and the Royal Exchange Shaft. ...It is assumed these shafts are on the Berry Lead near Creswick.Hand drawn plans of the South Berry Consuls Shaft and the Royal Exchange Shaft. It is most probably drawn by Richard Squire, a former student of the Ballarat School of Mines. Gift of the Squire Family, 2014new australasian, royal exchange, berry lead, richard squire, plans, mining, squire, south berry consul, mining leases, cgt -
 Federation University Historical Collection
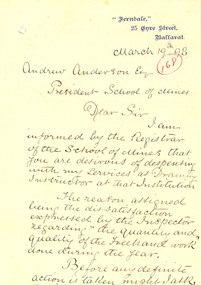
Letter - Correspondence, Henry J. Hall, Henry J. Hall to Ballarat School of Mines, 19/03/1898
... In 1889 he reported to the Ballarat School of Mines Council that this class was never established for the cultivation of Art (as generally understood) or the making of pictures but with an idea of assisting artisans - of both sexes - and persons connected with mechanical industries, in acquiring lightness of hand, and facility in the use of a black-lead pencil so as to be able to place legibly and intelligibly upon a sheet. ...In 1889 he reported to the Ballarat School of Mines Council that this class was never established for the cultivation of Art (as generally understood) or the making of pictures but with an idea of assisting artisans - of both sexes - and persons connected with mechanical industries, in acquiring lightness of hand, and facility in the use of a black-lead pencil so as to be able to place legibly and intelligibly upon a sheet. ...Henry J. Hall was an teacher Freehand Drawing and Model Drawing at the Ballarat School of Mines. In 1889 he reported to the Ballarat School of Mines Council that this class was never established for the cultivation of Art (as generally understood) or the making of pictures but with an idea of assisting artisans - of both sexes - and persons connected with mechanical industries, in acquiring lightness of hand, and facility in the use of a black-lead pencil so as to be able to place legibly and intelligibly upon a sheet. For many years Henry Hall advertised private tuition in Drawing, Painting and Perspective, at 'Ferndale', 25 Eyre Street. Handwritten letter on paper with the address 'Ferndale, 25 Eyre Street, Ballarat' printed at the top. The handwritten letter is from Henry J. Hall to Andrew Anderson, President of the Ballarat School of Mines. Handwritten in ink "March 19th 98 Andrew Anderson Esq President School of Mines Dear Sir I am informed by the registrar of the School of Miens that you are desirous of despensing [sic] with the services of Drawing Instructor at that Institution. The reason assigned being dis-satisfaction expressed by the inspector regarding "the quantity and quality of the freehand work done during the year. Before any definite action is taken, might I ask in justice to myself and the students whose work is thus maligned, that I be allowed a personal interview with Mr Monkhouse in order to ascertain the grounds of his complaint, and afford me an opportunity of vindicating my position. I have the honor to remain, respectfully yours Henry J. Hall." Written and circled in red ink "168" ballarat school of mines, henry j. hall, henry hall, andrew anderson, drawing, art -
 Federation University Historical Collection
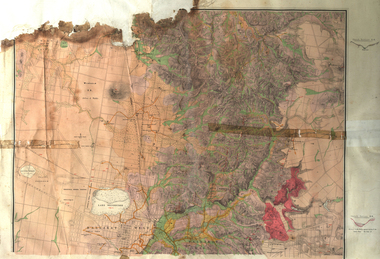
Map, Ballarat Goldfield, c1898
... hand and band co...police reserve...police paddock...mount rowan...ballarat industrial school reserve...market reserve...Winter's swamp...Kneeshar Co...Monte Cristo line of reef...Chinaman's Gully or Black Snake...Milkmaid's Gully...Ballarat gold field...Bakery Hil Lead...hand side. The map indicates the position of Lake Wendouree, Township of Warrenheip, Ballarat East, Industrial School Reserve, Winters Swamp, Police Paddock, Wyndholm Premptive Right (Salton and Waldie), Black Hill, Vale Park Reserve, Pennyweight Hill, Little Bendigo, Black Swamp Lead, monte Christo Reef, Chinaman's Gully, Miners Rest, Pincotts Dam, Northumberland Gully. ...The Ballarat Industrial School ran from 1869-1879, but the term Ballarat Industrial School Reserve was still in use in 1898 and possibly beyond. ballarat warrenheip lake wendouree ballarat east winters swamp winter swamp wyndholm premptive right cemetery vale park reserve little bendigo kneeshaw co. industrial school reserve kirks dam pincotts dam black hill wombat hill dead horse gully miners rest mt rowan salton and waldie rose hill co great north west no 1 rose's freehold co hand and band co police reserve police paddock mount rowan ballarat industrial school reserve market reserve Winter's swamp Kneeshar Co Monte Cristo line of reef Chinaman's Gully or Black Snake Milkmaid's Gully Ballarat gold field Bakery Hil Lead Old gravel pits lead Golden point lead Eureka Lead Miner's Rest Yarrowee Creek Leigh Creek Black Swamp Lead Yorkshire Reef Nil Desperandum reef Cockatoo Lead HIt or Miss Gully herbert werner frederick de nully Pennyweight Hill Esmond's Lead Ash's Lead Nightingale Lead John Bull Gully Gladstone Reef Whitehorse reef Petticoat Creek Pincott's Dam Frenchman's Gully Tim's Crushing Plant Jenkin's Gully California Gully Drake's Creek Sulton and Waldie Ballarat Undustrial School Ballarat & Mariborough Railway Geological Map of Ballarat with 3 holes in the left hand side. ...This map shows geological features, suggests the last basalt flow, and includes alotments and names of Mining Companies. Although this map has no date on it the Ballarat Industrial School is used for dating purposed. The Ballarat Industrial School ran from 1869-1879, but the term Ballarat Industrial School Reserve was still in use in 1898 and possibly beyond.Geological Map of Ballarat with 3 holes in the left hand side. The map indicates the position of Lake Wendouree, Township of Warrenheip, Ballarat East, Industrial School Reserve, Winters Swamp, Police Paddock, Wyndholm Premptive Right (Salton and Waldie), Black Hill, Vale Park Reserve, Pennyweight Hill, Little Bendigo, Black Swamp Lead, monte Christo Reef, Chinaman's Gully, Miners Rest, Pincotts Dam, Northumberland Gully. It also show the following goldmining companies: City of Ballarat, Kohinor, Hand and Band, Great North West, Northern Junction, Kneeshaw, Rossers Freehold, Silurial.ballarat, warrenheip, lake wendouree, ballarat east, winters swamp, winter swamp, wyndholm premptive right, cemetery, vale park reserve, little bendigo, kneeshaw co., industrial school reserve, kirks dam, pincotts dam, black hill, wombat hill, dead horse gully, miners rest, mt rowan, salton and waldie, rose hill co, great north west no 1, rose's freehold co, hand and band co, police reserve, police paddock, mount rowan, ballarat industrial school reserve, market reserve, winter's swamp, kneeshar co, monte cristo line of reef, chinaman's gully or black snake, milkmaid's gully, ballarat gold field, bakery hil lead, old gravel pits lead, golden point lead, eureka lead, miner's rest, yarrowee creek, leigh creek, black swamp lead, yorkshire reef, nil desperandum reef, cockatoo lead, hit or miss gully, herbert werner frederick de nully, pennyweight hill, esmond's lead, ash's lead, nightingale lead, john bull gully, gladstone reef, whitehorse reef, petticoat creek, pincott's dam, frenchman's gully, tim's crushing plant, jenkin's gully, california gully, drake's creek, sulton and waldie, ballarat undustrial school, ballarat & mariborough railway -
 Flagstaff Hill Maritime Museum and Village
Domestic object - Jug
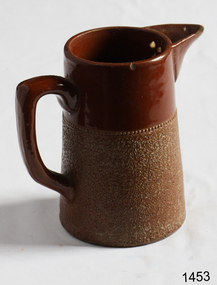
... lead to cracking – another time to lightly cover your work for drying. Step Four – Trimming and Cleaning Up Your work is dry! It is called greenware now and it is at it’s most fragile! Handle everything with two hands...lead to cracking – another time to lightly cover your work for drying. Step Four – Trimming and Cleaning Up Your work is dry! It is called greenware now and it is at it’s most fragile! Handle everything with two hands ...The Process of Making Pottery Decorating, Firing, Glazing, Making, Technical There is a rhythm and flow to clay. It can’t be done all at once! Even the making process! It can take weeks to get everything done, especially if you can only work on your pottery once a week! Even though we have three hour classes, it’s often just not enough time! Here is an overview of some of the processes so you have a bit more grasp on some of the technical stuff! Step One – Design There are SO many ideas out there for making stuff in clay! From delicate porcelain jewellery, through to heavy sculptural work and everything in between. Deciding your direction is sometimes not that easy – when you first start, try everything, you will naturally gravitate to the style that you enjoy! The options and variations are endless and can get a wee bit overwhelming too! Check in with me before you start to ensure your ideas will work, what order you might do things, how you could achieve the look you are seeking and any other technical data required! Step Two – Making Clay is thixotropic. This means that as you work with it, the clay first gets sloppier and wetter, before is begins to dry in the atmosphere. For most things, you simply can’t do all parts of the project at once. An example of work order might look like: Get last weeks work out from the shelves Prepare clay for today’s work – roll your clay, prepare balls for throwing, make the first stage of a pinch pot) Clean up last week’s work and put it on the shelf for bisque firing Check that you have any glazing to do – and do enough of it that you will have time to finish your main project Do the next step of your next project – there might be a further step that can’t be complete immediately, in that case, wrap your work well and put onto the shelves. Letting your work rest for a while can really help keep your work clean and professional looking. Many things require bagging under plastic to keep it ready for work the next week – put your name on the outside of the bag so you can find your work easily. We have stickers and markers. Consider how you want to decorate your work – coloured slip can be applied at a fairly wet stage (remembering that it will make your work even wetter!). Trying to apply slip to dry clay won’t work! If you want to do sgraffito – you will need to keep the work leather hard (a state of dryness where you can still work the clay with a little effort and a little water and care). Step Three – Drying Most of the time your work can go into the rack uncovered to let it dry out for the following week. If you want to continue forming or shaping you will need to double bag your work – put your work on a suitable sized bat and put the bat in a bag so the base of the bag is under the bat, then put another bag over the top of the work and tuck the top of the bag under the bat. If you want to trim (or turn) your thrown work the following week, it should also be double bagged. If your work is large, delicate, or of uneven thicknesses, you should lightly cover your work for drying. When considering the drying process, bare in mind the weather, humidity and wind! The hotter and dryer, the faster things dry and work can dry unevenly in the shelves – this can lead to cracking – another time to lightly cover your work for drying. Step Four – Trimming and Cleaning Up Your work is dry! It is called greenware now and it is at it’s most fragile! Handle everything with two hands. I often refer to soft hands – keep everything gentle and with your fingers spread as much as possible. Try to not pick up things like plates too much, and always with both hands! Before your work can be bisque fired it should be “cleaned up”. You work won’t go into the kiln if it has sharp edges – when glazed, sharp edges turn into razor blades! Use a piece of fly wire to rub the work all over – this will scratch a little so be light handed. Use a knife or metal kidney to scrape any areas that require a bit more dynamic treatment than the fly wire offers! Finally, a very light wipe over with a slightly damp sponge can help soften and soothe all of your edges and dags! Trimming thrown work: If you are planning to trim (or turn) your thrown work (and you should be), make sure you bag it well – your work should be leather hard to almost dry for easiest trimming. Use this step to finish the work completely – use a metal kidney to polish the surface, or a slightly damp sponge to give a freshly thrown look. Wipe the sponge around the rim after trimming, and check the inside of the pot for dags! Trimming slip cast work: Usually I will trim the rims of your work on the wheel the following day to make that stage easier, however you will still need to check your work for lumps and bumps. Last but not least – check that your name is still clearly on the bottom of your work. Step Five – Bisque Firing When the work is completely dry it can go into the bisque kiln. The bisque kiln is fired to 1000°C. This process burns off the water in the clay as well as some of the chemically bound water. The structure of the clay is not altered that much at this temperature. Inside the bisque kiln, the work is stacked a little, small bowl inside a larger bowl and onto a heavy plate. Smaller items like decorations or drink coasters might get stacked several high. Consideration is paid to the weight of the stack and shape of the work. A bisque kiln can fire about one and a half times the amount of work that the glaze kiln can fire. The firing takes about 10 hours to complete the cycle and about two days to cool down. Once it has been emptied the work is placed in the glaze room ready for you to decorate! Step Six – Glazing Decorating your work with colour can be a lot of fun – and time consuming! There are three main options for surface treatment at this stage: Oxide Washes Underglazes Glazes Washes and underglazes do not “glaze” the work – It will still need a layer of glaze to fully seal the clay (washes don’t need glaze on surfaces not designed for food or liquid as they can gloss up a little on their own). Underglazes are stable colourants that turn out pretty much how they look in the jar. They can be mixed with each other to form other colours and can be used like water colours to paint onto your work. Mostly they should have a clear glaze on top to seal them. Oxides are a different species – the pink oxide (cobalt) wash turns out bright blue for instance. They don’t always need a glaze on top, and some glazes can change the colour of the wash! The glazes need no other “glaze” on top! Be careful of unknown glaze interactions – you can put any combination of glaze in a bowl or on a plate, but only a single glaze on the outside of any vertical surface! Glazes are a chemical reaction under heat. We don’t know the exact chemicals in the Mayco glazes we use. I can guess by the way they interact with each other, however, on the whole, you need to test every idea you have, and not run the test on a vertical surface! Simply put, glaze is a layer of glass like substance that bonds with the clay underneath. Clay is made of silica, alumina and water. Glaze is made of mostly silica. Silica has a melting point of 1700°C and we fire to 1240°C. The silica requires a “flux” to help it melt at the lower temperature. Fluxes can be all sorts of chemicals – a common one is calcium – calcium has a melting point of 2500°C, however, together they both melt at a much lower temperature! Colourants are metal oxides like cobalt (blue), chrome (green through black), copper (green, blue, even red!), manganese (black, purple and pink) iron (red brown), etc. Different chemicals in the glaze can have dramatic effects. for example, barium carbonate (which we don’t use) turns manganese bright pink! Other elements can turn manganese dioxide brown, blue, purple and reddish brown. Manganese dioxide is a flux in and of itself as well. So, glazes that get their black and purple colours, often interact with other glazes and RUN! Our mirror black is a good example – it mixes really well with many glazes because it fluxes them – causes them to melt faster. It will also bring out many beautiful colours in the glazes because it’s black colouring most definitely comes from manganese dioxide! Glaze chemistry is a whole subject on it’s own! We use commercial Mayco glazes on purpose – for their huge range of colour possibilities, stability, cool interactions, artistic freedom with the ability to easily brush the glazes on and ease of use. We currently have almost 50 glazes on hand! A major project is to test the interactions of all glazes with each other. That is 2,500 test tiles!!!! I’m going to make the wall behind the wheels the feature wall of pretty colours! Step Seven – Glaze (Gloss or sometimes called “Glost”) Firing Most of the time this is the final stage of making your creation (but not always!) The glaze kiln goes to 1240°C. This is called cone 6, or midrange. It is the low end of stoneware temperatures. Stoneware clays and glazes are typically fired at cone 8 – 10, that is 1260 – 1290°C. The energy requirement to go from 1240°C to 1280°C is almost a 30% more! Our clay is formulated to vitrify (mature, turn “glass-like”) at 1240°, as are our glazes. A glaze kiln take around 12 hours to reach temperature and two to three days to cool down. Sometimes a third firing process is required – this is for decoration that is added to work after the glaze firing. For example – adding precious metals and lustres. this firing temperature is usually around 600 – 800°C depending upon the techniques being used. There are many students interested in gold and silver trims – we will be doing this third type of firing soon! After firing your work will be in the student finished work shelves. Remember to pay for it before you head out the door! There is a small extra charge for using porcelain clay (it’s more than twice the price of regular clay), and for any third firing process! Once your work has been fired it can not turn back into clay for millennia – so don’t fire it if you don’t like it! Put it in the bucket for recycling. https://firebirdstudios.com.au/the-process-of-making-pottery/The form of the jug has been in use for many centuries.Stoneware jug. Two tone brown glaze with pierced lip behind spout. Spout chipped.None.flagstaff hill, warrnambool, shipwrecked-coast, flagstaff-hill, flagstaff-hill-maritime-museum, maritime-museum, shipwreck-coast, flagstaff-hill-maritime-village, jug, ceramic jug -
 Flagstaff Hill Maritime Museum and Village
Domestic object - Bowl, Late 19th or early 20th Century
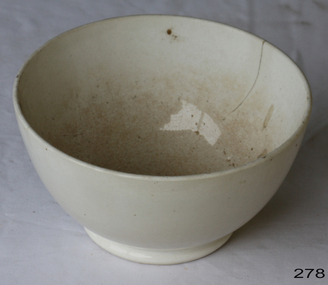
... lead to cracking – another time to lightly cover your work for drying. Step Four – Trimming and Cleaning Up Your work is dry! It is called greenware now and it is at it’s most fragile! Handle everything with two hands...lead to cracking – another time to lightly cover your work for drying. Step Four – Trimming and Cleaning Up Your work is dry! It is called greenware now and it is at it’s most fragile! Handle everything with two hands ...The Process of Making Pottery Decorating, Firing, Glazing, Making, Technical There is a rhythm and flow to clay. It can’t be done all at once! Even the making process! It can take weeks to get everything done, especially if you can only work on your pottery once a week! Even though we have three hour classes, it’s often just not enough time! Here is an overview of some of the processes so you have a bit more grasp on some of the technical stuff! Step One – Design There are SO many ideas out there for making stuff in clay! From delicate porcelain jewellery, through to heavy sculptural work and everything in between. Deciding your direction is sometimes not that easy – when you first start, try everything, you will naturally gravitate to the style that you enjoy! The options and variations are endless and can get a wee bit overwhelming too! Check in with me before you start to ensure your ideas will work, what order you might do things, how you could achieve the look you are seeking and any other technical data required! Step Two – Making Clay is thixotropic. This means that as you work with it, the clay first gets sloppier and wetter, before is begins to dry in the atmosphere. For most things, you simply can’t do all parts of the project at once. An example of work order might look like: Get last weeks work out from the shelves Prepare clay for today’s work – roll your clay, prepare balls for throwing, make the first stage of a pinch pot) Clean up last week’s work and put it on the shelf for bisque firing Check that you have any glazing to do – and do enough of it that you will have time to finish your main project Do the next step of your next project – there might be a further step that can’t be complete immediately, in that case, wrap your work well and put onto the shelves. Letting your work rest for a while can really help keep your work clean and professional looking. Many things require bagging under plastic to keep it ready for work the next week – put your name on the outside of the bag so you can find your work easily. We have stickers and markers. Consider how you want to decorate your work – coloured slip can be applied at a fairly wet stage (remembering that it will make your work even wetter!). Trying to apply slip to dry clay won’t work! If you want to do sgraffito – you will need to keep the work leather hard (a state of dryness where you can still work the clay with a little effort and a little water and care). Step Three – Drying Most of the time your work can go into the rack uncovered to let it dry out for the following week. If you want to continue forming or shaping you will need to double bag your work – put your work on a suitable sized bat and put the bat in a bag so the base of the bag is under the bat, then put another bag over the top of the work and tuck the top of the bag under the bat. If you want to trim (or turn) your thrown work the following week, it should also be double bagged. If your work is large, delicate, or of uneven thicknesses, you should lightly cover your work for drying. When considering the drying process, bare in mind the weather, humidity and wind! The hotter and dryer, the faster things dry and work can dry unevenly in the shelves – this can lead to cracking – another time to lightly cover your work for drying. Step Four – Trimming and Cleaning Up Your work is dry! It is called greenware now and it is at it’s most fragile! Handle everything with two hands. I often refer to soft hands – keep everything gentle and with your fingers spread as much as possible. Try to not pick up things like plates too much, and always with both hands! Before your work can be bisque fired it should be “cleaned up”. You work won’t go into the kiln if it has sharp edges – when glazed, sharp edges turn into razor blades! Use a piece of fly wire to rub the work all over – this will scratch a little so be light handed. Use a knife or metal kidney to scrape any areas that require a bit more dynamic treatment than the fly wire offers! Finally, a very light wipe over with a slightly damp sponge can help soften and soothe all of your edges and dags! Trimming thrown work: If you are planning to trim (or turn) your thrown work (and you should be), make sure you bag it well – your work should be leather hard to almost dry for easiest trimming. Use this step to finish the work completely – use a metal kidney to polish the surface, or a slightly damp sponge to give a freshly thrown look. Wipe the sponge around the rim after trimming, and check the inside of the pot for dags! Trimming slip cast work: Usually I will trim the rims of your work on the wheel the following day to make that stage easier, however you will still need to check your work for lumps and bumps. Last but not least – check that your name is still clearly on the bottom of your work. Step Five – Bisque Firing When the work is completely dry it can go into the bisque kiln. The bisque kiln is fired to 1000°C. This process burns off the water in the clay as well as some of the chemically bound water. The structure of the clay is not altered that much at this temperature. Inside the bisque kiln, the work is stacked a little, small bowl inside a larger bowl and onto a heavy plate. Smaller items like decorations or drink coasters might get stacked several high. Consideration is paid to the weight of the stack and shape of the work. A bisque kiln can fire about one and a half times the amount of work that the glaze kiln can fire. The firing takes about 10 hours to complete the cycle and about two days to cool down. Once it has been emptied the work is placed in the glaze room ready for you to decorate! Step Six – Glazing Decorating your work with colour can be a lot of fun – and time consuming! There are three main options for surface treatment at this stage: Oxide Washes Underglazes Glazes Washes and underglazes do not “glaze” the work – It will still need a layer of glaze to fully seal the clay (washes don’t need glaze on surfaces not designed for food or liquid as they can gloss up a little on their own). Underglazes are stable colourants that turn out pretty much how they look in the jar. They can be mixed with each other to form other colours and can be used like water colours to paint onto your work. Mostly they should have a clear glaze on top to seal them. Oxides are a different species – the pink oxide (cobalt) wash turns out bright blue for instance. They don’t always need a glaze on top, and some glazes can change the colour of the wash! The glazes need no other “glaze” on top! Be careful of unknown glaze interactions – you can put any combination of glaze in a bowl or on a plate, but only a single glaze on the outside of any vertical surface! Glazes are a chemical reaction under heat. We don’t know the exact chemicals in the Mayco glazes we use. I can guess by the way they interact with each other, however, on the whole, you need to test every idea you have, and not run the test on a vertical surface! Simply put, glaze is a layer of glass like substance that bonds with the clay underneath. Clay is made of silica, alumina and water. Glaze is made of mostly silica. Silica has a melting point of 1700°C and we fire to 1240°C. The silica requires a “flux” to help it melt at the lower temperature. Fluxes can be all sorts of chemicals – a common one is calcium – calcium has a melting point of 2500°C, however, together they both melt at a much lower temperature! Colourants are metal oxides like cobalt (blue), chrome (green through black), copper (green, blue, even red!), manganese (black, purple and pink) iron (red brown), etc. Different chemicals in the glaze can have dramatic effects. for example, barium carbonate (which we don’t use) turns manganese bright pink! Other elements can turn manganese dioxide brown, blue, purple and reddish brown. Manganese dioxide is a flux in and of itself as well. So, glazes that get their black and purple colours, often interact with other glazes and RUN! Our mirror black is a good example – it mixes really well with many glazes because it fluxes them – causes them to melt faster. It will also bring out many beautiful colours in the glazes because it’s black colouring most definitely comes from manganese dioxide! Glaze chemistry is a whole subject on it’s own! We use commercial Mayco glazes on purpose – for their huge range of colour possibilities, stability, cool interactions, artistic freedom with the ability to easily brush the glazes on and ease of use. We currently have almost 50 glazes on hand! A major project is to test the interactions of all glazes with each other. That is 2,500 test tiles!!!! I’m going to make the wall behind the wheels the feature wall of pretty colours! Step Seven – Glaze (Gloss or sometimes called “Glost”) Firing Most of the time this is the final stage of making your creation (but not always!) The glaze kiln goes to 1240°C. This is called cone 6, or midrange. It is the low end of stoneware temperatures. Stoneware clays and glazes are typically fired at cone 8 – 10, that is 1260 – 1290°C. The energy requirement to go from 1240°C to 1280°C is almost a 30% more! Our clay is formulated to vitrify (mature, turn “glass-like”) at 1240°, as are our glazes. A glaze kiln take around 12 hours to reach temperature and two to three days to cool down. Sometimes a third firing process is required – this is for decoration that is added to work after the glaze firing. For example – adding precious metals and lustres. this firing temperature is usually around 600 – 800°C depending upon the techniques being used. There are many students interested in gold and silver trims – we will be doing this third type of firing soon! After firing your work will be in the student finished work shelves. Remember to pay for it before you head out the door! There is a small extra charge for using porcelain clay (it’s more than twice the price of regular clay), and for any third firing process! Once your work has been fired it can not turn back into clay for millennia – so don’t fire it if you don’t like it! Put it in the bucket for recycling. https://firebirdstudios.com.au/the-process-of-making-pottery/ The bowl is an example of kitchenware used in the 19th century and still in use today.Bowl white ceramic. Crack on side. Badly stained.Backstamp very faint and unable to be read.flagstaff hill, warrnambool, shipwrecked-coast, flagstaff-hill, flagstaff-hill-maritime-museum, maritime-museum, shipwreck-coast, flagstaff-hill-maritime-village, mixing bowl, food preparation, kitchen equipment, ceramic -
 Flagstaff Hill Maritime Museum and Village
Domestic object - Bowl
... lead to cracking – another time to lightly cover your work for drying. Step Four – Trimming and Cleaning Up Your work is dry! It is called greenware now and it is at it’s most fragile! Handle everything with two hands...lead to cracking – another time to lightly cover your work for drying. Step Four – Trimming and Cleaning Up Your work is dry! It is called greenware now and it is at it’s most fragile! Handle everything with two hands ...The Process of Making Pottery Decorating, Firing, Glazing, Making, Technical There is a rhythm and flow to clay. It can’t be done all at once! Even the making process! It can take weeks to get everything done, especially if you can only work on your pottery once a week! Even though we have three hour classes, it’s often just not enough time! Here is an overview of some of the processes so you have a bit more grasp on some of the technical stuff! Step One – Design There are SO many ideas out there for making stuff in clay! From delicate porcelain jewellery, through to heavy sculptural work and everything in between. Deciding your direction is sometimes not that easy – when you first start, try everything, you will naturally gravitate to the style that you enjoy! The options and variations are endless and can get a wee bit overwhelming too! Check in with me before you start to ensure your ideas will work, what order you might do things, how you could achieve the look you are seeking and any other technical data required! Step Two – Making Clay is thixotropic. This means that as you work with it, the clay first gets sloppier and wetter, before is begins to dry in the atmosphere. For most things, you simply can’t do all parts of the project at once. An example of work order might look like: Get last weeks work out from the shelves Prepare clay for today’s work – roll your clay, prepare balls for throwing, make the first stage of a pinch pot) Clean up last week’s work and put it on the shelf for bisque firing Check that you have any glazing to do – and do enough of it that you will have time to finish your main project Do the next step of your next project – there might be a further step that can’t be complete immediately, in that case, wrap your work well and put onto the shelves. Letting your work rest for a while can really help keep your work clean and professional looking. Many things require bagging under plastic to keep it ready for work the next week – put your name on the outside of the bag so you can find your work easily. We have stickers and markers. Consider how you want to decorate your work – coloured slip can be applied at a fairly wet stage (remembering that it will make your work even wetter!). Trying to apply slip to dry clay won’t work! If you want to do sgraffito – you will need to keep the work leather hard (a state of dryness where you can still work the clay with a little effort and a little water and care). Step Three – Drying Most of the time your work can go into the rack uncovered to let it dry out for the following week. If you want to continue forming or shaping you will need to double bag your work – put your work on a suitable sized bat and put the bat in a bag so the base of the bag is under the bat, then put another bag over the top of the work and tuck the top of the bag under the bat. If you want to trim (or turn) your thrown work the following week, it should also be double bagged. If your work is large, delicate, or of uneven thicknesses, you should lightly cover your work for drying. When considering the drying process, bare in mind the weather, humidity and wind! The hotter and dryer, the faster things dry and work can dry unevenly in the shelves – this can lead to cracking – another time to lightly cover your work for drying. Step Four – Trimming and Cleaning Up Your work is dry! It is called greenware now and it is at it’s most fragile! Handle everything with two hands. I often refer to soft hands – keep everything gentle and with your fingers spread as much as possible. Try to not pick up things like plates too much, and always with both hands! Before your work can be bisque fired it should be “cleaned up”. You work won’t go into the kiln if it has sharp edges – when glazed, sharp edges turn into razor blades! Use a piece of fly wire to rub the work all over – this will scratch a little so be light handed. Use a knife or metal kidney to scrape any areas that require a bit more dynamic treatment than the fly wire offers! Finally, a very light wipe over with a slightly damp sponge can help soften and soothe all of your edges and dags! Trimming thrown work: If you are planning to trim (or turn) your thrown work (and you should be), make sure you bag it well – your work should be leather hard to almost dry for easiest trimming. Use this step to finish the work completely – use a metal kidney to polish the surface, or a slightly damp sponge to give a freshly thrown look. Wipe the sponge around the rim after trimming, and check the inside of the pot for dags! Trimming slip cast work: Usually I will trim the rims of your work on the wheel the following day to make that stage easier, however you will still need to check your work for lumps and bumps. Last but not least – check that your name is still clearly on the bottom of your work. Step Five – Bisque Firing When the work is completely dry it can go into the bisque kiln. The bisque kiln is fired to 1000°C. This process burns off the water in the clay as well as some of the chemically bound water. The structure of the clay is not altered that much at this temperature. Inside the bisque kiln, the work is stacked a little, small bowl inside a larger bowl and onto a heavy plate. Smaller items like decorations or drink coasters might get stacked several high. Consideration is paid to the weight of the stack and shape of the work. A bisque kiln can fire about one and a half times the amount of work that the glaze kiln can fire. The firing takes about 10 hours to complete the cycle and about two days to cool down. Once it has been emptied the work is placed in the glaze room ready for you to decorate! Step Six – Glazing Decorating your work with colour can be a lot of fun – and time consuming! There are three main options for surface treatment at this stage: Oxide Washes Underglazes Glazes Washes and underglazes do not “glaze” the work – It will still need a layer of glaze to fully seal the clay (washes don’t need glaze on surfaces not designed for food or liquid as they can gloss up a little on their own). Underglazes are stable colourants that turn out pretty much how they look in the jar. They can be mixed with each other to form other colours and can be used like water colours to paint onto your work. Mostly they should have a clear glaze on top to seal them. Oxides are a different species – the pink oxide (cobalt) wash turns out bright blue for instance. They don’t always need a glaze on top, and some glazes can change the colour of the wash! The glazes need no other “glaze” on top! Be careful of unknown glaze interactions – you can put any combination of glaze in a bowl or on a plate, but only a single glaze on the outside of any vertical surface! Glazes are a chemical reaction under heat. We don’t know the exact chemicals in the Mayco glazes we use. I can guess by the way they interact with each other, however, on the whole, you need to test every idea you have, and not run the test on a vertical surface! Simply put, glaze is a layer of glass like substance that bonds with the clay underneath. Clay is made of silica, alumina and water. Glaze is made of mostly silica. Silica has a melting point of 1700°C and we fire to 1240°C. The silica requires a “flux” to help it melt at the lower temperature. Fluxes can be all sorts of chemicals – a common one is calcium – calcium has a melting point of 2500°C, however, together they both melt at a much lower temperature! Colourants are metal oxides like cobalt (blue), chrome (green through black), copper (green, blue, even red!), manganese (black, purple and pink) iron (red brown), etc. Different chemicals in the glaze can have dramatic effects. for example, barium carbonate (which we don’t use) turns manganese bright pink! Other elements can turn manganese dioxide brown, blue, purple and reddish brown. Manganese dioxide is a flux in and of itself as well. So, glazes that get their black and purple colours, often interact with other glazes and RUN! Our mirror black is a good example – it mixes really well with many glazes because it fluxes them – causes them to melt faster. It will also bring out many beautiful colours in the glazes because it’s black colouring most definitely comes from manganese dioxide! Glaze chemistry is a whole subject on it’s own! We use commercial Mayco glazes on purpose – for their huge range of colour possibilities, stability, cool interactions, artistic freedom with the ability to easily brush the glazes on and ease of use. We currently have almost 50 glazes on hand! A major project is to test the interactions of all glazes with each other. That is 2,500 test tiles!!!! I’m going to make the wall behind the wheels the feature wall of pretty colours! Step Seven – Glaze (Gloss or sometimes called “Glost”) Firing Most of the time this is the final stage of making your creation (but not always!) The glaze kiln goes to 1240°C. This is called cone 6, or midrange. It is the low end of stoneware temperatures. Stoneware clays and glazes are typically fired at cone 8 – 10, that is 1260 – 1290°C. The energy requirement to go from 1240°C to 1280°C is almost a 30% more! Our clay is formulated to vitrify (mature, turn “glass-like”) at 1240°, as are our glazes. A glaze kiln take around 12 hours to reach temperature and two to three days to cool down. Sometimes a third firing process is required – this is for decoration that is added to work after the glaze firing. For example – adding precious metals and lustres. this firing temperature is usually around 600 – 800°C depending upon the techniques being used. There are many students interested in gold and silver trims – we will be doing this third type of firing soon! After firing your work will be in the student finished work shelves. Remember to pay for it before you head out the door! There is a small extra charge for using porcelain clay (it’s more than twice the price of regular clay), and for any third firing process! Once your work has been fired it can not turn back into clay for millennia – so don’t fire it if you don’t like it! Put it in the bucket for recycling. https://firebirdstudios.com.au/the-process-of-making-pottery/ This bowl is an example of kitchenware used in the 19th century and still in use today.Bowl white ceramic plain that has two sets of edging around lip. Inside bowl has plaster designed to look like cooking mixture.flagstaff hill, warrnambool, shipwrecked-coast, flagstaff-hill, flagstaff-hill-maritime-museum, maritime-museum, shipwreck-coast, flagstaff-hill-maritime-village, kitchen equipment, ceramic -
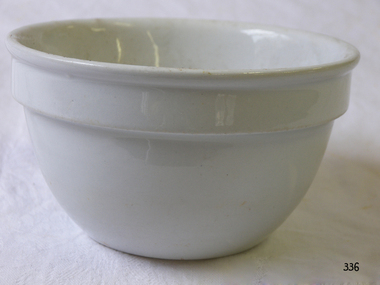 Flagstaff Hill Maritime Museum and Village
Domestic object - Bowl, J & G Meakin, Late 19th or early 20th Century
... lead to cracking – another time to lightly cover your work for drying. Step Four – Trimming and Cleaning Up Your work is dry! It is called greenware now and it is at it’s most fragile! Handle everything with two hands...lead to cracking – another time to lightly cover your work for drying. Step Four – Trimming and Cleaning Up Your work is dry! It is called greenware now and it is at it’s most fragile! Handle everything with two hands ...The Process of Making Pottery Decorating, Firing, Glazing, Making, Technical There is a rhythm and flow to clay. It can’t be done all at once! Even the making process! It can take weeks to get everything done, especially if you can only work on your pottery once a week! Even though we have three hour classes, it’s often just not enough time! Here is an overview of some of the processes so you have a bit more grasp on some of the technical stuff! Step One – Design There are SO many ideas out there for making stuff in clay! From delicate porcelain jewellery, through to heavy sculptural work and everything in between. Deciding your direction is sometimes not that easy – when you first start, try everything, you will naturally gravitate to the style that you enjoy! The options and variations are endless and can get a wee bit overwhelming too! Check in with me before you start to ensure your ideas will work, what order you might do things, how you could achieve the look you are seeking and any other technical data required! Step Two – Making Clay is thixotropic. This means that as you work with it, the clay first gets sloppier and wetter, before is begins to dry in the atmosphere. For most things, you simply can’t do all parts of the project at once. An example of work order might look like: Get last weeks work out from the shelves Prepare clay for today’s work – roll your clay, prepare balls for throwing, make the first stage of a pinch pot) Clean up last week’s work and put it on the shelf for bisque firing Check that you have any glazing to do – and do enough of it that you will have time to finish your main project Do the next step of your next project – there might be a further step that can’t be complete immediately, in that case, wrap your work well and put onto the shelves. Letting your work rest for a while can really help keep your work clean and professional looking. Many things require bagging under plastic to keep it ready for work the next week – put your name on the outside of the bag so you can find your work easily. We have stickers and markers. Consider how you want to decorate your work – coloured slip can be applied at a fairly wet stage (remembering that it will make your work even wetter!). Trying to apply slip to dry clay won’t work! If you want to do sgraffito – you will need to keep the work leather hard (a state of dryness where you can still work the clay with a little effort and a little water and care). Step Three – Drying Most of the time your work can go into the rack uncovered to let it dry out for the following week. If you want to continue forming or shaping you will need to double bag your work – put your work on a suitable sized bat and put the bat in a bag so the base of the bag is under the bat, then put another bag over the top of the work and tuck the top of the bag under the bat. If you want to trim (or turn) your thrown work the following week, it should also be double bagged. If your work is large, delicate, or of uneven thicknesses, you should lightly cover your work for drying. When considering the drying process, bare in mind the weather, humidity and wind! The hotter and dryer, the faster things dry and work can dry unevenly in the shelves – this can lead to cracking – another time to lightly cover your work for drying. Step Four – Trimming and Cleaning Up Your work is dry! It is called greenware now and it is at it’s most fragile! Handle everything with two hands. I often refer to soft hands – keep everything gentle and with your fingers spread as much as possible. Try to not pick up things like plates too much, and always with both hands! Before your work can be bisque fired it should be “cleaned up”. You work won’t go into the kiln if it has sharp edges – when glazed, sharp edges turn into razor blades! Use a piece of fly wire to rub the work all over – this will scratch a little so be light handed. Use a knife or metal kidney to scrape any areas that require a bit more dynamic treatment than the fly wire offers! Finally, a very light wipe over with a slightly damp sponge can help soften and soothe all of your edges and dags! Trimming thrown work: If you are planning to trim (or turn) your thrown work (and you should be), make sure you bag it well – your work should be leather hard to almost dry for easiest trimming. Use this step to finish the work completely – use a metal kidney to polish the surface, or a slightly damp sponge to give a freshly thrown look. Wipe the sponge around the rim after trimming, and check the inside of the pot for dags! Trimming slip cast work: Usually I will trim the rims of your work on the wheel the following day to make that stage easier, however you will still need to check your work for lumps and bumps. Last but not least – check that your name is still clearly on the bottom of your work. Step Five – Bisque Firing When the work is completely dry it can go into the bisque kiln. The bisque kiln is fired to 1000°C. This process burns off the water in the clay as well as some of the chemically bound water. The structure of the clay is not altered that much at this temperature. Inside the bisque kiln, the work is stacked a little, small bowl inside a larger bowl and onto a heavy plate. Smaller items like decorations or drink coasters might get stacked several high. Consideration is paid to the weight of the stack and shape of the work. A bisque kiln can fire about one and a half times the amount of work that the glaze kiln can fire. The firing takes about 10 hours to complete the cycle and about two days to cool down. Once it has been emptied the work is placed in the glaze room ready for you to decorate! Step Six – Glazing Decorating your work with colour can be a lot of fun – and time consuming! There are three main options for surface treatment at this stage: Oxide Washes Underglazes Glazes Washes and underglazes do not “glaze” the work – It will still need a layer of glaze to fully seal the clay (washes don’t need glaze on surfaces not designed for food or liquid as they can gloss up a little on their own). Underglazes are stable colourants that turn out pretty much how they look in the jar. They can be mixed with each other to form other colours and can be used like water colours to paint onto your work. Mostly they should have a clear glaze on top to seal them. Oxides are a different species – the pink oxide (cobalt) wash turns out bright blue for instance. They don’t always need a glaze on top, and some glazes can change the colour of the wash! The glazes need no other “glaze” on top! Be careful of unknown glaze interactions – you can put any combination of glaze in a bowl or on a plate, but only a single glaze on the outside of any vertical surface! Glazes are a chemical reaction under heat. We don’t know the exact chemicals in the Mayco glazes we use. I can guess by the way they interact with each other, however, on the whole, you need to test every idea you have, and not run the test on a vertical surface! Simply put, glaze is a layer of glass like substance that bonds with the clay underneath. Clay is made of silica, alumina and water. Glaze is made of mostly silica. Silica has a melting point of 1700°C and we fire to 1240°C. The silica requires a “flux” to help it melt at the lower temperature. Fluxes can be all sorts of chemicals – a common one is calcium – calcium has a melting point of 2500°C, however, together they both melt at a much lower temperature! Colourants are metal oxides like cobalt (blue), chrome (green through black), copper (green, blue, even red!), manganese (black, purple and pink) iron (red brown), etc. Different chemicals in the glaze can have dramatic effects. for example, barium carbonate (which we don’t use) turns manganese bright pink! Other elements can turn manganese dioxide brown, blue, purple and reddish brown. Manganese dioxide is a flux in and of itself as well. So, glazes that get their black and purple colours, often interact with other glazes and RUN! Our mirror black is a good example – it mixes really well with many glazes because it fluxes them – causes them to melt faster. It will also bring out many beautiful colours in the glazes because it’s black colouring most definitely comes from manganese dioxide! Glaze chemistry is a whole subject on it’s own! We use commercial Mayco glazes on purpose – for their huge range of colour possibilities, stability, cool interactions, artistic freedom with the ability to easily brush the glazes on and ease of use. We currently have almost 50 glazes on hand! A major project is to test the interactions of all glazes with each other. That is 2,500 test tiles!!!! I’m going to make the wall behind the wheels the feature wall of pretty colours! Step Seven – Glaze (Gloss or sometimes called “Glost”) Firing Most of the time this is the final stage of making your creation (but not always!) The glaze kiln goes to 1240°C. This is called cone 6, or midrange. It is the low end of stoneware temperatures. Stoneware clays and glazes are typically fired at cone 8 – 10, that is 1260 – 1290°C. The energy requirement to go from 1240°C to 1280°C is almost a 30% more! Our clay is formulated to vitrify (mature, turn “glass-like”) at 1240°, as are our glazes. A glaze kiln take around 12 hours to reach temperature and two to three days to cool down. Sometimes a third firing process is required – this is for decoration that is added to work after the glaze firing. For example – adding precious metals and lustres. this firing temperature is usually around 600 – 800°C depending upon the techniques being used. There are many students interested in gold and silver trims – we will be doing this third type of firing soon! After firing your work will be in the student finished work shelves. Remember to pay for it before you head out the door! There is a small extra charge for using porcelain clay (it’s more than twice the price of regular clay), and for any third firing process! Once your work has been fired it can not turn back into clay for millennia – so don’t fire it if you don’t like it! Put it in the bucket for recycling. https://firebirdstudios.com.au/the-process-of-making-pottery/This bowl was made by renowned pottery company J & G Meakin of England. The firm was established in the mid-1800's. The bowl is an example of kitchenware used in the 19th century and still in use today.Bowl; white ceramic, round and tapering inwards towards base. Made by J and G Meakin England.On base, 'Ironstone China Reg SOL 391413' with symbolflagstaff hill, flagstaff hill maritime museum and village, warrnambool, maritime museum, maritime village, great ocean road, shipwreck coast, mixing bowl, food preparation, j & g meakin, pottery, stoke-on-trent, kitchen equipment, ceramic -
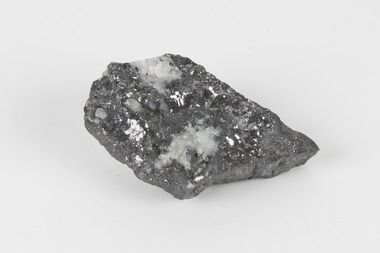 The Beechworth Burke Museum
Geological specimen - Galena (with quartz), unknown
... A flat, hand-sized, grey sulphide specimen that is the natural compound of lead with a quartz formation on the top surface. ...Geological Specimen geology Geology Collection Burke Museum Beechworth galena galena quartz quartz Charles Rasp Broken Hill Mining Company BHP group limited BHP Lead Ore lead sulphide Sulphide silver broken hill Existing Label: GALENA / (with quartz) / Locality: Broken Hill / N.S.W 120 x 70 x 29 A flat, hand-sized, grey sulphide specimen that is the natural compound of lead with a quartz formation on the top surface. ...Galena is the natural compound of lead and classed as a sulphide, it crystallises in a cubic pattern and its chemical formula is PbS. Galena is a primary source of both lead and silver. This specimen of Galena comes from Broken Hill. Broken Hill has one of the world’s largest and most significant deposit of ore for the production of lead. Mining of Galena at Broken Hill began with the staking of land by Charles Rasp in 1883. By the following year, in 1884, Rasp and six others had formed Broken Hill Mining Company. Broken Hill Mining Company eventually evolved into BHP group limited and is currently the largest mining company in the world and the largest company in Australia. There is archaeological evidence from artefacts discovered in Turkey that humans have been extracting lead from galena by the process of smelting since at least 6500 BCE. This specimen also has quartz on the top surface which is frequently discovered alongside Galena. This mineral specimen is of historic significance as a sample of Galena extracted from Broken Hill during the 19th century. Mining for Galena in Broken Hill begin in 1883 by Charles Rasp and evolved into the world’s largest mining company – BHP Group Limited. Broken Hill is one of the world’s most significant deposits of ore for the production of lead. This specimen is part of a larger collection of geological and mineral specimens collected from around Australia (and some parts of the world) and donated to the Burke Museum between 1868-1880. A large percentage of these specimens were collected in Victoria as part of the Geological Survey of Victoria that begun in 1852 (in response to the Gold Rush) to study and map the geology of Victoria. Collecting geological specimens was an important part of mapping and understanding the scientific makeup of the earth. Many of these specimens were sent to research and collecting organisations across Australia, including the Burke Museum, to educate and encourage further study.A flat, hand-sized, grey sulphide specimen that is the natural compound of lead with a quartz formation on the top surface. Existing Label: GALENA / (with quartz) / Locality: Broken Hill / N.S.W 120 x 70 x 29geological specimen, geology, geology collection, burke museum, beechworth, galena, galena quartz, quartz, charles rasp, broken hill mining company, bhp group limited, bhp, lead, ore, lead sulphide, sulphide, silver, broken hill -
Federation University Historical Collection
Letter - Correspondence, Correspondence - From the Flinders Rangers Silver Lead No Liability to the Principal, School of Mines Ballarat regarding the payment of a "May Jig", 26/08/1949
... Correspondence to the Principal of School of Mines Ballarat from Flinders Ranges Silver Lead No Liability, enclosing a cheque for 50 pounds, for the purchase of one "May Jig" from a Mr Ling. principal ballarat school of mines flinders ranges silver lead no liability "may jig" ling l.t. ewins Water mark W J & Co 3009 Extra Strong Hand written "Receipt posted 29-8-49" Fine paper with Flinders Ranges Silver Lead letterhead. ...Correspondence to the Principal of School of Mines Ballarat from Flinders Ranges Silver Lead No Liability, enclosing a cheque for 50 pounds, for the purchase of one "May Jig" from a Mr Ling. Fine paper with Flinders Ranges Silver Lead letterhead.Water mark W J & Co 3009 Extra Strong Hand written "Receipt posted 29-8-49"principal, ballarat school of mines, flinders ranges silver lead no liability, "may jig", ling, l.t. ewins -
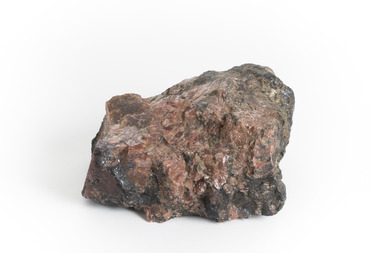 The Beechworth Burke Museum
Geological specimen - Rhodonite with Galena and Sphalerite
... Many of these specimens were sent to research and collecting organisations across Australia, including the Burke Museum, to educate and encourage further study. burke museum beechworth geological geological specimen galena rhodonite sphalerite silver ore manganese lead sulphide lead ore zinc ore lapidary mineral specimen Broken Hill NSW A hand-sized piece of Sphalerite and Galena with Rhodonite crystals Geological specimen Rhodonite with Galena and Sphalerite ...This specimen is from Broken Hill, NSW. Galena is a natural mineral form of lead sulphide and is often found associated with sphalerite, calcite, and fluorite. Galena is an important lead ore mineral, and, in some regions, it is also an important mineral associated with silver ore. Sphalerite is a sulphide mineral that is the main ore of zinc. Rhodonite is an uncommon mineral once used as an ore of manganese in India, however today the scarcity and fragility of the crystals mean it is primarily used as lapidary materials or mineral specimens. In 1883, Charles Rasp who was a boundary rider at the time, discovered what he thought were deposits of tin but were in fact samples of silver and lead. He and six others went on to set up the first mining company in Broken Hill (BHP). The ore body became the largest and richest of its kind in the world mining ore worth more than 42,000 pounds in its first year. Many of these specimens were sent to research and collecting organisations across Australia, including the Burke Museum, to educate and encourage further study. Galena contains lead and silver, Sphalerite contains zinc. This specimen is part of a larger collection of geological and mineral specimens collected from around Australia (and some parts of the world) and donated to the Burke Museum between 1868-1880. A large percentage of these specimens were collected in Victoria as part of the Geological Survey of Victoria that begun in 1852 (in response to the Gold Rush) to study and map the geology of Victoria. Collecting geological specimens was an important part of mapping and understanding the scientific makeup of the earth. Many of these specimens were sent to research and collecting organisations across Australia, including the Burke Museum, to educate and encourage further study.A hand-sized piece of Sphalerite and Galena with Rhodonite crystalsburke museum, beechworth, geological, geological specimen, galena, rhodonite, sphalerite, silver ore, manganese, lead sulphide, lead ore, zinc ore, lapidary, mineral specimen, broken hill, nsw
