Showing 137 items matching "load line"
-
 Flagstaff Hill Maritime Museum and Village
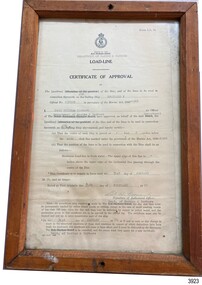
Document - Certificate of Approval, Load Line, 25-02-1970
... Load Line......Load Line...This Certificate, Load-Line, gave approval for the vessel Reginald M to load cargo up to a certain line, marked by a disc attached to the ship and inspected by the South Australian Harbors Board. ...Certificate of Approval - Load Line for sailing vessel Reginald M, Official Number 137228. ...Flagstaff Hill Maritime Museum and Village 89 Merri Street Warrnambool great-ocean-road This Certificate, Load-Line, gave approval for the vessel Reginald M to load cargo up to a certain line, marked by a disc attached to the ship and inspected by the South Australian Harbors Board. ...This Certificate, Load-Line, gave approval for the vessel Reginald M to load cargo up to a certain line, marked by a disc attached to the ship and inspected by the South Australian Harbors Board. The vessel had a long and varied life of service. This Certificate relates to early 1970, before the ship was sold to the Lyall Mining and Rail Company. The Load Line on the Reginald M was carved on the ship, inside the hull and not removeable. The REGINALD M - The vessel “Reginald M” was a two-masted coastal ketch, owned and built by Mr. Jack (John) Murch of Birkenhead, Port of Adelaide, South Australia. Its construction took approximately 6 months and it was launched at Largs Bay in 1922. The Reginald M’s purpose was to serve the coastal trade of South Australia, to carry cargo cheaply and efficiently. It is believed that the keel was in fact hewn from two telegraph poles! Its builder frequented all the salvage yards for materials and fittings. Reginald M had a very shallow draft and a flat bottom that enabled it to come close to shore and to sit high and dry at low tide or to be beached on sand. The flat bottom was also to make the ship able to skim over reefs. Wagons could load and unload direct from her side. Her cargo included Guano, Barley, Wool, Horses, Cattle, Timber, Explosives, Potatoes, Shell Grit and Gypsum. After a variety of services, in late 1970 Reginald M was sold to the Mt. Lyell Mining and Railway Company and was used by them as a barge to carry explosives. In 1972 the Navy League of Strahan, Tasmania, purchased her for use by the Strahan Sea Cadet Unit to use at Macquarie Harbour and renamed her T.S. Macquarie. However this plan for use of Reginald M did not come to pass. In 1974 Mr. Andrew Rennie, of East Brighton, Melbourne, bought her for a similar purpose. , paying $5,000 and donating a ‘Cadet of the Year” trophy to the Sea Cadets. He sailed her from Strahan to Melbourne, planning to use her for pleasure sailing. Also in 1975 Reginald M was sold to Melbourne Ferry Company at auction. Later in 1975 the Reginald M was bought by Flagstaff Maritime Museum for $20,000 . She has been restored and is now one of the exhibits in the Village lagoon or lake. It was restored in 2006 using funds from a $4,000 government grant.This Certificate is significant because of its association with the last working days of REGINALD M. REGNIALD M was a coastal trading ketch from South Australia built in 1922. It was one of very few sailing coastal trading vessels still existing until 2016, and its flat bottom, single chine shape illustrated a very simple but robust method of construction, compared to other round bilged examples of trading vessels. The vessel is listed on the Australian Register of Historic Vessels (ARHV Number: HV000562.)Certificate, rectangular, behind glass in wooden frame. Certificate is an official printed form, some information is over-typed, other information is hand written and signed. Frame has a central hole in top and bottom. The Certificate relates to Load Level of the vessel Reginald M and refers to the exact placement of a disc within the vessel that indicates the maximum load in fresh water. . Issued to the vessel 'Reginald M', Official Number 137228. . Issued by the Sough Australian Harbors Board . Valid from 25-02-1970 to 31-01-1974. . Signed by Neil Cormack, 25th February 1970Certificate of Approval - Load Line for sailing vessel Reginald M, Official Number 137228. Logo of the South Australian Harbors Board. Issued by Department of Marine & Harbors, Port Adelaide, 25th February 1970. In force until 31st January 1974. Signed by Neil William Cormack, authorised officer for Department of Marine & Harbors. Typed onto form: "AUX [SAILING SIP]" "REGINALD M" "137228" "1968" " Neil William Cormack" "Department of Marine & Harbors" "1 [foot] 3 [inches below the] main [deck]" "31st JANUARY 74" "25th FEBRUARY 70" Signature: "Neil W Cormack"flagstaff hill, warrnambool, maritime village, maritime museum, flagstaff hill maritime museum & village, shipwreck coast, great ocean road, coastal trader, reginald m, ketch, john murch, ch murch, reg webb, carribie station, mt lyell copper company, melbourne ferry company, certificate of approval, load line, 137228, load line disc, 25-02-1970, neil w cormack, neil william cormack, south australian harbors board, department of marine and harbors, harbours -
 Puffing Billy Railway
TACL - Erica State Sawmill Rail Tractor, 1928
... The weekly loading of the line for the first, second and third weeks were 54, 62 and 71 trucks respectively. ...The weekly loading of the line for the first, second and third weeks were 54, 62 and 71 trucks respectively. ...TACL-Tractor Appliance Company Limited TACL rail tractors manufactured by Malcolm Moore of Port Melbourne Located in the Parishes of Moondarra and Telbit, Gippsland, the tramway terminated at Collins Siding on the Moe Walhalla 2'6"gauge branch of the Victorian Railways. Its construction by the Forests Commission of Victoria was to facilitate the extraction of timber from the Southern and Western slopes of Mount Erica and to replace the outlet tramways destroyed during the disastrous forest fires of February 1926. Tyers Valley Tramway The line, following the Eastern arm of the river, passed Ingrams Siding (7m.) to terminate at a forest area, known as "Ten Acre Block", 8m. 60c. from Collins Siding. The western branch of the line followed the Western Tyers Valley to Growlers Creek, 13m. 40c. from Collins Siding. THE T.A.C.L. TRACTORS at Tyers Valley tramway. On the 19th January 1928, T.A.C.L. locomotive, purchased from Tractor Appliance Co. Ltd. (Malcolm Moore), was delivered. This unit had a 20 h.p. Fordson engine coupled by a chain drive to the two axles, providing a tractive effort of approx. 2000lbs. Wheelbase was 5’ and weight was four tons. It was intended that the two tractor locomotives, working with the grade, would deliver timber from the branch lines to Tyers Junction, from which place it would be steam hauled out to the Collins Siding transfer point. Following a breakdown of the steam locomotive, haulage during the early months of 1928 was carried out by the T.A.C.L. unit, supplemented by the Nattrass, which was, by this time, becoming unreliable. During April 1928, after ensuring that no suitable locomotive was available in Australia, an order was placed with the Climax Manufacturing Co., U.S.A. for the supply of a geared locomotive. A second T.A.C.L. engine was purchased during May and, on the 27th, the local mill owners, having obtained running rights on the tramway, commenced haulage with the Harman. The three tractor units worked the branch lines and transported ballast, whilst the Harman hauled the timber to Collins Siding in rakes of eight trucks (56 tons). The weekly loading of the line for the first, second and third weeks were 54, 62 and 71 trucks respectively. info from : http://www.nmra.org.au/tyersvalley/Tyers-Tram.html Historic - Industrial Narrow gauge Railway - Timber working - Rail Tractor used by the the Forests Commission of Victoria on the Tyers Valley TramwayRail Tractor with Fordson engine coupled by a chain drive to the two axles - made of steel and wrought ironerica sawmill, puffing billy, tacl, rail tractor, tractor appliance co. ltd. (malcolm moore), industrial narrow gauge railway, tyers valley tramway, forests commission of victoria -
 Melbourne Tram Museum
Album - Charles Craig - part 1 of 2, 1950s to 1970s
... CC14 W2 630 being washed at a depot – The Argus photo CC15 Royal Park line at Flemington Road – W2 355 and W5 786 CC16 Nicholson St track construction from a tram cab CC17 T181 on tour at Gordon St CC18 T181 on Maribyrnong Bridge CC19 Ditto at River St just off bridge CC20 As for CC18 CC21 At Raleigh Rd CC22 T181 at Footscray depot CC23 Track construction, Nicholson, just north of Gertrude CC24 Commissioning overhead Bourke St tram 988 CC25 Queens Parade – 997 and 994 CC26 Swapping trolley wheel to skid – commissioning CC27 Track construction in Gertrude St CC28 985 in Queens Parade running special CC29 997 in Queens Parade CC30 1033 at North Fitzroy – AETA Special CC31 Bourke St at Elizabeth St – has passengers on board CC32 W6 985, 996 Queens Parade, Mk 3 bus 333 CC33 As above CC34 Showing construction at Nicholson & Gertrude – Bourke St CC35 W2 223 on Burnley temporary bridge – VR track expansion CC36 W5 823 – ditto CC37 Tram on old bridge prior to removal CC38 W2 433 on temporary bridge with new bridge beams and old track CC39 Looking down showing temporary single track – Swan St CC40 Tait train passing under tram bridge CC41 SW6 on single line – off loading CC42 W2 547 at City Road Junction CC43 City Road Jtn – 1969 – 596 and 771 CC44 City Road Jtn – 1969 – 596 and 771 (same as CC45 438 in Flinders St CC46 355 somewhere CC47 552 somewhere CC47A 364 at Preston Workshops? ...CC14 W2 630 being washed at a depot – The Argus photo CC15 Royal Park line at Flemington Road – W2 355 and W5 786 CC16 Nicholson St track construction from a tram cab CC17 T181 on tour at Gordon St CC18 T181 on Maribyrnong Bridge CC19 Ditto at River St just off bridge CC20 As for CC18 CC21 At Raleigh Rd CC22 T181 at Footscray depot CC23 Track construction, Nicholson, just north of Gertrude CC24 Commissioning overhead Bourke St tram 988 CC25 Queens Parade – 997 and 994 CC26 Swapping trolley wheel to skid – commissioning CC27 Track construction in Gertrude St CC28 985 in Queens Parade running special CC29 997 in Queens Parade CC30 1033 at North Fitzroy – AETA Special CC31 Bourke St at Elizabeth St – has passengers on board CC32 W6 985, 996 Queens Parade, Mk 3 bus 333 CC33 As above CC34 Showing construction at Nicholson & Gertrude – Bourke St CC35 W2 223 on Burnley temporary bridge – VR track expansion CC36 W5 823 – ditto CC37 Tram on old bridge prior to removal CC38 W2 433 on temporary bridge with new bridge beams and old track CC39 Looking down showing temporary single track – Swan St CC40 Tait train passing under tram bridge CC41 SW6 on single line – off loading CC42 W2 547 at City Road Junction CC43 City Road Jtn – 1969 – 596 and 771 CC44 City Road Jtn – 1969 – 596 and 771 (same as CC45 438 in Flinders St CC46 355 somewhere CC47 552 somewhere CC47A 364 at Preston Workshops? ...Photo - see pdf file for further information. Number Brief Description CC1 S178 at Elsternwick level crossing track works CC2 Building East Preston Depot 1955 CC3 Camberwell depot – post WW2 – lots of trams and a black cat CC4 W2 584 and SW6 958 northbound – Chapel St and Brighton Road CC5 W2 357 – southbound, Chapel St Brighton Road CC6 Pascoe Vale Road, Raceday working – note the signal CC7 The Preston Workshops - The Argus, post WW2, 223, 647 et al CC8 923 or is it 922 being built at Preston – The Argus photo - CC8A 832 being positioned onto trucks at Preston after an overhaul – Argus Photo – see also CC306 CC9 Footscray depot` CC10 W5 797 in St Kilda Road during track works – 1950s CC11 W2 457 at Kew Post Office CC12 Wellington Parade – W2 432, 492 and 337 – special event CC13 Swan St line up of trams – football? Or other special event – Sinclair’s bus on the right side. CC14 W2 630 being washed at a depot – The Argus photo CC15 Royal Park line at Flemington Road – W2 355 and W5 786 CC16 Nicholson St track construction from a tram cab CC17 T181 on tour at Gordon St CC18 T181 on Maribyrnong Bridge CC19 Ditto at River St just off bridge CC20 As for CC18 CC21 At Raleigh Rd CC22 T181 at Footscray depot CC23 Track construction, Nicholson, just north of Gertrude CC24 Commissioning overhead Bourke St tram 988 CC25 Queens Parade – 997 and 994 CC26 Swapping trolley wheel to skid – commissioning CC27 Track construction in Gertrude St CC28 985 in Queens Parade running special CC29 997 in Queens Parade CC30 1033 at North Fitzroy – AETA Special CC31 Bourke St at Elizabeth St – has passengers on board CC32 W6 985, 996 Queens Parade, Mk 3 bus 333 CC33 As above CC34 Showing construction at Nicholson & Gertrude – Bourke St CC35 W2 223 on Burnley temporary bridge – VR track expansion CC36 W5 823 – ditto CC37 Tram on old bridge prior to removal CC38 W2 433 on temporary bridge with new bridge beams and old track CC39 Looking down showing temporary single track – Swan St CC40 Tait train passing under tram bridge CC41 SW6 on single line – off loading CC42 W2 547 at City Road Junction CC43 City Road Jtn – 1969 – 596 and 771 CC44 City Road Jtn – 1969 – 596 and 771 (same as CC45 438 in Flinders St CC46 355 somewhere CC47 552 somewhere CC47A 364 at Preston Workshops? CC48 W2 334 on Traverser – Preston Workshops CC49 Wellington pade – large line up of trams, c1950 925, and 611 CC50 W2 493 Franklin st – advertising for Savings Certificates CC51 Possibly 551 with advertising for fund raising for Blind institute CC52 249 at Hawthorn – Riversdale Junction – with a Tally Ho and Village Fair Aux. board CC53 MMTB Postcard of 511 CC54 Wattle Park terminus with Single line warning sign CC55 Wattle Park Duplication CC56 36 at Domain Junction – 833 CC57 36 at Domain Junction CC58 36 at Domain Junction with 810 and 833 CC59 36 in Swanston by Flinders St Station CC60 36 in Spencer St at A’Beckett CC61 36 crossing Collins St CC62 36 crossing Collins St CC63 36 northbound in St Kilda Road with Shrine in background CC64 36 northbound in Swanston St at Flinders St CC65 Postcard – Ballarat 36 in Domain Road CC66 Postcard - Stampshow – Hawthorn Horse tram CC67 Postcard - Stampshow – Peace cable tram CC68 Postcard - 1041 and cable car set 1 at Preston CC69 Postcard - Colins & Elizabeth – greetings from old Melbourne CC70 Postcard - Cable car set at Preston CC71 Postcard - Twentyman’s cable cars CC72 Postcard - Nu-color-vue – horse tram 256 CC73 Cable car set – Market & Flinders CC74 Cable trams at Twentymans’ in their shed CC75 Cable tram track at Bourke & Spencer prior to removal CC76 Cable tram bogie at Preston Workshops – used as a dolly CC77 Cable trams at Twentymans’ CC78 Postcard - Valentines – Bourke looking west from Swanston CC79 Postcard - Rose 3938 – Bourke at Swanston – the Leviathan building CC80 Postcard - Valentines – Elizabeth St looking south from Collins – No. 19 CC81 Postcard - Rose P4765 – Bourke St Melbourne CC82 Postcard - Rose 4090 – cable tram passing Parliament house CC83 Postcard - Valentines – GPO Elizabeth St CC84 Interior of cable trailer with clothing on a set CC85 Elizabeth St looking north CC86 Cigarette card - Collins St No. 41- WD HO Wills CC87 Postcard - Rialto building with cable set CC88 Postcard - Valentines - Swanston at Flinders looking north CC89 CC90 Q 150 Hanna St – dated on rear CC91 176 turning – photo ex Alan Jungworth CC92 161 on Princes Bridge – minimum fare 4d sign and Inspector CC93 459 at Point Ormond CC94 158 at Gordon St – side on view CC95 X 217 in Swanston St CC96 X 217 in Swanston St with an East Brighton destination CC97 T177 CC98 T177 Peel St – no destination roll – being transferred? CC99 X1 462 in Glenhuntly Road to Point Ormond CC100 X1 462 in Glenhuntly Road to Elsternwick Rly Station CC101 X1 462 in Glenhuntly Road to Point Ormond CC102 Q 150 Hanna St CC103 190 at Camberwell Depot CC104 T182 at Footscray CC105 X1 466 and W2 at Footscray CC106 190 at Camberwell Depot CC107 X1 467 Barkly St Footscray CC108 X2 679 turning into William St from La Trobe St CC109 X2 677 Glenhuntly Road with Point Ormond Destination CC110 Postcard T180 CC111 Postcard format – X1 467 on a truck – see also CC178 CC112 Postcard format – X1 467 at Wantirna South CC113 Q200 and SW6 896 at Thornbury – has labels on rear CC114 T177, Ballarat Road – has labels on rear CC115 T178 at Point Ormond CC116 Postcard X1 465 and 466 CC117 Postcard – X2 676 CC118 Postcard – TMSV X2 217 CC119 810 on temporary bridging – 24-12-67 CC120 W2 575 – Queens Parade junction in, still temporary bridging, substation under construction CC121 Forming Queens Parade Junction base slab CC122 W2 596 prior to tramway works – all tracks still in position CC123 It’s a mass of reinforcing – bridging being formed CC124 Looking north with substation being built CC125 Looking east with some rather tight curves, Wellington St still in use CC126 SW6 958 ex Wellington St with all tracks and signal box and buildings. CC127 Victoria Pde at Gisborne looking east – at least 4 cars CC128 SW6 893? With dash canopy lights and SW6 862 and a man with a newspaper CC129 SW6 894 on the S curves, with tram in Wellington St CC130 Similar photo CC131 W2 564 turning into Wellington St – the concrete tracks are not that old CC132 W2 552 running out of Wellington St CC133 W5 732 from Fitzroy St into St Kilda Road with next iteration in position – very wonky CC134 W5 764 turning into Fitzroy St CC135 SW6 947 turning from Wellington St CC136 W2 586 running out of High St CC137 W2 500 turning into Wellington St CC138 W2 543 in Wellington St inbound CC139 L103 with St Kilda Junction destination, and a tower truck on right CC140 Workmen – new track in Queensway in use CC141 Ditto CC142 L103 in Queensway, and another car in bound CC143 Looking east along Wellington St which has been taken out of use. Also a MMTB Roller CC144 W5 824 and a W2 and all types of wobbly temporary track CC145 W2 354 to High St CC146 Sw6 947 on the S bends CC147 W2 500 looking north – tram on the S bends CC148 SW6 896 leaving the S bend CC149 W2 357 and a MMTB City bus with trees/gardens on the side CC150 W5 817 Elliot Ave – see also CC302 CC151 W2 552 – note the large trolley bridge CC152 W2 550 at depot or workshops CC153 1B truck CC154 SW2 432 CC155 W2 155 at Glenhuntly CC156 SW6 937 on AETA tour? CC157 X2 677 on Footscray service – Ballarat Rd? CC158 W2 641 – High St Kew? CC159 SW6 847 – Power St Hawthorn CC160 Simpson St – big line up CC161 W2 546 truck No. 1? CC162 W2s at Glenhuntly depot CC163 No. 15 truck under 899 CC164 206 and other junk at Preston Workshops CC165 W in Swanston St Melbourne – Rose series card CC166 Y1 613 Batman Ave?? or William St at Collins CC167 Tram plans CC168 X 217 Swanston St – see also 95 and 96 CC169 217 in Swanston St – same as 95 CC169A 192 in St Kilda Road at Princes bridge CC170 192 in St Kilda Road at Princes bridge CC171 Bendigo 3 arriving Malvern depot – being unloaded CC172 Ditto CC173 T180 at a depot CC174 X1 463 wheel set CC175 C30 – dog car side view – close up CC176 C30 dog car CC177 206 and 30 at Preston Workshops CC178 X1 467 on a truck – see CC111 also CC179 42 CC180 42 at a depot, no destination box CC181 W2 556 1A type truck CC182 Flinders St Station – Rose Series CC183 W7 1035 Spring – Nicholson St CC184 W7 1022 MMTB Post Card CC185 Adelaide 178 – has on rear – R. Lilburn 4/82 CC186 Adelaide 175 – has on rear – R. Lilburn 4/82 CC187 Y1 610 on AETA tour CC188 Y1 610 on AETA tour with large group – Point Ormond CC189 AETA display – has GH55-32 in pencil on rear CC190 AETA display – has GH55-29 in pencil on rear CC191 Y1 610 on AETA tour with large group – Point Ormond CC192 VR 53 at Footscray CC193 VR cars 40 and 34 at Elwood wash dock CC194 W7 1024 as the 1970 Christmas tram CC195 Geelong – loading a set of 22E trucks CC196 Geelong 10 and 23 running an AETA special CC197 Geelong – AETA special CC198 Geelong 7 at Junction CC199 Geelong 10, in the city CC200 Geelong 33 with Belmont destination CC201 Geelong 15 Eastern Park destination 29-3-1948 CC202 Geelong 23 at Railway Station – 29-3-1948 CC203 Geelong 23 at Railway Station – 29-3-1948 CC204 Geelong – loading a bogie tram CC205 Geelong – loading a bogie tram CC206 Geelong 40 – loaded on truck CC207 Geelong 40 – on jacks CC208 Geelong 40 on jacks – 19 behind CC209 Geelong 38 with two workers on either side CC210 – 214 Australian Historic Tramways stamp folder and set CC215 Bendigo 17 at depot – has dup JBS on rear CC216 Bendigo 20, 29 bogie and straight sill car at Charing Cross CC217 Bendigo one man bogie Pall Mall CC218 Bendigo – Bogie 23, other cars and welding truck at depot CC219 Bendigo 7 with Quarry Hill destination CC220 Bendigo 21 with Lake Weerona destination CC221 ESCo 18 Ballarat CC222 Ballarat bogie 22 on AETA special CC223 Ditto CC224 Ballarat 34 at Stones Corner – R Lilburn CC225 Ballarat 15 in Bridge St – R Lilburn CC226 Ballarat 40 at Gardens – R Lilburn CC227 Ballarat 37 running out of depot – R Lilburn CC228 Postcard – Valentines – Sturt St with loaded horse tram trailer CC229 AETA Geelong tram tour ticket – 29-3-1948 CC230 Postcard – Geelong – Valentine 2114 – T&G building CC231 Postcard – PMTT ! – High St Malvern CC232 Postcard – Empire – Glenferrie Road, Malvern at Wattletree Rd CC233 Postcard Y469, MMTB CC234 Postcard Z2 Spring St CC235 Postcard – Z1 MMTB CC236 Postcard – Stamp Show W1 431 CC237 Postcard – Stamp show B2005 CC238 Postcard – Stamp show W6 982 CC239 Postcard – Valentines 1264 – Johnstone Park with tram in distance CC240 Postcard – Rose 10711 – Swanston and Lonsdale – Hospital and W232 CC241 Postcard – Rose 4827 – Fitzroy St St Kilda W2 362 and 548 CC242 Postcard – Valentines – 939 – St Kilda War Memorial, W and a R? CC243 Postcard – Valentines – 572 – St Kilda War Memorial, W 413 and 140? CC244 Postcard – Valentines – 938 – Uper and Lower Esplanade – L 104 CC245 Postcard – St Kilda Rd at Princes Bridge Y1 and W CC246 Postcard – Biscay BG82 – W5 814 - CC247 Postcard – Biscay 796112 – Bourke St looking west CC248 Postcard – Biscay 796109 – Bourke St looking east CC249 Postcard – Biscay 2AUS58 – Z5 Bourke St CC250 Postcard – Biscay BG 249 – Swanston St CC251 Postcard – National View – St Kilda Rd – shrine and Prince Henrys W2 405 CC252 Postcard – Nu color vue – 11 ML 156 – St Kilda Rd CC253 Postcard – Nu color vue – 11 ML 153 – Swanston St CC254 Postcard – Nu Color vue – Collins St 442 CC255 Postcard – Pitt card – Adelaide – H 364 at Victoria St CC256 Postcard – SPER L/P 154 CC257 Postcard – BTMS – 550 CC258 Postcard – SPER – Brisbane 295 CC259 Adelaide 131 at Burnside – has R Lilburn on card, c1911 CC260 Adelaide 194 CC261 Adelaide 235, with two crew, The News photo CC262 Rockhampton, outside post office – has source of photo details CC263 Sydney – 2086 and 2062 arriving Circular Quay CC264 Sydney – P class – Pitt St? CC265 Sydney – 1610 at Circular Quay CC266 Brisbane 99 and 468 CC267 Sydney with bridge behind CC268 Steam tram Paramatta Park – 103 CC269 Sydney – Museum Station =- Elizabeth St CC270 Sydney – weed burner 137S at a loop Demonstrates the work of Charles Craig in photography and collection of prints.Assembled album in a black presentation folder of 270 photographs from the Charles Craig Collection - 86 sleeves - part 1 of 2. All photographs have been scanned and placed on the Museum's G drive. A list of all photographs with details where possible has been compiled. Victorian Provincial, Launceston, Hobart and Sydney tram photos have been transferred to other Museums, image files retained.melbourne, tramways, tramcars, trams, charles craig, st kilda junction, trackworks -
 Bendigo Military Museum
Photograph - RA Svy Project C4 Aerodist Operation, Eastern Arnhem Land, NT, 1967
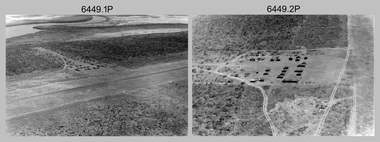
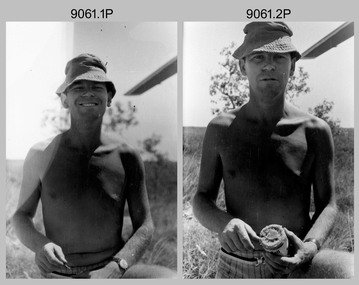
... line miles were successfully completed. This was the most productive Aerodist project thus far. The most common helicopter used by RA Svy up to 1972 was the civilian Bell 47G-2 and the Sioux Light Observation Helicopters (LOH), the Australian Army’s equivalent featured in this photo set. These light observation helicopters had a limiting load...line miles were successfully completed. This was the most productive Aerodist project thus far. The most common helicopter used by RA Svy up to 1972 was the civilian Bell 47G-2 and the Sioux Light Observation Helicopters (LOH), the Australian Army’s equivalent featured in this photo set. These light observation helicopters had a limiting load ...This is a set of 30 photographs of Royal Australian Survey Corps (RA Svy) personnel from Central Comd Fd Svy Unit (Adelaide) on Aerodist survey operation - Project C4 in Eastern Arnhem Land, Northern Territory in 1967. Photos of personnel were taken either at the operations base at Numbulwar or the main base at Gove (Nhulunbuy). RA Svy conducted nineteen Aerodist operations for 12 years from 1964 to 1975. Aerodist MRC2 was a tellurometer-based system adapted for aircraft to accurately measure distances between non-intervisible ground survey stations, using the aircraft as an intermediate station. Lower order geodetic results could be achieved by survey network trilateration. The measured distances between stations formed survey networks from which each station’s latitude and longitude was computed. Aerodist MRC2 was RA Svy’s major horizontal control survey tool for mainly medium scale topographic mapping (scale 1:100,000 Class A being spatially accurate to within 50 metres) in PNG, northern NT, north-west WA, Kalimantan Barat (West) Indonesia, Sumatra Indonesia, Gulf of Carpentaria and Cape York, QLD. In 1967, the Aerodist MRC2 Master equipment was installed in the aircraft featured in this set of photos, Executive Air Services’ (Essendon VIC) Grand Aero Commander VH-EXX. It was the same aircraft type and company contracted to Division of National Mapping for Aerodist MRC2 surveys. From July to October 1967 the aircraft was attached to Central Comd Fd Svy Unit (Adelaide - Major Don Ridge) on Project C4 eastern-Arnhem Land NT, where 317 Aerodist lines measuring 17,300 line miles were successfully completed. This was the most productive Aerodist project thus far. The most common helicopter used by RA Svy up to 1972 was the civilian Bell 47G-2 and the Sioux Light Observation Helicopters (LOH), the Australian Army’s equivalent featured in this photo set. These light observation helicopters had a limiting load carrying capacity of up to about 500 pounds. By comparison, one Aerodist team including two people weighed up to 1,500 pounds. Source: Royal Australian Survey Corps – Aerodist Years 1964-1975 by Peter Jensen. Refer to Item 9061.26P for more photos taken during this Aerodist survey operation.This is a set of 30 photographs of Royal Australian Survey Corps (RA Svy) personnel on Aerodist survey operations in Eastern Arnhem Land, Northern Territory in 1967. The photographs are on 35mm negative film and scanned at 96 dpi. They are part of the Army Survey Regiment’s Collection. .1) to .4) - black & white, 20th August 1967, Project C4 Aerodist Operations Base - Numbulwar, NT. .5) - Photo, black & white, 1967. Probable wrecked Indonesian fishing vessel. .6) to .8) - Photo, black & white, 1967. Unidentified survey operations base, L to R: unidentified personnel. .9) - Photo, black & white, 1967. Unidentified survey operations base, unidentified soldier driving a Haflinger 4x4 Light utility vehicle. .10) - Photo, black & white, 1967. Unidentified survey operations base, L to R: unidentified technician. .11) - Unidentified technician reading two survey altimeters to compute corrections to the measured distances for atmospheric refraction and to compute the sea level distances from the slope distances aircraft to the ground stations. .12) - Photo, black & white, 1967. Survey operations base, L to R: unidentified (x3), W01 Pat Wood BEM, unidentified. .13) to .16) - Photo, black & white, 1967. Unidentified personnel operating remote Aerodist MRC2 ground instruments. .17) to .18) - Photo, black & white, 1967. Unknown RA Svy office location. .19) to .20) - Photo, black & white, 1967. Aerodist MRC2 Master equipment. .21) to .22) - Photo, black & white, 1967. Aero Commander VH-EXX probably at Gove, NT, Central Comd Fd Svy Unit (Adelaide) – OC Major Don Ridge. .23) to .25) - Photo, black & white, 1967. Aero Commander VH-EXX probably at Gove, NT. Unidentified personnel. .26) - Photo, black & white, 1967. Aero Commander VH-EXX probably at Gove, NT. Aerodist antenna pods are visible on the aircraft. .27) to .29) - Photo, black & white, 1967. Australian Army Sioux Light Observation Helicopter (LOH) probably at Gove, NT. .30) - Photo, black & white, 1967. Panelled U337 survey station, visible as a white cross on aerial identification photo..1P to .2P – date and location on edge of film negative. .5P to .28P – no annotations .29P - annotated in white ‘RW-JEP Gove NT’ .30P - annotated in white ‘U337 Spool No1 Jun67’royal australian survey corps, rasvy, army survey regiment, army svy regt, fortuna, asr, aerodist, surveying, central comd fd svy unit -
 Bendigo Military Museum
Photograph - RA Svy Project C4 Aerodist Operation, Eastern & Western Arnhem Land, NT, 1967, 1968
... line miles were successfully completed. This was the most productive Aerodist project thus far. The most common helicopter used by RA Svy up to 1972 was the civilian Bell 47G-2 and the Sioux Light Observation Helicopters (LOH), the Australian Army’s equivalent featured in this photo set. These light observation helicopters had a limiting load...line miles were successfully completed. This was the most productive Aerodist project thus far. The most common helicopter used by RA Svy up to 1972 was the civilian Bell 47G-2 and the Sioux Light Observation Helicopters (LOH), the Australian Army’s equivalent featured in this photo set. These light observation helicopters had a limiting load ...This is a set of 26 photographs of Royal Australian Survey Corps (RA Svy) personnel from Central Comd Fd Svy Unit (Adelaide) on Aerodist survey operation - Project C4 in Eastern Arnhem Land, Northern Territory in 1967 (photos .4P to .26P) and in Western Arnhem Land, Northern Territory in 1968 (photos .1P to .3P). Photos of personnel were taken either at the operations base at Numbulwar or the main base at Gove (Nhulunbuy). RA Svy conducted nineteen Aerodist operations for 12 years from 1964 to 1975. Aerodist MRC2 was a tellurometer-based system adapted for aircraft to accurately measure distances between non-intervisible ground survey stations, using the aircraft as an intermediate station. Lower order geodetic results could be achieved by survey network trilateration. The measured distances between stations formed survey networks from which each station’s latitude and longitude was computed. Aerodist MRC2 was RA Svy’s major horizontal control survey tool for mainly medium scale topographic mapping (scale 1:100,000 Class A being spatially accurate to within 50 metres) in PNG, northern NT, north-west WA, Kalimantan Barat (West) Indonesia, Sumatra Indonesia, Gulf of Carpentaria and Cape York, QLD. In 1967, the Aerodist MRC2 Master equipment was installed in the aircraft featured in this set of photos, Executive Air Services’ (Essendon VIC) Grand Aero Commander VH-EXX. It was the same aircraft type and company contracted to Division of National Mapping for Aerodist MRC2 surveys. From July to October 1967 the aircraft was attached to Central Comd Fd Svy Unit (Adelaide - Major Don Ridge) on Project C4 eastern-Arnhem Land NT, where 317 Aerodist lines measuring 17,300 line miles were successfully completed. This was the most productive Aerodist project thus far. The most common helicopter used by RA Svy up to 1972 was the civilian Bell 47G-2 and the Sioux Light Observation Helicopters (LOH), the Australian Army’s equivalent featured in this photo set. These light observation helicopters had a limiting load carrying capacity of up to about 500 pounds. By comparison, one Aerodist team including two people weighed up to 1,500 pounds. In 1968, after completion of the Kimberley Aerodist Operation project, the Aerodist system in VH-EXX was immediately deployed to western-Arnhem Land NT for Central Comd Fd Svy Unit (Adelaide - Major Don Ridge) to complete the mapping control across northern NT from mid-July to October. The Aerodist MRC2 Remote antenna seen in Photos .24P to .26P is mounted on a 20 foot pole tower. The antenna direction was controlled by wires/ropes to the two arms under the dish at right angles. The antenna elevation could be changed to the vertical for aircraft height checks as seen in photo .25P. Source: Royal Australian Survey Corps – Aerodist Years 1964-1975 by Peter Jensen. Refer to Item 6449.30P for more photos taken during these Aerodist survey operations.This is a set of 26 photographs of Royal Australian Survey Corps (RA Svy) personnel on Aerodist survey operations in Eastern Arnhem Land, Northern Territory in 1967 and Western Arnhem Land, Northern Territory in 1968. The photographs are on 35mm negative film and scanned at 96 dpi. They are part of the Army Survey Regiment’s Collection. .1) to .2) – Photo, black & white, 1968, unidentified soldier with an opened can of food, possibly bully beef. .3) – Photo, black & white, 15 Aug 1968, aerial view of terrain taken from a helicopter in vicinity of MILINGIMBI SIERRA. .4) – Photo, black & white, 1967, aerial view of an island taken from a helicopter. .5) & .6) – Photo, black & white, 1967, unidentified soldier driving a Haflinger 4x4 Light utility vehicle with trailer. .7) – Photo, black & white, 1967, unidentified surveyors taking vertical measurements with a leveling instrument and staff. .8) – Photo, black & white, 1967, Australian Army Sioux Light Observation Helicopter (LOH) with float removed. .9) to .11) – Photo, black & white, 1967, Australian Army Sioux Light Observation Helicopter (LOH) with floats. .12) – Photo, black & white, 1967, civilian Bell 47G-2 helicopter (Australian Army Sioux LOH equivalent) refuelled. .13) – Photo, black & white, 1967, survey station on coastline surrounded by white plastic aerial photographic identification panels lined with rocks. .14) & .15) – Photo, black & white, 1967, soldier (possibly a signaller from RA Sigs) operating a radio. .16) – Photo, black & white, 1967, Central Comd Fd Svy Unit Operations Section tent, Main Base Gove (Nhulunbuy) L to R: SPR Harry Dunn, WO1 Pat Wood BEM. .17) – Photo, black & white, 1967, Central Comd Fd Svy Unit Operations Section tent, Main Base Gove (Nhulunbuy) L to R: unidentified, WO1 Pat Wood BEM. .18) – Photo, black & white, 1967, Central Comd Fd Svy Unit Operations Section, Main Base Gove (Nhulunbuy), unidentified Australian Army Catering Corps cook preparing meals. .19) – Photo, black & white, 1967, Central Comd Fd Svy Unit Operations Section, Main Base Gove (Nhulunbuy) mess tent in readiness for meals. .20) – Photo, black & white, 1967, Bank of batteries in transit boxes undergoing recharging using generators. .21) – Photo, black & white, 1967, A topographic survey identification plaque set in a concrete block being weighed using a set of scales hanging from slaughtering gallows. .22) – Photo, black & white, 1967, CPL (Geoff or Gary) Larkin operating the remote Aerodist MRC2 ground instrument at Veronica Island, located north of Nhulunbuy. .23) – Photo, black & white, 1967, L to R: CPL (Geoff or Gary) Larkin with unidentified surveyor operate the remote Aerodist MRC2 ground instrument at Venica Island, located north of Nhulunbuy. .24) & .25 – Photo, black & white, 1967, The Aerodist MRC2 Remote antenna. .26) – Photo, black & white, 1967, The Aerodist MRC2 Remote antenna.The following photos are annotated in black ink on edge of film negative: .3P – ’15 Aug ’68, 2000’, 1-C18 ’68 MILINGIMBI SIERRA’ .4P – ’U462’ .8P – ‘1-C3/67 Float Removed’ .13P – ‘U477 10-C3/67 .20P - ‘2-C3/67 Bank of Chargers’ .21P - ‘3-C3/67 Gallows & Scales’ .22P - ‘0462 VERONICA ISLAND NT, CPL Larkin’ .23P - ‘0462 VERONICA ISLAND NT’ .24P - ‘4-C3/67 20’ Aerodist Tower’ .25P - ‘5-C3/67 20’ Aerodist Tower’ .26P - ‘6-C3/67 20’ Aerodist Tower’royal australian survey corps, rasvy, army survey regiment, army svy regt, fortuna, asr, aerodist, surveying, central comd fd svy unit -
 Bendigo Military Museum
Photograph - PHOTOGRAPHS, LIGHT HORSE, Post WW1
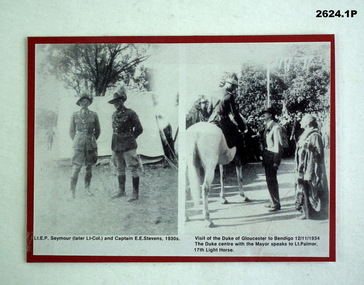
... RHS: Officer on horse speaking to 2 men on foot. .2) Top: Mounted troops; Bottom: Group of Officers standing. .3) Top: Mounted troops charging with swords drawn; Bottom: Group of Officers. .4) Top: Line of horses with 2 Troopers attending; Bottom: Group of Sergeants. .5) Top: Troopers loading horses into a railway truck; Bottom: Group of Troopers. .6) Top: Officer riding a white horse through a crowd; Bottom: Machine Gunners training. .7) Top: 3 Light Horsemen using a range finder; Bottom: Group of Officers....RHS: Officer on horse speaking to 2 men on foot. .2) Top: Mounted troops; Bottom: Group of Officers standing. .3) Top: Mounted troops charging with swords drawn; Bottom: Group of Officers. .4) Top: Line of horses with 2 Troopers attending; Bottom: Group of Sergeants. .5) Top: Troopers loading horses into a railway truck; Bottom: Group of Troopers. .6) Top: Officer riding a white horse through a crowd; Bottom: Machine Gunners training. .7) Top: 3 Light Horsemen using a range finder; Bottom: Group of Officers. ...Each photograph is captioned: .1) LHS: LT E P SEYMOUR (later LT COL) & CAPTAIN E E STEVENS, 1930's. RHS: Visit of the Duke of Gloucester to Bendigo 12.11.1934. The Duke centre with the Major speaks to LT PALMER, 17th Light Horse. .2) Top: Troopers of 17th Light Horse in Pall Mall in front of the Memorial Hall Bendigo. Officer is LT A V PALMER (later LT COL) on Snow; Bottom: Officers of 17th Light Horse at Bendigo Racecourse 1937. Centre front: MAJOR GENERAL G T RANKINM DSO, VD. .3) Top: SGTS of 17th Light Horse winning Assault Course Broadmeadows Army Camp 1927; Bottom: Officers 17/19th Light Horse at Bendigo Racecourse Camp 1932. .4) Top: Horse Llines 17/19th Light Horse 1931; Bottom: Sgts Mess 17th Light Horse Broadmeadows Camp 1927. .5) Top: 17th Light Horsemen trucking horses Bendigo Railway Station 1931; Bottom: Cohuna Troop of 17th Light Horse at Bendigo Racecourse Camp 1932. CAPT A V PALMER, CO centre rear. .6) Visit of Duke of Gloucester to Bendigo 1934, Escort official from 17th Light Horse Regiment in Mitchell Street. Duke & Major seated in rear of car; Bottom: 17th Light Horse Machine Gun Regiment with Vickers MG 1937. .7) 17th Light Horse as M G Regt Bendigo Camp 1937. LT A V PALMER, R SCHIER, A LEEDS with range finder; Bottom: 1939 Officers 17th Light Horse MG Regt at Bendigo. See also 2619P for larger named copy of this photograph..1) - .7) Collection of black & white photographs consisting of 2 photographs per card. Photographs are printed on red card. Copies of originals. .1) LHS: 2 Officers standing. RHS: Officer on horse speaking to 2 men on foot. .2) Top: Mounted troops; Bottom: Group of Officers standing. .3) Top: Mounted troops charging with swords drawn; Bottom: Group of Officers. .4) Top: Line of horses with 2 Troopers attending; Bottom: Group of Sergeants. .5) Top: Troopers loading horses into a railway truck; Bottom: Group of Troopers. .6) Top: Officer riding a white horse through a crowd; Bottom: Machine Gunners training. .7) Top: 3 Light Horsemen using a range finder; Bottom: Group of Officers.photography-photographs, military history - army, passchendaele barracks trust -
 4th/19th Prince of Wales's Light Horse Regiment Unit History Room
Photo Albums - set of two, c. 1919
... Chivalry 406 Sausage observation balloon 407 READY 408 Bomb on carrier 409 Testing 410 B Richmond, Wireless Operator RAFC 411 Loading Bomb 412 Crash in desert 413 Bomb in YMCA at MAZRAR 414 No caption 415 LW Simpkin - Late 3LHFA 416 LEMNOS 417 Shelling the MARSDEN 418 Pontoon across Jordan River 419 Shells on Walkers Ridge 420 Sweetwater Canal 421 LAKE ISMAILIA 422 Indian Lancers on Canal 423 CAIRO Railway Station 424 Destroying Turkish water supplies. Explosives used for breaking clay at bottom of lagoon, help to absorb water 425 Exercising horses at ZEITOUN Egypt 426 In Wadi on MUG-SHUBEE stunt 427 Tractor drawing 60 lb gun towards front line...Chivalry 406 Sausage observation balloon 407 READY 408 Bomb on carrier 409 Testing 410 B Richmond, Wireless Operator RAFC 411 Loading Bomb 412 Crash in desert 413 Bomb in YMCA at MAZRAR 414 No caption 415 LW Simpkin - Late 3LHFA 416 LEMNOS 417 Shelling the MARSDEN 418 Pontoon across Jordan River 419 Shells on Walkers Ridge 420 Sweetwater Canal 421 LAKE ISMAILIA 422 Indian Lancers on Canal 423 CAIRO Railway Station 424 Destroying Turkish water supplies. Explosives used for breaking clay at bottom of lagoon, help to absorb water 425 Exercising horses at ZEITOUN Egypt 426 In Wadi on MUG-SHUBEE stunt 427 Tractor drawing 60 lb gun towards front line ...Memorabilia of 908 Dvr Thomas Edward Whyte, 3rd Light Horse Field Ambulance, World War 1 READ THIS. During the last war I sent these pictures home through devious channels. When I lobbed back I found them all pasted in these albums by my young brother Billy. He was only a kid then! Nowadays he is serving up North. Went away with the original 9th Battn. Was in the Blitz on England and served in Libya, Tobruk, Greece, Crete and Palestine and was twice knocked. It's not long since the last upheaval 1914-18 and I wonder if these boys think as we did. This will be the last war? I sincerely hope so. TWSet of two photo albums. Photos pasted into albums with captions in white ink. Photo captions - Vol 1. (? = not legible) 1. Prisoners from ES SALT 2. Dust scene at AUJA FORD. 4th LH BDE 3. ? ? CHEOPS PYRAMID 4. Houses and domain WASSA battle 5 .Pontoon at SERAPELAI 6. SPINX (sic) & PYRAMID 7. The Nile floods occur once yearly and all irrigation centres are alternatively flooded 8. Pontoon bridge over SUEZ Canal at SERAPEUM . Constructed by Aust Engineers 9. The arrival of newspapers and mail 10. Lake IIMSAH-ISMALIA 11. Camp outside Jerusalem. Walls of old city easily discernible 12. Roman walls on beach at MONTAZEH 13. ? ? These boats are used for conveying between steamer & shore 14. Interest shown in the new issue. Through the scarcity of horses Batmen/Grooms and drivers ? allotted donkeys ? ? 15. DAMASCUS GATE JERUSALEM 16. Trumpeter ? 17 Indians making ? for railroad 18. 'SPELLO' Sinai Country 19. Police searching Egyptian labourer 20. Cavalry ?? SHA? 21. Entering ? WADI ? 22. Bedouins at ? 23 No caption 24 No caption 25 Bolar trees EZBEKIEH Gardens CAIRO 26 .Flamingos at NOUZEH Gardens ALEXANDRIA 27 BARAGE 28 KASR-ELNILL Bridge 29 NOUZEH GARDENS 30 AMGS on beach at ? 31 NOUZEH GARDENS - ALEX 32 Mascot of 7th M.V.G. 3RD ALHR 33 Printing on walls inside St Mary's Church. Depicting the Flight from Herod. (Corner torn off photo) 34 Inside Virgin Mary's Church at MATARA 35 ? painting in Church ?? 36 SUEZ Canal. Finish of Arab pony race. ZAL-A-ZIA 37 Admiralty offices at PORT SAID 38 A corner of CHEOP"s PYRAMID 39 The Spinx (sic). Nose was blown off by a shell from one of Napoleon's guns. 40 Monastry on the MT of TEMPTATION 41 Mess orderlies. Foodstuffs in locker given to troops by the AIF 42 Mid day meal on treck 43 Ambulance sand carts for conveying wounded and sick over desert sand 44 3rd ALHB 45 Kaisers Church JERUSALEM. Inside is a large painting figuring the Kaiser & Kaiserine holding a model church. 46 Bedouin women drawing water from well at EL-ARISH 47 2nd ALH BGDE doing route march on JERUSALEM-JERICHO ROAD 48 GEN HODSON GOC Anzac Mounted Divn presenting decorations & investitures on the sands at SHEIKS-ZOWAID 49 Armoured Car 50 Snow at the CEEDERS (sic) on Mt LEBANON 51 Compulsory phenyle bath for all troops in front line area 52 Austrian guns taken at point of bayonet by NZ & 2nd BGDE at GAZA 53 CACHOLETS for carrying wounded 54 The boys found some timber and made a spring board on SUEZ Canal 55 Bedouin wedding. The Bride travels in state amongst rubbish on top of camel. Her father leads conveyance. 56 Australian graves at SHALLAL 57 Camel Transport Company bring rations along beach 58 Billy the mascot holds an offensive & checks advancement 59 Exercising horses at HELMIEH Egypt 60 PONT-DE-QUOBBA Egypt. A suburb of well-to-do Egyptian merchants 61 Demolition stunt at ASLU. Bridge destroyed by Australian Engineers 62 Swimming horses in Great Bitter Lakes Egypt 63 On the move along Wadi 64 On the shores of the Bitter Lakes EL-EGYTE 65 A leave party waiting for the pontoon to swing into position 66 Carting grain 67 Egyptian Brass Band 68 French warboat (sic) in Canal 69 Russian Troops from Mesopotamia passing through SUEZ Canal 70 Prisoners coming in under escort. Turkish & German officers in lead mounted on ponies 71 Turkish prisoners 72 T.B.D in Canal 73 Old trenches on SUEZ CANAL near BITTER LAKES on W Bank 74 Monitor in Canal 75 Block house, trenches & entanglements near Post 62 76 A halt in an Egyptian village EL-MARO' 77 Mobile wireless plant 78 On the road from Canal to Railhead 79 Old Turkish guns in ancient fort at ALEXANDRIA 80 Francenia steaming through Canal 81 After MAGHDABA stunt. Convoy taking wounded form EL-ARISH to railway at 139 82 Indian Camelry 83 Virgin Mary's Church 84 Sluice gate at BARAGE Egypt 85 Hospital at lower W bank of Canal 86 Virgin Mary's tree 87 Sweetwater Canal at ISMAILIA Egypt 88 Halt and Feed. The A.M.C. attached to flying column. 89 Bringing stores ashore at JAFFA 90 H Videon & J Britton astride donks. Horses became scarce through casualties etc and units had donkeys issued to them 91 RAMLEH. The traditional burial place of St John the patron saint of England (sic). 92 Jewish Synagogue at RISHON-COUR-LE-LION (Richard the Lion Hearted) 93 Water tower at HELIOPOLIS 94 Portion of camp on HELIOPOLIS Racecourse 95 Arrival of papers 96 Sand sleigh 97 Boring plant & prisoners taken on the JIFF-JAFFA stunt. Two Austrian officers and party of Turks taken whilst building a concrete gun emplacement 98 The obelisk at MATARIA 99 In an avenue of Australian gums at ZEITOUA 100 Mountain battery gun 101 The 3rd ALH BGDE camped at HELIOPOLIS Racecourse 102 Captured Turkish guns 103 Turkish and Austrian prisoners. JORDAN VALLEY 104 The MT of Temptation Monastery built over spot where Christ spent his 40 days 105 Refugees from ES-SALT at JERICHO 106 3rd LHFA and 8th LH REGT at HELIOPOLIS 107 Fig trees at Roman Wells JIFF JAFFA 108 Inside the Blue Mosque CAIRO 109 Lagoon that was destroyed on JIFF JAFFA stunt 110 Section race at Brigade sports 111 Another tombstone at ALEX 112 Innoculating female date palm 113 Bronze tombstone in a cemetary at ALEXANDRIA 114 Luna Park at HELIOPOLIS 115 Egyptian water buffalo. Used by natives for ploughing etc 116 Russian church. Some call it the "Church of St Mary Magdelene" 117 At pyramids GIZA. Billingsley lost leg & McMullin KIA 118 Pontoon bridge over Suez Canal 119 DURBAN 120 Rescue work 121 Paddy Hanly 122 Motor train for conveying rations between Canal and Railhead. 123 At MUCKSHUBE ? 124 British ??? 125 Bedouins bringing in their harvest from the fields of ABBASSAN-EL-KEBIR Palestine 126 German HD QTRS BEERSHEBA 127 Date ? SINAI 128 Military railroad running through ? at EL-ARISH 129 Street scene at KHAN-YUNIS Palestine. Samson often called at this place to visit his girl. Napoleon narrowly escaped capture here during his ? in 1799 130 Date palms bearing fruit. These do not ? they are ?? 131 Motor ambulance convoy 132 Turkish hospital BEERSHEBA 133 MT CALVARY 134 Town Hall BEERSHEBA 135 Railway station BEERSHEBA 136 ASLUJ 137 Turkish depot MAGDABA 138 DURAN 139 3rd ALAB Hospital 140 Main Street PORT SAID 141 Stock Exchange ALEXANDRIA 142 The "Bull Ring" 14th AGH 143 (Double exposure) 144 Jewish School at DURAN Palestine 145 Damascus Gate JERUSALEM 146 Roller used for grinding clay for making bricks 147 The Harbour at ALEXANDRIA 148 Part of Napoleons Road along sea shore opposite BEELAH 149 Hotel at ALEX. Barred to the troops of course. 150 HELIOPOLIS 151 -153 ALEXANDRIA 154 Ambulance treck 155 Cacholets at the casually clearing station 156 Refugees from ES-SALT entering the Jordan Valley. Mts of MOAB in background 157 Cameliers bring in prisoners 158 The "Niagara". Casualties were from the front line by all descriptions of transport and passed through several field hospitals until they eventually reached the railway. They were sent to KANTARA by train. Despatched from there to PORT SAID by this boat 159 JERICHO 160 Turkish prisoners in JORDAN VALLEY 161 Bedouin nippers of SINAI 162 Bridge destroyed by ALH at ASLUJ 163 Railway sheds at BEERSHEBA. Portion was set afire by retreating Turks 164 ASLUJ Station 165 German Hospice 166 at ASLUJ 167 Suez Canal offices PORT SAID 168 MENA Village from top of Cheops. White lines at left are roads made by Australian troop. First Aust Contingent camped here. 169 A felukeh passing through gate at BARAGE 170 Military railway terminal EL ARISH 171 (No caption) 172 Egyptian family waiting for a train 173 Turkish prisoners and captured material coming in 174 Turkish wounded at BEERSHEBA awaiting removal 175 Two hospital ships at ALEXANDRIA 176 Some of the Bd boys 177 Race meeting 3rd ALHB at TRIPOLI- SYRIA 178 The blacksmith and Rodney Thomas swimming horse in SUEZ CANAL 179 Natives grinding grain 180 Thoroughbred 181 MUKATTAM HILLS 182 Trenches at JIFF JAFFA 183 MacBoyd as a Padre 184 Egyptian Syce having shave by travelling barber 185 The creek outside ALMINA 186 Cameliers 187 Clearing Station on beach at EL-ARISH 188 Wadi at TALLAT-EL-DUMM 189 Motor transport park 190 Some of the boys 191 Pompeys Pillar 192 at MAGHDABA 193 Hospital at JERUSALEM 194 Cheop's Pyramid 195 Golden Gate JERUSALEM 196 Hustling Turks through BEERSHEBA 197 Holy City 198 Mosque of Omar Jerusalem 199 Railway bridge destroyed by ALH at ASLUJ 200 Enemy material captured at SHERIA BEERSHEBA 201-3 These Mosques built with alabaster taken from pyramids at GIZA 204 Pontoon bridge built by our Engineers over RIVER JORDAN 205 3rd Bgde in Koil at MASAID 206 Billy McGhie throwing the weight 207 Nirazeh ? Gardens 208 Motor Ambulance Park 209 Bedouin women in Palestine village 210 ALEXANDRIA 211 Junction Stn 212 Indian Lancers 213 Motor convoy at ESSANI 214 A & B Sections 215 JERUSALEM. Once known as the 'City of Palms' and presented to Cleopatra by Anthony 216 Monastery on the Mount of Temptation. Situated on the Hills of Solomon on E side of Jordan Valley just behind JERICHO 217 DURAN A Jewish village in Palestine 218 One of our planes meets with a mishap on landing 219 Bedouin flocks around NABLUS 220 ES-SALT Road just above Jordan River 221 Halt! Action Front! Getting guns into action from pack 222 Village well 223 Gun inspection 224 WADI GHUZZEE Bridge 225-6 At GIZA Zoo Egypt 227 Syrians gathering olives 228 Smashed plane 229 MacBoyd 230 Bridge across Jordan at GORRONHOER 231 Competitors for Gretna Green. 3rd Bgde sports at TRIPOLIA 232 EL ARISH 233 Main street JAFFA 234 The beach at MARI-KHEB 235 Scene of old Cairo 236 Bedouin market 237 Bridge built over Wadi EL-ARISH. The biblical "River of Egypt". 238 Old water reservoir in native village 239 A "spello" on the track 240 Plane going out on reconnaissance 241 Bomb attached to carrier on a plane 242 Ancient Turkish gun at forts in TRIPOLI - SYRIA 243 Gun inspection 3rd AMGS 244 Old Turkish trenches outside GAZA 245 Wadi KHUZEL Bridge at SHALLA 246 BEERSHEBA 247 Street scene ZAG-A-ZIG 248 Spinx (sic) & Pyramid - GIZA 249 Egyptian Coastguards at ALEXANDRIA 250 A Palestine camp E Troop 3rd MG Sqn 251 B class horses killed in Syria 252 Scene from summit of Pyramid 253 Bert Richmond & an old Turkish Howitzer on MONTAZEH 254 LION'S WELL 255 Australian trenches outside Ferry's Post near Hill 70 256 A street scene in HELIO{PLIS 257 Electric trams at ALEXANDRIA 258 Cleaning harness 259 Swinging pontoon bridge into position at SERAPEUM 260 British Monitor in Suez Canal 261-2 Scenes of Turkish buildings at MAGHDABA. Taken by the ALH The first time in history mounted troops have attacked and taken entrenched positions 263 Aussies at Egypt's ancient monuments 264 Scenes of old CAIRO from MOKATTAM Hils 265 Bridge across canal at BARAGE, 16 miles outside CAIRO 266 Curly and Vic Norton 267 Stumpy McIntyre & Long Pikington 268 In Wadi GHUZZEL near TELL-EL-JEMM 269 Digging post holes for stables 270 Cameliers bring in prisoner. Austrian Officer in black 271 White washing mess shed 272 F Troop 3rd AMGS Sqn 273 Jews at Recruiting Depot at JERUSALEM, forming Jewish Battalion 274 In Jordan Valley, 3rd Machine Gunners have 8 horses killed by an aerial torpedo 275 Turkish prisoners 276 Cocos Island 277 Snow on the Lebanon Ranges 278 Egyptian Hotel 279 Gordon Wake. Note intruders 280 Electric trams at HELIOPOLIS Egypt. Heliopolis built by Belgian firm in 7 years 281 Sweetwater Canal at SERAPEUM 282 The ? wells at JIFF-JAFFA 283 Virgin Mary's well at MATARIA. Boyd, Simpkin & Crowley 284 Cricket for convalescents at MONTAREH 285 Indians working at cutting for military railway 286 Australian Hospital BEERSHEBA 287 Removing wrecked ambulance car from rail road 288 Engineers depot in ? at EL-ARISH 289 Water preservation scheme at SHALLAL 290 German Princes Palace at HELIOPOLOLIS 291 Some of the boys 292 Aussie aerodrome BEELAH 293 EL-JALLAH outside BETHLEHEM 294 Some of the gunners 295 Trying camels in gun carriages. Note sand caterpillar 296 Street outside old city JERUSALEM 297 D.H QRS In EL-ARISH. Hod 298 Cairo Museum 299 Wadi bridge built by Army Engineers 300 A two storied building at GALM used as German HQrs until reached by our guns 301-2 No caption 303 Ambulance with Flying Column 304 Jack Pegg 3 AMGS 305 KHAN YUNIS 306 In the Jewish village of "Rischon le Lion" 307 Wet Canteen BEELAH 308 Motor Transport LATRON 309 Gen Chauvel OC Desert Mounted Column 310 10th LH - Inverness Battery "Railhead" 311 3rd LHFA "SERAPIUM" 312 ESBEKIEN Gardens "LE CAIRE" 313 Camel training and wireless station Hill 60 314 ZAG-A-ZIG Rly Stn 315 One of the Irrigation Canal locks "HELOUAN" 316 Indian Camel Corps 317 Base at Hill 60 318 Aussie transport arriving "ALEXANDRIA" 319 3 ALHB at AL MINA 320 Main entry to city of JAFFA 321 Mosque at DAMASCUS 322 A Turk brought to earth by one of our patrols 323 Brigade boxing contrst 324 Ostrich farm ZEITOUN 325 MATERIA 326 No caption 327 Mail day 328 3rd LHFA entering HELIOPOLIS from MENA 329 M Boyd, L Simpkins, S Crowley 330 Stretcher bearers 331 French Hosp JERUSALEM 332 SERAPIUM 333 Gippo crushing wheel 334 On the move - bully and biscuits 335 V Morton, F Stokes, L Simpkins & Hanley 336 Turkish prisoners - SHERIA 337 Getting used to the mask J Antonio MM 338 Sand carts 339 Model house - MONTAZA Hospital 340 "Abdul" 341 Wood Depot "ESDUD" 342 On troop ship - from Syria 343 Turkish prisoners "JULIUS" 344 TRIPOLI 345 3rd AMGS cook house "BEELAH" 346 Breaking camp "ZEITOUN" 347 Turkish prisoners "GAZA" 348 One of our tanks. About nine were blown out of action at GAZA 349 Camp in HOD-EL-ARISH 350 German HQRS BEERSHEBA 351 Race Course TRIPOLI 352 A Locke & P Leeming 353 Sea planing in Suez Canal 354 MOASCR detail camp 355 KANTARE Suez Canal 356 Four boys of MG Sqn at cards while convalescing . Marked X was a prisoner of war for three days. Got him back with us when we countered. 357 Signal station at CANA 358 H Videon in german rig 359 ROD-EL-FARAC 360 Sweetwater Canal ZAG-A-ZOG 361 Hospital train on beach EL-ARISH 362 Jerusalem Road 363 Bedouin camel and young'un 364 Admiralty Offices, PORT SAID 365 Suez Canal PORT SAID 366 Taking wounded to clearing station 367 Hills of 10-60 MALHA 368 Junction Station 369 EL ARISH 370 Wine Distillery LATRON 371 White figures how entrance to Pyramid 372 RAPC Wireless Station 373 Sports in Canal. ANZAC Day 1916. Prince of Wales is aboard white launch. 374-5 Captured Austrian boat. 40,000 cases of benzine aboard. She was brought into Canal at Port Said. Spies set her afire. She burnt for some considerable time and eventually blew up. 376 Pumping water from Wadi on Muckshabee stunt 377 On trenches 378 Bringing in disabled battle plane 379 Giving a motor transport a lift 380 Old Turkish howitzer. MONTAZZA 381 Jerusalem country 382 Palm Hod in SINAI. Trees do not bear dates until 14 years old. No bees here. Palms innoculated by Bedouin. 383 Camel cacolets for conveying wounded 384 ESKBEKIEL Gardens Cairo 385 LAKE TIMBAH 386 Xmas dinner 1916 387 Gift billies from ACF 388 Section competition 389 In big marquees HELIOPOLIS 390 HM Landships 391 Capt Aberdeen inspecting horses 392 Football. Black vs White 393 The game 394 Old Napoleon fort. 10 mile along coast from ALEX 395 Jewish Cemetery AKRON 396 Ration fatigue 397 Blowing bottom out of Turkish Reservoir to allow soakage 398 Tilley & Farley - 14th AGH 399 At GIZA Zoo. Note height of giraffe 400 On this stunt we destroyed Turkish reservoir of 2 1/2 million gallons 401 Demolition party at wells MUCK-SHUBE 402 3rd ALH Bde HELIOPOLIS Race course 403 HMLS "Lady Wingate" 404 Turks blew out our tanks at GAZA 405 One of our aviators captured by German. Note German wearing Iron Cross. Snapped behind Turkish lines. Original of this snap was dropped at Aust aerodrome to let them know Aussie airman was alright and not killed in capture. Chivalry 406 Sausage observation balloon 407 READY 408 Bomb on carrier 409 Testing 410 B Richmond, Wireless Operator RAFC 411 Loading Bomb 412 Crash in desert 413 Bomb in YMCA at MAZRAR 414 No caption 415 LW Simpkin - Late 3LHFA 416 LEMNOS 417 Shelling the MARSDEN 418 Pontoon across Jordan River 419 Shells on Walkers Ridge 420 Sweetwater Canal 421 LAKE ISMAILIA 422 Indian Lancers on Canal 423 CAIRO Railway Station 424 Destroying Turkish water supplies. Explosives used for breaking clay at bottom of lagoon, help to absorb water 425 Exercising horses at ZEITOUN Egypt 426 In Wadi on MUG-SHUBEE stunt 427 Tractor drawing 60 lb gun towards front line 428 Sultan's mother's place at HELIOPOLIS = City of the Sun 429 Camped on the sands outside RAILHEAD, Jump off for SINAI campaign 430 G Turner & A Lockwood out for a camel ride. 431 GAZA and Nile floods from top of Pyramid 432 Baby refuses to carry his harness and his pal wears an astonished look 433 No caption 434 Turkish Officers 435 Regt HQRS at IBEETA 436 No caption 437 3rd Machine Gun Squadron 3rd ALH Bgde (my unit) 438 Camel Corps at dinner 439 KHEFREN Pyramid snapped from top of Cheops 440 CHEOPS 441 Pyramids 442 MENA from top of Pyramids 443 Snap from Pyramid showing MENA-CAIRO road running through Nile floods 444 MENA village from Pyramid 445 Band of British West Indies Regt 446 Gippo Band 447 Swimming on Med Sea 102 KmA 448 H Maddocks 449 Bedouin and Egyptians utilise any animals for their fields 450 Captured Turkish train - BEERSHEBA 451 Gardens ISMAILIA 452 Gippos used for horse lines etc 453 Canteens at HELIOPOLIS 454 3 ALHB watering in Wadi on ESSANI stunt 454 JAFFA 455 ALEX, Napoleon relics 456 Egyptian water wheel 457 SUEZ 458 WADI GHUZZEE 459 On Reconnaissance at 10-60 460 Goats and sheep captured from hostile Bedouins 461 Pontoon SERAPIUM 462 Aust trenches - Suez Canal. Turks attacked FEB 1916 463 Camel transport 464 3 ALHB Wireless Station. Col Scott 9 LH got DSO on this stunt (MUCK SHUBE) 465 ALEXANDRIA 466 Canal Hospital Ships 467 Ambulance - Sand cart 468 At old Cairo 469 No 1 Casualty Clearing Station 470 3rd Brigade on move 471 3rd LHFB- Making camp SERAPIUM 472 Watering horses 473 Moving up wadi 474 The wells at Wadi GHUZZEE 475 Camel transport SINAI 476 Turkish reservoir destroyed by ALH 477 Wall in a Luxor tomb 478 Entrance to "Temple of Bulls" 479 Bob White 480 Bedouin crops 481 Harem of Montazza, Turkish prince 482 Jack Holmes, Billy McGhee 483 MUDERIA, B Troop post 484 JIFF JAFFA 485 Natives on railroad construction 486 Aust graves SHALLAL 487 The Stumpy Mirror 488 R Nile at MANSUREH 489 Aust graves - BEELAH 490 NOUZEH Gardens - ALEXANDRIA 491 On issue from QMS. Take what comes. Fit does not matter 492 MATARA 493 German Yacht Club - ALEX 494 Old Turkish Howitzer and cannon ball 495 Field hospital 496 Gardens at BARAGE 497 A dispute's ending 498 Snow. MT LEBANON 499 Bedouin sheep 500 Combat in the air 501 no caption 502 Old Napoleon gun 503 Gordon Wake HQ car 504-5 Burying the dead at GAZA 506 Water Polo 507 Brigade boxing comp 508 Field cooker 509 Bridge on Jerusalem road, Blown up by Turks 510 Teaching horses to lay quiet. For protective purposes 511 "Major" and "Bitsy" 512 Bedouin Scarabs 513 Convalescent 514 1. W Billings. Returned to Aust 2. W McMahon KIA 515 Hospital 516 Coming good 517 1st day up - 14th AGH PORT SAID 518 Back again in Regt 519 Billy and Taffy 520 Stew 521 KHAN YUNIS 522 MENA 523 Casualties PORT SAID 524 Washing 525 Mail 526 Gun from the "Emden" mounted in Syney 527 MARSURES 528 Desert bivouac 529 HASSED 530 3RD ALH Bde. Good camp (Extra) All conv's 531 New issue 532 On to another camp (8 LH Regt) 533 Shore - JAFFA on MED SEA Photo Captions Volume 2 (Illegible = ?) 1 The Cedars on Mt Lebanon, according to tradition originated from the staves of the 12 Apostles 2000 years ago. 2 TIBERIUS taken 27th Sept '18 3 NAZARETH taken 20th Sept. German officer and Arab pony 4 TIBERIUS fell on 27th Sep. Von Saunders was the GOC of Turkish Forces in Palestine 5 Jordan Valley & Plains of Jericho run between Mts of Moab & Hills of Solomon. Distance across valley from foot of each range of hills abt 13 miles, looks ? 6 Storm on Sea of Galilee 7 DAMASCUS fell on 1st October. German vehicle park. 8 German funeral near Jerusalem 9 JENIN. German Headquarters. Fell 20th Sept. German field bakery 10 Three pages back will be seen a storm on GALILEE. Note now calm here. This photo taken near spot from which the previous one was taken. German motor launch on Galilee. 11 Captured intact on 20th Sept. German workshops JENIN 12 Turkish aerodrome captured here. Hostile aircraft landed whilst it was in our hands. Aviators greatly surprised and even indignant. Motor smash near EL FULE. 13 German Orderly Room (Ammunition box full of gold), DAMASCUS. All this gold Turkish coin secured by our troops. 14 German artillery on the way to the front near KENETRA. The ALH swooped down on the artillery around this vicinity & captured many field guns. 15 German Despatch Rider on the road to ES SALT. Unsuccessful raids carried out on ES SALT on 30th April & 4th May. This country was hard on men and horses. Goat tracks were used at times but horse were led most of the time. Stunt lasted 14 days in wet weather & horses were only unsaddled for about 2 hours during stunt. 16 Strand, ? , Tiberius, Gallilee 17 German workshop. Captured by ALH 18 One of the dead lying outside GAZA. Killed 19th April 17. We could not bury them before November 19 Some of the boys that fell in the charge at BEERSHEBA. Tibby Cotter 20 Collecting our dead for burial. They were K in A on the 19th April at GAZA. Buried seven months later, 23,000 casualties in one day 21 German U-Boat 22 Page of postage stamps and money - Struck to commemorate Gallipoli victory - Turkish war postage stamps - War duty - Turkish war bank notes 23 Pamphlet. With paper badges affixed These badges were worn by young Egyptian students. Arabic translation means "Egypt for Egyptians Long Live Egypt" This pamphlet was printed under German influence & distributed around ZAG-A-ZIG, the chief centre of hostilities during the recent Egyptian riots. The Young Egyptian Students influenced the Natives to oppose British Administration, what they called Tyranny. They professed to have sufficient competent educated men to govern their own affairs, but our Heads would not hear of it. Consequently the riots. Many ? and soldiers killed. All railways and communications disorganised. It took several months to bring things to their normal ? Pictures of medals 1. In honour of General Falkenhaugh GOC Turkish Forces 2. The Victorious Emperors of Germany, Austria and Turkey 3. Egypt Awakening 24 Those large photographs I sent you were procured for me by a pal who knew the chap that owned the negatives. The owner of these snaps belongs to the 5th Regiment of the 2nd Brigade, and he took the camera from a Turkish Officer. It had only 6 snaps of a spool of 10, and the BIll Jim finished off the spool by taking 4 of the special entry into Jerusalem. The cross indicates those taken by the Australian, the remainder were taken by the Jackos in the vicinity of BEERSHEBA and SHERIA Turkish field bakery 25 Cavalry going up to support their own line. However never had much action against the Turkish horsemen 26 Turkish Electricians in the field. I have an idea that this photo was taken to get the centre figure. He looks dinkum Australian. Note Australian leggings on Turk on the right 27 Turkish machine gunners ready for action. This is very much like the Beersheba country. Turkish officers on the right, and along side him is the range taker with his Barand Stroud. We use these instruments in the Sqn and they cost about 83 (Pound) 28 Turkish General Head Quarters just beyond SHERIA. Note hard rocky country 29 Turkish Cavalry watching a fight and getting ready to go into action. This is at SHERIA, and the heavy fighting lasted several days. Plenty of water and the Jacko's tried their hardest to hold on to this pozzie. Often our chaps met the gamer Turks in the dead of night, because both sides were on the same game, crawling down for water. This stunt is known as the Junction Fight. 30 Official entry Dec 11th. The official entry into Jerusalem. Sir G Allenby in the lead with his staff officers of the French and Italian troops accompanying him. Guard represents New Zealand, Australia, England Wales Scotland Ireland and India entering theJaffa Gate 31 Sir Ronald Storrs made Governor of JERU. Captured 9th Dec 17. Reading the Proclamation, General Allenby wearing white breeches. Troops of other nations were present, and the notables of Jerusalem. It was read from the foot of the Tower of David, a place that has been standing since the time of Christ 32 The first of the British troops entering Jerusalem. A few Turkish officers may b seen walking at the head of the column. Populace in a bad plight, very poor and no tucker, and all were greatly overjoyed at the ?? of the British Hundreds and kiddies ill treated ?? (Part of caption missing) 33 10th LH Regt first to enter JERUSALEM. Mounted officer on the right supposed to be the CO of the first troops to enter Jerusalem. Note mud on the horses. Had very wet and muddy weather 34 Dead Jacko 35 Turkish machine gun and crew 36 Hanging Armenian doctors who refused to join Turkish Army 37 Outside Damascus Gate Jerusalem 38 Turkish patrol lying outside trench at EL BUAJ 39 Burying Aussies at DAMASCUS 40 1. Djemel Pasha 2. General Limon Von Saunders GOC Turkish Forces in Palestine 41 One execution in Egypt. Executing an Egyptian offender 42 Turkish atrocities DAMASCUS 43 Turks occupying trenches outside JERICHO 44 On ASLUJ demolition stunt. Feeding and spelling. Arrived at Rendezvous too early 45 Turkish saw bayonet 46 Captured guns taken at BEERSHEBA & SHERIA 47 Our gunners obtained a direct hit on ammunition train 48 The large and small of the game. At GAZA. 74th CCS in background 49 Around JULIOUS. These Turkish shell dumps were very numerous around this vicinity 50 Captured Turkish Cavalry 51 Cavalry leaders 52 Turkish machine gun & crew 53 Enemy officers. One on left is wearing Iron Cross ribbon 54 Captured Austrian boat afire, Suez Canal Port Said. 40,000 cases of benzine aboard. Fire a mysterious outbreak 55 ? Hotchkiss gunners and enemy aircraft over ? TELL-EL-FARA 56 Types of enemy officers. One of our bikes in their possession. Recaptured later. The five pointed medals worn by these officers is called the Gallipoli Star. Issued to commemorate the Turkish victory at Gallipoli 57 Our batteries put in some good shooting amongst Turkish transport 58 Showing compactness of Turkish trenches 59 Desert homes. The only time we had cover in SINAI was when we camped near a Hod. Then we could use date palm leaves 60 JIFF JAFFA 61 ZAITZOUN 62 10th Regt MGS amongst hills outside JERUSALEM 63 Jews wailing place JERUSALEM 64-5 German post card characters 66 Post Card PHYLAE The Kiosk 67 Post Card Vue du Canal de Suez 68 Post Card No 93 Queen Street, Fort, Colombo 69 Snipers at NALIN Sth Syria. Lousy country for richochets. Nast wounds. (Aust War Memorial Melbourne) 70 Myself on Ginger. This little neddie is boshter jumper 71 Magazine cutting - Lt C H Vautin & German airman G Felmy 72 9th Regt 3rd LHB Judean Hills outside JERUSALEM. (Aust War memorial Melbourne) 73 Sand hills SINAI ? Desert (Aust War Memorial Melbourne) 74 3rd LHB spelling at GALILEE (AWM Melbourne) 75 Jordan Valley outside JERICHO (AWM Melbourne) - lovely Jordan Valley, dust and heat, 1280 ft below sea level 76 Copy of no 69 77 Watering at MATARIA 78 A desert grave - Tpr H R Olver MM 6th LH MGS Beneath this simple cross there lies a comrade true and tried He fought as fights a soldier And like a soldier died 79 B Section. When they first took our Stetsons and issued cumbersome helmets 80 Palestine types of Turkish and German officers 81 Some of the gunners amongst the snows in MT LEBANON 82 The country around JERUSALEM 83 JERUSALEM 84 Fishing ? ? at GALLILEE 85 Jerusalem taken Dec 9th. Official entry on the 11th. Jerusalem (showing) Holy City and Mosque of Omar 86 Turkish shell hits old tomb at ZERNUKAH. Capt Hurley official photographer - AWM Melbourne 87 14th AGH at PORT SAID 88 Human bones at Dead City ABBASSIA 89 3rd ALH Bde at HELIOPOLIS 90 Men wearing gloves 91 Wireless station in course of erection at MATARIA - 28 masts 92 Old slave market at ABBRASSIA. Many excavations performed on projecting wooden frame at corners 93 3rd guns on the move. The beautiful scenery between LATRON & JERUSALEM 94 Bedouin agents 95 Collecting captured enemy material 96 Captured double-engined plane 97 On the march. Country at Eastern SINAI 98 Anzac mosaic found at SHALLAL whilst trench digging now covered with gun etc ready for removal. Was sent to Canberra. 99 A Troop watering. A rotten job at a small well when horses are thirsty 100 The new Jericho road. Running through Hills of Solomon Valley in distance 101 Gun inspection 102 Draining pools at WADI AUJA. Keeping down Malaria carrying mosquitos 103 8th Regt and 3rd AMGS at BEELAH 104 A rendezvous in the Jordan Valley 105 2nd ALHB camped outside JERUSALEM 106 WADI AUJA in the Jordan Valley 107 Hospital train on the beach at EL -ARISH 108 Jacko's 109 Jerries 110 Stables of Turkish Headquarters SHALLAL 111 Early training. Every man to throw and quieten his horse for purpose of taking cover 112 A Troop 3rd Guns at TAALAT-EL-DUMM 113 Watering at WADI GHUZZEE 114 J Rushden KIA at ES-SALT 115 J Carling F Troop 3rd AMGS. Taken prisoner at EL-BURJ. Repatriated after Armistace 116 Captured enemy plane 117 Jacko gun 118 Brig-Gen Galloping Jack Royston. OC 3rd ALH Bde 119 Cleaning ammunition belts in the Hod at MASAID 120 Bringing up the fodder at ABBASSAN-EL-KEBIA 121 Some of the boys amongst the snow on MT LEBANON 122 Turkish barley crops at SHALLAL in Southern Palestine 123 The crops a few weeks after our horses had been in this vicinity 124 Clearing up after a stunt 125 On the move. 5 minute spells for the horses 126 In Jordan Valley. An airial torpedo lobbed amongst 3rd MG Transport horses & killed 28 127 Camel ration convoy coming along beach 128 Field Hospital at ET MALER 129 Desert graves at ROMANI 130 A day on the beach. Wash self, horse and clothing 131 Watering on the beach at BEELAH. Note how close fresh water is to the seashore 132 A patrol caught by a shell 133 Spello 134 Crossing the Wadi 135 Halt! Weights off and feed 136 Gas instruction 137 F Troop at TELL-EL-FARI 138 Xmas Dinner at MASAID 1916-17. Arrived back at this camp Xmas Eve after 5 nights & 4 days in saddle & the capture of MAGHDABA 139 Exercising along the beach at MARA-KHEB 140 Watering at a Bedouin well 141 At Sheikh's ZOWAID 142 3rd Gun Squadron at ABBASSAN-EL-KEBIR 143 Captured plane on its way to Australian Aerodrome 144 One of our planes about to pass over Hod 145 E & F Troop horse lines and horses 146 Sun set on Med Sea 147 Beach scene at EL-ARISH 148 Turkish transport. Small animals but they can pull big loads and they possess large hearts 149 The dressing station JIFF JAFFA ? 150-8 Types of Egyptian women - Nubian - Fellaheen - Sudanese - Low class Gippo - Egyptian - Middle Class -Egyptian Aristocracy - Turkish 159 French girls on beach at PORT SAID 160 Bedouin girls drawing water 161 Egyptian flappers at ALEXANDRIA 162 Post Card- Dame Turque 163 Post Card - Jeunne Fille Arabe 164 Graves of New Zealanders at RISCHON 165 Graves of Australians at DEIR-EL-BELAH 166 Race day. The saddling paddock 167 Bivouacs 168 3rd ALH Brigade at TRIPOLI 169 Advance party putting down horse lines at KHAN YURIS 170 Breaking the desert monotony 171 WADI QUELT. Taken from one of its precipitous banks 172 Turkish stores on N shore of DEAD SEA 173 Watering at Solomon's Pools 174 Waiting for action at - ES DUN (AWM Melbourne) 175 Camel Corps in action SINAI (AWM Melbourne) 176 ALH Time to Camp (part missing) (AWM Melbourne) 177 3rd Machine Gun Squadron IBU-HARITH, Lieut Breed, McLeod, Guppy, Whyte 178 Cartoon sketch - "A Digger" 179 Turkish Cavalry 180 Gun crew of No 2 Sub F Troop, 3rd Gun Sqdn 181 Operating base of JIFF JAFFA stunt 182 One of the British war boats that cooperated with the Land Force 183 Military railway line passing through a Hod in SINAI 184 AL-MINAH The sea port of Tripoli, Syria 185 NAZARETH Taken on 20 Sep 18 186 The Monastery on the Mt of Temptation, Taken from a cave on opposite hill. 187 JAFFA From the beach 188 In Monastery on the Mt of Temptation Rock on which Christ spent his 40 days 189 Cross indicates Garden of Gethsemane. Arrow at Russian Church of St Magdalene. MT of Olives on left 190 The Roman Bath at MONTAZAH. Hewn out of solid rock 191 Mine sweeper ashore near SHEIK'S ZOWAIL 192 Throwing "Chester" for an operation 193 The swimming pozzie at LAKE TIMSAH, ISMAILIA. Half a mile from MOASCAR, the Aust Training Depot 194 The remains of Napoleon's road. Portions can be seen running between BEELAH & GAZA 195 Camels utilised for ambulance work 196 TULKERAM taken on 19th Sep. This stunt started the previous night and this position fell to us the first day. About 60 miles from starting point 197 German officer at mess, JERUSALEM 198 German Headquarters SEMAK 199 TIBERIAS 200 Water preservation scheme at SHALLAL 201 A dip in the Jordan River. Crossed river on night 21-22 April 18 202 Watering and a wash up 203 JERICHO Taken on 21 Feb 18 204 Turkish graves 205 KHAN YUNIS. Southern Palestine, Note how sand ridges from the beach meet vegetation area. Fertile land 20 miles in width. the beginning of PHILISTIA 206 TAUBE-OVER 207 Drawing drinking water in Wadi GHUZZEE 208 The swimming pozzie in JORON 209 Landing stores at EL-ARISH 210 A camp near the wadi 211 Railway line and bridge crossing wadi above SHALLAL 212 The mid-day halt 213 Turks and Aussies at Dressing Station on beach 214 Washing day 215 Bringing supplies ashore 216 Trying mules in a 60 pounder 217 The desert winds have blown away and left this piece standing 218 Pontoons used by the Turks in their attempt to cross Suez Canal Feb 15 219 "HASSEIN" 220 "GIPPO" Mascot of 3rd AMG Sqdn 221 "Biddy" 222 Railhead camp 223 Typical Bedouin 224 Motor Submarine chaser dvr whyte, photos, ww1, light horse field ambulance -
 Orbost & District Historical Society
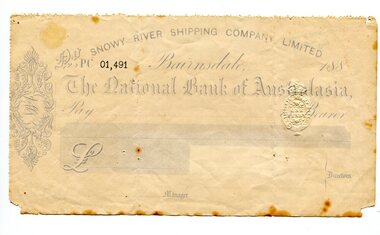
cheque, 1880's
... Towing a line of small barges these paddle steamers plied their trade between the port of Marlo, and the farms along the river banks, churning their way almost twenty miles upstream to a landing beside what is now Frank Richardson’s property. On these trips, the barges carried mail and supplies to the townspeople and farmers, loading...Towing a line of small barges these paddle steamers plied their trade between the port of Marlo, and the farms along the river banks, churning their way almost twenty miles upstream to a landing beside what is now Frank Richardson’s property. On these trips, the barges carried mail and supplies to the townspeople and farmers, loading ...Snowy River Shipping Company formed in 1880. They were soon shipping produce (mainly vegetables) from the area to Melbourne. The Snowy River Shipping Company was formed by Mr Henry James during the 1880s, with Captain McNeil as master. Captain Hegarty was the shipping agent at Marlo. Towing a line of small barges these paddle steamers plied their trade between the port of Marlo, and the farms along the river banks, churning their way almost twenty miles upstream to a landing beside what is now Frank Richardson’s property. On these trips, the barges carried mail and supplies to the townspeople and farmers, loading their produce, mostly maize, on the return trip to the coast. The coming of the railway in 1915 spelt the end for the little river boats. ( ref. F. W. RODWELL in the “Snowy Review”) Frank Richardson 1877-1950 was a sawmiller at Tabbara and helped build and run paddle steamer "Curlip"as engineer.This item is associated with an early transport business of the local district. The Snowy River once had its own paddle steamers. This item is reminiscent of that time.A light blue and white blank cheque for the Snowy River Shipping Company. The cheque is for The National Bank of Australasia and is numbered 01,491 in bold black print. It has a one penny stamp duty imprint.snowy-river-shipping-company james-harry -
 Flagstaff Hill Maritime Museum and Village
Photograph, C. 1915 - 09/07/1917
... At a hearing later on, the Marine Board could blame on no-one either, but found that the ship had been swamped by heavy seas, and had listed to one side when a load of 40 tons of coal in sacks on her deck shifted. The tow line to the ASTORIA was cut to try and save the tug but a huge wave swamped her, crashed open the engine room door and flooded the compartment. ...At a hearing later on, the Marine Board could blame on no-one either, but found that the ship had been swamped by heavy seas, and had listed to one side when a load of 40 tons of coal in sacks on her deck shifted. The tow line to the ASTORIA was cut to try and save the tug but a huge wave swamped her, crashed open the engine room door and flooded the compartment. ...This black and white photograph of the tugboat NYORA towing the steam ship INVERNESS-SHIRE was taken between 1915, when the INVERNESS-SHIRE was dis-masted, and 9the July 1917, when NYORA tragically sank. The sailing ship INVERNESS-SHIRE was a four masted steel barque built in 1894 by Robert Duncan & Co. Limited, Glasgow, U.K. (The supervising engineer during the building was William Cumming. He accompanied every ship he’d built on their maiden voyages from UK to Melbourne.) In 1916 she was purchased by A/S Christiansand (Sven O. Stray), Kristiansand, Norway and renamed SVARTSKOG. In October 1920 she disappeared at sea, carrying a cargo of coal, and all hands were lost. The steam powered NYORA was a powerful tugboat and a salvage vessel built by J.P. Rennoldson & Sons Ltd, South Shields, Tyne and Wear, UK. She was originally launched with the name NEPEAN in May 1909, then as NYORA in August 1909 and registered in Melbourne in November 1909 by owners Huddart Parker Pty Ltd. She was made of steel, had triple-compounded steam engines, and her dimensions were 306 ton, 135.0 x 25.1 x 13.6ft. The Melbourne tug NYORA was known as “one of the best known tugs in Victoria, and carried the latest appliances for firefighting and salvage purposes.” She serviced the Port of Melbourne for most of her career. In July 1917 NYORA was towing the American schooner ASTORIA from Port Pirie to Sydney, because ASTORIA’s engines had broken down; she had been delivering a large cargo of timber. On July 9th the vessels were two days out from Port Pirie. At 10:30am NYORA foundered after casting off at Cape Jaffa, 50 miles south of Kingston, South Australia, and sank. Only 2 of the 16 crew survived; NYORA’s Master, Captain W.M. McBain (William Murray) and helmsman, able seaman Gordon Lansley. They were rescued by the two Cape Jaffa light keepers, Jamieson & Clark, who launched the rescue from the Cape Jaffa lighthouse on Margaret Brock Reef. Both men were brought to the lighthouse keeper’s cottage where they recuperated after their long exposure to the rough. (The Queenscliff Sentinal of 14th July 1917 noted that both saved men originated from the same district; Gordon Lansley was from Queenscliff and Captain McBain formerly from Point Lonsdale.) The ASTORIA was “in a very dangerous position ten miles west of the Margaret Brock reef near the Cape Jaffa lighthouse, setting towards the land.” Captain Solly from Beachport later said “Owing to the position … the ship was very fortunate in making Guichen Bay in safety, as she did” (Guichen Bay is south of Robe). Captain Bull, manager of Huddart Packer Pty Ltd, NYORA’s owner, was unable to see any reason for the foundering, as the NYORA was well known for its seaworthiness. At a hearing later on, the Marine Board could blame on no-one either, but found that the ship had been swamped by heavy seas, and had listed to one side when a load of 40 tons of coal in sacks on her deck shifted. The tow line to the ASTORIA was cut to try and save the tug but a huge wave swamped her, crashed open the engine room door and flooded the compartment. It was impossible to launch the lifeboats due to the listing of the sea and NYORA sank within 15 minutes. There was some criticism of the length of time it took Captain Solly and the lifeboat crew to get from Beachport to Cape Jaffa to help with the rescue. However, they had great difficulty in the very strong seas, taking 9 hours just to reach Robe, which was only 32 miles away. There they filled the tanks with ample benzene for the task ahead (impossible to do at sea at the time), took in food and brought on board the Robe Harbour Master, Mr Sneath. The Harbour Master was then able to safely pilot the lifeboat to Cape Jaffa in the smoother coastal waters, saving very much time, but by the time they arrived at Cape Jaffa the 2 survivors had already been taken to the lighthouse on the mainland. There was also a question as to the chances of the ship ASTORIA lowering a lifeboat to help with the disaster. Captain Solly explained that it would have been impossible without sacrificing the lives of the lifeboat crew , due to the great height of the ship out of the water and the roughness of the sea. Captain Svenson, of the ASTORIA, said himself “We are ourselves in a helpless position” and “"Cannot see anything of lifeboats”. One of the 14 lost crew of the NYORA was Hugh Edwards, whose body was not recovered. The descendants of Captain William McBain have continued the seafaring heritage. His son was also a tugboat captain (Captain Norman Clive McBain), working mostly from Reid Street Pier, Williamstown, who would often take his own grandson out to sea to spend time with him on his tugboat. Now that grandson has built a tugboat in memory of his heritage and spends time in it with his own grandson. The Cape Jaffa original lighthouse has been dismantled and moved to Kingston and is now a Lighthouse Museum. The attached photographs of Margaret Brock Reef, and the Cape Jaffa Lighthourse keeper's cottage (now in ruins) is courtesy of Capt. William McBain's great grandson, who visited the area in 2015. There is a model of the NYORA in Museum Victoria, donated by Huddart Packer & Co Ltd. in 1937. This photograph is significant for its association with the tugboat NYORA, that is part of the seafaring history of the Port of Melbourne and associated Victorian ports. Black and White photograph of the tugboat NYORA and steam ship INVERNESS-SHIRE. C. 1915-1917.flagstaff hill, warrnambool, shipwrecked-coast, flagstaff-hill, flagstaff-hill-maritime-museum, maritime-museum, shipwreck-coast, flagstaff-hill-maritime-village, historic maritime photograph, lighthouses, shipwrecks, steamships, j.p. rennoldson & sons ltd, huddart parker pty ltd, nepean, nyora, inverness-shire, astoria, captain w.m. mcbain, william cummings supervising engineer, cape jaffa lighthouse, beachport lifeboat, captain solly, captain svenson, margaret brock reef -
 Upper Yarra Museum
Negative Photographic Reproduction, Smithy Workshop Millgrove
... "Smithy Workshop Millgrove" In the immediate and far background is the bush, central to this is the Smithys Workshop, it has a pailing roof and walls, there is a door left front, to the left above the dray wheel is a young man milking a brown and white cow, front left is the dray, with a young boy standing between the dray shafts holding a horse, next is a young Mother with a little girl, next to her is Dad with a hat and apron, he is the Smithy, he is holding a horse still with its yoke on, next is an older man wearing a suit and hat, holding a horse still yoked and harnessed, behind them is another horse near the workshop door, next is a horse yoked and harnessed to another horse and behind that is a sawn load of timber, next to the last horse is a man holding it, he is dressed with a vest and shirt sleeves and hat, at the end of the workshop is a lean-to shed which is probably the dunny, behind the load of timber there is a building with a 4 pane window and making an L shape another building, they appear to be on stumps , roof line is not distinguishable, the horses all seem like "Clydsdales"...."Smithy Workshop Millgrove" In the immediate and far background is the bush, central to this is the Smithys Workshop, it has a pailing roof and walls, there is a door left front, to the left above the dray wheel is a young man milking a brown and white cow, front left is the dray, with a young boy standing between the dray shafts holding a horse, next is a young Mother with a little girl, next to her is Dad with a hat and apron, he is the Smithy, he is holding a horse still with its yoke on, next is an older man wearing a suit and hat, holding a horse still yoked and harnessed, behind them is another horse near the workshop door, next is a horse yoked and harnessed to another horse and behind that is a sawn load of timber, next to the last horse is a man holding it, he is dressed with a vest and shirt sleeves and hat, at the end of the workshop is a lean-to shed which is probably the dunny, behind the load of timber there is a building with a 4 pane window and making an L shape another building, they appear to be on stumps , roof line is not distinguishable, the horses all seem like "Clydsdales". ...The Smithy job is very important in any town or settlement, horses need shoeing reguarly, and drays, carts and jinkers need their Tires replaced or tightened, also their are many other jobs that they perform.Negative Black white Scanned at 600 dpi. "Smithy Workshop Millgrove" In the immediate and far background is the bush, central to this is the Smithys Workshop, it has a pailing roof and walls, there is a door left front, to the left above the dray wheel is a young man milking a brown and white cow, front left is the dray, with a young boy standing between the dray shafts holding a horse, next is a young Mother with a little girl, next to her is Dad with a hat and apron, he is the Smithy, he is holding a horse still with its yoke on, next is an older man wearing a suit and hat, holding a horse still yoked and harnessed, behind them is another horse near the workshop door, next is a horse yoked and harnessed to another horse and behind that is a sawn load of timber, next to the last horse is a man holding it, he is dressed with a vest and shirt sleeves and hat, at the end of the workshop is a lean-to shed which is probably the dunny, behind the load of timber there is a building with a 4 pane window and making an L shape another building, they appear to be on stumps , roof line is not distinguishable, the horses all seem like "Clydsdales".blacksmith, horses, millgrove, smithy, workshop, shed, cart sandy ross -
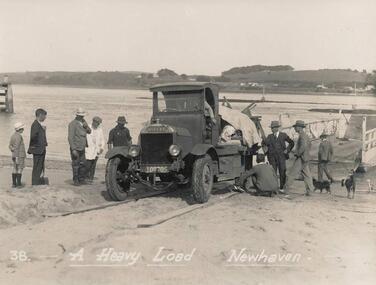 Phillip Island and District Historical Society Inc.
Photograph
... Phillip Island and District Historical Society Inc. phillip-island-and-the-bass-coast One of a collection of over 400 photographs in an album commenced in 1960 and presented to the Phillip Island & Westernport Historical Society by the Shire of Phillip Island local history photography motor lorry leaving the punt at newhaven black & white photograph coast line transport newhaven punt Phillip Island Punt John Jenner Bryant West 38 A Heavy Load Newhaven Photograph of a loaded motor lorry on planks on the beach at Newhaven with the Punt behind and San Remo distant background. ...One of a collection of over 400 photographs in an album commenced in 1960 and presented to the Phillip Island & Westernport Historical Society by the Shire of Phillip IslandPhotograph of a loaded motor lorry on planks on the beach at Newhaven with the Punt behind and San Remo distant background. The name "Vulcan" on the lorry's radiator.38 A Heavy Load Newhavenlocal history, photography, motor lorry leaving the punt at newhaven, black & white photograph, coast line, transport, newhaven, punt, phillip island punt, john jenner, bryant west -
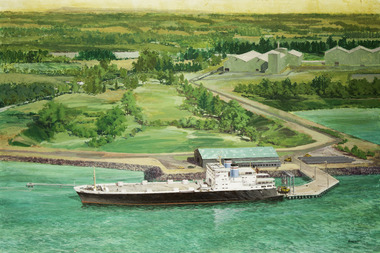 Mission to Seafarers Victoria
Painting - Painting, Acrylic, Ramon Honisett, Untitled, 1990-2000
... The location is probably Hastings Western Port in Victoria - notice the forklifts loading rolls of steel produced at the nearby steel rolling mill - the buildings in the distance. You can see the rolls of steel lined up on the hard stand to the right of the ship. ...The location is probably Hastings Western Port in Victoria - notice the forklifts loading rolls of steel produced at the nearby steel rolling mill - the buildings in the distance. You can see the rolls of steel lined up on the hard stand to the right of the ship. ...Ramon (Ray) Francis Honisett (11.04.1931 - 30.08.2019), Fellow RMIT and medallist specialised in philatelic design, marine and military aircraft painting art and was active in the 1960s - 1990s. Ray Honisett used to live in Rye, in the Mornington Peninsula. According to Gavin Fry's book: The painting likely depicts the Lysaght Endeavour loading at Hastings. "The Lysaght Endeavour and its sister ship Lysaght Entreprise were built in Newcastle in 1973 specifically to serve the regional steel industry on the route Port Kembla - Westernport - Adelaide. Even after being lengthened by 17 metres, the two ships had remarkably short working lines, with both being broken up by 1988."Maritime artLarge framed unglazed landscape format painting predominantly green depicting in foreground a merchant vessel, a roll-on roll-off cargo ship moored at a single quayside on a river or river mouth. The middle ground shows a moderate solid jetty leading to large storage sheds at right. The background appears primarily rural with fields and hills in the distance. The location is probably Hastings Western Port in Victoria - notice the forklifts loading rolls of steel produced at the nearby steel rolling mill - the buildings in the distance. You can see the rolls of steel lined up on the hard stand to the right of the ship. The funnel colours suggest the Australian National Line. The frame incorporates a beige fabric slip with gilt edge the actual dark wood frame also with inset banded gilt edge. The back of the painting is covered with brown paper in places damaged. Hangs on a cotton cord threaded between two screw in eyelet hooks.at lower right corner single uc word in black paint : "HONISETT"tankers, marine painting, maritime art, ramon honisett, ray honisett, anl maritime art prize, acta maritime art prize, hastings, western port, victoria, steel, roll on roll off, forklift, mornington peninsula, artwork-paintings -
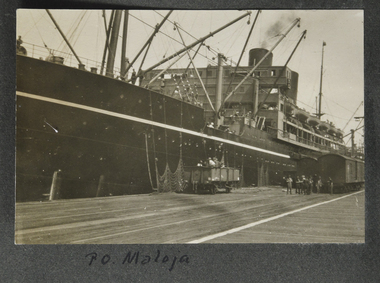 Mission to Seafarers Victoria
Photograph - Photograph, Sepia, P.O. Maloja, 1928
... Men at dockside level are loading or unloading with net in foreground. railway vehicles are lined alongside under a shed. ...Men at dockside level are loading or unloading with net in foreground. railway vehicles are lined alongside under a shed. ...The SS Maloja was a passenger liner operated by The Peninsular and Oriental Steam Navigation between 1923 and 1954. The ship was requisitioned by the Admiralty for service as an Armed Merchant Cruiser upon her arrival at AdenB & W landscape photograph with view from the dock of nearside port bow and superstructure of a moored ship. Men at dockside level are loading or unloading with net in foreground. railway vehicles are lined alongside under a shed. A faint series of letters can be made out near the portholes towards top of bow. This could be name of the vessel. Handwritten in black ink beneath lower edge of image on album page as "P O Maloja" (this may be misnamed) see notes belowsteam ships, world war 2, p.o. maloja, ss maloja, p & o, peninsular and oriental steam navigation company, fan album -
 Maffra Sugarbeet Museum
Beet Basket
... These special cane baskets were lined with a canvas filter cloth. They held three or four beets and were selected at random from a load. ...Maffra Sugarbeet Museum McMahon Drive Maffra gippsland These special cane baskets were lined with a canvas filter cloth. They held three or four beets and were selected at random from a load. ...These special cane baskets were lined with a canvas filter cloth. They held three or four beets and were selected at random from a load. The beet were taken to determine the dirt content after weighing. Dirt and vegetable matter were scraped away and weighed, as was the cleaned beet. The dirt to beet ratio so determined was then applied to the whole load. Only clean beet were paid for. The dirt content averaged eight to fourteen percent, but was higher in wet weather.A cane beet basket, grey colour. It is large, round and woven. There are two arch shaped handles at the top, one on the opposite side to the other. It is strengthened in four places with wire.sugarbeet -
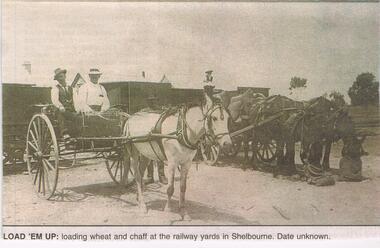 Bendigo Historical Society Inc.
Newspaper - JENNY FOLEY COLLECTION: LOAD'EM UP
... line. NEWSPAPER Bendigo advertiser the way we were Bendigo Advertiser ''The way we were'' from 2002. Load ...The Maldon-Laanacoorie railway line was never completed so Shelbourne became to termination point of this line. The station and railway yards opened in 1891 ad were last used in 1969 after bushfires had destroyed bridges on the line.Bendigo Advertiser ''The way we were'' from 2002. Load 'em up: loading wheat and chaff at the railway yards in Shelbourne. Date unknown. The clip is in a folder.newspaper, bendigo advertiser, the way we were -
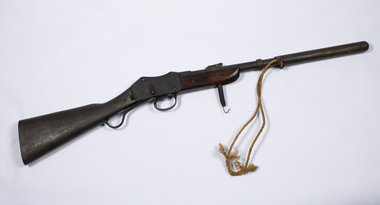 Queenscliffe Maritime Museum
Tool - Line Firing Gun, manufactured by B.S.A. [Birmingham Small Arms Company], Birmingham Small Arms
... Metal breech loading gun with wooden stock and rope canaster for attaching rescue line ...A rare representation of old life saving line throwing mechanisms in use up to the 1970s. lifeboat rescue Line firing Queenscliffe Rifle BSA Birmingham Small Arms Company Trade Marks, B.S.A., [three rifles leaning together]. Metal breech loading ...A line firing rifle used in rescue training by the lifeboat Queenscliffe crew from 1926 to 1976.A rare representation of old life saving line throwing mechanisms in use up to the 1970s. Metal breech loading gun with wooden stock and rope canaster for attaching rescue line Trade Marks, B.S.A., [three rifles leaning together].lifeboat, rescue, line firing, queenscliffe, rifle, bsa, birmingham small arms company -
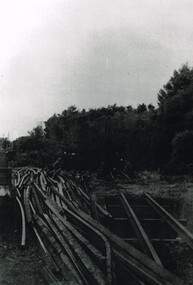 Otway Districts Historical Society
Photograph, Les Ogden, Crowes track being dismantled at ashpit, 1961, 1961
... line the section from Ferguson to Crowes was closed in December 1954, but reopened as far as Weeaproinah in January 1955. The section to Crowes, left to its own devices, was rapidly covered with vegetation which had to be cleared when rail recovery trains later ran. The track to Crowes was pulled up in 1961. colac; beech forest; crowes: railway; Crowes track being dismantled at the ashpit ready for loading ...On the Colac-Beech Forest-Crowes railway line the section from Ferguson to Crowes was closed in December 1954, but reopened as far as Weeaproinah in January 1955. The section to Crowes, left to its own devices, was rapidly covered with vegetation which had to be cleared when rail recovery trains later ran. The track to Crowes was pulled up in 1961. Crowes track being dismantled at the ashpit ready for loading into NQR wagons. colac; beech forest; crowes: railway; -
 Otway Districts Historical Society
Timetable, Victorian Railways, Crowes-Beech Forest line: December 1911, December 1911
... Crowes-Beech Forest-Colac narrow gauge line, December 1911, showing for each station the height above sea level in feet, the miles from Crowes to Colac (and Melbourne), the Station, a mixed train on Tuesdays, Thursdays and Saturdays, a mixed train on other days, and loading factors.. ...Crowes-Beech Forest-Colac narrow gauge line, December 1911, showing for each station the height above sea level in feet, the miles from Crowes to Colac (and Melbourne), the Station, a mixed train on Tuesdays, Thursdays and Saturdays, a mixed train on other days, and loading factors.. ...B/W. Photocopy. Crowes-Beech Forest-Colac narrow gauge line, December 1911, showing for each station the height above sea level in feet, the miles from Crowes to Colac (and Melbourne), the Station, a mixed train on Tuesdays, Thursdays and Saturdays, a mixed train on other days, and loading factors.. colac; beech forest; crowes; melbourne; railway; -
 Otway Districts Historical Society
Photograph, Knox Collection, Train hauling timber to build Colac-Beech Forest railway, 1901, 1901
... line between 1900 and 1902 as work trains were A Class locomotives, otherwise known as 'Coffee Pots'. They were based and serviced at Colac, but coal stages were erected at Barongarook and Wimba water tanks because of the lengthy periods of waiting time required to unload sleepers and rails or to load ballast....line between 1900 and 1902 as work trains were A Class locomotives, otherwise known as 'Coffee Pots'. They were based and serviced at Colac, but coal stages were erected at Barongarook and Wimba water tanks because of the lengthy periods of waiting time required to unload sleepers and rails or to load ballast. colac; beech forest; railway; timber; An A Class train on a revetment hauling timber and men to build the Colac-Beech Forest railway, with a steep hillside in the background.. ...The first engines to run on the Colac-Beech Forest line between 1900 and 1902 as work trains were A Class locomotives, otherwise known as 'Coffee Pots'. They were based and serviced at Colac, but coal stages were erected at Barongarook and Wimba water tanks because of the lengthy periods of waiting time required to unload sleepers and rails or to load ballast.An A Class train on a revetment hauling timber and men to build the Colac-Beech Forest railway, with a steep hillside in the background.. B/W.colac; beech forest; railway; timber; -
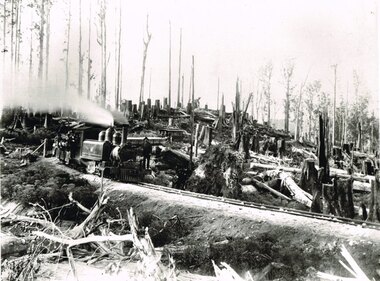 Otway Districts Historical Society
Photograph, Victorian Railways, Between Devitt Bros. Siding & Ditchley, 1901, 1901
... load of NQR wagons a NBB saloon car ended the train. The devastation to the standing timber was deliberate: the Engineer-in-Chief of VR ruled that all trees within a certain distance of the railway line were to be cut down. ...load of NQR wagons a NBB saloon car ended the train. The devastation to the standing timber was deliberate: the Engineer-in-Chief of VR ruled that all trees within a certain distance of the railway line were to be cut down. ...Construction of the Colac-Beech Forest railway line began in 1900 with about 100 men engaged in laying and ballasting the track, as well as others forming the earthworks and building culverts and bridges. The result of this labour saw the railway advance from Colac until it climbed a spur hugging the side of a forty degree slope emerging on top of the ridge at Beech Forest. This photograph was taken 28 miles (45 kilometres) from Colac between Devitt Bros. Siding and Ditchley, just out of Beech Forest. Two 2-6-2 Tank engines of the narrow-gauge A class built by Victorian Railway's Newport workshop, were commonly dubbed 'Coffee Pots'. As well as pulling a load of NQR wagons a NBB saloon car ended the train. The devastation to the standing timber was deliberate: the Engineer-in-Chief of VR ruled that all trees within a certain distance of the railway line were to be cut down. This certainly saved the line from destruction several times in the future.B/W. An NA class locomotive, NQR wagons and an NBB saloon car, all with workmen, going around a bend between Devitt Brother's Siding and Ditchley on the Beech Forest line in 1901.beech forest; ditchley; devitt bros siding, railways; -
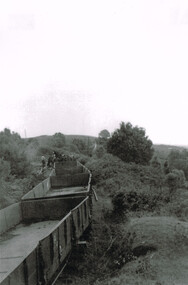 Otway Districts Historical Society
Photograph, Les Ogden, Out of Crowes, 1961, 1961
... On 8 March 1962, after the line from Crowes to Weeaproinah was shut down. Beginning at Crowes, groups of gangers started removing the tracks, loading them into NQR open wagons pushed by locomotive G42....Otway Districts Historical Society Cliff Young Drive Beech Forest great-ocean-road On 8 March 1962, after the line from Crowes to Weeaproinah was shut down. Beginning at Crowes, groups of gangers started removing the tracks, loading them into NQR open wagons pushed by locomotive G42. crowes; beech forest; weeaproinah; railways; B/W. ...On 8 March 1962, after the line from Crowes to Weeaproinah was shut down. Beginning at Crowes, groups of gangers started removing the tracks, loading them into NQR open wagons pushed by locomotive G42.B/W. Four empty NQR open wagons with a group of gangers tearing up the lines.crowes; beech forest; weeaproinah; railways; -
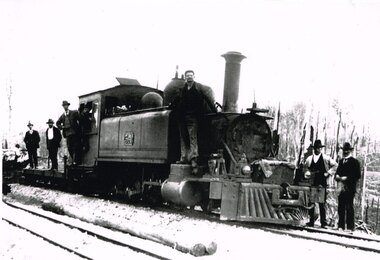 Otway Districts Historical Society
Photograph, Brucker, Beech Forest: Locomotive 5A during construction, c.1902, c.1902
... load ballast meant that a handy replenishment of coal and water supply was necessary. With earthworks specified to the bare minimum landslips in the narrow cuttings were frequent so a repairer was stationed in each length to deal quickly with minor slips until 1904 when the cuttings were widened. beech forest; railways; loco 5a; B/W. The driver and seven other men on locomotive 5A and its flat cars at Beech Forest during construction of the line ...In 1898 a recommendation for a railway of 2 ft 6 in gauge was handed down by the Parliamentary Standing Committee on Railways, to cost $138,000. Construction began in 1900. About 100 men were engaged in laying and ballasting the track while others, not included in the 100, formed the earthworks, culverts and bridges. Locomotive operations initially were two 2-6-2 Tank engines of the narrow gauge A class, dubbed "Coffee Pots", and these were used on the work trains between 1900 and 1902. Because of the lengthy periods of waiting time required to unload sleepers and rails or to load ballast meant that a handy replenishment of coal and water supply was necessary. With earthworks specified to the bare minimum landslips in the narrow cuttings were frequent so a repairer was stationed in each length to deal quickly with minor slips until 1904 when the cuttings were widened.B/W. The driver and seven other men on locomotive 5A and its flat cars at Beech Forest during construction of the line in c.1902. beech forest; railways; loco 5a; -
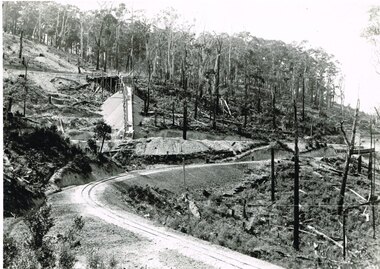 Otway Districts Historical Society
Photograph, Victorian Railways, Gellibrand ballast pit siding, c.1902
... loading bin and chute. The stone proved to be of durable quality so the siding continued after 1902 for periodic track re-ballasting works. The points were set for the main line...loading bin and chute. The stone proved to be of durable quality so the siding continued after 1902 for periodic track re-ballasting works. The points were set for the main line ...In 1902 a ballast siding was opened 4 km south of Gellibrand to provide materials for track construction. A spur siding with a capacity for six trucks was cut into the side of a slope. Above this was erected a loading bin and chute. The stone proved to be of durable quality so the siding continued after 1902 for periodic track re-ballasting works. The points were set for the main line and spiked shut when the siding was not in use. By the mid-1920s the Victorian Railways found it more economic to use ballast from Penshurst, so the siding was closed by 1925 and the rails lifted.B/W. Gellibrand ballast pit siding at 19 miles (30.6 km) south of Colac. gellibrand; gellibrand siding; railways; -
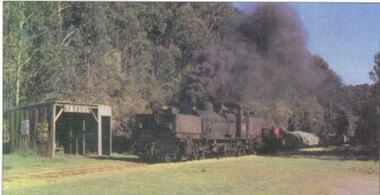 Otway Districts Historical Society
Photograph, R. Preston, Banool: Locomotive G42 and goods, c.1960, c.1960
... By 1912 with the extension of the line to Crowes increased train services on the line required a crossing station in this section of the track, and therefore Banool became a staff and ticket station with a crossing loop and home signals. However, this only lasted for two years and was abolished as an economy measure in 1916. Loading...By 1912 with the extension of the line to Crowes increased train services on the line required a crossing station in this section of the track, and therefore Banool became a staff and ticket station with a crossing loop and home signals. However, this only lasted for two years and was abolished as an economy measure in 1916. Loading ...This original station on the Colac-Beech Forest line was first known as "Moorbanool" after the local parish, and then shortened to "Banool" on 1 November 1904. At first facilities consisted of a passenger shelter, a loop siding for 11 trucks, plus a residence for the ganger of the track gang based there. By 1912 with the extension of the line to Crowes increased train services on the line required a crossing station in this section of the track, and therefore Banool became a staff and ticket station with a crossing loop and home signals. However, this only lasted for two years and was abolished as an economy measure in 1916. Loading figures show that in most years the outwards tonnage at Banool was less than 150 tonnes. The station was reduced to a passenger shelter and goods loop only by 1929, and by the time of closure in 1962 most trains were steaming through.Colour. Locomotive G42 and its NQR goods wagons, loaded and unloaded, steaming past Banool station passenger shelter. 143mm x 274mm print.banool; moorbanool; railways; locomotive g42; -
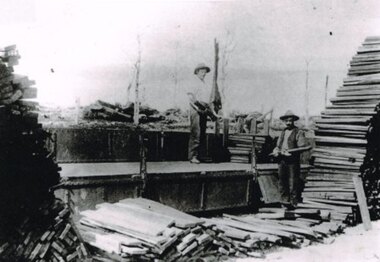 Otway Districts Historical Society
Photograph, R. Preston, Beech Forest: Loading puncheons, c.1914, c.1914
... Logs were hauled to the mill by horses, and the sawn timber despatched over a tramline that joined the Box mill line about 1.2 km (0.75 miles) along. beech forest; railways; puncheons; B/W. Two men loading puncheons (a short post approximately 4 feet [1.2 metres] especially used for supporting a roof in a coal mine) on a NQR wagon at Beech Forest. ...While one of the lesser prime loading points sawn and split timber were loaded at Beech Forest, and a large share of this was brought to the station over two timber tramways that operated between 1904 and 1933. At the eastern end of the railway yard, near the six-ton derrick crane, a wooden tramline curved out the gate and along the road for about 8 km (5 miles) to the co-operative Box Company, known locally as the Box mill, owned by the Victorian Diary Farmers' Co-operative whose purpose was the milling of butter boxes. Other millers also provided timber. Logs were hauled to the mill by horses, and the sawn timber despatched over a tramline that joined the Box mill line about 1.2 km (0.75 miles) along. B/W. Two men loading puncheons (a short post approximately 4 feet [1.2 metres] especially used for supporting a roof in a coal mine) on a NQR wagon at Beech Forest. Note the lack of trees in the background.beech forest; railways; puncheons; -
 Otway Districts Historical Society
Book, Norman Houghton, Rail Centre Colac, 2014
... Each line had its own character and peculiarities derived from its foundation, geography and economic base. As a general rule, the loadings on the branch lines had greater output tonnage than inwards, the reverse of the main line. ...Each line had its own character and peculiarities derived from its foundation, geography and economic base. As a general rule, the loadings on the branch lines had greater output tonnage than inwards, the reverse of the main line. ...Colac was the centre of a spidery rail network over which were carted anything and everything by Victorian Railways, the common carrier throughout the area. The main line through the region was the 35 km rail route from Birregurra (and thence to Geelong) though Colac to Pirron Yallock (and thence to Warrnambool and Port Fairy) from March, 1877, to July, 1883. The first branch line ran from Irrewarra to Beeac in 1889, which then extended in stages to Cressy and on the Ballarat. The second branch line was the 31 km long Birregurra to Forrest in 1891. The cost of building railways into mountainous terrain meant the third branch line was a narrow-gauge 2 foot 6 inch line, first of all to Beech Forest in 1902, and then to Crowes in 1911, for a total of 71 km. The final rail connection was the 16 km branch from Colac to Alvie to facilitate the transport of onions, opening in 1923. Each line had its own character and peculiarities derived from its foundation, geography and economic base. As a general rule, the loadings on the branch lines had greater output tonnage than inwards, the reverse of the main line. The lines traversed agricultural and timber areas where inputs like seed, grass, fertiliser and labour were minor, compared with the output, timber, wool, cream, butter, cheese fruit, potatoes, onion, grain and livestock.Rail Centre Colac. Rail stations in the Colac Otway Shire, 1877 to 2014. Norman Houghton. 1st ed. Norman Houghton; Geelong (Vic); 2014. vi, 262 p.; illus., maps, index. Soft cover.colac; cressy; forrest; beech forest; crowes -
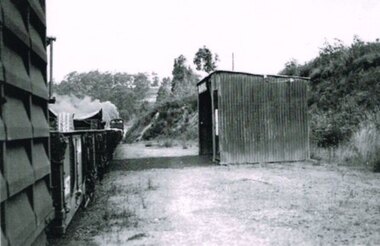 Otway Districts Historical Society
Photograph, Banool Station, c.1940, c.1940
... Increasing train services on the line required a crossing station in this section of track, so in 1913 Banool became a 'Staff & Ticket' station with a crossing loop, home signals, and a station office, although this only lasted two years. Loading...Increasing train services on the line required a crossing station in this section of track, so in 1913 Banool became a 'Staff & Ticket' station with a crossing loop, home signals, and a station office, although this only lasted two years. Loading ...Originally known as "Moorbanool" after the local parish, the name was shortened to Banool on 1 November 1904. At first facilities consisted of a loop siding for eleven trucks and a passenger shelter, plus a residence for the ganger for the track gang based there. Increasing train services on the line required a crossing station in this section of track, so in 1913 Banool became a 'Staff & Ticket' station with a crossing loop, home signals, and a station office, although this only lasted two years. Loading statistics showed that in most years the outwards tonnage at Banool was less than 150 tonnes. From 1924 the amount of timber despatched began a slow rise, but apart from a few years activity was generally slack. The crossing loop, the usually empty goods loop being used if necessary, the home signals and its status as a staff station being removed over the period 1923-27. The track ganger shelter was removed around 1929 and the station reduced to a passenger shelter and goods loop only.B/W. A goods train passing Banool Station, c.1940. -
 Otway Districts Historical Society
Photograph, Crowes: Terminus of the railway line, 1911
... line ended at "The Black Stump". Crowes was designed as a fully functioning terminus and received a complete instalment of facilities. The site was laid out with three roads plus a dead end siding for a locomotive shed and ash pit. Goods sheds, a platform and livestock ramps catered for freight loadings...line ended at "The Black Stump". Crowes was designed as a fully functioning terminus and received a complete instalment of facilities. The site was laid out with three roads plus a dead end siding for a locomotive shed and ash pit. Goods sheds, a platform and livestock ramps catered for freight loadings ...The terminus of the railway, and the southern-most station on the Australian mainland, was Crowes, approximately 2 kilometres from Lavers Hill. The line ended at "The Black Stump". Crowes was designed as a fully functioning terminus and received a complete instalment of facilities. The site was laid out with three roads plus a dead end siding for a locomotive shed and ash pit. Goods sheds, a platform and livestock ramps catered for freight loadings, while on the north side was a station office, waiting room, parcels shed and passenger shelter. Three departmental residences were also provided. The resident Station Master was withdrawn in November 1916 and the station closed with the line on 10 December 1954.Photograph. Terminus of the Colac-Crowes at Crowes.crowes; terminus; "the black stump"; -
Port Melbourne Historical & Preservation Society
Photograph - Wharfies strike at Webb Docks, Ron Laing, 1988 - 1999
... Shows picket line "greeting" bus load of scab workers...Shows picket line "greeting" bus load of scab workers Photograph Wharfies strike at Webb Docks Ron Laing ...Part of Ron Laing's collection of photographs recording Port Melbourne over a thirteen year period. Donated to the PMH&PS by the photographer.One of a set of 20 colour photographs 1980s-90s, of various events and subjects. Wharfies strike during dispute with Patricks on Webb Dock. Shows picket line "greeting" bus load of scab workersron laing -
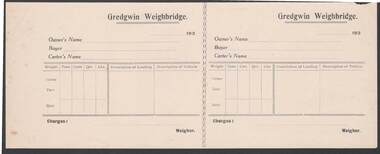 Bendigo Historical Society Inc.
Document - CAMBRIDGE PRESS COLLECTION: DOCKET - GREDGWIN WEIGHBRIDGE
... line 193-.. Owner's Name, Buyer, Carter's Name, Table with Weight in Tons Cwts, Qrs. Lbs, Description of Loading, Description of Vehicle, Gross, Tare, Net and underneath Charges and Weigher....line 193-.. Owner's Name, Buyer, Carter's Name, Table with Weight in Tons Cwts, Qrs. Lbs, Description of Loading, Description of Vehicle, Gross, Tare, Net and underneath Charges and Weigher. ...Gredgwin Weighbridge docket duplicate with a decorated perforated centre. Date line ends 193-. Both dockets are identical. Printed on the dockets are Gredgwin Weighbridge, date line 193-.. Owner's Name, Buyer, Carter's Name, Table with Weight in Tons Cwts, Qrs. Lbs, Description of Loading, Description of Vehicle, Gross, Tare, Net and underneath Charges and Weigher.business, printers, cambridge press, cambridge press collection, gredgwin weighbridge