Showing 401 items
matching enders bridge
-
 Ballarat Heritage Services
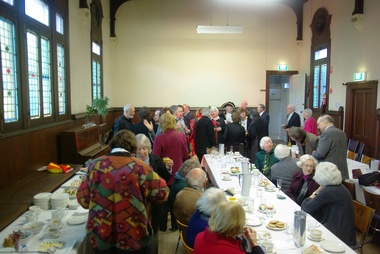
Photograph - Digital photographs, L.J. Gervasoni, Kew Historical Society in the Former Kew Court House, c2009
Environmental approach to preserving Kew Court House 4 June 2010 Paint stripping from older buildings can be a hazardous task. The City of Boroondara has found an environmentally sustainable solution for the works at local heritage icon, the Kew Police Station and Court House. Council used an organic based paint stripping alternative as part of the repairs to the rendering on the building facade. Over nearly three months, the damaged and unsound render was removed, the paint was stripped and the render was repainted. Usually, paint is removed via high pressure water cleaning or sandblasting. This is a harsh method and involves combining extreme high amounts of pressure, water and sand and is highly toxic. It also creates high noise levels. In this 'green' project, Council used a soy bean paint stripper. The process uses a paste-like substance, which is highly effective, non toxic and biodegradable, and applied by hand. Initially, a bandage is applied (much like a leg waxing strip) over the top of paste. It is allowed to dry and then the bandage is stripped off. Noise was kept to a minimum by using the paint stripping alternative. Scrapings and bandages are then bagged and sent to the tip as landfill, so it does not end up in our water supply. The waste and debris don’t run-off into drains, and the bags and bi-products are biodegradable. Studley Ward Councillor Phillip Healey explained that soy bean paint removal is not greatly used in Melbourne or the local government sector. "We know of special cases where it has been used, such as high profile projects like Sydney Harbour Bridge, but Boroondara is one of the first in Victoria to employ this natural plant-based paint-stripping treatment to a large-scale building," Cr Healey said. "What this means is that no harmful substances were used and no injury was caused, soy paint removal also preserves, protects and restores the heritage integrity and decorative stone masonry features of the historic building. "This is a terrific example of our commitment to 'enhancing the environment' which is one of our key directions in the 2010–15 Council Plan." The restoration of the Kew Court House and Police Station is expected to be completed in the year ahead. Council purchased the heritage building in 2007 with the intention for it to be restored and used for the community. The building required extensive renovation including repair of the slate roof and ventilation dome, and the renovation plans include a new foyer, bathrooms and kitchen to ensure the venue meets a broad range of community needs. Heritage Victoria helped fund the cost of the roof repairs with a grant of $250,000, along with the Australian Government contributing $330,000 through its Regional and Local Community Infrastructure Program. Restoration Underway Concept plans for a new performance and exhibition space at the Kew Court House and Police Station have been developed by the City of Boroondara. Two years ago, Council Purchased the Kew Court House and Police Station from the State Government for $825,000 with the intention for it to be restored and used for the community. The building requires extensive renovation including repair of the slate roof and ventilation dome. The renovation plans include a new foyer, bathrooms and kitchen to ensure the venue meets a broad range of community needs. The restoration has been assisted with a Federal Government grant of $330,000 under the Regional and Local Community Infrastructure Program. In 2008, Council was also successful in obtaining a Heritage Victoria Grant of $250,000 towards the costs of the roof repairs. Having satisfied the necessary permit requirements, works are about to commence using slate of a similar quality to the original. The City of Boroondara would like to thank all residents and businesses who have contributed to the Kew Court House Restoration Appeal which has raised $650,000. Special thanks go to a private donor who donated $250,000 and the Kew Senior Citizens Club which contributed $50,000. NEWS FLASH 14th March “Council moves to provide certainty for the restoration of the courthouse”. In a historic meeting last night 13th March 07 at Boroondara Council voted overwhelmingly to complete the purchase of the Kew Court House. The partnership continues between the Kew Court House Restoration Appeal and the Council to see this project through. The project now has the overwhelming support of Council. “It is no longer about “if” it is about “when” the doors will re open” said Prof Peter McIntyre. With the property secured the fundraising can now be completed without the encumbrances and we know the restoration will be undertaken as the funds become available from the appeal. Work can commence as soon as significant fund raising is achieved. “The community, philanthropists and corporations can now enter this project with certainty. 7th March At the Council meeting on 5th March, following many hours of debate a motion was passed by 5 to 4 vote to purchase the Kew Court House and Police Station outright. As of 7th March Cr Dick Menting lodged a rescission notice. This means that there was another Council meeting at 6pm, Tuesday 13th March at Council Chambers. MEDIA RELEASE - Kew, 3rd December 2006 APPEAL LAUNCHED TO SAVE A NATIONAL TREASURE On the morning of Saturday 18th. November 2006 the people of Kew were aroused by the triumphant sound of the Boroondara Brass which had assembled outside the former Kew Police Station. After four long years of neglect, the precinct was being heralded back to life, and what a heartwarming sound it was for all those early shoppers who gathered to hear Cr. Phillip Healey introduce Patrons and supporters of the Save the Court House campaign. Following the speeches, the "Thermometer" was unveiled and the Appeal was formally under way. The various committees have worked very hard during these past weeks. The Kew Court House Arts Association Inc. has been formed under the leadership of Graeme McCoubrie. This organization brings all the amateur theatre groups in the City of Boroondara together with a view to providing them with a permanent performing space within the former Court House. As well as intimate theatre, there will be provision for the staging of instrumental and choral performances before an audience of 40 to 50 people. The Police Station will compliment the function of the Court House by providing a venue for artist groups to exhibit their work, for the Historical Societies of Boroondara to meet, and for study groups to meet, for activities such as play and poetry readings. It will be a Hub for the Arts in Kew. Of course none of this can happen unless the money to pay for restoration of the buildings is raised, and we only have until March 2007 in which to do this. The City of Boroondara, Kew Historical Society and the East Kew Community Bank are working together as a team to make this dream a reality, but WE NEED YOUR HELP. This is a fantastic one-off opportunity, and it must not be wasted. Donations to the Appeal can be made through the Kew East Kew Community Bank or any branch of the Bendigo Bank, or through the Kew Historical Society Inc., P.O. Box 175 Kew Vic 3101. All donations over $2 are tax deductible through the Community Enterprise Foundation. End Media Release Kew Courthouse future looks bright The State Government has accepted an offer from the local government of Boroondara to purchase the former Kew Courthouse and Police Station, Minister for Finance John Lenders said today. In a joint statement with the Mayor of Boroondara, Councillor Jack Wegman, Mr Lenders said he was pleased that agreement had been reached and the contract of sale document finalised. “I welcome the Council making this step towards purchasing this property after recent negotiations,” Mr Lenders said. “The settlement date for the purchase of the property is March 2007. The State government sold the property to Council at a reduced cost of $825,000 for community use. The full value of the buildings on the commercial marketplace was estimated to be about $2million,” he said. Cr Wegman said the Contract of Sale provides that if the funds cannot be raised to restore the property for use as community buildings then they will be returned to the State government. In relation to this additional funding to restore and modernise the buildings, Council and the community will work together over the next eight months, with the encouragement of the State government, Cr Wegman said. Mr Lenders said both he and the Premier had advised the Council of fundraising opportunities to help the Council convert the property for its future use. Cr Wegman noted that applications for funding from the Community Support Fund and for State government heritage grants were being processed. “Council has agreed to a Memorandum of Understanding with the Kew Historical Society outlining arrangements for the Kew Court House Restoration Appeal and Council is delighted with the level of support shown by the community and is confident of a bright future for these historic buildings.” Mr Lenders said the Bracks Government is committed to securing the best outcome when buildings that have once served the community outlive their original purpose. “There is a responsibility for Governments to practice good financial management and achieve the best possible price when an asset is longer used by the State,” he said. “There is also a responsibility to consider the local community. The Government and City of Boroondara have worked hard to achieve a balance between these two interests.” The building ceased to operate as a courthouse in 1971 and as a police station in 2002. Part of the building was also used as a post office and this section of the building was sold by the Commonwealth in 1992 to a private owner and is currently run as a licensed restaurant. It is listed on the State's Heritage Register as a place of historical and architectural significance and is protected by the Victorian Heritage Act. Created: 30 August 2006 Last Update: 10 January 2007 Colour photograph of the Kew Historical Society holding an event in the Former Kew Court House.kew, kew court house, kew historical society, meeting, city of boroondara -
 Dandenong/Cranbourne RSL Sub Branch
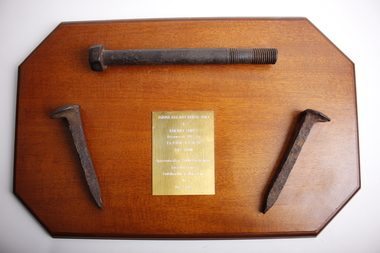
Souvenir - Burma Rail Bridge Bolt & Railway Spikes.On wooden plaque
Plaque with metal railway bridge bolt and 2 metal railway line spikes.Spikes have lip on top to hold rail lines down with chisel shaped ends to by driven into sleepers. Metal bolt used to hold railway sleepers to bridgesNo markings on spikes or bolt. Plaque brass plate engraved-: BURMA RAILWAY BRIDGE BOLT & RAILWAY SPIKES Recovered 1987 By Ex P.O.W V.X. 30397 BILL TOON Approximatly 7,000 Australians Lost Their Lives Building This Railway Line 1942-1945. -
 City of Ballarat Libraries
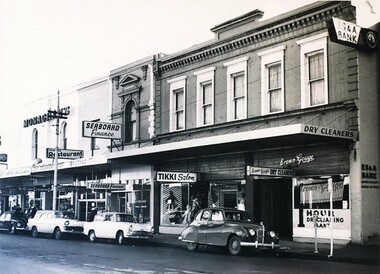
Photograph - Card Box Photographs, Bridge Street, Ballarat 1969
This is the east end of the north side of Bridge Street.bridge street, monaghan's pharmacy, seaboard finance, tikki salon, brown gouge drycleaners, es & a bank, buildings, commerical, vehicle -
 City of Ballarat Libraries
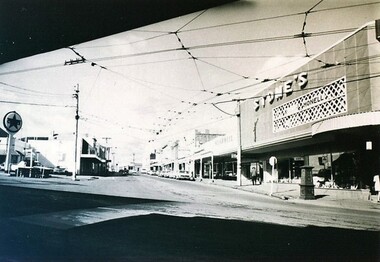
Photograph - Card Box Photographs, Stone's Corner, Ballarat 1969
... the Bridge Mall. Victoria Street ends at the roundabout and becomes... to become the Bridge Mall. Victoria Street ends at the roundabout ...This was the corner of Victoria Street and Main Road. Stone's building is now Intersport. The road in the front of the store is Main Road which swings around the side to become the Bridge Mall. Victoria Street ends at the roundabout and becomes Little Bridge Street and runs down the other side of the building. The road between the front of the building and the roundabout, was closed off.stone's corner, victoria street, main road, buildings, commerical, streetscape -
 Parliament of Victoria
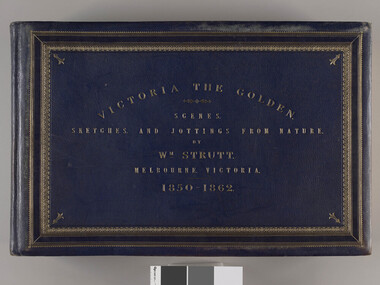
Victoria the Golden, Strutt, William 1825-1915, Victoria the golden : scenes, sketches, and jottings from nature, 1850-1862, 1850-1862, c.1895
"Victoria the Golden" documents life in Victoria between 1850 and 1862 as viewed by artist William Strutt. Momentous events in the Colony’s history such as Separation Day (1 July 1851), the sitting of the first Legislative Council (13 November 1851), the death of Burke (June 1861) and the Black Thursday bushfires (6 February 1851) are depicted. In 1907 the Premier of Victoria Thomas Bent purchased "Victoria the Golden" from Strutt for £120 and presented it to the Library. The album depicts events in chronological order with what Strutt considered “fidelity to nature and accuracy”, so that present day Victorians may view the sketches “as records of what we may now look upon as the dim past in the rapidly progressive history of Victoria”. Victoria the Golden is celebrated as one of the Parliament’s great treasures. It is a testament to William Strutt’s skill as a draughtsman and contains over 100 assorted images which were executed between the years of 1850-1862. Strutt’s particular talent was to be able to step back and record each event with particular care to detail. Many of the pieces contained within this album are littered with notes, such as the correct resting position of a corporal’s sword or details about the cloth and cut of a subject’s jacket. Strutt also notes in one of his many sketches of the new Legislative Council chamber at Spring Street that the President, Sir James Palmer, is seated ‘a little too high’ (page 30). Throughout the album, Strutt’s illustrations bring to life the diverse nature and peoples of the new colony. His range of subjects is comprehensive and includes parliamentarians, lawyers, wives and daughters, merchants, labourers, police and military officers, indigenous communities, farmers, miners, prisoners and explorers. The everyday and the extraordinary are depicted with each turn of the page. 44 leaves heavy card, approximately 1mm thick. Sketches, watercolours and prints of varying sizes and papers are glued onto the pages. Full leather binding in blue leather with title and decorative border in gold. There are four raised bands on the spine, with gold decoration on the bands and at the head and tail of the spine. Marbled end papers and flyleaves. Gold on the edges of the book block. Card pages have a sheet of mottled blue paper on recto. Album leaf connection is a guarded system with stiff stubs and cloth hinges. Each page has a sheet of glassine paper attached at the binding edge to protect the images. Many pages stamped with "Parliament of Victoria" verso. Printed in gold, recto: "VICTORIA THE GOLDEN/ SCENES,/ SKETCHES,/ AND JOTTINGS FROM NATURE./ BY/ Wm. STRUTT/ MELBOURNE, VICTORIA./ 1850-1862" First pages include handwritten 'introductory remarks' and index of plates.parliament of victoria, colony of victoria, separation day, victorian legislative council, burke and wills expedition, wills, william john, 1834-1861, burke, robert o'hara, 1821-1861, strutt, william, 1825-1915, bent, thomas sir, 1838-1909, native police corps, fawkner, john pascoe, 1792-1869, black thursday bushfires, gold rush, princes bridge, melbourne -
 Melbourne Legacy
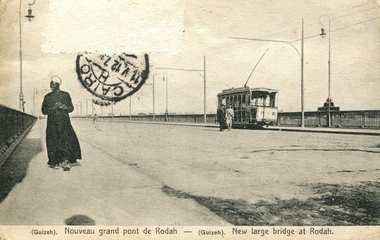
Postcard, New bridge at Rodah, c.1912
Postcards were a common form of souvenirs for soldiers who were travelling either during World War 1, or just after, or while returning to Australia. Was with other World War 1 memorabilia that has come from Private John Basil McLean, 2nd Reinforcements, 37th Battalion, A.I.F. J.B. McLean (Service No. 13824) was from near Maffra, Victoria and enlisted on 22 January 1916. He embarked on 16 December 1916 for Europe. His full war record is available from AWM. He spent time with the Australian Field Artillery (Pack Section). At the end of the war he worked for a year at the A.I.F. Headquarters in London before returning to Australia on the 'Ceramic', arriving Portsea in 1920.Postcards were a very common form of communication in the first World War. This postcard also records Gallipoli for those who didn't have cameras. This type of souvenir would have been familiar to the first Legatees as they had served in World War 1 and many had served at Gallipoli.Postcard showing black and white image of the bridge at Rodah, Guizeh (Giza). Several figures and a tram are also pictured crossing the bridge. A black postal stamp in the top left quadrant of the postcard indicates it was posted from Cairo. The back of the postcard contains a message. Based on the date and location it was posted from, the text could be Egyptian Arabic or it could be Pitman shorthand.Front - “(Guizeh) Nouveau grand pont de Rodah - (Guizeh) New large bridge at Rodah.” Back - “J/15/1912/ CARTE POSTALE / M J?. Hinaul / 20 Rue de Landrecies/ Le Cateau (Nord)/ France/ Ghino Dukich, 21 Rue Nubar Pacha - Le Caire, Egypte/ Serie A No. 25. Reproduction interdite” Stamps - Postes Egyptiennes/ Un Millieme”souvenir, war correspondence -
 Ballarat Tramway Museum
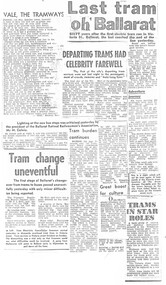
Newspaper, The Courier Ballarat, "Tram Shelter for Christmas Crib", "SEC replies to Lake tram proposal", "A Farewell tram ride", "Keep buses out of Bridge St", "Bus stops blamed for drop in business", "Complaint of parking loss through bus stops", "last journey for 39", "Last tram to start in filmed about Ballarat" "The end for tram 31?", "Destination Hamilton", late 1971
Yields information about the closure of the SEC operated Ballarat system - presented in an unorganised manner and without newspaper dates.Set of 8 foolscap size photocopies on heat sensitive paper of various newspaper cuttings compiled - many duplicated - about the closure of the Ballarat Tram system, mainly from The Courier, Sept to Dec. 1971. Principal headlines are: "Tram Shelter for Christmas Crib", "SEC replies to Lake tram proposal", "A Farewell tram ride", "Keep buses out of Bridge St", "Bus stops blamed for drop in business", "Complaint of parking loss through bus stops", "last journey for 39", "Last tram to start in film about Ballarat" "The end for tram 31?" "Destination Hamilton" - see item 9520 for the original cutting See also Reg item 3165 and 3161 for similar presentations of cuttings. sec, ballarat, disposal, tramcars, btps, shelters, shelters, buses, closure, bridge st, hamilton, shelters -
 Ballarat Tramway Museum
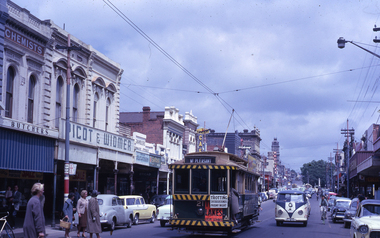
Slide - 35mm slide/s - set of 2, Noel Simons, 24/11/1962 12:00:00 AM
Set of 2 Kodachrome transparencies taken on 24/11/1962. 1163.1 - No. 21 in Bridge St., with destination of "Mt Pleasant" with a Twin Lakes advert and "Trotting Showgrounds Friday Night" auxiliary board on front dash panel. Also Picot & Widmer, chemists shop alongside tram. Tram at a stop with people boarding. 1163.2 - No. 13 and 30 crossing at the end of the double track in Sturt. St, at Grenville St. Both trams have Twin Lakes signs. Photo shows buildings either side of Sturt St.1163.1 - "No. 21 in Bridge St. Ballarat" 1163.2 - "No. 13 and 30 at foot of Sturt St. Ballarat" All have date stamp of "24 Nov. 1962" in purple ink. All black ink unless otherwise noted.tramways, trams, ballarat, bridge st, grenville st., sturt st., tram 13, tram 21, tram 30 -
 Ballarat Tramway Museum
Slide - 35mm slide/s, Noel Simons, 21/11/1962 12:00:00 AM
Set of 17 transparencies taken on 21/11/1962 on Kodak mounts. 1188.1 - Bendigo No. 11 at Depot Junction McCrae and Arnold St. with driver/conductor changing points. 1188.2 - Bendigo No. 4 at Charing Cross, side on photo, with City Club Hotel and Alexandra Fountain in the background. Tram has Castrol and SEC 'Electric Cooking' ads. 1188.3 - Bendigo No. 4 climbing View St. after tram has passed photographer. Tram has Streets Ice Cream and Cohns Soft Drinks ad on rear dash panel. In the background are the buildings in View St., including the Princess Theatre. Tram has destination of Eaglehawk. 1188.4 - Trams 2 and 4 crossing at the California Gully or Thorpe St Loop. 1188.5 - Bendigo 4 in Mt Korong Road. Tram inbound with destination of Quarry Hill, just leaving Garden Gully Loop. 1188.6 - Bendigo 4 and 17 crossing at the Hayes St. or Iron Bark Gully Loop. No. 17 bound for Eaglehawk, No. 4, Quarry Hill. 17 has two SEC roof ads and a white horse whiskey ad. 1188.7 - No. 17 bound for Eaglehawk, soon after leaving California Gully. Has large mullock heap in background. 1188.8 - Bendigo 2 and 17 crossing at the Thorpe St. or California Gully Loop. Has butchers shop in background. 1188.9 - Bendigo 17 at the Eaglehawk terminus. Has destination of Quarry Hill. In background is the hotel and shops at the terminus, showing ads for "Melbourne Bitter". Tram has two SEC 'Electric Cooking' ads. Driver and conductor about to assist two lady passengers with a pram and baby. 1188.10 - No. 17 at Eaglehawk terminus, awaiting departure. Has Eaglehawk Town Hall and Post Office in background. Tram has a Whitehorse Whiskey ad on the front dash panel. 1188.11 - No. 3 in High St. Eaglehawk, with destination of Eaglehawk. Has the shops on the south side of High St. in the background, including the Eaglehawk fish shop. Tram has two roof ads, one an SEC roof ad, and Cohns Drinks and Streets Ice cream ads on front dash panel. 1188.12 - as above, but after tram has passed photographer. Note the centre of the road poles. 1188.13 - No. 2 outbound for Eaglehawk at the intersection of Mt. Korong Road and the Calder Highway. Photo taken after the tram has passed the photographer. Has an Ampol service station in the background. 1188.14 - No. 11 leaving the Bendigo depot, crossing the bridge, with the Scrubber car in the background. 1188.15 - No. 21 at the North Bendigo terminus. Tram has destination of Golden Square and Cohns drink ad on front dash and two roof ads on side. 1188.16 - No. 11 on Golden Square route, in High St. at intersection with Old High St. 1188.17 - No. 11 at the Golden Square terminus, conductor turning the pole. Hotel on the left side of the photo. Note the road works barrier and red flag behind the tram. Slide has an end of roll mark on the right hand side of the image.Information written on in black ink and date stamped on purple ink. 1188.1 - "Birney car No. 11 in McCrae St. at Cnr of Arnold about to run into depot, Bendigo" 1188.2 - "No. 4 at Alexandra Fountain, Charing Cross Bendigo" 1188.3 - "No. 4 climbing the View St. Hill from Charing Cross, Bendigo (Eaglehawk Route)" 1188.4 - "No. 4 and 2 at Thorpe St. Loop, California Gully" 1188.5 - "No. 4 in Mt Korong Rd., Long Gully, Near Havilah Rd. (Bendigo) (Eaglehawk Route)" 1188.6 - "Nos. 17 and 4 crossing on Hayes St. Loop, Ironbark, Bendigo" 1188.7 - "No. 17 soon after leaving California Gully (Eaglehawk Route)" 1188.8 - "No.2 and 17 crossing on Thorpe St. Loop, California Gully (Eaglehawk Route)" 1188.9 - "No. 17 at Eaglehawk terminus" 1188.10 - "No. 17 at Eaglehawk terminus" 1188.11 - "No. 3 in High St. Eaglehawk" 1188.12 - "No. 3 nearing Eaglehawk terminus" 1188.13 - "No. 2 in Mt. Korong Rd., Ironbark. Calder highway on left (Eaglehawk route) 1188.14 - "Birney car No. 11 leaving Bendigo depot. Scrubber car at rear" 1188.15 - "No. 21 at North Bendigo Terminus" 1188.16 - "Birney car No. 11 in High St. Bendigo at intersection with Old High Street (Golden Square Route)" 1188.17 - "Birney Car No. 11 at Golden Square terminus, High St., Bendigo". tramways, trams, bendigo, depot junction, charing cross, view st., eaglehawk, north bendigo, golden square, tram 2, tram 3, tram 4, tram 11, tram 17, tram 21, tram scrubber -
 Ballarat Tramway Museum
Slide - 35mm slide/s - set of 20, Noel Simons, 21/05/1971 12:00:00 AM
Set of 20 transparencies taken on 21/5/1971 on Kodak mounts. 1197.1 - Bendigo No. 5 en route to Eaglehawk at Creeth St Long Gully. Tram has a SEC roof ad and Cinzano roof ad. 1197.2 - No 5 approaching Needle Loop between Long Gully and California Gully. On left hand side is the City of Bendigo sign, indicating city boundary. 1197.3 - As for 1197.2 but actually entering loop. Photo taken after tram has passed photographer. 1197.4 - No. 26 bound for Eaglehawk descending the railway bridge near Eaglehawk, at Jobs Gully. 1197.5 - as for 1197.4, but after crossing bridge, now ascending a hill. Photo taken after tram has passed photographer. 1197.6 - No. 26 climbing High St. hill Eaglehawk, nearing end of Double track, bound for Quarry Hill. Shows centre of the road poles. 1197.7 - As for 1197.6, with tram entering single track section. Photo taken after tram has passed photographer. Has a BP service station in the background. 1197.8 - No. 26 (bound for Quarry Hill) crossing No. 17 (Eaglehawk) at Job's Gully Loop. 1197.9 - No. 17 climbing railway bridge at Job's Gully, en route to Eaglehawk. Photo taken after tram has passed photographer. 1197.10 - No.26 bound for Quarry Hill, leaving Long Gully Loop? Has the Creeth St. church in l197.l in the far background. Photo taken after tram has passed photographer. 1197.11 - Tramway Point work at the northern end of Long Gully Loop. 1197.12 - No. 17 en route for Quarry Hill turning into View St. from Bamard St. Tram has SEC roof ads "Everything fine in my all electric Kitchen' and 'Electric Cooking is Matchless'. 1197.13 - as for 1197.12, but tram has turned into View St and about to enter the double line track. Photo taken after tram has passed photographer. 1197.14 - No. 21 enters Nolan St after turning from MacRae St. en route to Bendigo. Note sign on its own post noting tram turns "Beware Tram Turns" and stop sign on adjacent pole "Trams stop on Request". No. 21 has two SEC roof ads. 1197.15 - No. 21 in Nolan St. after turning from Bridge St. (White Hills Road). Note signal light for Bridge St. loop on pole corner of street. Photo taken after tram has passed photographer. 1197.16 - No. 2 bound for Eaglehawk at unknown location. 1197.17 - Tram stop sign on a pole "CARS STOP BY REQUEST" 1197.18 - No. 5 in Carpenter St.? en route to Quarry Hill. 1197.19 - No. 28 has just arrive at Golden Square terminus, passengers are disembarking and the trolley pole is being turned. Golden Square Hotel in the background. 1197.20 - No. 28 at Golden Square terminus. Has a "Nothing beats Briquettes for hear roof ad. Information written on in black ink and date stamped on purple ink. 1197.1 - "No. 5 at Creeth St. Long Gully" 1197.2 - "No. 5 approaching Needle Loop between Long Gully and California Gully" 1197.3 - "No. 5 at Needle Loop between Long Gully and California Gully" 1197.4 - "No. 26 crossing railway bridge at Job's Gully near Eaglehawk" 1197.5 - "No. 26 just after crossing railway bridge at Job's Gully near Eaglehawk/ 1197.6 - "No. 26 in High St. Eaglehawk" 1197.7 - "No. 26 at end of double track in High St. Eaglehawk" 1197.8 - "Nos. 26 and 17 crossing at Job's Gully Loop" 1197.9 - "No. 17 crossing railway bridge at Job's Gully near Eaglehawk". 1197.10 - "No. 26 at Long Gully" 1197.11 - 'Northern end of points at Long Gully Loop". 1197.12 - "No. 17 turning into View St. from Bamard St. Bendigo". 1197.13 -'No. 17 at beginning of double track in View St. after leaving Bamard St. Bendigo. 1197.14 - "No. 21 enters Nolan St. from MacRae St. Bendigo." 1197.15 - "No. 21 in Nolan St. Bendigo just after leaving White Hills Road." 1197.16 - "No. 2" 1197.18 - "No. 5" 1197.19 - "Birney car No. 28 at Golden Square Terminus" 1197.20 "Birney car No. 28 at Golden Square Terminus" tramways, trams, bendigo, long gully, railway bridge, jobs gully, trackwork, nolan st, quarry hill, tram stops, golden square, tram 2, tram 5, tram 17, tram 21, tram 26, tram 28 -
 Ballarat Tramway Museum
Slide - 35mm slide/s - set of 32, Noel Simons, 25/02/1971 12:00:00 AM
Set of 31 transparencies taken on 25/2/1972 on Kodak mounts. 1201.1 - Bendigo No. 26 in Bond St. just after leaving Long Gully en route for Quarry Hill. Has Norris Supermarket in background. Has two SEC roof ads. 1201.2 - No. 26 climbing View St. from Charing Cross en route to Eaglehawk. Has ANZ bank and AMOCO service station in background. 1201.3 - as for 1201.3, but after tram has passed photographer. Has buildings west of Mackenzie St. in photograph. 1201.4 - Tram stop and centre of the road pole with two "CARS STOP BY REQUEST" signs mounted on pole at the corner of Mackenzie St. 1201.5 - same position as for 1201.3, but with No. 5 descending the street. 1201.6 - same position as for 1201.2, but with No. 5 descending the street. Photo taken after tram has passed photographer. 1201.7 - No. 7 in Nolan St. from across the park at Lake Weeroona. 1201.8 - No. 7 entering McCrae St from Nolan St. - distant view. Note "TRAM "sign on left hand side under tree and overhead in McCrae St. from former track that once was in this street. 1201.9 - No. 7 in High St. with Cathedral in background. Tram en route to North Bendigo. Note scaffolding around Cathedral main spire area. 1201.10 - No. 7 crossing Bendigo Creek bridge in High St. near Golden Square. Has a Caltex Service station in the background. 1201.11 - No. 7 at Golden Square terminus with Sunburst Fruit Juices and a Peters Ice cream delivery vans alongside. 1201.12 - as for 1201.11 but photo taken from behind tram, with the end of the rails in the photograph. 1201.13 - No. 7 and 21 in Pall Mall at Charing Cross with No. 5 in the background. Taken some distance away from the location. 1201.14 - No. 7 at Golden Square terminus, taken a short distance from the tram terminus. Shows Milk Bar on right hand side and the hotel on the left hand side. Taken from the south side of the roadway. 1201.15 - as from 1201.14 but taken from the north side of the roadway. 1201.16 - No 5 waiting at California Gully loop. Distant photo showing surrounds 1201.17 - No. 5 en route for Quarry Hill crossing No. 26 at California Gully. 1201.18 - No. 26 at Eaglehawk terminus with Eaglehawk Town Hall and Post Office in background. 1201.19 - No. 21 arriving at Charing Cross en route to North Bendigo. Has Alexandra Fountain in the background, ANZ bank RACV building, and other buildings on the north side of Pall Mall or Nolan St. 1201.20 - No. 26 en route for Quarry Hill at Charing Cross, with crew standing by front door. Has Colonial Mutual life building, Armstrong Tyre Service (Firestone) and a sign for Cohns Drinks in the background. 1201.21 - as for 1201.20 but with No. 5 en route to Eaglehawk now in photograph. 1201.22 - No. 26 at Quarry Hill terminus. 1201.23 - No. 26 at Quarry Hill terminus, view of front portion of tram only from a gate at the Bendigo cemetery. 1201.24 - Track at the end of the Quarry Hill line showing the point blades of the former "Y" terminus and the overhead for this. 1201.25 - No. 2 at the Quarry Hill terminus, looking along the former Trackwork. 1201.26 - as for 1201.25 1201.27 - number not used. 1201.28 - Golden Square terminus from some distance from the actual terminus, showing the Warning sign "TRAM" for motorists from the south. No. 7 at the terminus. 1201.29 - No. 7 passing through the Golden Square shopping centre. Numerous cars and pedestrians. Tram en route for North Bendigo. 1201.30 - No. 7 in High St. Golden Square, en route for North Bendigo. Photo taken after tram has passed photographer. 1201.31 - No. 7 in High St. just past Wattle St. with the Cathedral in the background. Tram has two SEC roof ads good side on photo, 'Everything's fine in my all electric kitchen' and 'Electrical cooking - clean, quick, economical'. 1201.32 - No. 7 in High St. nearing Wattle St. Has Cathedral in the background. Photo taken after tram has passed photographer.Information written on in black ink and date stamped on purple ink. 1201.1 - "No. 26 in Bond St just after leaving Long Gully" 1201.2 - "No. 26 climbing View St. from Charing Cross" 1201.3 - "No. 26 ascending View St. from Charing Cross (At Mackenzie St.)" 1201.4 - "View St. & Mackenzie St." 1201.5 - "No. 5 in View St. near Mackenzie St." 1201.6 - "No. 5 in View St. nearing Charing Cross." 1201.7 - "No. 7 in Nolan St. seen from Lake Weeroona Park." 1201.8 - "No. 7 entering McRae St. from Nolan St. Note "TRAM" warning sign on left. 1201.9 - "No. 7 in High St. passing Short St." 1201.10 - "No. 7 crossing Bendigo Creek bridge in High St. near Golden Square." 1201.11 - "No. 7 at Golden Square terminus" 1201.12 - "No. 7 at Golden Square terminus" 1201.13 - "No 7, 21 and 5 at Charing Cross" 1201.14 - "No. 7 at Golden Square terminus" 1201.15 - "No. 7 at Golden Square terminus" 1201.16 - "No 5 waiting at California Gully loop." 1201.17 - "Nos. 5 and 26 crossing at California Gully loop" 1201.18 - "No. 26 at Eaglehawk terminus" 1201.19 - "No. 21 arriving at Charing Cross from Golden Square" 1201.20 - "No. 26 at Charing Cross" 1201.21 - "Nos. 5 and 26 at Charing Cross." 1201.22 - "No. 26 at Quarry Hill terminus" 1201.23 - "No. 26 at Quarry Hill terminus seen through the gates of the Bendigo Cemetery." 1201.24 - "Quarry Hill terminus showing remains for former double track layout abandoned before 1964." 1201.25 - "No. 2 at Quarry Hill terminus" 1201.26 - "No. 2 at Quarry Hill terminus" 1201.28 - "The Southern approach to Golden Square with No. 7 standing at the terminus, "TRAM" warning sign on the left. 1201.29 - "No. 7 passing through Golden Square Shopping Centre" 1201.30 - "No. 7 in High St. Golden Square" 1201.31 - "No. 7 in High St. passing Wattle St." 1201.32 - "No. 7 in High St. nearing Wattle St."tramways, trams, bendigo, bond st., view st., nolan st., high st., eaglehawk, california gully, charing cross, quarry hill, trackwork, tram 2, tram 5, tram 7, tram 21, tram 26 -
 Ballarat Tramway Museum
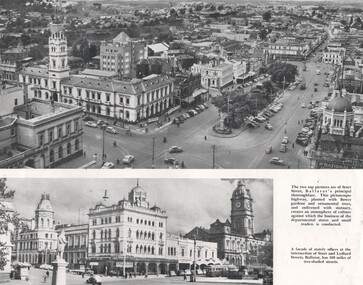
Photograph - Illustration/s, Ballarat Views, 1950's mid
Single sheet of printed paper, collected from a magazine (p59/60) with two black and white photos of Ballarat and one colour of Bendigo. Photo 1 - 260mm long x 122mm high, photo of north east Ballarat from Town Hall, looking out to Black Hill. Photo similar to Reg. No. 102, but buildings on corner of Grenville and Bridge St has a Plume sign instead of a Mobilgas Ad. This indicates early to mid 1950's. One tram in loop in one in Bridge St. Also has a "Neptune" sign in photograph. Photo 2 - 195mm long x 75mm high - from north east corner of Sturt and Lydiard Sts looking towards Town Hall and Craig's Hotel. Photo includes SEC bogie at tram stop and the front end of bus travelling east in Sturt St. Photo 3 - 230mm long x 156mm high - colour printed photo of Pall Mall, Bendigo from west side (by Post Office), looking towards the Shamrock Hotel. Photo includes signs for "COR Motor Spirit", "Tanox Paint" and the rear of a Bendigo to Huntly bus. See item Reg. No. 102trams, tramways, ballarat, bendigo, pall mall, oil companies -
 Ballarat Tramway Museum
Photograph - Black & White Photograph/s, Peter Bruce, Digital image - "City Loop and Bridge St", 1971
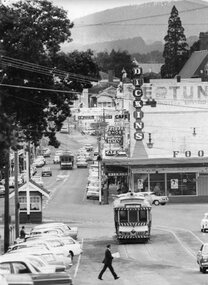
Yields information about the buildings and trams in view from Lydiard St looking east along Bridge St.Black and white photograph of SEC No. 31 and two other single truckers in the City Loop at the bottom end of Sturt St. near Grenville St and another single trucker in Bridge St. heading west, just after leaving the junction with Main and Victoria Sts. Has the Grenville St. tramway shelter. Telephoto lens used from about the intersection with Lydiard St. looking east. Has "Dickins" store and other shops in the background. Tram 31 shows the destination of City and has a Twin Lakes sign as well. Photograph by Peter Bruce, 1971. Digital image added 7/7/10. Peter Bruce title "City Loop and Bridge St"trams, tramways, sturt st, city loop, bridge st, dickins, tram 31 -
 Ballarat Tramway Museum
Postcard, Sturt St from the Town Hall tower, 1905
Printed colour postcard of the east end of Sturt St from the Town Hall tower, with the Post Office on the left hand side, looking down to Bridge St. Has Black Hill in background. Shows tram tracks, but no horse tram. Titled "Ballarat from the Town Hall, looking East" in top left hand corner. On rear of postcard is a letter to a Miss Lily Saw, Mair St. Ballarat from a person in Melbourne. Has a "Victoria One Penny" stamp, cancelled on Nov ?0, 1905. Handwriting has been carried over on the top of the front of the card. Handwritten letter on card. Has been carried over on the top of the card. $7.27trams, tramways, horse trams, sturt st, postcards, post office -
 Ballarat Tramway Museum
Slide - 35mm slide/s, Peter Moses, Jan. 1969
Photo of SEC Ballarat No. 40 west bound in Bridge St. Tram has two car numbers on the front, the destination roll with black background with white lettering. Later replaced with black letters on white background. Has Morseheads shop on the left hand side, Coles store and Christmas decorations in the street. The driver of the car in front of the tram is giving a hand signal - STOP! White cardboard mount slide, taken by Peter Moses assumed Jan. 1966.On the rear of the slides in black ink "Ballarat Tram, end of Main St." and "P. Moses" in the bottom left hand corner in black ink.tramways, trams, bridge st, morseheads, tram 40 -
 Ballarat Tramway Museum
Slide - 35mm slide/s, Peter Moses, Jan. 1969
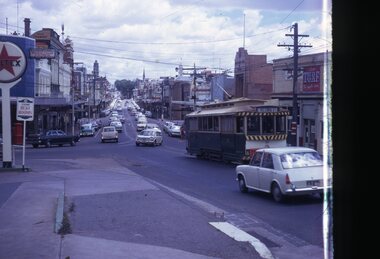
Photo of SEC Ballarat No. 33 east bound at junction of Main St. and Victoria Streets, bound for Victoria St. Tram has destination of Victoria St., a Twin Lakes sign. Companies in image are Turf advertisement and Caltex. Photo taken looking along Bridge St. Slide has been at the start or the end of the roll, and has been hand mounted in a cardboard mount by the photographer. White cardboard mount slide, taken by Peter Moses assumed Jan. 1969.On the rear of the slides in black ink "Ballarat tram turn off to Victoria St." and "P. Moses" in the bottom left hand corner in black ink.tramways, trams, bridge st, main st, victoria st., tram 33 -
 Ballarat Tramway Museum
Photograph - Black & White Photograph/s, Dave Macartney, 4/08/1968 12:00:00 AM
Black and white photograph of SEC No. 11 entering Bridge St, c 1970. Photo taken after tram has passed photographer. Tram has destination of Mt. Pleasant, has "TWIN LAKES" ad sign on rear end of tram. Signal light on pole shows track clear for tram to follow in same direction. Taken 4/8/1968."DJM" on rear in penciltrams, tramways, ballarat, bridge st., mt pleasant , tram 11 -
 Ballarat Tramway Museum
Photograph - Black & White Photograph/s, The Courier Ballarat, 19/07/1968 12:00:00 AM
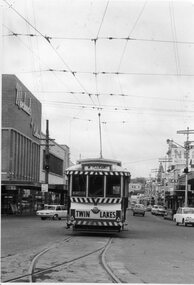
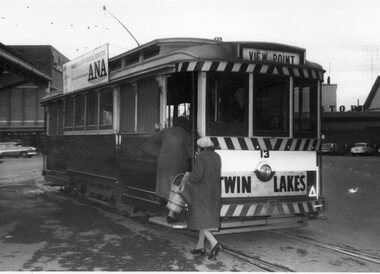
Yields information about the tram stop at the east end of Sturt St, advertisements on the tram and the way the stop was used.Black and White copy photograph of a newspaper photograph taken by The Courier, published 19/7/1968 of No. 13 picking up passengers, Sturt & Grenville Sts corner, after Govt announced intention to close Ballarat & Bendigo systems. Tram has the destination of View Point, a "Twin Lakes" sign and a roof advertisement for ANA medical services. Two lady passengers, one with a shopping basket boarding the tram. In the background are Morsheads and Dickins stores. See Reg Item 2921 for the Newspaper cutting the photograph used in. Collected by Alan Bradley from the Ballarat Courier early 1980's. See Excel file "Record of Ballarat Courier Photos SEC era" (Archive Documents) for source of details.On rear stamped "Copyright, The Ballarat Courier Proprietary Limited."tramways, trams, bridge st, grenville st, sturt st, twin lakes, tram 13 -
 Ballarat Tramway Museum
Photograph - Removal of tramway overhead wire, Bridge & Main Sts, The Courier Ballarat, 27/10/1971
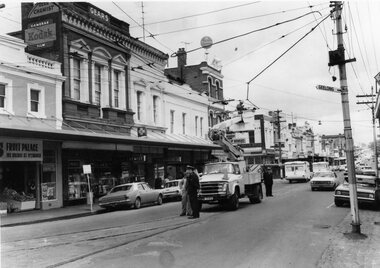
Photograph taken by The Courier - photo taken 27/10/1971, published 28/10/1971 of the Removal of tramway overhead wire, Bridge & Main Sts corner. shows an SEC bucket truck with a workman removing the signalling cabling, with a policeman at either end of the truck providing traffic control. Shows the track in the street and the overhead junction. In the background is Gears Chemist, a fruit shop (Fruit Palace), Bank of New South Wales, and a Kodak advertisement on the chemist building. Collected by Alan Bradley from the Ballarat Courier early 1980's. See Excel file "Record of Ballarat Courier Photos SEC era" (Archive Documents) for source of details.Yields information about removal, dismantling of the Ballarat tramway system overhead following closure of the system in Bridge St. Also shows the streetscape.Black and White copy photograph of a newspaper photograph.tramways, trams, closure, overhead, main st, bridge st -
 Ballarat Tramway Museum
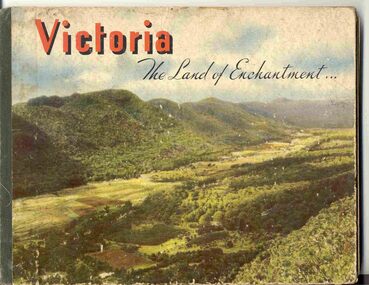
Book, Nu-color-vue or Nucolorvue Productions, "Victoria The Land of Enchantment", c1950
Book with hardcovers, 48 pages titled "Victoria The Land of Enchantment". Sewn in three sections, with a green strip of cloth and self end papers and printed outer paper, sides glued onto board covers. Consists of 43 colour photographs (full and half page) with captions, detailed text, and two black and white photos printed in blue on end covers. Photos of Mt Buffalo, Gippsland lakes, Mornington Beach, Yarra River, Flinders St. station from the Yarra, Collins and Spring St (with two W2's - see image No. 2), Parliament House, Kiewa Hydro scheme, Eildon Weir, Swan Hill Murray River Bridge, Bendigo Post Office, Melbourne Botanical Gardens, Ballarat - Grenville and Sturt St (No. 22 - see image No. 3), Lorne, Yallourn Power Station, Hume Weir, Maroondah Weir, Great Ocean Road, Warrnambool, Portland Beach, A timber train (see image No. 4), Mildura, flax mills, Eastern Geelong and the Prime Ministers Ave, Ballarat. Produced by Nucolorvue Productions, c1950. See also Reg Item 2925 for the same photo of No. 22 and Reg Item 5354 for a postcard. Purchased via eBay site - see attached sheets and packing slip. Purchased 10/2/2005 for A$12.50 including postage, from Virginia Georgopoulos of West Brunswick. eBay sheets and envelope with worksheet file. Has Swains 123 Pitt St, Sydney sticker on bottom left hand corner page 2trams, tramways, ballarat, sturt st, grenville st, bogie trams, geelong, bendigo, melbourne -
 Ballarat Tramway Museum
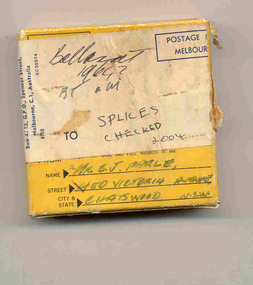
Film - Movie Film & Box, Kodak, 1960
... 13, showing “View Point” at Stones Corner, Bridge St, east..., Bridge St, east end, with trolley pole being turned, while ...Yields information in movie film format of Ballarat trams in 1960, how the system operated and was used by people., Yields information in movie film format of Ballarat trams in 1960, how the system operated and was used by people.Movie film - 8mm, approx. 30mins, with leader strip on a plastic reel, within a black and white plastic box, titled "Ballarat No. 1. 1960". Has been transferred to DVD - see Reg item 4100 as Segment No. 2. Made by Ben Parle. Also transferred to DVD by Rod Cook Oct. 2015, via Roger Greenwood for use in his DVD, "The City of Ballarat Trams, Gardens & Gold" of 2016. See Reg Item 6883. Synopsis: based on time. 0:00 View of typed introduction, noting that this is a pictorial record of Ballarat. 0:10 Title “The Tramways of Ballarat 1960, Part 1” 0:16 13, showing “View Point” at Stones Corner, Bridge St, east end, with trolley pole being turned, while another single trucker heads out towards Mt Pleasant. 0:25 13 leaving Stones Corner, short approach and then longer trailing shot of the tram going towards the City in Bridge St. 0:44 View out of front of tram in Bridge St heading towards the City, with cars in the photo, then passing through city Loop, no trams in the loop and running up to Lydiard St Nth and crossing the road. 1:22 Running up Sturt St from Armstrong St, passes over Dawson St X-over and up to the next intersection, Lyons St. 1:54 Title “The View Point Line” 1:59 19 inbound, in Ripon St, from crossing Mair St, towards camera and then passing away and turning into Sturt St. 2:49 View of a “Warning Oncoming Trams” sign 2:52 19 in Ripon St, going to View Point, crossing Webster St towards camera, then going away through the disconnected Victoria Ave loop, pass the “Warning Oncoming Trams” sign. Note very windy scene with people running across roads. 3:17 19 in Wendouree Parade, in bound, though showing destination View Point, going away from the camera, past the View Point Hotel. 3:39 19 coming towards camera near Excerpt or Devon St and then going away towards the terminus. 4:04 19 at the terminus, stationary, with a single trucker 3?, passing from Macarthur St into Wendouree Parade, behind 19. 4:20 33 coming towards camera in Wendouree Parade from St Aidans Drive, stopping to pick up passenger at Forest St and then going away towards the City, photographed from near the depot, on a wet and windy day. 4:54 35 in Wendouree Parade, coming towards the Camera from St Aidans Drive and then going away with the Gardens Loop area in the background. Tram stops at stop to let a passenger off. 5:28 21 leaving Gardens Loop for the City via the Depot, green light in signal can be seen. 5:43 28?, closely followed by 26 turn from Drummond St South into Sturt St. 6:18 Scene opens with shot of “Sebastopol” destination on a bogie tram. 6:21 Title “The Sebastopol Line” 6:24 21 turning from Sturt St into Drummond St Sth with destination of Bell St and then going away from the camera. 6:55 38 in Drummond St Sth, coming towards the camera and then passing the camera with Sturt St just in the view. 7:10 21, showing Gregory St, in Drummond St Sth, approaching and then going away, entering the Urquhart St Loop, 7:39 34 in Drummond St Sth (location check required (Latrobe?)), approaches camera, picks up passengers and the goes away. 8:09 39 at ? Street, turns from Drummond St Sth into Skipton St, after picking up and setting down passengers, bound for Sebastopol 8:55 35 inbound in Skipton St passes through the Bell Street Loop, and then goes away from the camera. 9:33 42 outbound in Skipton St, approaches the camera, passes and then crosses over the half the road into Albert St. 10:00 39 inbound in Albert St – location? 10:31 34 outbound for Sebastopol, approaches camera and just starts to pass by. 10:36 34 in Grey St crossing loop, crosses 42 inbound. 10:59 39 outbound in Albert St, with shopping centre in bound, approaches camera, passes and then crosses over Albert St. Mid morning scene. 11:39 39 inbound, Albert St south, approaches camera and then passes and the crosses over Albert St. 12:16 41 outbound in Albert St passes the camera, and pulls into the terminus with the conductor getting out on the back bumper to pull the pole down as the tram stops and a passenger walks into the Royal Hotel. 12:39 Title “The Lydiard Street North Line” 12:44 Filmed from the Hotel balcony, 21 inbound in Lydiard St Nth passes over Mair St, stops while 33 passes in the other direction. 13:18 With the red light showing on the Seymour St loop signal, 33 inbound for Sebastopol stops and picks up many passengers, passes the camera and runs past the VRI building in the background and through the loop. Possibly filmed on a Sunday given the ladies dresses and quieter streets. 14:01 30 outbound, passes the camera and stops at Macarthur St. Filmed alongside the brick wall of the cutting. 14:28 30 inbound arrives, passes through the Gregory St loop and then proceeds past the camera, making a stop to pick up passengers. 15:14 28 in Lydiard St Nth – location?, approaches and goes away from the camera, north of Gregory St. 15:34 28 ditto location? 15:53 21 arrives at the terminus with passengers getting on and off. 16:11 View of the a vertical positioned “End of Section” sign on a pole at the terminus and then lifting the camera to see the timetable board and the stop sign. 16:33 31 in Bridge St passing Morseheads and then turning into Sturt St, stops at the Grenville St stop, while another single trucker comes down to the stop from the City. 16:58 31 outbound in Bridge St, with destination of Victoria St. 17:14 Title “The Victoria Street Line” 17:18 31 outbound to Victoria St from Stones Corner. Starts with an overhead shot, shows clock at the Caltex service station,. 17:37 31 inbound approaching Bakery Hill and then descending to the junction after it passes camera. 18:09 25 climbing outbound in Victoria St, passing the camera, to then pass through the King St loop. 18:47 25 inbound in Victoria St, passing the camera, then pass through the King St loop, with St Alypius Church in the background. 19:36 14 approaching the rail bridge in Victoria St and stopping at the 2nd last stop to left of passengers. 20:01 14 leaving the terminus and approaching the camera and the a short sequence going away, to the next stop to pick up quite a few passengers. 20:14 “Trams Stop Here” sign, metal wrap around on a steel pole. 20:16 Title “The Mount Pleasant Line” 20:21 11 inbound in Main St, with a passenger leaping off the tramcar and another getting off just before the junction. 20:45 11 passes the junction and then proceeds away from the camera in Bridge St. 21:04 30 outbound in Main St, then turns into Barkly St, a bus (Eclipse Motors) passes in Main St just before the sequence ends. 21:31 30 inbound near Steinfield St. (exact location?) 21:49 25 approaches the camera, then proceeds away and passes through the Grant St. loop. 22:29 25 inbound, windy day, between Grant and Cobden, (exact location?), with a horse drawn bread van in the view and the breadman walking behind the tram as it passes. 23:02 11 outbound in Barkly St, (exact location?) 23:37 11 inbound in Barkly St (exact location?) 23:44 Mt Pleasant terminus signage 23:50 30 approaches the terminus and then stops with the conductor alighting turning the pole, passengers getting on and off and the driver appearing at the other end. 24:32 Title “The Gardens Via Sturt St. West Line” 24:35 21 outbound in Sturt St near Raglan St, approaches and passes the Camera. 25:09 12, showing City Oval, approaches and passes the camera, outbound near Windermere St. 25:33 13 showing View Point, goes away from the camera – location? 25:44 12 comes from St. West, inbound passes the camera and then stop as the next stop next Talbot St? 26:21 Short sequence of a “Warning Oncoming Trams” sign 26:28 42 inbound in Sturt St West, just before Ripon St, view coming towards camera and then going away to cross Ripon St. 27:10 34 passes through the Parker St loop 27:25 35 or 39 inbound past the college in Sturt St West 28:04 41 outbound at the Russell St curve, passes away from the camera. 28:11 35? inbound passes away from the camera through the Victoria Park or Morrison St loop, swinging out into the roadway. 28:29 View of timetable sign at Hamilton Ave. 28:37 35 turning from Sturt St West into Hamilton Ave, can see the conductor changing over the barrier rails. 29:11 42 inbound, crosses another bogie tram (35?) at Carlton St loop then passes the camera and goes past the Olympic rings monument. 29:42 12 approaches the Carlton St gates. 30:07 12 outbound, crosses a bogie tram in the loop with both trams then leaving the loop. 30:20 Title “End of Part One” Written labels giving title information on outside of box.trams, tramways, ballarat, sebastopol, lydiard st north, victoria st, mt pleasant, sturt st west -
 Ballarat Tramway Museum
Film - Movie Film & Box, Kodak, 1960s
Yields information in movie film format of Ballarat trams in 1962, a enthusiast tour, how the system operated and was used by people., Yields information in movie film format of Ballarat trams in 1962, a enthusiast tour, how the system operated and was used by people.Movie film - 8mm, approx. 4.15mins, with green leader strip on a plastic reel, within a Kodachrome II colour movie cardboard box and addressed to B.J. Parle, Chatswood. Titled "Ballarat 1962" Has been transferred to DVD - see Reg item 4100 as Segment No. 3. Filmed and made by Ben Parle. Also transferred to DVD by Rod Cook Oct. 2015, via Roger Greenwood for use in his DVD, "The City of Ballarat Trams, Gardens & Gold" of 2016. See Reg Item 6883. Synopsis: based on time - Colour film Title "Ballarat 1962" 0:00 21 in Sturt St arriving City Centre tram stop from the west. 0:12 41 and another bogie car at City Centre tram stop, North side of Sturt St loading passengers 0:21 39 crosses Sturt St from Lydiard St Nth and pulls up at the tram stop in Sturt St. 0:55 39 leaves City centre and travels west along Sturt St – two sequences. 1:11 View from front of a single trucker, leaving Carlton St loop after crossing a bogie car and travelling along Wendouree Parade towards Gardens Loop 2:09 No. 20 in Gardens Loop and pan across to the Gardens Statuary pavilion with lots of flowers. 2:41 No. 20 leaving Gardens loop and heading north in Wendouree Parade. 2:54 Bogie tram in Wendouree Parade between depot and Gardens loop, southbound. 3:12 No. 32 leaving Victoria St terminus, with orphanage in the background, in bound, has a Trotting tonight sign on front of tram, and crossing the Eureka line rail bridge. 3:23 No. 20 in Bridge St, out bound, near Stones Corner 3:42 38 in bound from Mt Pleasant at Stones Corner, stops, lets of passengers and then proceeds along Bridge St into the City 4:15 endWritten labels giving title information on outside of box.trams, tramways, ballarat, wendouree parade, sturt st, victoria st, bridge st, tram 21, tram 41, tram 39, tram 20, tram 32, tram 38 -
 Ballarat Tramway Museum
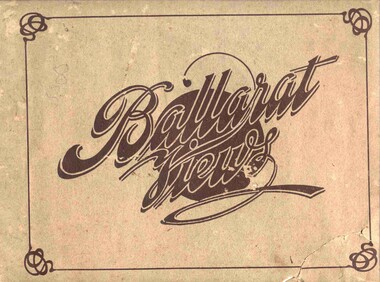
Book, Baxter & Stubbs, "Ballarat Views", 1920's
Yields information about Ballarat through pictures of the 1910-1920's various locations, institutions and street scenes, including tramways and railways.Twenty four page book within light brown covers, titled "Ballarat Views". Sheets, other than covers have been individually printed both sides, stapled within the covers. Cover - gives title, rear cover has printer details - Baxter and Stubbs. Pages 1 - Tonner Memorial , Fountain Lake Wendouree, Ballarat District Hospital, Sturt St south side at Grenville St with tram in distance and Sturt St North Side showing shops (image btm3900i2.jpg). 2 - Ballarat Street Scenes - Sturt Streets, Lydiard St with ESCo 18 in view, and Railway station with R193 in platform on passenger train. (image btm3900i3.jpg). 3 - Lake Wendouree views. 4 - Lake Wendouree, fish hatchery, Gardens and Sturt St at Dawson St (image btm3900i4.jpg). 5 - Art Gallery Ballarat 6 - Botanical Gardens 7 - Public Institution s- Benevolent asylum, Orphanage, Nazareth House, St Joseph Home, Hospital 8 & 9 - Statues, the Flight from Pompeii and others. 10 & 11 - Churches of Ballarat 12 - The Arch at The Avenue of Honour 13 - McDonald Pergola at the Gardens 14 - Zoological Gardens Ballarat 15 - Gardens aerial view and gates at the South End with tram in the distance (image btm3900i5.jpg). 16 - Some views in Ballarat East - Eureka Stockade, Ballarat East Bowling Green, Bridge St looking east and the lake at the Eureka Gardens (image btm3900i6.jpg). 17 - Snow Scene at Botanical Gardens, Begonia House 18 & 19 - Ballarat Water supply reservoirs 20 - Ballarat State Schools 21 - Ballarat East Views, includes view of track in Victoria St looking east (image btm3900i7.jpg). 22 - Views of the Water Reserves 23 - Views about the City - includes City fire station , agricultural High School, City Baths and View Point. 24 - Views at Lake Wendouree. \ Pdf copy of full book added 8/5/2019 - see btm3900i9.pdf trams, tramways, ballarat, lydiard st, sturt st, gardens, railway station, hospital, lake wendouree, wendouree parade, carlton st, esco -
 Ballarat Tramway Museum
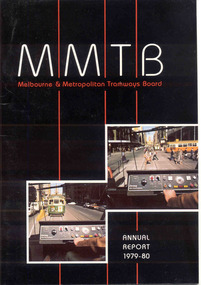
Document - Report, Melbourne and Metropolitan Tramways Board (MMTB), MMTB Reports 1979 to 1981, 1980 to 1982
Three copies of the Annual report of the MMTB for the years end 1980, 1981 and 1982 3953.1 - "Annual Report 1979-80" - white gloss paper with colour card covers with 36 pages, gloss, on inside giving details of the MMTB Board, Officers, Operations report, schedule of debenture, investments, Auditors reports, record of Annual traffic receipts, passengers, miles etc, tram and bus routes operated, statistical information, graphs and photographs. Photos include; Z 117 in Bourke St, Z 31 Burwood terminus, new safety tower wagon, Z118 in Bourke St, W2 528 High St Kew, reconstruction of High St Kew, Z3 120, cable and electric trams at Flemington Bridge, Z3 117, fitting trams to bogies at Preston workshops, Queens Bridge roundabout, MAN bus, Burwood substation, Z111 in Bourke St and Z's enter Elizabeth St service and Z3 129 on rear cover at night. 3953.2 - "Annual Report 1980-81" - white gloss paper with colour card covers with 36 pages, on inside giving details of the MMTB Board, Officers, Operations report, schedule of debenture, investments, Auditors reports, record of Annual traffic receipts, passengers, miles etc, tram and bus routes operated, statistical information, graphs and photographs. Photos include; image of Park St, Domain Road Jtn before changes, Museum station entrance, Flinders and Swanston St, CDB City Ring bus service, Swanston St, Westgate bus route, Park St, new substation, Swanston and Flinders St, Flinders land, and give way to buses pulling out of stops. 3953.2 - "Annual Report 1981-82" - white gloss paper with colour card covers with 36 pages, on inside giving details of the MMTB Board, Officers, Operations report, schedule of debenture, investments, Auditors reports, record of Annual traffic receipts, passengers, miles etc, tram and bus routes operated, statistical information, graphs and photographs. Photos include images of a z class crossing the Maribyrnong bridge, Footscray bus workshops, track renewals, a wedding at Wattle Park, a W2 arriving at Museum Station, Clifton Hill interchange, buses, Z class in Elizabeth St (Nos 158 and 43), Z89 in Mt Alexander Road North Essendon and a W2 loaded on a truck for New Zealand.3951.1 - has Graeme Breydon's address stamp on front cover., 3951.2 - ditto, 3951.3 - ditto and on inside of front cover., 3951.6 - "G. Breydon" in pencil on front cover and pencil comments on balance sheet., 3951.7 - dittotrams, tramways, mmtb, melbourne, annual reports, operations, trackwork -
 Ballarat Tramway Museum
Photograph - Digital image Set of 20
Set of 20 digital images of Bendigo Tramways, 1972 at or before closure while on a tram tour by Stuart Lodington. .1 - No. 28 and 5 at Eaglehawk terminus .2 - No. 28 leaving Charing Cross and travelling into View St with Armstrong Type Service building in background and Firestone Advertisements. .3 - No. 29 with Eaglehawk Town Hall and Post Office in background. .4 - No. 26 and 29 at start of double track, High St Eaglehawk .5 - No. 29 leaving Eaglehawk with shops in the background, Foodland, J. Bests .6 - No. 29 and 23 crossing Manchester Loop with Manchester Arms Hotel in the background and an old poppet head. .7 - No. 29 at ditto with poppet head in the background. .8 - No. 28 and two other trams at the Quarry Hill terminus. .9 - No. 29 in High St Bendigo with the Cathedral and Golden Gate Hotel in the background. .10 - No. 3 with destination Eaglehawk, in bound Carpenter St? .11 - No. 29 following a single trucker through a loop or the end of the double track near the depot. .12 - No. 23?, at Eaglehawk terminus, with Eaglehawk Town Hall in the background. .13 - Birney tram crossing the bridge at the Depot entrance - No. 29 .14 - No. 29 on the Eaglehawk line? .15 - as for .13 .16 - No. 29 entering the depot. .17 - No. 23, inbound from Eaglehawk, at Jobs Gully Loop with the railway overbridge in the background. .18 - No. 28 and two other trams (see also Reg Item 4982) for the same tram tour at Myrtle St. Loop. .19 - No. 21 with North Bendigo on the destination approaching the Golden Square terminus. .20 - No. 7 at Golden Square terminustrams, tramways, bendigo, eaglehawk, quarry hill, golden square, depot, tram 5, tram 29, tram 28, tram 26, tram 23, tram 7, tram 21 -
 Ballarat Tramway Museum
Photograph - Digital image Set of 20, 1971-72
Set of 20 digital images of Bendigo Tramways, 1972 at or before closure while on a tram tour by Stuart Lodington. .1 - No. 29 at the North Bendigo terminus .2 - No. 29 just past the Bendigo end of the double track in High St Eaglehawk, with a BP dealer in the background. .3 - Night photo of No. 18 at a terminus, showing "Eaglehawk" .4 - ditto .5 - Night photo of No. 24 at Eaglehawk with Leo A Hughes Photographer in the background. The Tram has "Johnnie Walker whiskey" roof adverts. .6 - No. 29 outbound in Thunder St with a train passing over the bridge in the background. .7 - view from the front window of a tram on the Eaglehawk line with a large "display event float" in the foreground and tram approaching a crossing loop. .8 - No. 29 at North Bendigo .9 - view of High St Eaglehawk looking east from the terminus, showing the track and centre poles. .10 - No. 29 outbound on the North Bendigo line turning from either Nolan St or Caledonia St, running a special. .11 - No. 7 departing North Bendigo for Golden Square. .12 - No. 3 and 18 at Charing Cross. No. 3 has two SEC roof Advertisements .13 - No. 7 at North Bendigo with the trolley pole being reversed. .14 - No. 24 at Quarry Hill with Northern Terrazzo in the background with the driver alongside .15 - No. 7 and No.6 at Charing Cross with the Beehive buildings in the background. .16 - No. 7 at North Bendigo terminus .17 - ditto .18 - No. 24 at Quarry Hill with Northern Terrazzo in the background with the conductor alongside. .19 - ditto .20 - No. 26 and other bogie tram in View St near Charing Cross with the Armstrong Tyre Service building and signs for Cohn's Drinks and T&G in the view.trams, tramways, bendigo, eaglehawk, quarry hill, golden square, depot, north bendigo, charing cross, tram 29, tram 18, tram 24, tram 3, tram 7, tram 6, tram 26 -
 Ballarat Tramway Museum
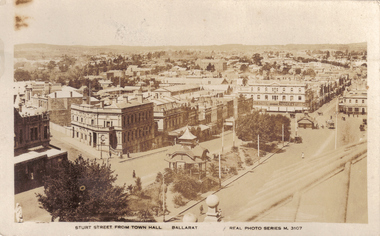
Photograph - Digital image, c1916
Shows the details of buildings in the east end of Sturt St, c1916.Digital image from a postcard from the collection of David Critchley, of Ballarat, Sturt St c1916. This 'birds eye' view of Sturt St reveals on of the early fleet standing at the city terminus probably during the Great War. Note the absence of motor cars and women's skirts are somewhat shorter - an economy concession with the shortage of cloth during the war years. A Valentines photo postcard. David scanned this pic at a higher resolution than normal, so you should be able to zoom in on the tram, which has been fitted with windshields and looks typically well used and unloved as did most of the original Ballarat fleet in their latter years. Image supplied by email 30/8/2011 - not to be published without David's authority.trams, tramways, sturt st, bridge st, esco -
 Ballarat Tramway Museum
Newspaper, The Courier Ballarat, "Runaway Tram' Career ends in Window", 1949
Yields information about the accidents and derailments in Ballarat and collisions with buildings.Newspaper clipping from The Courier, 3/10/1949 about No. 17 running away from Sturt and Lydiard St and its collision with a Doughnut van and crashing into the S. E. Dickins grocery shop. Gives details of witnesses, the event and people injured. Has two photographs pasted on the same page. Contained within Reg Item 5507 - Foolscap binder with green covers, black binding edge and metal clips. See Reg Item 1020 for other photographs.derailments, 17, bridge st, s.e. dickins, accidents -
 Ballarat Tramway Museum
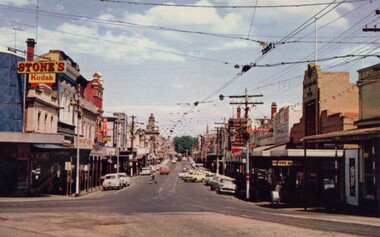
Photograph - Digital Image, Bridge Street
Yields information about the appearance of Bridge St early 1960's and the buildings on either side. Shows the festoon lighting.Digital Copy of a photograph sourced by Roger Greenwood as part of his work on the production of a Video Tape on Ballarat's trams. Photographer and source details not provided by Roger. See btm6304doc.pdf Image looking west along Bridge St Ballarat with the festoon lighting in position. See Reg Item 6303i. This image appears to be early 1960's, possibly a bogie tram with yellow stripping at the Grenville St end, but not the large white stripe. Has the Stones Corner and The State Bank buildings in the view. Photo from a postcard, published c1967 as advised in the e-mail of 20/7/15. Print in box 13 trams, tramways, bridge st, stones corner, main road -
 Ballarat Tramway Museum
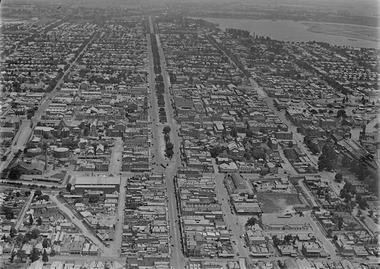
Photograph - Digital image, c1925
Yields information about Ballarat c1925 from an aerial photograph looking west.Digital photograph of Ballarat looking West c1925, aerial view, looking along Sturt St and Bridge St, taken from about Victoria St and Humffray St. Shows both the Alfred Hall and the Coliseum. Shows two single truckers at the east end of Sturt St. See email from Alan Bradley dated 28/7/2012 re date. See also Reg Item 5454 for another similar photograph.trams, tramways, ballarat, aerial views