Showing 14570 items
matching tram museum
-
 Ballarat Tramway Museum
Photograph - Digital image Set of 10, 19/02/2011 12:00:00 AM
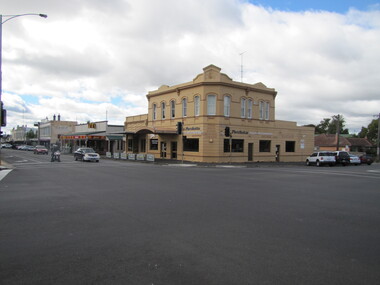
Yields information about the 2011 appearance of Hospital Corner.Set of 10 digital images of Hospital Corner, taken by Warren Doubleday on 19-2-2011 for use in BTM web presentation - Hospital Corner. .1 - SE Corner - La Porchetta's .2 - NE Corner - Shell service station .3 - Looking across to SE corner .4 - Looking across to SW corner - Celebrations store .5 - looking across to NW corner and Hospital .6 - ditto .7 - ditto .8 - Drummond St signage on western side .9 - Celebrations store on SW corner .10 - Davis bus turning from Drummond into Lydiard Sts.trams, tramways, hospital corner, drummond st, sturt st, davis buses -
 Ballarat Tramway Museum
Film - Movie Film & Box, Kodak, 1960 to 1971
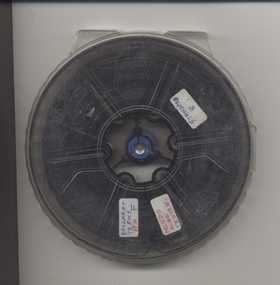
Yields information in movie film format of Ballarat trams in 1960 through to 1971, how the system operated and was used by people, including special trams., Yields information in movie film format of Ballarat trams in 1960 through to 1971, how the system operated and was used by people, including special trams.Movie film - 8mm, approx. 15 mins, without leader strip on a plastic reel, within a clear plastic case - Standard 8, titled "Ballarat Trams". See Reg Item 4957 for DVD and Mini DVD. Has been transferred to DVD - see Reg item 4957 Made by Arthur Hill. Also transferred to DVD by Rod Cook Oct. 2015, via Roger Greenwood for use in his DVD, "The City of Ballarat Trams, Gardens & Gold" of 2016. See Reg Item 6883. In Arthur's letter - on file - Made between 1960 and August 1971. Synopsis: based on time. Between 1960 and 1968 0:00 Trams Ahead sign before the Victoria St terminus with 20 at terminus 0.14 - No. 20 leaving Victoria St terminus and being followed along Victoria St by car and then passengers jointing the tram at a tram stop. 00.40 - No. 12 (c1960) in bound along Lydiard St North and arriving in the Gregory St loop. 00.56 - No. 12 and 14 crossing at Gregory St. 01.20 - No. 33 and a bogie car crossing at depot loop. 01.31 - No. 18 travelling along Wendouree Parade with the Lake in the background. 01.42 - No 41 at depot junction and running into the depot No. 2 road with a short sequence of a tramway signal. 02.17 - SEC Sign at the depot gate, shot of 41 in No. 2 road, with the lights other way around, Caution beware of trams sign and a red signal. 02.31- Timetable sign at Gardens Loop 02.36 - No. 30 arriving at Loop and view of a signal with no lights showing. 02.48 - Destination roll being changed through a number of destinations. 03.26 - No. 20 arriving at Carlton St loop with the Olympic monument in the background and the red signal light going out. 03.31 - a lady standing at the front of No. 20, with an ice cream in hand, and No. 17 arriving at the Carlton St loop with a short sped up sequence and No. 20 departing from the loop, followed by No. 17 leaving the loop, heading into the city. 03.41 - No. 13 inbound from Sebastopol crossing Albert St and heading into the city. 04.12 - view of signal and contactor, the light going green and the tram passing underneath. 04.24 - No. 12 at the Sebastopol terminus and departing. 04.51 - No. 12 crossing Albert St Sebastopol. 05.16 - Following No. 12 along Albert St, with Borough Offices in background initially. 05.28 - No. 12 arriving at the Grey St loop with No. 14 arriving at the loop from the city and both trams departing. March 1971 05.58 - No. 30 being followed along Barkly St, Mt Pleasant and the pole being turned at the terminus 06.32 - No. 30 picking up a lady passenger. 06.38 - view from the front of a tram, with the drivers hand and a cigarette, view from the back of the tram, along the Mt Pleasant route and running through the loop and then turning into Main St - has the Ballarat (East) fire station in one sequence, and finally running along Main St. 07.35 - view from tram, with car turning into Bridge St. and then running into Sturt St passed the Parking Loop, and along Sturt St. 08.32 - Points at Drummond St North being changed, doors changed over and the tram running along Drummond St. North, through the Mill St loop and into Macarthur St and in Wendouree Parade, with the Lake Wendouree in view and crossing No. 12 at the Depot Loop, with crews chatting, past the depot, a lady passenger getting off the tram near Forest St., and arriving at Gardens Loop with the same lady passenger who got on in Barkly St, getting off the tram. 11.09 - view of No. 30 at Gardens Loop, departing the loop. August 1971 11.30 - R761 crossing Melton (Exford Wier) on the special train to Ballarat and then the bridge between Ballan and Gordon Stations. 12.16 - View from the front of a tram, following No. 26 along Lydiard St North, crossing at Gregory St and returning to the City. 12.39 - No. 14 and one other tram running along Albert St to Sebastopol, crossing No. 21 at Grey St and then to Sebastopol terminus, crossing Albert St and return and running along Albert St. 13.36 - No. 26, 39 crossing 13 at Gardens Loop. 14.00 - view looking across Lake Wendouree. 14.07 - 26 arriving at Victoria St, running part of Destination roll, passengers getting off with hotel in the background, trolley pole being turned and then with 39 following tram along Victoria St, crossing at the King St Loop. 15.07 - view of a trolley pole tracking through the overhead at curve 15.10 - end. Written labels giving title information on reel.trams, tramways, ballarat, sebastopol, lydiard st north, victoria st, mt pleasant, lake wendouree, depot, tram 12, tram 13, tram 14, tram 17, tram 18, tram 21, tram 26, tram 33, tram 39, tram 41 -
 Ballarat Tramway Museum
Map, City of Ballaarat, Lake Wendouree, 2010
Colour printed map of Lake Wendouree and surrounding streets showing walking paths, roads, tram, bus and rail lines and other features. Used in the large maps placed around the Lake c2009. Printed on an A3 size sheet. Two copies held.trams, tramways, map, lake wendouree, wendouree parade -
 Ballarat Tramway Museum
Document - Report, John Smatlak and Railway Preservation Resources, "Streetcar 183 Interim Report Prepared by Railway Preservation Resources 11/5/10", 2010
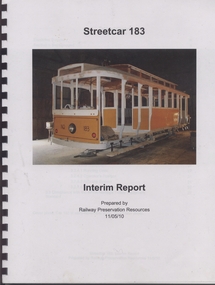
Yields information about the reconstruction of a former Ballarat tramcar that was damaged by fire in the US and being rebuilt.Report- 37 quarto colour printed pages contained within a black comb bound document with a clear plastic cover and black card cover, titled "Streetcar 183 Interim Report Prepared by Railway Preservation Resources 11/5/10". Contains information about the reconstruction of Melbourne M class No. 183 (Ballarat No. 30) by Paul Class. Report prepared by Railway Preservation Resources, John Smatlak. Supplied by Paul Class March 2011. See printed emails with documenttrams, tramways, reconstruction, m class, paul class, railway preservation resources -
 Ballarat Tramway Museum
Photograph - Colour Print/s, c2007
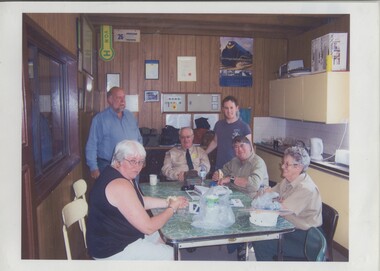
Has a strong association with BTM staff c2007, in the meal room of the BTM depot.Laminated A4 colour print of six BTM members in the meal room, Begonia festival? c2007. Photographer unknown at time of cataloguing, In photograph are: Carolyn Cleak, Greg Rogers, Andrew Paroissien, Guye, Graeme Cleak and Merle Clowes.trams, tramways, btm, depot -
 Ballarat Tramway Museum
Photograph - Colour Print/s, c2007
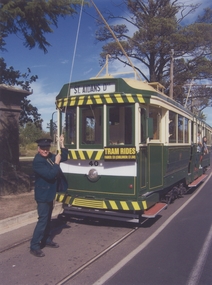
Has a strong association with BTM staff, Richard Gilbert c2007.Laminated A4 colour print of Richard Gilbert, c2007. lifting the pole on No. 40 at St Aidans Drive. Photographer unknown at time of cataloguing, trams, tramways, btm, st aidans drive, trolley poles, tram 40 -
 Ballarat Tramway Museum
Photograph - Colour Print/s, c2006
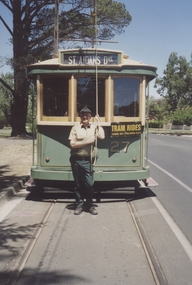
Has a strong association with BTM staff, Richard Gilbert c2007.Colour print of Richard Gilbert holding the trolley rope on No. 27 prior to turning the pole at Carlton St terminus. Photo c2006, prior to repainting of the tram. Photographer and date unknown at time of cataloguing, trams, tramways, btm, carlton st, trolley poles, tram 27 -
 Ballarat Tramway Museum
Photograph - Colour Photograph/s - set of 2, c1978
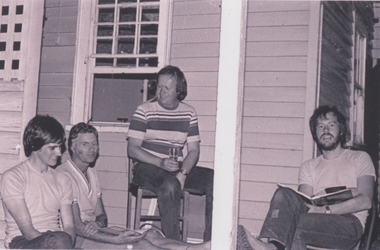
Has a strong association with volunteer staff, and the first house at Bungaree.Colour print of groups of BTM Volunteers at the Bungaree house, c19789, the original house used by the Museum, weather board. Two photos group on same sheet. Photo 1 - Paul McDonald, Bill Kingsley, Richard Gilbert and Campbell Duncan on the porch Photo 2 - Peter Hill, Peter Winspur and Richard Gilbert in front of the house, possibly soon after moving in, given the condition of the grass etc. Photographer unknown at time of cataloguing, trams, tramways, btps, bungaree, volunteers -
 Ballarat Tramway Museum
Newspaper, The Courier Ballarat, "Tram track rider woes", "GP seeks action", "I have the answer", Mar. 2011
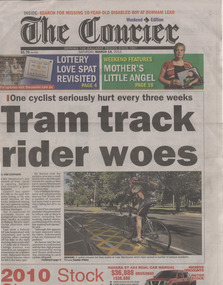
Yields information about newspaper articles about the problem of cyclists and the tramway rails at depot junction.Two sheets from The Ballarat Courier, regarding issues with the tram tracks at Depot junction and cyclists. .1 - Front page with headline "Tram track rider woes" of The Courier, Ballarat, 19/3/2011 written by Kim Stephens, photo Dominic O'Brien, and on page 2, GP Phillip Dover who was injured after falling off his bicycle. Page 3 - The Courier, 22/3/2011 - "I have the answer", about Kelvin England with a suggestion of a rubber tube in the flangeway, including a photograph. Article by Pat Nolan, Photo Lachlan Bence. depot junction, cyclists -
 Ballarat Tramway Museum
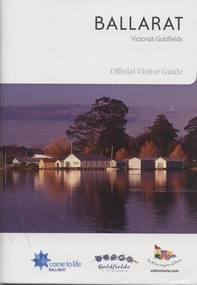
Book, The Ballarat Visitor Information Centre, "Ballarat Victoria's goldfields Official Visitor Guide", "Ballarat where Parks and Gardens come to life", 2011
.1 - Full colour, 100 page, book, A5 size titled "Ballarat Victoria's goldfields Official Visitor Guide", with an autumn view across Lake Wendouree. Gives details, maps accommodation listing, attractions etc of the Ballarat area. Pages30 and 31 detail the Ballarat Tramway Museum and the BTM advertisement on page 48. Published 2011 by The Ballarat Visitor Information Centre. .2 - Full colour 16 page brochure, titled "Ballarat where Parks and Gardens come to life" with rear fold out cover of map of the Ballarat and Buninyong district. Notes steam boats and trams on page 6.trams, tramways, ballarat, visitors, tourist guides, btm, gardens -
 Ballarat Tramway Museum
Photograph - Black & White Photograph/s, 24/05/1974 12:00:00 AM
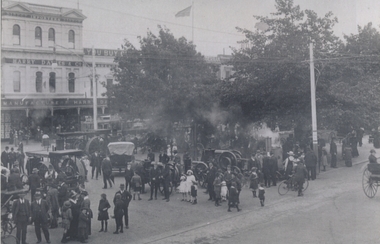
Black and white (6 prints), digital prints, of Jelbart Engine Display, Sturt and Doveton Streets, 24/5/1924 with Harry Davies building in background, along with an ESCo tram and other street furniture. Many people in the photograph. Donated by Colin Homes 27/3/2011. Colin notes no King George V statue (1936) See the June 2010 issue of Fares Please! for an article written by Colin Holmes on Jelbart and the Ballarat roller.trams, tramways, jelbart, sturt st, exhibitions, esco -
 Ballarat Tramway Museum
document - Typed Notes, Dave Macartney, "Extracts from Tram Tracks/ Electric Traction", c1968
Yields information about Ballarat News items that appeared in two enthusiast magazines between 1948 and 1968.Seven pages, carbon copy, typed notes titled "Extracts from Tram Tracks/ Electric Traction" of items concerning Ballarat trams and tramways. Typed on yellow paper, scanned to black and white image. 1948 - January, February, March and June 1951 - February, August, September, Oct./Nove and December 1954 - December 1955 - April 1959 - January 1960 - July, November 1961 - February, April, August 1962 - January, March, June, October 1963 - January, February, April, May, July, September, December 1964 - February, May, October 1968 - June, July, September. Prepared by and Donated by Dave Macartney 5/2011.electric traction, tram tracks, newspaper clippings, ballarat -
 Ballarat Tramway Museum
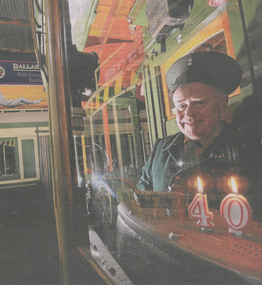
Newspaper, The Courier Ballarat, "Our trams on the right track, 40 years on", 28/05/2011 12:00:00 AM
Has a strong association with Richard Gilbert and the BTM's 40th anniversary celebrations.Newspaper clipping from The Courier, Ballarat 28 May 2011, titled "Our trams on the right track, 40 years on", written by Emma Schenk, featuring a photo of Richard Gilbert in a single trucker with 39 in the background and two lit candles "4" and "0" on the controller. Details the weekend events. Photo by Jeremy Bannister.btm, 40th anniversary, celebrations, btps -
 Ballarat Tramway Museum
Memorabilia - Event Materials, Menu, Richard Gilbert and Neil Lardner, "40th Anniversary", 31/05/2011 12:00:00 AM
Has a strong association with Richard Gilbert and Neil Lardner and the BTM's 40th anniversary celebrations and some of the paperwork used at the dinner..4974.1 - Booking form for the BTM's 40th Anniversary dinner at the Brewery Tap Hotel, printed on manilla coloured paper - A4 size. (two copies) 4974.2 - table seating plans and menu for the 40th Anniversary dinner, printed on yellow colour light weight card, with large Texta pen table number in top right hand corner - 3 copies - tables 2, 4 and 5., printed on A4 size paper. See also Reg item 4999 for other associated papers."numbers" in top right hand corner.trams, tramways, 40th anniversary, btm, btps, celebrations -
 Ballarat Tramway Museum
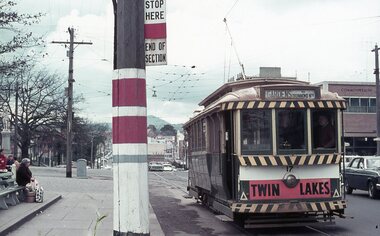
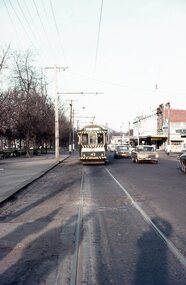
Photograph - Digital image Set of 11, Stuart Loddington, 10 images of Ballarat trams prior to closure, 1971
Yields information about Ballarat Tramways and trams prior to the closure of the tramway system.Set of 11 digital images, comprising 1 donation text image and 10 images of Ballarat trams prior to closure, scanned from original slides by Stuart Lodington, 1971 prior to closure of the system. .1 - Donation text slide. .2 - No. 26 southbound in Lydiard St North, with the Ballarat Railway Station level crossing gates in the background. .3 - No. 27 and 30 crossing at Bell St Loop, Skipton St. (see also btm4976i4) .4 - No. 17 Wendouree Parade, near Gardens Loop .5 - Single truck tram at Victoria St terminus, taken from the west side of the Buninyong Rail line bridge, with CRB Roadwork sign, Eureka Caravan Park and Meagher Hotel in the background, possibly No. 11, see entry for .10 .6 - No. 12 and 30 crossing at the Urquhart St Loop, Drummond St South. .7 - No. 12 westbound in Sturt St, with Grenville St in the background. .8 - No. 17 at Gardens Loop with the Trolley pole being reversed. .9 - No. 30, Lydiard St North with Reid's Palace building in the background. .10 - No. 11 passing over the Buninyong rail line bridge, with Gardens via Sturt St West and a Twin Lakes sign. Has a number of children alongside the driver. .11 - No. 21 heading northbound in Wendouree Parade, Gardens, just to the north of the now BTM depot junction.trams, tramways, ballarat, level crossings, buninyong railway, lydiard st north, bell st, victoria st, wendouree parade, gardens, drummond st, sturt st, tram 26, tram 27, tram 30, tram 17, tram 12, tram 21, tram 11 -
 Ballarat Tramway Museum
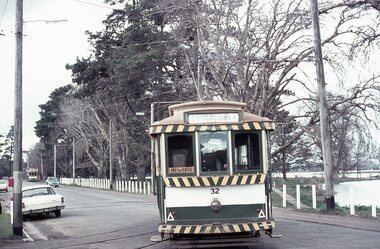
Photograph - Digital image Set of 10, 1971
Yields information about Ballarat Tramways and trams prior to the closure of the tramway system.Set of 10 digital images of Ballarat trams prior to closure, scanned from original slides by Stuart Lodington, 1971 prior to closure of the system. .1 - No. 17 at the City Centre, Sturt St, south side, with Gardens via Sturt St on destination roll. Can see the ESCo switch box in the back and the stop and section sign on the adjacent pole. .2 - No. 26 at Sebastopol terminus alongside the Royal Mail Hotel. The tram has yet to turn the pole or the destination roll. Note the Bus Stop sign on the pole, just prior to closure. .3 - ditto .4 - No. 27 and 30 crossing in Skipton St at the Bell St loop (see also btm4975i3) .5 - No. 32, Gardens, about to enter the Carlton St loop, with Lake Wendouree in background, Wendouree Parade. .6 - No. 32 at Depot junction, good photo of depot trackwork entry area. .7 - No. 21, Wendouree Parade, Gardens area, north bound, showing Gardens via Sturt. .8 - No. 12, inbound on Sturt St west at a tram stop. Has destination of Mt. Pleasant. .9 - No. 27 at Lydiard St north terminus with the shelter in the background. .10 - No. 21 at Gardens Loop, tram has destination of Mt. Pleasant. Crews sitting in the saloon.trams, tramways, ballarat, sturt st, sebastopol, drummond st sth, wendouree parade, carlton st, depot, depot junction, trackwork, gardens, sturt st west, crews, tram 17, tram 26, tram 27, tram 32, tram 21, tram 12 -
 Ballarat Tramway Museum
Photograph - Digital image Set of 10, Stuart Lodington, 1971
Set of 10 digital images of Ballarat trams prior to closure, scanned from original slides by Stuart Lodington, 1971 prior to closure of the system. .1 - No. 32 entering the depot from Wendouree Parade, with the Lake in the background. Shows the depot fire alarm on an adjacent pole. .2 - No. 26 at Sebastopol, before turning the pole. Has a bus stop sign on a pole already. .3 - No. 27 and 26? crossing at the Bell St loop in Skipton St. No. 27 has a Twin Lakes sign. .4 - No. 32 outbound to the Gardens in Hamilton Ave about to enter Wendouree Parade with Loreto convent and Olympic monument the background. .5 - No. 26, Albert St Sebastopol, approaching the Sebastopol terminus, with Sebastopol Food Stores building on the left of the photo. .6 - No. 12 leaving the Parker St. Loop, Sturt St West after crossing a tram. No. 12 has destination of Victoria St. .7 - No. 12 inward bound in Lydiard St North with Fine Art Gallery in the background, 3BA. No. 12 has destination of Sebastopol and has a Twin Lakes sign. .8 - No. 12 inward bound, Sturt St West, No. 12 has destination of Victoria St and has a Twin Lakes sign. .9 - No. 26 at Sebastopol terminus, outside the Royal Mail Hotel, has a bus stop sign on a pole. Tram pole yet to be turned, but destination adjusted to Lydiard St. North. .10 - No. 12 at Sebastopol terminus, outside the Royal Mail Hotel. No. 12 has destination of Lydiard St Nth and has a Twin Lakes sign.trams, tramways, ballarat, sturt st west, sebastopol, skipton st, wendouree parade, hamilton ave, depot, depot junction, parker st loop, bell st, lydiard st nth, tram 32, tram 26, tram 27, tram 12 -
 Ballarat Tramway Museum
Photograph - Digital image Set of 10, 1971
Yields information about Ballarat Tramways and trams prior to the closure of the tramway system.Set of 10 digital images of Ballarat trams prior to closure, scanned from original slides by Stuart Lodington, 1971 prior to closure of the system. .1 - No. 27 at Lydiard St North terminus with passengers alighting/boarding and an enthusiast about to turn the pole. .2 - No. 27 and No. 30 Skipton St at the Bell St Loop. .3 - No. 13 at the Mt Pleasant terminus, showing destination of Gardens via Drummond St North. .4 - Crews of No. 31 (Conductor and Driver) reversing pole of No. 31 at the depot. .5 - No. 11 inbound on Victoria St. .6 - Night view of a tram at a terminus. .7 - Scrubber on 0 road at the depot .8 - No. 14 at Gardens Loop with another tram behind and the driver standing in the front of the tram. .9 - No. 13 (Mt Pleasant) inbound in Sturt St with 14 behind. .10 - No. 26 northbound to Lydiard St north, about to cross Albert St Sebastopol with the SSW shop in the background. trams, tramways, sebastopol, lydiard st nth, skipton st, bell st, mt pleasant, victoria st, depot, albert st, tram 27, tram 30, tram 13, tram 11, scrubber, tram 14, tram 26 -
 Ballarat Tramway Museum
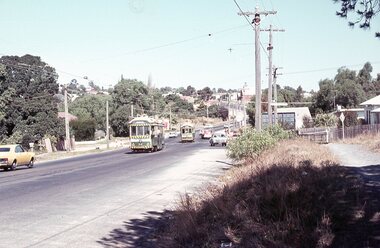
Photograph - Digital image Set of 10, 1971
Yields information about Ballarat Tramways and trams prior to the closure of the tramway system.Set of 10 digital images of Ballarat trams prior to closure, scanned from original slides by Stuart Lodington, 1971 prior to closure of the system. .1 - No. 43 westbound in Sturt St. .2 - No. 43 at Gardens Loop showing Mt Pleasant on the destination roll. .3 - Scrubber on 0 road at the depot. .4 - night photo of a bogie tramcar. .5 - No. 43 at the Gardens Loop, Wendouree Parade .6 - night photo of a bogie tramcar .7 - Sturt St West, with tram following? and Parker St Loop? .8 - Night photo of a single truck tramcar at the Sebastopol terminus .9 - Night photo of a bogie tram at Gardens Loop .10 - Night photo of No. 30 at Sebastopoltrams, tramways, sebastopol, sturt st, depot, wendouree parade, gardens loop, sturt st west, night lighting, tram 26, tram 27, tram 14, tram 39, tram 13, tram 43 -
 Ballarat Tramway Museum
Photograph - Digital image Set of 7, 1971
Yields information about Ballarat Tramways and trams prior to the closure of the tramway system.Set of 7 digital images of Ballarat trams prior to closure, scanned from original slides by Stuart Lodington, 1971 prior to closure of the system. .1 - No. 26 and 27 inbound Sturt St West at Parker St loop, both trams showing CITY. .2 - No. 43 and 14 crossing at Parker St Loop. .3 - No. 39 turning in bound from Hamilton Ave into Sturt St West. Tram showing destination of Mt Pleasant. .4 - No. 39 inbound in Hamilton Ave. .5 - No. 14 (Gardens via Sturt St W), and No. 13 (Special) at Gardens Loop .6 - No. 26, crossing Albert St Sebastopol, northbound, going to Lydiard St North .7 - Crew of No. 43 standing in front of the tram at Gardens Looptrams, tramways, sturt st west, parker st loop, hamilton ave, albert st, crews -
 Ballarat Tramway Museum
Photograph - Digital image Set of 13, Stuart Lodington, early BTPS operations and depot construction, 1975 - 1978c
Yields information about Ballarat Tramways and trams prior to the closure of the tramway system.Set of 13 digital images of early BTPS operations and depot construction, scanned from original slides by Stuart Lodington, 1974 to 1978c. .1 - Richard Gilbert and Gavin Young in No. 27 .2 - Richard Gilbert, Peter Bruce, Campbell Duncan, and others at the rear of the depot enjoying a drink. .3 - Richard Gilbert, Stuart Lodington, Gavin Young and Peter Rees in No. 27 .4 - as for No. 2 .5 - Richard Gilbert and Gavin Young on depot fan. .6 - Depot extensions, showing 4 and 5 roads, prior to any track laying of the pit track being built. .7 - Graeme Jordan lifting No. 38 on jacks .8 - front of new depot shed prior to any track construction .9 - King points laid into positron and queen points positioned .10 - Looking north inside shed across 4 road prior to any track laying .11 - spare motor and pinions at rear of shed. .12 - No. 26 at the Carlton St terminus, showing Sturt St West. .13 - ditto, looking north west.trams, tramways, btps, depot, carlton st, wendouree parade, tram 27, tram 38, tram 26 -
 Ballarat Tramway Museum
Photograph - Digital image Set of 20, Dec. 1970
Set of 20 digital images of Bendigo Tramways December 1970 by Stuart Lodington. .1 - Bendigo track gang renewing a joint, McCrae St, with welding truck alongside and Birney No. 29. .2 - No. 5 at Quarry Hill terminus? .3 - No. 24 at the depot .4 - No. 2 on the Quarry Hill line .5 - No. 5 approaching the Eaglehawk terminus .6 - No. 29? at the Golden Square Terminus with Bill Rodda's Golden Square hotel in the background. .7 - No. 3 inbound on the Quarry Hill line. .8 - trams crossing on the Eaglehawk line, through the window of one tram. .9 - side on view of a B23D controller in a bogie tram .10 - No. 5 at the Eaglehawk terminus .11 - No. 21 at No. 21 crossing on the Golden Square line. No. 29 showing special, No.21 - North Bendigo, Fire Station Loop? .12 - No. 29 and another tram - near work site? .13 - interior view from Birney looking at the front of another tram parked behind. .14 - No. 29, No. 6 crossing at .15 - No. 6, showing special at Charing Cross. .16 - No. 5 and another tram at North Bendigo on a Special .17 - No. 28 at Charing Cross .18 - No. 5 on Special at a Loop on the Eaglehawk line .19 - No. 28, and two other trams at the Myrtle St Loop .20 - No. 18 showing Quarry Hill and two other trams on View St.trams, tramways, bendigo, trackwork, mccrae st, depot, quarry hill, eaglehawk, golden square, controllers, north bendigo, view st, tram 29, tram 5, tram 24, tram 2, tram 3, tram 6, tram 28, tram 18 -
 Ballarat Tramway Museum
Photograph - Digital image Set of 20
Set of 20 digital images of Bendigo Tramways, 1972 at or before closure while on a tram tour by Stuart Lodington. .1 - No. 28 and 5 at Eaglehawk terminus .2 - No. 28 leaving Charing Cross and travelling into View St with Armstrong Type Service building in background and Firestone Advertisements. .3 - No. 29 with Eaglehawk Town Hall and Post Office in background. .4 - No. 26 and 29 at start of double track, High St Eaglehawk .5 - No. 29 leaving Eaglehawk with shops in the background, Foodland, J. Bests .6 - No. 29 and 23 crossing Manchester Loop with Manchester Arms Hotel in the background and an old poppet head. .7 - No. 29 at ditto with poppet head in the background. .8 - No. 28 and two other trams at the Quarry Hill terminus. .9 - No. 29 in High St Bendigo with the Cathedral and Golden Gate Hotel in the background. .10 - No. 3 with destination Eaglehawk, in bound Carpenter St? .11 - No. 29 following a single trucker through a loop or the end of the double track near the depot. .12 - No. 23?, at Eaglehawk terminus, with Eaglehawk Town Hall in the background. .13 - Birney tram crossing the bridge at the Depot entrance - No. 29 .14 - No. 29 on the Eaglehawk line? .15 - as for .13 .16 - No. 29 entering the depot. .17 - No. 23, inbound from Eaglehawk, at Jobs Gully Loop with the railway overbridge in the background. .18 - No. 28 and two other trams (see also Reg Item 4982) for the same tram tour at Myrtle St. Loop. .19 - No. 21 with North Bendigo on the destination approaching the Golden Square terminus. .20 - No. 7 at Golden Square terminustrams, tramways, bendigo, eaglehawk, quarry hill, golden square, depot, tram 5, tram 29, tram 28, tram 26, tram 23, tram 7, tram 21 -
 Ballarat Tramway Museum
Photograph - Digital image Set of 20, 1971-72
Set of 20 digital images of Bendigo Tramways, 1972 at or before closure while on a tram tour by Stuart Lodington. .1 - No. 7 at Golden Square terminus .2 - ditto .3 - No. 26 in bound on the Eaglehawk line with a crossing loop behind. .4 - Birney crossing the bridge by the tram depot. .5 - No. 29 running a special on the Eaglehawk line with a HBA billboard in the background. .6 - No. 29 with a driver walking in front of the tram at the above location. .7 - No. 29 on the Eaglehawk line .8 - ditto waiting for a tram at Manchester Loop with poppet head in the background. .9 - No. 29 on the Eaglehawk line .10 - Eaglehawk Town Hall at night. .11 - No. 7 at the depot junction in McCrae St, with Golden Square destination. .12 - No. 29 with the Camp Hotel Eaglehawk in the background. Also a Newsagent with The Sun, The Bendigo Advertiser and The Age signs on the building, High St .13 - No. 29 Mt Korong Rd, with the railway overbridge in the background. .14 - interior photo of Birney tram roof .15 - interior view of controls of Birney at Eaglehawk .16 - No. 29 outbound at the Depot Junction McCrae St. .17 - No. 18 at the Eaglehawk terminus .18 - close up view of No. 29 front. .19 - No. 29 in Nolan St, crossing the bridge, outbound. .20 - No. 18 at the Eaglehawk terminus with the Eaglehawk Town Hall, Post Office in the background. Has a circus banner on the side.trams, tramways, bendigo, eaglehawk, quarry hill, golden square, depot, mccrae st, nolan st, tram 7, tram 26, tram 29, tram 18 -
 Ballarat Tramway Museum
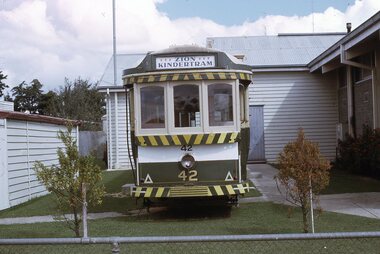
Photograph - Digital image Set of 2, 1972
Set of 2 digital images of Ballarat tramcars following closure of the system. .1 - No. 42 at the Zion Kindergarten. .2 - No. 35 at the Ballarat College Junior School. Use as a shelter shed. See Supplement to the April May issue of Information for Members and Friends, April / May 1972.trams, tramways, ballarat, zion congregational church, disposal, tram 42, tram 35 -
 Ballarat Tramway Museum
Photograph - Digital image Set of 20, 1971-72
Set of 20 digital images of Bendigo Tramways, 1972 at or before closure while on a tram tour by Stuart Lodington. .1 - No. 29 at the North Bendigo terminus .2 - No. 29 just past the Bendigo end of the double track in High St Eaglehawk, with a BP dealer in the background. .3 - Night photo of No. 18 at a terminus, showing "Eaglehawk" .4 - ditto .5 - Night photo of No. 24 at Eaglehawk with Leo A Hughes Photographer in the background. The Tram has "Johnnie Walker whiskey" roof adverts. .6 - No. 29 outbound in Thunder St with a train passing over the bridge in the background. .7 - view from the front window of a tram on the Eaglehawk line with a large "display event float" in the foreground and tram approaching a crossing loop. .8 - No. 29 at North Bendigo .9 - view of High St Eaglehawk looking east from the terminus, showing the track and centre poles. .10 - No. 29 outbound on the North Bendigo line turning from either Nolan St or Caledonia St, running a special. .11 - No. 7 departing North Bendigo for Golden Square. .12 - No. 3 and 18 at Charing Cross. No. 3 has two SEC roof Advertisements .13 - No. 7 at North Bendigo with the trolley pole being reversed. .14 - No. 24 at Quarry Hill with Northern Terrazzo in the background with the driver alongside .15 - No. 7 and No.6 at Charing Cross with the Beehive buildings in the background. .16 - No. 7 at North Bendigo terminus .17 - ditto .18 - No. 24 at Quarry Hill with Northern Terrazzo in the background with the conductor alongside. .19 - ditto .20 - No. 26 and other bogie tram in View St near Charing Cross with the Armstrong Tyre Service building and signs for Cohn's Drinks and T&G in the view.trams, tramways, bendigo, eaglehawk, quarry hill, golden square, depot, north bendigo, charing cross, tram 29, tram 18, tram 24, tram 3, tram 7, tram 6, tram 26 -
 Ballarat Tramway Museum
Photograph - Digital image Set of 20, 1971-72
Set of 22 digital images of Bendigo Tramways, 1972 at or before closure while on a tram tour by Stuart Lodington. .1 - No. 7 arriving at North Bendigo .2 - No. 5 departing Charing Cross along View St, with a Firestone tyres in the background. .3 - front view of a tram in View St with a blurred background image. .4 - No. 24 showing Eaglehawk destination .5 - No 26 and 3 in View St, with the Armstrong Tyre Service building in the background and signs for T&G and Cohn's Drinks. .6 - ditto .7 - No. 3 arriving at Charing Cross from Eaglehawk in View St, with a Quarry Hill destination. .8 - No. 3 and 18 at Charing Cross. .9 - No. 24 on the Quarry Hill line. .10 - No 26 in View St, with the Armstrong Tyre Service building in the background and signs for T&G and Cohn's Drinks. .11 - ditto, with fountain in view, Colonial Mutual building and a newsagent with a Herald sign on the building. .12 - No. 7 at North Bendigo terminus .13 - ditto with pole being reversed. .14 - No. 18 at Quarry Hill terminus with Northern Terrazzo sign in the background. .15 - No. 24 at Quarry Hill terminus .16 - No. 18 arriving at Charring Cross, with Fountain Plaza and Bendigo Pharmacy in the background. .17 - No. 3 and 18 at Charing Cross. .18 - No. 7 at North Bendigo terminus with pole being placed on the overhead. .19 - No. 26 in View St inbound, with Sandhurst Trustees sign in the background. .20 - No. 6 leaving Charing Cross in Pall Mall with Myer and other buildings in the background. .21 - No. 7 at North Bendigo .22 - Single trucker with two roof Advertisements crossing View St with fountain in view, Colonial Mutual building and a newsagent with a Herald sign on the building.trams, tramways, bendigo, eaglehawk, quarry hill, north bendigo, charing cross, view st, tram 7, tram 5, tram 24, tram 26, tram 5, tram 3, tram 18, tram 6 -
 Ballarat Tramway Museum
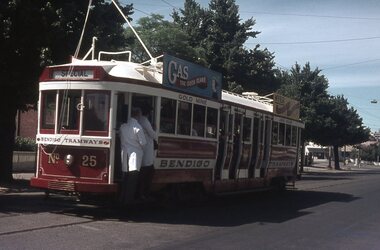
Photograph - Digital image Set of 20, 9/12/1972 12:00:00 AM
Set of 21 digital images of Bendigo Tramways, at the re-opening of the Bendigo tramways by the Bendigo Trust on 9/12/1972by Stuart Lodington. All trams in the first Bendigo Trust colours. .1 - No. 25 with Gas and Myer roof advertisements .2 - No. 30 with 3BO roof advert and a BP service station in the background. .3 - SEC single trucker at the Mine with a large "Tram Tours" sign on the front of the tram .4 - ditto .5 - No. 19 with a large group of passengers, Bendigo Motor Co and Sandhurst roof advertisements .6 - No. 30 in McCrae St .7 - view of opening march with band .8 - No. 19 in opening parade .9 - Opening Parade in High St with cathedral in the background .10 - No. 30 in Nolan St crossing bridge .11 - ditto .12 - No. 25 at the mine .13 - No. 30 leaving the mine .14 - No. 30 ditto with BCTV roof advert. .15 - Charing Cross with cenotaph, The Beehive building and Ezywalkin shoes and Coca Cola adverts .16 - No. 19 southbound in High St with City Centre Motel building in the background. .17 - No. 30 returning from North Bendigo .18 - No 25 in High St after leaving Gold Mine .19 - No. 30 at the Mine .20 - No. 30 in Nolan St .21 - No. 30 with 3BO roof advert and a BP service station in the background.trams, tramways, bendigo, north bendigo, charing cross, bendigo trust, central deborah, tram 25, tram 30, tram 19 -
 Ballarat Tramway Museum
Photograph - Digital image Set of 20, 16/04/1972 12:00:00 AM
Set of 20 digital images of Bendigo Tramways, of the last running day of the Eaglehawk to Quarry Hill line 16 April 1972, .1 - No. 24 outbound to Eaglehawk .2 - No. 3? at Manchester Loop .3 - No. 24 outbound to Eaglehawk .4 - bogie tram crossing the rail over bridge from Eaglehawk .5 - No. 18 in View St .6 - No. 24 outbound to Eaglehawk .7 - No 18 at Eaglehawk with destination roll being changed, and shopping centre in the background. .8 - No. 24 crossing the railway overbridge, going to Eaglehawk .9 - No. 3 outbound to Eaglehawk .10 - No. 24 crossing the railway overbridge, going to Eaglehawk .11 - No. 3 and 24 crossing at Long Gully .12 - No. 18 at Eaglehawk with Leo A Hughes photographer building in the background and a CFA truck passing the tram. Tram SEC roof advertisement and a banner for "German -?- Circus" at Eaglehawk and dates. .13 - No. 3 inbound on the Eaglehawk line. .14 - No. 18 outbound to Eaglehawk .15 - ditto .16 - No. 18 at Eaglehawk terminus with the Mechanics Institute in the background. .17 - No. 24 at the Eaglehawk terminus .18 - No 24 at the intersection with Taylor St .19 - No. 24 at the Eaglehawk terminus .20 - dittotrams, tramways, bendigo, eaglehawk, long gully, manchester loop, tram 24, tram 18, tram 3 -
 Ballarat Tramway Museum
Photograph - Digital image Set of 20, 16/04/1972 12:00:00 AM
Set of 22 digital images of Bendigo Tramways, of the last running day of the Eaglehawk to Quarry Hill line 16 April 1972, .1 - No. 3 and 24 crossing at Long Gully .2 - No. 3 turning at the Cricket ground, Barnard and View Sts, inbound to the City and Quarry Hill .3 - No. 3 in bound to the City and Quarry Hill, Long Gully area .4 - No. 18 inbound to the City and Quarry Hill crossing the railway bridge from Eaglehawk. .5 - Manchester Loop .6 - No. 18 inbound to the City and Quarry Hill crossing the railway bridge from Eaglehawk. .7 - No. 18 about to enter Jobs Gully Loop .8 - No. 3 about to turn at the Cricket ground, Barnard and View Sts inbound to the City and Quarry Hill .9 - No. 3 turning at the Cricket ground, Barnard and View Sts, inbound to the City and Quarry Hill .10 - No. 18 at Eaglehawk terminus with the Mechanics Institute in the background. .11 - No. 3 in bound, Ironbark area. .12 - No. 3 at Long Gully Loop .13 - No. 3 outbound to Eaglehawk. .14 - No. 18 at Eaglehawk with German circus banner on tram .15 - No. 18 on the Eaglehawk line at Jobs Gully Loop .16 - No. 24 outbound to Eaglehawk at Taylor St .17 - No. 18 inbound to the City and Quarry Hill crossing the railway bridge from Eaglehawk. .18 - No. 3 at Manchester Loop .19 - No. 18 at Eaglehawk terminus .20 - No. 18 at Eaglehawk with German circus banner on tram .21 - bogie tram at Long Gully Loop. .22 - No. 24 outbound to Eaglehawk at Taylor Sttrams, tramways, bendigo, eaglehawk, long gully, jobs gully, manchester loop, tram 24, tram 18, tram 3