Showing 613 items matching "overhead"
-
 Ballarat Tramway Museum
Slide - 27 mm sq slide/s - set of 22 - moving 18 to Sebastopol, Lilian Butler, 30/09/1971
Yields information about the transfer of tram 18 to Victory Park Sebastopol.Set of 22 Agfa blue and white plastic mount slides of tram 18 being moved to Victory Park for the Borough of Sebastopol - 30/9/1971. See Reg Item 2909 for the actual Newspaper cutting and 3778 for a photograph of the move. See Reg Item 3929 for list of dates of tram disposal, though this item gives the date as 2/10/71 .1 - No. 18 parked on the depot fan, with E. Davis alongside. .2 - group of 6 men standing alongside 18 - left to right - N. Lorensini, ? W. Trusler, S. Lakey, B.Peart and E. Davis .3 - tram being driven into Wendouree Parade. .4 - ditto .5 - turning from Macarthur St into Drummond St south with a SEC bucket truck following. .6 - ditto - with the Lisette Beauty Salon on the corner. .7 - Drummond St North .8 - Coupling a SEC tractor to the tram with the Ballarat Base Hospital in the background. .9 - Ditto with S. Lakey cleaning out the points. .10 - being towed across Sturt St .11 - being towed along Drummond St South .12 - workmen at Victory Park preparing the section of track. .13 - ditto .14 - being derailed near Vickers St with an Alsco Linen Service van in the background - note the overhead appears to have been removed. .15 - towing the tram across Albert St. .16 - towing the tram along Victory St, .17 - ditto .18 - moving steel channel along the street, with a tram sitting on one already. .19 - moving the tram .20 - ditto .21 - turning the track to align up with the storage track. .22 - Group of 7 men (see slide 2 for some of the names) and three children with the tram in position. Photo from the collection of Lilian Butler. See also Reg Item 6857 for a digital image. ballarat, tramways, trams, sec, depot, tram disposal, sebastopol, victory park, albert st, moving trams, drummond st, macarthur st, tram 18 -
 Melbourne Tram Museum
Magazine, Yarra Trams, "The Wire", 5/2011 to 1/2015
0 - No 9 - 1/4/2011 - Rhinos on skateboards, Did you know, Spencer St works, .1 - No. 11 of 3/5/2011 with the revised Yarra trams logo, traffic priority, work over Easter in Spencer St at Bourke and Collins St, Good Friday appeal, safety, passenger feedback and future works. .2 - No. 13 - 31/5/2011 - new uniform, cleaning, CEPR, trackwork - Fitzroy St, Northcote, Rhino, Carlton Control. .3 - No. 14 - 15/6/2011 - Haymarket Roundabout, accessibility, maintenance, CSE. 3a - No. 16 - 19/7/2011 - Managers on the move, Trevor Jones, Yarra's vision, Richard Ch'ng and Rhino update. .4 - No. 17 - 2/8/2011 - High St Westgarth trackwork, Swanston St, IMF CEO visit .5 - No. 18 - 16/8/2011 - Performance benchmarks met, Preston Workshops, repairs to 3018, tram signal priority. .6 - No . 19 - 30/8/2011 - New E class trams, routes "a" or "d", TramTracker in shelters, police, fare evasion .7 - No. 20 - 15/9/2011 - Football trams, Superstops, Bridge Road, Rhinos. .8 - No. 21 - 27/9/2011 - CEO's journey to work, accessibility, increased patronage, E class. .8a - No. 22 - 11/10/2011 - Minister Mulder visit, E class, Customer experience, Elizabeth Kerdelhue Corporate Affairs Director, flood indicator in Wellington Parade, Keolis - Orleans and PTV coming your way. .9 - No. 23 - 25/10/2011 - forthcoming royal visit, opening for Footscray Road extension, Rhinos, Stockholm .10 - No. 24 - 8/11/2011- Royal visit, photos, Z3 158, route 86 works in High St. (see htd5043i21 for a image from an unknown newspaper of the actual event - features Z3 158.) .11 - No. 25 - 22/11/2011 - new staff guide, Gold Coast tram line, Macarthur St, overhead, fund raising, route numbering update. .12 - No. 26 - 6/12/2011 - Swanston St Superstops, Newmarket bridge strikes, rhinos. .13 - No. 27 - 20/12/2011 - Christmas carnival, Lenny Bates, portable crossover, uniforms. .14 - No. 28 - 17/1/2012 - Passing of Len Bates, Myki, Gardiner railway station. 14a - No. 29 - 31/1/2012 - Southbank depot, patronage, myki, think like a passenger, fatigue management, .15 - No. 30 - 15/2/2012 - visit of Keolis, SNCF people, list of Executive leadership team with photos, Swanston St works, Myki introduction. .16 - No. 31 - 29/2/2012 - patronage up, tram postage stamps, Myki, rhinos. .17 - No. 32 - 14/3/2012 - St Kilda Rd trackwork, fund raising, Southbank Depot extensions, Myki, driving conditions, grand prix. .18 - No. 33 - 30/3/2012 - introduction of the PTV, end of MetLink and Transport Ticketing Authority, changes in management structure, trackwork, Gold Coast tramway and Keolis. .19 - No. 34 - Dr Jake - Royal children's Hospital super stop, route 96 - Premium line. .20 - No. 35, 2/5/2012 - Revision of Rules, trackwork in St Kilda Road and Elizabeth St, Myki, safety - Zero Harm. .21 - No. 69 - 25/9/2013 - Passengers paying their way, E class update, Mal Ashworth retires, progress report, feedback, new chime on trams. .22 - No. 70 - 9/10/2013 - Art comes alive, tram 925, driver simulator at Preston Workshops, E class project, 90th Glen Huntly. .23 - No. 83 - 23/4/2014 - Screen time for trams, new PIDs on B class, assistance animals, Operations Centre, Preston Workshops, Electrical log sheets to SLV. .24 - No. 89 - 23/7/2014 - punctuality, refresh of network map (fold-out map), women drivers. .25 - No. 97 - 19/11/2014 - Revitalising route 96, Keolis news, free tram zone, guide dogs. .26 - No. 99 - 17/12/2014 - Accessibility week, new uniform top for CSE's, free tram zone, world trade centre stop upgrade, heat stress, Art tram 158. .27 - No. 100 - 14/1/2015 - Route 96 complete, New Years eve free travel, fare compliance, patronage down, .28 - No. 12 - 16/5/2011 - Gold coast tramway, performance dashboard, tramworks and the rhino .29 - No. 16 - 19/7/2011 - Depot managers, tevor jones, record patronage, vision, rhino .30 - No. 17 - 2/8/2011 - High St Westgarth works, Duncan Smith, David Clarke Training, Swanston St works, and Preston Workshops . .32 - No. 39 - 28/6.2012 - maintenance, Emmanual Sorin, transformation, fare evasion, and Combino in Potsdam. .33 - No. 105 - 25/3/2015 - Grand Prix, Elgin and Lygon upgrade, Camberwell Junction, PTV hub, overhead. .34 - No. 78 - 12/2/2014 - January heatwave, Australian Open, Mark Wild of PTV, and Curt Skinner - voice in Channel 10 series Get Ace .35 - No. 81 - 26/3/2014 - drug and alcohol testing, zero harm, Victoria Bridge works, Keolis, relations with Toronto, Collins St safety and incident on a route 57 tram. .36 - No. 109 - 20/5/2015 - Goodbye Z class, Hello E class, Kew Depot centenary, drug & alcohol reminder, passenger satisfaction, Anzac day, B class life extension. .37 - No. 110 - 3/6/2015 - 3rd W class tram back grom Bendigo, employer of the year, CSE's go digital, Camberwell depot, Queensbridge tram and bus stop and Tram Hub preview. .38 - No. 115 - Feb. 2016 - 12 page centre stapled - New Year's eve services, spike the rhino is back, Burke Road level crossing removed, more E class, safe network in 2106, tennis, customers happy, New Preston depot, Farewell to Clement, Z class 40 years on network.Demonstrates Yarra trams staff newsletters.Set of 33 Yarra Trams internal newsletter "The Wire", All A4, printed in full colour. All four pages unless noted otherwise, full colour, performance snapshot on front cover.trams, tramways, yarra trams, traffic control, trackwork, spencer st, fund raising, operations, rhinos, carlton control, high st, haymarket, preston workshops, e class, route numbers, bridge road, wellington parade, ptv, royal visit, footscray road, new tramway, gold coast, macarthur st, swanston st, superstops, newmarket, gardiner, burke road, level crossings, railway squares, myki, metlink, tickets, route 96, rules, st kilda road, elizabeth st, tram 158, tram 925, glen huntly depot, simulator, b class, opeations centre, art trams, patronage, kew depot, new preston, queensbridge, w class, bendigo -
 University of Melbourne, Burnley Campus Archives
Photograph - Black and white and colour prints and negatives, Dept pf Agriculture, Victoria, Miscellaneous Burnley, 1942-1943
orchard, margaret bowron, betty williams, dept of agriculture, opium poppy, j l provan, t h kneen, geelong excursion, horses pulling lawnmower, ponds, greenhouses, trees, principal's residence, flying fox, j p mclennan, plants, draught horse, calf, students working outside, luffmann ponds, lily ponds, sequoia sempervirans, californian redwood, gardewn views, prunus glandulosa, magnolia stellata, petunia x hybrida -
 Ballarat Tramway Museum
Slide - 35mm slide/s - set of 32, Noel Simons, 25/02/1971 12:00:00 AM
Set of 31 transparencies taken on 25/2/1972 on Kodak mounts. 1201.1 - Bendigo No. 26 in Bond St. just after leaving Long Gully en route for Quarry Hill. Has Norris Supermarket in background. Has two SEC roof ads. 1201.2 - No. 26 climbing View St. from Charing Cross en route to Eaglehawk. Has ANZ bank and AMOCO service station in background. 1201.3 - as for 1201.3, but after tram has passed photographer. Has buildings west of Mackenzie St. in photograph. 1201.4 - Tram stop and centre of the road pole with two "CARS STOP BY REQUEST" signs mounted on pole at the corner of Mackenzie St. 1201.5 - same position as for 1201.3, but with No. 5 descending the street. 1201.6 - same position as for 1201.2, but with No. 5 descending the street. Photo taken after tram has passed photographer. 1201.7 - No. 7 in Nolan St. from across the park at Lake Weeroona. 1201.8 - No. 7 entering McCrae St from Nolan St. - distant view. Note "TRAM "sign on left hand side under tree and overhead in McCrae St. from former track that once was in this street. 1201.9 - No. 7 in High St. with Cathedral in background. Tram en route to North Bendigo. Note scaffolding around Cathedral main spire area. 1201.10 - No. 7 crossing Bendigo Creek bridge in High St. near Golden Square. Has a Caltex Service station in the background. 1201.11 - No. 7 at Golden Square terminus with Sunburst Fruit Juices and a Peters Ice cream delivery vans alongside. 1201.12 - as for 1201.11 but photo taken from behind tram, with the end of the rails in the photograph. 1201.13 - No. 7 and 21 in Pall Mall at Charing Cross with No. 5 in the background. Taken some distance away from the location. 1201.14 - No. 7 at Golden Square terminus, taken a short distance from the tram terminus. Shows Milk Bar on right hand side and the hotel on the left hand side. Taken from the south side of the roadway. 1201.15 - as from 1201.14 but taken from the north side of the roadway. 1201.16 - No 5 waiting at California Gully loop. Distant photo showing surrounds 1201.17 - No. 5 en route for Quarry Hill crossing No. 26 at California Gully. 1201.18 - No. 26 at Eaglehawk terminus with Eaglehawk Town Hall and Post Office in background. 1201.19 - No. 21 arriving at Charing Cross en route to North Bendigo. Has Alexandra Fountain in the background, ANZ bank RACV building, and other buildings on the north side of Pall Mall or Nolan St. 1201.20 - No. 26 en route for Quarry Hill at Charing Cross, with crew standing by front door. Has Colonial Mutual life building, Armstrong Tyre Service (Firestone) and a sign for Cohns Drinks in the background. 1201.21 - as for 1201.20 but with No. 5 en route to Eaglehawk now in photograph. 1201.22 - No. 26 at Quarry Hill terminus. 1201.23 - No. 26 at Quarry Hill terminus, view of front portion of tram only from a gate at the Bendigo cemetery. 1201.24 - Track at the end of the Quarry Hill line showing the point blades of the former "Y" terminus and the overhead for this. 1201.25 - No. 2 at the Quarry Hill terminus, looking along the former Trackwork. 1201.26 - as for 1201.25 1201.27 - number not used. 1201.28 - Golden Square terminus from some distance from the actual terminus, showing the Warning sign "TRAM" for motorists from the south. No. 7 at the terminus. 1201.29 - No. 7 passing through the Golden Square shopping centre. Numerous cars and pedestrians. Tram en route for North Bendigo. 1201.30 - No. 7 in High St. Golden Square, en route for North Bendigo. Photo taken after tram has passed photographer. 1201.31 - No. 7 in High St. just past Wattle St. with the Cathedral in the background. Tram has two SEC roof ads good side on photo, 'Everything's fine in my all electric kitchen' and 'Electrical cooking - clean, quick, economical'. 1201.32 - No. 7 in High St. nearing Wattle St. Has Cathedral in the background. Photo taken after tram has passed photographer.Information written on in black ink and date stamped on purple ink. 1201.1 - "No. 26 in Bond St just after leaving Long Gully" 1201.2 - "No. 26 climbing View St. from Charing Cross" 1201.3 - "No. 26 ascending View St. from Charing Cross (At Mackenzie St.)" 1201.4 - "View St. & Mackenzie St." 1201.5 - "No. 5 in View St. near Mackenzie St." 1201.6 - "No. 5 in View St. nearing Charing Cross." 1201.7 - "No. 7 in Nolan St. seen from Lake Weeroona Park." 1201.8 - "No. 7 entering McRae St. from Nolan St. Note "TRAM" warning sign on left. 1201.9 - "No. 7 in High St. passing Short St." 1201.10 - "No. 7 crossing Bendigo Creek bridge in High St. near Golden Square." 1201.11 - "No. 7 at Golden Square terminus" 1201.12 - "No. 7 at Golden Square terminus" 1201.13 - "No 7, 21 and 5 at Charing Cross" 1201.14 - "No. 7 at Golden Square terminus" 1201.15 - "No. 7 at Golden Square terminus" 1201.16 - "No 5 waiting at California Gully loop." 1201.17 - "Nos. 5 and 26 crossing at California Gully loop" 1201.18 - "No. 26 at Eaglehawk terminus" 1201.19 - "No. 21 arriving at Charing Cross from Golden Square" 1201.20 - "No. 26 at Charing Cross" 1201.21 - "Nos. 5 and 26 at Charing Cross." 1201.22 - "No. 26 at Quarry Hill terminus" 1201.23 - "No. 26 at Quarry Hill terminus seen through the gates of the Bendigo Cemetery." 1201.24 - "Quarry Hill terminus showing remains for former double track layout abandoned before 1964." 1201.25 - "No. 2 at Quarry Hill terminus" 1201.26 - "No. 2 at Quarry Hill terminus" 1201.28 - "The Southern approach to Golden Square with No. 7 standing at the terminus, "TRAM" warning sign on the left. 1201.29 - "No. 7 passing through Golden Square Shopping Centre" 1201.30 - "No. 7 in High St. Golden Square" 1201.31 - "No. 7 in High St. passing Wattle St." 1201.32 - "No. 7 in High St. nearing Wattle St."tramways, trams, bendigo, bond st., view st., nolan st., high st., eaglehawk, california gully, charing cross, quarry hill, trackwork, tram 2, tram 5, tram 7, tram 21, tram 26 -
 Bendigo Historical Society Inc.
Photograph - HILDA HILL COLLECTION: BLACK AND WHITE PHOTOS, 1921-1922
Series of Black & White Images of Hill Family in the years 1921-1922. Total 7 Photos. Darkie the horse tethered to stable. Zita, Nora, Rita & Doreen one Zita is dressed in black with white scarf around her neck and wearing a dark coloured hat, other three are all dressed in white Nora has a dark hat and other two have broad brimmed hats, Rita and Doreen have black ribbons hanging from their necks, to the right are a man and lady seated on the ground and in dark clothing, a man with a pipe in his mouth and wearing a grey suit and hat in background, lady in black and lady in white looking in other directions, background has grandstand with gab le roof and fronted by a white picket fence and people sitting at tables and chairs, trees in right background, Queenscliff February 1921. Rita Nora Doreen lying face down on the beach, girl on left has dark hat on, background shows large shed and other housing with fences, 'Merry Mermaids' Queenscliff 1921.Four girls and one male, three girls dressed in white, one in dark colour, two have light coloured hats and two have dark colour hats, one girl dressed in dark colour, male is wearing white trousers and college coat with stripes, background shows skyline of the nearby city and beach buildings, two men occupy a seat right back ground and dressed in dark clothing, Queenscliff 1921. Cyril Fred Mollie Doreen in a conga line the boys in grey suits and the girls in white, one has circular bands on her skirt, hedge in near back ground, gable roofed building and trees further back,'Durvol' January 1922. Hal wearing dark coat and jodhpurs long boots sitting astride a bicycle, something balanced between the handlebars and on the top bar, paling fence with vine hanging overhead other plants in the corner of the yard, December 24 1921. Doreen riding in a billy cart and pulled by a large dog along a pathway, Doreen is wearing all white, background is bushes and hedge with large tree, Dog is dark colour, 'I'm coming' January 1921.Hilda Hill Personal Collectionaustralia, history, post war life -
 Ballarat Tramway Museum
Photograph - Black & White Photograph/s, State Electricity Commission of Victoria (SECV), c1935
Set of 8 black and white photographs of the SEC Ballarat track welding truck, Reg. No. 119 341. Truck is a British Bedford truck, model WHG, built by GMH Melbourne between 1932 and 1934. Has a fabric roof, chassis fitted with a tray top body, side tool box, metal frame and covered with canvas, fitted out with a motor generator set, welding equipment and oxy acetylene bottles. Also fitted with a spot light - 'Auto Reel Lite". - See Related Items sheet on truck notes provided by Kevin Oates, MFESB workshops, 4/2001. (Scan of this sheet of the Kodak folder added 15-8-2017 - see pdf file.) 1705.1 - side on view of truck with covers down, except for opening at back. Photographed in Wendouree Parade with two different boat sheds in the background. 1705.2 - view with drivers side cover opened, showing equipment arrangement. 1705.3 - close up view of motor generator set and controls and one of the oxy acetylene bottles. 1705.4 - view showing equipment laid out on the roadway, welding cover, seat, grinder, cables, shovels, welding mask etc. 1705.5 - close up view of motor generator control panel and associated cables. 1705.6 - view of side of truck showing all equipment. 1705.7 - vertical format photo from rear of truck showing equipment laid out and wandering lead connected to the overhead. Also shows high voltage wires on a power pole fitted with a bracket arm. 1705.8 - view of truck from the front, with SEC symbol on side, with a covers closed. Thought to be photographed at loop in Wendouree Parade on the View Point line, near Mill St. Prints when donated to the BTM were contained within a red and yellow "Kodak" folder. Folder stored with catalogue worksheet. On rear of folder in ink is number "53569" and stamped on the front is number "984" and written in front top left hand cover, "8 prints" and in top right hand corner word "Sarah". See Notes provided by Kevin Oates of the MFESB (Metro Fire Brigade Melbourne) Thornbury workshops on the truck, manufacture and engine. A survey of Wendouree Parade on 22/4/2001 did not show the boat sheds or power lines featured in the photographed. Thought to be in vicinity of Power station because of the high voltage lines on the power poles.Stamped on rear in black ink, "984" on photos 1705.3 to 1705.8.trams, tramways, welding truck, trackwork, secv, wendouree parade -
 Eltham District Historical Society Inc
Photograph - Digital Photograph, Marguerite Marshall, Avenue of Honour, Main Road, Eltham, 20 April 2008
The suggestion of an Avenue of Honour may have been originally put forward by Lady Irvine who was a member of the Welcome Home Committee. The Avenue of Honour was established to memorialise all those from Eltham who enlisted (some of whom were still fighting overseas at the time), similarly as the Shire of Eltham (Soldiers) Memorial Park was in tribute to all from the Shire who enlisted. The twenty-seven names of those killed from Eltham were engraved on the Eltham War Memorial Obelisk unveiled in 1919 at the corner of Main Road and Bridge Street. From an article in the Heidelberg News and Greensborough, Eltham and Diamond Creek Chronicle, September 22, 1917, p. 2, it was reported: Some few weeks ago a public meeting was held in the Eltham Rechabite Hall for the purpose of forming a committee to make necessary arrangements for the return of our brave lads from the front, with the result that the following officers were elected, viz., Sir William Irvine. president; Cr. R. D. Taylor, vice-president; Rev. T. W. Sapsford, secretary; Mr R. E. Gilsenan, treasurer; with a very strong committee of local residents. Lady Irvine then suggested that it would be nice to plant an Avenue of Honor, which was carried out in a very cheerful and spirited manner on Saturday afternoon. Cr Taylor and Mr R. E. Gilsenan occupied themselves during the fore-forenoon in getting the lining-out and other preliminaries ready, but shortly after one o'clock the willing workers could be seen wending their way towards the township, with picks, shovels. &c., on their shoulders, and in a very short time the gang at work was in appearance a very lively and pretty sight, the only thing that was missing was the camera, to have had a few snapshots taken. A little after 3 o'clock Sir William and Lady Irvine, and Mr W. Gray and family, arrived by motor. Cr Taylor then explained that their object in gathering together so hurriedly to plant the avenue was on account of the lateness of the season, and being offered 100 trees, free of charge, by Cr. Wm. G. Gray; of Allwood Nursery, Hurst's Bridge (for which the committee are deeply grateful to him and the public highly appreciate his generous offer). Sir Wm. Irvine then spoke at some length on the ravages of this cruel war, and the good that must result therefrom in bringing all closer together; he also referred to our brave lads who were fighting for us, and thought it was for those at home to show their appreciation by planting the Avenue of Honor. Lady Irvine thou proceeded to plant the first tree, which was an English oak: Sir William following by planting a Spanish chestnut; and Mrs W. G. Gray a sycamore. After that the gathering refired to the entrance of Mr R. E. Gilsenan's green paddock to partake of refreshments, which the ladies had kindly provided for the willing band of workers. Work was again taken to in earnest, and the planting finished, all being satisfied that they had done good work. At the Eltham Shire Council’s monthly meeting held May 6, 1918, Cr. Gray promised to give Council £20 to £25 worth of trees if the Council would plant and guard them. His desire was that a tree be planted in the name of every soldier lad who has gone to the front. Each tree was later adorned with a brass plaque with the name of a soldier and a wooden tree guard placed around them. Over the years many trees died, and following roadworks were replanted on a new alignment. Nillumbik Shire Council is continuing this process of replanting trees in a new alignment to move them away from overhead power lines and to clear the VicRoads reserve. Covered under Heritage Overlay, Nillumbik Planning Scheme. Published: Nillumbik Now and Then / Marguerite Marshall 2008; photographs Alan King with Marguerite Marshall.; p119This collection of almost 130 photos about places and people within the Shire of Nillumbik, an urban and rural municipality in Melbourne's north, contributes to an understanding of the history of the Shire. Published in 2008 immediately prior to the Black Saturday bushfires of February 7, 2009, it documents sites that were impacted, and in some cases destroyed by the fires. It includes photographs taken especially for the publication, creating a unique time capsule representing the Shire in the early 21st century. It remains the most recent comprehenesive publication devoted to the Shire's history connecting local residents to the past. nillumbik now and then (marshall-king) collection, avenue of honour, main road, eltham -
 Federation University Historical Collection
Photograph - Colour photograph, Davey Paxman Experimental Steam Engine in the Mount Helen Workshop, c1994
The Davey Paxman Experimental Steam Engine was purchased by the Ballarat School of Mines as the result of a bequest from Thomas Bath.The Davey Paxman Experimental Steam Engine was purchased as the result of a bequest from Thomas Bath. The 'substantial sum' was used to build an Engineering Laboratory. The Ballarat School of Mines Council minutes of 08 November 1901 record: - Plans for [the] proposed building were submitted ... and ... it was resolved that a temporary building for an Engineering Laboratory be put up.' This laboratory, as an existing building, is first mentioned in the Ballarat School of Mines President's Annual Report of 1901, presented on 28 February 1902, reporting 'the erection of a building 67ft long by 33 ft wide' This report also lists all the equipment that would be accommodated in the Engineering Laboratory, including the experimental steam engine and boiler. The experimental Davey-Paxman steam engine arrived in Ballarat towards the end of 1902. The Engineering Laboratory was opened on 14 August 1903 by His Excellency Sir Sydenham Clarke. This engineering laboratory remained in use till about 1945. By 1944 preparations were under way at the Ballarat School of Mines to expand existing facilities, to be ready for the influx of returned soldiers. A new Heat Engines laboratory was built, this time of brick construction, replacing the previous corrugated-iron shed. In the early stages the steam engine was used to drive an overhead transmission shaft for machinery in the adjacent workshop. Later the steam engine was moved to a space that became the Heat Thermodynamics Laboratory. At the end of 1969 the engine was relocated to the Thermodynamics Laboratory at the then Ballarat Institute of Advanced Education (BIAE) Mt Helen Campus. It was donated to Sovereign Hill in 2006. According to the research of Rohan Lamb in 2001 around five experimental steam engines were made by Davey Paxman, and three of these had similar configuration to the Ballarat School of Mines Steam Engine, however, each of these was also unique with different valve arrangements. The list, which was on a scrap of paper in a folio held in the Essex Archives, confirmed that one was sent to India. The Ballarat steam engine can be dated to late 1901 to early 1902. Zig Plavina was responsible for moving the steam engine to Mount Helen, and worked on it as a technician for many years. He observed the following: * The condenser is driven by the low pressure engine. * The following arrangements are possible: i) the high pressure engine alone, exhausting to atmosphere. Condenser not used, crankshaft flanges not coupled. ii) crankshafts coupled, mains pressure (120 psi) steam supplied to high pressure engine, partially expanded steam delivered to low pressure engine (Tandem operation). Choice available re exhaust steam: either to the condenser or to atmosphere. iii) crankshafts not coupled, reduced pressure steam supplied to low pressure engine. Exhaust steam - either to the condenser or to atmosphere. * Valve arrangement - a choice of Pickering cut-off or throttle governor. On low pressure engine - throttle governor only.davey paxman experimental steam engine, model steam engine, steam, thermodynamics laboratory, thomas bath, bequest -
 Ballarat Tramway Museum
Slide - 35mm slide/s - set of 17, Noel Simons, 20/11/1962 12:00:00 AM
Set of 17 transparencies taken on 20/11/1962 on Kodak mounts. 1187.1 - Bendigo No. 2 at the Quarry Hill terminus, showing destination of Quarry Hill. Has Cohns Drinks and Streets Ice Cream ads on dash panel, a SEC 'electric cooking' roof ad and another roof ad. Shows the Y terminus at this location, but tram standing just before it. Overhead in position. 1187.2 - as above, but closer up. 1187.3 - as above, but from the north side, showing cemetery in the background. 1187.4 - Bendigo No.3 at Eaglehawk terminus. Tram showing destination of Quarry Hill. Has the various buildings at Eaglehawk in the background including the Foodland store. Has Streets Ice cream and White Horse Whiskey ads on the dash panel. 1187.5 - Bendigo No. 18 at Garden Gully crossing loop, in bound, with destination of Eaglehawk. Passengers waiting for an Eaglehawk tram at the stop. Has a white horse whiskey ad on dash panel and SEC roof ads. Conductor standing in doorway looking out. 1187.6 - Bendigo No. 7 inbound in Nolan St. at cnr of McCrae St. showing destination of Golden Square. Has Streets Ice cream ad on dash panel and a Castrol Roof ad. 1187.7 - Bendigo No. 19 at the North Bendigo terminus with railway level crossing in background. Tram has a Cohns Drinks ad and an SEC 'Electric Cooking' roof ad. 1187.8 - Bendigo No. 2 at the Quarry Hill terminus, looking back into Bendigo, showing destination of Eaglehawk. 1187.9 - Bendigo No. 21 in McCrae St, near Nolan St outbound for North Bendigo. Photo taken after tram has passed photographer. 1187.10 - Bendigo Nos. 4 and 26 at Charing Cross in View St. with fountain alongside and the Beehive, Ezywalkin Buildings in the background. No. 26 has a Sandhurst Milk and SEC 'Electric Cooking' roof ad. 1187.11 - close up of 22E maximum traction truck and folded footstep. 1187.12 - Bendigo No. 19 at Charing Cross terminus, after tram has passed photographer, showing destination of North Bendigo, with the Beehive building in the background and passengers boarding tram. 1187.13 - Bendigo No. 11, turning from View St. into Pall Mall, showing Special with the conductor holding point bar. Has the Beehive and Ezywalkin Buildings in the background. 1187.14 - No. 7 at Charing Cross terminus, in Pall Mall, bound for Golden Square. Has the Beehive and Ezywalkin buildings in the background and passengers waiting at the tram stop. 1187.15 - No. 18 at the Charing Cross terminus, bound for Eaglehawk. Has the Beehive and Ezywalkin buildings in the background and passengers waiting at the tram stop. Also has the 'Safety Zone' sign in the photograph. 1187.16 - No. 2 at Quarry Hill terminus, night or dusk photo. Tram showing destination of Depot. 1187.17 - No. 26 at Charing Cross, night photo. Tram has destination of Quarry Hill, but is on the line for Eaglehawk. Photo looks along Mitchell St. Also shows Safety Zone sign. Information written on in black ink and date stamped on purple ink. 1187.1 - "No. 2 at Quarry Hill terminus Bendigo" 1187.2 - "No. 2 at Quarry Hill terminus Bendigo" 1187.3 - "No. 2 at Quarry Hill terminus Bendigo" 1187.4 - "No. 3 at Eaglehawk terminus" 1187.5 - "No. 18 in Mt Korong Road, Long Gully at cnr of Havilah Road (Eaglehawk Route)" 1187.6 - "No. 7 in Nolan St. Bendigo, at Cnr of McCrae St., near lake Weeroona, (North Bendigo Route)' 1187.7 - "No. 19 at North Bendigo terminus" 1187.8 - "No. 2 at Quarry Hill terminus" 1187.9 - "No. 21 in McCrae St. Bendigo, near Nolan St. (North Bendigo Route) 1187.10 - "4 and 26 at Alexandra Fountain, Charing Cross Bendigo" 1187.11 - "Truck of Bogie Car, Bendigo Tramways" 1187.12 - "No. 19 in Pall Mall at Charing Cross, Bendigo" 1187.13 - "Birney car No. 11 entering Pall Mall from View St. at Charing Cross Bendigo" 1187.14 - "No. 7 in Pall Mall at Charing Cross, Bendigo" 1187.15 - "No. 18 at Alexandra Fountain, Charing Cross, Bendigo" 1187.16 - "No. 2 at Quarry Hill terminus, Bendigo" 1187.17 - "No. 26 at Alexandra Fountain, Charing Cross, Bendigo" tramways, trams, bendigo, quarry hill, eaglehawk, north bendigo, maximum traction, night photo, tram 2, tram 3, tram 4, tram 7, tram 11, tram 18, tram 19, tram 21, tram 26 -
 Flagstaff Hill Maritime Museum and Village
Postcard - Ships Collection, Stephen Cribb, circa 1914-1945
The postcards and photograph in this Ships Collection were found by the donor. Two of the cards are addressed to a local person "Master Jack de Little, Caramut House, Caramut, Victoria, Australia". Another has a message written in a different language. The remainder have no personal messages on them. The details of the postcards are- Published by Stephen Cribb, Southsea: 6967.1 Striking scene at Spithead; Aircraft over the fleet, including airships 6967.2 The King’s Ships; Fleet of ships. Aircraft overhead. 6967.3 HMS HIBERNIA; King Edward Class ship 6967.4 For Docking; Super Dreadnaughts, largest floating dock in the world, in Portsmouth Harbour 6967.5 HMS COLLINGWOOD; Dreadnaught, on which His Majesty’s son is serving. 6967.6 HMS BRITANNICA; Pre-Dreadnaught, 16,350 tons. Inscription “b1” or “61” written on the sea on the front of the postcard. 6967.7 HMS IRON DUKE; Fleet Flagship 6967.8 HMS Submarine D8. Ship numbered “78” 6967.9 HMS IRON DUKE, Fleet Flagship 6967.10 HMS SOUTHAMPTON 6967.11 SHAMROCK IV (Ketch rigged), leaving for America July 18, 14 (1914’) to fetch home the American to Gosport 6967.12 HMS CONQUEROR, June 1913 6967.13 Portsmouth Harbour, The Entrance (from Gosport Hard) 6967.14 Seaplane rising; 20th Century Marvel. Naval air defence. Types of airships, Seaplanes, Monoplanes in The Solent review 6967.15 HMS AUDACIOUS 6967.16 HMS DREADNAUGHT, pioneer of the all-big-gun warship ”Marcus Ward Series, McCaw Stevenson & Oms Ltd” 6967.17 HMS TERRIBLE, textured paper on front with aqua lower border, remnants of blue paper on the back. Published by Stephen Cribb, Southsea 6967.18 “In time of peace, prepare for war” Hoisting guns and torpedo heads on board a warship 6967.19 HMS LORD NELSON 6967.20 HMS HINDUSTAN 6967.21 Spitbank Fort, Spithead, on Solvent Sea 6967.22 HMS GARLAND of Netley Photographer Edgar Ward. “A halfpenny stamp for inland, one penny for foreign” 6967.23 Entrance to the Cambor, from Portsmouth Harbour. “312, copyright Edgar Ward” 6967.24 Royal yacht alongside Portsmouth Dockyard, “305” J. Welch & Sons, English Photography 6967.25 The Royal Yacht, Victoria & Albert “50” 6967.26 The VICTORY, firing a Royal Salute “21” Published by E.A. Schwerdtfeger & Co. London E.C. Printed at their works in Berline. Trade Mark E.A.S. 6967.27 The Hard and Viaduct, Portsea, Portsmouth 6967.28 SS MACEDONIA, P&O, 15212 tons, 1500 h.p., Coloured drawing. On reverse “Master Jack de Little, Caramut House, Caramut, Victoria, Australia” Published by Union Postale Universelle, Gibralta. 6967.29 HMS KING EDWARD VII leaving Dock N.3 GIBRALTAR – 11/3/05 (1905). Printer V.B. Cumbo, Gibraltar. Drawing. Handwritten “Oroton 28/5/06”. “Master Jack De Little Caramut, Victoria, Australia” 6967.30 7274 BARBARA, Hamburg. Imprinted “ ---O WEDDE ----- VORSETZEN 35/37” inscription, six lines of handwritten text in another language on the back. Published by the Valentine & Sons Co. Publishing Ltd., Melbourne, Sydney and Brisbane. Branches Sydney. London, Dundee, Cape Town, Montreal, Toronto. 6967.31 SS MOLDAVIA, the first dining saloon, Valentine Series M.4059. Valentines Real Photo Series Postcard. Postcard made in U.S.A. Agfa ANSCO 6967.32 Port McNicoll, Ont. DSR.. 6967.33 Orient Line SS ORONSAY, 20,000 tons. On board the Orient Line. Tuck’s Post Card, Carte Postale. ‘Our Navy’ Series II, Raphael Tuck & Sons. “Photogravure” Postcard Nu. 4305. Art publishers to their Majesties the King and Queen. 6967.34 HMS QUEEN MARY, HMS Queen Mary, Battle Cruiser, launched 1912, completed 1913, 27,000 tons, 75,000 S.H.P., 28 knots per hour, 8 13.5-inch guns, 16 4-inch guns, 2 torpedoes. Commissioned September 1913. Printed in England. 6967.35 HMS SUPERB 6967.36 HMS TEMERAIRE 6967.37 HMS MONARCH Small photograph, not a postcard, H 6 x W 9 cm 6967.38 PHOTOGRAPH NESTOR? Small sepia photograph, ship at dock. Stamped “Kodak print” “549”. Handwritten on back is “NESTOR?“ The Ships Collection of postcards and a small photograph depict maritime vessels connected to our Australian alliance with Britain, particularly during World War I. Two of the postcards are specifically addressed to a ‘Master Jack de Little’ at Caramut House, in the local township of Caramut which was a Pioneer Settlement and a Soldier Settlement area after World War I. Collection of thirty-eight postcards from various photographers. They depict shipping, harbours and naval vessels from the Great War to the Second War War. Most of the cards have a title, generally handwritten, on the front of the postcard. A few of the postcards have inscriptions.6967.6 Handwritten on the sea in the photograph “b1” or “61” 6967.28 Handwritten on reverse “Master Jack de Little, Caramut House, Caramut, Victoria, Australia” 6967.29 Handwritten “Oroton 28/5/06”. “Master Jack De Little Caramut, Victoria, Australia” 6967.30 Imprinted Stamp “ ---O WEDDE ----- VORSETZEN 35/37” (a location in Germany). Handwritten, six lines of text in another language, possibly German. 6967.38 Handwritten on the back is “NESTOR?“flagstaff hill, maritime village, maritime museum, postcard, world war ii, ww2, royal navy, british merchant navy, portsmouth, the great war, ship, world war i, wwi, british, 1914-1918, jack de little, caramut, caramut house, vorsetzen, spithead, sea fort, fort, spithead fort, aircraft, fleet, airship, the king’s ships, hms hibernia, king edward class ship, super dreadnaught, floating dock, portsmouth harbour, hms collingwood, dreadnaught, hms britannica, hms iron duke, fleet flagship, hms submarine d8, hms southampton, shamrock iv, hms conqueror, the entrance, gosport head, seaplane, naval air defence, monoplane, the solvent, hms audacious, hms dreadnaught, warship, marcus ward series, mccaw stevenson & oms ltd, s cribb, southsea, hms terrible, hms hindustan, hms garland, edgar ward, cambor, portsmouth dockyard, j. welch & sons, the royal yacht, victoria & albert “50”, victory, royal salute “21”, e.a. schwerdtfeger & co, e.a.s., the hard and viaduct, ss macedonia, p&o, master jack de little, hms king edward vii, dock n.3 gibraltar, v.b. cumbo, gibraltar, union postale universelle, 7274 barbara, ss moldavia, valentine series, valentine & sons co, port mcnicoll, agfa ansco, ss oronsay, orient line, raphael tuck & sons, hms queen mary, hms superb, hms temeraire, hms monarch, nestor, stephen cribb, stephen cribb photography, hms lord nelson -
 Ballarat Tramway Museum
Magazine, Melbourne and Metropolitan Tramways Board (MMTB), "MMTB News", 1967
Eight issues of "MMTB News" - The Magazine of the Melbourne and Metropolitan Tramways Board. No. 1 not in bag 11/9/2016 when checked - further checking to be done. All issues printed with an cream colour paper cover with the rest of the magazine white glass paper. 2721.1 - Vol. 4, No. 1 - 16 pages, January 1967, with a photo of the W7 1031 prior to running out of Preston Depot with its crew and depot starter, photo of opening of Glenferrie Rd Malvern, "Like to Drive a Tram?" - Hawthorn driver training school with photos, intake of new conductors, Stores - The Board's Housekeeper - Mr. D. Tatam, extension of the East Preston route, Children's Christmas party, trackwork and duplication of East Coburg to Bell St, laying of a cable tram cable. 2721.2 - Vol. 4, No. 2 - 16 pages, February 1967, with a photo of North Fitzroy bus crews prior to running out, "Sixty years of Essendon Tramways", R. Risson's speech to the ANA on 26/1, Annual report highlights, Tramways band, retirement of Max Jones. Photo of Mr. Risson scanned - see i9 2721.3 - Vol. 4, No. 3 - 16 pages, March 1967, with a photo of a model of the proposed St. Kilda junction arrangements, "Trams and Buses - they keep them rolling", St. Kilda Junction scheme, Overhead crews, Conductresses Uniforms, new conductors, sports and social club news. 2721.4 - Vol. 4, No. 4 - 16 pages, April 1967, with a photo of the reconstruction of Camberwell Road, "Melbourne Needs Trams", Tramways Band, Long Service awards, retirement of Roy Allen, Jack Moffatt World wide TV broadcast from South Melbourne depot, sports and social club news. 2721.5 - Vol. 4, No. 5 - 16 pages, May 1967, with a photo of bus maintenance work at North Fitzroy, Tram track maintenance procedures, retirement of Arthur Battye, death or Harold Wallace, sports and social club news. 2721.6 - Vol. 4, No. 6 - 16 pages, June 1967 with a photo of the World TV broadcast, "Our World" that featured South Melbourne Depot, tram track maintenance procedures, TMSV Visit to Rubicon with bus 570, staggered working hours, first MMTB built tramcars (T166), TMSV all night tour, retirement of Bill Trickey, sports and social club news. 2721.7 - Vol. 4, No. 7 - 16 pages, July - August 1967 with a photo of visiting US Sailors on a tramcar, changes to tramways routes (Norm Cross), retirement of Val Marchesi, Tom Addison, J. J. McKenzie, Gordon Mitchell, sports and social club news. 2721.8 - Vol. 4, No. 8 - 16 pages, September - October 1967 with a photo of Ray Harvey working on a RC2 Controller, tram charter by Bob Wilson, Essendon reunion, sports and social club news. Two copies of each other than No. 1, No. 3 and No. 8 as at 12/9/2016.-Each issue has stamped on the front cover or inside "The Australian Railway Historical Society (S.A. Branch).trams, tramways, mmtb, hawthorn, essendon, tramways band, st kilda road, trackwork, tmsv, tv broadcasts, tramcars -
 Melbourne Tram Museum
Magazine, Melbourne & Metropolitan Tramways Board (MMTB), MMTB News, 1967
Eight issues of "MMTB News" - The Magazine of the Melbourne and Metropolitan Tramways Board. Two copies of each issue held. All issues printed with an cream colour paper cover with the rest of the magazine white glass paper. 1724.1 - Vol. 4, No. 1 - 16 pages, January 1967, with a photo of the W7 1031 prior to running out of Preston Depot with its crew and depot starter, photo of opening of Glenferrie Rd Malvern, "Like to Drive a Tram?" - Hawthorn driver training school with photos, intake of new conductors, Stores - The Board's Housekeeper - Mr. D. Tatam, extension of the East Preston route, Children's Christmas party, trackwork and duplication of East Coburg to Bell St, laying of a cable tram cable. 2721.2 - Vol. 4, No. 2 - 16 pages, February 1967, with a photo of North Fitzroy bus crews prior to running out, "Sixty years of Essendon Tramways", R. Risson's speech to the ANA on 26/1, Annual report highlights, Tramways band, retirement of Max Jones. Photo of Mr. Risson scanned - see i9 1724.3 - Vol. 4, No. 3 - 16 pages, March 1967, with a photo of a model of the proposed St. Kilda junction arrangements, "Trams and Buses - they keep them rolling", St. Kilda Junction scheme, Overhead crews, Conductresses Uniforms, new conductors, sports and social club news. 1724.4 - Vol. 4, No. 4 - 16 pages, April 1967, with a photo of the reconstruction of Camberwell Road, "Melbourne Needs Trams", Tramways Band, Long Service awards, retirement of Roy Allen, Jack Moffatt World wide TV broadcast from South Melbourne depot, sports and social club news. 2721.5 - Vol. 4, No. 5 - 16 pages, May 1967, with a photo of bus maintenance work at North Fitzroy, Tram track maintenance procedures, retirement of Arthur Battye, death or Harold Wallace, sports and social club news. 1724.6 - Vol. 4, No. 6 - 16 pages, June 1967 with a photo of the World TV broadcast, "Our World" that featured South Melbourne Depot, tram track maintenance procedures, TMSV Visit to Rubicon with bus 570, staggered working hours, first MMTB built tramcars (T166), TMSV all night tour, retirement of Bill Trickey, sports and social club news. 1724.7 - Vol. 4, No. 7 - 16 pages, July - August 1967 with a photo of visiting US Sailors on a tramcar, changes to tramways routes (Norm Cross), retirement of Val Marchesi, Tom Addison, J. J. McKenzie, Gordon Mitchell, sports and social club news. 1724.8 - Vol. 4, No. 8 - 16 pages, September - October 1967 with a photo of Ray Harvey working on a RC2 Controller, tram charter by Bob Wilson, Essendon reunion, sports and social club news. Two copies of issue 4 held. Second copy added 31/8/2004. Two copies of issue 6 held. Second copy added 26/09/2006.trams, tramways, mmtb, hawthorn, essendon, tramways band, st kilda rd, trackwork, tmsv, tv broadcasts, tramcars -
 Ballarat Tramway Museum
Book, "Ballarat Illustrated", 1972
Original c 1914 (see below), facsimile copy - re-published 1972. Original features photos of Ballarat City and Town, its buildings, parks and the various industries and organisations that were in Ballarat at the time of publication, including ESCo. Many photos features ESCo trams. Photos sepia toned. Has some red colour block printing on the front cover and rear, for Star Oil Engines. On inside back cover is a map with the places of interest and tram route map, marked in red. Pages are un-numbered. Original published by Ballarat East Town Council and Ballaarat City Council. On cover has number stamped in black in, "No. 87" (assume facsimile copy No.). Photos with publication show tram No. 21, built 1913 and ESCo photo page shows Mr. Pringle as Manager. Mr Pringle became manager in January 1911, As there is no photos of the "Avenue of Honour", or other mention of the first world war, assume original published about 1913 or 1914. Original shows Engravings and printing by "Campbell Wilson Prop Ltd, Ballarat". See Other Information as well for more listing details. High Resolution image added 31/8/2012 of i2 of ESCo page and i3 for Ballarat identies and sheet i4 extracted for Mr Pringle. PDF scan of full document added 21/5/2019 - see images btm633-1i.pdf and btm633-2i.pdf Notes on "Ballarat Illustrated" Reg. Item No. 733 From notes made by Neville Gower 12/1/1997 Cover: Inside front cover: Last paragraph, "Facilities for Travelling" - Electric trams serve all parts of Ballarat. Page 3: Street Scene, Municipal Town Hall, showing tram wiring Page 7: Street Scene, Lydiard St. North, intersection and tramway centre, with ESCo tram No. 21 in the bottom photo. Other photos features trams as well in Sturt St and Lydiard St. North. Page 9: Street Scene, Top photo of Sturt St. from Lydiard St. looking east, shows piles on right-hand side of road. Car parked by Post Office has a car registration number "9007". Bottom photo, an tram climbing hill, shows double trolley in the street, with early English type of pull offs. Page 13: Street Scenes and Historic Buildings: One of five photos, shows Victoria St. looking East, with tram track prominent in photo and how stone work was set up about the rails and overhead poles. Page 23: Street scene, Gardens North Entrance gates, shows details of gates near St. Aidans Drive. Note double trolley wire on poles, and style of insulators. No trams in photo, three ladies walking down the track. Page 37: Street Scene; Lydiard St views, top left hand photo, shows Railway station and railway gates with signal gantry and horse drawn vehicles. Tram tracks apparent. Bottom left hand photo shows Lydiard St. North, near Post Office, double track with centre poles - Single wire per track. Top right hand photo, showing Cemetery gates in background. Bottom right hand photo - from north end of Lydiard St. South, looking north, with an ESCo tram in background. Also has a parked car on left hand side. Page 45: Street Scenes - Bridge St; top photo at west end of Bridge St. with ESCo No. 11 with possibly double trolley wire in photo. Bottom photo at east end of Bridge St. with tram in background, shows junction. Double trolley heading out to Mt. Pleasant, single trolley for Victoria St. Page 45: Street Scenes - Bridge St; top photo at west end of Bridge St. with ESCo No. 11 with possibly double trolley wire in photo. Bottom photo at east end of Bridge St. with tram in background, shows junction. Double trolley heading out to Mt. Pleasant, single trolley for Victoria St. Page 61: Street Scenes and Historic Buildings - Public Institutions Ballarat - top left hand photo of the Hospital shows some tram track in foreground, with double trolley wire. Top right photo is of the Orphanage, the name of the tram terminus for many years. Page 68: Electric Supply Co. of Victoria's pages - top photo showing powerhouse in background, across the lake, can hardly see anything for the trees, except for the chimney. Bottom photos of the steam Turbo Generators and the switchboard. Gives Mr. P.J. Pringle as Chief Engineer and General Manager. He took over in Jan. 1911. Page 69: Ballarat East Views - features photo of Black Hill open cut, Ballarat East Railway Station, Ballarat Fire Station and "Victoria St. looking East", repeat of photo printed on page 12, but slightly darker. Image on system includes fire station and railway station, - Ballarat East. Page 78: Series of photos of various Ballarat VIP's of the era, fourth one in on top line features "P.J.Pringle, Electric Supply Co." Inside Back cover - map of Ballarat including tram lines and places of interest marked in red. Gives a detailed photographic presentation of Ballarat in 1914.80 page book with, in addition, light green card covers, titled "Ballarat Illustrated". Loose copy of page 9 and 10 held.trams, tramways, ballarat, local history, heritage buildings, esco -
 Melbourne Tram Museum
Magazine, Metropolitan Transit Authority (MTA), "Headway News", July 1983 to July 1984
Magazine, published by the Metropolitan Transit Authority of Victoria "Headway News" - A4 printed on white gloss paper, with the MTA logo or symbol. Issued under the name of L. A. Strouse as Chairman of the body which commenced on 1/7/1983. Major tram and bus items listed. .1 - Vol 1 No. 1 - July 1983 - four pages - gives details of corporate identity, including notes on the design of the logo, notes from the Chairman, details of the Management Team, the Board, move to the new head office - World Trade Centre, Preston Workshops Project. Management Team - Albrecht Scholer (Metro rail), Dudley Snell (trams), John Wagstaff (GM Marketing and Sales), Michael Maude (GM Personnel) and Paul Riboni (GM - Finance and Corporate). .2 - Vol 1 No. 2 - August 1983 - four pages - details the MTA Board with a photo, gives details of the intended directions that the MTA is planning to take, western suburbs and Doncaster bus changes, new bus workshop at Northcote. Photo notes Bill (W) Aird as Interim Secretary of the MTA. MURLA. .3 - Vol 1 No. 3 - September 1983 - four pages - Flinders St station redevelopment, METROL, AVM - vehicle monitoring, Employees Board Member election and sports roundup. .4 - Vol 1 No. 4 - October 1983 - six pages (one sheet folded) - Refurbishment of W5 trams - fitting of sliding doors, Bundoora Extension, Tram Priority, management changes - Level 3 - John Grigg and Geoff Carkeek, early retirement seminars, transport loan, upgrade to rail overhead, Bob Drummond Retires, flat fares, Gail Moody project engineer for Bundoora Extension and MTA at Royal Show. .5 - Vol 1 No. 5 - November 1983 - eight pages - two sheets - intro of new fare system on 13/11/1983 - "the Met", (Travel Cards and neighbourhood tickets), tram priority, training in new ticketing system, profile of Paul Riboni, restructure of the Metro Rail division, New A class trams, notes restarting of alphabet, cost containment, early retirements, election of employee Reps (Norm Maddock and Tony Tuohey), sporting news, Preston Workshops redevelopment and tram 520 goes to Elton John. .6 - Vol 1 No. 6 - December 1983 - single sheet, two pages with a Christmas message and consultation committees will work during 1984. .7 - Special Edition 1984 - one page - message from the Chairman and Managing director, - re on time running, METROL and planning for 1984. .8 - Vol 2 No. 1-2, January - February 1984 - four pages - METROL now in operation, new managers - John Coulson ex MMTB Assistant Secretary and financial manager, tram and bus appointments, "trams that bend in the middle" - launch of B class trams, sport - Cricket carnival. .9 - Vol 2 No. 3 - March 1984 - four pages- "charting the football crows, proposed head office at 60 Market St (did the World Trade Centre in first issue ever happen?), Colin West Group Manager Personnel - ex MMTB Personnel, Robin Ould employee relations - ex MMTB Industrial Officer. Has a profile on John Wagstaff, interstate cricket and new apprentices. Includes an item on the down fall of Sydney tram network - "The fall of the Giant" .10 - Vol 2 No. 4 - April 1984 - four pages - John Grigg appointed as Chief GM Metro Rail, OH&S Bill, train defects, Tony Jackson bus mechanic wins award, Beppie - Welfare Counsellor for MTA Tram and Bus based at Hawthorn depot. .11 - Special Edition - 1984 - single page- "Met Birthday address by Chairman". The continues to:trams, tramways, mta, preston workshops, board members, management, northcote bus workshops, avm, flinders st, w5 class, bundoora, tram priority, retirements, fares, royal show, funding, sale of trams, a class, travel cards, neighbourhood tickets, b class, cricket, sydney, welfare -
 Ballarat Tramway Museum
Document - Report, Melbourne and Metropolitan Tramways Board (MMTB), MMTB Reports 1970 to 1976, 1970 to 1976
Seven copies of the Annual report of the MMTB for the years end 1970 to 1976. 3951.1 - "Report and Statement of Accounts for year ended 30 June 1970", No. 51, gloss fawn heavy paper cover with 44 pages, gloss, on inside giving details of the MMTB Board, Officers, Balance Sheet, Statement of operations, schedule of debenture, investments, Auditors reports, record of Annual traffic receipts, passengers, miles etc, tram and bus routes operated, statistical information, graphs and photographs. Photos include Doncaster depot, track reconstruction - concrete spreading equipment, Wattle Park and tram wheel grinding equipment. No printer name given. 3951.2 - "Report and Statement of Accounts for year ended 30 June 1971", No. 52, white embossed heavy paper cover with 44 pages, gloss, on inside giving details of the MMTB Board, Officers, Balance Sheet, Statement of operations, schedule of debenture, investments, Auditors reports, record of Annual traffic receipts, passengers, miles etc, tram and bus routes operated, statistical information, graphs and photographs. Photos include; prototype tram in St Kilda Rd, the New computer installation, decorated tram - Christmas 1970, Tram Advertising 1971 (briquettes), No printer name given. 3951.3 - "Annual Report 1972" - white gloss heavy paper cover with 44 pages, gloss, on inside giving details of the MMTB Board, Officers, Operations report, schedule of debenture, investments, Auditors reports, record of Annual traffic receipts, passengers, miles etc, tram and bus routes operated, statistical information, graphs and photographs. Photos include; school children boarding bus, passengers boarding bus at Shoppingtown, Concreting tracks in Keilor Road, Rail Inspection Unit and Wattle Park. No printer name given. 3951.4 - "Annual Report 1973" - light grey gloss heavy paper cover with 40 pages, gloss, on inside giving details of the MMTB Board, Officers, Operations report, schedule of debenture, investments, Auditors reports, record of Annual traffic receipts, passengers, miles etc, tram and bus routes operated, statistical information, graphs and photographs. Photos include; tram 1041, interior and driving cabin of 1041 and fire fighting demonstration at Preston Workshops. No printer name given. 3951.5 - "Annual Report 1974" - light blue gloss heavy paper cover with 40 pages, gloss, on inside giving details of the MMTB Board, Officers, Operations report, schedule of debenture, investments, Auditors reports, record of Annual traffic receipts, passengers, miles etc, tram and bus routes operated, statistical information, graphs and photographs. Photos include; Pedestrian Mall, Bourke St, New truck assembly area at Preston Workshops, electronic control equipment for new trams, English language lessons for migrant employees and 1041 turning from Bourke into Spring St. Printed by Sands & McDougall. 3951.6 - "Annual Report 1975" - fawn coloured gloss heavy paper cover with 44 pages, gloss, on inside giving details of the MMTB Board, Officers, Operations report, schedule of debenture, investments, Auditors reports, record of Annual traffic receipts, passengers, miles etc, tram and bus routes operated, statistical information, graphs and photographs. Photos include; Z class tram in Nicholson St, National Bus in Doncaster, New passenger shelter in St Kilda Road, new trams at Preston, drivers position of Z class tram, Interior of National Bus, Drivers position in National bus and first cable car in Melbourne after restoration. Printed by Magnum Press. 3951.7 - "Annual Report 1976" - light blue coloured gloss heavy paper cover with 44 pages, gloss, on inside giving details of the MMTB Board, Officers, Operations report, schedule of debenture, investments, Auditors reports, record of Annual traffic receipts, passengers, miles etc, tram and bus routes operated, statistical information, graphs and photographs. Photos include; Z2 in Bourke St, Z24 Victoria Parade, Z17 Nicholson St, overhead trucks, W2 in Mount Alexander Road Nth Essendon, Z28 Nicholson St, W2 226 loading passengers St Georges Rd and Wattle Park. Printed by Magnum Press.3951.1 - has Graeme Breydon's address stamp on front cover., 3951.2 - ditto, 3951.3 - ditto and on inside of front cover., 3951.6 - "G. Breydon" in pencil on front cover and pencil comments on balance sheet., 3951.7 - dittotrams, tramways, mmtb, melbourne, annual reports, operations, trackwork -
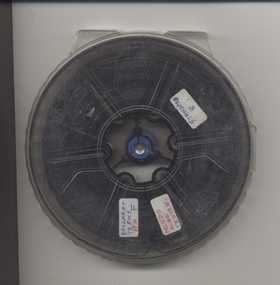 Ballarat Tramway Museum
Film - Movie Film & Box, Kodak, 1960 to 1971
Yields information in movie film format of Ballarat trams in 1960 through to 1971, how the system operated and was used by people, including special trams., Yields information in movie film format of Ballarat trams in 1960 through to 1971, how the system operated and was used by people, including special trams.Movie film - 8mm, approx. 15 mins, without leader strip on a plastic reel, within a clear plastic case - Standard 8, titled "Ballarat Trams". See Reg Item 4957 for DVD and Mini DVD. Has been transferred to DVD - see Reg item 4957 Made by Arthur Hill. Also transferred to DVD by Rod Cook Oct. 2015, via Roger Greenwood for use in his DVD, "The City of Ballarat Trams, Gardens & Gold" of 2016. See Reg Item 6883. In Arthur's letter - on file - Made between 1960 and August 1971. Synopsis: based on time. Between 1960 and 1968 0:00 Trams Ahead sign before the Victoria St terminus with 20 at terminus 0.14 - No. 20 leaving Victoria St terminus and being followed along Victoria St by car and then passengers jointing the tram at a tram stop. 00.40 - No. 12 (c1960) in bound along Lydiard St North and arriving in the Gregory St loop. 00.56 - No. 12 and 14 crossing at Gregory St. 01.20 - No. 33 and a bogie car crossing at depot loop. 01.31 - No. 18 travelling along Wendouree Parade with the Lake in the background. 01.42 - No 41 at depot junction and running into the depot No. 2 road with a short sequence of a tramway signal. 02.17 - SEC Sign at the depot gate, shot of 41 in No. 2 road, with the lights other way around, Caution beware of trams sign and a red signal. 02.31- Timetable sign at Gardens Loop 02.36 - No. 30 arriving at Loop and view of a signal with no lights showing. 02.48 - Destination roll being changed through a number of destinations. 03.26 - No. 20 arriving at Carlton St loop with the Olympic monument in the background and the red signal light going out. 03.31 - a lady standing at the front of No. 20, with an ice cream in hand, and No. 17 arriving at the Carlton St loop with a short sped up sequence and No. 20 departing from the loop, followed by No. 17 leaving the loop, heading into the city. 03.41 - No. 13 inbound from Sebastopol crossing Albert St and heading into the city. 04.12 - view of signal and contactor, the light going green and the tram passing underneath. 04.24 - No. 12 at the Sebastopol terminus and departing. 04.51 - No. 12 crossing Albert St Sebastopol. 05.16 - Following No. 12 along Albert St, with Borough Offices in background initially. 05.28 - No. 12 arriving at the Grey St loop with No. 14 arriving at the loop from the city and both trams departing. March 1971 05.58 - No. 30 being followed along Barkly St, Mt Pleasant and the pole being turned at the terminus 06.32 - No. 30 picking up a lady passenger. 06.38 - view from the front of a tram, with the drivers hand and a cigarette, view from the back of the tram, along the Mt Pleasant route and running through the loop and then turning into Main St - has the Ballarat (East) fire station in one sequence, and finally running along Main St. 07.35 - view from tram, with car turning into Bridge St. and then running into Sturt St passed the Parking Loop, and along Sturt St. 08.32 - Points at Drummond St North being changed, doors changed over and the tram running along Drummond St. North, through the Mill St loop and into Macarthur St and in Wendouree Parade, with the Lake Wendouree in view and crossing No. 12 at the Depot Loop, with crews chatting, past the depot, a lady passenger getting off the tram near Forest St., and arriving at Gardens Loop with the same lady passenger who got on in Barkly St, getting off the tram. 11.09 - view of No. 30 at Gardens Loop, departing the loop. August 1971 11.30 - R761 crossing Melton (Exford Wier) on the special train to Ballarat and then the bridge between Ballan and Gordon Stations. 12.16 - View from the front of a tram, following No. 26 along Lydiard St North, crossing at Gregory St and returning to the City. 12.39 - No. 14 and one other tram running along Albert St to Sebastopol, crossing No. 21 at Grey St and then to Sebastopol terminus, crossing Albert St and return and running along Albert St. 13.36 - No. 26, 39 crossing 13 at Gardens Loop. 14.00 - view looking across Lake Wendouree. 14.07 - 26 arriving at Victoria St, running part of Destination roll, passengers getting off with hotel in the background, trolley pole being turned and then with 39 following tram along Victoria St, crossing at the King St Loop. 15.07 - view of a trolley pole tracking through the overhead at curve 15.10 - end. Written labels giving title information on reel.trams, tramways, ballarat, sebastopol, lydiard st north, victoria st, mt pleasant, lake wendouree, depot, tram 12, tram 13, tram 14, tram 17, tram 18, tram 21, tram 26, tram 33, tram 39, tram 41 -
 Melbourne Tram Museum
Album - Photo Album, John Etkins, Ray Marsh, 1990's
Photo Album - 48 sheets bound with a white circular metal/plastic spiral bound within a heavy duty cardboard cover, with glued cover pages, plastic covered with an index sheet. Allows for three photographs per page. Not known whether the plastic envelope for each photograph is of archival quality. No Manufacture detail, though has a bar code on the bottom left hand corner of the rear cover. Cover is a reproduction from a painted art piece. Listing of photographs given on htd1800-RayMarshalbum.pdf Dates given when written on the rear of the photograph. Compiled by John Etkins from photographs given to him by Ray Marsh. 1990's to 1993 generally. Page Tram/s Notes – dates given when on rear of photograph. 1 226 Loading passengers – ex MMTB Annual Report? 1 957 City Circle 1 “hands off our trams” protest march 2 2100, 231 South Melbourne Depot – 10-4-1993 2 676 And many others – Hawthorn Depot 2 217 Princes Bridges 3 380, 104 St Kilda Road 3 106, 104 Essendon Depot 3 431 As a W1 4 1011 Fresh fruit tram, Preston Depot 6-12-1992, 4 824 Day in Day out, Brunswick and Victoria Parade 29-4-1993 4 722 Art tram 5 ? Advert tram – Imperial China 5 237 Stubbsy tram – TrippleM? 6 856 City Circle – with gas and fuel building – 31-7-1994 6 925 City Circle - with gas and fuel building – 31-7-1994 6 728 City Circle – 10-8-1994 7 246 Navy tram x three pics – July 1992 8 ? Gold tram advertising Georges 8 990 Advertising Telstra– 29-4-1993 8 749 Art tram? 9 990 NRMA - 1-3-1994 9 727, 215 Public Transport 9 920 Advert tram with a picket fence 10 Bendigo 21 Preston Workshops 11-3-1993 10 774? W5 being rebuilt at Preston – 21-10-1991 11 ? Bogie cable trailer at Preston – 29-4-1993 11 922 Interior view of a tram – being modernised – 11-3-1993 11 922 Preston Workshops 29-4-1993 12 1018 Workcare tram at Preston 1994 – 11-8-1994 12 774 Preston Workshops – 20-12-1993 12 8 Preston Workshops – 1-10-1992 13 380 Preston Workshops 13 8 Preston Workshops 13 20, 8 Preston Workshops 14 721 Preston Workshops 20-12-1993 14 ? Tramways painted artist tram featuring a driver and workshop 14 Traverser Preston Workshops 15 2110, 2106 Preston Workshops 15 ? Preston Workshops 15 2130 Interior Preston Workshops 20-12-1993 16 Set of three pics Elizabeth St floods – 17-2-1972 17 Set of three pics Elizabeth St floods – 17-2-1972 18 676 Turning into Swanston St from Batman Ave 18 676 Kew Depot – 10-11-1991 18 237, 676, 611 Kew Depot – 10-11-1991 19 214, 676 South Melbourne Depot – Kingsway 19 217 Spencer St 19 214 Advertising Kew Depot Open Day -8-12-1991 20 231, 676 Advertising Kew Depot Open Day -8-12-1991 20 Zoo tram, 256 Outside Kew Depot 20 214 Hawthorn Open Day with band 21 Zoo tram x 3 pics And horses, Kew Open day 22 231, 431 Kew Depot 22 892, 214 Kew Depot 75 years, Postcard – 1991 22 282 Kew Depot – with the name Monique on the tram and a lady standing alongside 23 238, 233 Kew Depot 23 236, 892, 282 Kew Depot – 25-4-1992 23 232, 236, 282 Kew Depot 24 2112 Port Melbourne line – with long grass – 11-4-1993 24 469, 2037, ? 2015 South Melbourne Depot 24 1018 or 976? Advertising a PTC Open Day – 20-10-1991 – In Swanston St - see Reg Item 1845 25 250 Bourke St 25 2100 Running into Preston Workshops 25 282, 1003 Collins St in the rain 26 Logo PMTT 26 Point cover With P&MTT cast into the cover 26 Foundation Stone Person reblocking in gold, a PMTT Foundation Stone 27 Logo Tramway Board 27 Logo MMTB logo 27 Logo Footscray Tramways Trust 28 217 And 2’gauge W2 – South Melbourne Depot – 20-10-1991 28 164 Somewhere? 28 1018 Advert tram – “Moro”, Preston flyover 29 V214 x 3 pics Kew Depot 30 611 Whitehorse Road, Balwyn 5-10-1991 30 976 x 2 pics Advert tram – have a red instead 31 610 Malvern Depot 31 138 (max tract) Flinders St 31 138 (max tract) Bourke into Spencer 32 844 Victoria Parade with R10 behind 32 264 With a TV interview being undertaken 32 2066 Elizabeth St – 29-4-1993 33 255 x 2 pics Derailed at Kew Depot 33 253 Derailed outside the Beehive Hotel 34 214, 892, 611 Re-enactment of Victoria Bridge to Esplanade service – 10-11-91 34 726 Art tram? – Swanston St with overhead trucks in background 34 10W Reblocking scrubber car at Brunswick Depot 1999 35 2085 At Preston workshops over an inspection track section 35 731 St Georges Road, road being rebuilt – Nov. 1991 35 Preston Jtn Junction at Workshops being relaid 36 1003 St Georges Road, Nov. 1991 trackworks 36 St Georges Rd Track being rebuilt – Nov. 1991 has temp track cross over 36 Victoria St Victoria St being reconstructed 6-9-1992 37 East Burwood Extension works – 18-2-1993 37 East Burwood Re-building crossover – 18-2-1993 37 Victoria St Victoria St being reconstructed 6-9-1992 38 19W, 16W Bylands – 5-12-1993 38 R10 Kew Depot 38 Workers Kew Depot pushing on a post 39 R10 R10 towing a B class tram- Royal Parade? 39 11W, 10W? South Melbourne Depot 39 Overhead Overhead truck at Kew Depot 40 Kew Depot Demolition works opposite depot 40 613? Malvern Depot on special tram 40 256 zoo tram Royal Park tram at Kew Depot 41 B class Bundoora line 1993 41 231, 611 Kew depot 75th anniversary tram 41 469, 287 Kew depot 42 510 Spring St into Bourke St – 28-4-1993. “42nd street promotion. 42 153 High St Northcote, Bundoora 42 611 Kew Depot, Nov. 1991 43 195? Simpson St siding – 25-4-1993 – 7 trams in all 43 646 Route 12, with fire station in background – Gisborne and Victoria 43 961 Burke Road, Camberwell, 10-8-1994 44 760 Art tram 44 938 Sam the tram, Flinders St 44 1014 Gilbert Road, West Preston, June 1994, advert for AGC 45 965 Daimaru advert tram, Swanston St 45 1018 Express post advert tram, Swanston St. 45 1024 Advert – lego exhibition – Swanston St 46 104 Camberwell depot 46 611 Looking towards driver’s controls from interior. 46 W1 Interior photo showing tip over seats 47 Cable car Interior photo – could be zoo tram 47 510 Interior, 28-4-1993 47 214 Kew Depot, night shot, Oct. 1991 48 246, 237 Kew depot, 13-9-1993 – Stubbsy and Energy Victoria advert 48 246, 231, 237 Kew depot, Navy, 75th anniversary of Kew and Fox Fm advert 48 2014, 2072 South Melbourne – tt line? Advert tram 49 59 And six other trams in front of Preston Workshops 49 1024 MMTB Christmas Tram, 1970 49 2001 Camberwell Depot 50 725 Preston depot area – tram has a red upper half 50 725 South Melbourne depot – now has Xmas decorations 50 1026 Bourke St, Christmas 6-12-1993 51 933 Victoria Parade shunt and other A class tram – Autumn 51 829 Art tram 51 39 Advert tram – Crime prevention 52 Connie Connie at night = has jeans on 52 1?? Has a MET inspector standing in front of number – Latrobe uni tram 52 611 Kew Depot 53 237 Fox FM Black Thunder tram at Kew Depot, August 1992 53 237, 611, 892 Victoria Bridge re-enactment – 10-11-1991 53 237 At Kew depot with 4 people, including Hugh Waldron 53 442, 10W South Melbourne Restaurant tram and works car 53 W2 At Wattle Park 53 School art Photo of students holding artwork on the zoo tram 256 at Kew 54 138 And many others 54 469 Launch of the Melbourne Tram by the PTC 54 School art Photo of students holding artwork on the zoo tram 256 at Kew 55 B2 Elizabeth St terminus, Christmas 1994 55 8 Z8 Swanston St, April 1993 55 504 Clifton Pugh – Preston Workshops 56 138, 180, 214 Hawthorn Depot display 56 650, 510 Hawthorn Depot 56 469 Camberwell 57 568 Bridge Road Richmond by cable tram depot 57 ? Advert tram – Falls Creek 57 995 Malvern Road, 18-5-1992 58 457, 217 etc Swanston St display 58 231, 611 Kew 75th Anniversary 58 682 Artist tram at Malvern Depot – 18-5-1992 59 1018 Country Road advert tram 59 8 Z class – decorated tram – Essendon Depot 59 947 Metland Safety Express – safety tram – Kew depot 60 101 x 2pics Decorated for RAAF 70th Anniversary 60 2082 Near East Preston Depot, with destination “Next Stop Mill Park” 61 475 After sale and disposal 61 585 After sale and disposal 61 651 After sale and disposal – Diamond Creek – 9-8-1994 62 386 After sale and disposal – Sunbury 62 590 After sale and disposal – Hall ACT 62 476 After sale and disposal – Kinglake 63 11W Bundoora Extension – track being opened 63 947 Metland Safety Express – safety tram – Kew depot 63 Model 2,3 2’ gauge model trams 64 Model 2 Ditto 64 250 After sale and disposal 64 293 After sale and disposal – Diamond Ck – 9-8-1994 65 246, 231, 237 Kew depot, Navy, 75th anniversary of Kew and Fox Fm advert 65 1002 Advert tram – Salvation Army 65 231, 29 Kew Depot 66 246, 231, 237 Kew depot, Navy, 75th anniversary of Kew and Fox Fm advert 66 646, 935, 1002 Kew depot 66 220, 60 Preston Workshops? 67 851, 814 Malvern Depot 3-9-1992 67 726 Malvern Rd at Glenferrie Road – 18-5-1992 67 237, 133 Victoria Parade 1996 68 814 and others Interior Malvern Depot – 18-5-1992 68 231 75th Kew depot anniversary at depot 68 231 75th Kew depot anniversary at depot 69 1024 Malvern Depot 10-11-1991 69 1011 Advert tram Melbourne City Toyota 69 106, 180 Swanston St 70 190, 568 Camberwell Depot 70 431 Flinders St – tram event 70 20, 138 Camberwell Depot 71 431 Flinders St – tram event 71 237 Fox FM Thunder Tram 71 2057, 2014 Elizabeth St, Vic Market 29-4-1993 72 676, 611, 892 Victoria Bridge re-enactment – 10-11-1991 72 Ceremony Victoria Bridge – mayor and others event 72 214 214 on the bridge 73 164 Lygon St – former outer circle line level crossing in view 73 841 Swanston Walk 29-4-1993 74 821 St Georges Road, April 1993 74 431, 231 Victoria Parade 74 217, 676 Passing Camberwell Depot 75 Oporto 018 Clarendon St 6-3-2003 75 3007 Albert Park – 7-3-2003 75 3001, 018, 3502 Docklands – 10-3-2003 76 Oporto 018 Docklands – 16-1-2003 76 Oporto 018 Flinders St 7-3-2003 76 3502 Swanston St at Flinders St -8-3-2003 77 16 Kew Depot, Jan 1991 77 112, 110 Bundoora 4-9-1992 77 738 Camberwell Feb 1991 78 1011 Thornbury Jan 1991 advert for City Toyota 78 101 Bundoora – RAAF tram 4-9-1992 78 814 Art tram – Swanston St August 1992 79 1024, 469, Z3 Preston Workshops – 469 as the Melbourne Tram – 9-9-1992 79 961 Malvern Depot 3-9-1992 79 242 Single line working in Victoria St 6-9-1992 80 781 Thornbury, the hump, Preston Workshops Jan 1991 80 2104 Preston Workshops 9-9-1992 80 2100 Launch, Preston Workshops 9-9-1992 81 5W + 1A 5 x W at Kew Depot 3-2-1991 81 676 Kew Depot 21-2-1991 81 873, 2016 Brunswick depot 2-3-1991 82 231 Kew Depot Yard – 21-1-1991 82 157, 158 Brunswick Depot – 2-3-1991 82 2057, 873, 158 Brunswick Depot – 2-3-1991 83 802 Art Tram - Franklin St from the signal box 2-3-1991 83 990 990 Evian advert tram, Franklin St signal box 2-3-1991 83 920 GIO Advert Tram with Bushels tea and Yellow Pages? Adverts 84 721 Art Tram, Franklin St signal box 84 976 St Georges Road, Jan 1991 – advert tram Capital society 84 731 St Georges Road, Jan. 1991 Art tram 85 10W Victoria Parade, Brunswick St, 1/3/1991 85 10W, 9 or 11W South Melbourne depot 85 10W Bundoora Terminus 4-2-1991 86 11W City Baths 86 10, 16 Camberwell Depot 6-12-1990 86 944 Glenhuntly Depot 18-2-1991 87 2011 Spring St – Princess Theatre, March 1990 87 294, 239, 277, 243, 259, 280 Kew Depot 87 296 Kew Depot 88 1015, 16 Batman Ave 19-1-1991 88 963, 948, 935, 996, 892 Kew Depot 3-2-1991 88 Victoria St Victoria St Richmond Reconstruction 6-2-1992 89 1014, 990 Batman Ave 19-1-1991 (Image added i5 and rear view added 23-12-2018, scanned for Dale Budd. 89 920 920 – GIO advert tram, 760 art Tram Collins at Spencer 17-10-1990 89 610, 611 Kooyong Station level crossing 30-12-1990 90 95 Royal Park, 15-2-1991 90 2057, 873, 158 Brunswick Depot – 2-3-1991 90 10 Camberwell Depot 6-12-1990 91 Bendigo 44 In Prahran and Malvern Tramways Trust Colours 1986 –Black and white photo. Listed 5-11-2016See note page 1 and on image 3trams, tramways, album, photo album, tramcars, the met, yarra trams, kew depot, brunswick depot, advertising trams, transporting art, preston depot, hawthorn, bundoora, st georges rd, victoria st, camberwell depot, tram r10, 8, 10w, 10, 11w, 16, 16w, oporto 018, 19w, 20, bendigo 21, 29, 39, bendigo 44, 59, 60, 95, 101, 104, 106, 110, 112, 133, 138, 153, 157, 158, 164, 180, 190, 195?, 214, 215, 217, 220, 226, 231, 232, 233, 236, 237, 238, 239, 242, 243, 246, 250, 253, 255, 256, 259, 264, 277, 280, 282, 287, 293, 294, 296, 380, 386, 431, 442, 457, 469, 475, 476, 504, 510, 568, 585, 590, 610, 611, 613?, 646, 651, 676, 682, 721, 722, 725, 726, 727, 728, 731, 738, 749, 760, 774, 781, 802, 814, 821, 824, 829, 841, 844, 851, 856, 873, 892, 920, 922, 925, 933, 935, 938, 944, 947, 948, 957, 961, 963, 965, 976, 990, 995, 996, 1002, 1003, 1011, 1014, 1015, 1018, 1024, 1026, 2001, 2011, 2014, 2015, 2016, 2037, 2057, 2057, 2066, 2072, 2082, 2085, 2100, 2104, 2106, 2112, 2130, 3001, 3007, 3502 -
 Melbourne Tram Museum
Album - Charles Craig - part 1 of 2, 1950s to 1970s
Photo - see pdf file for further information. Number Brief Description CC1 S178 at Elsternwick level crossing track works CC2 Building East Preston Depot 1955 CC3 Camberwell depot – post WW2 – lots of trams and a black cat CC4 W2 584 and SW6 958 northbound – Chapel St and Brighton Road CC5 W2 357 – southbound, Chapel St Brighton Road CC6 Pascoe Vale Road, Raceday working – note the signal CC7 The Preston Workshops - The Argus, post WW2, 223, 647 et al CC8 923 or is it 922 being built at Preston – The Argus photo - CC8A 832 being positioned onto trucks at Preston after an overhaul – Argus Photo – see also CC306 CC9 Footscray depot` CC10 W5 797 in St Kilda Road during track works – 1950s CC11 W2 457 at Kew Post Office CC12 Wellington Parade – W2 432, 492 and 337 – special event CC13 Swan St line up of trams – football? Or other special event – Sinclair’s bus on the right side. CC14 W2 630 being washed at a depot – The Argus photo CC15 Royal Park line at Flemington Road – W2 355 and W5 786 CC16 Nicholson St track construction from a tram cab CC17 T181 on tour at Gordon St CC18 T181 on Maribyrnong Bridge CC19 Ditto at River St just off bridge CC20 As for CC18 CC21 At Raleigh Rd CC22 T181 at Footscray depot CC23 Track construction, Nicholson, just north of Gertrude CC24 Commissioning overhead Bourke St tram 988 CC25 Queens Parade – 997 and 994 CC26 Swapping trolley wheel to skid – commissioning CC27 Track construction in Gertrude St CC28 985 in Queens Parade running special CC29 997 in Queens Parade CC30 1033 at North Fitzroy – AETA Special CC31 Bourke St at Elizabeth St – has passengers on board CC32 W6 985, 996 Queens Parade, Mk 3 bus 333 CC33 As above CC34 Showing construction at Nicholson & Gertrude – Bourke St CC35 W2 223 on Burnley temporary bridge – VR track expansion CC36 W5 823 – ditto CC37 Tram on old bridge prior to removal CC38 W2 433 on temporary bridge with new bridge beams and old track CC39 Looking down showing temporary single track – Swan St CC40 Tait train passing under tram bridge CC41 SW6 on single line – off loading CC42 W2 547 at City Road Junction CC43 City Road Jtn – 1969 – 596 and 771 CC44 City Road Jtn – 1969 – 596 and 771 (same as CC45 438 in Flinders St CC46 355 somewhere CC47 552 somewhere CC47A 364 at Preston Workshops? CC48 W2 334 on Traverser – Preston Workshops CC49 Wellington pade – large line up of trams, c1950 925, and 611 CC50 W2 493 Franklin st – advertising for Savings Certificates CC51 Possibly 551 with advertising for fund raising for Blind institute CC52 249 at Hawthorn – Riversdale Junction – with a Tally Ho and Village Fair Aux. board CC53 MMTB Postcard of 511 CC54 Wattle Park terminus with Single line warning sign CC55 Wattle Park Duplication CC56 36 at Domain Junction – 833 CC57 36 at Domain Junction CC58 36 at Domain Junction with 810 and 833 CC59 36 in Swanston by Flinders St Station CC60 36 in Spencer St at A’Beckett CC61 36 crossing Collins St CC62 36 crossing Collins St CC63 36 northbound in St Kilda Road with Shrine in background CC64 36 northbound in Swanston St at Flinders St CC65 Postcard – Ballarat 36 in Domain Road CC66 Postcard - Stampshow – Hawthorn Horse tram CC67 Postcard - Stampshow – Peace cable tram CC68 Postcard - 1041 and cable car set 1 at Preston CC69 Postcard - Colins & Elizabeth – greetings from old Melbourne CC70 Postcard - Cable car set at Preston CC71 Postcard - Twentyman’s cable cars CC72 Postcard - Nu-color-vue – horse tram 256 CC73 Cable car set – Market & Flinders CC74 Cable trams at Twentymans’ in their shed CC75 Cable tram track at Bourke & Spencer prior to removal CC76 Cable tram bogie at Preston Workshops – used as a dolly CC77 Cable trams at Twentymans’ CC78 Postcard - Valentines – Bourke looking west from Swanston CC79 Postcard - Rose 3938 – Bourke at Swanston – the Leviathan building CC80 Postcard - Valentines – Elizabeth St looking south from Collins – No. 19 CC81 Postcard - Rose P4765 – Bourke St Melbourne CC82 Postcard - Rose 4090 – cable tram passing Parliament house CC83 Postcard - Valentines – GPO Elizabeth St CC84 Interior of cable trailer with clothing on a set CC85 Elizabeth St looking north CC86 Cigarette card - Collins St No. 41- WD HO Wills CC87 Postcard - Rialto building with cable set CC88 Postcard - Valentines - Swanston at Flinders looking north CC89 CC90 Q 150 Hanna St – dated on rear CC91 176 turning – photo ex Alan Jungworth CC92 161 on Princes Bridge – minimum fare 4d sign and Inspector CC93 459 at Point Ormond CC94 158 at Gordon St – side on view CC95 X 217 in Swanston St CC96 X 217 in Swanston St with an East Brighton destination CC97 T177 CC98 T177 Peel St – no destination roll – being transferred? CC99 X1 462 in Glenhuntly Road to Point Ormond CC100 X1 462 in Glenhuntly Road to Elsternwick Rly Station CC101 X1 462 in Glenhuntly Road to Point Ormond CC102 Q 150 Hanna St CC103 190 at Camberwell Depot CC104 T182 at Footscray CC105 X1 466 and W2 at Footscray CC106 190 at Camberwell Depot CC107 X1 467 Barkly St Footscray CC108 X2 679 turning into William St from La Trobe St CC109 X2 677 Glenhuntly Road with Point Ormond Destination CC110 Postcard T180 CC111 Postcard format – X1 467 on a truck – see also CC178 CC112 Postcard format – X1 467 at Wantirna South CC113 Q200 and SW6 896 at Thornbury – has labels on rear CC114 T177, Ballarat Road – has labels on rear CC115 T178 at Point Ormond CC116 Postcard X1 465 and 466 CC117 Postcard – X2 676 CC118 Postcard – TMSV X2 217 CC119 810 on temporary bridging – 24-12-67 CC120 W2 575 – Queens Parade junction in, still temporary bridging, substation under construction CC121 Forming Queens Parade Junction base slab CC122 W2 596 prior to tramway works – all tracks still in position CC123 It’s a mass of reinforcing – bridging being formed CC124 Looking north with substation being built CC125 Looking east with some rather tight curves, Wellington St still in use CC126 SW6 958 ex Wellington St with all tracks and signal box and buildings. CC127 Victoria Pde at Gisborne looking east – at least 4 cars CC128 SW6 893? With dash canopy lights and SW6 862 and a man with a newspaper CC129 SW6 894 on the S curves, with tram in Wellington St CC130 Similar photo CC131 W2 564 turning into Wellington St – the concrete tracks are not that old CC132 W2 552 running out of Wellington St CC133 W5 732 from Fitzroy St into St Kilda Road with next iteration in position – very wonky CC134 W5 764 turning into Fitzroy St CC135 SW6 947 turning from Wellington St CC136 W2 586 running out of High St CC137 W2 500 turning into Wellington St CC138 W2 543 in Wellington St inbound CC139 L103 with St Kilda Junction destination, and a tower truck on right CC140 Workmen – new track in Queensway in use CC141 Ditto CC142 L103 in Queensway, and another car in bound CC143 Looking east along Wellington St which has been taken out of use. Also a MMTB Roller CC144 W5 824 and a W2 and all types of wobbly temporary track CC145 W2 354 to High St CC146 Sw6 947 on the S bends CC147 W2 500 looking north – tram on the S bends CC148 SW6 896 leaving the S bend CC149 W2 357 and a MMTB City bus with trees/gardens on the side CC150 W5 817 Elliot Ave – see also CC302 CC151 W2 552 – note the large trolley bridge CC152 W2 550 at depot or workshops CC153 1B truck CC154 SW2 432 CC155 W2 155 at Glenhuntly CC156 SW6 937 on AETA tour? CC157 X2 677 on Footscray service – Ballarat Rd? CC158 W2 641 – High St Kew? CC159 SW6 847 – Power St Hawthorn CC160 Simpson St – big line up CC161 W2 546 truck No. 1? CC162 W2s at Glenhuntly depot CC163 No. 15 truck under 899 CC164 206 and other junk at Preston Workshops CC165 W in Swanston St Melbourne – Rose series card CC166 Y1 613 Batman Ave?? or William St at Collins CC167 Tram plans CC168 X 217 Swanston St – see also 95 and 96 CC169 217 in Swanston St – same as 95 CC169A 192 in St Kilda Road at Princes bridge CC170 192 in St Kilda Road at Princes bridge CC171 Bendigo 3 arriving Malvern depot – being unloaded CC172 Ditto CC173 T180 at a depot CC174 X1 463 wheel set CC175 C30 – dog car side view – close up CC176 C30 dog car CC177 206 and 30 at Preston Workshops CC178 X1 467 on a truck – see CC111 also CC179 42 CC180 42 at a depot, no destination box CC181 W2 556 1A type truck CC182 Flinders St Station – Rose Series CC183 W7 1035 Spring – Nicholson St CC184 W7 1022 MMTB Post Card CC185 Adelaide 178 – has on rear – R. Lilburn 4/82 CC186 Adelaide 175 – has on rear – R. Lilburn 4/82 CC187 Y1 610 on AETA tour CC188 Y1 610 on AETA tour with large group – Point Ormond CC189 AETA display – has GH55-32 in pencil on rear CC190 AETA display – has GH55-29 in pencil on rear CC191 Y1 610 on AETA tour with large group – Point Ormond CC192 VR 53 at Footscray CC193 VR cars 40 and 34 at Elwood wash dock CC194 W7 1024 as the 1970 Christmas tram CC195 Geelong – loading a set of 22E trucks CC196 Geelong 10 and 23 running an AETA special CC197 Geelong – AETA special CC198 Geelong 7 at Junction CC199 Geelong 10, in the city CC200 Geelong 33 with Belmont destination CC201 Geelong 15 Eastern Park destination 29-3-1948 CC202 Geelong 23 at Railway Station – 29-3-1948 CC203 Geelong 23 at Railway Station – 29-3-1948 CC204 Geelong – loading a bogie tram CC205 Geelong – loading a bogie tram CC206 Geelong 40 – loaded on truck CC207 Geelong 40 – on jacks CC208 Geelong 40 on jacks – 19 behind CC209 Geelong 38 with two workers on either side CC210 – 214 Australian Historic Tramways stamp folder and set CC215 Bendigo 17 at depot – has dup JBS on rear CC216 Bendigo 20, 29 bogie and straight sill car at Charing Cross CC217 Bendigo one man bogie Pall Mall CC218 Bendigo – Bogie 23, other cars and welding truck at depot CC219 Bendigo 7 with Quarry Hill destination CC220 Bendigo 21 with Lake Weerona destination CC221 ESCo 18 Ballarat CC222 Ballarat bogie 22 on AETA special CC223 Ditto CC224 Ballarat 34 at Stones Corner – R Lilburn CC225 Ballarat 15 in Bridge St – R Lilburn CC226 Ballarat 40 at Gardens – R Lilburn CC227 Ballarat 37 running out of depot – R Lilburn CC228 Postcard – Valentines – Sturt St with loaded horse tram trailer CC229 AETA Geelong tram tour ticket – 29-3-1948 CC230 Postcard – Geelong – Valentine 2114 – T&G building CC231 Postcard – PMTT ! – High St Malvern CC232 Postcard – Empire – Glenferrie Road, Malvern at Wattletree Rd CC233 Postcard Y469, MMTB CC234 Postcard Z2 Spring St CC235 Postcard – Z1 MMTB CC236 Postcard – Stamp Show W1 431 CC237 Postcard – Stamp show B2005 CC238 Postcard – Stamp show W6 982 CC239 Postcard – Valentines 1264 – Johnstone Park with tram in distance CC240 Postcard – Rose 10711 – Swanston and Lonsdale – Hospital and W232 CC241 Postcard – Rose 4827 – Fitzroy St St Kilda W2 362 and 548 CC242 Postcard – Valentines – 939 – St Kilda War Memorial, W and a R? CC243 Postcard – Valentines – 572 – St Kilda War Memorial, W 413 and 140? CC244 Postcard – Valentines – 938 – Uper and Lower Esplanade – L 104 CC245 Postcard – St Kilda Rd at Princes Bridge Y1 and W CC246 Postcard – Biscay BG82 – W5 814 - CC247 Postcard – Biscay 796112 – Bourke St looking west CC248 Postcard – Biscay 796109 – Bourke St looking east CC249 Postcard – Biscay 2AUS58 – Z5 Bourke St CC250 Postcard – Biscay BG 249 – Swanston St CC251 Postcard – National View – St Kilda Rd – shrine and Prince Henrys W2 405 CC252 Postcard – Nu color vue – 11 ML 156 – St Kilda Rd CC253 Postcard – Nu color vue – 11 ML 153 – Swanston St CC254 Postcard – Nu Color vue – Collins St 442 CC255 Postcard – Pitt card – Adelaide – H 364 at Victoria St CC256 Postcard – SPER L/P 154 CC257 Postcard – BTMS – 550 CC258 Postcard – SPER – Brisbane 295 CC259 Adelaide 131 at Burnside – has R Lilburn on card, c1911 CC260 Adelaide 194 CC261 Adelaide 235, with two crew, The News photo CC262 Rockhampton, outside post office – has source of photo details CC263 Sydney – 2086 and 2062 arriving Circular Quay CC264 Sydney – P class – Pitt St? CC265 Sydney – 1610 at Circular Quay CC266 Brisbane 99 and 468 CC267 Sydney with bridge behind CC268 Steam tram Paramatta Park – 103 CC269 Sydney – Museum Station =- Elizabeth St CC270 Sydney – weed burner 137S at a loop Demonstrates the work of Charles Craig in photography and collection of prints.Assembled album in a black presentation folder of 270 photographs from the Charles Craig Collection - 86 sleeves - part 1 of 2. All photographs have been scanned and placed on the Museum's G drive. A list of all photographs with details where possible has been compiled. Victorian Provincial, Launceston, Hobart and Sydney tram photos have been transferred to other Museums, image files retained.melbourne, tramways, tramcars, trams, charles craig, st kilda junction, trackworks -
 Ballarat Tramway Museum
Film - Movie Film & Box, Kodak, 1960
Yields information in movie film format of Ballarat trams in 1960, how the system operated and was used by people., Yields information in movie film format of Ballarat trams in 1960, how the system operated and was used by people.Movie film - 8mm, approx. 30mins, with leader strip on a plastic reel, within a black and white plastic box, titled "Ballarat No. 1. 1960". Has been transferred to DVD - see Reg item 4100 as Segment No. 2. Made by Ben Parle. Also transferred to DVD by Rod Cook Oct. 2015, via Roger Greenwood for use in his DVD, "The City of Ballarat Trams, Gardens & Gold" of 2016. See Reg Item 6883. Synopsis: based on time. 0:00 View of typed introduction, noting that this is a pictorial record of Ballarat. 0:10 Title “The Tramways of Ballarat 1960, Part 1” 0:16 13, showing “View Point” at Stones Corner, Bridge St, east end, with trolley pole being turned, while another single trucker heads out towards Mt Pleasant. 0:25 13 leaving Stones Corner, short approach and then longer trailing shot of the tram going towards the City in Bridge St. 0:44 View out of front of tram in Bridge St heading towards the City, with cars in the photo, then passing through city Loop, no trams in the loop and running up to Lydiard St Nth and crossing the road. 1:22 Running up Sturt St from Armstrong St, passes over Dawson St X-over and up to the next intersection, Lyons St. 1:54 Title “The View Point Line” 1:59 19 inbound, in Ripon St, from crossing Mair St, towards camera and then passing away and turning into Sturt St. 2:49 View of a “Warning Oncoming Trams” sign 2:52 19 in Ripon St, going to View Point, crossing Webster St towards camera, then going away through the disconnected Victoria Ave loop, pass the “Warning Oncoming Trams” sign. Note very windy scene with people running across roads. 3:17 19 in Wendouree Parade, in bound, though showing destination View Point, going away from the camera, past the View Point Hotel. 3:39 19 coming towards camera near Excerpt or Devon St and then going away towards the terminus. 4:04 19 at the terminus, stationary, with a single trucker 3?, passing from Macarthur St into Wendouree Parade, behind 19. 4:20 33 coming towards camera in Wendouree Parade from St Aidans Drive, stopping to pick up passenger at Forest St and then going away towards the City, photographed from near the depot, on a wet and windy day. 4:54 35 in Wendouree Parade, coming towards the Camera from St Aidans Drive and then going away with the Gardens Loop area in the background. Tram stops at stop to let a passenger off. 5:28 21 leaving Gardens Loop for the City via the Depot, green light in signal can be seen. 5:43 28?, closely followed by 26 turn from Drummond St South into Sturt St. 6:18 Scene opens with shot of “Sebastopol” destination on a bogie tram. 6:21 Title “The Sebastopol Line” 6:24 21 turning from Sturt St into Drummond St Sth with destination of Bell St and then going away from the camera. 6:55 38 in Drummond St Sth, coming towards the camera and then passing the camera with Sturt St just in the view. 7:10 21, showing Gregory St, in Drummond St Sth, approaching and then going away, entering the Urquhart St Loop, 7:39 34 in Drummond St Sth (location check required (Latrobe?)), approaches camera, picks up passengers and the goes away. 8:09 39 at ? Street, turns from Drummond St Sth into Skipton St, after picking up and setting down passengers, bound for Sebastopol 8:55 35 inbound in Skipton St passes through the Bell Street Loop, and then goes away from the camera. 9:33 42 outbound in Skipton St, approaches the camera, passes and then crosses over the half the road into Albert St. 10:00 39 inbound in Albert St – location? 10:31 34 outbound for Sebastopol, approaches camera and just starts to pass by. 10:36 34 in Grey St crossing loop, crosses 42 inbound. 10:59 39 outbound in Albert St, with shopping centre in bound, approaches camera, passes and then crosses over Albert St. Mid morning scene. 11:39 39 inbound, Albert St south, approaches camera and then passes and the crosses over Albert St. 12:16 41 outbound in Albert St passes the camera, and pulls into the terminus with the conductor getting out on the back bumper to pull the pole down as the tram stops and a passenger walks into the Royal Hotel. 12:39 Title “The Lydiard Street North Line” 12:44 Filmed from the Hotel balcony, 21 inbound in Lydiard St Nth passes over Mair St, stops while 33 passes in the other direction. 13:18 With the red light showing on the Seymour St loop signal, 33 inbound for Sebastopol stops and picks up many passengers, passes the camera and runs past the VRI building in the background and through the loop. Possibly filmed on a Sunday given the ladies dresses and quieter streets. 14:01 30 outbound, passes the camera and stops at Macarthur St. Filmed alongside the brick wall of the cutting. 14:28 30 inbound arrives, passes through the Gregory St loop and then proceeds past the camera, making a stop to pick up passengers. 15:14 28 in Lydiard St Nth – location?, approaches and goes away from the camera, north of Gregory St. 15:34 28 ditto location? 15:53 21 arrives at the terminus with passengers getting on and off. 16:11 View of the a vertical positioned “End of Section” sign on a pole at the terminus and then lifting the camera to see the timetable board and the stop sign. 16:33 31 in Bridge St passing Morseheads and then turning into Sturt St, stops at the Grenville St stop, while another single trucker comes down to the stop from the City. 16:58 31 outbound in Bridge St, with destination of Victoria St. 17:14 Title “The Victoria Street Line” 17:18 31 outbound to Victoria St from Stones Corner. Starts with an overhead shot, shows clock at the Caltex service station,. 17:37 31 inbound approaching Bakery Hill and then descending to the junction after it passes camera. 18:09 25 climbing outbound in Victoria St, passing the camera, to then pass through the King St loop. 18:47 25 inbound in Victoria St, passing the camera, then pass through the King St loop, with St Alypius Church in the background. 19:36 14 approaching the rail bridge in Victoria St and stopping at the 2nd last stop to left of passengers. 20:01 14 leaving the terminus and approaching the camera and the a short sequence going away, to the next stop to pick up quite a few passengers. 20:14 “Trams Stop Here” sign, metal wrap around on a steel pole. 20:16 Title “The Mount Pleasant Line” 20:21 11 inbound in Main St, with a passenger leaping off the tramcar and another getting off just before the junction. 20:45 11 passes the junction and then proceeds away from the camera in Bridge St. 21:04 30 outbound in Main St, then turns into Barkly St, a bus (Eclipse Motors) passes in Main St just before the sequence ends. 21:31 30 inbound near Steinfield St. (exact location?) 21:49 25 approaches the camera, then proceeds away and passes through the Grant St. loop. 22:29 25 inbound, windy day, between Grant and Cobden, (exact location?), with a horse drawn bread van in the view and the breadman walking behind the tram as it passes. 23:02 11 outbound in Barkly St, (exact location?) 23:37 11 inbound in Barkly St (exact location?) 23:44 Mt Pleasant terminus signage 23:50 30 approaches the terminus and then stops with the conductor alighting turning the pole, passengers getting on and off and the driver appearing at the other end. 24:32 Title “The Gardens Via Sturt St. West Line” 24:35 21 outbound in Sturt St near Raglan St, approaches and passes the Camera. 25:09 12, showing City Oval, approaches and passes the camera, outbound near Windermere St. 25:33 13 showing View Point, goes away from the camera – location? 25:44 12 comes from St. West, inbound passes the camera and then stop as the next stop next Talbot St? 26:21 Short sequence of a “Warning Oncoming Trams” sign 26:28 42 inbound in Sturt St West, just before Ripon St, view coming towards camera and then going away to cross Ripon St. 27:10 34 passes through the Parker St loop 27:25 35 or 39 inbound past the college in Sturt St West 28:04 41 outbound at the Russell St curve, passes away from the camera. 28:11 35? inbound passes away from the camera through the Victoria Park or Morrison St loop, swinging out into the roadway. 28:29 View of timetable sign at Hamilton Ave. 28:37 35 turning from Sturt St West into Hamilton Ave, can see the conductor changing over the barrier rails. 29:11 42 inbound, crosses another bogie tram (35?) at Carlton St loop then passes the camera and goes past the Olympic rings monument. 29:42 12 approaches the Carlton St gates. 30:07 12 outbound, crosses a bogie tram in the loop with both trams then leaving the loop. 30:20 Title “End of Part One” Written labels giving title information on outside of box.trams, tramways, ballarat, sebastopol, lydiard st north, victoria st, mt pleasant, sturt st west -
 Kiewa Valley Historical Society
Book - Kiewa Hydro Electric Scheme, Bogong - Technical Notes
Ronald G. Thorn was a cadet engineer with the SEC on the Kiewa Hydro Electric Scheme. The SEC employed young engineers as cadets to gain experience in their profession. As a cadet he took notes on his work for future reference. Refer to KVHS 1148Ronald George Thorn cadet engineer with the SECV on the KHES 1948 - 1950 doing overhead line re-construction and maintenance plus electrical design and drawing work.Leather cover with 2 silver rings. Pages A-Z with additional fold out pages of diagrams. Some pages have handwritten notes.Inside on front cover "R.G.Thorn / H.V. Section/ Yarraville Lab/ SEC / OE Section Y.T.S. R.T.S./ N.P.S. / Stamped 'Bogong" / N.P.S. / Sub/E / E.P.E."kiewa hydro electric scheme, r.g.thorn, cadet engineers, electrical design -
 Kiewa Valley Historical Society
Book - Air Raid Precautions, WWII, Manual of General Training Sept. 1939
With the onset of WWII, the Victorian State Emergency Council of Defence printed this book for the volunteers who kept watch for enemy aeroplanes flying in the skies during the day and night. For success, training was necessary.During WWII the SECV township of Bogong had an Air Observer's Hut used to monitor the skies overhead for enemy planes. Men and women working on the Kiewa Hydro Electric Scheme volunteered to be rostered on duty. See also KVHS 0937 (photo) and KVHS 0938 (certificate)Small book grey with black print and a red binding with 64 pages. issued by the Victorian State Emergency Council for Civil Defence.Pages 26, 48 & 49 have pencil marks / notes.air raid, wwii, secv, kiewa hydro electric scheme, bogong, victorian state emergency council -
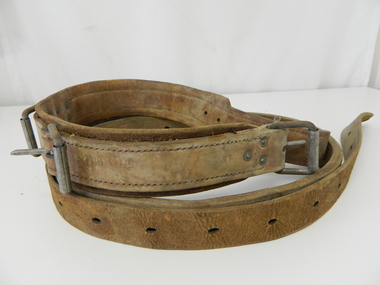 Kiewa Valley Historical Society
Belt Linesman Pole, circa mid to late 1900's
This linesman belt was used under the 1947 Electricity Regulations and before tighter Occupation and Health regulations (late 1990's early 2000's) were introduced that mechanical lifting platforms(wherever possible) replaced the belt up the pole method.The safety concern was that it required that tools needed by the linesman had to be placed in a large canvas bag and attached to the belt (extra weight) then the linesman had to climb the ladder. Ladders had to be at the correct angle and not able to "slip" from their initial footings. A full harness and a secondary fall belt is now mandatory for pole linesmen. The safety of fellow workers could be compromised if they were required to assist or recover the first linesman if needed. In 2006 an additional 269 registered lineworkers were employed. Please note that the terminology of linesman has become unisex. The linesman's belt enabled the linesman to place his feet against the pole adjust the belt (if needed) and lean back securely allowing both hands to be free to work with. This linesman belt is very significant to the Kiewa Valley due to the numerous poles and high voltage overhead power structures that needed maintenance for the extensive "mushroom" installation of electrical power polls(wood and metal). On high poles (steel) climbing pegs were welded on, however in the Alpine areas snow in winter caused an OH&S problem which were hard to overcome. The safety of a linesman when maintenance of electricity line on poles can be highlighted by the New Zealand linesman who survived an 11,000 volt shock when carrying out maintenance. For the record 11,000 volts is four times more powerful than execution by "the electric chair". The maintenance of the linesman's belt was his responsibility (keeping it clean and in "good" condition). Labour laws change this initial responsibility, from the linesman, to the employer. Climbing pegs were installed on higher poles that extended beyond the reach of ladders.This thick leather linesman belt is made from two lengths of heavy lengths of leather straps sewn together to make up 80% of the belt. The remaining 20% is "the belt tonge" which has eleven holes for three (solid steel tang) buckle connections.kiewa hydro electricity scheme, victorian state electricity commission, relays, generators, electrical pole maintenance -
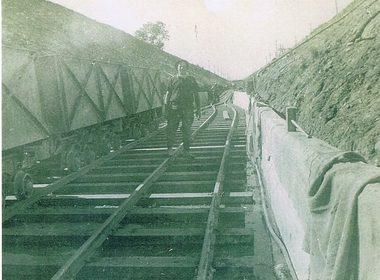 Kiewa Valley Historical Society
Photograph KHS Rail, Kiewa Hydroelectric Scheme Railway, Circa1940s
This photograph shows part of the railway constructed and used for the removal of soil and rocks from the tunnels bored out of the mountains for the pipeline servicing the Hydro Electricity power stations in the Kiewa Hydroelectric Scheme. This photo details an era when there were 4,000 construction workers located in two main accommodation camps, Mount Beauty (the larger one) and Bogong village. These accommodation sites were constructed and maintained as a secured or gated residential area with access only available by a special pass authorised by the Kiewa Hydroelectric Scheme. All the power used by the rail system was from electric motors connected to batteries. Overhead power poles seen on either side of the embankment details that electricity from the Scheme was in use. This use was cleaner and more environmentally friendly than the coal still used by large locomotives from city to country railways. The worker shown is not however wearing protective head and hand coverings. This is also an era where there was a lack of health and safety legislation covering workers in dangerous working conditions.Scanned photo of original black and white photo on Kodak XtraLife II paper. Picture is of a section of railway track servicing the tunnels of the Hydroelectric scheme during the 1940s - 1950sOn back of photo "Kodak XtraLife II paper"railway in kiewa electric scheme, tunneling -
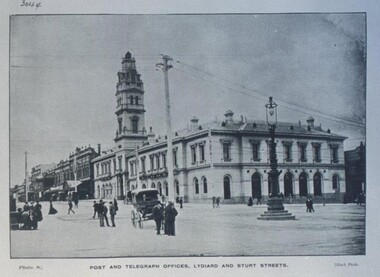 Federation University Historical Collection
Photograph - Photograph - Black and White, Ballarat Post and Telegraph Office - 1897, 1897
Early photograph of the Ballarat Post Office taken from the intersection of Sturt and Lydiard Streets. A gas lamp stands in the middle of the intersection. People standing and talking on the roads. The Post Office was built in two sections. Section one built in 1864. Section two and the tower were built in 1885. It was built in the Victorian Italianate design. Arched headed windows on the ground floor originally formed a colonnade. These were filled in to provide more internal space. The tower was a feature - the top having a cast iron balustraded widow's walk.Ballarat Post Office - view north along Lydiard Street from its intersection with Sturt Street. Image taken in 1897. Gas lamp in the middle of the intersection. Numerous people are seen standing in the middle of the road talking. There are wires noticeable but cannot verify if they are electric or for the telephone. Electricity was produced in Dana Street Ballarat as early as 1895post office, gas lamp, overhead wires, tower, arched headed windows, victorian italianate design, widow's walk, ballarat post office -
 Bendigo Historical Society Inc.
Tool - MERCURY BUCKET
Cast iron mercury bucket, used to hold mercury, potentially in the process of recovering minute pieces of gold mixed in soil and sediments. See research page for description of one process of using mercury to extract gold.gold mines, mining equipment, mercury bucket, miners used mercury in a number of ways to amalgamate gold, with each mill or battery operator having their preferred method depending on the nature of the ore. by the late 1850s the most common way of crushing goldbearing quartz ores or consolidated alluvial cements was in a stamp battery. the battery featured heavy iron stamp heads held in a frame, with each head often weighing up to 500 pounds (226 kg) or more (see msv 1880, page 45) (birrell 2005). stamp heads were lifted and dropped by a rotating overhead cam shaft driven by a steam engine or water wheel. ore was fed into a large cast-iron battery box, mixed with a steady stream of water, and pulverised by the stamp heads. in some batteries, mercury was placed in the base of the boxes to amalgamate with freed gold. the violent agitation of the mercury in the mortar box, however, could cause the mercury to break into myriad tiny globules that were carried away by the water with the tailings, thus losing a certain amount of gold in the process (thompson 1867; ritchie & hooker 1997). the water and sand slurry was splashed by the falling stamps from the box through fine mesh screens and onto inclined wooden tables below the mortar box (figure 2). the tables were covered with copper sheets or plates coated with mercury, which caught and amalgamated with a portion of the gold. the grey putty-like amalgam was periodically scraped off the sheets and retorted in a furnace to collect the gold and recover the mercury for reuse. mercury was inevitably lost from the plates, while poor maintenance resulted in further losses of gold and mercury in the tailings. mercury use and loss from gold mining in 19th century victoria. peter davies1, susan lawrence, and jodi turnbull, department of archaeology and history, la trobe university. -
 Whitehorse Historical Society Inc.
Photograph, Whitehorse Road, 1/06/1999 12:00:00 AM
Coloured photo of Whitehorse Road, Mitcham, opposite Doncaster East Road looking toward Mitcham Road.whitehorse road, overhead powerlines -
 Whitehorse Historical Society Inc.
Photograph, Cnr. Cochrane & Whitehorse Road, 1/06/1999 12:00:00 AM
Coloured photo looking towards Mitcham Road from Corner Cochrane Street and Whitehorse Road, Mitcham.whitehorse road mitcham, cochrane street mitcham, overhead powerlines -
 Whitehorse Historical Society Inc.
Photograph, Footbridge Whitehorse Road, 1/06/1999 12:00:00 AM
Coloured photo - From Footbridge in Whitehorse Road, Mitcham, looking towards Mitcham Road.whitehorse road, overhead powerlines -
 Whitehorse Historical Society Inc.
Photograph, Whitehorse Road Footbridge, 1/06/1999 12:00:00 AM
Coloured photo - From Whitehorse Road Footbridge in Mitcham, looking towards Rooks Road.whitehorse road, overhead powerlines -
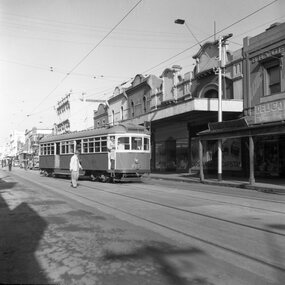 Ballarat Tramway Museum
Negative, Geoff Grant, 19/06/1955 12:00:00 AM
Negative No. N319 and black and white print made by a laser printer (stored in folder ) of W6 988 in Smith St. Fitzroy testing a crossover outside No. 325 Smith St. Has a tower truck in the background. Date of photograph 19/6/1955. Adjacent to tram is A. Brygel drapery shop. Refer to page 414 of Sands and McDougall's Directory of Victoria, 1968 Edition. Negative scanned hi res and imaged updated 21/5/2020. See Refer to page 414 of Sands and McDougall's Directory of Victoria, 1968 Edition.trams, tramways, melbourne, smith st, testing overhead, commissioning, tram w6 988