Showing 989 items matching "semi-precious"
-
 National Wool Museum
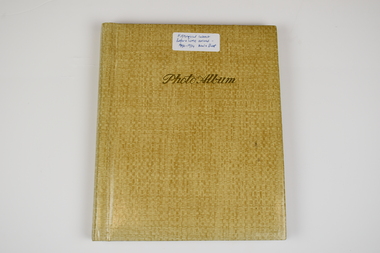
Photo Album, 1930-1934
The Photo Album was created by Hans Beck, who interned with the donor's father (Wilhelm Eckels). The Photo Album depicts wool buying and sheep station related life between 1927-1939. Each photograph has been individually labelled.Straw coloured booklet with gold cursive writing on front cover spelling 'Photo Album'. Inside are 18 pages containing 63 photographs, each individually captioned. Internal pages show signs of age with discolouration, particularly in areas of previous adhesive application.Lettering, Front: Historic Interest Before WME arrived - 1930-1934 Wool & Sheep Photo Album Lettering, Internal by Page: Page 1 - Bottom Left Conner: Table from right:/ O. Hilbert sen. / WW. Richter, W. Ehrig/ Sampler: C. McCarthy/ at desk: E.S. Bottom Right Corner: 1927/ Wool Sample Room/ O. Hilbert/ Terranora Buildings/ Reiby Lane Page 2 - Bottom Middle: 1931/ Opening Sale/ Sydney Page 3 - Bottom Middle: 1934/ Opening Sale/ Sydney Page 4 - Bottom Middle: 1933/ Wool Auctions/ Brisbane Page 5 - Top Left Corner: 1930 Escapade/ Sydney to CAIRNS/ via Bourke, Central/ Queensland, Hinter-/ land & Atherton/ Table Lands Top Right Corner: Dubbo: Main Street/ (1st Night)/ 31.7.1930 Middle Right: 1st Night-"OUT"/ Stranded 11 miles/ from Bourke. (Red/ Dust in Carburettor Bottom Right Corner: Our "ERSKINE'/ hits Culvert &/ breaks both King-/pins. 1 1/2 miles from/ CUNNAMULLA SW-Q. Page 6 - Top Right Corner: "Rosevale Station"/ via Cunnamulla SWQ/ "Gidgi" country/ Gidgi Creak &/ Warrigo R. Middle Left: STAN HILL Page 7 - Middle Top: Blackhall/ Tattersall's Hotel/ Yarning at Cross-/roads. Middle Left: FO Wool Sales/ 22 Horse team Middle Right: Roadsign to:/ ISIS DOWNS &/ Homestead (Fart Page 8 - Middle Top: Muster: 3000 sheep/ Semi-circular/ Shearing shed/ ISIS DOWNS Page 9 - Middle Top: Shearer/ Water Tower/ Counting out/ pens Middle Bottom: Shearers Cook/ Hot Water & Soup/ Cake for Shearing/ Shed Charity Ball Page 10 - Middle Left: Isis Downs Home-/ stead with fire// flood Lookout./ Artesian Borewell Bottom Right: Manager: Moore/ & Alfred Loh-/ mann with kills/ Ducks & Emus Page 11 - Top Middle: PORTLAND DOWNS/ Muster: 10,000/ Sheep Bottom Left: Manager:/ Mr. Luck/ with A.L./Moore Page 12 - Middle Top: ROOKWOOD Station/ near/ HUGHENDEN/ Central NWQ Page 13 - Top Middle: 'HINTERLAND"/ Cattle country/ Spear Grass/ Tracks Bottom Middle: Crossings:/ Creeks: Quick/ Sand/ Rivers: rocky Page 14 - Middle Right: Lyndhurst stat/tion/ Head Stockman Middle Left: -Valley of la-/goons/ Station Bottom Right Corner: Master Atkinson/ saves/ Petrol shortage Page 15 - Top Middle: ATHERTON TABLELANDS/ LAKE BERRINE Middle Centre: Tropical Rainforest/ near/ Lake Berrine Page 16 - Top Middle: ATHERTON TABLELANDS/ Timber Country Bottom Middle Edge: CAIRNS/ Imperial Hotel Page 17 - Hans Beck with/ Betty Hilbert/ Lapstone Hill 1931 wool - transportation, wool sales, wool growing, wool growing agriculture farming, wool industry, wool sales - sydney, wool sales - brisbane, dubbo, 1930, bourke, cunnamulla, isis downs, shearing, shearing - lifestyle, portland downs, muster, hughenden, hinterland, lake berrine, cairns -
 Glen Eira Historical Society
Ephemera - Caulfield Cricket Club
This file contains two items. A menu and programme for Caulfield Cricket Club. Includes handwritten list of names of office-bearers and printed list of sponsors. Thirty-four newspaper clippings on Caulfield Cricket Club. “Haviland, Pritchard give Caulfield Boost”, cutting from Caulfield Port Phillip Leader, 21/12/2010 on recent match. “Daron Cruickshank Shows His Class” cutting from Caulfield Port Phillip Leader 11/01/2011 on Daron Cruickshank from Trinidad-Tobago who whit 111 not out in recent match for Caulfield against Ormond. “Century Lifts Monds, Another Ton For Hansen” cutting from Caulfield Port Phillip Leader on 01/02/2011 on recent centuries by Michael Hansen of Ormond in matches. “Fields Take Minor Premiership” cutting from Caulfield Port Phillip Leader 08/03/2011 on forthcoming match of Elsternwick against Coburg. “Richo’s Century Puts Caulfield in Driver’s Seat” cutting from Caulfield Port Phillip Leader 15/03/2011 on Shaun Richardson’s 160 for Caulfield against Brunswick in a recent match. “Caulfield Up for Challenge” by Brad Beitzel cutting from Caulfield Port Phillip Leader 22/03/2011 on forthcoming match against Coburg. “Fielders Work For It. Sliver of Hope Going Into Day Two” by Paul Amy, cutting from Caulfield Port Phillip Leader 29/03/2011 on recent match of Caulfield against Malvern. Photograph, cutting from Caulfield Port Phillip Leader 05/04/2011 of batsman Matt Lawrence who had announced his retirement, pictured with unnamed wicket-keeper. “‘Grub’ will be missed” cutting from Caulfield Port Phillip Leader 12/04/2011. Obituary of Tony Sheehan who represented Caulfield in 170 matches. “Caulfield Goes in to Bat Early” cutting from Caulfield Port Phillip Leader 03/05/2011 on recent recruits Adam Warren and Rob Bartlett for forthcoming season. “South Caulfield on Top” cutting from Caulfield Port Phillip Leader 01/11/2011 on prospects of South Caulfield Club and recent matches. “Monds Break Duck” cutting from Caulfield Port Phillip Leader 31/01/2012 on recent win by Ormond Club. “Help To Put Cancer Fund in the Pink” article from the Caulfield Port Phillip Leader dated 07/02/2012 concerning the Caulfield South Cricket Club’s participation in Pink Stumps Day in order to raise funds for cancer research. “Premier Cricket” by Brad Beitzel, cutting from Caulfield Port Phillip Leader 14/02/2012 on recent watches of local clubs. “Damiano’s Three Tons A record” by Brad Beitzel, cutting from Caulfield Port Phillip Leader 28/02/2012 on batting record of Ricky Damiano. “Caulfield Digs In. Baldry Leads Lower Order Fight Against Malvern” by Paul Amy, cutting from Caulfield Port Phillip Leader 13/03/2012 on undefeated season of Caulfield club and future match. “Fields Bound For Glory. Rugged Day for Elsty” by Brad Beitzel cutting from Caulfield Port Phillip Leader 20/03/2012 on success of Caulfield Club. “Fielders Perfect Finish. Golden Summer Capped by Premiership” by Brad Beitzel cutting from Caulfield port Phillip Leader 27/03/2012 on undefeated season of Caulfield Club. “Caulfield Leaders Pay Hospital Visit to Club Stalwart. That Was For ‘Morro’” by Paul Amy cutting from Caulfield Port Phillip Leader 02/03/2012 on visit to ill Brian Morrison. “Caulfield Hearts Heavy After Death of Club Legend ‘Morro’” by Paul Amy cutting from Caulfield Port Phillip Leader 10/04/2012 on death of Brian Morrison. “Big Send Off For Legend ‘Morro’” cutting from Caulfield Port Phillip Leader 17/04/2012 on funeral of Brian Morrison. “Cricket Season to Commence” clipping from unnamed journal or magazine, hand dated 10/12 on new cricket season. “Christiansen Cracks Ton in Elsternwick Victory”, cutting from Glen Eira Port Phillip Leader 30/10/2012 on century by Cam Christiansen in match against Malvern. “Harwood Hits Hard to Set test For Caulfield” by Paul Amy cutting from Glen Eira Port Phillip Leader 13/11/2012 on performance of Shane Harwood in match against Melton. “ ‘Richo’ To The Rescue” by Paul Amy cutting from Glen Eira Port Phillip Leader 11/12/2012 on performance of Shaun Richardson in match against Williamstown. “Victorian Turf Cricket Association South Poised for Outright Win Against Bernies” cutting from Glen Eira Port Phillip Leader 29/01/2013 on match between South Caulfield and St. Bernards. “Tough Chase Awaits Caulfield” cutting from Glen Eira Port Phillip Leader 22/01/2013 on prospects of Caulfield Club. “Stateswide Twenty 20 Cup. South Caulfield Gets The Chance To Play At the MCG” photocopy of article in Glen Eira Port Phillip Leader 12/02/2013 that the team is to play in the MCG in finish of Twenty 20 Competition. “Nurse to the rescue for Wiaks” by Paul Amy cutting from Glen Eira Port Phillip Leader 19/02/2013 on century by Harry Nurse in match against Yarraville. “VTCA South Caulfield Crowned Twenty 20 Champion” cutting from Glen Eira Port Phillip Leader 12/03/2013 on win by South Caulfield in state wide Twenty 20 Cup. “Sub-District Cricket Finals. Caulfield Up Agianst Melton and Weather” cutting from Glen Eira Port Phillip Leader 19/03/2013 on semi-final match between Caulfield and Elsternwick. “Cricket Championship Team” photograph cutting from Glen Eira Port Phillip Leader 09/04/2013 of Championship Caulfield Club with thirteen players named in caption. “Cricket High Hopes for Scholarship Winner” cutting from Glen Eira Port Phillip Leader 16/04/2013 on cricket scholarship for Adam Cosgrove, aged twelve.caulfield cricket club, ormond cricket club, elsternwick cricket club, south caulfield cricket club, north caulfield glenhuntly cricket club, malvern cricket club, sheehan tony, damiano ricky, oakleigh cricket club, morrison brian, little harold, christiansen cam, harwood shane, richardson shaun, murrumbeena cricket club, carnegie cricket club, mcg, melbourne cricket grounds, nurse harry, reilly geoff, shipley colin, jacobs bill, lahiff tommy, haviland james, pritchard heath, cruickshank daron, hansen michael, lawrence matt, warren adam, baldry leigh, vtca, twenty 20 club, cosgrove adam, cricket, cricket clubs, cricketers, sporting clubs, sports -
 Federation University Historical Collection
Clothing - Textiles, Ruth McGannon, Needlework, c 1950-70s
These items were made as samplers either at school or most likely college. They are samples of embroidery stitches, seam types and sewing and knitting techniques.Nos 1-16 are group of samplers made from cotton lawn, cotton with sateen weave and flannel and made by Ruth McGannon. No 17 is a pair of gloves made by Margaret Russell. .1) A small square of yellow lawn with three horizontal rows in blue thread and three vertical rows in red thread of running stitch each 3.5 centimeters apart. The edges are frayed to 1.2 centimeters. .2) A larger rectangle of yellow lawn with three horizontal rows 7.8 centimeters apart and three vertical rows 10 centimeters apart of long stitch, stitched in blue thread. The edges are frayed to 2 centimeters. .3) A small square of yellow lawn with three horizontal rows and three vertical rows of blue thread of running stitch, each 1.9 centimeters apart. The edges are frayed to 1.5 centimeters. .4) A larger rectangle of yellow lawn with three horizontal rows 9 centimeters apart and three vertical rows 11.2 centimeters apart of running stitch, stitched in red thread. The edges are hemmed with two rows of long stitch .5 centimeter apart with a loose blue thread of laced running stitch weaving in and out of the red long stitch. .5) A rectangle of hemmed yellow lawn with a pocket formed at each end. Two rows of long stitch in red thread hem the edges with a blue thread stitched between each red stitch. The pockets are formed by turning back the edges and stitching them down in brown thread. R.M. is embroidered in brown chain stitch on the right side. .6) A rectangle of hemmed blue lawn the same as the previous piece but with five rows of back stitch in yellow and orange thread creating a pattern. .7) A rectangle of blue lawn with the top and bottom edges hemmed with two rows of long stitch close together in yellow and orange. The other two edge are frayed to 2.5 centimeters and has four rows of long stitch .7 centimeter apart in yellow and orange thread. .8) A blue lawn bag with two packets was made by hemming a rectangle of fabric on three sides in long stitch with orange thread, then yellow thread between the stitches. The fourth side is hemmed in hemming stitch in yellow thread with blanket stitch in yellow thread along the edge. This edge is folded up by one third to create a pocket. The edges on either side are stitched together. A row of chain stitch in orange thread is stitched down the middle to create two pockets. A tape is stitched to either side at the top and this is folded over the pocket. .9) A cream cotton with sateen weave rectangle is hemmed with a double row of orange thread in long stitch. On both sides is embroidery in orange and yellow thread. .10) A yellow cotton with sateen weave baby's bib is made from a rectangle of fabric with a semi circle cut out of the top. The edges are turned and hemmed with a narrower turning on the neck. A tape is stitched at either side of the neck. On the front is embroidered a train in blue and yellow threads. .11) A yellow lawn embroidery sampler using blue and brown thread shows long stitch, stem stitch, herringbone stitch, chain stitch, fly stitch, lazy daisy stitch, cross stitch and satin stitch. It is hemmed using drawn thread work and the bottom is scalloped and finished in blanket stitch. .12) A pink lawn embroidery sampler with green thread shows herringbone stitch, stem stitch, running stitch, chain stitch, cross stitch, lazy daisy stitch, fly stitch, feather stitch, satin stitch and back stitch. The bottom is scalloped and finished in buttonhole stitched. The other three edges are hemmed using drawn thread work. .13) A small cream flannel square with two smaller squares are stitched together down the middle in decreasing sizes using chain stitch. The largest piece is hemmed using both herringbone and a decorative blanket stitch. It also has a run and fell seam on the opposite side using both running and herringbone stitches. A row of feather stitch is on either side of the seam. The two smaller squares are frayed on the edges. .14) A cream rectangular flannel sampler has two seams along the length. One is a run and fell seam using running and herringbone stitches and the other is an open seam using running stitch and both edges are stitched down with herringbone stitch. The two shorter edges are bound and the longer edges have a tape which is stitched down to neaten the edges. On the right side are two rows of feather stitch. .15) This blue lawn apron has a rectangular gathered skirt which is attached to a waistband and in turn attached to a bib front which goes over the head. The bib and skirt sides are hemmed using decorative blanket stitch in pink and dark blue thread. The skirt hem and both sides of the waistband are stitched in two rows of herringbone in pink and dark blue thread. .16) This pale pink lawn child's shirt has french seam side seams, a waist band to which the shirt is attached using slight gathering. The sleeves have cuffs. There is a front facing and a collar and there is a small pocket in the left hand breast. .17) These yellow knitted gloves are made using plain stitch for the hand and rib for the wrist.Written on paper and stitched on to a couple of items - Ruth McGannon V.3 - 312 Written on paper and stitched to the gloves - Margaret Russell x No2embroidery, sampler, gloves, stitches, sewing, knitting, apron, costume, needlework, dressmaking, textiles -
 Lara RSL Sub Branch
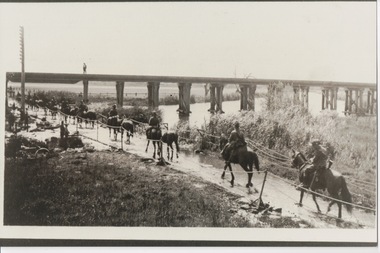
Photograph, Set 4 photographs. and others for Torquay Light Horse camp, 1940
These images capture for all time Light Horsemen travelling through Geelong on their way to camp at Torquay for the last Group meeting in Australia . information following - details obtained from .........https://torquayhistory.com/light-horse-brigade/ On Australia Day, 1997, Sir John Young unveiled this plaque on Point Danger, Torquay. Torquay history, Light Horse Training Camp, WW2 Plaque at Pt. Danger Note----- (See images to view plaque) The plaque identifies a significant event in Torquay’s history and the sentiments of ‘change’ for the Light Horse Brigade – from horses to machines. In 1940 the four Light Horse Regiments (4th, 8th, 13th and 20th), some 5000 Light Horse and 2000 horses camped and trained at Torquay. Three other regiments, formerly mounted on horses, were also at Torquay ‘mounted’ on privately owned trucks and cars. Division troops included Artillery, Engineers, Signals, Field Ambulance and other branches of the Army necessary to enable a Division to function. It wasn’t just the sheer numbers of men coming to this little town that made the event significant, it was also the fact that the men of the Light Horse were dramatic, almost glamorous figures and it is easy to see their exploits as some splendid adventure. Horses have played a special role in the story of Australia. They were the only means of transport across this huge country, so it was necessary for everyone to have the ability to ride a horse. When war broke out in 1899 between Britain and the Boers of South Africa (“Boer” was Dutch for “farmer”) Australia sent troops to fight. At first Britain was wary of using untried, unprofessional colonial cavalrymen but soon saw that the slouch-hatted Australian “bushmen” were a match for the fast-moving and unconventional mounted commandos of the Boers. The Australians proved themselves to be expert rough-riding horsemen and good shots. Bush life had hardened them to go for long periods with little food and water. They also showed remarkable ability to find their way in a strange country and use its features for cover, in both attack and defence. By 1914, when Australia joined the war against Germany, there were 23 Light Horse regiments of militia volunteers. Many men from these units joined the Light Horse regiments of the Australian Imperial Force (AIF). Men were given remounts (if not using their own horses) – army horses bought by Commonwealth purchasing officers from graziers and breeders. These were called “walers” because they were a New South Wales stockhorse type – strong, great-hearted animals with the strains of the thoroughbred and semi-draught to give them speed, strength and stamina. On 1st November, 1914, Australia’s First Infantry Division and the first four Light Horse regiments sailed for England in a fleet of transport ships. The first of the Light Horse arrived at Gallipoli in May without their horses. Back with their horses after Gallipoli, they were formidable combatants across the Sinai and Palestine. Some British commanders observed that the light horseman moved with a “lazy, slouching gait, like that of a sleepy tiger” but described how the promise of battle “changes that careless gait, into a live athletic swing that takes him over the ground much quicker than other troops”. They had Light Horse, Torquay, training campdeveloped a reputation as formidable infantrymen. The Turks called them “the White Ghurkas” – a reference to their deadly skill with the bayonet. The Arabs called them “The Kings of the Feathers”. The plume had originally been a battle honour of the Queensland Mounted Infantry for their work in the shearer’s strike of 1891. During WW1 it was adopted by almost all the Light Horse Regiments. It was the proud badge of the light horseman. The most famous of their battles was the attack on Beersheba- the charge of the 4th Light Horse Brigade. Mounted infantrymen and their superb walers had carried out one of the most successful cavalry charges in history – against what seemed impossible odds. They surprised the Turks by charging cavalry-style, when they would normally have ridden close to an objective then dismounted to fight. The fall of Beersheba swung the battle tide against the Turks in Palestine; and changed the history of the Middle East. While 19 men from the Surf Coast Shire served with the 4th Light Horse over the course of WW1, only four were involved in the charge of Beersheba- John GAYLARD, Philip QUINN.(Winchelsea); Wallace FINDLAY (Anglesea); Harry TRIGG (Bambra). After the war, Light Horse units played a key role in the Australian Government’s compulsory military training programme. The Citizen Military Forces (C.M.F.) thrived on the glamour of the wartime Light Horse tradition, ignoring the possibility that motor vehicles would soon replace the horses. When training was no longer compulsory, the C.M.F. regiments declined and horses became more of a luxury during the 1930s depression years of poverty and unemployment. Some regiments were motorised. Then, in 1939, Australia joined Britain in another world war. Training was increased for the militia at both home bases and regional training camps. The camp at Torquay in 1940, commanded by Major General Rankin, was at Divisional strength. By the end of the camp some felt that the Division was ready for active service. Gradually, over the next four years, the Australian Light Horse units were mounted on wheels and tracks and the horses were retired. Six men enlisted at the Torquay camp and another 57 men and women enlisted at Torquay for service in WW2. Those who served in the Militia provided valuable Officers and NCOs and men for the armed services during the war. Each infantry division of the 2nd AIF had a Light Horse regiment attached to it. But the day of the Australian mounted soldier hadn’t quite passed. During World War II, Australia’s 6th Cavalry Regiment formed a mounted unit they called “The Kelly Gang” which did valuable scouting work. In New Guinea, a mounted Light Horse Troop did patrol duty and helped carry supplies. Some fully equipped walers were flown into Borneo for reconnaissance in rugged mountain country. But by the end of the war, in 1945, the horse had disappeared from the Australian Army. References: Australian Light Horse Association www.lighthorse.org.au National Australia Archives Australian War Memorial Surf Coast Shire WW1 memorials www.togethertheyserved.com The Light horse- a Cavalry under Canvas Light Horse, Training Camp, Torquay, WW2 Late in 1939 it was decided to set up a Lighthorse training camp in Torquay to train both men and horses for the battles of the Second World War. Horses, men and equipment came on special trains from all over Victoria and NSW, and as you would expect horseman came from areas such as Omeo and Sale, the Wimmera and the Western District. They arrived at the Geelong racecourse for watering in the Barwon River and then were ridden across the ford at the breakwater and began their 11 mile trek to Torquay. Light Horse, Training Camp, Torquay, WW2 Tent city By the end of January 1940 the camp at Torquay accommodated some 5000 men and 2500 horses of the Second Cavalry Division. The rows of horses, tents and huts near Blackgate Road were quite a sight. While the cavalrymen engaged in exercises on the land and on the beaches, many of the troops took over the Torquay School for special training of men and officers. Mr Bob Pettit local farmer and Councillor for the Barrabool Shire, wrote about the Light horse in the Surf Coast Community News in 1985 saying “They used to travel about the district riding four abreast in one long convoy. To my annoyance they went through my property and shut all the gates behind them. I had certain gates open to let stock in to the water holes and it would take me three -quarters of an hour to follow the horsemen up and put all the gates right again” he continued “the men from the Light Horse were here when the fire went through in March 1940. He recalled an incident when early one morning, as some one blew the bugle, a soldier putting a white sheet on the line frightened the horses. They panicked and ran off in all directions. Six went over the cliff near Bird Rock, five were never found, and the rest were gathered up after nearly a fortnight in the bush around Addiscott and Anglesea" Light Horse, Training Camp, Torquay, WW2, Geelong Parade Geelong parade The training camp culminated in a parade through the streets of Geelong on March 12th 1940. The salute was given at the Town Hall and the troops continued on a route to the You Yang’s for a training exercise. Note-----(see media section for photograph) The Camp was abandoned in mid 1940 as it was deemed unsuitable for training during winter and the cost of a permanent camp could not be justified if it could not be used all year. Historic.......Rare,,,Interpretive.Sepia photographs.set of four ....post card size ....Horses &LighthorsemenNo 1, Lighthorsemen Regiment Geelong 1940......No 2 Light Horse at Breakwater Geelong 1938 to 1940....No 3 Light Horse at Breakwater Geelong 1938 to 1940.....No 4 Light Horse crossing Breakwater camped at Geelong Showgrounds. These markings are on reverse of photographs.light horsemengeelong 1940., world war 2 -
 Flagstaff Hill Maritime Museum and Village
Domestic object - Bowl, Late 19th or early 20th Century
The Process of Making Pottery Decorating, Firing, Glazing, Making, Technical There is a rhythm and flow to clay. It can’t be done all at once! Even the making process! It can take weeks to get everything done, especially if you can only work on your pottery once a week! Even though we have three hour classes, it’s often just not enough time! Here is an overview of some of the processes so you have a bit more grasp on some of the technical stuff! Step One – Design There are SO many ideas out there for making stuff in clay! From delicate porcelain jewellery, through to heavy sculptural work and everything in between. Deciding your direction is sometimes not that easy – when you first start, try everything, you will naturally gravitate to the style that you enjoy! The options and variations are endless and can get a wee bit overwhelming too! Check in with me before you start to ensure your ideas will work, what order you might do things, how you could achieve the look you are seeking and any other technical data required! Step Two – Making Clay is thixotropic. This means that as you work with it, the clay first gets sloppier and wetter, before is begins to dry in the atmosphere. For most things, you simply can’t do all parts of the project at once. An example of work order might look like: Get last weeks work out from the shelves Prepare clay for today’s work – roll your clay, prepare balls for throwing, make the first stage of a pinch pot) Clean up last week’s work and put it on the shelf for bisque firing Check that you have any glazing to do – and do enough of it that you will have time to finish your main project Do the next step of your next project – there might be a further step that can’t be complete immediately, in that case, wrap your work well and put onto the shelves. Letting your work rest for a while can really help keep your work clean and professional looking. Many things require bagging under plastic to keep it ready for work the next week – put your name on the outside of the bag so you can find your work easily. We have stickers and markers. Consider how you want to decorate your work – coloured slip can be applied at a fairly wet stage (remembering that it will make your work even wetter!). Trying to apply slip to dry clay won’t work! If you want to do sgraffito – you will need to keep the work leather hard (a state of dryness where you can still work the clay with a little effort and a little water and care). Step Three – Drying Most of the time your work can go into the rack uncovered to let it dry out for the following week. If you want to continue forming or shaping you will need to double bag your work – put your work on a suitable sized bat and put the bat in a bag so the base of the bag is under the bat, then put another bag over the top of the work and tuck the top of the bag under the bat. If you want to trim (or turn) your thrown work the following week, it should also be double bagged. If your work is large, delicate, or of uneven thicknesses, you should lightly cover your work for drying. When considering the drying process, bare in mind the weather, humidity and wind! The hotter and dryer, the faster things dry and work can dry unevenly in the shelves – this can lead to cracking – another time to lightly cover your work for drying. Step Four – Trimming and Cleaning Up Your work is dry! It is called greenware now and it is at it’s most fragile! Handle everything with two hands. I often refer to soft hands – keep everything gentle and with your fingers spread as much as possible. Try to not pick up things like plates too much, and always with both hands! Before your work can be bisque fired it should be “cleaned up”. You work won’t go into the kiln if it has sharp edges – when glazed, sharp edges turn into razor blades! Use a piece of fly wire to rub the work all over – this will scratch a little so be light handed. Use a knife or metal kidney to scrape any areas that require a bit more dynamic treatment than the fly wire offers! Finally, a very light wipe over with a slightly damp sponge can help soften and soothe all of your edges and dags! Trimming thrown work: If you are planning to trim (or turn) your thrown work (and you should be), make sure you bag it well – your work should be leather hard to almost dry for easiest trimming. Use this step to finish the work completely – use a metal kidney to polish the surface, or a slightly damp sponge to give a freshly thrown look. Wipe the sponge around the rim after trimming, and check the inside of the pot for dags! Trimming slip cast work: Usually I will trim the rims of your work on the wheel the following day to make that stage easier, however you will still need to check your work for lumps and bumps. Last but not least – check that your name is still clearly on the bottom of your work. Step Five – Bisque Firing When the work is completely dry it can go into the bisque kiln. The bisque kiln is fired to 1000°C. This process burns off the water in the clay as well as some of the chemically bound water. The structure of the clay is not altered that much at this temperature. Inside the bisque kiln, the work is stacked a little, small bowl inside a larger bowl and onto a heavy plate. Smaller items like decorations or drink coasters might get stacked several high. Consideration is paid to the weight of the stack and shape of the work. A bisque kiln can fire about one and a half times the amount of work that the glaze kiln can fire. The firing takes about 10 hours to complete the cycle and about two days to cool down. Once it has been emptied the work is placed in the glaze room ready for you to decorate! Step Six – Glazing Decorating your work with colour can be a lot of fun – and time consuming! There are three main options for surface treatment at this stage: Oxide Washes Underglazes Glazes Washes and underglazes do not “glaze” the work – It will still need a layer of glaze to fully seal the clay (washes don’t need glaze on surfaces not designed for food or liquid as they can gloss up a little on their own). Underglazes are stable colourants that turn out pretty much how they look in the jar. They can be mixed with each other to form other colours and can be used like water colours to paint onto your work. Mostly they should have a clear glaze on top to seal them. Oxides are a different species – the pink oxide (cobalt) wash turns out bright blue for instance. They don’t always need a glaze on top, and some glazes can change the colour of the wash! The glazes need no other “glaze” on top! Be careful of unknown glaze interactions – you can put any combination of glaze in a bowl or on a plate, but only a single glaze on the outside of any vertical surface! Glazes are a chemical reaction under heat. We don’t know the exact chemicals in the Mayco glazes we use. I can guess by the way they interact with each other, however, on the whole, you need to test every idea you have, and not run the test on a vertical surface! Simply put, glaze is a layer of glass like substance that bonds with the clay underneath. Clay is made of silica, alumina and water. Glaze is made of mostly silica. Silica has a melting point of 1700°C and we fire to 1240°C. The silica requires a “flux” to help it melt at the lower temperature. Fluxes can be all sorts of chemicals – a common one is calcium – calcium has a melting point of 2500°C, however, together they both melt at a much lower temperature! Colourants are metal oxides like cobalt (blue), chrome (green through black), copper (green, blue, even red!), manganese (black, purple and pink) iron (red brown), etc. Different chemicals in the glaze can have dramatic effects. for example, barium carbonate (which we don’t use) turns manganese bright pink! Other elements can turn manganese dioxide brown, blue, purple and reddish brown. Manganese dioxide is a flux in and of itself as well. So, glazes that get their black and purple colours, often interact with other glazes and RUN! Our mirror black is a good example – it mixes really well with many glazes because it fluxes them – causes them to melt faster. It will also bring out many beautiful colours in the glazes because it’s black colouring most definitely comes from manganese dioxide! Glaze chemistry is a whole subject on it’s own! We use commercial Mayco glazes on purpose – for their huge range of colour possibilities, stability, cool interactions, artistic freedom with the ability to easily brush the glazes on and ease of use. We currently have almost 50 glazes on hand! A major project is to test the interactions of all glazes with each other. That is 2,500 test tiles!!!! I’m going to make the wall behind the wheels the feature wall of pretty colours! Step Seven – Glaze (Gloss or sometimes called “Glost”) Firing Most of the time this is the final stage of making your creation (but not always!) The glaze kiln goes to 1240°C. This is called cone 6, or midrange. It is the low end of stoneware temperatures. Stoneware clays and glazes are typically fired at cone 8 – 10, that is 1260 – 1290°C. The energy requirement to go from 1240°C to 1280°C is almost a 30% more! Our clay is formulated to vitrify (mature, turn “glass-like”) at 1240°, as are our glazes. A glaze kiln take around 12 hours to reach temperature and two to three days to cool down. Sometimes a third firing process is required – this is for decoration that is added to work after the glaze firing. For example – adding precious metals and lustres. this firing temperature is usually around 600 – 800°C depending upon the techniques being used. There are many students interested in gold and silver trims – we will be doing this third type of firing soon! After firing your work will be in the student finished work shelves. Remember to pay for it before you head out the door! There is a small extra charge for using porcelain clay (it’s more than twice the price of regular clay), and for any third firing process! Once your work has been fired it can not turn back into clay for millennia – so don’t fire it if you don’t like it! Put it in the bucket for recycling. https://firebirdstudios.com.au/the-process-of-making-pottery/ The bowl is an example of kitchenware used in the 19th century and still in use today.Bowl white ceramic. Crack on side. Badly stained.Backstamp very faint and unable to be read.flagstaff hill, warrnambool, shipwrecked-coast, flagstaff-hill, flagstaff-hill-maritime-museum, maritime-museum, shipwreck-coast, flagstaff-hill-maritime-village, mixing bowl, food preparation, kitchen equipment, ceramic -
 Flagstaff Hill Maritime Museum and Village
Domestic object - Bowl
The Process of Making Pottery Decorating, Firing, Glazing, Making, Technical There is a rhythm and flow to clay. It can’t be done all at once! Even the making process! It can take weeks to get everything done, especially if you can only work on your pottery once a week! Even though we have three hour classes, it’s often just not enough time! Here is an overview of some of the processes so you have a bit more grasp on some of the technical stuff! Step One – Design There are SO many ideas out there for making stuff in clay! From delicate porcelain jewellery, through to heavy sculptural work and everything in between. Deciding your direction is sometimes not that easy – when you first start, try everything, you will naturally gravitate to the style that you enjoy! The options and variations are endless and can get a wee bit overwhelming too! Check in with me before you start to ensure your ideas will work, what order you might do things, how you could achieve the look you are seeking and any other technical data required! Step Two – Making Clay is thixotropic. This means that as you work with it, the clay first gets sloppier and wetter, before is begins to dry in the atmosphere. For most things, you simply can’t do all parts of the project at once. An example of work order might look like: Get last weeks work out from the shelves Prepare clay for today’s work – roll your clay, prepare balls for throwing, make the first stage of a pinch pot) Clean up last week’s work and put it on the shelf for bisque firing Check that you have any glazing to do – and do enough of it that you will have time to finish your main project Do the next step of your next project – there might be a further step that can’t be complete immediately, in that case, wrap your work well and put onto the shelves. Letting your work rest for a while can really help keep your work clean and professional looking. Many things require bagging under plastic to keep it ready for work the next week – put your name on the outside of the bag so you can find your work easily. We have stickers and markers. Consider how you want to decorate your work – coloured slip can be applied at a fairly wet stage (remembering that it will make your work even wetter!). Trying to apply slip to dry clay won’t work! If you want to do sgraffito – you will need to keep the work leather hard (a state of dryness where you can still work the clay with a little effort and a little water and care). Step Three – Drying Most of the time your work can go into the rack uncovered to let it dry out for the following week. If you want to continue forming or shaping you will need to double bag your work – put your work on a suitable sized bat and put the bat in a bag so the base of the bag is under the bat, then put another bag over the top of the work and tuck the top of the bag under the bat. If you want to trim (or turn) your thrown work the following week, it should also be double bagged. If your work is large, delicate, or of uneven thicknesses, you should lightly cover your work for drying. When considering the drying process, bare in mind the weather, humidity and wind! The hotter and dryer, the faster things dry and work can dry unevenly in the shelves – this can lead to cracking – another time to lightly cover your work for drying. Step Four – Trimming and Cleaning Up Your work is dry! It is called greenware now and it is at it’s most fragile! Handle everything with two hands. I often refer to soft hands – keep everything gentle and with your fingers spread as much as possible. Try to not pick up things like plates too much, and always with both hands! Before your work can be bisque fired it should be “cleaned up”. You work won’t go into the kiln if it has sharp edges – when glazed, sharp edges turn into razor blades! Use a piece of fly wire to rub the work all over – this will scratch a little so be light handed. Use a knife or metal kidney to scrape any areas that require a bit more dynamic treatment than the fly wire offers! Finally, a very light wipe over with a slightly damp sponge can help soften and soothe all of your edges and dags! Trimming thrown work: If you are planning to trim (or turn) your thrown work (and you should be), make sure you bag it well – your work should be leather hard to almost dry for easiest trimming. Use this step to finish the work completely – use a metal kidney to polish the surface, or a slightly damp sponge to give a freshly thrown look. Wipe the sponge around the rim after trimming, and check the inside of the pot for dags! Trimming slip cast work: Usually I will trim the rims of your work on the wheel the following day to make that stage easier, however you will still need to check your work for lumps and bumps. Last but not least – check that your name is still clearly on the bottom of your work. Step Five – Bisque Firing When the work is completely dry it can go into the bisque kiln. The bisque kiln is fired to 1000°C. This process burns off the water in the clay as well as some of the chemically bound water. The structure of the clay is not altered that much at this temperature. Inside the bisque kiln, the work is stacked a little, small bowl inside a larger bowl and onto a heavy plate. Smaller items like decorations or drink coasters might get stacked several high. Consideration is paid to the weight of the stack and shape of the work. A bisque kiln can fire about one and a half times the amount of work that the glaze kiln can fire. The firing takes about 10 hours to complete the cycle and about two days to cool down. Once it has been emptied the work is placed in the glaze room ready for you to decorate! Step Six – Glazing Decorating your work with colour can be a lot of fun – and time consuming! There are three main options for surface treatment at this stage: Oxide Washes Underglazes Glazes Washes and underglazes do not “glaze” the work – It will still need a layer of glaze to fully seal the clay (washes don’t need glaze on surfaces not designed for food or liquid as they can gloss up a little on their own). Underglazes are stable colourants that turn out pretty much how they look in the jar. They can be mixed with each other to form other colours and can be used like water colours to paint onto your work. Mostly they should have a clear glaze on top to seal them. Oxides are a different species – the pink oxide (cobalt) wash turns out bright blue for instance. They don’t always need a glaze on top, and some glazes can change the colour of the wash! The glazes need no other “glaze” on top! Be careful of unknown glaze interactions – you can put any combination of glaze in a bowl or on a plate, but only a single glaze on the outside of any vertical surface! Glazes are a chemical reaction under heat. We don’t know the exact chemicals in the Mayco glazes we use. I can guess by the way they interact with each other, however, on the whole, you need to test every idea you have, and not run the test on a vertical surface! Simply put, glaze is a layer of glass like substance that bonds with the clay underneath. Clay is made of silica, alumina and water. Glaze is made of mostly silica. Silica has a melting point of 1700°C and we fire to 1240°C. The silica requires a “flux” to help it melt at the lower temperature. Fluxes can be all sorts of chemicals – a common one is calcium – calcium has a melting point of 2500°C, however, together they both melt at a much lower temperature! Colourants are metal oxides like cobalt (blue), chrome (green through black), copper (green, blue, even red!), manganese (black, purple and pink) iron (red brown), etc. Different chemicals in the glaze can have dramatic effects. for example, barium carbonate (which we don’t use) turns manganese bright pink! Other elements can turn manganese dioxide brown, blue, purple and reddish brown. Manganese dioxide is a flux in and of itself as well. So, glazes that get their black and purple colours, often interact with other glazes and RUN! Our mirror black is a good example – it mixes really well with many glazes because it fluxes them – causes them to melt faster. It will also bring out many beautiful colours in the glazes because it’s black colouring most definitely comes from manganese dioxide! Glaze chemistry is a whole subject on it’s own! We use commercial Mayco glazes on purpose – for their huge range of colour possibilities, stability, cool interactions, artistic freedom with the ability to easily brush the glazes on and ease of use. We currently have almost 50 glazes on hand! A major project is to test the interactions of all glazes with each other. That is 2,500 test tiles!!!! I’m going to make the wall behind the wheels the feature wall of pretty colours! Step Seven – Glaze (Gloss or sometimes called “Glost”) Firing Most of the time this is the final stage of making your creation (but not always!) The glaze kiln goes to 1240°C. This is called cone 6, or midrange. It is the low end of stoneware temperatures. Stoneware clays and glazes are typically fired at cone 8 – 10, that is 1260 – 1290°C. The energy requirement to go from 1240°C to 1280°C is almost a 30% more! Our clay is formulated to vitrify (mature, turn “glass-like”) at 1240°, as are our glazes. A glaze kiln take around 12 hours to reach temperature and two to three days to cool down. Sometimes a third firing process is required – this is for decoration that is added to work after the glaze firing. For example – adding precious metals and lustres. this firing temperature is usually around 600 – 800°C depending upon the techniques being used. There are many students interested in gold and silver trims – we will be doing this third type of firing soon! After firing your work will be in the student finished work shelves. Remember to pay for it before you head out the door! There is a small extra charge for using porcelain clay (it’s more than twice the price of regular clay), and for any third firing process! Once your work has been fired it can not turn back into clay for millennia – so don’t fire it if you don’t like it! Put it in the bucket for recycling. https://firebirdstudios.com.au/the-process-of-making-pottery/ This bowl is an example of kitchenware used in the 19th century and still in use today.Bowl white ceramic plain that has two sets of edging around lip. Inside bowl has plaster designed to look like cooking mixture.flagstaff hill, warrnambool, shipwrecked-coast, flagstaff-hill, flagstaff-hill-maritime-museum, maritime-museum, shipwreck-coast, flagstaff-hill-maritime-village, kitchen equipment, ceramic -
 Flagstaff Hill Maritime Museum and Village
Domestic object - Bowl, J & G Meakin, Late 19th or early 20th Century
The Process of Making Pottery Decorating, Firing, Glazing, Making, Technical There is a rhythm and flow to clay. It can’t be done all at once! Even the making process! It can take weeks to get everything done, especially if you can only work on your pottery once a week! Even though we have three hour classes, it’s often just not enough time! Here is an overview of some of the processes so you have a bit more grasp on some of the technical stuff! Step One – Design There are SO many ideas out there for making stuff in clay! From delicate porcelain jewellery, through to heavy sculptural work and everything in between. Deciding your direction is sometimes not that easy – when you first start, try everything, you will naturally gravitate to the style that you enjoy! The options and variations are endless and can get a wee bit overwhelming too! Check in with me before you start to ensure your ideas will work, what order you might do things, how you could achieve the look you are seeking and any other technical data required! Step Two – Making Clay is thixotropic. This means that as you work with it, the clay first gets sloppier and wetter, before is begins to dry in the atmosphere. For most things, you simply can’t do all parts of the project at once. An example of work order might look like: Get last weeks work out from the shelves Prepare clay for today’s work – roll your clay, prepare balls for throwing, make the first stage of a pinch pot) Clean up last week’s work and put it on the shelf for bisque firing Check that you have any glazing to do – and do enough of it that you will have time to finish your main project Do the next step of your next project – there might be a further step that can’t be complete immediately, in that case, wrap your work well and put onto the shelves. Letting your work rest for a while can really help keep your work clean and professional looking. Many things require bagging under plastic to keep it ready for work the next week – put your name on the outside of the bag so you can find your work easily. We have stickers and markers. Consider how you want to decorate your work – coloured slip can be applied at a fairly wet stage (remembering that it will make your work even wetter!). Trying to apply slip to dry clay won’t work! If you want to do sgraffito – you will need to keep the work leather hard (a state of dryness where you can still work the clay with a little effort and a little water and care). Step Three – Drying Most of the time your work can go into the rack uncovered to let it dry out for the following week. If you want to continue forming or shaping you will need to double bag your work – put your work on a suitable sized bat and put the bat in a bag so the base of the bag is under the bat, then put another bag over the top of the work and tuck the top of the bag under the bat. If you want to trim (or turn) your thrown work the following week, it should also be double bagged. If your work is large, delicate, or of uneven thicknesses, you should lightly cover your work for drying. When considering the drying process, bare in mind the weather, humidity and wind! The hotter and dryer, the faster things dry and work can dry unevenly in the shelves – this can lead to cracking – another time to lightly cover your work for drying. Step Four – Trimming and Cleaning Up Your work is dry! It is called greenware now and it is at it’s most fragile! Handle everything with two hands. I often refer to soft hands – keep everything gentle and with your fingers spread as much as possible. Try to not pick up things like plates too much, and always with both hands! Before your work can be bisque fired it should be “cleaned up”. You work won’t go into the kiln if it has sharp edges – when glazed, sharp edges turn into razor blades! Use a piece of fly wire to rub the work all over – this will scratch a little so be light handed. Use a knife or metal kidney to scrape any areas that require a bit more dynamic treatment than the fly wire offers! Finally, a very light wipe over with a slightly damp sponge can help soften and soothe all of your edges and dags! Trimming thrown work: If you are planning to trim (or turn) your thrown work (and you should be), make sure you bag it well – your work should be leather hard to almost dry for easiest trimming. Use this step to finish the work completely – use a metal kidney to polish the surface, or a slightly damp sponge to give a freshly thrown look. Wipe the sponge around the rim after trimming, and check the inside of the pot for dags! Trimming slip cast work: Usually I will trim the rims of your work on the wheel the following day to make that stage easier, however you will still need to check your work for lumps and bumps. Last but not least – check that your name is still clearly on the bottom of your work. Step Five – Bisque Firing When the work is completely dry it can go into the bisque kiln. The bisque kiln is fired to 1000°C. This process burns off the water in the clay as well as some of the chemically bound water. The structure of the clay is not altered that much at this temperature. Inside the bisque kiln, the work is stacked a little, small bowl inside a larger bowl and onto a heavy plate. Smaller items like decorations or drink coasters might get stacked several high. Consideration is paid to the weight of the stack and shape of the work. A bisque kiln can fire about one and a half times the amount of work that the glaze kiln can fire. The firing takes about 10 hours to complete the cycle and about two days to cool down. Once it has been emptied the work is placed in the glaze room ready for you to decorate! Step Six – Glazing Decorating your work with colour can be a lot of fun – and time consuming! There are three main options for surface treatment at this stage: Oxide Washes Underglazes Glazes Washes and underglazes do not “glaze” the work – It will still need a layer of glaze to fully seal the clay (washes don’t need glaze on surfaces not designed for food or liquid as they can gloss up a little on their own). Underglazes are stable colourants that turn out pretty much how they look in the jar. They can be mixed with each other to form other colours and can be used like water colours to paint onto your work. Mostly they should have a clear glaze on top to seal them. Oxides are a different species – the pink oxide (cobalt) wash turns out bright blue for instance. They don’t always need a glaze on top, and some glazes can change the colour of the wash! The glazes need no other “glaze” on top! Be careful of unknown glaze interactions – you can put any combination of glaze in a bowl or on a plate, but only a single glaze on the outside of any vertical surface! Glazes are a chemical reaction under heat. We don’t know the exact chemicals in the Mayco glazes we use. I can guess by the way they interact with each other, however, on the whole, you need to test every idea you have, and not run the test on a vertical surface! Simply put, glaze is a layer of glass like substance that bonds with the clay underneath. Clay is made of silica, alumina and water. Glaze is made of mostly silica. Silica has a melting point of 1700°C and we fire to 1240°C. The silica requires a “flux” to help it melt at the lower temperature. Fluxes can be all sorts of chemicals – a common one is calcium – calcium has a melting point of 2500°C, however, together they both melt at a much lower temperature! Colourants are metal oxides like cobalt (blue), chrome (green through black), copper (green, blue, even red!), manganese (black, purple and pink) iron (red brown), etc. Different chemicals in the glaze can have dramatic effects. for example, barium carbonate (which we don’t use) turns manganese bright pink! Other elements can turn manganese dioxide brown, blue, purple and reddish brown. Manganese dioxide is a flux in and of itself as well. So, glazes that get their black and purple colours, often interact with other glazes and RUN! Our mirror black is a good example – it mixes really well with many glazes because it fluxes them – causes them to melt faster. It will also bring out many beautiful colours in the glazes because it’s black colouring most definitely comes from manganese dioxide! Glaze chemistry is a whole subject on it’s own! We use commercial Mayco glazes on purpose – for their huge range of colour possibilities, stability, cool interactions, artistic freedom with the ability to easily brush the glazes on and ease of use. We currently have almost 50 glazes on hand! A major project is to test the interactions of all glazes with each other. That is 2,500 test tiles!!!! I’m going to make the wall behind the wheels the feature wall of pretty colours! Step Seven – Glaze (Gloss or sometimes called “Glost”) Firing Most of the time this is the final stage of making your creation (but not always!) The glaze kiln goes to 1240°C. This is called cone 6, or midrange. It is the low end of stoneware temperatures. Stoneware clays and glazes are typically fired at cone 8 – 10, that is 1260 – 1290°C. The energy requirement to go from 1240°C to 1280°C is almost a 30% more! Our clay is formulated to vitrify (mature, turn “glass-like”) at 1240°, as are our glazes. A glaze kiln take around 12 hours to reach temperature and two to three days to cool down. Sometimes a third firing process is required – this is for decoration that is added to work after the glaze firing. For example – adding precious metals and lustres. this firing temperature is usually around 600 – 800°C depending upon the techniques being used. There are many students interested in gold and silver trims – we will be doing this third type of firing soon! After firing your work will be in the student finished work shelves. Remember to pay for it before you head out the door! There is a small extra charge for using porcelain clay (it’s more than twice the price of regular clay), and for any third firing process! Once your work has been fired it can not turn back into clay for millennia – so don’t fire it if you don’t like it! Put it in the bucket for recycling. https://firebirdstudios.com.au/the-process-of-making-pottery/This bowl was made by renowned pottery company J & G Meakin of England. The firm was established in the mid-1800's. The bowl is an example of kitchenware used in the 19th century and still in use today.Bowl; white ceramic, round and tapering inwards towards base. Made by J and G Meakin England.On base, 'Ironstone China Reg SOL 391413' with symbolflagstaff hill, flagstaff hill maritime museum and village, warrnambool, maritime museum, maritime village, great ocean road, shipwreck coast, mixing bowl, food preparation, j & g meakin, pottery, stoke-on-trent, kitchen equipment, ceramic -
 Flagstaff Hill Maritime Museum and Village
Domestic object - Plate
The Process of Making Pottery Decorating, Firing, Glazing, Making, Technical There is a rhythm and flow to clay. It can’t be done all at once! Even the making process! It can take weeks to get everything done, especially if you can only work on your pottery once a week! Even though we have three hour classes, it’s often just not enough time! Here is an overview of some of the processes so you have a bit more grasp on some of the technical stuff! Step One – Design There are SO many ideas out there for making stuff in clay! From delicate porcelain jewellery, through to heavy sculptural work and everything in between. Deciding your direction is sometimes not that easy – when you first start, try everything, you will naturally gravitate to the style that you enjoy! The options and variations are endless and can get a wee bit overwhelming too! Check in with me before you start to ensure your ideas will work, what order you might do things, how you could achieve the look you are seeking and any other technical data required! Step Two – Making Clay is thixotropic. This means that as you work with it, the clay first gets sloppier and wetter, before is begins to dry in the atmosphere. For most things, you simply can’t do all parts of the project at once. An example of work order might look like: Get last weeks work out from the shelves Prepare clay for today’s work – roll your clay, prepare balls for throwing, make the first stage of a pinch pot) Clean up last week’s work and put it on the shelf for bisque firing Check that you have any glazing to do – and do enough of it that you will have time to finish your main project Do the next step of your next project – there might be a further step that can’t be complete immediately, in that case, wrap your work well and put onto the shelves. Letting your work rest for a while can really help keep your work clean and professional looking. Many things require bagging under plastic to keep it ready for work the next week – put your name on the outside of the bag so you can find your work easily. We have stickers and markers. Consider how you want to decorate your work – coloured slip can be applied at a fairly wet stage (remembering that it will make your work even wetter!). Trying to apply slip to dry clay won’t work! If you want to do sgraffito – you will need to keep the work leather hard (a state of dryness where you can still work the clay with a little effort and a little water and care). Step Three – Drying Most of the time your work can go into the rack uncovered to let it dry out for the following week. If you want to continue forming or shaping you will need to double bag your work – put your work on a suitable sized bat and put the bat in a bag so the base of the bag is under the bat, then put another bag over the top of the work and tuck the top of the bag under the bat. If you want to trim (or turn) your thrown work the following week, it should also be double bagged. If your work is large, delicate, or of uneven thicknesses, you should lightly cover your work for drying. When considering the drying process, bare in mind the weather, humidity and wind! The hotter and dryer, the faster things dry and work can dry unevenly in the shelves – this can lead to cracking – another time to lightly cover your work for drying. Step Four – Trimming and Cleaning Up Your work is dry! It is called greenware now and it is at it’s most fragile! Handle everything with two hands. I often refer to soft hands – keep everything gentle and with your fingers spread as much as possible. Try to not pick up things like plates too much, and always with both hands! Before your work can be bisque fired it should be “cleaned up”. You work won’t go into the kiln if it has sharp edges – when glazed, sharp edges turn into razor blades! Use a piece of fly wire to rub the work all over – this will scratch a little so be light handed. Use a knife or metal kidney to scrape any areas that require a bit more dynamic treatment than the fly wire offers! Finally, a very light wipe over with a slightly damp sponge can help soften and soothe all of your edges and dags! Trimming thrown work: If you are planning to trim (or turn) your thrown work (and you should be), make sure you bag it well – your work should be leather hard to almost dry for easiest trimming. Use this step to finish the work completely – use a metal kidney to polish the surface, or a slightly damp sponge to give a freshly thrown look. Wipe the sponge around the rim after trimming, and check the inside of the pot for dags! Trimming slip cast work: Usually I will trim the rims of your work on the wheel the following day to make that stage easier, however you will still need to check your work for lumps and bumps. Last but not least – check that your name is still clearly on the bottom of your work. Step Five – Bisque Firing When the work is completely dry it can go into the bisque kiln. The bisque kiln is fired to 1000°C. This process burns off the water in the clay as well as some of the chemically bound water. The structure of the clay is not altered that much at this temperature. Inside the bisque kiln, the work is stacked a little, small bowl inside a larger bowl and onto a heavy plate. Smaller items like decorations or drink coasters might get stacked several high. Consideration is paid to the weight of the stack and shape of the work. A bisque kiln can fire about one and a half times the amount of work that the glaze kiln can fire. The firing takes about 10 hours to complete the cycle and about two days to cool down. Once it has been emptied the work is placed in the glaze room ready for you to decorate! Step Six – Glazing Decorating your work with colour can be a lot of fun – and time consuming! There are three main options for surface treatment at this stage: Oxide Washes Underglazes Glazes Washes and underglazes do not “glaze” the work – It will still need a layer of glaze to fully seal the clay (washes don’t need glaze on surfaces not designed for food or liquid as they can gloss up a little on their own). Underglazes are stable colourants that turn out pretty much how they look in the jar. They can be mixed with each other to form other colours and can be used like water colours to paint onto your work. Mostly they should have a clear glaze on top to seal them. Oxides are a different species – the pink oxide (cobalt) wash turns out bright blue for instance. They don’t always need a glaze on top, and some glazes can change the colour of the wash! The glazes need no other “glaze” on top! Be careful of unknown glaze interactions – you can put any combination of glaze in a bowl or on a plate, but only a single glaze on the outside of any vertical surface! Glazes are a chemical reaction under heat. We don’t know the exact chemicals in the Mayco glazes we use. I can guess by the way they interact with each other, however, on the whole, you need to test every idea you have, and not run the test on a vertical surface! Simply put, glaze is a layer of glass like substance that bonds with the clay underneath. Clay is made of silica, alumina and water. Glaze is made of mostly silica. Silica has a melting point of 1700°C and we fire to 1240°C. The silica requires a “flux” to help it melt at the lower temperature. Fluxes can be all sorts of chemicals – a common one is calcium – calcium has a melting point of 2500°C, however, together they both melt at a much lower temperature! Colourants are metal oxides like cobalt (blue), chrome (green through black), copper (green, blue, even red!), manganese (black, purple and pink) iron (red brown), etc. Different chemicals in the glaze can have dramatic effects. for example, barium carbonate (which we don’t use) turns manganese bright pink! Other elements can turn manganese dioxide brown, blue, purple and reddish brown. Manganese dioxide is a flux in and of itself as well. So, glazes that get their black and purple colours, often interact with other glazes and RUN! Our mirror black is a good example – it mixes really well with many glazes because it fluxes them – causes them to melt faster. It will also bring out many beautiful colours in the glazes because it’s black colouring most definitely comes from manganese dioxide! Glaze chemistry is a whole subject on it’s own! We use commercial Mayco glazes on purpose – for their huge range of colour possibilities, stability, cool interactions, artistic freedom with the ability to easily brush the glazes on and ease of use. We currently have almost 50 glazes on hand! A major project is to test the interactions of all glazes with each other. That is 2,500 test tiles!!!! I’m going to make the wall behind the wheels the feature wall of pretty colours! Step Seven – Glaze (Gloss or sometimes called “Glost”) Firing Most of the time this is the final stage of making your creation (but not always!) The glaze kiln goes to 1240°C. This is called cone 6, or midrange. It is the low end of stoneware temperatures. Stoneware clays and glazes are typically fired at cone 8 – 10, that is 1260 – 1290°C. The energy requirement to go from 1240°C to 1280°C is almost a 30% more! Our clay is formulated to vitrify (mature, turn “glass-like”) at 1240°, as are our glazes. A glaze kiln take around 12 hours to reach temperature and two to three days to cool down. Sometimes a third firing process is required – this is for decoration that is added to work after the glaze firing. For example – adding precious metals and lustres. this firing temperature is usually around 600 – 800°C depending upon the techniques being used. There are many students interested in gold and silver trims – we will be doing this third type of firing soon! After firing your work will be in the student finished work shelves. Remember to pay for it before you head out the door! There is a small extra charge for using porcelain clay (it’s more than twice the price of regular clay), and for any third firing process! Once your work has been fired it can not turn back into clay for millennia – so don’t fire it if you don’t like it! Put it in the bucket for recycling. https://firebirdstudios.com.au/the-process-of-making-pottery/Ceramics have evolved over thousands of years.White earthenware dinner plate. Crazing evident all over.Backstamped ‘Made in England S LTD’flagstaff hill, warrnambool, shipwrecked-coast, flagstaff-hill, flagstaff-hill-maritime-museum, maritime-museum, shipwreck-coast, flagstaff-hill-maritime-village, ceramics, tableware -
 Flagstaff Hill Maritime Museum and Village
Domestic object - Plate, Johnson Bros
The Process of Making Pottery Decorating, Firing, Glazing, Making, Technical There is a rhythm and flow to clay. It can’t be done all at once! Even the making process! It can take weeks to get everything done, especially if you can only work on your pottery once a week! Even though we have three hour classes, it’s often just not enough time! Here is an overview of some of the processes so you have a bit more grasp on some of the technical stuff! Step One – Design There are SO many ideas out there for making stuff in clay! From delicate porcelain jewellery, through to heavy sculptural work and everything in between. Deciding your direction is sometimes not that easy – when you first start, try everything, you will naturally gravitate to the style that you enjoy! The options and variations are endless and can get a wee bit overwhelming too! Check in with me before you start to ensure your ideas will work, what order you might do things, how you could achieve the look you are seeking and any other technical data required! Step Two – Making Clay is thixotropic. This means that as you work with it, the clay first gets sloppier and wetter, before is begins to dry in the atmosphere. For most things, you simply can’t do all parts of the project at once. An example of work order might look like: Get last weeks work out from the shelves Prepare clay for today’s work – roll your clay, prepare balls for throwing, make the first stage of a pinch pot) Clean up last week’s work and put it on the shelf for bisque firing Check that you have any glazing to do – and do enough of it that you will have time to finish your main project Do the next step of your next project – there might be a further step that can’t be complete immediately, in that case, wrap your work well and put onto the shelves. Letting your work rest for a while can really help keep your work clean and professional looking. Many things require bagging under plastic to keep it ready for work the next week – put your name on the outside of the bag so you can find your work easily. We have stickers and markers. Consider how you want to decorate your work – coloured slip can be applied at a fairly wet stage (remembering that it will make your work even wetter!). Trying to apply slip to dry clay won’t work! If you want to do sgraffito – you will need to keep the work leather hard (a state of dryness where you can still work the clay with a little effort and a little water and care). Step Three – Drying Most of the time your work can go into the rack uncovered to let it dry out for the following week. If you want to continue forming or shaping you will need to double bag your work – put your work on a suitable sized bat and put the bat in a bag so the base of the bag is under the bat, then put another bag over the top of the work and tuck the top of the bag under the bat. If you want to trim (or turn) your thrown work the following week, it should also be double bagged. If your work is large, delicate, or of uneven thicknesses, you should lightly cover your work for drying. When considering the drying process, bare in mind the weather, humidity and wind! The hotter and dryer, the faster things dry and work can dry unevenly in the shelves – this can lead to cracking – another time to lightly cover your work for drying. Step Four – Trimming and Cleaning Up Your work is dry! It is called greenware now and it is at it’s most fragile! Handle everything with two hands. I often refer to soft hands – keep everything gentle and with your fingers spread as much as possible. Try to not pick up things like plates too much, and always with both hands! Before your work can be bisque fired it should be “cleaned up”. You work won’t go into the kiln if it has sharp edges – when glazed, sharp edges turn into razor blades! Use a piece of fly wire to rub the work all over – this will scratch a little so be light handed. Use a knife or metal kidney to scrape any areas that require a bit more dynamic treatment than the fly wire offers! Finally, a very light wipe over with a slightly damp sponge can help soften and soothe all of your edges and dags! Trimming thrown work: If you are planning to trim (or turn) your thrown work (and you should be), make sure you bag it well – your work should be leather hard to almost dry for easiest trimming. Use this step to finish the work completely – use a metal kidney to polish the surface, or a slightly damp sponge to give a freshly thrown look. Wipe the sponge around the rim after trimming, and check the inside of the pot for dags! Trimming slip cast work: Usually I will trim the rims of your work on the wheel the following day to make that stage easier, however you will still need to check your work for lumps and bumps. Last but not least – check that your name is still clearly on the bottom of your work. Step Five – Bisque Firing When the work is completely dry it can go into the bisque kiln. The bisque kiln is fired to 1000°C. This process burns off the water in the clay as well as some of the chemically bound water. The structure of the clay is not altered that much at this temperature. Inside the bisque kiln, the work is stacked a little, small bowl inside a larger bowl and onto a heavy plate. Smaller items like decorations or drink coasters might get stacked several high. Consideration is paid to the weight of the stack and shape of the work. A bisque kiln can fire about one and a half times the amount of work that the glaze kiln can fire. The firing takes about 10 hours to complete the cycle and about two days to cool down. Once it has been emptied the work is placed in the glaze room ready for you to decorate! Step Six – Glazing Decorating your work with colour can be a lot of fun – and time consuming! There are three main options for surface treatment at this stage: Oxide Washes Underglazes Glazes Washes and underglazes do not “glaze” the work – It will still need a layer of glaze to fully seal the clay (washes don’t need glaze on surfaces not designed for food or liquid as they can gloss up a little on their own). Underglazes are stable colourants that turn out pretty much how they look in the jar. They can be mixed with each other to form other colours and can be used like water colours to paint onto your work. Mostly they should have a clear glaze on top to seal them. Oxides are a different species – the pink oxide (cobalt) wash turns out bright blue for instance. They don’t always need a glaze on top, and some glazes can change the colour of the wash! The glazes need no other “glaze” on top! Be careful of unknown glaze interactions – you can put any combination of glaze in a bowl or on a plate, but only a single glaze on the outside of any vertical surface! Glazes are a chemical reaction under heat. We don’t know the exact chemicals in the Mayco glazes we use. I can guess by the way they interact with each other, however, on the whole, you need to test every idea you have, and not run the test on a vertical surface! Simply put, glaze is a layer of glass like substance that bonds with the clay underneath. Clay is made of silica, alumina and water. Glaze is made of mostly silica. Silica has a melting point of 1700°C and we fire to 1240°C. The silica requires a “flux” to help it melt at the lower temperature. Fluxes can be all sorts of chemicals – a common one is calcium – calcium has a melting point of 2500°C, however, together they both melt at a much lower temperature! Colourants are metal oxides like cobalt (blue), chrome (green through black), copper (green, blue, even red!), manganese (black, purple and pink) iron (red brown), etc. Different chemicals in the glaze can have dramatic effects. for example, barium carbonate (which we don’t use) turns manganese bright pink! Other elements can turn manganese dioxide brown, blue, purple and reddish brown. Manganese dioxide is a flux in and of itself as well. So, glazes that get their black and purple colours, often interact with other glazes and RUN! Our mirror black is a good example – it mixes really well with many glazes because it fluxes them – causes them to melt faster. It will also bring out many beautiful colours in the glazes because it’s black colouring most definitely comes from manganese dioxide! Glaze chemistry is a whole subject on it’s own! We use commercial Mayco glazes on purpose – for their huge range of colour possibilities, stability, cool interactions, artistic freedom with the ability to easily brush the glazes on and ease of use. We currently have almost 50 glazes on hand! A major project is to test the interactions of all glazes with each other. That is 2,500 test tiles!!!! I’m going to make the wall behind the wheels the feature wall of pretty colours! Step Seven – Glaze (Gloss or sometimes called “Glost”) Firing Most of the time this is the final stage of making your creation (but not always!) The glaze kiln goes to 1240°C. This is called cone 6, or midrange. It is the low end of stoneware temperatures. Stoneware clays and glazes are typically fired at cone 8 – 10, that is 1260 – 1290°C. The energy requirement to go from 1240°C to 1280°C is almost a 30% more! Our clay is formulated to vitrify (mature, turn “glass-like”) at 1240°, as are our glazes. A glaze kiln take around 12 hours to reach temperature and two to three days to cool down. Sometimes a third firing process is required – this is for decoration that is added to work after the glaze firing. For example – adding precious metals and lustres. this firing temperature is usually around 600 – 800°C depending upon the techniques being used. There are many students interested in gold and silver trims – we will be doing this third type of firing soon! After firing your work will be in the student finished work shelves. Remember to pay for it before you head out the door! There is a small extra charge for using porcelain clay (it’s more than twice the price of regular clay), and for any third firing process! Once your work has been fired it can not turn back into clay for millennia – so don’t fire it if you don’t like it! Put it in the bucket for recycling. https://firebirdstudios.com.au/the-process-of-making-pottery/Ceramics have evolved over thousands of years.A white earthenware side plate with a gadroon edge. Has water marks and chips on front.‘Johnson Bros England Reg No 15587’flagstaff hill, warrnambool, shipwrecked-coast, flagstaff-hill, flagstaff-hill-maritime-museum, maritime-museum, shipwreck-coast, flagstaff-hill-maritime-village, johnson bros, ceramics, tableware -
 Flagstaff Hill Maritime Museum and Village
Domestic object - Plate, Alfred Meakin
The Process of Making Pottery Decorating, Firing, Glazing, Making, Technical There is a rhythm and flow to clay. It can’t be done all at once! Even the making process! It can take weeks to get everything done, especially if you can only work on your pottery once a week! Even though we have three hour classes, it’s often just not enough time! Here is an overview of some of the processes so you have a bit more grasp on some of the technical stuff! Step One – Design There are SO many ideas out there for making stuff in clay! From delicate porcelain jewellery, through to heavy sculptural work and everything in between. Deciding your direction is sometimes not that easy – when you first start, try everything, you will naturally gravitate to the style that you enjoy! The options and variations are endless and can get a wee bit overwhelming too! Check in with me before you start to ensure your ideas will work, what order you might do things, how you could achieve the look you are seeking and any other technical data required! Step Two – Making Clay is thixotropic. This means that as you work with it, the clay first gets sloppier and wetter, before is begins to dry in the atmosphere. For most things, you simply can’t do all parts of the project at once. An example of work order might look like: Get last weeks work out from the shelves Prepare clay for today’s work – roll your clay, prepare balls for throwing, make the first stage of a pinch pot) Clean up last week’s work and put it on the shelf for bisque firing Check that you have any glazing to do – and do enough of it that you will have time to finish your main project Do the next step of your next project – there might be a further step that can’t be complete immediately, in that case, wrap your work well and put onto the shelves. Letting your work rest for a while can really help keep your work clean and professional looking. Many things require bagging under plastic to keep it ready for work the next week – put your name on the outside of the bag so you can find your work easily. We have stickers and markers. Consider how you want to decorate your work – coloured slip can be applied at a fairly wet stage (remembering that it will make your work even wetter!). Trying to apply slip to dry clay won’t work! If you want to do sgraffito – you will need to keep the work leather hard (a state of dryness where you can still work the clay with a little effort and a little water and care). Step Three – Drying Most of the time your work can go into the rack uncovered to let it dry out for the following week. If you want to continue forming or shaping you will need to double bag your work – put your work on a suitable sized bat and put the bat in a bag so the base of the bag is under the bat, then put another bag over the top of the work and tuck the top of the bag under the bat. If you want to trim (or turn) your thrown work the following week, it should also be double bagged. If your work is large, delicate, or of uneven thicknesses, you should lightly cover your work for drying. When considering the drying process, bare in mind the weather, humidity and wind! The hotter and dryer, the faster things dry and work can dry unevenly in the shelves – this can lead to cracking – another time to lightly cover your work for drying. Step Four – Trimming and Cleaning Up Your work is dry! It is called greenware now and it is at it’s most fragile! Handle everything with two hands. I often refer to soft hands – keep everything gentle and with your fingers spread as much as possible. Try to not pick up things like plates too much, and always with both hands! Before your work can be bisque fired it should be “cleaned up”. You work won’t go into the kiln if it has sharp edges – when glazed, sharp edges turn into razor blades! Use a piece of fly wire to rub the work all over – this will scratch a little so be light handed. Use a knife or metal kidney to scrape any areas that require a bit more dynamic treatment than the fly wire offers! Finally, a very light wipe over with a slightly damp sponge can help soften and soothe all of your edges and dags! Trimming thrown work: If you are planning to trim (or turn) your thrown work (and you should be), make sure you bag it well – your work should be leather hard to almost dry for easiest trimming. Use this step to finish the work completely – use a metal kidney to polish the surface, or a slightly damp sponge to give a freshly thrown look. Wipe the sponge around the rim after trimming, and check the inside of the pot for dags! Trimming slip cast work: Usually I will trim the rims of your work on the wheel the following day to make that stage easier, however you will still need to check your work for lumps and bumps. Last but not least – check that your name is still clearly on the bottom of your work. Step Five – Bisque Firing When the work is completely dry it can go into the bisque kiln. The bisque kiln is fired to 1000°C. This process burns off the water in the clay as well as some of the chemically bound water. The structure of the clay is not altered that much at this temperature. Inside the bisque kiln, the work is stacked a little, small bowl inside a larger bowl and onto a heavy plate. Smaller items like decorations or drink coasters might get stacked several high. Consideration is paid to the weight of the stack and shape of the work. A bisque kiln can fire about one and a half times the amount of work that the glaze kiln can fire. The firing takes about 10 hours to complete the cycle and about two days to cool down. Once it has been emptied the work is placed in the glaze room ready for you to decorate! Step Six – Glazing Decorating your work with colour can be a lot of fun – and time consuming! There are three main options for surface treatment at this stage: Oxide Washes Underglazes Glazes Washes and underglazes do not “glaze” the work – It will still need a layer of glaze to fully seal the clay (washes don’t need glaze on surfaces not designed for food or liquid as they can gloss up a little on their own). Underglazes are stable colourants that turn out pretty much how they look in the jar. They can be mixed with each other to form other colours and can be used like water colours to paint onto your work. Mostly they should have a clear glaze on top to seal them. Oxides are a different species – the pink oxide (cobalt) wash turns out bright blue for instance. They don’t always need a glaze on top, and some glazes can change the colour of the wash! The glazes need no other “glaze” on top! Be careful of unknown glaze interactions – you can put any combination of glaze in a bowl or on a plate, but only a single glaze on the outside of any vertical surface! Glazes are a chemical reaction under heat. We don’t know the exact chemicals in the Mayco glazes we use. I can guess by the way they interact with each other, however, on the whole, you need to test every idea you have, and not run the test on a vertical surface! Simply put, glaze is a layer of glass like substance that bonds with the clay underneath. Clay is made of silica, alumina and water. Glaze is made of mostly silica. Silica has a melting point of 1700°C and we fire to 1240°C. The silica requires a “flux” to help it melt at the lower temperature. Fluxes can be all sorts of chemicals – a common one is calcium – calcium has a melting point of 2500°C, however, together they both melt at a much lower temperature! Colourants are metal oxides like cobalt (blue), chrome (green through black), copper (green, blue, even red!), manganese (black, purple and pink) iron (red brown), etc. Different chemicals in the glaze can have dramatic effects. for example, barium carbonate (which we don’t use) turns manganese bright pink! Other elements can turn manganese dioxide brown, blue, purple and reddish brown. Manganese dioxide is a flux in and of itself as well. So, glazes that get their black and purple colours, often interact with other glazes and RUN! Our mirror black is a good example – it mixes really well with many glazes because it fluxes them – causes them to melt faster. It will also bring out many beautiful colours in the glazes because it’s black colouring most definitely comes from manganese dioxide! Glaze chemistry is a whole subject on it’s own! We use commercial Mayco glazes on purpose – for their huge range of colour possibilities, stability, cool interactions, artistic freedom with the ability to easily brush the glazes on and ease of use. We currently have almost 50 glazes on hand! A major project is to test the interactions of all glazes with each other. That is 2,500 test tiles!!!! I’m going to make the wall behind the wheels the feature wall of pretty colours! Step Seven – Glaze (Gloss or sometimes called “Glost”) Firing Most of the time this is the final stage of making your creation (but not always!) The glaze kiln goes to 1240°C. This is called cone 6, or midrange. It is the low end of stoneware temperatures. Stoneware clays and glazes are typically fired at cone 8 – 10, that is 1260 – 1290°C. The energy requirement to go from 1240°C to 1280°C is almost a 30% more! Our clay is formulated to vitrify (mature, turn “glass-like”) at 1240°, as are our glazes. A glaze kiln take around 12 hours to reach temperature and two to three days to cool down. Sometimes a third firing process is required – this is for decoration that is added to work after the glaze firing. For example – adding precious metals and lustres. this firing temperature is usually around 600 – 800°C depending upon the techniques being used. There are many students interested in gold and silver trims – we will be doing this third type of firing soon! After firing your work will be in the student finished work shelves. Remember to pay for it before you head out the door! There is a small extra charge for using porcelain clay (it’s more than twice the price of regular clay), and for any third firing process! Once your work has been fired it can not turn back into clay for millennia – so don’t fire it if you don’t like it! Put it in the bucket for recycling. https://firebirdstudios.com.au/the-process-of-making-pottery/Ceramics have evolved over thousands of years.Earthenware dessert plate, cream colour. Made by Alfred Meakin, England. Backstamped ‘Alfred Meakin England’. flagstaff hill, warrnambool, shipwrecked-coast, flagstaff-hill, flagstaff-hill-maritime-museum, maritime-museum, shipwreck-coast, flagstaff-hill-maritime-village, alfred meakin, ceramics, earthenware, kitchenware -
 Flagstaff Hill Maritime Museum and Village
Domestic object - Jug
The Process of Making Pottery Decorating, Firing, Glazing, Making, Technical There is a rhythm and flow to clay. It can’t be done all at once! Even the making process! It can take weeks to get everything done, especially if you can only work on your pottery once a week! Even though we have three hour classes, it’s often just not enough time! Here is an overview of some of the processes so you have a bit more grasp on some of the technical stuff! Step One – Design There are SO many ideas out there for making stuff in clay! From delicate porcelain jewellery, through to heavy sculptural work and everything in between. Deciding your direction is sometimes not that easy – when you first start, try everything, you will naturally gravitate to the style that you enjoy! The options and variations are endless and can get a wee bit overwhelming too! Check in with me before you start to ensure your ideas will work, what order you might do things, how you could achieve the look you are seeking and any other technical data required! Step Two – Making Clay is thixotropic. This means that as you work with it, the clay first gets sloppier and wetter, before is begins to dry in the atmosphere. For most things, you simply can’t do all parts of the project at once. An example of work order might look like: Get last weeks work out from the shelves Prepare clay for today’s work – roll your clay, prepare balls for throwing, make the first stage of a pinch pot) Clean up last week’s work and put it on the shelf for bisque firing Check that you have any glazing to do – and do enough of it that you will have time to finish your main project Do the next step of your next project – there might be a further step that can’t be complete immediately, in that case, wrap your work well and put onto the shelves. Letting your work rest for a while can really help keep your work clean and professional looking. Many things require bagging under plastic to keep it ready for work the next week – put your name on the outside of the bag so you can find your work easily. We have stickers and markers. Consider how you want to decorate your work – coloured slip can be applied at a fairly wet stage (remembering that it will make your work even wetter!). Trying to apply slip to dry clay won’t work! If you want to do sgraffito – you will need to keep the work leather hard (a state of dryness where you can still work the clay with a little effort and a little water and care). Step Three – Drying Most of the time your work can go into the rack uncovered to let it dry out for the following week. If you want to continue forming or shaping you will need to double bag your work – put your work on a suitable sized bat and put the bat in a bag so the base of the bag is under the bat, then put another bag over the top of the work and tuck the top of the bag under the bat. If you want to trim (or turn) your thrown work the following week, it should also be double bagged. If your work is large, delicate, or of uneven thicknesses, you should lightly cover your work for drying. When considering the drying process, bare in mind the weather, humidity and wind! The hotter and dryer, the faster things dry and work can dry unevenly in the shelves – this can lead to cracking – another time to lightly cover your work for drying. Step Four – Trimming and Cleaning Up Your work is dry! It is called greenware now and it is at it’s most fragile! Handle everything with two hands. I often refer to soft hands – keep everything gentle and with your fingers spread as much as possible. Try to not pick up things like plates too much, and always with both hands! Before your work can be bisque fired it should be “cleaned up”. You work won’t go into the kiln if it has sharp edges – when glazed, sharp edges turn into razor blades! Use a piece of fly wire to rub the work all over – this will scratch a little so be light handed. Use a knife or metal kidney to scrape any areas that require a bit more dynamic treatment than the fly wire offers! Finally, a very light wipe over with a slightly damp sponge can help soften and soothe all of your edges and dags! Trimming thrown work: If you are planning to trim (or turn) your thrown work (and you should be), make sure you bag it well – your work should be leather hard to almost dry for easiest trimming. Use this step to finish the work completely – use a metal kidney to polish the surface, or a slightly damp sponge to give a freshly thrown look. Wipe the sponge around the rim after trimming, and check the inside of the pot for dags! Trimming slip cast work: Usually I will trim the rims of your work on the wheel the following day to make that stage easier, however you will still need to check your work for lumps and bumps. Last but not least – check that your name is still clearly on the bottom of your work. Step Five – Bisque Firing When the work is completely dry it can go into the bisque kiln. The bisque kiln is fired to 1000°C. This process burns off the water in the clay as well as some of the chemically bound water. The structure of the clay is not altered that much at this temperature. Inside the bisque kiln, the work is stacked a little, small bowl inside a larger bowl and onto a heavy plate. Smaller items like decorations or drink coasters might get stacked several high. Consideration is paid to the weight of the stack and shape of the work. A bisque kiln can fire about one and a half times the amount of work that the glaze kiln can fire. The firing takes about 10 hours to complete the cycle and about two days to cool down. Once it has been emptied the work is placed in the glaze room ready for you to decorate! Step Six – Glazing Decorating your work with colour can be a lot of fun – and time consuming! There are three main options for surface treatment at this stage: Oxide Washes Underglazes Glazes Washes and underglazes do not “glaze” the work – It will still need a layer of glaze to fully seal the clay (washes don’t need glaze on surfaces not designed for food or liquid as they can gloss up a little on their own). Underglazes are stable colourants that turn out pretty much how they look in the jar. They can be mixed with each other to form other colours and can be used like water colours to paint onto your work. Mostly they should have a clear glaze on top to seal them. Oxides are a different species – the pink oxide (cobalt) wash turns out bright blue for instance. They don’t always need a glaze on top, and some glazes can change the colour of the wash! The glazes need no other “glaze” on top! Be careful of unknown glaze interactions – you can put any combination of glaze in a bowl or on a plate, but only a single glaze on the outside of any vertical surface! Glazes are a chemical reaction under heat. We don’t know the exact chemicals in the Mayco glazes we use. I can guess by the way they interact with each other, however, on the whole, you need to test every idea you have, and not run the test on a vertical surface! Simply put, glaze is a layer of glass like substance that bonds with the clay underneath. Clay is made of silica, alumina and water. Glaze is made of mostly silica. Silica has a melting point of 1700°C and we fire to 1240°C. The silica requires a “flux” to help it melt at the lower temperature. Fluxes can be all sorts of chemicals – a common one is calcium – calcium has a melting point of 2500°C, however, together they both melt at a much lower temperature! Colourants are metal oxides like cobalt (blue), chrome (green through black), copper (green, blue, even red!), manganese (black, purple and pink) iron (red brown), etc. Different chemicals in the glaze can have dramatic effects. for example, barium carbonate (which we don’t use) turns manganese bright pink! Other elements can turn manganese dioxide brown, blue, purple and reddish brown. Manganese dioxide is a flux in and of itself as well. So, glazes that get their black and purple colours, often interact with other glazes and RUN! Our mirror black is a good example – it mixes really well with many glazes because it fluxes them – causes them to melt faster. It will also bring out many beautiful colours in the glazes because it’s black colouring most definitely comes from manganese dioxide! Glaze chemistry is a whole subject on it’s own! We use commercial Mayco glazes on purpose – for their huge range of colour possibilities, stability, cool interactions, artistic freedom with the ability to easily brush the glazes on and ease of use. We currently have almost 50 glazes on hand! A major project is to test the interactions of all glazes with each other. That is 2,500 test tiles!!!! I’m going to make the wall behind the wheels the feature wall of pretty colours! Step Seven – Glaze (Gloss or sometimes called “Glost”) Firing Most of the time this is the final stage of making your creation (but not always!) The glaze kiln goes to 1240°C. This is called cone 6, or midrange. It is the low end of stoneware temperatures. Stoneware clays and glazes are typically fired at cone 8 – 10, that is 1260 – 1290°C. The energy requirement to go from 1240°C to 1280°C is almost a 30% more! Our clay is formulated to vitrify (mature, turn “glass-like”) at 1240°, as are our glazes. A glaze kiln take around 12 hours to reach temperature and two to three days to cool down. Sometimes a third firing process is required – this is for decoration that is added to work after the glaze firing. For example – adding precious metals and lustres. this firing temperature is usually around 600 – 800°C depending upon the techniques being used. There are many students interested in gold and silver trims – we will be doing this third type of firing soon! After firing your work will be in the student finished work shelves. Remember to pay for it before you head out the door! There is a small extra charge for using porcelain clay (it’s more than twice the price of regular clay), and for any third firing process! Once your work has been fired it can not turn back into clay for millennia – so don’t fire it if you don’t like it! Put it in the bucket for recycling. https://firebirdstudios.com.au/the-process-of-making-pottery/The form of the jug has been in use for many centuries.Stoneware jug. Two tone brown glaze with pierced lip behind spout. Spout chipped.None.flagstaff hill, warrnambool, shipwrecked-coast, flagstaff-hill, flagstaff-hill-maritime-museum, maritime-museum, shipwreck-coast, flagstaff-hill-maritime-village, jug, ceramic jug -
 Carlton Football Club
Dinner Program & Menu, Carlton Football Club November 21st 1957 to Mr H R Clover, 1957
Dinner to Mr H R Clover player Career : 1920-24, 1926-31 Debut : Round 2, 1920 vs. Richmond, aged 25 years, 46 days Carlton Player No. 346 Games : 147 Goals : 396 Guernsey No. 1 Last Game : Semi Final, 1931 vs. Collingwood, aged 36 years, 180 days Height : 185 cm (6 ft. 1 in.) Weight : 86.5 kg (13 stone, 9 lbs.) DOB : 20 March, 1895 League Leading Goalkicker: 1922 Leading Goalkicker: 1920, 1921, 1922, 1923, 1926, 1928 Best and Fairest: 1929 Captain Coach: 1922-1924, 1927 Champion of the Colony: 1921 VFL AFL Hall of Fame Carlton Hall of Fame Team of the Century President: 1956-57 Vice President: 1932, 1935-54 Club Secretary: 1925-26 Horace “Horrie” Clover was Carlton’s star centre half-forward of the 1920’s; a high flying, long-kicking champion who enjoyed a stellar career with the Old Dark Navy Blues, then went on to be one of our longest-serving administrators. But even before he took the field for Carlton, Clover had to conquer the odds on the battlefields of France in World War 1. From Maryborough in central Victoria, Horrie enlisted in the 1st AIF in September 1915. After basic training, he embarked for France with reinforcements for the 7th Battalion in January of 1916. Soon pitched into the horrors of trench warfare, he fought and survived until September of that year, when he was transferred to a machine gun company and promoted to the rank of Corporal. On Christmas day, 1916, Horrie was struck down with acute appendicitis. He was evacuated to a field hospital for emergency surgery, where the doctors discovered that his appendix was gangrenous and that his life was in danger. He was immediately transferred to London for specialist treatment, and months of recuperation. Pronounced unfit for further front-line service, he was repatriated back to Australia in August 1917, and honourably discharged in May of the following year – six months before the Armistice. Having recovered, and keen to have a crack at senior football, Clover trained with Richmond and Melbourne before Carlton gave him an opportunity at VFL level. And how he delivered! In his first match in 1920 – ironically, against Richmond - he kicked four goals from centre half-forward, and hit the post three times! By the end of his first season at Princes Park, Clover was one of Carlton’s drawcards. Former Australian Prime Minister Sir Robert Menzies was just one of the many Carlton fans who were captivated; “he was the most artistic of high marks, unforgettable at half-forward,” said Menzies. Horrie could kick a football, too. A balanced, deceptively quick mover, he was a glorious running drop-kick for goal. Playing against Richmond again at Princes Park in July, 1921, he let fly with a monster kick that was later measured at 86.26 metres – that’s 94 yards, 2 feet in imperial terms! And there are numerous other instances where he roosted the ball more than 70 metres. In round 12 of 1921, he slotted 13 goals in a game against St Kilda; a club record which still stands today. The Blues made the finals in third place in 1921 and battled through to meet Richmond for the Premiership. Then the heavens above the MCG opened up on the day before the decider, turning the ground into a quagmire. In what was to be Clover’s only Grand Final appearance, Richmond won a slogging, mauling contest by four points. While Premiership glory eluded him, Horrie was Carlton’s top goalkicker in three of his first four seasons, including 1922, where his total of 58 was the competition’s best. He was appointed captain of the Blues that same year, and in 1923 took on the dual role of captain-coach. Over 1924 / 1925, he suffered more debilitating illness that prevented him from playing all season. Unable to pull on his football boots, he took on the job of Club Secretary, and continued in that position even after returning to the field in 1926. When he did eventually resume, he formed a new, powerful Carlton forward set-up with a young Harry “Soapy” Vallence at full-forward. Twice more – in 1926 and 1928, Clover’s brilliance and accuracy in front of goal saw him at the top of Carlton’s goal-kicking, and in 1929 – aged 34, he was honoured with the captaincy of Victoria against WA in his ninth and final game in the Big Vee. show_image.php?id=205 Horrie Clover retired as a player in 1931 after 147 games. His total of 396 goals is still ranked fifth best in Carlton’s proud history (only displaced for fourth when Brendan Fevola broke through in 2007/2008) – and it should be remembered that all but a handful of his games were played at centre half-forward, not in the goal square. In 1932 he was elected Vice-President of the Carlton Football Club, but retired after one year. In February 1935 on learning of Terry Ogden's the serious illness, Clover and Newton Chandler offered their services for a blood transfusion for the club's wing man. After a blood test Chandler's blood was accepted. However, Ogden passed away the next month. Clover stood again in 1935, was elected – and spent twenty unbroken years serving his beloved Blues. He even took on the Presidency in 1956, aged 60, and was as vigorous and determined as ever in his two years in the job. Carlton Football Club mourned deeply when Horrie Clover passed away on the first day of January, 1984. Three years later, he was among the first to be inducted into the Carlton Hall of Fame. Testament to his stature in the game as a whole, he was elected to the AFL Hall of Fame in 1996; and May 2000 saw him named as one of four emergencies in Carlton’s Team of the Century. A champion in every sense of the word, he spent 37 years of his remarkable life at Princes Park. Footnote The Argus published an article on Maryborough, April 12 1930, it said; "Clover has been the leading half-forward in League ranks for some time. It takes a specialist to fill the position capably, and the Carisbrook man does this admirably. Like good wine he has improved with age, and besides being one of the greatest half forwards that has ever appeared on a football field, he is about the best all round kicker that has ever played the game. He excells in punting, drop, and place kicking. He is a great marksman and a splendid exponent, one of the greatest the district has produced, besides being a fair cricketer also." When Clover returned to football in 1926, The Argus mentioned that they thought it was the first time a member of the Permit and Umpire Committee had played in a League game. 13 GOAL AWARD Round 12, 1921 At the Carlton AGM held on Monday 27 February 1922, Horrie Clover "was presented with ball used on the occasion, the St.Kilda club having generously donated it to the Carlton officials, who had it mounted for the purpose." (Age February 22 1922) 1922 The Art Of Forward Play Horrie wrote an article for the Sporting Globe August 30 p7 To read click here> http://nla.gov.au/nla.news-article184798404 1928 Idol of Carlton Crowds - Australia's Best Centre Half Forward The Sporting Globe's football writer W. S. "Jumbo" Sharland writes about Horrie Clover To read click here> http://nla.gov.au/nla.news-article183958222 Footballer Who Gambles With Death. Daily Pictorial (Sydney) article about Horrie. http://nla.gov.au/nla.news-article246129350 1932 Jack Worrall on Clover Writing for the Australasian September 03 p7; "Take Horrie Clover as an example, a real specialist, one of the best forwards the game has seen, and the best all-round kick that has ever come under my purview. For that reason he deserves a line to himself. He played the game like a sportsman, was a glorious high mark, and could cover a great distance by either drop, punt, or place kick - a remarkable accomplishment. Many players have been notable kicks in two aspects of the game, yet none have equalled Clover in the three branches. His nearest rival as an all-round kick, though not quite as certain in his efforts, was Frank Caine, of Carlton, who, like Clover, also hailed from the country." 1933 Coming Football Champion Melbourne, Saturday A special warning was issued to the Victorian Football League delegates last night by Mr. D. H. Crone, a Carlton delegate, not to angle for a certain "coming" champion that the Carlton Club had signed up that day. At first delegates were a little puzzled at the statement, but when it was explained that Horrie Clover, former champion half-forward, had that day become the father of of a son they burst into sustained laughter. It was only by persistent ringing of the bell by the chairman that order was restored. (News (Adelaide) May 20 1933 p3) 1933 - The Place Kick A letter to The Argus via the Huon Times about the lack of place kicking expertise in the VFL. The writer mentions that he got Horrie to play football in Maryborough after he saw the then 15 y.o. place kick a ball 63 yards, and later with Carlton, Clover place kicked 8 goals in one match. To read click here> http://nla.gov.au/nla.news-article137253000 Milestones 50 Games: Round 1, 1923 vs Fitzroy 100 Games: Round 18, 1927 vs St Kilda 100 Goals: Round 18, 1921 vs Collingwood 200 Goals: Round 3, 1924 vs St Kilda 300 Goals: Round 11, 1928 vs Geelong Links Articles: The Magical 'Three Goal Average' | A Letter From Horrie | Our Flagless Greats Blueseum: Stat Shot for Horrie Clover | Career Breakdown | Clover's big goals hauls | Clover's Blueseum Image Gallery A dinner to celebrate career Horrie Clover in 1957Four Page Program & Menu 1927 -
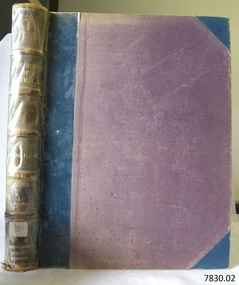 Flagstaff Hill Maritime Museum and Village
Book, The Birds of Australia Vol 3 - 4
The Work “The Birds of Australia; containing over 300 full-page illustrations, with a descriptive account of the life and characteristic habits of over 700 species” by Gracius J. [Joseph] Broinowski – Australian author, artist and ornithologist - was created in 40 parts for subscribers and sold for 10s [shillings]., These parts were later published in six volumes, which were later published and bound in pairs to make three volumes, each of which contain two of the six original volumes, numbered volumes, “I”, “III” and “V” on their fly page, but numbered “Vols. I-II”, “Vols. III-IV” and “Vols. V-VI” on their respective spines. The volumes were all published by Charles Stuart & Co. (Melbourne, Sydney, Adelaide, Brisbane, New Zealand, and Tasmania). All of the beautifully drawn and coloured illustrations in The Birds of Australia were illustrated by Broinowski. They were printed using a new 19th century method called chromolithography. This is the art of making multi-coloured prints. The skilled lithographer would work from an original coloured painting and create a copy for every one of the many layers of colour used to build the painting. These layers were then printed carefully over each other to re-build the picture. Gracius J. Broinowski’s Work “The Birds of Australia” was described by Jean.Anker as “a semi-popular but comprehensive treatment of the subject” in the book “Bird Books and Bird Art: an outline of the Literary History and Iconology of Descriptive Ornithology” 1979. It may be that these books were donated to, or ordered specifically for, the Warrnambool Public Museum, due to the embossing on the spine “WARRNAMBOOL PUBLIC LIBRARY”. The acquisition of these books would most likely to have made 1891-1910, between the date the books were published and the date that the Museum amalgamated with the Mechanics Institute, which then became part of The Museum and Art Gallery. These three books were part of the collection of books belonging to the Warrnambool Public Museum, established 1873 by Joseph Archibald. The Museum moved into the back of the Mechanics’ Institute in 1885, along with the Art Gallery and School of Dancing. In 1886 it was officially opened as The Warrnambool Museum and Art Gallery, with Joseph Archibald as its curator. In 1887 the Museum section was moved to the former court house in Timor Street, with Joseph Archibald as Curator until 1897. In 1910 the Museum was transferred back to the original building and the management of the Mechanics' Institute was handed over to the Warrnambool City Council. In 1935 Ralph Pattison was appointed as City Librarian. He developed his own sorting and cataloguing system and organised the collection of books accordingly. In the 1960’s the Warrnambool City Council closed down the Museum and Art Gallery and the books and artefacts were redistributed to other organisations in Warrnambool. Each spine of this book set, The Birds of Australia by Gracius Broinowski, shows a space on which a previous cataloguing label may have been affixed. The volumes are amongst the many books at Flagstaff Hill Maritime Village that display stamps and markings from Pattison as well as a variety of other institutions including the Mechanics’ Institute itself. Some other Australian Libraries also include these books in their collections; Australian National University, University of NSW, University of Western Australia, State Library of Western Australia, Deakin University, Queen Victoria Museum and Art Gallery, University of Adelaide, University of Queensland, University of Tasmania. The Library of Congress and the University of British Columbia also have sets of these volumes. These books are considered as Rare Book; a set of Broinowski’s 3 volumes was advertised in Melbourne’s Rare Book Fair 2012, “for ornithological collectors”. (See the more detailed information below in “Warrnambool Public Museum and Mechanics Institute” and the “Pattison Collection”.) GRACIUS JOSEP BROINOWSKI Gracius Joseph Broinowski (7/3/1837 – 11/4/1913), artist and ornithologist, was born in Walichnowy, Poland, son of a landowner and military officer of the same name. He was educated privately then later, at the Munich University, he was a student of languages, classics and art. To avoid conscription into the Russian army, he migrated to Germany. At the age of about 20 years he migrated to Portland (Victoria, Australia), working his passage as part of the crew of a windjammer. Broinowski worked in the country for a few years then found employment working for a Melbourne publisher and later sold his own paintings. In about 1863, while on one of his many travels in eastern Australia painting landscapes and scenes, he married Jane Smith in Richmond, Victoria (her father was captain of a whaler). In 1880 he settled in Sydney where his work involved teaching painting, lecturing on art and exhibiting his own work at showings of the Royal Art Society. Also in the 1880s he began to publish illustrated works on Australian natural history, including; - illustrations of the birds and mammals of Australia, commissioned by the Department of Public Instruction, New South Wales, and mounted, varnished and hung on walls in many classrooms - "The Birds and Mammals of Australia"; a bound collection of illustrations with appropriated text - 1888 "The Cockatoos and Nestors of Australia and New Zealand" - 1890-1891, "The Birds of Australia" Broinowski died in 1913 at Mosman, Sydney, survived by his wife, six sons and a daughter. His son, Leopold, became a significant political journalist in Tasmania. WARRNAMBOOL PUBLIC MUSEUM & MECHANICS INSTITUTE Warrnambool's Mechanics' Institute (or Institution as it was sometimes called) was one of the earliest in Victoria. On 17th October 1853 a meeting was held where it was resolved to request the Lieutenant Governor of the Colony to grant land for the erection of a Mechanics' Institutes building. A committee was formed at the meeting and Richard Osburne chaired the first meeting of this committee. The land on the North West corner of Banyan and Merri Streets was granted but there were no funds to erect the building. The Formal Rights of the Warrnambool Mechanics' Institute's encompassed its aims and these were officially adopted in1859; "This Institution has for its object the diffusion of literary, scientific, and other useful knowledge amongst its members, excluding all controversial subjects, religious or political. These objects are sought to be obtained by means of a circulating library, a reading room, the establishment of classes, debates, and the occasional delivery of lectures on natural and experimental philosophy, mechanics, astronomy, chemistry, natural history, literature, and the useful and ornamental arts, particularly those which have a more immediate reference to the colony." The Warrnambool Mechanics' Institute opened its first reading room in December 1854 in the National School building at the corner of Banyan and Timor Streets. The Institute was funded by member subscription, payable on a quarterly, half yearly or yearly basis. Samuel Hannaford, the Manager of the Warrnambool Bank of Australasia, was the first Honorary Secretary of the Mechanics' Institutes, and an early President and Vice-President. He also gave several of the early lectures in the Reading Room. Another early Secretary, Librarian and lecturer was Marmaduke Fisher, the teacher at the National School. Lecture topics included The Poets and Poetry of Ireland', 'The Birth and Development of the Earth', 'The Vertebrae - with Remarks on the pleasures resulting from the study of Natural History' and 'Architecture'. In 1856 the Reading Room was moved to James Hider's shop in Timor Street, and by 1864 it was located in the bookshop of Davies and Read. In the 1860's the Mechanics' Institute struggled as membership waned but in 1866, after a series of fund raising efforts, the committee was able to purchase land in Liebig Street, on a site then called Market Square, between the weighbridge and the fire station. A Mechanics' Institute building was opened at this site in August 1871. The following year four more rooms were added to the main Reading Room and in 1873 the Artisan School of Design was incorporated into the Institute. The same year, 1873, Joseph Archibald established the Warrnambool Public Museum [Warrnambool Museum], however it deteriorated when he was transferred to Bendigo in 1877. In 1880, with Archibald's return to Warrnambool, the Museum was re-established and he served as Curator 1882-1897. In 1885 a new building was added to the back of the Mechanics’ Institute to accommodate the re-created School of Design, the Art Gallery and the Museum. It was officially opened as the Warrnambool Museum and Art Gallery on 26th July 1886 with Mr Joseph Archibald as Curator. In 1887 the Museum section was moved to the former court house in Timor Street (for some time the walls of the building formed part of the TAFE cafeteria but all is now demolished). In 1910 the Museum was transferred back to the original building and the management of the Mechanics' Institute was handed over to the Warrnambool City Council. The Museum and Art Gallery became one and housed many fine works of art, and the Library continued to grow. The building was well patronised, with records showing that at the beginning of the 20th century there were between 500 and 800 visitors. During World War One the monthly figures were in the thousands, with 3,400 people visiting in January 1915. The Museum was a much loved Institution in Warrnambool until 1963 when the Museum and Art Gallery was closed and the contents removed to make room for the Warrnambool City Council Engineers' Department. The contents were stored but many of the items were scattered or lost. The Museum has never been re-opened. When the original building was demolished the site became occupied by the Civic Centre, which included the new City Library. (The library was temporarily located in the old Palais building in Koroit Street.) In the process of reorganisation the Collection was distributed amongst the community groups: -The new City Library took some of the historic books and some important documents, historic photographs and newspapers. -The Art Gallery kept the 19th Century art collection and some of the artefacts from the museum. -The Historic Society has some items -The State Museum has some items -Some items were destroyed -Flagstaff Hill Maritime Village has old newspapers, Government Gazettes, most of the Mechanics' Institute Library (which included books from the Warrnambool Public Museum), ledgers and documents connected to the Mechanics' Institute Library, some framed and unframed art works and some photographs. THE PATTISON COLLECTION These books “The Birds of Australia” by Broinowsky, are also listed as part of the ‘Pattison Collection’, a collection of books and records that was originally owned by the Warrnambool Mechanics’ Institute, which was founded in Warrnambool in 1853. In 1935 Ralph Pattison was appointed as City Librarian to establish and organise the Warrnambool Library, as the Warrnambool Mechanics’ Institute was then called. When the Warrnambool Mechanics’ Institute building was pulled down in 1963 a new civic building was erected on the site and the new Warrnambool Library, on behalf of the City Council, took over all the holdings of the Warrnambool Mechanics’ Institute. At this time some of the items were separated and identified as the ‘Pattison Collection’, named after Ralph Pattison. Eventually the components of the Warrnambool Mechanics’ Institute were distributed from the Warrnambool Library to various places, including the Art Gallery, Historical Society and Flagstaff Hill. Later some were even distributed to other regional branches of Corangamite Regional Library and passed to and fro. It is difficult now to trace just where all of the items have ended up. The books at Flagstaff Hill Maritime Village generally display stamps and markings from Pattison as well as a variety of other institutions including the Mechanics’ Institute itself. RALPH ERIC PATTISON Ralph Eric Pattison was born in Rockhampton, Queensland, in 1891. He married Maude Swan from Warrnambool in 1920 and they set up home in Warrnambool. In 1935 Pattison accepted a position as City Librarian for the Warrnambool City Council. His huge challenge was to make a functional library within two rooms of the Mechanics’ Institute. He tirelessly cleaned, cleared and sorted a disarrayed collection of old books, jars of preserved specimens and other items reserved for exhibition in the city’s museum. He developed and updated the library with a wide variety of books for all tastes, including reference books for students; a difficult task to fulfil during the years following the Depression. He converted all of the lower area of the building into a library, reference room and reading room for members and the public. The books were sorted and stored using a cataloguing and card index system that he had developed himself. He also prepared the upper floor of the building and established the Art Gallery and later the Museum, a place to exhibit the many old relics that had been stored for years for this purpose. One of the treasures he found was a beautiful ancient clock, which he repaired, restored and enjoyed using in his office during the years of his service there. Ralph Pattison was described as “a meticulous gentleman whose punctuality, floorless courtesy and distinctive neat dress were hallmarks of his character, and ‘his’ clock controlled his daily routine, and his opening and closing of the library’s large heavy doors to the minute.” Pattison took leave during 1942 to 1945 to serve in the Royal Australian Navy, Volunteer Reserve as Lieutenant. A few years later he converted one of the Museum’s rooms into a Children’s Library, stocking it with suitable books for the younger generation. This was an instant success. In the 1950’s he had the honour of being appointed to the Victorian Library Board and received more inspiration from the monthly conferences in Melbourne. He was sadly retired in 1959 after over 23 years of service, due to the fact that he had gone over the working age of council officers. However he continued to take a very keen interest in the continual development of the Library until his death in 1969. References: Archibald Street, Discover the History of Warrnambool Streets, https://www.warrnambool.vic.gov.au/sites/warrnambool.vic.gov.au/files/images/Property/roads/The%20story%20of%20Warrnambool's%20streets.pdf Broinowski, Bird Books and Bird Art etc, Jean Anker 1979, https://books.google.com.au/books?id=B5TpCAAAQBAJ&pg=PA66&lpg=PA66&dq=the+birds+of+australia,+broinowski,+bird+books+and+bird+art&source=bl&ots=nQroxqePdY&sig=a3lnn-_FqB-ZcFAwqRYVK6Y7ZeM&hl=en&sa=X&ved=0ahUKEwj5sL7-2JTSAhWIyLwKHaCHAJcQ6AEIUTAN#v=onepage&q=the%20birds%20of%20australia%2C%20broinowski%2C%20bird%20books%20and%20bird%20art&f=false Broinowski, Gracius Joseph, by A.H. Chisholm, Australian Dictionary of Biography http://adb.anu.edu.au/biography/broinowski-gracius-joseph-3061 Chromolithography, Wikipedia https://en.wikipedia.org/wiki/Chromolithography Document, Flagstaff Hill, ‘Mechanics’ Institute Collection’: Books on Dean, Melbourne Rare Book Fare 2015, BookFare Newsletter #5, www.anzaab.com/newsletters/BookFare_1207.pdf Flagstaff Hill archives; document “Re: Ralph Eric Pattison”] Gracius Broinowski, Wikipedia https://en.wikipedia.org/wiki/Gracius_Broinowski Gracius Joseph Broinowski, Design & Art Australia online, https://www.daao.org.au/bio/gracius-joseph-broinowski/biography/ Mechanics' Institutes of Victoria Pg ix, 283; Significance Assessment, Warrnambool Mechanics’ Institute Books, FHMV, 2010 The Birds of Australia by Gracius J. Broinowski, Libraries of Australia, Trove http://trove.nla.gov.au/work/12425131?q&sort=holdings+desc&_=1487246530281&versionId=210683608 The Birds of Australia, Broinowski; www.Librarything.com The History of Warrnambool, R. Osburne, 1887, p.72, p. 283 The Warrnambool Mechanics’ Institute – FHMV datasheet Warrnambool Art Gallery History, Warrnambool Art Gallery Foundation Information Booklet, http://www.wagf.com.au/cms/downloads/WAGF-Information-Booklet.pdf Warrnambool Museum and Art Gallery, The Argus, 29th July 1886 Web; The Birds of Australia (Broinowski), Wikipedia The Birds of Australia by Gracius J. Broinowski is a respected source of scientific information. It is also significant for its rarity and as an early Australian Work. The book is significant for its association with the Warrnambool Public Museum, which played an important educational and social role in the early settlement of Warrnambool and District. The book is also significant for its association with the Warrnambool Mechanics' Institute Library book collection, which is deemed to be of great importance because it is one of the few collections in an almost intact state, and many of the books are now very rare and of great value. The Warrnambool Mechanics’ Institute Collection is primarily significant in its totality, rather than for the individual objects it contains. Its contents are highly representative of the development of Mechanics' Institute libraries across Australia, particularly Victoria. A diversity of publications and themes has been amassed, and these provide clues to our understanding of the nature of and changes in the reading habits of Victorians from the 1850s to the middle of the 20th century. The Warrnambool Mechanics Institute book collection has historical and social significance for its strong association with the Mechanics Institute movement and the important role it played in the intellectual, cultural and social development of people throughout the latter part of the nineteenth century and the early twentieth century. The collection of books is a rare example of an early lending library and its significance is enhanced by the survival of an original collection of many volumes. The collection also highlights the Warrnambool community’s commitment to the Mechanics’ Institute, reading, literacy and learning in the regions, and proves that access to knowledge was not impeded by distance. These items help to provide a more complete picture of our community’s ideals and aspirations. The book is also significant for its inclusion in the Pattison Collection, a collection that as a whole shows a snapshot of the types of reading material offered to the local public at that point in time. The Birds of Australia Vol 3 - 4 Author and Illustrator: Gracius J Broinowski Publisher: Charles Stuart & Co Date: 1890Label on spine cover with typed text RA 598.2 BRO Pastedown front endpaper has sticker from Warrnambool Mechanics Institute and Free Library Embossing added to spine “WARRNAMBOOL PUBLIC MUSEUM” flagstaff hill, warrnambool, shipwrecked coast, flagstaff hill maritime museum, maritime museum, shipwreck coast, flagstaff hill maritime village, great ocean road, the birds of australia, gracius joseph broinowski, charles stuart & co, joseph archibald, warrnambool public museum, warrnambool museum, warrnambool library, warrnambool art gallery, warrnambool city librarian, pattison collection, ralph eric pattison, samuel hannaford, warrnambool mechanics’ institute and free library, mechanics’ institute library, victorian library board, warrnambool books and records, rare books, australian bird illustrations, australian bird text, australian natural history, the birds of australia vol 3 - 4 -
 Flagstaff Hill Maritime Museum and Village
Book, The Birds of Australia Vol 5 - 6
The Work “The Birds of Australia; containing over 300 full-page illustrations, with a descriptive account of the life and characteristic habits of over 700 species” by Gracius J. [Joseph] Broinowski – Australian author, artist and ornithologist - was created in 40 parts for subscribers and sold for 10s [shillings]., These parts were later published in six volumes, which were later published and bound in pairs to make three volumes, each of which contain two of the six original volumes, numbered volumes, “I”, “III” and “V” on their fly page, but numbered “Vols. I-II”, “Vols. III-IV” and “Vols. V-VI” on their respective spines. The volumes were all published by Charles Stuart & Co. (Melbourne, Sydney, Adelaide, Brisbane, New Zealand, and Tasmania). All of the beautifully drawn and coloured illustrations in The Birds of Australia were illustrated by Broinowski. They were printed using a new 19th century method called chromolithography. This is the art of making multi-coloured prints. The skilled lithographer would work from an original coloured painting and create a copy for every one of the many layers of colour used to build the painting. These layers were then printed carefully over each other to re-build the picture. Gracius J. Broinowski’s Work “The Birds of Australia” was described by Jean.Anker as “a semi-popular but comprehensive treatment of the subject” in the book “Bird Books and Bird Art: an outline of the Literary History and Iconology of Descriptive Ornithology” 1979. It may be that these books were donated to, or ordered specifically for, the Warrnambool Public Museum, due to the embossing on the spine “WARRNAMBOOL PUBLIC LIBRARY”. The acquisition of these books would most likely to have made 1891-1910, between the date the books were published and the date that the Museum amalgamated with the Mechanics Institute, which then became part of The Museum and Art Gallery. These three books were part of the collection of books belonging to the Warrnambool Public Museum, established 1873 by Joseph Archibald. The Museum moved into the back of the Mechanics’ Institute in 1885, along with the Art Gallery and School of Dancing. In 1886 it was officially opened as The Warrnambool Museum and Art Gallery, with Joseph Archibald as its curator. In 1887 the Museum section was moved to the former court house in Timor Street, with Joseph Archibald as Curator until 1897. In 1910 the Museum was transferred back to the original building and the management of the Mechanics' Institute was handed over to the Warrnambool City Council. In 1935 Ralph Pattison was appointed as City Librarian. He developed his own sorting and cataloguing system and organised the collection of books accordingly. In the 1960’s the Warrnambool City Council closed down the Museum and Art Gallery and the books and artefacts were redistributed to other organisations in Warrnambool. Each spine of this book set, The Birds of Australia by Gracius Broinowski, shows a space on which a previous cataloguing label may have been affixed. The volumes are amongst the many books at Flagstaff Hill Maritime Village that display stamps and markings from Pattison as well as a variety of other institutions including the Mechanics’ Institute itself. Some other Australian Libraries also include these books in their collections; Australian National University, University of NSW, University of Western Australia, State Library of Western Australia, Deakin University, Queen Victoria Museum and Art Gallery, University of Adelaide, University of Queensland, University of Tasmania. The Library of Congress and the University of British Columbia also have sets of these volumes. These books are considered as Rare Book; a set of Broinowski’s 3 volumes was advertised in Melbourne’s Rare Book Fair 2012, “for ornithological collectors”. (See the more detailed information below in “Warrnambool Public Museum and Mechanics Institute” and the “Pattison Collection”.) GRACIUS JOSEP BROINOWSKI Gracius Joseph Broinowski (7/3/1837 – 11/4/1913), artist and ornithologist, was born in Walichnowy, Poland, son of a landowner and military officer of the same name. He was educated privately then later, at the Munich University, he was a student of languages, classics and art. To avoid conscription into the Russian army, he migrated to Germany. At the age of about 20 years he migrated to Portland (Victoria, Australia), working his passage as part of the crew of a windjammer. Broinowski worked in the country for a few years then found employment working for a Melbourne publisher and later sold his own paintings. In about 1863, while on one of his many travels in eastern Australia painting landscapes and scenes, he married Jane Smith in Richmond, Victoria (her father was captain of a whaler). In 1880 he settled in Sydney where his work involved teaching painting, lecturing on art and exhibiting his own work at showings of the Royal Art Society. Also in the 1880s he began to publish illustrated works on Australian natural history, including; - illustrations of the birds and mammals of Australia, commissioned by the Department of Public Instruction, New South Wales, and mounted, varnished and hung on walls in many classrooms - "The Birds and Mammals of Australia"; a bound collection of illustrations with appropriated text - 1888 "The Cockatoos and Nestors of Australia and New Zealand" - 1890-1891, "The Birds of Australia" Broinowski died in 1913 at Mosman, Sydney, survived by his wife, six sons and a daughter. His son, Leopold, became a significant political journalist in Tasmania. WARRNAMBOOL PUBLIC MUSEUM & MECHANICS INSTITUTE Warrnambool's Mechanics' Institute (or Institution as it was sometimes called) was one of the earliest in Victoria. On 17th October 1853 a meeting was held where it was resolved to request the Lieutenant Governor of the Colony to grant land for the erection of a Mechanics' Institutes building. A committee was formed at the meeting and Richard Osburne chaired the first meeting of this committee. The land on the North West corner of Banyan and Merri Streets was granted but there were no funds to erect the building. The Formal Rights of the Warrnambool Mechanics' Institute's encompassed its aims and these were officially adopted in1859; "This Institution has for its object the diffusion of literary, scientific, and other useful knowledge amongst its members, excluding all controversial subjects, religious or political. These objects are sought to be obtained by means of a circulating library, a reading room, the establishment of classes, debates, and the occasional delivery of lectures on natural and experimental philosophy, mechanics, astronomy, chemistry, natural history, literature, and the useful and ornamental arts, particularly those which have a more immediate reference to the colony." The Warrnambool Mechanics' Institute opened its first reading room in December 1854 in the National School building at the corner of Banyan and Timor Streets. The Institute was funded by member subscription, payable on a quarterly, half yearly or yearly basis. Samuel Hannaford, the Manager of the Warrnambool Bank of Australasia, was the first Honorary Secretary of the Mechanics' Institutes, and an early President and Vice-President. He also gave several of the early lectures in the Reading Room. Another early Secretary, Librarian and lecturer was Marmaduke Fisher, the teacher at the National School. Lecture topics included The Poets and Poetry of Ireland', 'The Birth and Development of the Earth', 'The Vertebrae - with Remarks on the pleasures resulting from the study of Natural History' and 'Architecture'. In 1856 the Reading Room was moved to James Hider's shop in Timor Street, and by 1864 it was located in the bookshop of Davies and Read. In the 1860's the Mechanics' Institute struggled as membership waned but in 1866, after a series of fund raising efforts, the committee was able to purchase land in Liebig Street, on a site then called Market Square, between the weighbridge and the fire station. A Mechanics' Institute building was opened at this site in August 1871. The following year four more rooms were added to the main Reading Room and in 1873 the Artisan School of Design was incorporated into the Institute. The same year, 1873, Joseph Archibald established the Warrnambool Public Museum [Warrnambool Museum], however it deteriorated when he was transferred to Bendigo in 1877. In 1880, with Archibald's return to Warrnambool, the Museum was re-established and he served as Curator 1882-1897. In 1885 a new building was added to the back of the Mechanics’ Institute to accommodate the re-created School of Design, the Art Gallery and the Museum. It was officially opened as the Warrnambool Museum and Art Gallery on 26th July 1886 with Mr Joseph Archibald as Curator. In 1887 the Museum section was moved to the former court house in Timor Street (for some time the walls of the building formed part of the TAFE cafeteria but all is now demolished). In 1910 the Museum was transferred back to the original building and the management of the Mechanics' Institute was handed over to the Warrnambool City Council. The Museum and Art Gallery became one and housed many fine works of art, and the Library continued to grow. The building was well patronised, with records showing that at the beginning of the 20th century there were between 500 and 800 visitors. During World War One the monthly figures were in the thousands, with 3,400 people visiting in January 1915. The Museum was a much loved Institution in Warrnambool until 1963 when the Museum and Art Gallery was closed and the contents removed to make room for the Warrnambool City Council Engineers' Department. The contents were stored but many of the items were scattered or lost. The Museum has never been re-opened. When the original building was demolished the site became occupied by the Civic Centre, which included the new City Library. (The library was temporarily located in the old Palais building in Koroit Street.) In the process of reorganisation the Collection was distributed amongst the community groups: -The new City Library took some of the historic books and some important documents, historic photographs and newspapers. -The Art Gallery kept the 19th Century art collection and some of the artefacts from the museum. -The Historic Society has some items -The State Museum has some items -Some items were destroyed -Flagstaff Hill Maritime Village has old newspapers, Government Gazettes, most of the Mechanics' Institute Library (which included books from the Warrnambool Public Museum), ledgers and documents connected to the Mechanics' Institute Library, some framed and unframed art works and some photographs. THE PATTISON COLLECTION These books “The Birds of Australia” by Broinowsky, are also listed as part of the ‘Pattison Collection’, a collection of books and records that was originally owned by the Warrnambool Mechanics’ Institute, which was founded in Warrnambool in 1853. In 1935 Ralph Pattison was appointed as City Librarian to establish and organise the Warrnambool Library, as the Warrnambool Mechanics’ Institute was then called. When the Warrnambool Mechanics’ Institute building was pulled down in 1963 a new civic building was erected on the site and the new Warrnambool Library, on behalf of the City Council, took over all the holdings of the Warrnambool Mechanics’ Institute. At this time some of the items were separated and identified as the ‘Pattison Collection’, named after Ralph Pattison. Eventually the components of the Warrnambool Mechanics’ Institute were distributed from the Warrnambool Library to various places, including the Art Gallery, Historical Society and Flagstaff Hill. Later some were even distributed to other regional branches of Corangamite Regional Library and passed to and fro. It is difficult now to trace just where all of the items have ended up. The books at Flagstaff Hill Maritime Village generally display stamps and markings from Pattison as well as a variety of other institutions including the Mechanics’ Institute itself. RALPH ERIC PATTISON Ralph Eric Pattison was born in Rockhampton, Queensland, in 1891. He married Maude Swan from Warrnambool in 1920 and they set up home in Warrnambool. In 1935 Pattison accepted a position as City Librarian for the Warrnambool City Council. His huge challenge was to make a functional library within two rooms of the Mechanics’ Institute. He tirelessly cleaned, cleared and sorted a disarrayed collection of old books, jars of preserved specimens and other items reserved for exhibition in the city’s museum. He developed and updated the library with a wide variety of books for all tastes, including reference books for students; a difficult task to fulfil during the years following the Depression. He converted all of the lower area of the building into a library, reference room and reading room for members and the public. The books were sorted and stored using a cataloguing and card index system that he had developed himself. He also prepared the upper floor of the building and established the Art Gallery and later the Museum, a place to exhibit the many old relics that had been stored for years for this purpose. One of the treasures he found was a beautiful ancient clock, which he repaired, restored and enjoyed using in his office during the years of his service there. Ralph Pattison was described as “a meticulous gentleman whose punctuality, floorless courtesy and distinctive neat dress were hallmarks of his character, and ‘his’ clock controlled his daily routine, and his opening and closing of the library’s large heavy doors to the minute.” Pattison took leave during 1942 to 1945 to serve in the Royal Australian Navy, Volunteer Reserve as Lieutenant. A few years later he converted one of the Museum’s rooms into a Children’s Library, stocking it with suitable books for the younger generation. This was an instant success. In the 1950’s he had the honour of being appointed to the Victorian Library Board and received more inspiration from the monthly conferences in Melbourne. He was sadly retired in 1959 after over 23 years of service, due to the fact that he had gone over the working age of council officers. However he continued to take a very keen interest in the continual development of the Library until his death in 1969. References: Archibald Street, Discover the History of Warrnambool Streets, https://www.warrnambool.vic.gov.au/sites/warrnambool.vic.gov.au/files/images/Property/roads/The%20story%20of%20Warrnambool's%20streets.pdf Broinowski, Bird Books and Bird Art etc, Jean Anker 1979, https://books.google.com.au/books?id=B5TpCAAAQBAJ&pg=PA66&lpg=PA66&dq=the+birds+of+australia,+broinowski,+bird+books+and+bird+art&source=bl&ots=nQroxqePdY&sig=a3lnn-_FqB-ZcFAwqRYVK6Y7ZeM&hl=en&sa=X&ved=0ahUKEwj5sL7-2JTSAhWIyLwKHaCHAJcQ6AEIUTAN#v=onepage&q=the%20birds%20of%20australia%2C%20broinowski%2C%20bird%20books%20and%20bird%20art&f=false Broinowski, Gracius Joseph, by A.H. Chisholm, Australian Dictionary of Biography http://adb.anu.edu.au/biography/broinowski-gracius-joseph-3061 Chromolithography, Wikipedia https://en.wikipedia.org/wiki/Chromolithography Document, Flagstaff Hill, ‘Mechanics’ Institute Collection’: Books on Dean, Melbourne Rare Book Fare 2015, BookFare Newsletter #5, www.anzaab.com/newsletters/BookFare_1207.pdf Flagstaff Hill archives; document “Re: Ralph Eric Pattison”] Gracius Broinowski, Wikipedia https://en.wikipedia.org/wiki/Gracius_Broinowski Gracius Joseph Broinowski, Design & Art Australia online, https://www.daao.org.au/bio/gracius-joseph-broinowski/biography/ Mechanics' Institutes of Victoria Pg ix, 283; Significance Assessment, Warrnambool Mechanics’ Institute Books, FHMV, 2010 The Birds of Australia by Gracius J. Broinowski, Libraries of Australia, Trove http://trove.nla.gov.au/work/12425131?q&sort=holdings+desc&_=1487246530281&versionId=210683608 The Birds of Australia, Broinowski; www.Librarything.com The History of Warrnambool, R. Osburne, 1887, p.72, p. 283 The Warrnambool Mechanics’ Institute – FHMV datasheet Warrnambool Art Gallery History, Warrnambool Art Gallery Foundation Information Booklet, http://www.wagf.com.au/cms/downloads/WAGF-Information-Booklet.pdf Warrnambool Museum and Art Gallery, The Argus, 29th July 1886 Web; The Birds of Australia (Broinowski), Wikipedia The Birds of Australia by Gracius J. Broinowski is a respected source of scientific information. It is also significant for its rarity and as an early Australian Work. The book is significant for its association with the Warrnambool Public Museum, which played an important educational and social role in the early settlement of Warrnambool and District. The book is also significant for its association with the Warrnambool Mechanics' Institute Library book collection, which is deemed to be of great importance because it is one of the few collections in an almost intact state, and many of the books are now very rare and of great value. The Warrnambool Mechanics’ Institute Collection is primarily significant in its totality, rather than for the individual objects it contains. Its contents are highly representative of the development of Mechanics' Institute libraries across Australia, particularly Victoria. A diversity of publications and themes has been amassed, and these provide clues to our understanding of the nature of and changes in the reading habits of Victorians from the 1850s to the middle of the 20th century. The Warrnambool Mechanics Institute book collection has historical and social significance for its strong association with the Mechanics Institute movement and the important role it played in the intellectual, cultural and social development of people throughout the latter part of the nineteenth century and the early twentieth century. The collection of books is a rare example of an early lending library and its significance is enhanced by the survival of an original collection of many volumes. The collection also highlights the Warrnambool community’s commitment to the Mechanics’ Institute, reading, literacy and learning in the regions, and proves that access to knowledge was not impeded by distance. These items help to provide a more complete picture of our community’s ideals and aspirations. The book is also significant for its inclusion in the Pattison Collection, a collection that as a whole shows a snapshot of the types of reading material offered to the local public at that point in time. The Birds of Australia Vol 5 - 6 Author and Illustrator: Gracius J Broinowski Publisher: Charles Stuart & Co Date: 1891 Label on spine cover with typed text RA 598.2 BRO Pastedown front endpaper has sticker from Warrnambool Mechanics Institute and Free Library Embossing added to spine “WARRNAMBOOL PUBLIC MUSEUM” flagstaff hill, warrnambool, shipwrecked coast, flagstaff hill maritime museum, maritime museum, shipwreck coast, flagstaff hill maritime village, great ocean road, the birds of australia, gracius joseph broinowski, charles stuart & co, joseph archibald, warrnambool public museum, warrnambool museum, warrnambool library, warrnambool art gallery, warrnambool city librarian, pattison collection, ralph eric pattison, samuel hannaford, warrnambool mechanics’ institute and free library, mechanics’ institute library, victorian library board, warrnambool books and records, rare books, australian bird illustrations, australian bird text, australian natural history, the birds of australia vol 5 - 6 -
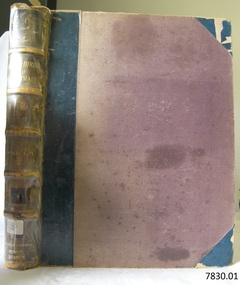 Flagstaff Hill Maritime Museum and Village
Book - Reference Book, The Birds of Australia Vol 1-2, 1890-1891
The Work “The Birds of Australia; containing over 300 full-page illustrations, with a descriptive account of the life and characteristic habits of over 700 species” by Gracius J. [Joseph] Broinowski – Australian author, artist and ornithologist - was created in 40 parts for subscribers and sold for 10s [shillings]., These parts were later published in six volumes, which were later published and bound in pairs to make three volumes, each of which contain two of the six original volumes, numbered volumes, “I”, “III” and “V” on their fly page, but numbered “Vols. I-II”, “Vols. III-IV” and “Vols. V-VI” on their respective spines. The volumes were all published by Charles Stuart & Co. (Melbourne, Sydney, Adelaide, Brisbane, New Zealand, and Tasmania). All of the beautifully drawn and coloured illustrations in The Birds of Australia were illustrated by Broinowski. They were printed using a new 19th century method called chromolithography. This is the art of making multi-coloured prints. The skilled lithographer would work from an original coloured painting and create a copy for every one of the many layers of colour used to build the painting. These layers were then printed carefully over each other to re-build the picture. Gracius J. Broinowski’s Work “The Birds of Australia” was described by Jean.Anker as “a semi-popular but comprehensive treatment of the subject” in the book “Bird Books and Bird Art: an outline of the Literary History and Iconology of Descriptive Ornithology” 1979. It may be that these books were donated to, or ordered specifically for, the Warrnambool Public Museum, due to the embossing on the spine “WARRNAMBOOL PUBLIC LIBRARY”. The acquisition of these books would most likely to have made 1891-1910, between the date the books were published and the date that the Museum amalgamated with the Mechanics Institute, which then became part of The Museum and Art Gallery. These three books were part of the collection of books belonging to the Warrnambool Public Museum, established 1873 by Joseph Archibald. The Museum moved into the back of the Mechanics’ Institute in 1885, along with the Art Gallery and School of Dancing. In 1886 it was officially opened as The Warrnambool Museum and Art Gallery, with Joseph Archibald as its curator. In 1887 the Museum section was moved to the former court house in Timor Street, with Joseph Archibald as Curator until 1897. In 1910 the Museum was transferred back to the original building and the management of the Mechanics' Institute was handed over to the Warrnambool City Council. In 1935 Ralph Pattison was appointed as City Librarian. He developed his own sorting and cataloguing system and organised the collection of books accordingly. In the 1960’s the Warrnambool City Council closed down the Museum and Art Gallery and the books and artefacts were redistributed to other organisations in Warrnambool. Each spine of this book set, The Birds of Australia by Gracius Broinowski, shows a space on which a previous cataloguing label may have been affixed. The volumes are amongst the many books at Flagstaff Hill Maritime Village that display stamps and markings from Pattison as well as a variety of other institutions including the Mechanics’ Institute itself. Some other Australian Libraries also include these books in their collections; Australian National University, University of NSW, University of Western Australia, State Library of Western Australia, Deakin University, Queen Victoria Museum and Art Gallery, University of Adelaide, University of Queensland, University of Tasmania. The Library of Congress and the University of British Columbia also have sets of these volumes. These books are considered as Rare Book; a set of Broinowski’s 3 volumes was advertised in Melbourne’s Rare Book Fair 2012, “for ornithological collectors”. (See the more detailed information below in “Warrnambool Public Museum and Mechanics Institute” and the “Pattison Collection”.) GRACIUS JOSEP BROINOWSKI Gracius Joseph Broinowski (7/3/1837 – 11/4/1913), artist and ornithologist, was born in Walichnowy, Poland, son of a landowner and military officer of the same name. He was educated privately then later, at the Munich University, he was a student of languages, classics and art. To avoid conscription into the Russian army, he migrated to Germany. At the age of about 20 years he migrated to Portland (Victoria, Australia), working his passage as part of the crew of a windjammer. Broinowski worked in the country for a few years then found employment working for a Melbourne publisher and later sold his own paintings. In about 1863, while on one of his many travels in eastern Australia painting landscapes and scenes, he married Jane Smith in Richmond, Victoria (her father was captain of a whaler). In 1880 he settled in Sydney where his work involved teaching painting, lecturing on art and exhibiting his own work at showings of the Royal Art Society. Also in the 1880s he began to publish illustrated works on Australian natural history, including; - illustrations of the birds and mammals of Australia, commissioned by the Department of Public Instruction, New South Wales, and mounted, varnished and hung on walls in many classrooms - "The Birds and Mammals of Australia"; a bound collection of illustrations with appropriated text - 1888 "The Cockatoos and Nestors of Australia and New Zealand" - 1890-1891, "The Birds of Australia" Broinowski died in 1913 at Mosman, Sydney, survived by his wife, six sons and a daughter. His son, Leopold, became a significant political journalist in Tasmania. WARRNAMBOOL PUBLIC MUSEUM & MECHANICS INSTITUTE Warrnambool's Mechanics' Institute (or Institution as it was sometimes called) was one of the earliest in Victoria. On 17th October 1853 a meeting was held where it was resolved to request the Lieutenant Governor of the Colony to grant land for the erection of a Mechanics' Institutes building. A committee was formed at the meeting and Richard Osburne chaired the first meeting of this committee. The land on the North West corner of Banyan and Merri Streets was granted but there were no funds to erect the building. The Formal Rights of the Warrnambool Mechanics' Institute's encompassed its aims and these were officially adopted in1859; "This Institution has for its object the diffusion of literary, scientific, and other useful knowledge amongst its members, excluding all controversial subjects, religious or political. These objects are sought to be obtained by means of a circulating library, a reading room, the establishment of classes, debates, and the occasional delivery of lectures on natural and experimental philosophy, mechanics, astronomy, chemistry, natural history, literature, and the useful and ornamental arts, particularly those which have a more immediate reference to the colony." The Warrnambool Mechanics' Institute opened its first reading room in December 1854 in the National School building at the corner of Banyan and Timor Streets. The Institute was funded by member subscription, payable on a quarterly, half yearly or yearly basis. Samuel Hannaford, the Manager of the Warrnambool Bank of Australasia, was the first Honorary Secretary of the Mechanics' Institutes, and an early President and Vice-President. He also gave several of the early lectures in the Reading Room. Another early Secretary, Librarian and lecturer was Marmaduke Fisher, the teacher at the National School. Lecture topics included The Poets and Poetry of Ireland', 'The Birth and Development of the Earth', 'The Vertebrae - with Remarks on the pleasures resulting from the study of Natural History' and 'Architecture'. In 1856 the Reading Room was moved to James Hider's shop in Timor Street, and by 1864 it was located in the bookshop of Davies and Read. In the 1860's the Mechanics' Institute struggled as membership waned but in 1866, after a series of fund raising efforts, the committee was able to purchase land in Liebig Street, on a site then called Market Square, between the weighbridge and the fire station. A Mechanics' Institute building was opened at this site in August 1871. The following year four more rooms were added to the main Reading Room and in 1873 the Artisan School of Design was incorporated into the Institute. The same year, 1873, Joseph Archibald established the Warrnambool Public Museum [Warrnambool Museum], however it deteriorated when he was transferred to Bendigo in 1877. In 1880, with Archibald's return to Warrnambool, the Museum was re-established and he served as Curator 1882-1897. In 1885 a new building was added to the back of the Mechanics’ Institute to accommodate the re-created School of Design, the Art Gallery and the Museum. It was officially opened as the Warrnambool Museum and Art Gallery on 26th July 1886 with Mr Joseph Archibald as Curator. In 1887 the Museum section was moved to the former court house in Timor Street (for some time the walls of the building formed part of the TAFE cafeteria but all is now demolished). In 1910 the Museum was transferred back to the original building and the management of the Mechanics' Institute was handed over to the Warrnambool City Council. The Museum and Art Gallery became one and housed many fine works of art, and the Library continued to grow. The building was well patronised, with records showing that at the beginning of the 20th century there were between 500 and 800 visitors. During World War One the monthly figures were in the thousands, with 3,400 people visiting in January 1915. The Museum was a much loved Institution in Warrnambool until 1963 when the Museum and Art Gallery was closed and the contents removed to make room for the Warrnambool City Council Engineers' Department. The contents were stored but many of the items were scattered or lost. The Museum has never been re-opened. When the original building was demolished the site became occupied by the Civic Centre, which included the new City Library. (The library was temporarily located in the old Palais building in Koroit Street.) In the process of reorganisation the Collection was distributed amongst the community groups: -The new City Library took some of the historic books and some important documents, historic photographs and newspapers. -The Art Gallery kept the 19th Century art collection and some of the artefacts from the museum. -The Historic Society has some items -The State Museum has some items -Some items were destroyed -Flagstaff Hill Maritime Village has old newspapers, Government Gazettes, most of the Mechanics' Institute Library (which included books from the Warrnambool Public Museum), ledgers and documents connected to the Mechanics' Institute Library, some framed and unframed art works and some photographs. THE PATTISON COLLECTION These books “The Birds of Australia” by Broinowsky, are also listed as part of the ‘Pattison Collection’, a collection of books and records that was originally owned by the Warrnambool Mechanics’ Institute, which was founded in Warrnambool in 1853. In 1935 Ralph Pattison was appointed as City Librarian to establish and organise the Warrnambool Library, as the Warrnambool Mechanics’ Institute was then called. When the Warrnambool Mechanics’ Institute building was pulled down in 1963 a new civic building was erected on the site and the new Warrnambool Library, on behalf of the City Council, took over all the holdings of the Warrnambool Mechanics’ Institute. At this time some of the items were separated and identified as the ‘Pattison Collection’, named after Ralph Pattison. Eventually the components of the Warrnambool Mechanics’ Institute were distributed from the Warrnambool Library to various places, including the Art Gallery, Historical Society and Flagstaff Hill. Later some were even distributed to other regional branches of Corangamite Regional Library and passed to and fro. It is difficult now to trace just where all of the items have ended up. The books at Flagstaff Hill Maritime Village generally display stamps and markings from Pattison as well as a variety of other institutions including the Mechanics’ Institute itself. RALPH ERIC PATTISON Ralph Eric Pattison was born in Rockhampton, Queensland, in 1891. He married Maude Swan from Warrnambool in 1920 and they set up home in Warrnambool. In 1935 Pattison accepted a position as City Librarian for the Warrnambool City Council. His huge challenge was to make a functional library within two rooms of the Mechanics’ Institute. He tirelessly cleaned, cleared and sorted a disarrayed collection of old books, jars of preserved specimens and other items reserved for exhibition in the city’s museum. He developed and updated the library with a wide variety of books for all tastes, including reference books for students; a difficult task to fulfil during the years following the Depression. He converted all of the lower area of the building into a library, reference room and reading room for members and the public. The books were sorted and stored using a cataloguing and card index system that he had developed himself. He also prepared the upper floor of the building and established the Art Gallery and later the Museum, a place to exhibit the many old relics that had been stored for years for this purpose. One of the treasures he found was a beautiful ancient clock, which he repaired, restored and enjoyed using in his office during the years of his service there. Ralph Pattison was described as “a meticulous gentleman whose punctuality, floorless courtesy and distinctive neat dress were hallmarks of his character, and ‘his’ clock controlled his daily routine, and his opening and closing of the library’s large heavy doors to the minute.” Pattison took leave during 1942 to 1945 to serve in the Royal Australian Navy, Volunteer Reserve as Lieutenant. A few years later he converted one of the Museum’s rooms into a Children’s Library, stocking it with suitable books for the younger generation. This was an instant success. In the 1950’s he had the honour of being appointed to the Victorian Library Board and received more inspiration from the monthly conferences in Melbourne. He was sadly retired in 1959 after over 23 years of service, due to the fact that he had gone over the working age of council officers. However he continued to take a very keen interest in the continual development of the Library until his death in 1969. References: Archibald Street, Discover the History of Warrnambool Streets, https://www.warrnambool.vic.gov.au/sites/warrnambool.vic.gov.au/files/images/Property/roads/The%20story%20of%20Warrnambool's%20streets.pdf Broinowski, Bird Books and Bird Art etc, Jean Anker 1979, https://books.google.com.au/books?id=B5TpCAAAQBAJ&pg=PA66&lpg=PA66&dq=the+birds+of+australia,+broinowski,+bird+books+and+bird+art&source=bl&ots=nQroxqePdY&sig=a3lnn-_FqB-ZcFAwqRYVK6Y7ZeM&hl=en&sa=X&ved=0ahUKEwj5sL7-2JTSAhWIyLwKHaCHAJcQ6AEIUTAN#v=onepage&q=the%20birds%20of%20australia%2C%20broinowski%2C%20bird%20books%20and%20bird%20art&f=false Broinowski, Gracius Joseph, by A.H. Chisholm, Australian Dictionary of Biography http://adb.anu.edu.au/biography/broinowski-gracius-joseph-3061 Chromolithography, Wikipedia https://en.wikipedia.org/wiki/Chromolithography Document, Flagstaff Hill, ‘Mechanics’ Institute Collection’: Books on Dean, Melbourne Rare Book Fare 2015, BookFare Newsletter #5, www.anzaab.com/newsletters/BookFare_1207.pdf Flagstaff Hill archives; document “Re: Ralph Eric Pattison”] Gracius Broinowski, Wikipedia https://en.wikipedia.org/wiki/Gracius_Broinowski Gracius Joseph Broinowski, Design & Art Australia online, https://www.daao.org.au/bio/gracius-joseph-broinowski/biography/ Mechanics' Institutes of Victoria Pg ix, 283; Significance Assessment, Warrnambool Mechanics’ Institute Books, FHMV, 2010 The Birds of Australia by Gracius J. Broinowski, Libraries of Australia, Trove http://trove.nla.gov.au/work/12425131?q&sort=holdings+desc&_=1487246530281&versionId=210683608 The Birds of Australia, Broinowski; www.Librarything.com The History of Warrnambool, R. Osburne, 1887, p.72, p. 283 The Warrnambool Mechanics’ Institute – FHMV datasheet Warrnambool Art Gallery History, Warrnambool Art Gallery Foundation Information Booklet, http://www.wagf.com.au/cms/downloads/WAGF-Information-Booklet.pdf Warrnambool Museum and Art Gallery, The Argus, 29th July 1886 Web; The Birds of Australia (Broinowski), Wikipedia The Birds of Australia by Gracius J. Broinowski is a respected source of scientific information. It is also significant for its rarity and as an early Australian Work. The book is significant for its association with the Warrnambool Public Museum, which played an important educational and social role in the early settlement of Warrnambool and District. The book is also significant for its association with the Warrnambool Mechanics' Institute Library book collection, which is deemed to be of great importance because it is one of the few collections in an almost intact state, and many of the books are now very rare and of great value. The Warrnambool Mechanics’ Institute Collection is primarily significant in its totality, rather than for the individual objects it contains. Its contents are highly representative of the development of Mechanics' Institute libraries across Australia, particularly Victoria. A diversity of publications and themes has been amassed, and these provide clues to our understanding of the nature of and changes in the reading habits of Victorians from the 1850s to the middle of the 20th century. The Warrnambool Mechanics Institute book collection has historical and social significance for its strong association with the Mechanics Institute movement and the important role it played in the intellectual, cultural and social development of people throughout the latter part of the nineteenth century and the early twentieth century. The collection of books is a rare example of an early lending library and its significance is enhanced by the survival of an original collection of many volumes. The collection also highlights the Warrnambool community’s commitment to the Mechanics’ Institute, reading, literacy and learning in the regions, and proves that access to knowledge was not impeded by distance. These items help to provide a more complete picture of our community’s ideals and aspirations. The book is also significant for its inclusion in the Pattison Collection, a collection that as a whole shows a snapshot of the types of reading material offered to the local public at that point in time The Birds of Australia Vol 1-2 Author and Illustrator: Gracius J Broinowski Publisher: Charles Stuart & Co Date: 1890 - 1891Label on spine cover with typed text RA 598.2 BRO Embossing added to spine “WARRNAMBOOL PUBLIC MUSEUM" Pastedown front endpaper has sticker from Warrnambool Mechanics Institute and Free Librarythe birds of australia vol 1-2, flagstaff hill, warrnambool, shipwrecked coast, flagstaff hill maritime museum, maritime museum, shipwreck coast, flagstaff hill maritime village, great ocean road, the birds of australia, gracius joseph broinowski, charles stuart & co, joseph archibald, warrnambool public museum, warrnambool museum, warrnambool library, warrnambool art gallery, warrnambool city librarian, pattison collection, ralph eric pattison, samuel hannaford, warrnambool mechanics’ institute and free library, mechanics’ institute library, victorian library board, warrnambool books and records, rare books, australian bird illustrations, australian bird text, australian natural history -
 The Beechworth Burke Museum
Photograph - Photograph - Reproduction
This photo depicts a man standing next to a large piece of mining equipment identified as a hydraulic chisel (alternative name: drifter dill or power rock drill). This piece of machinery was used in mining to place holes in the walls of a mine which were then filled with dynamite or other explosives for rock blasting or to make holes for plug and feather quarrying. The additional tools to the right of the photograph and in front of the machinery can be identified as either picks or as feather and wedges, the latter of which were used to split stone drilled by the hydraulic or power chisel. Depending on the date of the photograph, which is not provided, this chisel was either powered by electricity or by hydraulics. The following is written on the drill "R.C. FORD'S PATENT No91 / MELBOURNE VICTORIA 1879". The man depicted in this photograph wears a wide brim hat, a loose fitting white shirt and loose pants. He wears boots and has a medium sized dark beard. This attire, along with his locality in the mine and proficiency with the mining equipment, identifies this man as a miner working in this particular, but unidentified, mine. It depicts an instance of hydraulic chiseling which makes this photograph valuable for the study of mining techniques from a date c1880.The search for gold is ingrained into the history of Victoria and therefore, images like this one which portray the types of machinery used in mining can reveal important information for technology and highlight the methods used to break apart the earth in order to obtain access to gold and other precious materials during the period this photograph was captured. Further research into RC Ford can potentially reveal even further information pertaining to this photograph. This image is of important historical significance for its ability to convey information about the methods and machinery used to access gold or mine more in general. It also highlights the size of machinery at the time and allows us to compare this to the size of the person standing besides the machinery to better understand the manpower which would have been required to use and set-up this macinery.A black and white rectangular reproduced photograph printed on matte photographic paper.Reverse: 7816/ copy 1/3gold, sluicing, gold sluicing, hydraulic sluicing, gold and tin mine, mining, gold mining, beechworth, burke museum, melbourne, victoria, hat, mining machinery, machinery, r. c. ford -
 Warrnambool and District Historical Society Inc.
Book - Diary, Diaries of John Ward Vol 1 & Vol 2
They are the handwritten history of Methodism in Warrnambool (produced in the 1930s?) by John Ward, and early settler, North Warrnambool shopkeeper and an ex-councillor and mayor. The books contain over 100 original photographs of people connected to the Methodist Church, both clerical and lay, including women, and other Warrnambool photographs. There is also much written material on all the people connected to the church. The books were given to Warrnambool & District Historical Society Inc in March 2013 by the Uniting Church together with DVD with a digital copy of the photographs and a typed copy of the writings. [Elizabeth O'Callaghan, March 2013]Exercise books: History of Methodism in Warrnambool by John Ward Cat No: WARR These two black exercise books are most precious as they are of high historical significance. They provide an insight into the social and spiritual history of the methodists in Warrnambool Vol 1: 265pp Vol 2: 180pphistory of methodism in warrnambool, john ward -
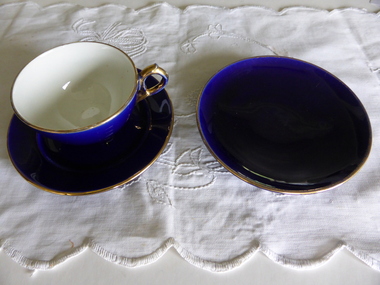 Warrnambool and District Historical Society Inc.
Crockery, Blue Cup Saucer and Plate, 1920s
This cup, saucer and plate are part of a tea set. It was given by Eva Carmichael, a survivor of the ship Loch Ard which was wrecked near Port Campbell in 1878, to Jane Shields, the young woman who supported her while she was recovering from her ordeal at Glenample homestead at Princetown. The two women remained friends after Eva Carmichael returned to her home in Britain and was married. Jane Shields also married and it was when her daughter visited Eva in England that she was given the tea set to take back home to her mother. Jane died in 1932 and Eva died in 1934 and the tea set was inherited by Jane’s daughters. In 1975 Jane’s daughter, Mrs Ann Fuller, donated a cup, saucer and plate to the Warrnambool and District Historical Society. The handle of the cup was mended. These items (cup, saucer and plate) are of high significance as they are closely connected to the wreck of the Loch Ard, and one of the two survivors, Eva Carmichael. Memorabilia connected to Eva Carmichael are precious and rare. These china items (cup, saucer and plate) are coloured royal blue and gold. .1 The cup has a gilt rim on the cup edge and base. There is a small crack on the side of the cup and the handle has been broken and mended. .2 The saucer is glazed on both sides with a small fault in the middle. It has a gilt band on the inner rim. .3 The plate is glazed on both sides with some evidence of scratching on the plate surface. It has a gilt edge. wreck of the loch ard, jane osborne (nee shields), eva carmichael, shipwreck coast history, bone china cup saucer and plate -
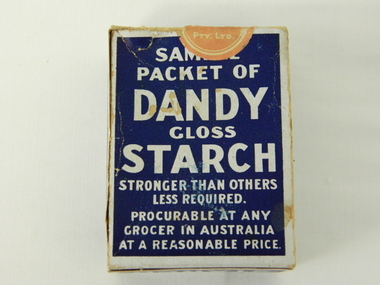 Kiewa Valley Historical Society
Box Sample Dandy Starch, circa mid to late 1900's
This brand of starch was first manufactured in 1914, during the First World War, and continued to cover the other wars and military conflicts that followed. It was a time when Australian made was important due to the limited supplies coming from England and Europe. This was a period when the demand for "home grown" produce was at its peak. This was in a time when by necessity not by the "Buy Australian" campaign (of later years) which was the major factor for the demand of goods. It was in a time when starch was used in formal clothing to put a "crisp" or fresh new appearance for clothes. The important social more of "clothes make the person" was in vogue. This is a sample box provided by the manufacturer as an advertising and promotional method of prospective customers becoming aware of the product. This type of promotional avenue brought results and ensured that this type of advertising and inducement by manufacturers would be ingrained as a lasting avenue through to the 2nd Millennium This box which once contained starch powder is very significant to a rural semi isolated region because it clearly demonstrates that the social mores of the city were also entrenched into the rural population. The fashion of the day, even in remote areas, especially rural, were still a requirement to be maintained on certain special occasions. Cleanliness and stiff "upper lip" persona were just as important in the rural sector as in city and Government circles. Institutions such as hospitals, Government Offices and the legal personnel were bound by the fashion of the starch appearance (no dirt sticks to a personage with the "starch" look). Appearances, especially the first ones, were the judgmental image that remained in the uppermost regions of the viewer.This box with white writing and a "formally clad" man on a navy blue background held Australian grown maize based starch powder(1 LB gross). The package is made from 200 gsm thick cardboard. As production was made during the two World Wars 1914 to 1945 the promotion was heavily focused on Australian made and Australian grown maize.The front(has "Sample" on top) the rest inscriptions are the same on each cover both and back, "DANDY" below this a figure outlined in white on a navy blue background "hat and tails" outfit. Next to the sketch in smaller lettering" STRONGER THAN OTHER STARCHES. LESS REQUIRED". Below the figure "GLOSS" and below this in larger print "STARCH". Below this and in smaller print "CONTENTS. NETT WEIGHT 14 1/2 ozs" Below this and in smaller print "MANUFACTURED BY MAIZE PRODUCTS PTY LTD FOOTSCRAY VICTORIA" On one side of the box and in large white print on royal blue background"PURITY, STRENGTH AND UNIFORMITY." On the other side are the manufacturers directions. On the left side "FOR RAW STARCH" Underneath and in smaller print,"Dissolve in warm water a quantity to give the required thickness. Add bluing if required Stir before each using. On the right side "FOR BOILING STARCH" underneath this in small print"Mix well in small quantity of cold water to creamy consistency. Add boiling water, and stir constantly while cooking. Allow to cool, and add blueing if required. Underneath these two sets of instructions is "Make your consistency thinner than if using another kind of Starch"household starch, household cleaning, domestic laundering. -
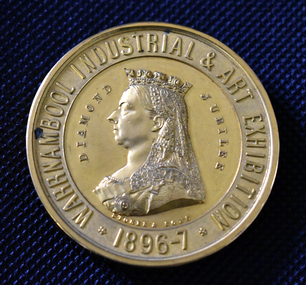 Warrnambool and District Historical Society Inc.
Medal - Warrnambool Industrial and Art Exhibition Medallion and Box
This medallion was awarded by the Commissioners of the Warrnambool Industrial & Art Exhibition to ten boys from the Kew Asylum who sent handmade items (basketware, matwork etc ) for display at the Education Court of the Exhibition. The Warrnambool Industrial & Art Exhibition, held in Warrnambool from December 1896 to March 1897, partly to commemorate Queen Victoria's Diamond Jubilee, was a signal event in Warrnambool's history, with one report suggesting that over 70,000 people attended the various activities held over these months. These included concerts, operas, displays, business stands, sporting events and competitions. The earliest surviving voice recordings made in Australia were produced in Warrnambool at this Exhibition and there were various other 'firsts'. The medallion awarded to the boys at the Asylum for the high quality of their work, was made by the Melboune firm of Stokes and Sons who had a stall and machinery at the Exhibition and made small souvenir Exhibition coins on the spot for visitors to buy. As well as the gold medallion the boys were also given by the Commissioners some small souvenirs to the total value of 12 shillings. This medallion is of great historical value as it is a precious and rare memento of the 1896-7 Warrnambool Industrial & Art Exhibition, an important event in Warrnambool's history..1 A round gilt-bronze medallion with a bust image of Queen Victoria and lettering on one side and a laurel wreath and lettering on the other side .2 A square black box with a metal hinge and clasp. The inside is lined with dark blue satin and silk and has a sunken area to hold a medallion. The maker's name is printed in gold lettering on the inside top of the lid.Warrnambool Industrial & Art Exhibition 1896-7 Diamond Jubilee Awarded to Idiot Asylum Kew For excellence of Workmanship Basket & Matwork & Photos of Asylum Stokes & Sons Medallists Melbournewarrnambool industrial & art exhibition, kew asylum medallion, medallion, 19th c exhibition warrnambool, warrnambool, warrnambool history -
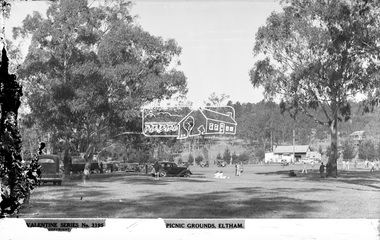 Eltham District Historical Society Inc
Photograph, The Rose Stereograph Company, Picnic Grounds. Eltham, Vic, c.1939
View looking north along present day Hohnes Road in Eltham Lower Park towards the intersection of Old Eltham Road and Main Road. Picnickers have pulled up in their cars and are enjoying a game of cricket being played on the oval. This glass plate negative was used to manufacture postcards (1:1 printing) for commercial sale by the Rose Sterograph Company and its subsidiaries. George Rose founded the Rose Stereograph Company in 1880 and was joined by Herbert (Bert) Cutts in the early 20th Century. The pair formed a lifetime working partnership and strong personal friendship. Assisted by George’s two sons, Herbert George and Walter, and later by Neil Cutts, the Rose Stereograph Company continued its operations for more than 140 years. The company was initially built on stereographs, but as cinema took over and stereographs fell out of fashion, the Rose Stereograph Company developed Australia’s first commercially viable photographic postcard business. Specialising in postcards of iconic historical moments and significant landmarks, The Rose Stereograph Company became a staple of the Australian travel industry.This remarkable collection of glass plate negatives, transparencies, and postcards – arguably Australia’s most significant photography collection outside of public hands – has been passed down through the generations, surviving war, relocation, and the harsh Victorian climate. The historic Rose Stereograph collection is the culmination of George Rose’s dream of capturing and preserving precious moments in time and remains the legacy of the Rose and Cutts families. It is with great sadness that the Cutts family says goodbye to a collection that spans five generations and 140 years. The Cutts family understands that for these historically important pieces to rest with one family is to deny others the pleasure of their custodianship.Glass Plate Negative Size: 9.2 x 13.9 cmPicnic Grounds, Eltham, Valentine Series No. 3195, Copyrighteltham lower park, cricket, cars, buildings, electricity lines, lower plenty, eltham, postcard, travel, picnic ground, rose stereograph company, valentine series postcard, glass plate negative, peter and elizabeth pidgeon collection -
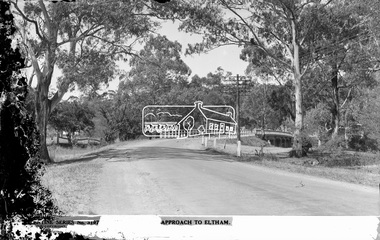 Eltham District Historical Society Inc
Negative - Photograph postcard, The Rose Stereograph Company, Approach To Eltham, c.1939
Looking east along the unsealed main road heading into Eltham across the concrete bridge over the Diamond Creek circa 1939. The original wooden bridge was destroyed by flood waters in 1924. This glass plate negative was used to manufacture postcards (1:1 printing) for commercial sale by the Rose Sterograph Company and its subsidiaries. George Rose founded the Rose Stereograph Company in 1880 and was joined by Herbert (Bert) Cutts in the early 20th Century. The pair formed a lifetime working partnership and strong personal friendship. Assisted by George’s two sons, Herbert George and Walter, and later by Neil Cutts, the Rose Stereograph Company continued its operations for more than 140 years. The company was initially built on stereographs, but as cinema took over and stereographs fell out of fashion, the Rose Stereograph Company developed Australia’s first commercially viable photographic postcard business. Specialising in postcards of iconic historical moments and significant landmarks, The Rose Stereograph Company became a staple of the Australian travel industry.This remarkable collection of glass plate negatives, transparencies, and postcards – arguably Australia’s most significant photography collection outside of public hands – has been passed down through the generations, surviving war, relocation, and the harsh Victorian climate. The historic Rose Stereograph collection is the culmination of George Rose’s dream of capturing and preserving precious moments in time and remains the legacy of the Rose and Cutts families. It is with great sadness that the Cutts family says goodbye to a collection that spans five generations and 140 years. The Cutts family understands that for these historically important pieces to rest with one family is to deny others the pleasure of their custodianship.Glass Plate Negative Size: 9 x 14 cmApproach to Eltham, Valentine Series No. 3197, Copyrightbuildings, electricity lines, eltham, postcard, travel, rose stereograph company, valentine series postcard, main road bridge, glass plate negative, main road, peter and elizabeth pidgeon collection, diamond creek (creek), eltham south, rose stereograph -
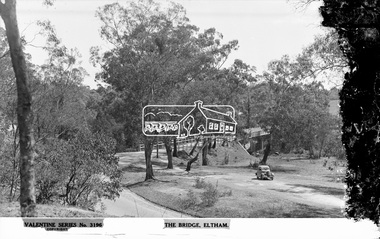 Eltham District Historical Society Inc
Negative - Photograph, The Rose Stereograph Company, The Bridge, Eltham, c.1939
Looking west across the Main Road Bridge over the Diamond Creek at Eltham, c.1939. The car in the foreground, possibly the photographer's, is a Ford Model C Ten built by Ford UK between 1934 and 1937. The Model C was released in Australia in 1935. The Ford Model C Ten is a car that was built by Ford UK between 1934 and 1937. The Model C was released in Australia in 1935 https://en.wikipedia.org/wiki/Ford_Model_C_Ten This glass plate negative was used to manufacture postcards (1:1 printing) for commercial sale by the Rose Sterograph Company and its subsidiaries. George Rose founded the Rose Stereograph Company in 1880 and was joined by Herbert (Bert) Cutts in the early 20th Century. The pair formed a lifetime working partnership and strong personal friendship. Assisted by George’s two sons, Herbert George and Walter, and later by Neil Cutts, the Rose Stereograph Company continued its operations for more than 140 years. The company was initially built on stereographs, but as cinema took over and stereographs fell out of fashion, the Rose Stereograph Company developed Australia’s first commercially viable photographic postcard business. Specialising in postcards of iconic historical moments and significant landmarks, The Rose Stereograph Company became a staple of the Australian travel industry.This remarkable collection of glass plate negatives, transparencies, and postcards – arguably Australia’s most significant photography collection outside of public hands – has been passed down through the generations, surviving war, relocation, and the harsh Victorian climate. The historic Rose Stereograph collection is the culmination of George Rose’s dream of capturing and preserving precious moments in time and remains the legacy of the Rose and Cutts families. It is with great sadness that the Cutts family says goodbye to a collection that spans five generations and 140 years. The Cutts family understands that for these historically important pieces to rest with one family is to deny others the pleasure of their custodianship.Glass Plate Negative Size: 9 x 13.9 cmThe Bridge, Eltham, Valentine Series No. 3196, Copyrightpeter and elizabeth pidgeon collection, bridge, cars, diamond creek (creek), eltham, eltham south, ford model c ten, glass plate negative, main road, main road bridge, motor vehicles, postcard, rose stereograph, rose stereograph company, valentine series postcard -
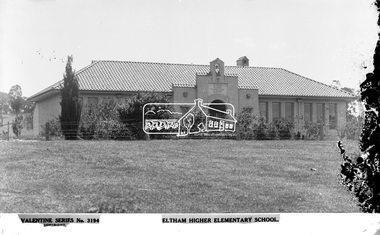 Eltham District Historical Society Inc
Photograph, The Rose Stereograph Company, Eltham Higher Elementary School, c.1939
View looking west towards the Eltham High School circa 1939 from what is now the present day oval on Bell Street. The school was officially opened in October 1928 at which point there were no trees or shrubs in front. This glass plate negative was used to manufacture postcards (1:1 printing) for commercial sale by the Rose Sterograph Company and its subsidiaries. George Rose founded the Rose Stereograph Company in 1880 and was joined by Herbert (Bert) Cutts in the early 20th Century. The pair formed a lifetime working partnership and strong personal friendship. Assisted by George’s two sons, Herbert George and Walter, and later by Neil Cutts, the Rose Stereograph Company continued its operations for more than 140 years. The company was initially built on stereographs, but as cinema took over and stereographs fell out of fashion, the Rose Stereograph Company developed Australia’s first commercially viable photographic postcard business. Specialising in postcards of iconic historical moments and significant landmarks, The Rose Stereograph Company became a staple of the Australian travel industry.This remarkable collection of glass plate negatives, transparencies, and postcards – arguably Australia’s most significant photography collection outside of public hands – has been passed down through the generations, surviving war, relocation, and the harsh Victorian climate. The historic Rose Stereograph collection is the culmination of George Rose’s dream of capturing and preserving precious moments in time and remains the legacy of the Rose and Cutts families. It is with great sadness that the Cutts family says goodbye to a collection that spans five generations and 140 years. The Cutts family understands that for these historically important pieces to rest with one family is to deny others the pleasure of their custodianship.Glass Plate Negative Size: 9.1 x 13.9 cmEltham Higher Elementary School, Valentine Series No. 3194, Copyrighteltham, postcard, travel, rose stereograph company, valentine series postcard, glass plate negative, eltham high school, eltham higher elementary school, peter and elizabeth pidgeon collection -
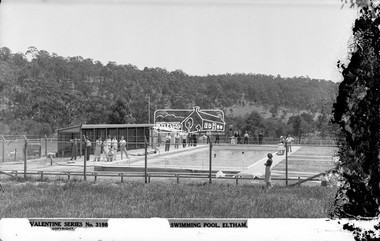 Eltham District Historical Society Inc
Negative - Photograph, The Rose Stereograph Company, Swimming Pool, Eltham, c.1939
Eltham swimming pool was opened in December 1936. It was located adjacent to Central Park. The small children's pool in the foreground was opened in November 1938. This glass plate negative was used to manufacture postcards (1:1 printing) for commercial sale by the Rose Sterograph Company and its subsidiaries. George Rose founded the Rose Stereograph Company in 1880 and was joined by Herbert (Bert) Cutts in the early 20th Century. The pair formed a lifetime working partnership and strong personal friendship. Assisted by George’s two sons, Herbert George and Walter, and later by Neil Cutts, the Rose Stereograph Company continued its operations for more than 140 years. The company was initially built on stereographs, but as cinema took over and stereographs fell out of fashion, the Rose Stereograph Company developed Australia’s first commercially viable photographic postcard business. Specialising in postcards of iconic historical moments and significant landmarks, The Rose Stereograph Company became a staple of the Australian travel industry.This remarkable collection of glass plate negatives, transparencies, and postcards – arguably Australia’s most significant photography collection outside of public hands – has been passed down through the generations, surviving war, relocation, and the harsh Victorian climate. The historic Rose Stereograph collection is the culmination of George Rose’s dream of capturing and preserving precious moments in time and remains the legacy of the Rose and Cutts families. It is with great sadness that the Cutts family says goodbye to a collection that spans five generations and 140 years. The Cutts family understands that for these historically important pieces to rest with one family is to deny others the pleasure of their custodianship.Glass Plate Negative Size: 9 x 13.9 cmSwimming Pool, Eltham, Valentine Series No. 3198, Copyrighteltham, postcard, travel, rose stereograph company, valentine series postcard, glass plate negative, central park, eltham central park, swimming pool, peter and elizabeth pidgeon collection -
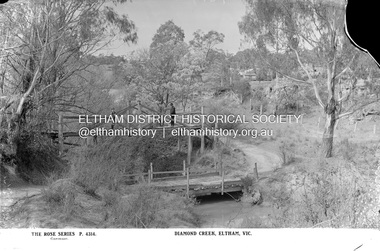 Eltham District Historical Society Inc
Negative - Photograph, The Rose Stereograph Company, Diamond Creek, Eltham, Vic, c.1919
Shows two bridge crossings over the Diamond Creek in Diamond Street, Eltham. The upper pedestrian crossing provided continual access for foot traffic during times of flood. The railway came to Eltham in 1901, the Eltham Railway Station is visible in the distance as well as a wooden bodied Tait (Red Rattler) First Class train carriage. The Tait train was first introduced in 1910 as a steam locomotive hauled carriage and in 1919 electric motor carriages were introduced however the line to Heidelberg was not electrified till 1921 and to Eltham in April 1923. The Railway General Store on Main Road is visible beyond the station and was built by Luther Haley in 1902. It was the first shop in the present day shopping centre. It was later known as lloyd's stopre (1917-1920) followed by a succession of six other owners until purchased by Eric Staff in 1939. This glass plate negative was used to manufacture postcards (1:1 printing) for commercial sale by the Rose Sterograph Company and its subsidiaries. George Rose founded the Rose Stereograph Company in 1880 and was joined by Herbert (Bert) Cutts in the early 20th Century. The pair formed a lifetime working partnership and strong personal friendship. Assisted by George’s two sons, Herbert George and Walter, and later by Neil Cutts, the Rose Stereograph Company continued its operations for more than 140 years. The company was initially built on stereographs, but as cinema took over and stereographs fell out of fashion, the Rose Stereograph Company developed Australia’s first commercially viable photographic postcard business. Specialising in postcards of iconic historical moments and significant landmarks, The Rose Stereograph Company became a staple of the Australian travel industry.This remarkable collection of glass plate negatives, transparencies, and postcards – arguably Australia’s most significant photography collection outside of public hands – has been passed down through the generations, surviving war, relocation, and the harsh Victorian climate. The historic Rose Stereograph collection is the culmination of George Rose’s dream of capturing and preserving precious moments in time and remains the legacy of the Rose and Cutts families. It is with great sadness that the Cutts family says goodbye to a collection that spans five generations and 140 years. The Cutts family understands that for these historically important pieces to rest with one family is to deny others the pleasure of their custodianship.Glass Plate Negative Size: 9 x 13.9 cmDiamond Creek, Eltham, Vic., The Rose Series P. 4314, Copyrighteltham, postcard, travel, rose stereograph company, glass plate negative, rose series postcard, tait train, eltham railway station, railway store, staffs general store, diamond creek, diamond street bridge, lloyd's general store, railway station, peter and elizabeth pidgeon collection -
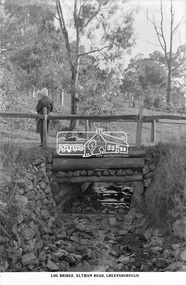 Eltham District Historical Society Inc
Photograph, The Rose Stereograph Company, Log Bridge, Eltham Road. Greensborough, c.1920
A woman stands at the end of a log bridge over a creek looking towards the south along the unsealed roadway. The sun illuminates her back. She is wearing a woollen knit beanie with edges rolled up, dark jacket and skirt, full length dark stockings and slip on dark leather shoes with raised heel, typical of the early 1920s. The creek is possibly feeding into the Karingal Yalloc. The direction of the road based on shadows is northwest as is the Eltham Road to Greensborough (present day Sherbourne, Karingal and St Helena roads). The creek is falling to the foreground so from south west to the north east, possibly feeding into the Karingal Yalloc, somewhere near presenet day Ramptons Road Reserve. This glass plate negative was used to manufacture postcards (1:1 printing) for commercial sale by the Rose Sterograph Company and its subsidiaries. George Rose founded the Rose Stereograph Company in 1880 and was joined by Herbert (Bert) Cutts in the early 20th Century. The pair formed a lifetime working partnership and strong personal friendship. Assisted by George’s two sons, Herbert George and Walter, and later by Neil Cutts, the Rose Stereograph Company continued its operations for more than 140 years. The company was initially built on stereographs, but as cinema took over and stereographs fell out of fashion, the Rose Stereograph Company developed Australia’s first commercially viable photographic postcard business. Specialising in postcards of iconic historical moments and significant landmarks, The Rose Stereograph Company became a staple of the Australian travel industry.This remarkable collection of glass plate negatives, transparencies, and postcards – arguably Australia’s most significant photography collection outside of public hands – has been passed down through the generations, surviving war, relocation, and the harsh Victorian climate. The historic Rose Stereograph collection is the culmination of George Rose’s dream of capturing and preserving precious moments in time and remains the legacy of the Rose and Cutts families. It is with great sadness that the Cutts family says goodbye to a collection that spans five generations and 140 years. The Cutts family understands that for these historically important pieces to rest with one family is to deny others the pleasure of their custodianship.Glass Plate Negative Size: 9.2 x 13.8 cmLog Bridge, Eltham Road, Greensborougheltham, postcard, travel, rose stereograph company, glass plate negative, creek, eltham road, greensborough, karingal road, karingal yallock, log bridge, sherbourne road, st helena road, women's fashion, rampton's road reserve, peter and elizabeth pidgeon collection -
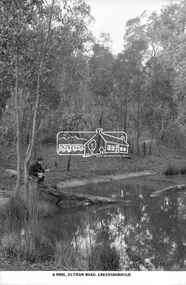 Eltham District Historical Society Inc
Photograph, The Rose Stereograph Company, A Pool, Eltham Road, Greensborough, c.1920
A boy of about ten years of age sits on the end of a fallen tree, which is resting in a natural pool in bushland. He is holding a stick gazing into the pool waters. He appears to be dressed in a schoolboy's uniform with close fitting short peaked cap, dark scarf or long sleeved jumper with polo neck and what appears to be a logo on the left breast, the ends of the sleeves turned over, dark shorts and dark long socks with ankle height lace up leather boots. The pool is located on the Eltham Road to Greensborough (present day Sherbourne, Karingal and St Helena roads) and is possibly part of the Karingal Yalloc somewhere near present day Ramptons Road Reserve. This glass plate negative was used to manufacture postcards (1:1 printing) for commercial sale by the Rose Sterograph Company and its subsidiaries. George Rose founded the Rose Stereograph Company in 1880 and was joined by Herbert (Bert) Cutts in the early 20th Century. The pair formed a lifetime working partnership and strong personal friendship. Assisted by George’s two sons, Herbert George and Walter, and later by Neil Cutts, the Rose Stereograph Company continued its operations for more than 140 years. The company was initially built on stereographs, but as cinema took over and stereographs fell out of fashion, the Rose Stereograph Company developed Australia’s first commercially viable photographic postcard business. Specialising in postcards of iconic historical moments and significant landmarks, The Rose Stereograph Company became a staple of the Australian travel industry.This remarkable collection of glass plate negatives, transparencies, and postcards – arguably Australia’s most significant photography collection outside of public hands – has been passed down through the generations, surviving war, relocation, and the harsh Victorian climate. The historic Rose Stereograph collection is the culmination of George Rose’s dream of capturing and preserving precious moments in time and remains the legacy of the Rose and Cutts families. It is with great sadness that the Cutts family says goodbye to a collection that spans five generations and 140 years. The Cutts family understands that for these historically important pieces to rest with one family is to deny others the pleasure of their custodianship.Glass Plate Negative Size: 9 x 14 cmA Pool, Eltham Road, Greensborougheltham, postcard, travel, rose stereograph company, glass plate negative, eltham road, greensborough, karingal road, karingal yallock, sherbourne road, st helena road, rampton's road reserve, schoolboy, peter and elizabeth pidgeon collection -
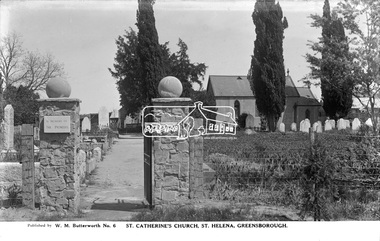 Eltham District Historical Society Inc
Photograph, The Rose Stereograph Company, St. Katherine's Church, St Helena. Greensborough, c.1936
View of St Katherine's Church from the Memorial Gate which were dedicated Saturday, September 12, 1936 "In Memory of The Pioneers". A prominent gravestone for the Mapleton and Ellis families visible to the far left of the path. This glass plate negative was used to manufacture postcards (1:1 printing) for commercial sale by the Rose Sterograph Company and its subsidiaries. George Rose founded the Rose Stereograph Company in 1880 and was joined by Herbert (Bert) Cutts in the early 20th Century. The pair formed a lifetime working partnership and strong personal friendship. Assisted by George’s two sons, Herbert George and Walter, and later by Neil Cutts, the Rose Stereograph Company continued its operations for more than 140 years. The company was initially built on stereographs, but as cinema took over and stereographs fell out of fashion, the Rose Stereograph Company developed Australia’s first commercially viable photographic postcard business. Specialising in postcards of iconic historical moments and significant landmarks, The Rose Stereograph Company became a staple of the Australian travel industry.This remarkable collection of glass plate negatives, transparencies, and postcards – arguably Australia’s most significant photography collection outside of public hands – has been passed down through the generations, surviving war, relocation, and the harsh Victorian climate. The historic Rose Stereograph collection is the culmination of George Rose’s dream of capturing and preserving precious moments in time and remains the legacy of the Rose and Cutts families. It is with great sadness that the Cutts family says goodbye to a collection that spans five generations and 140 years. The Cutts family understands that for these historically important pieces to rest with one family is to deny others the pleasure of their custodianship.Glass Plate Negative Size: 9 x 14 cmSt. Catherine's Church, St Helena, Greensborough, Published by W. M. Butterworth No. 6postcard, travel, rose stereograph company, glass plate negative, greensborough, st helena, w. m. butterworth, st katherine's church, memorial gate, mapleton, ellis, mediterranean cypress, peter and elizabeth pidgeon collection -
 Eltham District Historical Society Inc
Photograph, The Rose Stereograph Company, St. Katherine's Church, St Helena. Greensborough, c.1936
View of St Katherine's Church from the path inside the Memorial Gate. Also visible several Mediterranean Cypress trees. A prominent gravestone for the Mapleton and Ellis families visible to the far left of the path. This glass plate negative was used to manufacture postcards (1:1 printing) for commercial sale by the Rose Sterograph Company and its subsidiaries. George Rose founded the Rose Stereograph Company in 1880 and was joined by Herbert (Bert) Cutts in the early 20th Century. The pair formed a lifetime working partnership and strong personal friendship. Assisted by George’s two sons, Herbert George and Walter, and later by Neil Cutts, the Rose Stereograph Company continued its operations for more than 140 years. The company was initially built on stereographs, but as cinema took over and stereographs fell out of fashion, the Rose Stereograph Company developed Australia’s first commercially viable photographic postcard business. Specialising in postcards of iconic historical moments and significant landmarks, The Rose Stereograph Company became a staple of the Australian travel industry.This remarkable collection of glass plate negatives, transparencies, and postcards – arguably Australia’s most significant photography collection outside of public hands – has been passed down through the generations, surviving war, relocation, and the harsh Victorian climate. The historic Rose Stereograph collection is the culmination of George Rose’s dream of capturing and preserving precious moments in time and remains the legacy of the Rose and Cutts families. It is with great sadness that the Cutts family says goodbye to a collection that spans five generations and 140 years. The Cutts family understands that for these historically important pieces to rest with one family is to deny others the pleasure of their custodianship.Glass Plate Negative Size: 9.2 x 14 cmSt. Catherine's Church, St Helena, Greensborough, Published by W. M. Butterworth No. 1postcard, travel, rose stereograph company, glass plate negative, greensborough, st helena, w. m. butterworth, st katherine's church, memorial gate, mapleton, ellis, mediterranean cypress, peter and elizabeth pidgeon collection