Showing 166 items
matching 169
-
 Coal Creek Community Park & Museum
Music Sheets
A selection of 36 music sheets. Numbers against each song title has been written by the original owner. 1 - Ginger Headed Feller 2 - Dreamy Hawaiian Moon 3 - Small Fry 4 - A Little Kiss At Twilight 7 - Musical Comedy Favourites Pt 1 & 2 9 - Moonlight in Waikiki 12 - You're Pretty as a Picture / My Own 19 - Sweethearts and Wooden Shoes (2 Copies) 20 - One Day When We Were Young 24 - Who Do You Think You Saw Last Night? / You're Lovely Madam 25 - Thanks For Everything / I Found My Yellow Basket 27 - Josephine / I'm Singing a Song for the Old Folks 30 - Romany / The Park Parade 31 - A Song of Old Hawaii / So little Time 83 - A Pretty Girl is like a Melody / You 101 - One Never Knows, Does One / Goodnight My love 103 - Someone to Care For Me / Rainbow on the Rive 105 - Miracles Sometimes Happen / I Want the Whole World to Love You 112 - The Coronation Waltz 116 - Looking Around Corners For You / There's That Look in Your Eyes Again 117 - May I Have The Next Romance With You? / Head Over Heels in Love 118 - Harbour Lights / There's Yoo-hoo in Your Eyes 146 - Its The Natural Thing to Do / The Moon Got In My Eyes 150 - The Little Boy Santa Forgot / Have You Ever Been In Heaven 152 - Where an Old Spanish Town Used To Be / Once In A While 154 - You're a Sweetheart / My Fine Feathered Friend 157 - Sweet Someone / Broadway's Gone Hawaii 158 - Always and Always / A Gypsy Told Me 160 - Got A Pair Of New Shoes / A Serenade to the Stars 161 - Down Where the Trade Winds Blow / Hawaii Calls 163 - More Than Ever / Let's Give love Another Chance 165 - A Foggy Day / Rosalie 166 - Who Are We To Say / Shadows on the Moon 169 - Melody Farm / The One I Love 170 - Moonshine Over Kentucky / An Old Straw Hat 175 - On The Sentimental Side / My Heart is Taking Lessonspencil and blue ink numbering system. -
 Wodonga & District Historical Society Inc
Souvenir - Souvenir Cup and Saucer Woodland Grove, Wodonga, Victoria, Royal Stafford China, c1940s
This item is from a collection donated by descendants of John Francis Turner of Wodonga. Mr. Turner was born on 6 June 1885. He completed all of his schooling at Scotts Boarding School in Albury, New South Wales. On leaving school, he was employed at Dalgety’s, Albury as an auctioneer. In 1924 John was promoted to Manager of the Wodonga Branch of Dalgety’s. On 15/03/1900 he married Beatrice Neal (born 7/12/1887 and died 7/2/1953) from Collingwood, Victoria. They had 4 daughters – Francis (Nancy), Heather, Jessie and Mary. In 1920, the family moved From Albury to Wodonga, purchasing their family home “Locherbie” at 169 High Street, Wodonga. "Locherbie" still stands in Wodonga in 2022. The collection contains items used by the Turner family during their life in Wodonga. A wide range of small china pieces carrying scenic views of holiday destinations or key locations were a popular kind of souvenir during much of the 20th century. Several different items have been produced to commemorate Wodonga and its landmarks over time. These items document key changes in Wodonga and its heritage. This plate depicts three key landmarks in Wodonga. THE SOLDIERS' MEMORIAL in Wodonga was unveiled on Tuesday 18th November 1924. It was designed by Messrs. Hosken & Co., of Hawthorn, Victoria. The monument is all of Australian workmanship. The pedestal is made of Harcourt granite, 9ft x 9ft at the base, and rising in seven courses to a height of 10ft 2in. The emblems (rising sun and wreath) are of bronze, and the lettering of the inscription and names of fallen soldiers are in raised lead letters. Originally the Memorial was completed with a full life size, 6ft in height, sculpture of an Australian soldier in Sicilian marble. The memorial bore the inscriptions: ERECTED BY THE RESIDENTS OF WODONGA AND DISTRICT IN MEMORY of the Men of this Town and District who fell in the Great War, 1914-1919, Also in grateful recognition of the men who served and returned. “Lest We Forget.” In 1982, due to frequent vandalism and high cost of materials to repair, the soldier statue was removed and later installed at the RSL Rooms. THE WATER TOWER is a major landmark of High Street, Wodonga. It began operation from January 1924 until it ceased operation in 1959. It stood unused for a decade until the lower section was modified and put to use as “ The Tower’s Cobbler’s Inn” in 1962. In 1972 Wodonga City Council proposed to demolish the Tower. Their suggestion received an unfavorable response from the city’s citizens, so the Tower still stands today. THE BAND ROTUNDA was officially opened on Sunday 5th September 1920 at the naming of the triangular reserve at the corner of High and Hovell Streets as Woodland Grove. The Wodonga Band gave a public performance on this occasion. The tri-coloured ribbon, which stretched across the entrance to the Rotunda was cut by Mrs R.H Murphy, daughter of Mr. John Woodland, secretary of the Wodonga Shire Council for 35 years, after whom the area was named. The rotunda has since been moved to Martin Park, Wodonga. This item comes from a collection used by a prominent citizen of Wodonga. It is also representative of a domestic item common in the 1940s and features significant landmarks used in many forms to represent the city of Wodonga.This bone china cup and saucer set features an image of Woodland Grove. Wodonga, Victoria. The image incorporates landmarks in Woodland Grove, including the Soldiers' Memorial, the Rotunda and the Water Tower. There is a makers' mark imprinted on the underside of the plate."ROYAL STAFFORD/BONE CHINA/ MADE IN ENGLAND/ 423" . A crown is in the centre of the textmemorabilia, woodland grove, wodonga victoria -
 Melbourne Tram Museum
Album - Robert Thomson Slide Collection - box 17
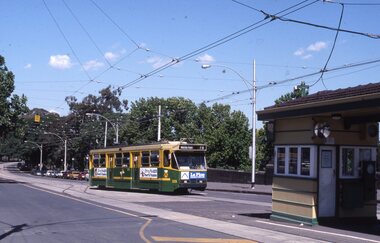
Photo - see pdf file for further information. Number Date Brief Description Box 17 RT396 Nov. 99 A 239 arriving Batman Ave Route 70 RT397 Nov 99 W7 1012 running Special, Clarendon St RT398 Nov 99 A 300, Port Melbourne, Mont Albert route 109 RT399 Nov 99 A 286 Port Melbourne line, route 109 RT400 Nov 99 Z3 223 Carlisle St St Kilda, route 69 – with destination set for return Kew Cotham Road RT401 Nov 99 W7 1005 Swanston St route 8 with Christmas decorations – route 8 RT402 Nov 99 Z3 140 Swanston St route 8 with Christmas decorations – route 11 RT403 Nov 99 Z3 144 Swanston and Bourke with “Give way to passengers ”sign – route 1 RT404 Nov 99 Z3s 144 and 196 Swanston St – with sign “Tram stop ahead” RT405 Nov 99 W6 977 Swanston St – route 8 and Z1 72 RT406 Nov 99 11W and City Circle SW5 723 – Spencer and Collins Sts RT407 Nov 99 SW6 960 University terminus, route 16 RT408 Nov 99 SW6 960 University terminus with Z2 108 and other trams RT409 Nov. 99 A 234 Wattle Park terminus, route 70 RT410 Nov 99 New track docklands with old shipping shed in the view. RT411 Nov 99 Flinders St extension Docklands new track RT412 Nov 99 A 255 route 109 Port Melbourne terminus with former station building RT413 Nov 99 SW6 954 Route 16, Ackland St terminus with a Z3 behind. RT414 Nov 99 Restraurant tram 442, Esplanade. RT 415 Nov 2000 Z27 and Z1 Balaclava Junction RT416 Nov 2000 A 278 route 109 Port Melbourne terminus with former station building RT417 Nov 2001 B2 2010 in Yarra livery, Bourke St at Spencer St RT418 Nov 2001 B2 2108 turning from Bourke into Spencer St (route 96) followed by another B2 2048? RT 419 Nov 2001 Z 80 and another two Zs in Swanston St RT420 Nov 2001 Z137 and other Z’s in Swanston St RT421 Nov 2001 Z82 Swanston st RT422 Nov 2001 Z3 169 Wests Road, West Maribyrnong terminus with another Z arriving. Route 57 RT423 Nov 2001 West Maribyrnong terminus board with Swanston Trams signage RT424 Nov 2001 Z3 172 route 82, Wests Road RT425 Nov 2001 A class Flinders St extension route 48 in Yarra Trams livery RT426 Nov 2001 11W Bourke St with MTOCco building in the background. Demonstrates the work of Robert Thomson in photography, collection and/or production of slidesAssembled album in a black presentation folder of 31 colour slides, collected or produced by Robert Thomson. A list of all photographs with details has been compiled. All rights reserved for all photos., melbourne, tramways, trams, tram 239, route 70, batman ave, tram 1012, clarendon st, tram 300, port melbourne, route 109, tram 223, tram 69, tram 1005, route 8, swanston st, tram 140, tram 144, tram 196, tram 977, tram 72, tram 11w, tram 723, city circle, tram 960, tram 108, tram 234, wattle park, docklands, trackwork, flinders st, tram 255, tram 954, tram 442, tram 27, tram 1, tram 278, tram 2010, tram 2108, tram 80, tram 137, tram 82, tram 169, wests road, west maribyrnong, swanston trams, tram 172, route 82, route 48, bourke st, mtoco -
Ballarat Tramway Museum
Memorabilia - Exhibition Material, Warren Doubleday, "gold!, Gold!, GOLD! and Trams", 29/01/2003 12:00:00 AM
Two photos and thirty captions or label cards used in the Museum's exhibition entitled "gold!, Gold!, GOLD! and Trams". Printed on a colour laser jet, 200 gsm card, unless noted otherwise. Most cards have two Velcro dots on rear, except larger ones which may have three or four. .1 151 x 210 Opening Tram Leonora Tramways - supplied by the Perth Electric Tramway Society .2 210 x 292 Kalgoorlie Electric Tramways Limited trams No. 19 and 13 - ex PETS .3 210 x 297 Gold and Tramways of Ballarat - text card.. .4 210 x 297 text card - 2nd card. .5 130 x 210 Acknowledgements card. .6 - .8 97 x 297 - "GOLD!" on each card, with a heavier font each time. .9 172 x 297 "and trams" .10 136 x 297 "Painted to Celebrate" .11 383 x 80 "At first horses" .12 62 x 472 "Then came Electric" - Two pieces of card joined together, stored folded. .13 65 x 557 "and other Golden Cities" - Two pieces of card joined together, stored folded. .14 68 x 550 "For the City of Ballarat" - Two pieces of card joined together, stored folded. .15 47 x 385 "To Ballarat East as well" .16 45 x 90 "Main St" / "Photo Wal Jack 1963 btm362" .17 46 x 194 "Main and Victoria Sts" / "Photo Ron Fluck 1950 btm870" .18 69 x 126 "1964 Sebastopol" / "Photo Tramway Museum Society of Victoria" .19 66 x 99 "1951 Ballarat / Photo Keith Kings btm1378" .20 45 x 102 "Bendigo N.J. Simons Collection btm 1205.7" .21 68 x 106 "2001 Ballarat / Photo Warren Doubleday" .22 43 x 157 "To Sebastopol / From E.D. Jenkins book, Sebastopol Victoria 1864-1964 btm1090" .23 43 x 158 "From the City / Charles Rudd photograph, State Library of Victoria btm 1113i" .24 43 x 271 "Electric Power for Industry / BTM Collection btm 698i" .25 47 x 160 "To the Gardens / From Geo Rose stereo pair. Donated by Bacchus Marsh Blacksmith Cottage and Forge btm1257" .26 41 x 96 "Leonora / Courtesy Perth Electric Tramway Society" .27 45 x 117 "Bridge St / Postcard from Norm DePomeroy collection btm 841" .28 46 x 169 "Transport for all / Postcard from Norm DePomeroy collection btm837" .29 44 x 89 "Main St / Photo Ron Fluck 1962 btm867" .30 41 x 117 "Kalgoorlie / Courtesy Perth Electric Tramway Society" .31 46 x 150 "1905 Opening / BTM Collection btm482" .32 52 x 404 "Ballarat Trams are Ballarat History"trams, tramways, btm, exhibitions, gold!, gold!, gold! and trams, gold tram -
 Melbourne Tram Museum
Album - Ron Wilson 46 Photographs -1987 to 1999
Photo - see pdf file for further information. Number Brief Description RWC1 SW6 897 in MTA livery on Rt 5 in Swanston St outside Flinders St Station RWC2 WS6 965 as an advertising car for Next Flight on Rt 15 in Swanston St outside Flinders St Station RWC3 W1 427 on tourist Service in Swanston St at the city shunt. Photo taken from the signal box RWC4 SW5 814 as an advertising car for the RVIB in Park St near St Kilda Rd RWC5 PMTT foundation stone for Kew Depot RWC6 SW5 682 as an arts car in Coldblo Rd in Malvern Depot RWC7 SW5 724 as an arts car on Rt 6 in St Kilda Rd at Domain Rd RWC8 SW6 866 on Rt 6 and a Z 107 in MTA livery in Swanston St outside Flinders St Station RWC9 W5 821 with 2 doors in MTA livery in Victoria Prd at Brunswick St RWC10 782 at Bylands RWC11 SW5 847 in MTA livery turns into Preston Workshops during track repairs RWC12 Scrubber 10W in St Kilda Rd outside the arts centre RWC13 W5 685 on the fan of South Melb Depot RWC14 SW6 880 on Rt 8 in St Kilda Rd outside Flinders St Station RWC15 W6 997 on Rt 15 in St Kilda Rd outside Flinders St Station RWC16 W6 971 in Victoria Prd crossing Nicholson St RWC17 SW5 846 on Rt 6 in Swanston St at Flinders St RWC18 SW6 852 on Rt 72 in Swanston St at Flinders St RWC19 Z 217 on Rt 22 as an advertising car for Qantas in Swanston St outside Flinders St Station RWC20 Z 230 on Rt 1 in Swanston St at Little Lonsdale St RWC21 W7 1011 on Rt 8 as an advertising car for St George Bank in St Kilda Rd outside the Arts Centre RWC22 Z 220 as an advertising car foe Telstra in Swanston St at Flinders Lane RWC23 SW6 854 on RT passes 946 in Swanston St outside Flinders St Station RWC24 Z 56 in MTA livery in Swanston St outside Flinders St Station RWC25 SW6 930 in MTA Livery at the end of the siding in the South Melb per way depot RWC26 SW6 954 on Rt 69 at the St Kilda Terminus RWC27 SW6 948 on a semi-trailer in Preston Workshops RWC28 Z 159 in MTA Livery in Elizabeth St at Victoria St RWC29 B2 2003 on Rt 59 in Elizabeth St at Victoria St RWC30 A1 235 at the Batman Ave Terminus RWC31 Z 191 at the Batman Ave Terminus RWC32 SW6 998 on Rt 15 in MTA livery in Swanston St at Collins St RWC33 SW6 925 on Rt 8 in MTA livery in Swanston St at Collins St RWC34 SW6 993 on Rt 67 in MTA livery in Swanston St at Collins St RWC35 SW5 846 on Rt 6 in MTA livery in Swanston St at Collins St RWC36 W2 643 at Bylands RWC37 A1 233 at the Batman Ave Terminus RWC38 SW6 883 on Rt 64 in MTA livery in Swanston St at Collins St RWC39 SW6 939 in MTA Livery running in to South Melb Depot in Swanston St at Collins St RWC40 SW5 844 in M&MTB on Rt 72 in Swanston St at Collins St RWC41 W7 1024 advertising Buy Australian on Rt 5 in Swanston St at Collins ST RWC42 W7 1007 on RT 64 in M&MTB livery in Swanston St at Collins St RWC43 SW6 880 in MTA livery on Rt 69 at the St Kilda Terminus RWC44 SW6 884 on Rt 16 waits as Z 169 shunts in ST Kilda Rd outside the Arts Centre RWC45 SW5 in M&MTB livery on Rt 8 in ST Kilda Rd outside the Arts Centre RWC46 Z 133 in MTA Livery on Rt 50 in Elizabeth St at the Terminus Demonstrates the work of Ron Wilson in photography and collection of prints. Assembled album in a black presentation folder of 46 photographs from the Ron Wilson Collection - 12 A4 sleeves. All photographs have been scanned and placed on the Museum's G drive. A list of all photographs with details has been compiled. melbourne, tramways, trams, flinders st, mta, advertising trams -
 National Communication Museum
Vehicle - Mobile Telephone Exchange, c. 1965
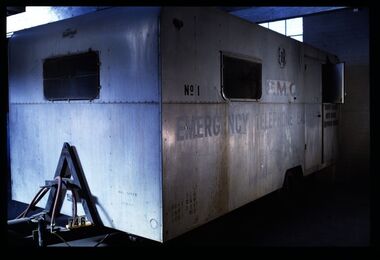
Manufactured in the 1960s, this mobile emergency telephone exchange was fitted into a caravan. Part of the Shepparton Division State Disaster Plan, the caravan could be towed to areas affected by disasters to enable communications to recommence. The caravan remained in service until approximately 1974.Mobile infrastructure plays an important role in Australian communications, owing to the often remote and hostile environments in which Australians live and work. Exchanges such as this facilitated phone calls in the aftermath of an emergency, particularly for hospitals, police and other emergency services. Today, Mobile Exchange on Wheels (MEOWs), Cell on Wheels (CoW) and Satellite Cell on Wheels (SatCOW) - which provide temporary landline and broadband services, mobile phone coverage and service in areas without communications infrastructure respectively - are a critical part of emergency response procedures for natural disasters such as fire and flood. Though technology has progressed, the need for rapid service in remote areas remains a present concern of the communications service providers in Australia. This mobile service infrastructure is historically significant as an early example of a service which has evolved over decades, yet is still needed today. The exchange, as a representative example of a vehicle which would provide early-response in a disaster, is socially significant as a facilitator of critical communications needs in devastated communities: access to emergency services and contact with family and friends. The exchange itself, intact from its period of use, provides an insight into technology of the 1970s.Mobile emergency exchange housed in a caravan trailer on 2 wheel base, duralin body, steel tow bar, Caravan divided into 3 sections; the exchange room; the relay room and the main frame room. The exchange room contains 3 switchboards, a folding table, cupboards, benches and switch rack (.1). table (.2), steel bar for attaching the table (.3), back boards of switchboards (.4-.6), switches (.7-.16), box of switches (.17). There is a wall phone magneto, 300 type handset on wall and 2 skylights with wire screens. .11? hat pegs and shelf; there are 2 fluorescent tubes for lighting, all in exchange section. The floor is covered with 2 tone grey tiles and there are wire mesh on outside of windows and a geometric curtain inside behind switch rack. There is a flywire screen door as well as exterior door. The relay room has a sectioned door so half can open at a time. Room contains a cupboard with folding bench top beneath a curtained window. The opposite wall has a bank of batteries and transmission condensers; there is a shelf above window, one fluorescent tube and fuse boxes. Tiles on floor also. The main frame room contains many metres of coiled black covered cable, a black covered magneto wall telephone with 300 type handset; grey plastic jumper cords, a rack of termination points and wire with wasp nests attached. There is a small iron step under door, a fluorescent tube on wall and 3 hat hooks. Roll of Paper Handtowels (.18), cord and handle (.19), red exchange cords and plugs (.20-.22), plastic aluminium runners (.23,.24), headset (.25,.26), logbook (.27), battery readings (.28), box containing papers circuit drawings etc (.29-.93), paper lists off wall (.94,.95). Books, record books etc (.96-.103). Manila folder (.104) containing circuit drawings (105-.124). Wooden drawer (.125), metal drawer containing subscribers master cards, record of faults cards, particular switchboards connected, Junction line cards (.126). Box of valves (.127), box of clamps (.128). Box of 2000 type rack fuses, red 1 1/2 AMPS, black 3 AMP, blue 1/2 AMP (.129). Box of sleeves for covering wire joints (.130), plastic beakers (.131,.132), soap (.133), box of white plastic squares (.134), time switch "Venner BF/43 time switch" Made in England (.135), box of bolts, knobs etc (.136), box of switchboard number indicators (.137), fuse (.138), fuse wire (.139), football card (.140). Box of cartridge fuse 6 AMP (.141). Envelope of drawing pins, rubber bands (.142), black plastic, paper tape centres (.143-.152), metal plug (.153), 2 signs "Beware of vehicles" (.154-.155). Paper listing Naringal East automatic conversion (.156). Green Commonwealth of Australia note pad (.157). Wiring plug for tail lights (.158). Black fuse plugs (.159,.160). Box of bolts (.161). 2 sections of blue plastic coated wires (.162,.163). Gloves used for working on batteries (.164-.167). Wasp nests (.168,.169). White fuse (.170). Photographs of van in use (.171,.172)..1 on front: "ANOTHER / MOBILETRAIL / PRODUCT" "MAX SPEED / 25MPH" "TRAILER BRAKES / --- / " On sides: "EMERGENCY TELEPHONE EXCHANGE" "NO 1" "PMG" "TCQ / GROSS 250 / TARE 182 / LOAD 162" "6" "COUNTRY BRANCH / NORTH REGION / [SHEPPARTON DIVISION]" "LAW'S SIGNS" "Telecom Australia" On back: "DANGER / LONG LOAD" "MQA 3787" .133: "FIR OIL" "AUSTRALIA"mobile telephone exchanges, mobile telecommunications trailers, trailers, transport, natural disaster, black saturday, bushfires, floods, emergency communications -
 Ballarat Tramway Museum
Manual, Doug Prosser, "General Electric Data for Car Equipment Maintenance", 1998
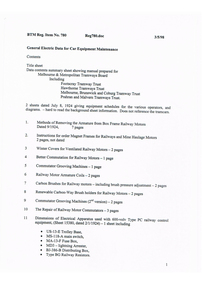
A black plastic folder containing a set of 38 General Electric Data Sheets for MMTB and tramway trust equipment, dated July 8 1924. Contained in folder with flexible clips. Pages have been punched with four holes. Copy of document made for BTM Feb 1998 by Doug Prosser. For scan of list - see btm780sheet.pdf General Electric Data for Car Equipment Maintenance Contents For scan see btm780d1 (5 pages) Title sheet Data contents summary sheet showing manual prepared for Melbourne & Metropolitan Tramways Board Including Footscray Tramway Trust Hawthorne Tramways Trust Melbourne, Brunswick and Coburg Tramway Trust Prahran and Malvern Tramways Trust. 2 sheets dated July 8, 1924 giving equipment schedules for the various operators, and diagrams. - hard to read the background sheet information. Does not reference the tramcars. For scan see btm780d2 (54 sheets - items 1 to 27) 1. Methods of Removing the Armature from Box Frame Railway Motors Dated 9/1924, 7 pages 2. Instructions for order Magnet Frames for Railways and Mine Haulage Motors 2 pages, not dated 3 Winter Covers for Ventilated Railway Motors - 2 pages 4 Better Commutation for Railway Motors - 1 page 5 Commutator Grooving Machines - 1 page 6 Railway Motor Armature Coils - 2 pages 7 Carbon Brushes for Railway motors - including brush pressure adjustment - 2 pages 8 Renewable Carbon-Way Brush holders for Railway Motors - 2 pages 9 Commutator Grooving Machines (2nd version) - 2 pages 10 The Repair of Railway Motor Commutators - 3 pages 11 Dimensions of Electrical Apparatus used with 600-volv Type PC railway control equipment, (Sheet 15380, dated 2/1/1924) - 1 sheet including · US-13-E Trolley Base, · MS-118-A main switch, · MA-13-F Fuse Box, · MD3 - lightning Arrester, · BJ-386-B Distributing Box, · Type BG Railway Resistors. 12 Connections of Type KM-63-BR Railway Controllers and Equipment - Drawing 15257, 1 page, dated 1/3/1921 with dimension details on rear of type K-63-BR railway controller equipment including: · SG Resister, · BK-13-A Insulator, · MR11 - Circuit breaker, · MD3 - Lightning Arrester box, · K63-BR Controller, · US15C Trolley Base. 13 Method of Supporting Railway Resistors using Porcelain Bolt insulators for 600 and 1500 Volt Work. Drawing dated 1/11/1923, No. 15249B - 1 page 14 Dimensions of Electrical Apparatus used with 600-volv Type M railway control equipment, (Sheet 15381, dated 2/1/1924) - 1 sheet including · US-13-E Trolley Base, · MS-118-A main switch, · MA-13-F Fuse Box, · MD3 - lightning Arrester, · BJ-386-B Distributing Box, · Type BG Railway Resistors. 15 Dimensions of Electrical Apparatus used with 600Volt, Type PC Railway Control Equipment. Drawing No. 15382, dated 2/1/1924. Includes: · C129-A Master Controller, · DA82C Coupler sockets, · MS-14-G switch, · MS-46-H switch. 16 Dimensions of Electrical Apparatus used with 600-volv Type M railway control equipment, (Sheet 15383, dated 2/1/1924) - 1 sheet including · C-169-A Controller · DA-69-B Coupler Socket and DC-66-C Coupler Plug · MS-14-G Switch · MS-46-H-Switch 17 Method of Making Tap Connections for Car Cables -= SD 15468, 1/11/1924, 1 page 18 The Repair of 600 Volt Railway Motor Armatures, 64408, 9/2/1924, 4 pages 19 Proper Method of Mounting and Dismounting Railway Motor Pinions. - 2 pages 20 Pinion Pullers for Railway Motors - 2 pages, dated 8/1/1924. 21 The Care of Railway Motor Bearings - 4 pages 22 Oil Scraper Rings for Air Compressors - 64590 - May 1924 - 1 page 23 Finger Bases for type K 63 controller 1 page 24 Adjustment of Drum Controller fingers - 29/1/1924, 64600A - 1 page 25 Star Wheels for Type K Controllers - 64603 - 1 page 26 Soldering Aluminium Controller Cylinder Castings - 2 pages 27 Porcelain Bolt Insulators for Railway Service - and drawing on rear showing mounting arrangement of resistor Grids - 2 pages. For scan see btm780d3 (13 pages) 28 Connections of Armature and Field Winding for GE-201-F and GE 263A railway motors. DS37869 29 Connections of Armature and Field Winding for GE-201-I railway motors. K1629303 30 Connections of Armature and Field Winding for GE-202 motor, DS 10472 31 Connections of Armature and Field Winding for GE-203 A and GE 226 railway motors. DS23869. 32 Connections of Armature and Field Winding for GE-241 motors - K1629077 33 Connections of Armature and Field Winding for CP25A Air compressor 34 Connections of Armature and Field Winding for CP27A Air compressor 35 Connections of Armature and Field Winding for GE-258 and GE 264 railway motors. K1629343. 36A- Dimensions of Type K-63-BR Railway Controller Equipment 36 US-13-E Trolley Base for Railway Service - 3/1/1923, 64823 - 2 pages 37 Copy of M&MTB (Eastern System) Certificate of Competency as Motorman. 38 Photocopies of a series of four photos of 22E trucks under an SEC tramcar. For scan see btm780d4 (40 pages) 39 Sprague G-E Multiple Unit Control, Type PC, Instruction Book 84772 - Oct. 1922 - 40 Pages. Images of sheets added 2-11-15 trams, tramways, general electric, motors, controllers, trolley pole bases -
 Geelong Football Club
Geelong Cats Print 1990s players Sholl, Brad: Snell, Jason: Kilpatrick, Glenn: Hocking, Garry: Pickering, Liam: Riccardi, Peter: Colbert, Leigh: McGrath, Tim: Stoneham, Barry: Mansfield, Michae
Brad ‘Nails’ Sholl Born: 10/11/1972 From: Geelong College via North Melb Height: 184cm Weight: 84kg Natural kicking foot: Right Guernsey number: 12 First senior match for Geelong: Round 1, 1995 v Melbourne at Kardinia Park The attacking small defender delighted fans with his adventurous attacks on the ball and dashes out of the danger area. He was an excellent mark for his size and lacked nothing in courage and determination. His ability to rush to space to create a viable target for a team-mate was another of his trademarks. Occasionally, he was moved forward with success, where he took great delight in booting important goals. Total Brownlow Medal votes for Geelong: 54 Runner-up in club B&F count: 1996 Fourth in club B&F count: 1997, 1998, 2000 Fifth in club B&F count: 1995 Seventh in club B&F count: 1999 GFC Hall of Fame inductee (2002) GFC Life Membership (2001) Career span for Geelong: 1995-2002 Total matches for Geelong: Premiership 169, Night/Pre-Season Series 12, Interstate 1 Total goals for Geelong: Premiership 46, Night/Pre-Season Series 5, Interstate 0 Finals matches for Geelong: 7 Finals goals for Geelong: 0 Last senior match for Geelong: Round 19, 2002 v St Kilda at Docklands Stadium Jason Snell Born: 27/07/1977 From: Upwey-Tecoma/Eastern U18 Height: 181cm Weight: 81kg Natural kicking foot: Right Guernsey numbers: 25 (1996-97) & 4 (1998-2001) First senior match: Round 1, 1996 v Melbourne at the MCG The courageous mid-fielder/small forward possessed sound skills and an excellent football brain. Opposition coaches experienced difficulty in finding suitable match-up opponents to counter him. In a match at Kardinia Park against Port Adelaide in 1997 he scored a match-winning five goals after spending the first half on the bench. He won the club most improved player award in 1999. Tragically, a shocking leg injury sustained at the MCG prematurely terminated his highly promising career. Total Brownlow Medal votes: 5 Career span: 1996-2001 Total matches: Premiership 68, Night/Pre-Season Series 8 Total goals: Premiership 62, Night/Pre-Season Series 3 Finals matches: 3 Finals goals: 1 Last senior match: Round 3, 2001 v Melbourne at the MCG Glenn ‘Killer’ Kilpatrick Born: 29/08/1972 From: Studfield via North Melb Reserves, West Adelaide (SA) & Essendon Height: 184cm Weight: 85kg Natural kicking foot: Right Guernsey number: 13 First senior match for Geelong: Round 5, 1996 v Richmond at Kardinia Park No-one could accuse the dogged half-back flanker and mid-fielder of not giving his all in every match that he played. He used courage and determination to win the ball, negate an opponent or block for a team-mate. Often, his repeated efforts would inspire his fellow Cats. Although effective disposal by foot did not come easy for him, he worked hard on the training track to improve. Total Brownlow Medal votes for Geelong: 27 Runner-up in club B&F count: 1997 Seventh in club B&F count: 2000 Eighth in club B&F count: 1999 (equal) Career span for Geelong: 1996-2002 Total matches for Geelong: Premiership 120, Night/Pre-Season Series 12 Total goals for Geelong: Premiership 31, Night/Pre-Season Series 1 Finals matches for Geelong: 3 Finals goals for Geelong: 0 Last senior match for Geelong: Round 20, 2002 v Fremantle at Subiaco Garry ‘Buddha’ Hocking Born: 08/10/1968 From: Cobram Height: 182cm Weight: 84kg Natural kicking foot: Right Guernsey numbers: 51 (1987) & 32 (1988-2001) First senior match: Round 3, 1987 v Melbourne at Kardinia Park As one of football’s genuine tough and skilful performers, he gave the Cats magnificent service. Undoubtedly, he became one of the code’s all-time greats. His ability to make perfect position, fix eyes on the ball at all costs, seize the ball in packs, mark with vice-like fingers and dispose by hand and foot on either side of his body to bring team-mates into the play made him a nightmare opponent. He delighted in applying gorilla-like tackles and bone-shattering bumps to open up opportunities for his allies. During the last few seasons of his career a severely damaged knee saw him ignore agonizing pain to continue to contribute. He just loved footy! Total Brownlow Medal votes: 133 Captain: 21 matches (1994-95; 1999) Third in Brownlow Medal count: 1991, 1994 Club Best & Fairest: 1991, 1993, 1994, 1996 Runner-up in club B&F count: 1990, 1998 Sixth in club B&F count: 1989, 2000 Seventh in club B&F count: 1997 Ninth in club B&F count: 1995 Tenth in club B&F count: 1992 All Australian selection: 1991, 1993, 1994, 1996 GFC Team of the Century selection (ruck-rover) GFC Hall of Fame inductee (2002) GFC Hall of Fame Legend GFC Life Membership (1995) Career span: 1987-2001 Total matches: Premiership 274, Night/Pre-Season Series 19, Interstate 8 Total goals: Premiership 243, Night/Pre-Season Series 6, Interstate 10 Finals matches: 21 Finals goals: 21 Last senior match: Round 22, 2001 v Carlton at Princes Park Liam Pickering Born: 09/09/1968 From: Stawell via North Melb Height: 184cm Weight: 85kg Natural kicking foot: Right Guernsey number: 23 First senior match for Geelong: Round 3, 1993 v North Melb at Kardinia Park After being unable to command regular senior selection with the Kangaroos, the dogged mid-fielder quickly gained the respect of Geelong coaching staff and team-mates with his faultless reading of the play and ability to bring others into the game. Although not fleet of foot, he was capable of instant decision-making and quick, accurate disposal. He knew how to restrict talented opponents with disciplined manning-up, while having a positive influence on play himself. A series of injuries terminated his career prematurely. Total Brownlow Medal votes for Geelong: 12 Captain: 3 matches (1996-97) Club Best & Fairest: 1997 Third in club B&F count: 1995 Eighth in club B&F count: 1994 Career span for Geelong: 1993-99 Total matches for Geelong: Premiership 102, Night/Pre-Season Series 3, Interstate 1 Total goals for Geelong: Premiership 46, Night/Pre-Season Series 1, Interstate 0 Finals matches for Geelong: 9 Finals goals for Geelong: 8 Last senior match for Geelong: Round 20, 1999 v Carlton at the MCG Peter Riccardi Born: 17/12/1972 From: West St Peters Height: 183cm Weight: 89kg Natural kicking foot: Left Guernsey number: 15 First senior match: Round 4, 1992 v West Coast at Subiaco Few players with more natural pace have represented the club. He is a crisp ball-handler, a safe mark and a long raking left-foot kick. Many of his goals have been registered in spectacular fashion from a long way out, on the run. His versatility as a mid-fielder/forward has been a valuable asset. In recent season he has improved his team-play by improving his tackling and chasing techniques. Total Brownlow Medal votes: 60 Club Best & Fairest: 1998 Runner-up in club B&F count: 1999 Third in club B&F count: 2002 Fifth in club B&F count: 1996 Sixth in club B&F count: 1995 Ninth in club B&F count: 2000 GFC Hall of Fame inductee (2002) GFC Life Membership (1999) Career span: 1992-2006 Total matches: Premiership 288, Night/Pre-Season Series 26, Interstate 2 Total goals: Premiership 286, Night/Pre-Season Series 24, Interstate 1 Finals matches: 19 Finals goals: 13 Last senior match: Round 19, 2006 v St Kilda at Docklands Stadium Leigh ‘Spider’ Colbert Born: 07/06/1975 From: Golden Square Height: 192cm Weight: 92kg Natural kicking foot: Right Guernsey numbers: 35 (1993) & 2 (1994-98) First senior match for Geelong: Round 7, 1993 v West Coast at Kardinia Park Although not strongly built, he was a fearless competitor who performed well at centre half-back. His versatility allowed him to be effective anywhere on the field. Reliable marking, sure ball handling and accurate disposals were features of his play. In 1999 he was appointed captain but a serious knee injury sustained in a pre-season practice match caused him to miss that season. He left the club in controversial circumstances. Total Brownlow Medal votes for Geelong: 10 Captain: 3 matches (1998) Third in club B&F count: 1996 Fifth in club B&F count: 1997 Sixth in club B&F count: 1998 Career span for Geelong: 1993-98 Total matches for Geelong: Premiership 105, Night/Pre-Season Series 7, Interstate 3 Total goals for Geelong: Premiership 50, Night/Pre-Season Series 3, Interstate 1 Finals matches for Geelong: 10 Finals goals for Geelong: 4 Last senior match for Geelong: Round 22, 1998 v Essendon at the MCG Transferred to North Melb in 2000 Tim ‘Bluey’ McGrath Born: 07/10/1970 From: North Dandenong via North Melb Height: 190cm Weight: 94kg Natural kicking foot: Right Guernsey number: 17 First senior match for Geelong: Round 1, 1992 v Hawthorn at Waverley Park He has been one of several players recruited from the Kangaroos to give the club excellent service. His first match for the Cats was a hectic one at full-back opposed to a rampant Jason Dunstall. The selectors showed faith in the strong red-headed defender and he rewarded them with a long string of highly serviceable performances. His determination, safe marking, sound defensive skills and leadership qualities were great assets. Often, he was able to outpoint champion opponents. Around the club he was a valuable role-model with his general attitude. Total Brownlow Medal votes for Geelong: 26 Captain: 8 matches (1999) Runner-up in club B&F count: 1998 Third in club B&F count: 1993, 1999 Seventh in club B&F count: 1998 Eighth in club B&F count: 1995, 1997 Ninth in club B&F count: 2001 Tenth in club B&F count: 1996 GFC Hall of Fame inductee (2002) GFC Life Membership (1998) Career span for Geelong: 1992-2002 Total matches for Geelong: Premiership 219, Night/Pre-Season Series 15, Interstate 1 Total goals for Geelong: Premiership 18, Night/Pre-Season Series 3, Interstate 0 Finals matches for Geelong: 14 Finals goals for Geelong: 1 Last senior match for Geelong: Round 2, 2002 v Adelaide at Football Park Barry Stoneham Born: 09/02/1968 From: St Josephs (VCFL) Height: 194cm Weight: 98kg Natural kicking foot: Right Guernsey numbers: 53 (R 6, 1986) & 26 (R 7, 1986-2000) First senior match: Round 6, 1986 v Footscray at Kardinia Park A fanatical Geelong supporter all his life, the determined big man was in his element at centre half-forward. Excellent positioning, agility, magnificent marking, a mean streak and endless determination were his trademarks. He was able to bring crumbing team-mates into the play and score goals regularly. He was sufficiently versatile to play successfully in any key position or as a relief ruckman. Tragically, in 1994 a badly broken leg severely restricted his mobility and kicking power. Despite such restrictions, he retained his effectiveness by developing additional team skills. Total Brownlow Medal votes: 21 Captain: 59 matches (1991-93; 1996-98) Club Best & Fairest: 1990 Runner-up in club B&F count: 1989 Third in club B&F count: 1992 Fourth in club B&F count: 1991, 1993 Tenth in club B&F count: 1997, 1999 All Australian selection: 1989, 1992 GFC Hall of Fame inductee (2002) GFC Life Membership (1994) Career span: 1986-94; 1996-2000 Total matches: Premiership 241, Night/Pre-Season Series 21, Interstate 7 Total goals: Premiership 223, Night/Pre-Season Series 14, Interstate 2 Finals matches: 15 Finals goals: 14 Last senior match: First Elimination Final, 2000 v Hawthorn at Docklands Stadium Michael Mansfield Born: 08/08/1971 From: St Josephs (VCFL) Height: 183cm Weight: 85kg Natural kicking foot: Left Guernsey numbers: 49 (1990) & 21 (1991-99) First senior match for Geelong: Round 18, 1990 v Essendon at Kardinia Park The well-balanced performer played mostly as an attacking half-back flanker but was capable of being used effectively on the forward line. His exceptional strength, reliable marking and considerable mobility made him a difficult opponent who did not lack courage. His performances in finals matches were outstanding. Total Brownlow Medal votes for Geelong: 28 Captain: 9 matches (1997-99) Third in club B&F count: 1994, 1997 Fourth in club B&F count: 1995 Sixth in club B&F count: 1996 Eighth in club B&F count: 1998 GFC Hall of Fame inductee (2002) GFC Life Membership (1998) Career span for Geelong: 1990-99 Total matches for Geelong: Premiership 181, Night/Pre-Season Series 10, Interstate 4 Total goals for Geelong: Premiership 100, Night/Pre-Season Series 0, Interstate 1 Finals matches for Geelong: 15 Finals goals for Geelong: 9 Last senior match for Geelong: Round 22, 1999 v Fremantle at Kardinia Park Transferred to Carlton in 2000 Historical information provided by GFC Historian Col Hutchinson The print consists of ten player photographs and a Geelong Cat Mascot in the top centre of the print with the words - GEELONG/CATS - below the picture. In the top left are action photographs of Sholl and Snell. In the top right corner are action photographs of Kilpatrick and Hocking. Along the bottom of the print from left to right are action photographs of Pickering, Riccardi, Colbert, McGrath, Stoneham and Mansfield. Each photograph has the player's surname in white text in the bottom left hand corner. Has a wire along the back for hanging. 1990s players Sholl, Brad: Snell, Jason: Kilpatrick, Glenn: Hocking, Garry: Pickering, Liam: Riccardi, Peter: Colbert, Leigh: McGrath, Tim: Stoneham, Barry: Mansfield, Michael. -
 Melbourne Tram Museum
Album - Photographs - Comeng Dandenong, 1980s - 1990s
In March 2024, Milissa Box (DTP) was at a trash and treasure market. She'd found a $5 photo album for sale with some photos that she thought might be of interest… From what I can gather it belonged to the gentleman pictured who was a worker at Dandenong in the Comeng and ABB eras. He appears to have worked on the Z3, A1/A2, B1/B2 class trams, Hong Kong LRVs, Comeng Melbourne suburban trains, and later the extra Victorian-purchased XP power cars and XAM sleepers to enable the Riverina XPT to be extended to Melbourne. It's clear he was very proud of the vehicles he'd helped to build. I have scanned a selection of the images, which appear to be a mix of official builder's portraits, team photos, and self-taken shots showing candid everyday scenes on the shop floor. There are also images of the launch of the XP power cars with then-Victorian Premier Joan Kirner; and some personal visits to see the Flying Scotsman, Victorian Goldfields Railway, Coal Creek, etc. Filename Description Date Comeng Scans 2024-03-05 0001 Three Comeng workers (including the photographer) stand in front of Comeng suburban train 697M (Chopper unit) c. June-July 1989 Comeng Scans 2024-03-05 0002 Three Comeng workers (including the photographer) stand in front of Comeng suburban train 697M (Chopper unit) c. June-July 1989 Comeng Scans 2024-03-05 0003 Hong Kong Light Rail Phase 1 LRV 1013 being lifted onto its transport loader c. 1987-88 Comeng Scans 2024-03-05 0004 Walter Wright transport truck (Mack) waits to draw a heavy transport platform out of a shed at Comeng Dandenong. Hong Kong Phase I LRV (1024) can be seen inside the shed c. 1988 Comeng Scans 2024-03-05 0005 Hong Kong Light Rail Phase 1 LRV 1013 on its transport loader in a shed at Comeng Dandenong ready for transport c. 1988 Comeng Scans 2024-03-05 0006 Hong Kong Light Rail Phase 1 LRV 1013 on its transport loader in a shed at Comeng Dandenong ready for transport c. 1988 Comeng Scans 2024-03-05 0007 The photographer is pictured fitting components to the cab of a Phase I Hong Kong LRV No 1026 c. 1988 Comeng Scans 2024-03-05 0008 Hong Kong Light Rail Phase 1 LRV 1013 on its transport loader at Comeng Dandenong ready for transport c. 1988 Comeng Scans 2024-03-05 0009 Hong Kong Light Rail Phase 1 LRV 1013 on its transport loader at Comeng Dandenong ready for transport c. 1988 Comeng Scans 2024-03-05 0010 Hong Kong Light Rail Phase 1 LRV 1013 on its transport loader at Comeng Dandenong ready for transport c. 1988 Comeng Scans 2024-03-05 0011 The photographer and a colleague are pictured in the car park posing for a photo at Comeng Dandenong c. 1988 Comeng Scans 2024-03-05 0012 The photographer and a colleague are pictured inside the cab of Comeng suburban train 697M, posing for a photo at Comeng Dandenong c. 1989 Comeng Scans 2024-03-05 0013 A stainless steel Hitachi train bodyshell is being transported on a truck-trailer. Possibly taken at Martin and King in Bayswater, under transport to the station for railing to Somerton for fitout. This is a later series M car with the rear-mounted pantograph (note the mounting lugs above the non-driving end) c. 1980 Comeng Scans 2024-03-05 0014 A shot at Comeng Dandenong of the onsite workforce standing in front of a Phase I Hong Kong LRV. c.1987-88 Comeng Scans 2024-03-05 0015 A shot at Comeng Dandenong of the onsite workforce standing in front of a Phase I Hong Kong LRV. c.1987-88 Comeng Scans 2024-03-05 0016 Hong Kong Light Rail Phase 1 LRV 1038 on its transport loader at Port of Melbourne ready for transport c. 1988 Comeng Scans 2024-03-05 0017 Three Comeng workers (including the photographer) stand in front of a workbench at Comeng Dandenong c. June-July 1989 Comeng Scans 2024-03-05 0018 A newly completed Comeng train (wearing VicRail teacup orange) on the factory access track at Comeng Dandenong c. 1981 Comeng Scans 2024-03-05 0019 A newly completed Z3 class tram on a transporter, with its bogie frames waiting transport to Preston Workshops for final fitout and commissioning c. 1981 Comeng Scans 2024-03-05 0020 A newly completed Comeng train (wearing VicRail teacup orange) on the factory access track at Comeng Dandenong c. 1981 Comeng Scans 2024-03-05 0021 A newly completed Z3 class tram on a transporter, with its bogie frames waiting transport to Preston Workshops for final fitout and commissioning c. 1981 Comeng Scans 2024-03-05 0022 A Comeng/ABB artist impression presumably part of their bid for the Double Decker demonstrator train for Melbourne. Note the similarity to similar Comeng sets constructed for Sydney. c. Nov 1989 – April 1990 Comeng Scans 2024-03-05 0023 Victorian Railways steam locomotive K 169 on static display at Coal Creek. c. 1980s Comeng Scans 2024-03-05 0024 Comeng suburban train carriage 1190T on a traverser in the yard at Comeng Dandenong. c. June-July 1989 Comeng Scans 2024-03-05 0025 Comeng suburban train carriages the yard at Comeng Dandenong. c. June-July 1989 Comeng Scans 2024-03-05 0026 Comeng suburban train carriages the yard at Comeng Dandenong. c. June-July 1989 Comeng Scans 2024-03-05 0027 Comeng suburban train carriages the yard at Comeng Dandenong. c. June-July 1989 Comeng Scans 2024-03-05 0028 Comeng suburban train carriages the yard at Comeng Dandenong. c. June-July 1989 Comeng Scans 2024-03-05 0029 Comeng suburban train in a shed at Comeng Dandenong. c. June-July 1989 Comeng Scans 2024-03-05 0030 Comeng suburban train carriage 1190T on a traverser in the yard at Comeng Dandenong – possible Factory Acceptance Inspection by the Met c. June-July 1989 Comeng Scans 2024-03-05 0031 Comeng suburban train carriage 1190T being tractor-shunted in the yard at Comeng Dandenong – possible Factory Acceptance Inspection by the Met c. June-July 1989 Comeng Scans 2024-03-05 0032 Two Comeng workers carry a train part (possibly a first aid kit) for fitting to a Comeng suburban train. c. June-July 1989 Comeng Scans 2024-03-05 0033 Comeng suburban train carriage 1190T on a traverser in the yard at Comeng Dandenong – possible Factory Acceptance Inspection by the Met. One of the Met staff appears to be giving one of the Comeng workers a kiss on the cheek. c. June-July 1989 Comeng Scans 2024-03-05 0034 A B2 Class tram is on a low-loader multiwheel transport trailer waiting transport to Preston Workshops; while what appears to be a classic AP6 Valiant Safari Wagon is in the foreground. c. June-July 1989 Comeng Scans 2024-03-05 0035 A B2 Class tram is on a low-loader multiwheel transport trailer waiting transport to Preston Workshops; while a worker poses for a photo with his hand on the rigging. c. June-July 1989 Comeng Scans 2024-03-05 0036 A B2 Class tram is on a low-loader multiwheel transport trailer waiting transport to Preston Workshops; An HT Holden Belmont sedan has been posed in front to appear as if it is towing the heavy vehicle. c. June-July 1989 Comeng Scans 2024-03-05 0037 A B2 Class tram is on a low-loader multiwheel transport trailer waiting transport to Preston Workshops; An HT Holden Belmont sedan has been posed in front to appear as if it is towing the heavy vehicle. c. June-July 1989 Comeng Scans 2024-03-05 0038 A1 Class tram 232 is pictured up on stands while various A/B class tram cab frames are in the foreground in various stages of assembly. Of note, 232 appears to have been returned to Dandenong for major repair or other work, and shows signs of having been in traffic for some time (weathering and wear) c. June-July 1989 Comeng Scans 2024-03-05 0039 various A/B class tram cab frames are in the foreground in various stages of assembly. c. June-July 1989 Comeng Scans 2024-03-05 0040 A group of Comeng Dandenong workers stopped on a tea break. c. June-July 1989 Comeng Scans 2024-03-05 0041 An A/B Class tram cab being fitted out with electronics and controls. c. June-July 1989 Comeng Scans 2024-03-05 0042 A new Comeng suburban train in Metropolitan Transit livery on the test track at Comeng Dandenong. c. mid 1980s Comeng Scans 2024-03-05 0043 A new Comeng suburban train in Metropolitan Transit livery on the test track at Comeng Dandenong. c. mid 1980s Comeng Scans 2024-03-05 0044 Interior shot of a new Comeng suburban train at Comeng Dandenong. c. mid 1980s Comeng Scans 2024-03-05 0045 Interior shot of a new Comeng suburban train at Comeng Dandenong. c. mid 1980s Comeng Scans 2024-03-05 0046 The exterior sign at Dandenong showing ABB brand. Early 1990s Comeng Scans 2024-03-05 0047 A B2 Class tram is on a low-loader multiwheel transport trailer waiting transport to Preston Workshops. Early 1990s Comeng Scans 2024-03-05 0048 The Brush generator and Paxman Valenta engine as fitted inside a new XP power car for NSW Countrylink (paid for by Victoria) c. 1992 Comeng Scans 2024-03-05 0049 An exterior shot of a new Countrylink XP power car for NSW under construction (paid for by Victoria) c. 1992 Comeng Scans 2024-03-05 0050 Two new XAM class XPT sleeper carriages under construction at Comeng Dandenong c. 1992 Comeng Scans 2024-03-05 0051 A B2 class tram under construction at Comeng Dandenong Early 1990s Comeng Scans 2024-03-05 0052 A B2 class tram under construction at Comeng Dandenong Early 1990s Comeng Scans 2024-03-05 0053 An exterior shot of a new Countrylink XP power car for NSW being moved out of the shed c. 1992 Comeng Scans 2024-03-05 0054 An exterior shot of a new Countrylink XP power car at Comeng Dandenong c. 1992 Comeng Scans 2024-03-05 0055 An exterior shot of a new Countrylink XP power car at Comeng Dandenong c. 1992 Comeng Scans 2024-03-05 0056 An exterior shot of a new Countrylink XP power car at Comeng Dandenong c. 1992 Comeng Scans 2024-03-05 0057 B2 class trams under construction at Comeng Dandenong Early 1990s Comeng Scans 2024-03-05 0058 An XP Powercar from NSW wearing the Intercity XPT Candy Livery at Comeng Dandenong. It is not known if this was originally painted in this livery (incorrectly) or if this was one of the first delivered series transported to Dandenong to aid the construction process of the four additional locomotives. Early 1990s Comeng Scans 2024-03-05 0059 Melbourne B2 Class tram B2.2100 (renumbered from 2102) painted in the distinctive Chocolate and Cream livery to mark the completion of 100 B2 class trams Early 1990s Comeng Scans 2024-03-05 0060 A factory forklift wearing a hand painted “We love Labo(u)r” cardboard sign, possibly in connection to a media event with the Victorian Premier onsite at Comeng Dandenong. c. 1992 Comeng Scans 2024-03-05 0061 An exterior shot of a new Countrylink XP power car at Comeng Dandenong c. 1992 Comeng Scans 2024-03-05 0062 Two new new Countrylink XP power cars under construction and final fitout at Comeng Dandenong c. 1992 Comeng Scans 2024-03-05 0063 An exterior shot of a new Countrylink XP power car on the traverser at Comeng Dandenong c. 1992 Comeng Scans 2024-03-05 0064 A B2 Class tram is on a low-loader multiwheel transport trailer waiting transport to Preston Workshops. A large banner is draped on the side explaining that this is the 106th vehicle delivered to the Public Transport Corporation (B2.2108). c. Oct 1992 (based on delivery date) Comeng Scans 2024-03-05 0065 Victorian Premier Joan Kirner addresses a group of dignitaries in front of an ABB banner inside the main administration building at Dandenong, on the occasion of the first XPT power car purchased by Victoria being unveiled at a media event c. 1992 Comeng Scans 2024-03-05 0066 An ABB executive addresses a group of dignitaries in front of an ABB banner inside the main administration building at Dandenong, on the occasion of the first XPT power car purchased by Victoria being unveiled at a media event c. 1992 Comeng Scans 2024-03-05 0067 Victorian Premier Joan Kirner addresses the media in front of a completed XP class XPT power car at Dandenong, on the occasion of the first XPT power car purchased by Victoria being unveiled at a media event c. 1992 Comeng Scans 2024-03-05 0068 An exterior shot of a new Countrylink XP power car at Comeng Dandenong c. 1992 Comeng Scans 2024-03-05 0069 A Melbourne B2 class tram undergoing testing on the test circuit at ABB Dandenong c. early 1990s Comeng Scans 2024-03-05 0070 An XPlorer type DMU emerges from a shed at ABB Dandenong c.1994 Comeng Scans 2024-03-05 0071 Voith final drive axle mounted units for XPlorer railcars waiting to be fitted at Dandenong. c.1994 Comeng Scans 2024-03-05 0072 A completed XAM class sleeper carriage at ABB Dandenong. c.1993 Comeng Scans 2024-03-05 0073 Completed XPlorer railcars wait transfer to South Dynon for bogie exchange and transfer to NSW at ABB Dandenong. c. 1994 Comeng Scans 2024-03-05 0074 A clipping from an ABB internal newsletter outlining the staff-led initiative to commemorate the 100th B2 class tram with a special livery c.1992 Has photographs of ABB, Steamrail tours, Castlemaine and Maldon Railway, Fying Scotsman 4472 visit and Puffing Billy.Yields information about the people and events at Commonwealth Engineering plant Dandenong and the activities of the unknown compiler.Album containing 40 leaves, photos in a heavy card 3 ring spring binder.comeng, commonwealth engineering co., tramcars, hong kong, nsw, sydney, melbourne, railways, the met, b class, cmr, steam engines, abb, asea brown boveri -
 Ballarat Tramway Museum
Album - Postcards & Photographs - Vic Solomons and others - Australian Tramways, Vic Solomons, 2023
Contains 184 images of postcards and photographs collected primarily by Vic Solomons of Sydney, with others from the collection of Wal Jack and Warren Doubleday. Covers almost all of Australia's tramway systems. 1 Post Card Hay St Perth Looking East No 3 Unknown Perth 2 Post Card Cars 30 & 90 both on Route 19 pass in Barrack St looking South Perth WA 1935.02.18 Perth 3 Post Card Hay St Looking East Perth WA Unknown Perth 4 Post Card William St Perth WA Unknown Perth 5 Post Card Perth from Shaftsbury Hotel Unknown Perth 6 Post Card Hay St Perth WA Looking East Unknown Perth 7 Post Card Barrack St Perth Unknown Perth 8 Post Card Murray Views No 3 High St Showing Town Hall Fremantle WA Unknown Fremantle 9 Post Card High St Fremantle WA Unknown Fremantle 10 Post Card View of Bolder City Golden Mile in the Background (Section No 1) 1908.08.20 Kalgoolie 11 Post Card Hannan St Kalgoolie 1900.08.19 Kalgoolie 12 Post Card Hannan St Kalgoolie WA (No 2) Unknown Kalgoolie 13 Post Card Intersection Hannan & Maritana Sts Kalgoolie WA Unknown Kalgoolie 14 Post Card Hannan St Kalgoolie Unknown Kalgoolie 15 Post Card Lane Street Bolder City Unknown Kalgoolie 16 Post Card Hobart Double Deck Tram Unknown Hobart 17 Post Card Macquarie St Hobart Unknown Hobart 18 Photo Liverpool Street Hobart Unknown Hobart 19 Photo Hobart 21 Unknown Hobart 20 Photo Hobart 14 in Elizabeth St Hobart Unknown Hobart 21 Post Card Macquarie St Hobart Unknown Hobart 22 Post Card Macquarie St Hobart Tas Unknown Hobart 23 Photo Double Decker Tram 3 at G.P.O. Hobart Tas No 31 Unknown Hobart 24 Post Card Double Decker Tram 19 Hobart Tas A B Series No 24 Unknown Hobart 25 Photo Hobart Municipal Tramways Tas No 95 Unknown Hobart 26 Post Card Elizabeth St Hobart Unknown Hobart 27 Post Card Elizabeth St Hobart Unknown Hobart 28 Post Card Elizabeth St Hobart Unknown Hobart 29 Post Card Elizabeth St Hobart Tas Unknown Hobart 30 Post Card HMT 21 with crew at Beach Road Terminus Unknown Hobart 31 Post Card HMT 9 & another with crew at Beach Road Terminus. Front cover photo of Destination GPO 1921.01.00 Hobart 32 Post Card Cascade Road and Mount Wellington Hobart Unknown Hobart 33 Post Card Elizabeth St Hobart Unknown Hobart 34 Post Card Elizabeth St Hobart Unknown Hobart 35 Post Card Elizabeth St Hobart 1915.04.07 Hobart 36 Post Card Macquarie St Hobart Tas Unknown Hobart 37 Post Card Macquarie St showing Post Office Hobart 1908.03.12 Hobart 38 Post Card Hobart Municipal Tramways 21 Unknown Hobart 39 Post Card Elizabeth St Hobart Tas Unknown Hobart 40 Post Card Liverpool Street Hobart Unknown Hobart 41 Post Card Electric Tram Launceston Tas 446 W J Little Photo 1919.02.08 Launbceston 42 Post Card Launceston Tram no 3 1911.08.30 Launbceston 43 Post Card Launceston Tram no 3 passes tram No 1 Unknown Launbceston 44 Post Card Tram 6 at Trevallyn a popular suburb Launceston Tasmania Unknown Launbceston 45 Post Card Tram 7 at Trevallyn Road Terminus Launceston Tasmania Unknown Launbceston 46 Post Card Tram 4 in Brisbane St Launceston Unknown Launbceston 47 Post Card Tram 9 in Brisbane St Launceston Tasmania Unknown Launbceston 48 Post Card Camerom Street Launceston Tasmania Unknown Launbceston 49 Post Card Murray Views No 15 Jetty Road Glenelg Terminus 1962-02-08 Adelaide 50 Post Card Bay Tram at Jetty Road Terminus Glenelg SA Unknown Adelaide 51 Post Card Tram 3 in King William Street Adelaide S Aust Unknown Adelaide 52 Post Card Valentine Series No 3065 The Old Horse Tram Victor Harbour Unknown Victor Harbour 53 Post Card Bourke Street Melbourne with Cable Car Looking East 1904.04.25 Melbourne 54 Post Card Opening of New Electric Tramway Elsternwick 1913-11-13 Melbourne 55 Post Card Cable trams in Clarendon St Sth Melb Unknown Melbourne 56 Post Card Pall Mall from Charing Cross Bendigo Unknown Bendigo 57 Post Card Tram 4 & 7 pass at The Fountain and Mitchell Street Bendigo Vic Rose Series P 3198 Unknown Bendigo 58 Post Card M&MTB 133 at Charing Cross bound for Eaglehawk Bendigo Vic Murray Views No 45 Unknown Bendigo 59 Post Card Pall Mall Bendigo Vic Unknown Bendigo 60 Post Card Charing Cross & Mitchell St Bendigo Trams passing 1919.00.00 Bendigo 61 Post Card Pall Mall Looking East Unknown Bendigo 62 Post Card Electric Trams and City Hotel Bendigo Vic Unknown Bendigo 63 Post Card Moorabool Street Geelong V 23 Unknown Geelong 64 Post Card Murray Views No 3 Moorabool Street Geelong Vic Unknown Geelong 65 Post Card The Rose Series P 2487 Ryrie Street Geelong Vic Unknown Geelong 66 Post Card Southern Cross Series 2696 Ryrie Stret Geelong Vic Unknown Geelong 67 Post Card The Rose Series P 1490 Ryrie Street Geelong Vic 1920-03-04 Geelong 68 Post Card Valentine Series No 1568 Lower Sturt Street Ballarat Unknown Ballarat 69 Post Card Rose Series P 1710 Sturt Street Ballarat Victoria Unknown Ballarat 70 Post Card Sturt Street Ballarat Victoria Unknown Ballarat 71 Post Card Horse Tram In Sturt Street Ballarat 1905.11.10 Ballarat 72 Post Card Sturt Street Ballarat Looking North-West Unknown Ballarat 73 Post Card Shoppes Square Sturt Street Ballarat Looking North Unknown Ballarat 74 Post Card Junction Sturt and Lydiard Streets Ballarat 1909-09-01 Ballarat 75 Post Card The Electric Supply Co Souvenir Tram Ticket No 3085of the opening of Electric System August 18 1905 1905.08.18 Ballarat 76 Post Card Sturt Street Ballarat Victoria 1907.11.25 Ballarat 77 Post Card Off to the Gardens Electric Tram Ballarat Unknown Ballarat 78 Post Card Sturt Street Ballarat 1907.04.16 Ballarat 79 Post Card Sturt Street Ballarat Looking East Electric tram with Double Deck Trailer 1911.04.17 Ballarat 80 Post Card Sturt Street Ballarat Looking East Unknown Ballarat 81 Post Card Sturt Street Ballarat Looking West 1911.03.01 Ballarat 82 Post Card Town Hall and Sturt Street Ballarat Unknown Ballarat 83 Post Card Lydiard Street Ballarat 1906.11.23 Ballarat 84 Post Card Looking North along Adelaide Street from George Street Brisbane Sidues Series No 764 Unknown Brisbane 85 Post Card Looking South along Queen Street from the Creek Street Intersection Brisbane Qld Sirues Series No 1379 Unknown Brisbane 86 Post Card George Street from near Supreme Court Brisbane Unknown Brisbane 87 Post Card Queen and Eagle Streets Brisbane 1907.07.04 Brisbane 88 Post Card Queen Street showing His Majesty’s Theatre Brisbane Unknown Brisbane 89 Post Card Queen Street Treasury Building 1908.01.20 Brisbane 90 Post Card G P O and Queen Street Brisbane Unknown Brisbane 91 Post Card Queen Street Brisbane Looking from Wharf Street Unknown Brisbane 92 Post Card Customs House Brisbane 1905.02.16 Brisbane 93 Post Card Queen St Brisbane 1905.09.16 Brisbane 94 Post Card Queen St Brisbane 1907.11.19 Brisbane 95 Post Card Treasury Buildings Brisbane Unknown Brisbane 96 Post Card Queen and Eagle Streets Brisbane Unknown Brisbane 97 Post Card The Valley Corner Brisbane Unknown Brisbane 98 Post Card Brisbane Queen Street opposite General Post Office Unknown Brisbane 99 Post Card North Quay and Milton Beach Brisbane Q Unknown Brisbane 100 Post Card Victoria Bridge Brisbane South Side 1907.08.14 Brisbane 101 Post Card Victoria Bridge Brisbane Unknown Brisbane 102 Post Card Breakfast Creek Bridge Brisbane Q Unknown Brisbane 103 Post Card Melbourne Street Station South Brisbane Queensland Unknown Brisbane 104 Post Card General Post Office Queen Street Brisbane 1955.09.23 Brisbane 105 Post Card Customs House Brisbane 1904.11.04 Brisbane 106 Post Card Queen St Brisbane 1919.11.00 Brisbane 107 Post Card Queen St Brisbane Sidues Series No 627 Unknown Brisbane 108 Post Card Creek Street Brisbane Queensland Unknown Brisbane 109 Post Card Customs House and Garden Reach Brisbane Queensland 1910.00.08 Brisbane 110 Post Card Queen and Creek Streets Brisbane 1909.06.07 Brisbane 111 Post Card Queensland National Bank andd Queen Street Brisbane Queensland Unknown Brisbane 112 Post Card Queen Street and Treasury Buildings Brisbane 0000.09.07 Brisbane 113 Post Card Queen Street showing “Courier” Buildings Brisbane Unknown Brisbane 114 Post Card Intersection George & Roma Streets Brisbane Q 1916.05.11 Brisbane 115 Post Card Adelaide Street Brisbane Q Unknown Brisbane 116 Post Card G P O Queen Street Brisbane Q Unknown Brisbane 117 Post Card Treasury Building Brisbane 1906.03-20 Brisbane 118 Post Card Queen and Eagle Streets Brisbane 1907.02.01 Brisbane 119 Post Card Queen St Brisbane Unknown Brisbane 120 Post Card Queen St Brisbane Q Unknown Brisbane 121 Post Card Victoria Bridge Brisbane 1906.07.30 Brisbane 122 Post Card An Unusual View showing Head of Queen Street Victoria Bridge & South SideSuburbs Brisbane Q Unknown Brisbane 123 Post Card Petries Bight Brisbane Q Unknown Brisbane 124 Post Card South End Victoria Bridge Brisbane Q Unknown Brisbane 125 Post Card Customs House Brisbane Unknown Brisbane 126 Post Card Photo of toastrack car circa 1910 Unknown Brisbane 127 Post Card Treasury Buildings Brisbane Unknown Brisbane 128 Post Card East Street Rockhampton with Steam Tram & trailer Unknown Rockhampton 129 Post Card Post Office Rockhampton with steam tram Unknown Rockhampton 130 Post Card East Street Rockhampton with Steam Trams Rose Series P 7154 Unknown Rockhampton 131 Post Card William Street Rockhampton Rose Series P 7156 Unknown Rockhampton 132 Post Card Central East Street Rockhampton Q with Steam Trams Unknown Rockhampton 133 Photo Sturt St Ballarat Unknown Ballarat 134 Photo Bridge Street Ballarat Unknown Ballarat 135 Post Card George St Sydney Unknown Sydney 136 Post Card Elizabeth St Sydney Unknown Sydney 137 Post Card Railway Square Unknown Sydney 138 Post Card Sydney Harbor Bridge - pending receipt 139 Post Card Kings Cross - Mowbray Series with description on rear from C Roy G Field Unknown Sydney 140 Post Card Kings Cross - Mowbray Series with description on rear from C Roy G Field Unknown Sydney 141 Post Card Central Railway Station Sydney - Rose Series P6033 1954-01-26 Sydney 142 Post card William Street Darlinghurst looking towards City - Rose Series P6602 unknown Sydney 143 Post Card Circular Quay Sydney - Rose Series P6680 Unknown Sydney 144 Post Card View at Manly NSW - Rose Series B1003 Unknown Sydney 145 Post Card Hunter St Newcastle NSW - Rose Series P7843 Unknown Newcastle 146 Post Card Bank Corner Newcastle NSW - Mowbray Series No. 155 Unknown Newcastle 147 Post Card Hunter St Newcastle NSW Unknown Newcastle 148 Post Card Criterion Hotel Hunter St Newcastle NSW Unknown Newcastle 149 Photo Horse tram at Newtown Station 1894 to 1898 - PTC photo c1894 Newtown 150 Photo Steam tram motor No 3 at Railway Square 1879 1879 Sydney 151 Photo Railway steam tram c1900 with a horse drawn double deck bus c1900 Sydney 152 Photo Steam motor 5A and doubled deck bus Unknown Sydney 153 Photo Steam motor 53A with detail notes on rear 1922 Sydney 154 Photo Cable tram set at Milsons Point ferry terminal c1900 Sydney 155 Photo Early Sydney electric car - Ocean St - Rose Bay Unknown Sydney 156 Photo George St looking souoth c1905 c1905 Sydney 157 Photo Tram 165 at Circular Quay Unknown Sydney 158 Photo Tramcar ferry or transporter at The Spit Unknown Sydney 159 Photo tram 882 George St at Marti Place, 1937 1937 Sydney 160 Photo Tram 826 Railway Sq area Unknown Sydney 161 Photo Railway Sq in background, Broadway with double decker bus and toastrack car late 1930s Sydney 162 Photo Coupled St Pitt St? - photo Ben Parle Feb. 1950 Sydney 163 Photo Electric tram No. 2 - North Sydney with side trolley pole running Unknown Sydney 164 Photo George St - Horden's Corner Unknown Sydney 165 Photo George St at Martin Place c1920 Sydney 166 Photo Castlereagh St Sydney c1928 c1928 Sydney 167 Photo Railway Sqare c1920 c1920 Sydney 168 Photo Darling St Countereweight Unknown Sydney 169 Photo Trolley bus depot Unknown Sydney 170 Photo Trolley bus No. 14 Unknown Sydney 171 Photo Newcastle Railway Station with steam tram - Wharf Road?? Unknown Newcastle 172 Photo High St West Maitland - steam tram Unknown Maitland 173 Photo High St West Maitland - steam tram Unknown Maitland 174 Post Card Argent St near tram terminal Broken Hill NSW c1900 Broken Hill 175 postcard Argent St looking south Broken Hill - with Ken Magor's notes on rear Unknown Broken Hill 176 Photo Toronto - steam tram 61A Unknown Toronto 177 Photo 124A trial run 1911? Sutherland - Cronulla line 1911 Sutherland 178 Photo 103A at a tram stop Unknown Sydney 179 Photo Cable tram set at Crows Nest terminus grip car 12, trailer 22 Unknown Sydney 180 Photo Cable tram Queens Square Sydney 1903 Sydney 181 Photo cars 2078 and 2077 Chatswood late 1950s Sydney 182 Photo car 1877 Balmain area late 1950s Sydney 183 Photo Trolley bus - Rockdale destination Late 1950s Sydney 184 Photo Broken Hill steam tram - motor 18A North Tram Unknown Broken Hill 185 Photo Millars Point Sydney NSW - ferry/tram interchange, unknown Sydney All items imaged including the rear or back where there was writing of information. All files stored on the Museum's Photo Collections directory. Demonstrates through the medium of many images, Australian tramway systems and Ballarat's place in them.Album - heavy card covers, plastic lined with postcard or 6x4 photo sleeves.australia, tramways, postcards, photographs, steam trams, horse trams, cable trams, trolley buses -
4th/19th Prince of Wales's Light Horse Regiment Unit History Room
Photo Albums - set of two, c. 1919
Memorabilia of 908 Dvr Thomas Edward Whyte, 3rd Light Horse Field Ambulance, World War 1 READ THIS. During the last war I sent these pictures home through devious channels. When I lobbed back I found them all pasted in these albums by my young brother Billy. He was only a kid then! Nowadays he is serving up North. Went away with the original 9th Battn. Was in the Blitz on England and served in Libya, Tobruk, Greece, Crete and Palestine and was twice knocked. It's not long since the last upheaval 1914-18 and I wonder if these boys think as we did. This will be the last war? I sincerely hope so. TWSet of two photo albums. Photos pasted into albums with captions in white ink. Photo captions - Vol 1. (? = not legible) 1. Prisoners from ES SALT 2. Dust scene at AUJA FORD. 4th LH BDE 3. ? ? CHEOPS PYRAMID 4. Houses and domain WASSA battle 5 .Pontoon at SERAPELAI 6. SPINX (sic) & PYRAMID 7. The Nile floods occur once yearly and all irrigation centres are alternatively flooded 8. Pontoon bridge over SUEZ Canal at SERAPEUM . Constructed by Aust Engineers 9. The arrival of newspapers and mail 10. Lake IIMSAH-ISMALIA 11. Camp outside Jerusalem. Walls of old city easily discernible 12. Roman walls on beach at MONTAZEH 13. ? ? These boats are used for conveying between steamer & shore 14. Interest shown in the new issue. Through the scarcity of horses Batmen/Grooms and drivers ? allotted donkeys ? ? 15. DAMASCUS GATE JERUSALEM 16. Trumpeter ? 17 Indians making ? for railroad 18. 'SPELLO' Sinai Country 19. Police searching Egyptian labourer 20. Cavalry ?? SHA? 21. Entering ? WADI ? 22. Bedouins at ? 23 No caption 24 No caption 25 Bolar trees EZBEKIEH Gardens CAIRO 26 .Flamingos at NOUZEH Gardens ALEXANDRIA 27 BARAGE 28 KASR-ELNILL Bridge 29 NOUZEH GARDENS 30 AMGS on beach at ? 31 NOUZEH GARDENS - ALEX 32 Mascot of 7th M.V.G. 3RD ALHR 33 Printing on walls inside St Mary's Church. Depicting the Flight from Herod. (Corner torn off photo) 34 Inside Virgin Mary's Church at MATARA 35 ? painting in Church ?? 36 SUEZ Canal. Finish of Arab pony race. ZAL-A-ZIA 37 Admiralty offices at PORT SAID 38 A corner of CHEOP"s PYRAMID 39 The Spinx (sic). Nose was blown off by a shell from one of Napoleon's guns. 40 Monastry on the MT of TEMPTATION 41 Mess orderlies. Foodstuffs in locker given to troops by the AIF 42 Mid day meal on treck 43 Ambulance sand carts for conveying wounded and sick over desert sand 44 3rd ALHB 45 Kaisers Church JERUSALEM. Inside is a large painting figuring the Kaiser & Kaiserine holding a model church. 46 Bedouin women drawing water from well at EL-ARISH 47 2nd ALH BGDE doing route march on JERUSALEM-JERICHO ROAD 48 GEN HODSON GOC Anzac Mounted Divn presenting decorations & investitures on the sands at SHEIKS-ZOWAID 49 Armoured Car 50 Snow at the CEEDERS (sic) on Mt LEBANON 51 Compulsory phenyle bath for all troops in front line area 52 Austrian guns taken at point of bayonet by NZ & 2nd BGDE at GAZA 53 CACHOLETS for carrying wounded 54 The boys found some timber and made a spring board on SUEZ Canal 55 Bedouin wedding. The Bride travels in state amongst rubbish on top of camel. Her father leads conveyance. 56 Australian graves at SHALLAL 57 Camel Transport Company bring rations along beach 58 Billy the mascot holds an offensive & checks advancement 59 Exercising horses at HELMIEH Egypt 60 PONT-DE-QUOBBA Egypt. A suburb of well-to-do Egyptian merchants 61 Demolition stunt at ASLU. Bridge destroyed by Australian Engineers 62 Swimming horses in Great Bitter Lakes Egypt 63 On the move along Wadi 64 On the shores of the Bitter Lakes EL-EGYTE 65 A leave party waiting for the pontoon to swing into position 66 Carting grain 67 Egyptian Brass Band 68 French warboat (sic) in Canal 69 Russian Troops from Mesopotamia passing through SUEZ Canal 70 Prisoners coming in under escort. Turkish & German officers in lead mounted on ponies 71 Turkish prisoners 72 T.B.D in Canal 73 Old trenches on SUEZ CANAL near BITTER LAKES on W Bank 74 Monitor in Canal 75 Block house, trenches & entanglements near Post 62 76 A halt in an Egyptian village EL-MARO' 77 Mobile wireless plant 78 On the road from Canal to Railhead 79 Old Turkish guns in ancient fort at ALEXANDRIA 80 Francenia steaming through Canal 81 After MAGHDABA stunt. Convoy taking wounded form EL-ARISH to railway at 139 82 Indian Camelry 83 Virgin Mary's Church 84 Sluice gate at BARAGE Egypt 85 Hospital at lower W bank of Canal 86 Virgin Mary's tree 87 Sweetwater Canal at ISMAILIA Egypt 88 Halt and Feed. The A.M.C. attached to flying column. 89 Bringing stores ashore at JAFFA 90 H Videon & J Britton astride donks. Horses became scarce through casualties etc and units had donkeys issued to them 91 RAMLEH. The traditional burial place of St John the patron saint of England (sic). 92 Jewish Synagogue at RISHON-COUR-LE-LION (Richard the Lion Hearted) 93 Water tower at HELIOPOLIS 94 Portion of camp on HELIOPOLIS Racecourse 95 Arrival of papers 96 Sand sleigh 97 Boring plant & prisoners taken on the JIFF-JAFFA stunt. Two Austrian officers and party of Turks taken whilst building a concrete gun emplacement 98 The obelisk at MATARIA 99 In an avenue of Australian gums at ZEITOUA 100 Mountain battery gun 101 The 3rd ALH BGDE camped at HELIOPOLIS Racecourse 102 Captured Turkish guns 103 Turkish and Austrian prisoners. JORDAN VALLEY 104 The MT of Temptation Monastery built over spot where Christ spent his 40 days 105 Refugees from ES-SALT at JERICHO 106 3rd LHFA and 8th LH REGT at HELIOPOLIS 107 Fig trees at Roman Wells JIFF JAFFA 108 Inside the Blue Mosque CAIRO 109 Lagoon that was destroyed on JIFF JAFFA stunt 110 Section race at Brigade sports 111 Another tombstone at ALEX 112 Innoculating female date palm 113 Bronze tombstone in a cemetary at ALEXANDRIA 114 Luna Park at HELIOPOLIS 115 Egyptian water buffalo. Used by natives for ploughing etc 116 Russian church. Some call it the "Church of St Mary Magdelene" 117 At pyramids GIZA. Billingsley lost leg & McMullin KIA 118 Pontoon bridge over Suez Canal 119 DURBAN 120 Rescue work 121 Paddy Hanly 122 Motor train for conveying rations between Canal and Railhead. 123 At MUCKSHUBE ? 124 British ??? 125 Bedouins bringing in their harvest from the fields of ABBASSAN-EL-KEBIR Palestine 126 German HD QTRS BEERSHEBA 127 Date ? SINAI 128 Military railroad running through ? at EL-ARISH 129 Street scene at KHAN-YUNIS Palestine. Samson often called at this place to visit his girl. Napoleon narrowly escaped capture here during his ? in 1799 130 Date palms bearing fruit. These do not ? they are ?? 131 Motor ambulance convoy 132 Turkish hospital BEERSHEBA 133 MT CALVARY 134 Town Hall BEERSHEBA 135 Railway station BEERSHEBA 136 ASLUJ 137 Turkish depot MAGDABA 138 DURAN 139 3rd ALAB Hospital 140 Main Street PORT SAID 141 Stock Exchange ALEXANDRIA 142 The "Bull Ring" 14th AGH 143 (Double exposure) 144 Jewish School at DURAN Palestine 145 Damascus Gate JERUSALEM 146 Roller used for grinding clay for making bricks 147 The Harbour at ALEXANDRIA 148 Part of Napoleons Road along sea shore opposite BEELAH 149 Hotel at ALEX. Barred to the troops of course. 150 HELIOPOLIS 151 -153 ALEXANDRIA 154 Ambulance treck 155 Cacholets at the casually clearing station 156 Refugees from ES-SALT entering the Jordan Valley. Mts of MOAB in background 157 Cameliers bring in prisoners 158 The "Niagara". Casualties were from the front line by all descriptions of transport and passed through several field hospitals until they eventually reached the railway. They were sent to KANTARA by train. Despatched from there to PORT SAID by this boat 159 JERICHO 160 Turkish prisoners in JORDAN VALLEY 161 Bedouin nippers of SINAI 162 Bridge destroyed by ALH at ASLUJ 163 Railway sheds at BEERSHEBA. Portion was set afire by retreating Turks 164 ASLUJ Station 165 German Hospice 166 at ASLUJ 167 Suez Canal offices PORT SAID 168 MENA Village from top of Cheops. White lines at left are roads made by Australian troop. First Aust Contingent camped here. 169 A felukeh passing through gate at BARAGE 170 Military railway terminal EL ARISH 171 (No caption) 172 Egyptian family waiting for a train 173 Turkish prisoners and captured material coming in 174 Turkish wounded at BEERSHEBA awaiting removal 175 Two hospital ships at ALEXANDRIA 176 Some of the Bd boys 177 Race meeting 3rd ALHB at TRIPOLI- SYRIA 178 The blacksmith and Rodney Thomas swimming horse in SUEZ CANAL 179 Natives grinding grain 180 Thoroughbred 181 MUKATTAM HILLS 182 Trenches at JIFF JAFFA 183 MacBoyd as a Padre 184 Egyptian Syce having shave by travelling barber 185 The creek outside ALMINA 186 Cameliers 187 Clearing Station on beach at EL-ARISH 188 Wadi at TALLAT-EL-DUMM 189 Motor transport park 190 Some of the boys 191 Pompeys Pillar 192 at MAGHDABA 193 Hospital at JERUSALEM 194 Cheop's Pyramid 195 Golden Gate JERUSALEM 196 Hustling Turks through BEERSHEBA 197 Holy City 198 Mosque of Omar Jerusalem 199 Railway bridge destroyed by ALH at ASLUJ 200 Enemy material captured at SHERIA BEERSHEBA 201-3 These Mosques built with alabaster taken from pyramids at GIZA 204 Pontoon bridge built by our Engineers over RIVER JORDAN 205 3rd Bgde in Koil at MASAID 206 Billy McGhie throwing the weight 207 Nirazeh ? Gardens 208 Motor Ambulance Park 209 Bedouin women in Palestine village 210 ALEXANDRIA 211 Junction Stn 212 Indian Lancers 213 Motor convoy at ESSANI 214 A & B Sections 215 JERUSALEM. Once known as the 'City of Palms' and presented to Cleopatra by Anthony 216 Monastery on the Mount of Temptation. Situated on the Hills of Solomon on E side of Jordan Valley just behind JERICHO 217 DURAN A Jewish village in Palestine 218 One of our planes meets with a mishap on landing 219 Bedouin flocks around NABLUS 220 ES-SALT Road just above Jordan River 221 Halt! Action Front! Getting guns into action from pack 222 Village well 223 Gun inspection 224 WADI GHUZZEE Bridge 225-6 At GIZA Zoo Egypt 227 Syrians gathering olives 228 Smashed plane 229 MacBoyd 230 Bridge across Jordan at GORRONHOER 231 Competitors for Gretna Green. 3rd Bgde sports at TRIPOLIA 232 EL ARISH 233 Main street JAFFA 234 The beach at MARI-KHEB 235 Scene of old Cairo 236 Bedouin market 237 Bridge built over Wadi EL-ARISH. The biblical "River of Egypt". 238 Old water reservoir in native village 239 A "spello" on the track 240 Plane going out on reconnaissance 241 Bomb attached to carrier on a plane 242 Ancient Turkish gun at forts in TRIPOLI - SYRIA 243 Gun inspection 3rd AMGS 244 Old Turkish trenches outside GAZA 245 Wadi KHUZEL Bridge at SHALLA 246 BEERSHEBA 247 Street scene ZAG-A-ZIG 248 Spinx (sic) & Pyramid - GIZA 249 Egyptian Coastguards at ALEXANDRIA 250 A Palestine camp E Troop 3rd MG Sqn 251 B class horses killed in Syria 252 Scene from summit of Pyramid 253 Bert Richmond & an old Turkish Howitzer on MONTAZEH 254 LION'S WELL 255 Australian trenches outside Ferry's Post near Hill 70 256 A street scene in HELIO{PLIS 257 Electric trams at ALEXANDRIA 258 Cleaning harness 259 Swinging pontoon bridge into position at SERAPEUM 260 British Monitor in Suez Canal 261-2 Scenes of Turkish buildings at MAGHDABA. Taken by the ALH The first time in history mounted troops have attacked and taken entrenched positions 263 Aussies at Egypt's ancient monuments 264 Scenes of old CAIRO from MOKATTAM Hils 265 Bridge across canal at BARAGE, 16 miles outside CAIRO 266 Curly and Vic Norton 267 Stumpy McIntyre & Long Pikington 268 In Wadi GHUZZEL near TELL-EL-JEMM 269 Digging post holes for stables 270 Cameliers bring in prisoner. Austrian Officer in black 271 White washing mess shed 272 F Troop 3rd AMGS Sqn 273 Jews at Recruiting Depot at JERUSALEM, forming Jewish Battalion 274 In Jordan Valley, 3rd Machine Gunners have 8 horses killed by an aerial torpedo 275 Turkish prisoners 276 Cocos Island 277 Snow on the Lebanon Ranges 278 Egyptian Hotel 279 Gordon Wake. Note intruders 280 Electric trams at HELIOPOLIS Egypt. Heliopolis built by Belgian firm in 7 years 281 Sweetwater Canal at SERAPEUM 282 The ? wells at JIFF-JAFFA 283 Virgin Mary's well at MATARIA. Boyd, Simpkin & Crowley 284 Cricket for convalescents at MONTAREH 285 Indians working at cutting for military railway 286 Australian Hospital BEERSHEBA 287 Removing wrecked ambulance car from rail road 288 Engineers depot in ? at EL-ARISH 289 Water preservation scheme at SHALLAL 290 German Princes Palace at HELIOPOLOLIS 291 Some of the boys 292 Aussie aerodrome BEELAH 293 EL-JALLAH outside BETHLEHEM 294 Some of the gunners 295 Trying camels in gun carriages. Note sand caterpillar 296 Street outside old city JERUSALEM 297 D.H QRS In EL-ARISH. Hod 298 Cairo Museum 299 Wadi bridge built by Army Engineers 300 A two storied building at GALM used as German HQrs until reached by our guns 301-2 No caption 303 Ambulance with Flying Column 304 Jack Pegg 3 AMGS 305 KHAN YUNIS 306 In the Jewish village of "Rischon le Lion" 307 Wet Canteen BEELAH 308 Motor Transport LATRON 309 Gen Chauvel OC Desert Mounted Column 310 10th LH - Inverness Battery "Railhead" 311 3rd LHFA "SERAPIUM" 312 ESBEKIEN Gardens "LE CAIRE" 313 Camel training and wireless station Hill 60 314 ZAG-A-ZIG Rly Stn 315 One of the Irrigation Canal locks "HELOUAN" 316 Indian Camel Corps 317 Base at Hill 60 318 Aussie transport arriving "ALEXANDRIA" 319 3 ALHB at AL MINA 320 Main entry to city of JAFFA 321 Mosque at DAMASCUS 322 A Turk brought to earth by one of our patrols 323 Brigade boxing contrst 324 Ostrich farm ZEITOUN 325 MATERIA 326 No caption 327 Mail day 328 3rd LHFA entering HELIOPOLIS from MENA 329 M Boyd, L Simpkins, S Crowley 330 Stretcher bearers 331 French Hosp JERUSALEM 332 SERAPIUM 333 Gippo crushing wheel 334 On the move - bully and biscuits 335 V Morton, F Stokes, L Simpkins & Hanley 336 Turkish prisoners - SHERIA 337 Getting used to the mask J Antonio MM 338 Sand carts 339 Model house - MONTAZA Hospital 340 "Abdul" 341 Wood Depot "ESDUD" 342 On troop ship - from Syria 343 Turkish prisoners "JULIUS" 344 TRIPOLI 345 3rd AMGS cook house "BEELAH" 346 Breaking camp "ZEITOUN" 347 Turkish prisoners "GAZA" 348 One of our tanks. About nine were blown out of action at GAZA 349 Camp in HOD-EL-ARISH 350 German HQRS BEERSHEBA 351 Race Course TRIPOLI 352 A Locke & P Leeming 353 Sea planing in Suez Canal 354 MOASCR detail camp 355 KANTARE Suez Canal 356 Four boys of MG Sqn at cards while convalescing . Marked X was a prisoner of war for three days. Got him back with us when we countered. 357 Signal station at CANA 358 H Videon in german rig 359 ROD-EL-FARAC 360 Sweetwater Canal ZAG-A-ZOG 361 Hospital train on beach EL-ARISH 362 Jerusalem Road 363 Bedouin camel and young'un 364 Admiralty Offices, PORT SAID 365 Suez Canal PORT SAID 366 Taking wounded to clearing station 367 Hills of 10-60 MALHA 368 Junction Station 369 EL ARISH 370 Wine Distillery LATRON 371 White figures how entrance to Pyramid 372 RAPC Wireless Station 373 Sports in Canal. ANZAC Day 1916. Prince of Wales is aboard white launch. 374-5 Captured Austrian boat. 40,000 cases of benzine aboard. She was brought into Canal at Port Said. Spies set her afire. She burnt for some considerable time and eventually blew up. 376 Pumping water from Wadi on Muckshabee stunt 377 On trenches 378 Bringing in disabled battle plane 379 Giving a motor transport a lift 380 Old Turkish howitzer. MONTAZZA 381 Jerusalem country 382 Palm Hod in SINAI. Trees do not bear dates until 14 years old. No bees here. Palms innoculated by Bedouin. 383 Camel cacolets for conveying wounded 384 ESKBEKIEL Gardens Cairo 385 LAKE TIMBAH 386 Xmas dinner 1916 387 Gift billies from ACF 388 Section competition 389 In big marquees HELIOPOLIS 390 HM Landships 391 Capt Aberdeen inspecting horses 392 Football. Black vs White 393 The game 394 Old Napoleon fort. 10 mile along coast from ALEX 395 Jewish Cemetery AKRON 396 Ration fatigue 397 Blowing bottom out of Turkish Reservoir to allow soakage 398 Tilley & Farley - 14th AGH 399 At GIZA Zoo. Note height of giraffe 400 On this stunt we destroyed Turkish reservoir of 2 1/2 million gallons 401 Demolition party at wells MUCK-SHUBE 402 3rd ALH Bde HELIOPOLIS Race course 403 HMLS "Lady Wingate" 404 Turks blew out our tanks at GAZA 405 One of our aviators captured by German. Note German wearing Iron Cross. Snapped behind Turkish lines. Original of this snap was dropped at Aust aerodrome to let them know Aussie airman was alright and not killed in capture. Chivalry 406 Sausage observation balloon 407 READY 408 Bomb on carrier 409 Testing 410 B Richmond, Wireless Operator RAFC 411 Loading Bomb 412 Crash in desert 413 Bomb in YMCA at MAZRAR 414 No caption 415 LW Simpkin - Late 3LHFA 416 LEMNOS 417 Shelling the MARSDEN 418 Pontoon across Jordan River 419 Shells on Walkers Ridge 420 Sweetwater Canal 421 LAKE ISMAILIA 422 Indian Lancers on Canal 423 CAIRO Railway Station 424 Destroying Turkish water supplies. Explosives used for breaking clay at bottom of lagoon, help to absorb water 425 Exercising horses at ZEITOUN Egypt 426 In Wadi on MUG-SHUBEE stunt 427 Tractor drawing 60 lb gun towards front line 428 Sultan's mother's place at HELIOPOLIS = City of the Sun 429 Camped on the sands outside RAILHEAD, Jump off for SINAI campaign 430 G Turner & A Lockwood out for a camel ride. 431 GAZA and Nile floods from top of Pyramid 432 Baby refuses to carry his harness and his pal wears an astonished look 433 No caption 434 Turkish Officers 435 Regt HQRS at IBEETA 436 No caption 437 3rd Machine Gun Squadron 3rd ALH Bgde (my unit) 438 Camel Corps at dinner 439 KHEFREN Pyramid snapped from top of Cheops 440 CHEOPS 441 Pyramids 442 MENA from top of Pyramids 443 Snap from Pyramid showing MENA-CAIRO road running through Nile floods 444 MENA village from Pyramid 445 Band of British West Indies Regt 446 Gippo Band 447 Swimming on Med Sea 102 KmA 448 H Maddocks 449 Bedouin and Egyptians utilise any animals for their fields 450 Captured Turkish train - BEERSHEBA 451 Gardens ISMAILIA 452 Gippos used for horse lines etc 453 Canteens at HELIOPOLIS 454 3 ALHB watering in Wadi on ESSANI stunt 454 JAFFA 455 ALEX, Napoleon relics 456 Egyptian water wheel 457 SUEZ 458 WADI GHUZZEE 459 On Reconnaissance at 10-60 460 Goats and sheep captured from hostile Bedouins 461 Pontoon SERAPIUM 462 Aust trenches - Suez Canal. Turks attacked FEB 1916 463 Camel transport 464 3 ALHB Wireless Station. Col Scott 9 LH got DSO on this stunt (MUCK SHUBE) 465 ALEXANDRIA 466 Canal Hospital Ships 467 Ambulance - Sand cart 468 At old Cairo 469 No 1 Casualty Clearing Station 470 3rd Brigade on move 471 3rd LHFB- Making camp SERAPIUM 472 Watering horses 473 Moving up wadi 474 The wells at Wadi GHUZZEE 475 Camel transport SINAI 476 Turkish reservoir destroyed by ALH 477 Wall in a Luxor tomb 478 Entrance to "Temple of Bulls" 479 Bob White 480 Bedouin crops 481 Harem of Montazza, Turkish prince 482 Jack Holmes, Billy McGhee 483 MUDERIA, B Troop post 484 JIFF JAFFA 485 Natives on railroad construction 486 Aust graves SHALLAL 487 The Stumpy Mirror 488 R Nile at MANSUREH 489 Aust graves - BEELAH 490 NOUZEH Gardens - ALEXANDRIA 491 On issue from QMS. Take what comes. Fit does not matter 492 MATARA 493 German Yacht Club - ALEX 494 Old Turkish Howitzer and cannon ball 495 Field hospital 496 Gardens at BARAGE 497 A dispute's ending 498 Snow. MT LEBANON 499 Bedouin sheep 500 Combat in the air 501 no caption 502 Old Napoleon gun 503 Gordon Wake HQ car 504-5 Burying the dead at GAZA 506 Water Polo 507 Brigade boxing comp 508 Field cooker 509 Bridge on Jerusalem road, Blown up by Turks 510 Teaching horses to lay quiet. For protective purposes 511 "Major" and "Bitsy" 512 Bedouin Scarabs 513 Convalescent 514 1. W Billings. Returned to Aust 2. W McMahon KIA 515 Hospital 516 Coming good 517 1st day up - 14th AGH PORT SAID 518 Back again in Regt 519 Billy and Taffy 520 Stew 521 KHAN YUNIS 522 MENA 523 Casualties PORT SAID 524 Washing 525 Mail 526 Gun from the "Emden" mounted in Syney 527 MARSURES 528 Desert bivouac 529 HASSED 530 3RD ALH Bde. Good camp (Extra) All conv's 531 New issue 532 On to another camp (8 LH Regt) 533 Shore - JAFFA on MED SEA Photo Captions Volume 2 (Illegible = ?) 1 The Cedars on Mt Lebanon, according to tradition originated from the staves of the 12 Apostles 2000 years ago. 2 TIBERIUS taken 27th Sept '18 3 NAZARETH taken 20th Sept. German officer and Arab pony 4 TIBERIUS fell on 27th Sep. Von Saunders was the GOC of Turkish Forces in Palestine 5 Jordan Valley & Plains of Jericho run between Mts of Moab & Hills of Solomon. Distance across valley from foot of each range of hills abt 13 miles, looks ? 6 Storm on Sea of Galilee 7 DAMASCUS fell on 1st October. German vehicle park. 8 German funeral near Jerusalem 9 JENIN. German Headquarters. Fell 20th Sept. German field bakery 10 Three pages back will be seen a storm on GALILEE. Note now calm here. This photo taken near spot from which the previous one was taken. German motor launch on Galilee. 11 Captured intact on 20th Sept. German workshops JENIN 12 Turkish aerodrome captured here. Hostile aircraft landed whilst it was in our hands. Aviators greatly surprised and even indignant. Motor smash near EL FULE. 13 German Orderly Room (Ammunition box full of gold), DAMASCUS. All this gold Turkish coin secured by our troops. 14 German artillery on the way to the front near KENETRA. The ALH swooped down on the artillery around this vicinity & captured many field guns. 15 German Despatch Rider on the road to ES SALT. Unsuccessful raids carried out on ES SALT on 30th April & 4th May. This country was hard on men and horses. Goat tracks were used at times but horse were led most of the time. Stunt lasted 14 days in wet weather & horses were only unsaddled for about 2 hours during stunt. 16 Strand, ? , Tiberius, Gallilee 17 German workshop. Captured by ALH 18 One of the dead lying outside GAZA. Killed 19th April 17. We could not bury them before November 19 Some of the boys that fell in the charge at BEERSHEBA. Tibby Cotter 20 Collecting our dead for burial. They were K in A on the 19th April at GAZA. Buried seven months later, 23,000 casualties in one day 21 German U-Boat 22 Page of postage stamps and money - Struck to commemorate Gallipoli victory - Turkish war postage stamps - War duty - Turkish war bank notes 23 Pamphlet. With paper badges affixed These badges were worn by young Egyptian students. Arabic translation means "Egypt for Egyptians Long Live Egypt" This pamphlet was printed under German influence & distributed around ZAG-A-ZIG, the chief centre of hostilities during the recent Egyptian riots. The Young Egyptian Students influenced the Natives to oppose British Administration, what they called Tyranny. They professed to have sufficient competent educated men to govern their own affairs, but our Heads would not hear of it. Consequently the riots. Many ? and soldiers killed. All railways and communications disorganised. It took several months to bring things to their normal ? Pictures of medals 1. In honour of General Falkenhaugh GOC Turkish Forces 2. The Victorious Emperors of Germany, Austria and Turkey 3. Egypt Awakening 24 Those large photographs I sent you were procured for me by a pal who knew the chap that owned the negatives. The owner of these snaps belongs to the 5th Regiment of the 2nd Brigade, and he took the camera from a Turkish Officer. It had only 6 snaps of a spool of 10, and the BIll Jim finished off the spool by taking 4 of the special entry into Jerusalem. The cross indicates those taken by the Australian, the remainder were taken by the Jackos in the vicinity of BEERSHEBA and SHERIA Turkish field bakery 25 Cavalry going up to support their own line. However never had much action against the Turkish horsemen 26 Turkish Electricians in the field. I have an idea that this photo was taken to get the centre figure. He looks dinkum Australian. Note Australian leggings on Turk on the right 27 Turkish machine gunners ready for action. This is very much like the Beersheba country. Turkish officers on the right, and along side him is the range taker with his Barand Stroud. We use these instruments in the Sqn and they cost about 83 (Pound) 28 Turkish General Head Quarters just beyond SHERIA. Note hard rocky country 29 Turkish Cavalry watching a fight and getting ready to go into action. This is at SHERIA, and the heavy fighting lasted several days. Plenty of water and the Jacko's tried their hardest to hold on to this pozzie. Often our chaps met the gamer Turks in the dead of night, because both sides were on the same game, crawling down for water. This stunt is known as the Junction Fight. 30 Official entry Dec 11th. The official entry into Jerusalem. Sir G Allenby in the lead with his staff officers of the French and Italian troops accompanying him. Guard represents New Zealand, Australia, England Wales Scotland Ireland and India entering theJaffa Gate 31 Sir Ronald Storrs made Governor of JERU. Captured 9th Dec 17. Reading the Proclamation, General Allenby wearing white breeches. Troops of other nations were present, and the notables of Jerusalem. It was read from the foot of the Tower of David, a place that has been standing since the time of Christ 32 The first of the British troops entering Jerusalem. A few Turkish officers may b seen walking at the head of the column. Populace in a bad plight, very poor and no tucker, and all were greatly overjoyed at the ?? of the British Hundreds and kiddies ill treated ?? (Part of caption missing) 33 10th LH Regt first to enter JERUSALEM. Mounted officer on the right supposed to be the CO of the first troops to enter Jerusalem. Note mud on the horses. Had very wet and muddy weather 34 Dead Jacko 35 Turkish machine gun and crew 36 Hanging Armenian doctors who refused to join Turkish Army 37 Outside Damascus Gate Jerusalem 38 Turkish patrol lying outside trench at EL BUAJ 39 Burying Aussies at DAMASCUS 40 1. Djemel Pasha 2. General Limon Von Saunders GOC Turkish Forces in Palestine 41 One execution in Egypt. Executing an Egyptian offender 42 Turkish atrocities DAMASCUS 43 Turks occupying trenches outside JERICHO 44 On ASLUJ demolition stunt. Feeding and spelling. Arrived at Rendezvous too early 45 Turkish saw bayonet 46 Captured guns taken at BEERSHEBA & SHERIA 47 Our gunners obtained a direct hit on ammunition train 48 The large and small of the game. At GAZA. 74th CCS in background 49 Around JULIOUS. These Turkish shell dumps were very numerous around this vicinity 50 Captured Turkish Cavalry 51 Cavalry leaders 52 Turkish machine gun & crew 53 Enemy officers. One on left is wearing Iron Cross ribbon 54 Captured Austrian boat afire, Suez Canal Port Said. 40,000 cases of benzine aboard. Fire a mysterious outbreak 55 ? Hotchkiss gunners and enemy aircraft over ? TELL-EL-FARA 56 Types of enemy officers. One of our bikes in their possession. Recaptured later. The five pointed medals worn by these officers is called the Gallipoli Star. Issued to commemorate the Turkish victory at Gallipoli 57 Our batteries put in some good shooting amongst Turkish transport 58 Showing compactness of Turkish trenches 59 Desert homes. The only time we had cover in SINAI was when we camped near a Hod. Then we could use date palm leaves 60 JIFF JAFFA 61 ZAITZOUN 62 10th Regt MGS amongst hills outside JERUSALEM 63 Jews wailing place JERUSALEM 64-5 German post card characters 66 Post Card PHYLAE The Kiosk 67 Post Card Vue du Canal de Suez 68 Post Card No 93 Queen Street, Fort, Colombo 69 Snipers at NALIN Sth Syria. Lousy country for richochets. Nast wounds. (Aust War Memorial Melbourne) 70 Myself on Ginger. This little neddie is boshter jumper 71 Magazine cutting - Lt C H Vautin & German airman G Felmy 72 9th Regt 3rd LHB Judean Hills outside JERUSALEM. (Aust War memorial Melbourne) 73 Sand hills SINAI ? Desert (Aust War Memorial Melbourne) 74 3rd LHB spelling at GALILEE (AWM Melbourne) 75 Jordan Valley outside JERICHO (AWM Melbourne) - lovely Jordan Valley, dust and heat, 1280 ft below sea level 76 Copy of no 69 77 Watering at MATARIA 78 A desert grave - Tpr H R Olver MM 6th LH MGS Beneath this simple cross there lies a comrade true and tried He fought as fights a soldier And like a soldier died 79 B Section. When they first took our Stetsons and issued cumbersome helmets 80 Palestine types of Turkish and German officers 81 Some of the gunners amongst the snows in MT LEBANON 82 The country around JERUSALEM 83 JERUSALEM 84 Fishing ? ? at GALLILEE 85 Jerusalem taken Dec 9th. Official entry on the 11th. Jerusalem (showing) Holy City and Mosque of Omar 86 Turkish shell hits old tomb at ZERNUKAH. Capt Hurley official photographer - AWM Melbourne 87 14th AGH at PORT SAID 88 Human bones at Dead City ABBASSIA 89 3rd ALH Bde at HELIOPOLIS 90 Men wearing gloves 91 Wireless station in course of erection at MATARIA - 28 masts 92 Old slave market at ABBRASSIA. Many excavations performed on projecting wooden frame at corners 93 3rd guns on the move. The beautiful scenery between LATRON & JERUSALEM 94 Bedouin agents 95 Collecting captured enemy material 96 Captured double-engined plane 97 On the march. Country at Eastern SINAI 98 Anzac mosaic found at SHALLAL whilst trench digging now covered with gun etc ready for removal. Was sent to Canberra. 99 A Troop watering. A rotten job at a small well when horses are thirsty 100 The new Jericho road. Running through Hills of Solomon Valley in distance 101 Gun inspection 102 Draining pools at WADI AUJA. Keeping down Malaria carrying mosquitos 103 8th Regt and 3rd AMGS at BEELAH 104 A rendezvous in the Jordan Valley 105 2nd ALHB camped outside JERUSALEM 106 WADI AUJA in the Jordan Valley 107 Hospital train on the beach at EL -ARISH 108 Jacko's 109 Jerries 110 Stables of Turkish Headquarters SHALLAL 111 Early training. Every man to throw and quieten his horse for purpose of taking cover 112 A Troop 3rd Guns at TAALAT-EL-DUMM 113 Watering at WADI GHUZZEE 114 J Rushden KIA at ES-SALT 115 J Carling F Troop 3rd AMGS. Taken prisoner at EL-BURJ. Repatriated after Armistace 116 Captured enemy plane 117 Jacko gun 118 Brig-Gen Galloping Jack Royston. OC 3rd ALH Bde 119 Cleaning ammunition belts in the Hod at MASAID 120 Bringing up the fodder at ABBASSAN-EL-KEBIA 121 Some of the boys amongst the snow on MT LEBANON 122 Turkish barley crops at SHALLAL in Southern Palestine 123 The crops a few weeks after our horses had been in this vicinity 124 Clearing up after a stunt 125 On the move. 5 minute spells for the horses 126 In Jordan Valley. An airial torpedo lobbed amongst 3rd MG Transport horses & killed 28 127 Camel ration convoy coming along beach 128 Field Hospital at ET MALER 129 Desert graves at ROMANI 130 A day on the beach. Wash self, horse and clothing 131 Watering on the beach at BEELAH. Note how close fresh water is to the seashore 132 A patrol caught by a shell 133 Spello 134 Crossing the Wadi 135 Halt! Weights off and feed 136 Gas instruction 137 F Troop at TELL-EL-FARI 138 Xmas Dinner at MASAID 1916-17. Arrived back at this camp Xmas Eve after 5 nights & 4 days in saddle & the capture of MAGHDABA 139 Exercising along the beach at MARA-KHEB 140 Watering at a Bedouin well 141 At Sheikh's ZOWAID 142 3rd Gun Squadron at ABBASSAN-EL-KEBIR 143 Captured plane on its way to Australian Aerodrome 144 One of our planes about to pass over Hod 145 E & F Troop horse lines and horses 146 Sun set on Med Sea 147 Beach scene at EL-ARISH 148 Turkish transport. Small animals but they can pull big loads and they possess large hearts 149 The dressing station JIFF JAFFA ? 150-8 Types of Egyptian women - Nubian - Fellaheen - Sudanese - Low class Gippo - Egyptian - Middle Class -Egyptian Aristocracy - Turkish 159 French girls on beach at PORT SAID 160 Bedouin girls drawing water 161 Egyptian flappers at ALEXANDRIA 162 Post Card- Dame Turque 163 Post Card - Jeunne Fille Arabe 164 Graves of New Zealanders at RISCHON 165 Graves of Australians at DEIR-EL-BELAH 166 Race day. The saddling paddock 167 Bivouacs 168 3rd ALH Brigade at TRIPOLI 169 Advance party putting down horse lines at KHAN YURIS 170 Breaking the desert monotony 171 WADI QUELT. Taken from one of its precipitous banks 172 Turkish stores on N shore of DEAD SEA 173 Watering at Solomon's Pools 174 Waiting for action at - ES DUN (AWM Melbourne) 175 Camel Corps in action SINAI (AWM Melbourne) 176 ALH Time to Camp (part missing) (AWM Melbourne) 177 3rd Machine Gun Squadron IBU-HARITH, Lieut Breed, McLeod, Guppy, Whyte 178 Cartoon sketch - "A Digger" 179 Turkish Cavalry 180 Gun crew of No 2 Sub F Troop, 3rd Gun Sqdn 181 Operating base of JIFF JAFFA stunt 182 One of the British war boats that cooperated with the Land Force 183 Military railway line passing through a Hod in SINAI 184 AL-MINAH The sea port of Tripoli, Syria 185 NAZARETH Taken on 20 Sep 18 186 The Monastery on the Mt of Temptation, Taken from a cave on opposite hill. 187 JAFFA From the beach 188 In Monastery on the Mt of Temptation Rock on which Christ spent his 40 days 189 Cross indicates Garden of Gethsemane. Arrow at Russian Church of St Magdalene. MT of Olives on left 190 The Roman Bath at MONTAZAH. Hewn out of solid rock 191 Mine sweeper ashore near SHEIK'S ZOWAIL 192 Throwing "Chester" for an operation 193 The swimming pozzie at LAKE TIMSAH, ISMAILIA. Half a mile from MOASCAR, the Aust Training Depot 194 The remains of Napoleon's road. Portions can be seen running between BEELAH & GAZA 195 Camels utilised for ambulance work 196 TULKERAM taken on 19th Sep. This stunt started the previous night and this position fell to us the first day. About 60 miles from starting point 197 German officer at mess, JERUSALEM 198 German Headquarters SEMAK 199 TIBERIAS 200 Water preservation scheme at SHALLAL 201 A dip in the Jordan River. Crossed river on night 21-22 April 18 202 Watering and a wash up 203 JERICHO Taken on 21 Feb 18 204 Turkish graves 205 KHAN YUNIS. Southern Palestine, Note how sand ridges from the beach meet vegetation area. Fertile land 20 miles in width. the beginning of PHILISTIA 206 TAUBE-OVER 207 Drawing drinking water in Wadi GHUZZEE 208 The swimming pozzie in JORON 209 Landing stores at EL-ARISH 210 A camp near the wadi 211 Railway line and bridge crossing wadi above SHALLAL 212 The mid-day halt 213 Turks and Aussies at Dressing Station on beach 214 Washing day 215 Bringing supplies ashore 216 Trying mules in a 60 pounder 217 The desert winds have blown away and left this piece standing 218 Pontoons used by the Turks in their attempt to cross Suez Canal Feb 15 219 "HASSEIN" 220 "GIPPO" Mascot of 3rd AMG Sqdn 221 "Biddy" 222 Railhead camp 223 Typical Bedouin 224 Motor Submarine chaser dvr whyte, photos, ww1, light horse field ambulance -
Kew Historical Society Inc
Archive (series) - Subject File, Kew Historical Society et al, 'Iveagh', Studley Park Road, 1993
Various partiesReference, Research, InformationSecondary Values (KHS Imposed Order)Subject file containing a 16-page manuscript recording the history of Iveagh in Studley Park Road, Kew from the earliest land sales to the ownership of the house by the Pallottine Fathers. Jean-Marie Labdanum and Dorothy Lyons created the manuscript in 1993 as part of a school research project. [There is also an article in KHS Newsletter 107, June 2014 by Kerry Fairbank on the history of the building].kew historical society - archives, kew - history, pallotine fathers, iveagh - 169 studley park road - kew (vic), john bakewell, richard goldsborough, william de graves, john mckenzie, john miller, thomas greenwood, thomas nankivell, george ramsden, patrick mcginnis, studley heights estatekew historical society - archives, kew - history, pallotine fathers, iveagh - 169 studley park road - kew (vic), john bakewell, richard goldsborough, william de graves, john mckenzie, john miller, thomas greenwood, thomas nankivell, george ramsden, patrick mcginnis, studley heights estate -
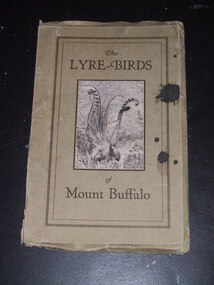 Parks Victoria - Mount Buffalo Chalet
Booklet, "The Lyre-Birds of Mt Buffalo"
Information booklet for distribution, collected by Roger Jones. "The Mount Buffalo plateau has been attracting scientific investigation into its unique plants, insects and animals from at least the 1850's. "(Pg. 131. Historica) "In 1924, amateur naturalist and mountain guide, Alice Manfield (1878-1960) popularly known as Guide Alice , released The Lyre-birds of Mount Buffalo, a 23 page booklet detailing her studies into the lyre-birds on Mount Buffalo, the first pictorial record of lyre-birds to be published. It features Mansfield's photography and includes an introduction by Charles Barrett (1879-1959), an Australian naturalist, journalist, author and foundation member of the Ornithologists Union." (Pg. 132) There are very few known copies of this booklet.Listed in Draft Inventory of Significant Collection Items . Appendix A.3. Natural History. (Pg 169. Historica)..1 Smooth olive book cover with stick-on photograph of a male lyre-bird. Framed within a border, ink blotches on right-side of booklet. 16 page booklet A 5 size, illustrations on left side pages, stick-on photographs on right pages except for introduction with illustration on right. Thick rough printed paper. •.2 Same as above with slight ink marks on top right, slight tear on right of image. .1 "The Lyre-Birds of Mt Buffalo" Photographs and notes by 'Guide Alice', Introduction by Charles Barrett CM2s Publisher: Robertson and Mullens Ltd....." •.2 Same as .1. -
 Parks Victoria - Mount Buffalo Chalet
Booklet, "Flower & Feather at Mt Buffalo National Park Victoria, Australia"
H.C.E. Stewart , who first visited the plateau in 1919, produced the booklet, Flower and Feather, the Chalet has two copies. Published in the 1950's by the Victorian Railways Public Relations and Betterment Board, it is still an accepted guide on the the mountain bird's annd plants." (pg 132. Historica) The writer first visited Mt Buffalo in 1919 - & then after the war he decided to show all the unique flowers of Mt Buffalo through this book.Listed in Draft Inventory of Significant Collection Items . Appendix A.3. Natural History. (Pg 169. Historica).2 x Yellow & white books with an eastern Rosella and a red & white flower on it. 21 pages of text & photos. Front page has a picture of an Eastern Rosella and flower, the Melbourne Bay. (.2 has holes punched in it.Yes -
 Parks Victoria - Mount Buffalo Chalet
Tickets
"The collection of ephemera builds on the Chalet's holding of archival material with a range of interesting, original items. Dinner menus., stationery., luggage labels, tickets, dockets and plans help to interpret the structured routine and social conventions of the Chalet that held sway for so many years." (pg 127 MBCC) Probably printed by Rayner QuickprintListed in Draft inventory of significant collection items. Appendix A.3. Ephemera. (pg 169). The tickets are made of yellow paper; on the front page it says "Mt. Buffalo Ski School Class Lesson"; there are 3 empty squares in order to say if it is for an adult, child or other; the information on the right side of the ticket is for the customer, the left part of the ticket is for the seller with just the information adult, child or other; on the right side there is a ticket number, there are 449 tickets in this book;On the reverse of the ticket there is a "disclaimer of liability"; signed by Mt. Buffalo Ski School, Cresta, Mt. Buffalo -
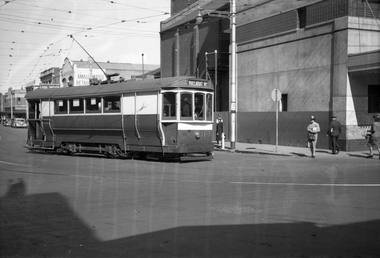 Melbourne Tram Museum
Negative, Wal Jack, c1943
Black and white negative, by Wal Jack, of S169 from Leeds St Footscray in to Barkly St with the destination of Ballarat Road. Has the Amalgamated Cash Drapers store, the Hoyts Trocadero Theatre in the background. Note the tram stop alongside. Photo not dated in Wal Jack album, c1943 - though Could be the same date as Reg Item 5446 - 20-4-1945.trams, tramways, leeds st, footscray, s class, barkly st, ballarat rd, tram 169