Showing 529 items matching " belmont "
-
 Melbourne Tram Museum
Album - Photographs - Comeng Dandenong, 1980s - 1990s
In March 2024, Milissa Box (DTP) was at a trash and treasure market. She'd found a $5 photo album for sale with some photos that she thought might be of interest… From what I can gather it belonged to the gentleman pictured who was a worker at Dandenong in the Comeng and ABB eras. He appears to have worked on the Z3, A1/A2, B1/B2 class trams, Hong Kong LRVs, Comeng Melbourne suburban trains, and later the extra Victorian-purchased XP power cars and XAM sleepers to enable the Riverina XPT to be extended to Melbourne. It's clear he was very proud of the vehicles he'd helped to build. I have scanned a selection of the images, which appear to be a mix of official builder's portraits, team photos, and self-taken shots showing candid everyday scenes on the shop floor. There are also images of the launch of the XP power cars with then-Victorian Premier Joan Kirner; and some personal visits to see the Flying Scotsman, Victorian Goldfields Railway, Coal Creek, etc. Filename Description Date Comeng Scans 2024-03-05 0001 Three Comeng workers (including the photographer) stand in front of Comeng suburban train 697M (Chopper unit) c. June-July 1989 Comeng Scans 2024-03-05 0002 Three Comeng workers (including the photographer) stand in front of Comeng suburban train 697M (Chopper unit) c. June-July 1989 Comeng Scans 2024-03-05 0003 Hong Kong Light Rail Phase 1 LRV 1013 being lifted onto its transport loader c. 1987-88 Comeng Scans 2024-03-05 0004 Walter Wright transport truck (Mack) waits to draw a heavy transport platform out of a shed at Comeng Dandenong. Hong Kong Phase I LRV (1024) can be seen inside the shed c. 1988 Comeng Scans 2024-03-05 0005 Hong Kong Light Rail Phase 1 LRV 1013 on its transport loader in a shed at Comeng Dandenong ready for transport c. 1988 Comeng Scans 2024-03-05 0006 Hong Kong Light Rail Phase 1 LRV 1013 on its transport loader in a shed at Comeng Dandenong ready for transport c. 1988 Comeng Scans 2024-03-05 0007 The photographer is pictured fitting components to the cab of a Phase I Hong Kong LRV No 1026 c. 1988 Comeng Scans 2024-03-05 0008 Hong Kong Light Rail Phase 1 LRV 1013 on its transport loader at Comeng Dandenong ready for transport c. 1988 Comeng Scans 2024-03-05 0009 Hong Kong Light Rail Phase 1 LRV 1013 on its transport loader at Comeng Dandenong ready for transport c. 1988 Comeng Scans 2024-03-05 0010 Hong Kong Light Rail Phase 1 LRV 1013 on its transport loader at Comeng Dandenong ready for transport c. 1988 Comeng Scans 2024-03-05 0011 The photographer and a colleague are pictured in the car park posing for a photo at Comeng Dandenong c. 1988 Comeng Scans 2024-03-05 0012 The photographer and a colleague are pictured inside the cab of Comeng suburban train 697M, posing for a photo at Comeng Dandenong c. 1989 Comeng Scans 2024-03-05 0013 A stainless steel Hitachi train bodyshell is being transported on a truck-trailer. Possibly taken at Martin and King in Bayswater, under transport to the station for railing to Somerton for fitout. This is a later series M car with the rear-mounted pantograph (note the mounting lugs above the non-driving end) c. 1980 Comeng Scans 2024-03-05 0014 A shot at Comeng Dandenong of the onsite workforce standing in front of a Phase I Hong Kong LRV. c.1987-88 Comeng Scans 2024-03-05 0015 A shot at Comeng Dandenong of the onsite workforce standing in front of a Phase I Hong Kong LRV. c.1987-88 Comeng Scans 2024-03-05 0016 Hong Kong Light Rail Phase 1 LRV 1038 on its transport loader at Port of Melbourne ready for transport c. 1988 Comeng Scans 2024-03-05 0017 Three Comeng workers (including the photographer) stand in front of a workbench at Comeng Dandenong c. June-July 1989 Comeng Scans 2024-03-05 0018 A newly completed Comeng train (wearing VicRail teacup orange) on the factory access track at Comeng Dandenong c. 1981 Comeng Scans 2024-03-05 0019 A newly completed Z3 class tram on a transporter, with its bogie frames waiting transport to Preston Workshops for final fitout and commissioning c. 1981 Comeng Scans 2024-03-05 0020 A newly completed Comeng train (wearing VicRail teacup orange) on the factory access track at Comeng Dandenong c. 1981 Comeng Scans 2024-03-05 0021 A newly completed Z3 class tram on a transporter, with its bogie frames waiting transport to Preston Workshops for final fitout and commissioning c. 1981 Comeng Scans 2024-03-05 0022 A Comeng/ABB artist impression presumably part of their bid for the Double Decker demonstrator train for Melbourne. Note the similarity to similar Comeng sets constructed for Sydney. c. Nov 1989 – April 1990 Comeng Scans 2024-03-05 0023 Victorian Railways steam locomotive K 169 on static display at Coal Creek. c. 1980s Comeng Scans 2024-03-05 0024 Comeng suburban train carriage 1190T on a traverser in the yard at Comeng Dandenong. c. June-July 1989 Comeng Scans 2024-03-05 0025 Comeng suburban train carriages the yard at Comeng Dandenong. c. June-July 1989 Comeng Scans 2024-03-05 0026 Comeng suburban train carriages the yard at Comeng Dandenong. c. June-July 1989 Comeng Scans 2024-03-05 0027 Comeng suburban train carriages the yard at Comeng Dandenong. c. June-July 1989 Comeng Scans 2024-03-05 0028 Comeng suburban train carriages the yard at Comeng Dandenong. c. June-July 1989 Comeng Scans 2024-03-05 0029 Comeng suburban train in a shed at Comeng Dandenong. c. June-July 1989 Comeng Scans 2024-03-05 0030 Comeng suburban train carriage 1190T on a traverser in the yard at Comeng Dandenong – possible Factory Acceptance Inspection by the Met c. June-July 1989 Comeng Scans 2024-03-05 0031 Comeng suburban train carriage 1190T being tractor-shunted in the yard at Comeng Dandenong – possible Factory Acceptance Inspection by the Met c. June-July 1989 Comeng Scans 2024-03-05 0032 Two Comeng workers carry a train part (possibly a first aid kit) for fitting to a Comeng suburban train. c. June-July 1989 Comeng Scans 2024-03-05 0033 Comeng suburban train carriage 1190T on a traverser in the yard at Comeng Dandenong – possible Factory Acceptance Inspection by the Met. One of the Met staff appears to be giving one of the Comeng workers a kiss on the cheek. c. June-July 1989 Comeng Scans 2024-03-05 0034 A B2 Class tram is on a low-loader multiwheel transport trailer waiting transport to Preston Workshops; while what appears to be a classic AP6 Valiant Safari Wagon is in the foreground. c. June-July 1989 Comeng Scans 2024-03-05 0035 A B2 Class tram is on a low-loader multiwheel transport trailer waiting transport to Preston Workshops; while a worker poses for a photo with his hand on the rigging. c. June-July 1989 Comeng Scans 2024-03-05 0036 A B2 Class tram is on a low-loader multiwheel transport trailer waiting transport to Preston Workshops; An HT Holden Belmont sedan has been posed in front to appear as if it is towing the heavy vehicle. c. June-July 1989 Comeng Scans 2024-03-05 0037 A B2 Class tram is on a low-loader multiwheel transport trailer waiting transport to Preston Workshops; An HT Holden Belmont sedan has been posed in front to appear as if it is towing the heavy vehicle. c. June-July 1989 Comeng Scans 2024-03-05 0038 A1 Class tram 232 is pictured up on stands while various A/B class tram cab frames are in the foreground in various stages of assembly. Of note, 232 appears to have been returned to Dandenong for major repair or other work, and shows signs of having been in traffic for some time (weathering and wear) c. June-July 1989 Comeng Scans 2024-03-05 0039 various A/B class tram cab frames are in the foreground in various stages of assembly. c. June-July 1989 Comeng Scans 2024-03-05 0040 A group of Comeng Dandenong workers stopped on a tea break. c. June-July 1989 Comeng Scans 2024-03-05 0041 An A/B Class tram cab being fitted out with electronics and controls. c. June-July 1989 Comeng Scans 2024-03-05 0042 A new Comeng suburban train in Metropolitan Transit livery on the test track at Comeng Dandenong. c. mid 1980s Comeng Scans 2024-03-05 0043 A new Comeng suburban train in Metropolitan Transit livery on the test track at Comeng Dandenong. c. mid 1980s Comeng Scans 2024-03-05 0044 Interior shot of a new Comeng suburban train at Comeng Dandenong. c. mid 1980s Comeng Scans 2024-03-05 0045 Interior shot of a new Comeng suburban train at Comeng Dandenong. c. mid 1980s Comeng Scans 2024-03-05 0046 The exterior sign at Dandenong showing ABB brand. Early 1990s Comeng Scans 2024-03-05 0047 A B2 Class tram is on a low-loader multiwheel transport trailer waiting transport to Preston Workshops. Early 1990s Comeng Scans 2024-03-05 0048 The Brush generator and Paxman Valenta engine as fitted inside a new XP power car for NSW Countrylink (paid for by Victoria) c. 1992 Comeng Scans 2024-03-05 0049 An exterior shot of a new Countrylink XP power car for NSW under construction (paid for by Victoria) c. 1992 Comeng Scans 2024-03-05 0050 Two new XAM class XPT sleeper carriages under construction at Comeng Dandenong c. 1992 Comeng Scans 2024-03-05 0051 A B2 class tram under construction at Comeng Dandenong Early 1990s Comeng Scans 2024-03-05 0052 A B2 class tram under construction at Comeng Dandenong Early 1990s Comeng Scans 2024-03-05 0053 An exterior shot of a new Countrylink XP power car for NSW being moved out of the shed c. 1992 Comeng Scans 2024-03-05 0054 An exterior shot of a new Countrylink XP power car at Comeng Dandenong c. 1992 Comeng Scans 2024-03-05 0055 An exterior shot of a new Countrylink XP power car at Comeng Dandenong c. 1992 Comeng Scans 2024-03-05 0056 An exterior shot of a new Countrylink XP power car at Comeng Dandenong c. 1992 Comeng Scans 2024-03-05 0057 B2 class trams under construction at Comeng Dandenong Early 1990s Comeng Scans 2024-03-05 0058 An XP Powercar from NSW wearing the Intercity XPT Candy Livery at Comeng Dandenong. It is not known if this was originally painted in this livery (incorrectly) or if this was one of the first delivered series transported to Dandenong to aid the construction process of the four additional locomotives. Early 1990s Comeng Scans 2024-03-05 0059 Melbourne B2 Class tram B2.2100 (renumbered from 2102) painted in the distinctive Chocolate and Cream livery to mark the completion of 100 B2 class trams Early 1990s Comeng Scans 2024-03-05 0060 A factory forklift wearing a hand painted “We love Labo(u)r” cardboard sign, possibly in connection to a media event with the Victorian Premier onsite at Comeng Dandenong. c. 1992 Comeng Scans 2024-03-05 0061 An exterior shot of a new Countrylink XP power car at Comeng Dandenong c. 1992 Comeng Scans 2024-03-05 0062 Two new new Countrylink XP power cars under construction and final fitout at Comeng Dandenong c. 1992 Comeng Scans 2024-03-05 0063 An exterior shot of a new Countrylink XP power car on the traverser at Comeng Dandenong c. 1992 Comeng Scans 2024-03-05 0064 A B2 Class tram is on a low-loader multiwheel transport trailer waiting transport to Preston Workshops. A large banner is draped on the side explaining that this is the 106th vehicle delivered to the Public Transport Corporation (B2.2108). c. Oct 1992 (based on delivery date) Comeng Scans 2024-03-05 0065 Victorian Premier Joan Kirner addresses a group of dignitaries in front of an ABB banner inside the main administration building at Dandenong, on the occasion of the first XPT power car purchased by Victoria being unveiled at a media event c. 1992 Comeng Scans 2024-03-05 0066 An ABB executive addresses a group of dignitaries in front of an ABB banner inside the main administration building at Dandenong, on the occasion of the first XPT power car purchased by Victoria being unveiled at a media event c. 1992 Comeng Scans 2024-03-05 0067 Victorian Premier Joan Kirner addresses the media in front of a completed XP class XPT power car at Dandenong, on the occasion of the first XPT power car purchased by Victoria being unveiled at a media event c. 1992 Comeng Scans 2024-03-05 0068 An exterior shot of a new Countrylink XP power car at Comeng Dandenong c. 1992 Comeng Scans 2024-03-05 0069 A Melbourne B2 class tram undergoing testing on the test circuit at ABB Dandenong c. early 1990s Comeng Scans 2024-03-05 0070 An XPlorer type DMU emerges from a shed at ABB Dandenong c.1994 Comeng Scans 2024-03-05 0071 Voith final drive axle mounted units for XPlorer railcars waiting to be fitted at Dandenong. c.1994 Comeng Scans 2024-03-05 0072 A completed XAM class sleeper carriage at ABB Dandenong. c.1993 Comeng Scans 2024-03-05 0073 Completed XPlorer railcars wait transfer to South Dynon for bogie exchange and transfer to NSW at ABB Dandenong. c. 1994 Comeng Scans 2024-03-05 0074 A clipping from an ABB internal newsletter outlining the staff-led initiative to commemorate the 100th B2 class tram with a special livery c.1992 Has photographs of ABB, Steamrail tours, Castlemaine and Maldon Railway, Fying Scotsman 4472 visit and Puffing Billy.Yields information about the people and events at Commonwealth Engineering plant Dandenong and the activities of the unknown compiler.Album containing 40 leaves, photos in a heavy card 3 ring spring binder.comeng, commonwealth engineering co., tramcars, hong kong, nsw, sydney, melbourne, railways, the met, b class, cmr, steam engines, abb, asea brown boveri -
 Melbourne Tram Museum
Album - Charles Craig - part 1 of 2, 1950s to 1970s
Photo - see pdf file for further information. Number Brief Description CC1 S178 at Elsternwick level crossing track works CC2 Building East Preston Depot 1955 CC3 Camberwell depot – post WW2 – lots of trams and a black cat CC4 W2 584 and SW6 958 northbound – Chapel St and Brighton Road CC5 W2 357 – southbound, Chapel St Brighton Road CC6 Pascoe Vale Road, Raceday working – note the signal CC7 The Preston Workshops - The Argus, post WW2, 223, 647 et al CC8 923 or is it 922 being built at Preston – The Argus photo - CC8A 832 being positioned onto trucks at Preston after an overhaul – Argus Photo – see also CC306 CC9 Footscray depot` CC10 W5 797 in St Kilda Road during track works – 1950s CC11 W2 457 at Kew Post Office CC12 Wellington Parade – W2 432, 492 and 337 – special event CC13 Swan St line up of trams – football? Or other special event – Sinclair’s bus on the right side. CC14 W2 630 being washed at a depot – The Argus photo CC15 Royal Park line at Flemington Road – W2 355 and W5 786 CC16 Nicholson St track construction from a tram cab CC17 T181 on tour at Gordon St CC18 T181 on Maribyrnong Bridge CC19 Ditto at River St just off bridge CC20 As for CC18 CC21 At Raleigh Rd CC22 T181 at Footscray depot CC23 Track construction, Nicholson, just north of Gertrude CC24 Commissioning overhead Bourke St tram 988 CC25 Queens Parade – 997 and 994 CC26 Swapping trolley wheel to skid – commissioning CC27 Track construction in Gertrude St CC28 985 in Queens Parade running special CC29 997 in Queens Parade CC30 1033 at North Fitzroy – AETA Special CC31 Bourke St at Elizabeth St – has passengers on board CC32 W6 985, 996 Queens Parade, Mk 3 bus 333 CC33 As above CC34 Showing construction at Nicholson & Gertrude – Bourke St CC35 W2 223 on Burnley temporary bridge – VR track expansion CC36 W5 823 – ditto CC37 Tram on old bridge prior to removal CC38 W2 433 on temporary bridge with new bridge beams and old track CC39 Looking down showing temporary single track – Swan St CC40 Tait train passing under tram bridge CC41 SW6 on single line – off loading CC42 W2 547 at City Road Junction CC43 City Road Jtn – 1969 – 596 and 771 CC44 City Road Jtn – 1969 – 596 and 771 (same as CC45 438 in Flinders St CC46 355 somewhere CC47 552 somewhere CC47A 364 at Preston Workshops? CC48 W2 334 on Traverser – Preston Workshops CC49 Wellington pade – large line up of trams, c1950 925, and 611 CC50 W2 493 Franklin st – advertising for Savings Certificates CC51 Possibly 551 with advertising for fund raising for Blind institute CC52 249 at Hawthorn – Riversdale Junction – with a Tally Ho and Village Fair Aux. board CC53 MMTB Postcard of 511 CC54 Wattle Park terminus with Single line warning sign CC55 Wattle Park Duplication CC56 36 at Domain Junction – 833 CC57 36 at Domain Junction CC58 36 at Domain Junction with 810 and 833 CC59 36 in Swanston by Flinders St Station CC60 36 in Spencer St at A’Beckett CC61 36 crossing Collins St CC62 36 crossing Collins St CC63 36 northbound in St Kilda Road with Shrine in background CC64 36 northbound in Swanston St at Flinders St CC65 Postcard – Ballarat 36 in Domain Road CC66 Postcard - Stampshow – Hawthorn Horse tram CC67 Postcard - Stampshow – Peace cable tram CC68 Postcard - 1041 and cable car set 1 at Preston CC69 Postcard - Colins & Elizabeth – greetings from old Melbourne CC70 Postcard - Cable car set at Preston CC71 Postcard - Twentyman’s cable cars CC72 Postcard - Nu-color-vue – horse tram 256 CC73 Cable car set – Market & Flinders CC74 Cable trams at Twentymans’ in their shed CC75 Cable tram track at Bourke & Spencer prior to removal CC76 Cable tram bogie at Preston Workshops – used as a dolly CC77 Cable trams at Twentymans’ CC78 Postcard - Valentines – Bourke looking west from Swanston CC79 Postcard - Rose 3938 – Bourke at Swanston – the Leviathan building CC80 Postcard - Valentines – Elizabeth St looking south from Collins – No. 19 CC81 Postcard - Rose P4765 – Bourke St Melbourne CC82 Postcard - Rose 4090 – cable tram passing Parliament house CC83 Postcard - Valentines – GPO Elizabeth St CC84 Interior of cable trailer with clothing on a set CC85 Elizabeth St looking north CC86 Cigarette card - Collins St No. 41- WD HO Wills CC87 Postcard - Rialto building with cable set CC88 Postcard - Valentines - Swanston at Flinders looking north CC89 CC90 Q 150 Hanna St – dated on rear CC91 176 turning – photo ex Alan Jungworth CC92 161 on Princes Bridge – minimum fare 4d sign and Inspector CC93 459 at Point Ormond CC94 158 at Gordon St – side on view CC95 X 217 in Swanston St CC96 X 217 in Swanston St with an East Brighton destination CC97 T177 CC98 T177 Peel St – no destination roll – being transferred? CC99 X1 462 in Glenhuntly Road to Point Ormond CC100 X1 462 in Glenhuntly Road to Elsternwick Rly Station CC101 X1 462 in Glenhuntly Road to Point Ormond CC102 Q 150 Hanna St CC103 190 at Camberwell Depot CC104 T182 at Footscray CC105 X1 466 and W2 at Footscray CC106 190 at Camberwell Depot CC107 X1 467 Barkly St Footscray CC108 X2 679 turning into William St from La Trobe St CC109 X2 677 Glenhuntly Road with Point Ormond Destination CC110 Postcard T180 CC111 Postcard format – X1 467 on a truck – see also CC178 CC112 Postcard format – X1 467 at Wantirna South CC113 Q200 and SW6 896 at Thornbury – has labels on rear CC114 T177, Ballarat Road – has labels on rear CC115 T178 at Point Ormond CC116 Postcard X1 465 and 466 CC117 Postcard – X2 676 CC118 Postcard – TMSV X2 217 CC119 810 on temporary bridging – 24-12-67 CC120 W2 575 – Queens Parade junction in, still temporary bridging, substation under construction CC121 Forming Queens Parade Junction base slab CC122 W2 596 prior to tramway works – all tracks still in position CC123 It’s a mass of reinforcing – bridging being formed CC124 Looking north with substation being built CC125 Looking east with some rather tight curves, Wellington St still in use CC126 SW6 958 ex Wellington St with all tracks and signal box and buildings. CC127 Victoria Pde at Gisborne looking east – at least 4 cars CC128 SW6 893? With dash canopy lights and SW6 862 and a man with a newspaper CC129 SW6 894 on the S curves, with tram in Wellington St CC130 Similar photo CC131 W2 564 turning into Wellington St – the concrete tracks are not that old CC132 W2 552 running out of Wellington St CC133 W5 732 from Fitzroy St into St Kilda Road with next iteration in position – very wonky CC134 W5 764 turning into Fitzroy St CC135 SW6 947 turning from Wellington St CC136 W2 586 running out of High St CC137 W2 500 turning into Wellington St CC138 W2 543 in Wellington St inbound CC139 L103 with St Kilda Junction destination, and a tower truck on right CC140 Workmen – new track in Queensway in use CC141 Ditto CC142 L103 in Queensway, and another car in bound CC143 Looking east along Wellington St which has been taken out of use. Also a MMTB Roller CC144 W5 824 and a W2 and all types of wobbly temporary track CC145 W2 354 to High St CC146 Sw6 947 on the S bends CC147 W2 500 looking north – tram on the S bends CC148 SW6 896 leaving the S bend CC149 W2 357 and a MMTB City bus with trees/gardens on the side CC150 W5 817 Elliot Ave – see also CC302 CC151 W2 552 – note the large trolley bridge CC152 W2 550 at depot or workshops CC153 1B truck CC154 SW2 432 CC155 W2 155 at Glenhuntly CC156 SW6 937 on AETA tour? CC157 X2 677 on Footscray service – Ballarat Rd? CC158 W2 641 – High St Kew? CC159 SW6 847 – Power St Hawthorn CC160 Simpson St – big line up CC161 W2 546 truck No. 1? CC162 W2s at Glenhuntly depot CC163 No. 15 truck under 899 CC164 206 and other junk at Preston Workshops CC165 W in Swanston St Melbourne – Rose series card CC166 Y1 613 Batman Ave?? or William St at Collins CC167 Tram plans CC168 X 217 Swanston St – see also 95 and 96 CC169 217 in Swanston St – same as 95 CC169A 192 in St Kilda Road at Princes bridge CC170 192 in St Kilda Road at Princes bridge CC171 Bendigo 3 arriving Malvern depot – being unloaded CC172 Ditto CC173 T180 at a depot CC174 X1 463 wheel set CC175 C30 – dog car side view – close up CC176 C30 dog car CC177 206 and 30 at Preston Workshops CC178 X1 467 on a truck – see CC111 also CC179 42 CC180 42 at a depot, no destination box CC181 W2 556 1A type truck CC182 Flinders St Station – Rose Series CC183 W7 1035 Spring – Nicholson St CC184 W7 1022 MMTB Post Card CC185 Adelaide 178 – has on rear – R. Lilburn 4/82 CC186 Adelaide 175 – has on rear – R. Lilburn 4/82 CC187 Y1 610 on AETA tour CC188 Y1 610 on AETA tour with large group – Point Ormond CC189 AETA display – has GH55-32 in pencil on rear CC190 AETA display – has GH55-29 in pencil on rear CC191 Y1 610 on AETA tour with large group – Point Ormond CC192 VR 53 at Footscray CC193 VR cars 40 and 34 at Elwood wash dock CC194 W7 1024 as the 1970 Christmas tram CC195 Geelong – loading a set of 22E trucks CC196 Geelong 10 and 23 running an AETA special CC197 Geelong – AETA special CC198 Geelong 7 at Junction CC199 Geelong 10, in the city CC200 Geelong 33 with Belmont destination CC201 Geelong 15 Eastern Park destination 29-3-1948 CC202 Geelong 23 at Railway Station – 29-3-1948 CC203 Geelong 23 at Railway Station – 29-3-1948 CC204 Geelong – loading a bogie tram CC205 Geelong – loading a bogie tram CC206 Geelong 40 – loaded on truck CC207 Geelong 40 – on jacks CC208 Geelong 40 on jacks – 19 behind CC209 Geelong 38 with two workers on either side CC210 – 214 Australian Historic Tramways stamp folder and set CC215 Bendigo 17 at depot – has dup JBS on rear CC216 Bendigo 20, 29 bogie and straight sill car at Charing Cross CC217 Bendigo one man bogie Pall Mall CC218 Bendigo – Bogie 23, other cars and welding truck at depot CC219 Bendigo 7 with Quarry Hill destination CC220 Bendigo 21 with Lake Weerona destination CC221 ESCo 18 Ballarat CC222 Ballarat bogie 22 on AETA special CC223 Ditto CC224 Ballarat 34 at Stones Corner – R Lilburn CC225 Ballarat 15 in Bridge St – R Lilburn CC226 Ballarat 40 at Gardens – R Lilburn CC227 Ballarat 37 running out of depot – R Lilburn CC228 Postcard – Valentines – Sturt St with loaded horse tram trailer CC229 AETA Geelong tram tour ticket – 29-3-1948 CC230 Postcard – Geelong – Valentine 2114 – T&G building CC231 Postcard – PMTT ! – High St Malvern CC232 Postcard – Empire – Glenferrie Road, Malvern at Wattletree Rd CC233 Postcard Y469, MMTB CC234 Postcard Z2 Spring St CC235 Postcard – Z1 MMTB CC236 Postcard – Stamp Show W1 431 CC237 Postcard – Stamp show B2005 CC238 Postcard – Stamp show W6 982 CC239 Postcard – Valentines 1264 – Johnstone Park with tram in distance CC240 Postcard – Rose 10711 – Swanston and Lonsdale – Hospital and W232 CC241 Postcard – Rose 4827 – Fitzroy St St Kilda W2 362 and 548 CC242 Postcard – Valentines – 939 – St Kilda War Memorial, W and a R? CC243 Postcard – Valentines – 572 – St Kilda War Memorial, W 413 and 140? CC244 Postcard – Valentines – 938 – Uper and Lower Esplanade – L 104 CC245 Postcard – St Kilda Rd at Princes Bridge Y1 and W CC246 Postcard – Biscay BG82 – W5 814 - CC247 Postcard – Biscay 796112 – Bourke St looking west CC248 Postcard – Biscay 796109 – Bourke St looking east CC249 Postcard – Biscay 2AUS58 – Z5 Bourke St CC250 Postcard – Biscay BG 249 – Swanston St CC251 Postcard – National View – St Kilda Rd – shrine and Prince Henrys W2 405 CC252 Postcard – Nu color vue – 11 ML 156 – St Kilda Rd CC253 Postcard – Nu color vue – 11 ML 153 – Swanston St CC254 Postcard – Nu Color vue – Collins St 442 CC255 Postcard – Pitt card – Adelaide – H 364 at Victoria St CC256 Postcard – SPER L/P 154 CC257 Postcard – BTMS – 550 CC258 Postcard – SPER – Brisbane 295 CC259 Adelaide 131 at Burnside – has R Lilburn on card, c1911 CC260 Adelaide 194 CC261 Adelaide 235, with two crew, The News photo CC262 Rockhampton, outside post office – has source of photo details CC263 Sydney – 2086 and 2062 arriving Circular Quay CC264 Sydney – P class – Pitt St? CC265 Sydney – 1610 at Circular Quay CC266 Brisbane 99 and 468 CC267 Sydney with bridge behind CC268 Steam tram Paramatta Park – 103 CC269 Sydney – Museum Station =- Elizabeth St CC270 Sydney – weed burner 137S at a loop Demonstrates the work of Charles Craig in photography and collection of prints.Assembled album in a black presentation folder of 270 photographs from the Charles Craig Collection - 86 sleeves - part 1 of 2. All photographs have been scanned and placed on the Museum's G drive. A list of all photographs with details where possible has been compiled. Victorian Provincial, Launceston, Hobart and Sydney tram photos have been transferred to other Museums, image files retained.melbourne, tramways, tramcars, trams, charles craig, st kilda junction, trackworks -
 Geelong RSL Sub Branch
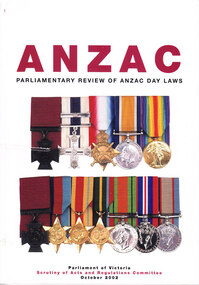
Book, Parliament of Victoria, Scrutiny of Acts and Regulations Committee, ANZAC Parliamentary Review of ANZAC Day Laws, October 2002
The Report recognizes a broad community acceptance that ANZAC Day is a solemn occasion of remembrance for the gallantry and sacrifices of Australians in wars and peace keeping effortsThis book is significant because it provides legislative guidance for the commemoration of ANZAC Day Medium size soft cover book with white background and two rows of medals featured on the front. Title in bold red writing. Back cover plain white with parliamentary logoanzac, parliament, victoria, commemoration, leglislation, world war 1, review, scrutiny of acts and regulations committee -
 Geelong RSL Sub Branch
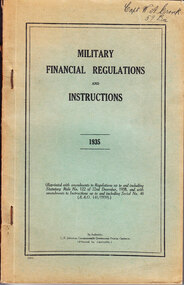
Book, L.F. Johnston Commonwealth Government Printer, Military Financial Regulations and Instructions, Early 20th Century
Military Financial Regulations and Instructions 1935 Reprinted with amendments up to and including Statutory Rule No 122 of 22 December 1938 and with amendments to Instructions up to and including Serial No 40 (AAO 141/1939)Pay and Allowances for Service Personnel as at 1935/1939 A book oblong in shape faded blue/green colour thin cardboard covers white pages.Serial No 40 (AAO 141/1939) by Authority L.F. Johnston, Commonwealth Government Printer, Canberra (Printed in Australia). Hand written in ink in top right hand corner of front cover: W. A. Cronk/Capt 59 Bn Hand written in ink top right corner of inside front page: W.A. CRONK. Capt./59 Bn.military financial regulations canberra johnston australia -
 Geelong RSL Sub Branch
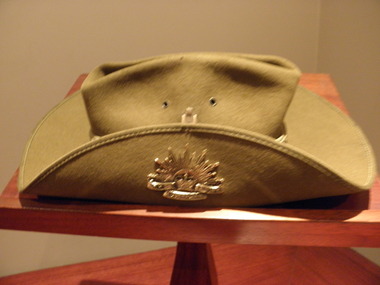
Hat, Slouch, Mid 20th Century
Australian Army issue slouch hat issued to all members of the Australian Army owned by a person by the name of Phipps.Post World War 2 Australian Army Hat pinned into the slouch position. The pinned brim has a Rising Sun Badge attached by two metal pins. Hat Band is cotton and rouched. It also has a leather chin strap. Hand written on leather band inside the hat: PHIPPS Embossed into leather band: MADE BY/"FAYREFIELD"/MELBOURNE/6 5/8/19[indecipherable]australian army slouch rising sun phipps fayrefield -
 Geelong RSL Sub Branch
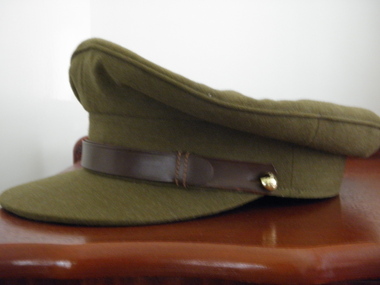
Cap, Peaked, Mid 20th Century
Australian Army Officers Cap worn in the mid 20th century. These caps are not issued anymore and have been replaced by the slouch hat.Khaki Officer's Peak Cap, cloth material, leather band round the peak attached to the cap by two small round shaped gold in colour Australian Army cap buttons.Internal cap band is leather and joined at the centre back by a silk white ribbon. Internal leather band is secured at the rear by a white silk bowed ribbon. The inside water proof insert is inscribed Dept of Supply and CGCF (Commonwealth Government Clothing Factory) with the Commonwealth Coat of Arms in the centre of the inscriptions. Size 7 and one half.officer, cap, khaki, -
 Geelong RSL Sub Branch
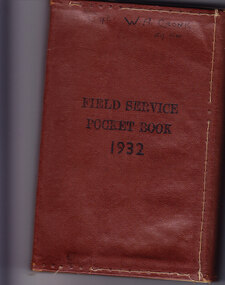
Book, Field Service Pocket Book 1932, circa 1932
This book belonged to Australian Army Officer Major W.A. Cronk.This book is designed for Officer's on Active Service and at manoeuvres and on instructional exercises in conjunction with operations.Brown imitation leather covered book oblong in shape.W.A. Cronk 59 Bn on front cover. Inside first page Major W.A. Cronk 2/14 Trng Bn. J.W.B. Anderson B Coy. 59th Infantry Coburg. On the spine FSPB 1932.book field service pocket 59 bn 2/14 trng bn -
 Geelong RSL Sub Branch
Book, Drill for Foot Guards and Infantry of the Line, 04/1939
Training Manual Belonging to Major W.A. Cronk 15 Trng BnMilitary Drill Training Manual 1939An oblong book faded buff color cardboard cover white pages. Military Training Pamphlet No18 1939.26/G.S. Pubns./92 Major W.A. Cronk. 15 Trng Bntraining drill foot guards infantry pamphlet -
 Geelong RSL Sub Branch
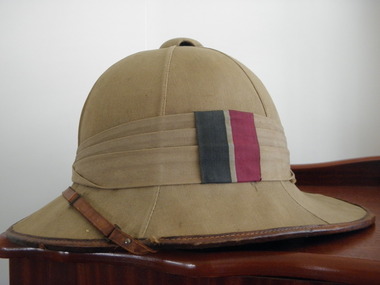
Pith Helmet
The earliest appearance of these helmets went back as far as 1840 for use in the field and then worn with dress uniform only in the 20th century. The helmet was part of military uniform from 1840 up until the the mid 20th century.Pith Helmet is khaki colour with khaki puggaree, the puggaree has three folds and sewn on the left hand side of the puggaree is a blue white red colour patch. There is a leather band around the brim of the helmet and across the front visor there is a leather chin strap with metal adjustment buckles there is a ball shaped finial in the top of the hat.Handwritten inside the helmet is the name of Sgt. Canr A.E.khaki pith helmet field use dress uniform headware -
 Geelong RSL Sub Branch
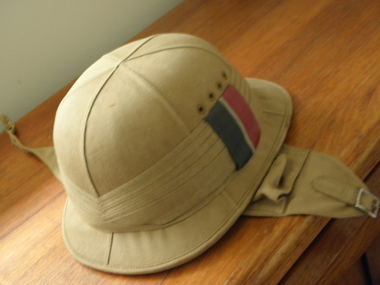
Pith Helmet, Early 20th Century
The helmet was used by Sgt Cane A. E.Royal Australian Air Force Pith Helmet WW2.Khaki pith helmet with khaki puggaree which has 5 pleats. One the pugaree is an oblong colour patch blue white red colours. The Pith Helmet has a cloth khaki band around the brim and 4 ventilation holes on each side of the helmet. This helmet has chin straps that also have ear protection when done up. On the back band of the helmet is a leather loop with a press stud.Inside the helmet handwritten numbers R18098 and 13745 name Cane A. E.khaki pith helmet field sgt a.e.cane -
 Geelong RSL Sub Branch
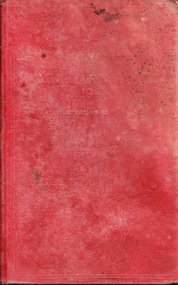
Book, L.F. Johnston Commonwealth Government Printer Canberra, Manual of Military Law 1941 Australian Edition, Early 20th Century
This Manual of Military Law 1941 Australian Edition contains Military Law that apply's to officers and enlisted personnel of the Australian Military Forces.The Manual provides rules and regulations that apply to officers and enlisted personnel of the AMF when not on war service and on war service.Leather bound book red in colour oblong shape. The front cover has faded over time.Printed in Australia L.F. Johnston, Commonwealth Government Printer, Canberra.military law manual 1941 l.f. johnston printer canberra -
 Geelong RSL Sub Branch
Book, Signal Training (All Arms) 1938, Early 20th Century
Signal Training (All Arms) 1938 for the use of training Military Personal.Used for training Military Personnel in Signals.Oblong shape book, red cardboard and cloth cover.Inside front cover written in pencil in name Booth. Printed by Brown, Prior, Anderson Pty Ltd Melbourne. C.1.training, signals, all arms, military. -
 Geelong RSL Sub Branch
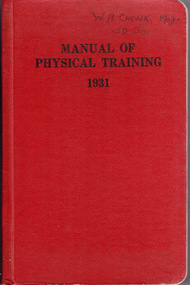
Book, Manual of Physical Training 1931, Early 20th Century
Book of Physical Training for use by members of the Military Forces.Physical Training for members of the Military Forces.Oblong book red cloth cardboard cover.Front cover W.A. Cronk Major 59 Bn. Inside on first page in ink W.A. Cronk Major 59 Bn. Inside on title page in pencil W.A. Cronk 59 Bn.manual, training, physical, military. -
 Geelong RSL Sub Branch
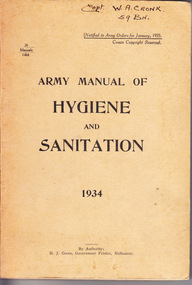
Book, Army Manual of Hygiene and Sanitation 1934, Early 20th Century
Book relating to Hygiene and Sanitation in the Military Forces used by W.A. Cronk.Book belonging to W.A. Cronk 59 Bn.Oblong book buff colour cardboard cover.On the front cover in pen Capt W.A. Cronk 59 Bn. On the spine in in H&S 1934. Inside on the first page in ink W.A. Cronk Capt 59 Bn. manual hygiene sanitation army -
 Geelong RSL Sub Branch
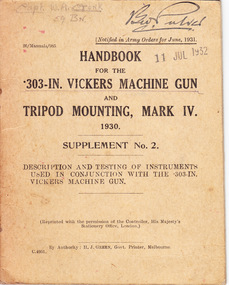
Book, Handbook for .303-IN Vickers Machine Gun and Tripod Mounting, Mark IV 1930 Supplement No 2, Early 20th Century
Handbook for the .303-IN Vickers Machine Gun and Tripod Mounting, Mark IV 1930 Supplement 2.Handbook used by Military Personnel in relation to the .303-IN Vickers Machine Gun and Tripod Mounting, Mark IV.A small oblong book buff in colour cardboard outer cover.On the front cover in pencil Capt W.A. Cronk 59 Bn. On the front cover in ink B.W. Pulver.machine gun, tripod mounting, mounting -
 Geelong RSL Sub Branch
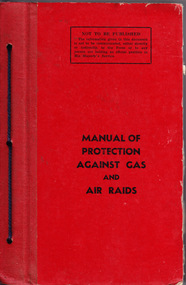
Book, Manual of Protection against Gas and Air Raids, Early 20th Century
This Manual would have been used by Military Personnel of Protection against Gas and Air Raids, Respirators, Passive Air Defence.Safety precautions for Members of the Military circa 1930 and beyond.An oblong manual there are two seperate covers to the manual which are cardboard construction and coloured red. The covers are tied together with a black shoe lace. Inside the covers are Pamphlet No 1 Protection Against Gas in the Field, Pamphlet No 2 Respirators, Pamphlet No no 3 Passive Air DefenceOn the first Pamphlet stamped 115 G.H. Heidelberg. In ink the figures 79.gas, air raids, respirators, passive air defence, military, personnel. -
 Geelong RSL Sub Branch
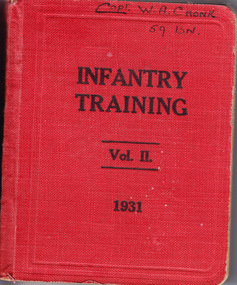
Book, H.J. Green, Govt Printer, Melbourne, Infantry Training Vol.11 1931, Early 20th Century
This book was at some time in the possession of Capt W.A. Cronk 59th Bn. This Book would have been used to train Military Personnel in Infantry Training in the early 20th Century.Small pocket book, red cardboard cover.In ink on front cover Capt W.A. Cronk 59Bn. In ink on the spine IT 11 1931. Inside on second page Capt W.A. Cronk 59th Infantry.training, infantry, military, battalion army. -
 Geelong RSL Sub Branch
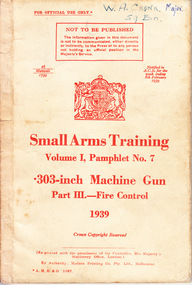
Book, Small Arms Training Volune 1, Pamphlet 7 .303-inch Machine Gun Part III.-Fire Control 1939, Early 20th Century
A book in the possession of Major W.A. Cronk 59 Bn used in the training of Military Personnel in the early 20th Century.This book would have been used in the training of Military Personnel in Small Arms Training.An oblong book/pamphlet buff colour cardboard cover.On the front cover in ink W.A. Cronk. Major. 59 Bn. Inside page 2 in ink W.A. Cronk. Major. 59 Bn. army, military, small arms, .303-inch machine gun, fire control. -
 Geelong RSL Sub Branch
Book, D.W. Paterson Co. Pty. Ltd, Manual of Field Engineering Vol.I (All Arms) 1933, Early 20th Century
A training manual of Field Engineering for use by the Australian Military Forces.A Training Manual used by Australian Military Forces in the early 20th Century.An oblong book, pink cardboard cover, red taped spine. The figure 2 in ink on the front cover. In stamp on the front cover 4th Anti-Tank Regt. A.I.F.training, engineering, field, military, -
 Geelong RSL Sub Branch
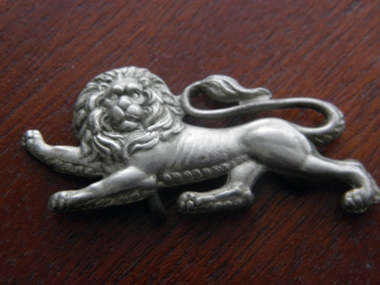
Cap/Lapel Badge, Not known, Early 20th Century
This Badge would have been made in the early 20th century for the British Army for wearing as a hat/lapel badge, possibly for the Royal Lancaster Regiment.Silver, male lion shapeNonehat/lapel badge, british army, -
 Geelong RSL Sub Branch
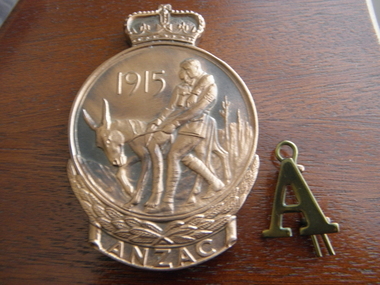
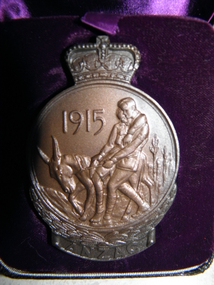
Medallion, Australian and New Zealand Military Forces, Mid 20th Century
This medallion was issued to surviving members of the Defence Force who served on the Gallipoli Peninsula, or in direct support. NOK or other entitled persons can aapply to receive the medallion on behalf of the relatives.The medallion is to be issued to ANZACs who were at Gallipoli between 15 April 1915 and the final date of evacuation in January 1916.Round medallion, bronze in colour, crown on top and ANZAC inscribed on the bottom of medallion. There is a lapel badge "A". The medallion is cast in bronze and the lapel badge will be a metal of bronze colour.Obverse of medallion depicts Simpson and his Donkey, lower border is a laurel wreath above the word ANZAC. The reverse shows a map in relief of Australia and New Zealand superimposed by the Southern Cross the lower half is bordered by the New Zealand fern leaves. Inscribed J.C. Martin.anzac, medallion, gallipoli, commemorative -
 Geelong RSL Sub Branch
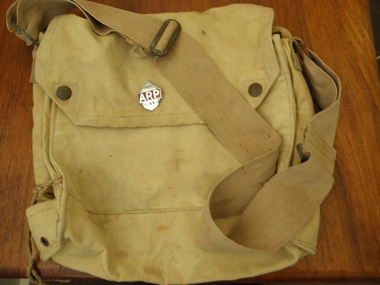
Bag, Early 20th Century
The Bag was issued to volunteer Air Raid Patrol Persons in Australia during WW2.Canvas bag with shoulder strap and Victorian ARP Badge on the front. Round metal button on left side. Two air vents on the bottom. Two studs to close the bag.Inside front flap M.H. ??. 1942. Victoria ARP Badge on front flap numbered BG359.air, raid, precautions, patrol persons, ww2, volunteers, -
 Geelong RSL Sub Branch
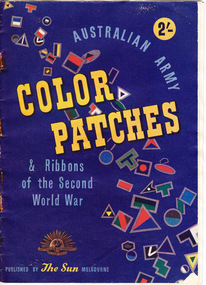
Book, Laurence Kay, Australian Army Colour Patches, Mid 20th Century
History of Australian Army Colour Patches in WW1 and WW2.Colour patches make units easier to find in large camps.Oblong book, paper covers blue front white back. Rising Sun on the front cover.Published by The Sun Melbourne.colour, patches, australian army, military. -
 Geelong RSL Sub Branch
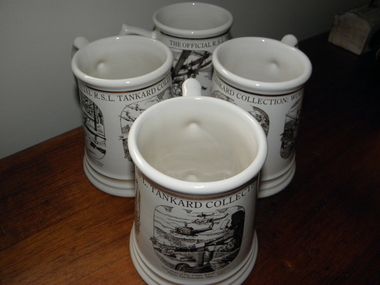
Tankard, Franklin Mint Pty Ltd, 1983
There are four tankards in this collection. Each tankard has three pictures pertaining to a specific conflict - WW1, WW2, Korean War and Vietnam War.The pictures show particular battles per conflict.The Official RSL Tankard Collection, four tankards, round, white, ceramic with three pictures per tankard.Made by Franklin Mint Pty Ltd 1983.military, tankard, world wars. -
 Geelong RSL Sub Branch
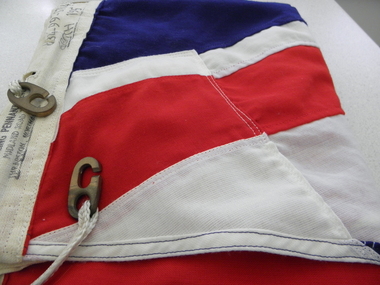
Flag, 1985
Union Jack made in 1985 and possibly once in the possession of Peter Wilson.A Union Jack that was once in the possession of Peter Wilson.Union Jack, oblong red white and blue, cloth, three metal eyelets on the white edge band, two brass toggles for hanging the flag onto a flagpost.On the white edge band the makers name, stock number 8834-99-5714529 6BDTH 1985, an upwards arrow in a circle and in black ink the name Peter Wilson.flag, union jack, united kingdom. -
 Geelong RSL Sub Branch
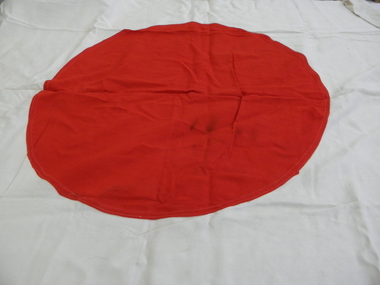
Flag
This Flag of Japan appears to have been in the possession of Chief Petty Officer Writer D'Arcy who served on the HMAS Arunta.Oblong flag, white cloth fabric with red circle in the middle.flag, japan, ww2, cpo writer d'arcy, hmas arunta. -
 Geelong RSL Sub Branch
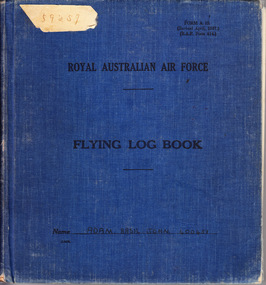
Book, No makers listed, RAAF Flying Log Book, Mid 20th Century
This RAAF Flying Log Book belonged to Flt Lt Basil John Adam 400451. The first entry in the log book is 16 November 1940 at Elementary Training Course at Narrandera NSW.This is a RAFF Flying Log Book belonging to Flt Lt B J Adams.Not quite square book, blue cloth cover. White tape on the front upper left cover with the number 59259. On the spine the number 4259. On the spine on tape the number 184. Writen on the bottom pages thickness of the book ADAM.B. 400451.Royal Australian Air Force Flying Log Book Form A.18 (Revised April, 1937.) (RAF Form 414) Name ADAM Basiel John 400451.raaf, log book, adams b.j., 1940. -
 Geelong RSL Sub Branch
Medallion, Department of Defence, Mid 20th Century
ANZAC Commemorative Medallion is issued to all members of the Australian Defence Force and New Zealand Defence Force who served on the Gallipoli Peninsula. The medallion is also known as the Gallipoli Medallion.The personnel receiving the medallion served on the Gallipoli Peninsula from 25 April 1915 to the final date of evacuation in January 1916.The medallion is round the obverse depicts Simpson and his donkey carrying a wounded soldier to safety. It is bordered on the lower half by a laurel wreath above the word ANZAC. The reverse shows a map in relief of Australia and New Zealand superimposed by the Southern Cross. The lower half will be boardered by the New Zealand Fern Leaves. There is a crown at the top of the medallion. The medallion is cast in bronze.This medallion has the name W.E. Sabeston inscribed on the back underneath the New Zealand Fern Leaves.anzac, medallioin, gallipoli, 1915-1916, defence. -
 Geelong RSL Sub Branch
Bayonet, No maker, Early 20th Century
There are no distinguishing features on the item to be able to link it to any one event.Metal bayonet with wooden and medal handle, four screws holding the wood to the metal frame. The bayonet has a release button to free the the blade to a position as required. There is a metal scabbard to house the bayonet blade, there is a metal loop on the scabbard to hang onto a belt. There is a round sight on top of the bayonet.T4 37248military, bayonet, australian army. -
 Geelong RSL Sub Branch
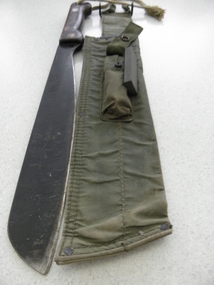
Machete, There are no makers names, Mid 20th Century
These machete's were issued to military personnel posted in jungle like conditions.The machete would have been used by military personnel during WW2 and during the 1950s.Steel blade machete with wooden double sided handle. The handle is attached to the wood with four steel rods. There is an olive green scabbard made of cotton material oil impregnated. The scabbard has a pocket on the front to hold a sharpening stone and has steel on the top opening to keep the opening firm, there is a steel catch for attachment to webbing and a cloth loop with press stud to hold the handle of the machete in place when in the scabbard. There is a cotton fabric loop through the handle.On the handle of the machete MA67. The item number on the scabbard is not readable.army, military, machete.