Showing 3151 items matching "any"
-
 Coal Creek Community Park & Museum
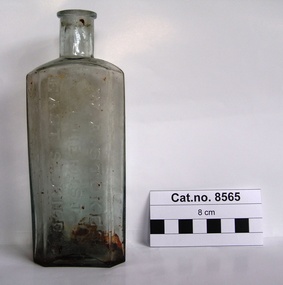
Bottle, glass, W. A. Stokes, Chemist
TROVE : Jewish Herald (Vic. : 1879 - 1920) Friday 14 March 1913 p 10 Advertising. Mr. Frank Newman desires to intimate that he has purchased the old-established business of the late MR. W. A. STOKES, recently carried on by Mr. P. J. Winch, and hopes by giving; his personal attention to the Pharmacy to merit your support. 181 CARLISLE ST.. BALACLAVA. Tel. Windsor 30. TROVE : The Age (Melbourne, Vic. : 1854 - 1954) Tuesday 13 December 1887 p 5 Article " ROUGH ON RATS" POISON.' . PROSECUTION UNDER THE POISONS ACT. At the St. Kilda police court, on Friday, W, A. Stokes, chemist, Carlisle-street, Balaclava, was prosecuted under the Poisons Statute on the charge of selling to one Mrs. Hannah Charlton a poison without having made and signed the entry required by the act. A second charge of selling to Mrs, Hannah Charlton a poison without having obtained the signature of the purchaser to an entry as required by the act was also preferred against the defendant. Both cases were taken together. Mr, Donovan appeared to prosecute, and Mr. Cole for the defence. Senior-constable Connell deposed that he knew the defendant. On the 24th of October last an inquest was held at East St. Kilda relative to the cause of the death of a man named Charlton. A packet bearing the label " Rough on Rats," which was found. in the deceased's bedroom, was produced at the inqiry, and afterwards handed over to Mr. Blackett, Government analytical chemist for analysis. The verdict of the jury was that the deceased died from the effects of arsenical poisoning. Hannah Charlton, a widow, residing in South Yarra, said in September last she purchased a packet of "Rough on Rats" from the defendant's assistant. Witness was not asked her name, place of abode, occupation or for what purpose the poison was required; neither did she observe the assistant make any entry in a book, She did not attach her signature to any document, and was not asked to do so. The packet was purchased for the purpose of poisoning rats. Cuthbert Robert Blackett, Government analytical chemist, stated that Constable Ballantyne handed him the packet produced. Witness made an analysis of the contents, and found it composed of arsenic, slightly coloured with a carbonaceous matter. The mayor announced that there was a doubt in the minds of the magistrates as to whether the defendant could be held guilty under the law, but they thought the prosecution had attained its object by making known the fact that "Rough on Rats" is a poison. They thought that such preparations should be entered by the sellers, but in that case they were inclined to give the defendant the benefit of the doubt and dismiss the case.Rectangular clear light green tinted glass bottle with embossed text and numerals on side and base.'W. A. STOKES CHEMIST EAST ST.KILDA' on side. 'K6232' on base.chemist, poison, arsenic -
 Kew Historical Society Inc
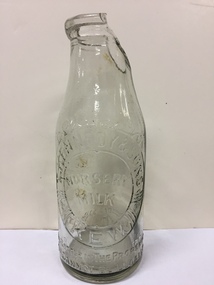
Container - Milk Bottle, Nursery Milk Bottle : Kennedy & Sons, Kew, Twentieth century
Kennedy and sons, Roselea Dairy operated in Kew (<1930-1945>). In 1945 Thomas Kennedy, Michael Kennedy and Patrick John Kennedy traded as Kennedy and sons, Roselea Dairy at 80 Pakington St, Kew. (Victorian Government, 07 December 1945). Tom Kennedy, Jnr, and his wife, Lucy, lived at 109 Pakington St Kew. Tom Kennedy Jnr. died 02 November 1963. Lucy Kennedy died 28 November 1987. "CONTEMPT OF COURT. MILK-CARTER GUILTY. Breach of an Injunction. A Supreme Court writ has been issued by Thomas Kennedy, sen., Thomas Kennedy, jun., Patrick John Kennedy, and Michael Kennedy, trading as Kennedy and Sons, Rose Lea Dairy, against Gordon Allberry Shepherdly, of Barnard street, North Kew, milk-carter, claiming an injunction and damages. Plaintiffs carry on business at Pakington street. Kew, and Melville street, Hawthorn, and they claim In their writ an injunction restraining the defendant from soliciting or endeavouring to obtain the custom of people who were customers of plaintiffs when Shepherdly was employed by them under an agreement dated March 13 1928. Plaintiffs also claim damages. Mr Read (instructed by Messrs. Moule, Hamilton, and Derham) appeared for plaintiffs before Mr. Justice Macfarlan in the Practice Court yesterday, to ask for an order for the committal of Shepherdly to prison, or alternatively, for an order that plaintiffs be at liberty to Issue a writ of attachment against him for contempt of court in soliciting or endeavouring to obtain the custom of plaintiffs' customers. The affidavits set out that Shepherdly was employed by plaintiffs from March I3, 1928. until June 6. 1930. An Interlocutory injunction had been granted pending trial of the action for a permanent injunction. Shepherdly, who appeared in person yesterday, said that he had a sick wife and two children. He had not served any of the customers referred to since the granting of the injunction. He had passed them over to another man for whom he was working. Mr Justice Macfarlan - In doing that you have committed a breach of the injunction, and I have no alternative but to order that you be sent to gaol. I will make an order that you be committed to prison until further order of the Court. I will direct, however, that the order be not executed until Tuesday next. If you can then satisfy the Court that you have ceased to serve, or take any part in serving, the customers of Kennedy and Sons, the order will not be executed. (The Argus, 11 July 1930) Rare, if damaged milk bottle from an historic Kew dairyMilk bottle produced for and retailed by Kennedy & Sons Kew. The dairy operated under various names, and at one stage was described as the Rose Lea Dairy. The dairy was situated on the corner of Eglinton and Pakington Streets, Kew. "Kennedy & Sons / Kew / Nursery Milk / This bottle is the property of T.Kennedy & Sons, Kew/ and cannot be legally used by others."kennedy's dairy, kennedy and sons, dairies - kew (vic), milk bottles - kew - melbourne - victoria, thomas kennedy, michael kennedy -
 Red Cliffs Military Museum
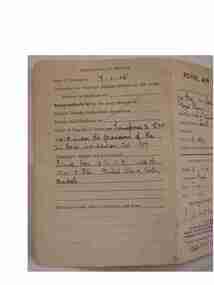
Discharge Paper WW1, Copy of WW1 Discharge Paper in cover, (estimated); 1921
This is a part of the A.J. Roddy Collection. The Family have glued a piece on the envelope which says, "Dad's Discharge Paper/ Royal Irish Rifles & Royal Flying Corps./ 7-1-1915 to Dec 1921. Copy a the Discharge paper of Pte2 James Roddy, Royal Irish Rifles & Royal Flying Corps RAF 7-1-1915 to Dec 1921 and CoverCover: Cover for Certificates/ and other Documents of a/ soldier on Demobilization or Transfer to the Reseve/ or Discharge.// Front of Paper: Top right: Form 2067/ Royal Air Force/ Serial No/ Character Certificate of No 133458/ Rank Pte2 Name Roddy James/ Royal Flying Corp (Regiment (crossed out))/ Born in the Parish of / near the Town of South in the / County of ......... on the / Date 11.7.1897/ Trade as stated by him on Enlistment Postman/ 2 parallel lines/ * Description on Leaving the Colours/ Heoght 5ft 6in. Identification Marks:-/ Complexion Fresh Scar above 1st Lumbar/ Eyes Grey. Vertibrae/ Hair Brown/ Signature of Soldier/ (was signed J. Roddy/ * To prevent impersonation/ In the event of any doubt arising as to the bona fidis of the/ bearer, the above description and signature should be carefully compared with present appearance and hand writing. (16:957) WT 3183C/1875 5m.17/18. P&P Ltd/ Photostat copy of Original Opening the paper inside: The character here given is based on continous records of the holder's conduct and / employment throughout his Military Career./ This is to Certify that No 133458 Rank Pte2 Name Roddy James/ has served with the colours in the Royal Irish Rifles & Royal Flying Corps for 3 83/365 years. 1915-18/ Serving in the Royal Flying Corps as a Batman, and during/ the whole of this period carrying out his duites in a/ satisfactory manner/ There is no record of him having incurred any service/ entries on his conduct sheet during this period./ for service in the R.A.F. see form 280/ Signature ..... Squadron Leader/ Date December 1921 Commanding R.A.F. Records Ruislip/ If further particulars as to his character and record of service are required within three years of above date, apply to/ where he is registered for Civil Employment,/ afterwards to the Officer in Charge of Records./ * This space is intended to be filled in by any organisation which has registered the man's name and is prepared to/ supply further information.// Back of paper: Particulars of Service/ Date of Enlistement 7.1.15/ Preceeded on Furlough pending Transfer to the Army/ Reserve, or Discharge on... passed medically fit for the Army Reserve on/ Due for Final Discharge on../ Cause of Transfer or Discharge - Transferred to R.A.F. 1-4-18. under the provisions of the/ Air Force (Constitution) Act Oct. 1917./ Campaigns, Medals and Decorations/ France from 15.6.15 to 3.12.16/ 1914-15 Star, British War & Victory/ Medals. /Education and other Certificates and dates/corps, ww1, collection, royal, a j, roddy, flying, irish, rifles, pte2, james, 1915 -
 Bendigo Historical Society Inc.
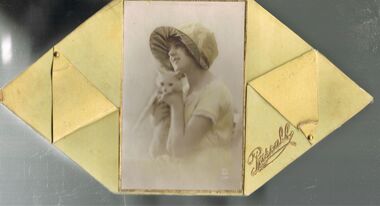
Container - CHOCOLATE BOX COLLECTION: PASCALL BOX, 1920s
Object.Pascall 1920s Yellow Chocolate Box. Design Flanged Sexangular Box with Curved Sectional Top, Sepia Photograph with Subject's Hat and Dress tinted in Pale Yellow in Centre of Lid. Photograph Surrounded by Gold Border. Subject Young Woman & Her Pet Cat. Photograph has White Mark PC Parts in a circle and the number 524 underneath. Inside Lid Pascall 1 lb Net. Contained in Box Labels Packers No 493 and Checkers No 476. Packaging Brown Paper and Fine Paper Shavings in Pale & Dark Colours. Also Another Tag Buff Paper & Red Text In Top Left Hand Corner is the Pascall London Trademark Purity & Sweetness Seal & In The Top Right-hand Corner is A Floral Emblem & The Words Furzedown. The Title On This Tag Reads Co-operation Between The Manufacturer & Consumer. The Remaining Text Reads: - These chocolates were packed with the greatest care and left in our factory in perfect condition. Extremely hot weather or contact with steam pipes may turn these chocolates grey. This is not an indication of age but of the temperature to which they have been exposed. Goods are all packed full weight; the paper shavings used are for packing and protection only. If any complaint necessary please return this ticket with the goods. James Pascall, Ltd London England. Chocolates are also still contained within the box all these years later.domestic equipment, containers, decorative chocolate box -
 Bendigo Historical Society Inc.
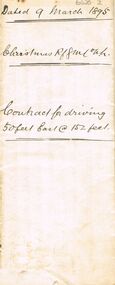
Document - CHRISTMAS REEF GOLD MINING CO COLLECTION: CONTRACT FOR DRIVING 50 FT EAST
Contract, 2 page handwritten, dated 9 March 1895, Written on front Christmas Reef GML Contract for driving 50 feet east @ 152 feet. On inside specification for driving cross-cut for the Christmas Reef Gold Mining Company No Liability ( least no 6486 Sandhurst ) at a depth of 150 feet A numbered list of expectation is given, for example Number 3: ' All Mullock & Co., obtained from the cross-cut shall be brought to the surface and the shaft and cross-cut left perfectly clear on the completion of the contract. Should any quartz be struck it must be brought up and stacked separately or disposed of as the company shall direct On bottom of contract I the undersigned hereby agree to perform the within mentioned work according to ?. Within written specification and to be bound by the terms and conditions therein mentioned for the sum of nine shilling and sixpence per completed foot of driving. Dated this ninth day of March 1895' signed Pat English. Below: My father the above named Pat English having died this morning, I am desirous of completing the above contract and I agree to complete the same according to the within written specification and to be bound by the terms and conditions therein mentioned for the sum of nine shillings and sixpence per completed foot of driving and to clean up the cross-cut to the presend and before starting. Dated this 29th. Day of March, 1895. Signed Patrick English.bendigo, mining, christmas reef gold mining -
 Bendigo Historical Society Inc.
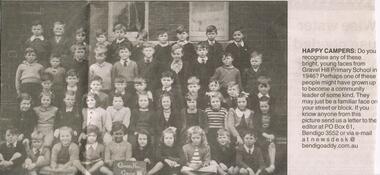
Newspaper - JENNY FOLEY COLLECTION: HAPPY CAMPERS
Bendigo Advertiser ''The way we were'' from 2003. Happy campers: do you recognize any of these bright, young faces from Gravel Hill primary school in 1946? Bendigo Advertiser ''The way we were'' from 2003. School days: Gravel Hill primary school grade 2, 1946. Names supplied by Alan McCaig. Back row L to R: Jimmy Pitson, Gerald Johnston, Unknown, Maxie Hutchinson, Barry Hope, Unknown, Ron Phillips, Eric Threlfall, Bill Hall, Bill Thorpe. Fourth row: Bernard Hinton, Des Braumann, John Chambers, John Caldwell, Brian Baker, Stan Climas, Kevin Paine, Alan McKean, Lenny Clark, Alan McCaig. Centre row: Neville Skelton, Ian Colwell, Larry Williams, Sydney Vaughan, Norman Skoglund, John Timmins, Brian Rowarth, John Cambridge, Mickey Gall, unknown. Second row: Ann Yandell, Phyllis Fisher, Adrienne Nuttall, Jean Bouch, Judith Ewing, Nola Grose, Unknown, Faye Masters, Unknown, Dorothy Stephenson, Unknown. Front row: Jim Allen, Tich Hamilton, Pam Smith, Marie Floreani, Annette Letitia, Denise Dowsey, Sylvia Coad, Alison Gibson, Colin Whitehead, Jim Hartwell. The clip is in a foldernewspaper, bendigo advertiser, the way we were -
 The 5th/6th Battalion Royal Victoria Regiment Historical Collection
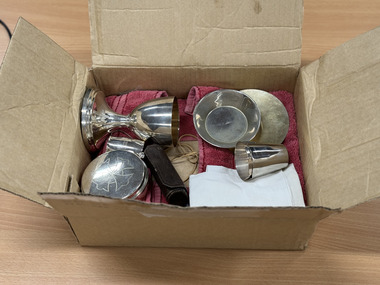
Ceremonial object - Communion Kit- Rev J.J. Tresidder
Catholic Chaplains Communion kit carried by Rev JJ Tresidder. Rev Tresidder served during the second world war as an Army Chaplian.Catholic Chaplians Communition kit, carried by WW2 chaplain VX117292 John Joseph Tressider. This is an example of the style of equipment, soldiers would have been offered communion from.Communion kit, consisting of 10 items. 1. A white linen Corporal with small red cross embroidered in its centre. This item was used during Mass/ communion/ Lords Supper to collect any host if it were to be dropped, especially after concecration. 2. Pyx. This is a flat circular dish with a hinged lid. On the side of the container is a small silver ball with a hole drilled through it to allow a string to be placed through and the Pyx to be worn around the priests neck. The Pyx is made of silver, and has a cross engraved on the lid. on the reverse " Rev. J.J.Tressider Catholic Chaplain" is enscribed. This item holds individual hosts ( bread) Following Concecration hosts are to be consumed or worn by the Priest and later to be distrubted as reserved sacrement. 3.Paten, a small silver dish, slightly bowing in the centre. There are no engraving on this item except for the makers stamps on the reverse. "T.G. Aunt & Co." " STG. Silver" Use for holding the Priests Host (Bread) representing the body of Christ, broken for all. 4. Chalice. Silver cup with flaired base.The inseide of the cup has a gold coloured appearence. On the base is a small raised silver cruisifix affixed by a screw. The Chalice was used asa a cup for holding water and wine, drunk from by all as a common cup, beginning and ending with the Priest. 5&6. Two silver Cruets. Each crust is a small silver jug with sloping sides with a small pinched lip for pouring. There are no handles and each cruet has the words " Catholic Chaplain" enscribed on its side. One of the cruets is used for adding a small amount of water to the chalice, representing Christs humanity, the outher is used to add a small amount of wine, representing the blood of Christ and divinity. 7. Lavabo Bowl. a small silver bowl with raised sides. The bowl has " Catholic Chaplain" inscribed in the base of the disg. The Lavabo bowl is used to wash the Priests hands prior to celebrating the Mass. 8. Ewer. A small silver water jug with a curled handle. The Ewer has 3 bands engraved arounf its middle and inside has a goldish tint. On its base is stamped "Albion Pla" "EPNS A" The Ewer is used to wash the priests hands prior to Mass. 9. Oil for the infirm- A small sliver canister that can be screwed to two similat canasters. The base has an internal screw thread to allow this to happen. The lid can be screwed on/ off and has an ornate cross enscribed on its top. The side of the canaster has a letter "I" incribed on it filling most of the canasters side. The canaster is believed to still contain the oil. The oil of the infirm is used outside of the mass in a service to administer the sacrement of the anointing of the sick. 10, Leather Oil Carry case, small, chocolate brown tubular carrying case with two snaps for closure on the side. the case has cardboard stiffening and a small amount of cottonwool to soak up any spilt oil. Case is used to carry upto three oil canasters. listed in descriptioncatholic church, 5/6rvr, chaplains kit -
 Upper Yarra Museum
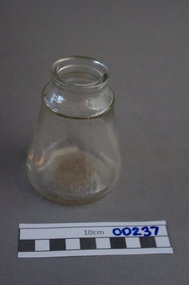
Glass container, 1898 (exact); before 1898, product was trademarked in 1898
http://www.clag.com.au/about/about.htm http://en.wikipedia.org/wiki/Clag_(glue) Clag was first trademarked in 1898 by Joseph Angus, manufacturer, of 216 Nicholson Street, North Fitzroy, Melbourne. The National Archives of Australia holds the original trademark application - a digitised version is available online (see References). The exact composition of the original paste is unknown but is thought to have been starch-based. Australian schools commonly request that parents purchase Clag paste for their children as part of the stationery lists that are circulated before each school year. The main reason for this is Clag's reputation for safety and ease of use. The bottle includes a brush recessed into the lid that children find relatively easy to handle, and the packaging does not contain any small components that children might swallow. The main ingredient of Clag is wheat starch dissolved in a water base, meaning that children can safely swallow the glue without incident It feels cold to touch and when applied to paper, it sometimes alters the colour of what is on it and causes paper to warp, owing to the high water content of the glue. There is an Australian slang usage of the word "clagged" derived from the characteristic of Clag Paste and can be used in place of the words, "clogged", "congested", "restricted" or "stuck". Bottle used for clag. The bottle has the original marking made by Angus P/l who trademarked the glue in 1898.Angus & Co Pty Ltd, ISM 12school, bottle, glue, clag, trademark, wheat starch -
 Christ Church Anglican Parish of Warrnambool
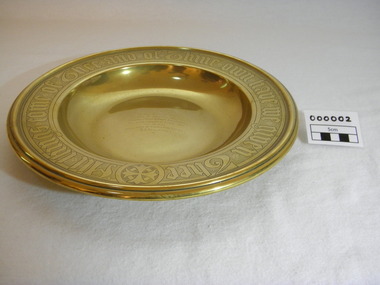
Plate, Untitled, Brass Alms dish, C.1902
Brass Collection Plate presented to St Paul's Anglican Church, Allansford, by the mother of Joseph & Frank Dallimore as a Memorial to the two brothers who drowned at Ryan's Den (near Cape Otway) on Jan 1st 1903. Major Joseph Dallimore (aged 32) was on leave from Sth Africa during the war and he, his wife (Beatrice Wiggs) and baby, his brother Frank Rupert Dallimore (aged 22), a farm hand Arthur Geach (aged 19) and a house maid servant, were picnicing at Ryan's Den (near Cape Otway) when the three men went walking, but never returned, all assumed drowned. One theary has it - Mrs M.E. Dallimore was picnicing at Lake Gillear beach when an enormous wave swept over the shore - (much larger than any other during that day) and rolled in all along the beach. This wave may have also reached the area where the three men were walking on the rocks and swept them into the ocean. Only one body was recovered - some 4 weeks later - that of Frank Rupert Dallimore and washed into Brown's Creek, 1 mile from the Johanna River and ten miles east of Ryans Den.It is a memorial plate and records the family's attachment and importance to the Church.Brass engraved and embossed Memorial Collection PlateEmbossed wording around edge of plate in Old English font reads - "All things come of Thee and of Thine own have we given Thee". The inscription on the tondo of the plate reads - "TO THE GLORY OF GOD / AND IN MEMORY OF / JOSEPH & FRANK RUPERT DALLIMORE, / WHO WERE DROWNED AT RYAN'S DEN, / JAN 1ST 1903. / PRESENTED BY THEIR LOVING MOTHER, / M.E.DALLIMORE."brass st pauls anglican church allansford warrnambool church of england christ church parish of warrnambool collection plate memorial plate dallimore drowning ryan s den alms dish -
 Warrnambool and District Historical Society Inc.
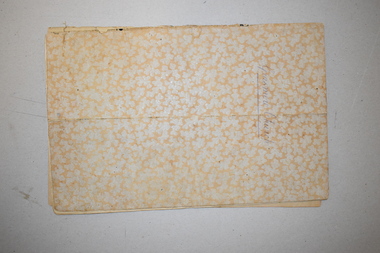
Document, Grasmere Church Dispute, 1882
These papers contain cuttings newspaper articles from the Standard of 1882 and handwritten comments appended to these cuttings. They refer to a dispute in 1882 regarding the ownership of the church in Grasmere to which the Anglican Church was claiming ownership The author of the handwritten comments is unknown but the comments purport to be a more accurate account of events than what appears in the paper cuttings. Grasmere is a small settlement 10 kilometres north of Warrnambool. In the 1850s land in Grasmere was donated for educational purposes and a Government-subsidized school which was a Denominational School run by the Church of England was established in 1858. This school was closed when Government State Schools were established after 1872 and the Anglican Church dismantled the old school and built a church on the site in the late 1870s. This church was erected by public subscription and many of the subscribers apparently believed they were donating to a building that could be used by any local Protestant churchgoers. The church in 1882 was being used by the Presbyterian Church for its services. A public meeting was held in 1882 to try to resolve the dispute between the Anglican Church claim and the local residents’ claim that the site belonged to the local community. Apparently the dispute remained unresolved and the Grasmere Anglican Church continued to operate until the early 20th century. This document is of interest as it is associated with a dispute that took place in Grasmere in 1882 and gives some indication of the arguments that were presented at the time in favour of, or opposed to, the Anglican Church’s claim to the ownership of the church. It is a document of particular interest to the history of the Grasmere. This is a folder of eleven foolscap-size sheets of paper enclosed in a mottle-coloured cardboard cover. The front cover is creased and partly torn and the back cover is detached and is in two pieces. The pages have been stitched together with thread and contain paste-in newspaper cuttings and handwritten material in purple ink. Grasmere Anglican Church -
 Eltham District Historical Society Inc
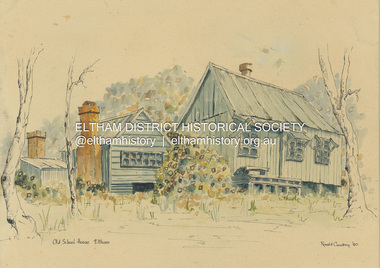
Painting - Watercolour, Ronald Coudrey, Falkiners Cottage, 1980
Originally situated on the northwest corner of Ely and Porter streets, Eltham. Incorrectly titled by the artist as "Old School House" Newsletter No. 189 November 2009 Donation: Lesley Rickards of South Australia has made a donation to the Society of a painting by her father Ronald Coudrey, who was a well-known artist in that state. The water colour painting reproduced below, is titled "Old School House, Eltham" but has been identified as an old cottage that once stood in Ely Street Eltham near the Eltham High School. In the late 1970s and early 80s this building was the subject of a campaign by our Society with the objective of its preservation. It had been identified as having associations with Eltham pioneer Frederick Falkiner. Suggestions that it was an old school building shifted to this site were not supported by any evidence. The land developer donated the cottage and a small area of land to the Eltham Shire Council. However, due to its poor condition and vandalism, it was decided that the cottage could not be retained and ultimately it was demolished. The land on which it stood has recently been sold by Nillumbik Shire Council. The Society has a number of photos and another painting of this building, but this recent donation is an important addition to our collection and we are grateful for the donation.art, falkiners cottage, ronald coudrey -
 Glen Eira Historical Society
Document - Taylor, Joseph Leslie (Squizzy)
Seven items related to Squizzy Taylor: Two printed biographies on Squizzy Taylor, one from the Australian Dictionary of Biography by Chris McConville undated; and one from the Brighton Cemetery website printed 25/05/12; includes grave photograph. Computer printout on brief details of Squizzy and Ida Muriel Pender from St. Kilda historical website. Photocopied poster of Squizzy Taylor. Handwritten and printed history on Squizzy. Printed photocopy of Squizzy Taylor grave. An excerpt from John James Whitty’s “Been everywhere and seen everything”, hand dated by Claire Barton 11/06/2013. The excerpt mentions driver Whitty picking up Squizzy Taylor and Ida Pender on a few occasions, namely to take Pender dancing at the Palais, and how Squizzy never gave him any trouble. Handwritten notes by Claire Barton with regards to an interview on radio station 774 on 11/06/2013 with author and defence lawyer James Morton. Morton reveals some information on Squizzy Taylor, and some recollections by the public who call in including that Taylor’s wife Dolly Gray’s real name was Charlotte Hayes, the cause of his nickname, his escape tricks and his death.taylor joseph leslie (squizzy), taylor squizzy, brighton, taylor benjamin isaiah, coach builders, taylor rosina, crime, criminals, kelly irene lorna, kelly lorna irene, pender ida muriel, brighton cemetery, riding to win, films, cemeteries, new street, jockeys, taylor june, neerim road, carnegie, murrumbeena, emily street, lew george thomas, gray dollie, caulfield racecourse, fires, pender david galloway, smith grace lillian, edward street, elsternwick, hayes charlotte, good shepherd convent, abbotsford, morton james, pender ida, jarvie mollie -
 Lara RSL Sub Branch
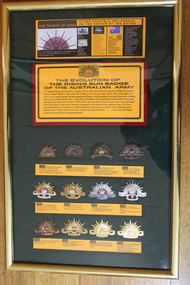
The Evolution of the Rising Sun Badge of the Australian Army, Captain D'arcy.2004, 2004
The origins of the rising sun badge are disputed. Rising sun designs had appeared on early Australian colonial coins and military insignia decades before the federation of the Australian colonies in 1901, and may have represented the image of Australia as 'a young nation' and a 'new Britannia'.[2] As early as the 1820s, the symbol of a 'rising sun' was used by various progressive organisations, loosely characterised under the banner "Advance Australia". The rising sun crest used in the New South Wales colonial and State crests was taken from the crest used on the first Advance Australia Arms, circa 1821, and consistently since then.[3] The oldest known example is the 'Advance Australia' coat of arms. The 'Advance Australia Arms' (named because of the motto inscription) became widely used in New South Wales and the neighbouring colonies by private corporations and individuals. Although they never had any official status, they formed the basis for several official coats of arms, including the New South Wales coat of arms. The representation below was reputedly painted for Thomas Silk, the son of the captain of the Prince of Orange, a convict ship that visited Sydney in 1821. The symbol struck a chord with the pre-federation population and many examples still exist on colonial architecture.[4] Proudly worn by soldiers of the 1st and 2nd Australian Imperial Force in both World Wars, the 'Rising Sun' badge has become an integral part of the digger tradition. The distinctive shape of the badge, worn on the upturned side of a slouch hat, is commonly identified with the spirit of Anzac.Glass covered Rectangular Picture Frame showing the Evolution of the Rising Sun Badge of the Australian Army.Gives a brief rundown on the Evolution of Rising Sun Badge with 12 examples and explanatory notes -
 Flagstaff Hill Maritime Museum and Village
Tool - Auger, Robert Sorby, First half of the 20th Century
A scotch eye auger is perfect for quickly making holes in dry or wet wood for making chairs, stools, and any number of woodworking projects. The scotch eye serves as a peg gauge and whatever peg you make to go into the hole should fit into the augers eye. Robert Sorby & Sons: The forbearer's of Robert Sorby had been cutlers in the Sheffield region of England, dating from the mid 17th century. Robert Sorby and Sons were registered in Sheffield in 1828 as a manufacturer of edge tools, saws, scythes and hay knives. In addition to manufacturing tools, they also diversified into the manufacture of crucible steel for tool manufacture. From circa 1860-1967, the Sorby factory in Sheffield was known as the “Kangaroo Works”. The Kangaroo Brand of tools was made by Robert Sorby & Sons. During the 19th century, they had a large trade in Australasia. By the early 20th century, they were manufacturing carving tools, planes and plane irons, circular saws, wood saws, butchers saws and cleavers, garden tools, pruning knives, coopers’ knives, bricklayers tools and joiners tools. In 1923 Robert Sorby & Sons was bought by Sheffield company Hattersley and Davidson. They are today one of the few remaining British tool manufacturers.The company has a long tradition of making edged tools for various uses and exporting them to Australia, however the subject item was probably made from the early 20th century up until 1967 when the company stopped exporting to Australia.Scotch Eye Auger, Double Twist with Lead Screw, square shaft, socket set at right angleRob Sorbey Sheffield stamped on shaft with Kangaroo trade markflagstaff hill, warrnambool, flagstaff-hill, flagstaff-hill-maritime-museum, maritime-museum, shipwreck-coast, flagstaff-hill-maritime-village, ring auger, carpenders tools, hole drilling, rob sorby & sons -
 Federation University Historical Collection
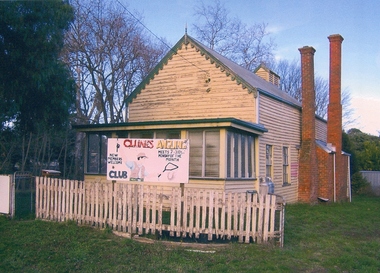
Photograph, Val D'Angri, Former Clunes School of Mines, c2000, c2000
On 29 February 1892 'The Argus' reported on the first Annual Meeting of the Clunes School of Mines. "The annual meeting of the council of the Clunes School of Mines was held last evening at the town-hall. In place of members of the council retiring by effluxion of time the following were elected: — Rev. Elder Gray, Messrs. John Beveridge, R. Nichol, J. Bryant, W. T. Pitcher, J. H. Daley, and T. Gilbert. The first annual report, showing remarkable progress, was received and adopted. The following officers were elected for the ensuing year: — Rev. E. Grey, president; Rev. Father John Barrett and Dr. Gordon, vice- presidents; Mr. Joseph Bryant, hon. director; Mr. W. Y. Witherden, hon. treasurer, Mr. H. E. Sando retained the office of secretary, and the officers for the time being were appointed trustees." Great satisfaction was expressed with the success of the school, and the progress and extent of the classes. It was referred to a sub committee to make arrangements for allowing the free inclusion, in certain classes, of a limited number of boys and girls of 14 and upward, who on examination qualified themselves for the privilege. An offer by an anonymous resident to pay the fees for four miners for admission to any class in the school was announced by the president, and received with thanks.Two photographs showing the exterior of a weatherboard building known as the former Ballarat School of Mines Clunes campus. The Timber hall was erected as a School of Mines and later used by the Australian Natives Association. The retort furnace (indicated by the large chimney) is still located in the rear rooms.ballarat school of mines, assaying, clunes school of mines, john beveridge, r. nichol, j. bryant, w. t. pitcher, j. h. daley, t. gilbert, e. grey, john barret, joseph bryant, w. y. witherden, h. e. sando, schools of mines -
 City of Moorabbin Historical Society (Operating the Box Cottage Museum)
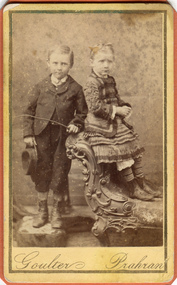
Photograph, B&W, Possibly 2 children of Heny Box 1839 -1913, c1900
Henry Box ,who was born in Withyham in 1839 , was the 3rd son of George and Mary Cripps Box and came to Australia in 1856 with the family. Henry paid his own fare so was not ‘bound’ to any employer. Henry helped his brother William establish his market garden on the site of Box Cottage, Jasper Road 1865 and by 1870 was purchasing property in East Brighton (Bentleigh.). He continued to purchase land, which he rent / leased to family members, and at his death in 1913 owned property in East Boundary Road, Murrumbeena and Elsternwick. Henry married Elizabeth ‘Emma’ Ward in 1868 and they had 9 children but 2 died in infancy. ‘ Emma’ was the daughter of William Ward 1820- 1908 who was born in Norfolk and emigrated with his wife Ann Ostler in 1853. Henry was a member of the Court Pride of St George AOF, and a lay preacher at the Bentleigh Baptist Church.. Surviving Children were - Caroline Alma Box 1863-1943, Mary Anne Box 1865- ?, Lydia Elizabeth Box 1867- 1957, William Henry Box 1869- 1945, Emma Elizabeth Ellen Box 1875 – 1964, Olivia Christina ‘Chrissie’ Box 1878 – 1963, Archibald Ward Box 1882 -? Box Cottage Museum, a reconstruction of an early settler hut, is named after the Box family who resided there 1865 -1913 . William Box who with his wife Elizabeth Avis Box and 13 children lived and farmed on the block of land in Jasper Road, East Brighton ( now McKinnon / Ormond) that was part of the Henry Dendy Special Survey 1841 . Henry Box, a brother of William Box, was born in Withyham, Sussex and came to Australia with his parents George and Mary Box and siblings in 1856. He purchased property and helped the family establish market gardens in East Brighton (Bentleigh). Henry and his wife Elizabeth Emma Ward Box had 9 children, Henry was a lay preacher for the Baptist Church Bentleigh. Inscribed in Album “ The early photos in this album were found by Mr (Laurie) Lewis when he was demolishing the Old Box Cottage. He gave them to Mrs Avis Box Eldridge who in turn gave them to me. They were not identified. I believe they rightly belong in the Cottage. I have attempted to identify them and present them in a way they can be preserved as a historical record of the era.” A B Leigh A black and white photograph of a young girl and boy who may be 2 of the surviving 7 children of Henry Box 1839 -1913Goulter Prahran -
 Ballarat Heritage Services
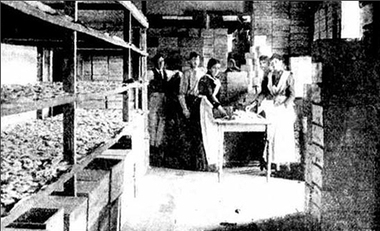
Photograph - Image - Black and White, Macaroni Factory, Hepburn Springs, 1900, 1900
"MACARONI MANUFACTORY. On the pretty road to the Hepburn Mineral Springs, and not far from where the health-laden waters gush plentifully from the earth, is a two-storied brick it is that Messrs Lucini and Co, carry building, dedicated to the manufacture of macaroni, vermicelli, and the Italians' own especial delight— spaghetti. Here on operations, and Mr Lucini himself was good enough to show the writer around and explain the various proces ses of a manufacture which is little known to Australians. The finest wheat and the mineral waters fresh from the springs are utilised, and by means of a most ingenious machine, the hollow rods of macaroni are turned out in large numbers. Finally, they are packed in boxes and cases, and sent off to the prin cipal agent in Daylesford, Mr J. W. King, who in turn forwards them to all parts of the country. Mr Blackett, thv Govrnment Analyst, writes in most lau datory manner of the productions of the factory, and says that on testing them he found the various sam ples were of excellent quality, and quite equal to any of Italian manufacture. Visitors to the springs should not fail to call in at Messrs Lucini's, which is one of the show places of the district, and will well repay an inspection.A number of women, members of the Lucini family, make macroni and the macaroni factory in Hepburn Springs. lucini, macaroni factory, hepburn springs, spaghetti, macaroni -
 Ballarat and District Irish Association
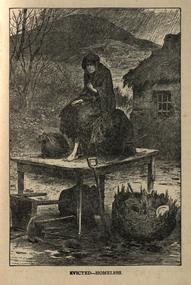
Image, Evicted - Homeless, 1864, c1864
Absentee landlords were common in Ireland and for many landlords the primary focus was income rather than the conditions of their tenants. Many landlords realized that they could get a higher income by turning their properties to pasture than to continue with the old practice of collecting rents from tenant farmers. Evictions was the most common way of getting rid of unwanted tenants. The tenant frequently built his cottage himself from local materials. However, his rent was higher if he had windows, if his door was over a certain height and if he made any type of improvements or enlargements to the dwelling. The landlords practiced "Rack Renting" in order to get rid of unwanted tenants. Rents were raised to the point that the tenant could not afford to pay them. The landlord then had the tenant evicted for non payment of rent. There were no appeals and no mercy shown. Although the only legal reason for eviction was non payment of the rent there were numerous examples of landlords who evicted tenants if they did not conform to the landlord's wishes.[http://www.maggieblanck.com/Mayopages/Eviction.html, accessed 13/12/2013] This image was also printed in he Illustrated London News, April 17, 1886, with the title 'all that is left, scene at a Mayo Eviction. A barefoot woman sits on a table in the rain, outside a cottage with thatched roof. She is surrounded by her possessions.ballarat irish, eviction, rent, cottage, tenant, homeless, mayo -
 Melbourne Legacy
Letter, Holmbush
Architects Carleton & Carleton applied to the City of Kew for any objections to the Melbourne Legacy Club establishing a Hostel for children of deceased Service men on Burke Road, yellow copy of the letter is dated 16 Dec 1942 and signed C.R.Carleton (also a legatee). The reply from the City of Kew is that there were no objections and was dated 19th December 1942. Holmbush was the first hostel for children that Legacy started and operated from April 1943. It was later renamed Blamey House after another hostel called Blamey House was closed. Melbourne Legacy ran three residences: Blamey House (purchased 1947) , Stanhope (purchased 1945) and Harelands (purchased 1950), to take care of children whose fathers were servicemen, and who may have been left orphans, or whose mother may have been unable to care for them herself. Harelands accommodated boys and girls under the age of 14, Blamey House looked after boys over 14, and Stanhope looked after girls over 14. The children were cared for until they were old enough to become independent. Was deposited in the archive cabinets in a file with documents pertaining to the residences, along with many other items and photos prior to the start of the cataloguing.A record of the investigations into regulations prior to the purchase of land on Burke Road for the first hostel to be established by Melbourne Legacy.00336.1 Yellow quarto paper, black type 00336.2 Quarto paper with City of Kew letterhead, black type.00336.1 Signed C.R. Carleton 00336.2 Signed (illegible) Town Clerkresidences, holmbush, properties -
 Wodonga & District Historical Society Inc
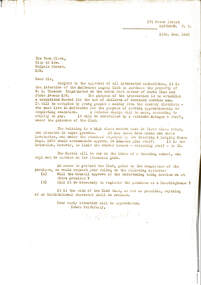
Functional object - Haeusler Collection Hand Made Photograph Printing Frame c. early 1900s
The Wodonga Historical Society Haeusler Collection provides invaluable insight into life in late nineteenth and early twentieth century north east Victoria. The collection comprises manuscripts, personal artefacts used by the Haeusler family on their farm in Wodonga, and a set of glass negatives which offer a unique visual snapshot of the domestic and social lives of the Haeusler family and local Wodonga community. The Haeusler family migrated from Prussia (Germany) to South Australia in the 1840s and 1850s, before purchasing 100 acres of Crown Land made available under the Victorian Lands Act 1862 (also known as ‘Duffy’s Land Act’) in 1866 in what is now Wodonga West. The Haeusler family were one of several German families to migrate from South Australia to Wodonga in the 1860s. This homemade photographic printing frame was built by Louis Haeusler (b.1878) and demonstrates his engineering capabilities. Rather than purchase the required materials for his home dark room processing, Louis would make any tools he needed from found materials around the Haeusler family home. Louis’ photographic equipment is among the many objects in the Haeusler Collection that represent home and social life in early twentieth century Wodonga. The item is handmade and unique, with well documented provenance. It forms part of a significant and representative historical collection which reflects the local history of Wodonga. It contributes to our understanding of domestic and family life in early twentieth century Wodonga, as well as providing interpretative capacity for themes including local history and social history. A handmade photographic printing frame, constructed from timber, paper, nails, glass and sticky tape. photography, photos, photographic, photographs, family photos, family photography, darkroom photography, dark room photography, printing, printing frame, wodonga, haeusler, haeusler collection -
 Wodonga & District Historical Society Inc
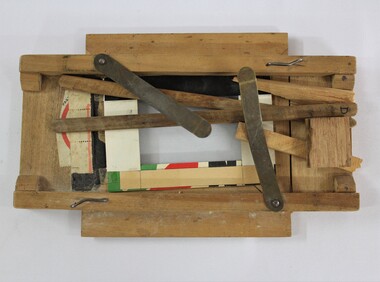
Book - Let's Have Water - A history of the Fish River Water Supply, Robin McLachlan, Denis Barrett, Jack Domis, Nick Welling, 1997
A history of the development of the management of the Fish River Water Supply Scheme in Central NSW. The scheme extends across the local government areas of the Shire of Oberon, the City of Lithgow and the City of the Blue Mountains.non-fictionA history of the development of the management of the Fish River Water Supply Scheme in Central NSW. The scheme extends across the local government areas of the Shire of Oberon, the City of Lithgow and the City of the Blue Mountains.water nsw, fish river region nsw, oberon dam, water resources development nsw australia -
 Falls Creek Historical Society
Medal - Australian Cross Country Ski Championships, 1991
This medal commemorates performance in the Australian Cross Country Ski Championships and was awarded to Diana Patterson. Diana Patterson was born in Tasmania and originally pursued a career as a physical education teacher. After making a major career change, she applied to join the Australian Antarctic Division. She applied four times before she was accepted. Diana first travelled to the Antarctic in October 1987. By this time only ten Australian women had spent a winter there. She first worked at Casey Station, before becoming leader at Mawson Station therein becoming the first female leader of an Antarctic base of any nation. After retiring Diana guided tourist expeditions to the Antarctic for many years, as well as continuing work in research and conservation. In 2012 she published her story “The Ice Beneath My Feet: My Year In Antarctica”. Diana Patterson was awarded the Medal of the Order of Australia (OAM) for "service to conservation and the environment”. As well as these outstanding career achievements, Diana has been a Board Member of both the Mt. Buller Alpine Resort Management Board, including a period as Chairman, and also the Falls Creek Resort Management Board. She was also a founding member of Falls Creek Historical Society.This medal recognises the performance of a highly recognised member of the Falls Creek community.Hexagon shaped medal with a skier and Nordic figure on the front and snowflake design on the reverse side.Below image: AUSTRALIAN SKI FEDERATIONx country skiing cbampionships, australian ski federation -
 Falls Creek Historical Society
Medal - Nordic Ski Club 1972
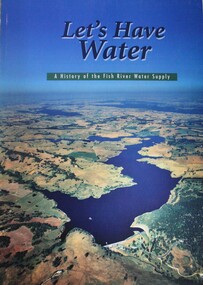
This medal commemorates the Nordic Ski Club and belonged to Diana Patterson. Diana Patterson was born in Tasmania and originally pursued a career as a physical education teacher. After making a major career change, she applied to join the Australian Antarctic Division. She applied four times before she was accepted. Diana first travelled to the Antarctic in October 1987. By this time only ten Australian women had spent a winter there. She first worked at Casey Station, before becoming leader at Mawson Station therein becoming the first female leader of an Antarctic base of any nation. After retiring Diana guided tourist expeditions to the Antarctic for many years, as well as continuing work in research and conservation. In 2012 she published her story “The Ice Beneath My Feet: My Year In Antarctica”. Diana Patterson was awarded the Medal of the Order of Australia (OAM) for "service to conservation and the environment”. As well as these outstanding career achievements, Diana has been a Board Member of both the Mt. Buller Alpine Resort Management Board, including a period as Chairman, and also the Falls Creek Resort Management Board. She was also a founding member of Falls Creek Historical Society.This medal belonged to a highly recognised Australian and founding member of the Falls Creek Historical Society.A triangle shaped medal with a red, white and blue lanyard attached. It bears an embossed figure of a Nordic Skier and text.On front, around edges: 1972 TELEMARK NORDIC SKI CLUB AUSTRALIA On back: Rocky Valley Rush W40 1991nordic ski club, australian skiing, diana patterson, falls creek, telemark skiing -
 National Vietnam Veterans Museum (NVVM)
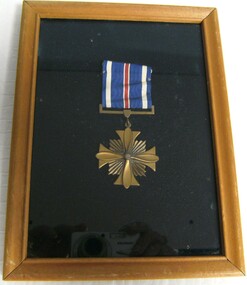
Medal - Medal Replica - Distinguished Flying Cross
Squadron Leader Alan Reed from the Royal Australian Air Force 052363 served in Vietnam from 26 May 1968 until 20 November 1968. He spent most of his tour detached to the 12th Tactical Reconnaissance Squadron, US Air Force. He was made an Officer of the Order of Australia (AO) in June 1989 for his service to the RAAF as Air Officer Commanding, Support Command. For his service with the USAF, Alan Reed was awarded the United States Distinguished Flying Cross with oak leaf cluster. His final rank with the Air Force was Air Vice Marshal and his last posting was with Headquarters, Australian Force Vietnam (RAAF Element) The Distinguished Flying Cross (DFC) is a military decoration of the United States Armed Forces. The medal was established on July 2, 1926, and is currently awarded to any persons who, after April 6, 1917, distinguish themselves by single acts of heroism or extraordinary achievement while participating in aerial flight. Both heroism and extraordinary achievement are entirely distinctive, involving operations that are not routine. The medal may be awarded to friendly foreign military members in ranks equivalent to U.S. Pay Grade of O-6 and below, in combat in support operations.Distinguished Flying Cross medal in a wooden frame with glass front. Gold coloured medal described as "First Oak Leaf Cluster" attached to blue, white and red striped ribbon mounted on navy blue velvet.distinguished flying cross, alan reed, united states air force, vietnam, squadron leader alan reed, royal australian air force, 052363, 12th tactical reconnaissance squadron, officer of the order of australia, raaf, usaf, air vice marshall allan reed, headquarters, australian force vietnam, raaf element -
 Federation University Historical Collection
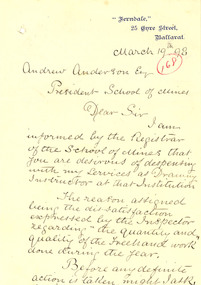
Letter - Correspondence, Henry J. Hall, Henry J. Hall to Ballarat School of Mines, 19/03/1898
Henry J. Hall was an teacher Freehand Drawing and Model Drawing at the Ballarat School of Mines. In 1889 he reported to the Ballarat School of Mines Council that this class was never established for the cultivation of Art (as generally understood) or the making of pictures but with an idea of assisting artisans - of both sexes - and persons connected with mechanical industries, in acquiring lightness of hand, and facility in the use of a black-lead pencil so as to be able to place legibly and intelligibly upon a sheet. For many years Henry Hall advertised private tuition in Drawing, Painting and Perspective, at 'Ferndale', 25 Eyre Street. Handwritten letter on paper with the address 'Ferndale, 25 Eyre Street, Ballarat' printed at the top. The handwritten letter is from Henry J. Hall to Andrew Anderson, President of the Ballarat School of Mines. Handwritten in ink "March 19th 98 Andrew Anderson Esq President School of Mines Dear Sir I am informed by the registrar of the School of Miens that you are desirous of despensing [sic] with the services of Drawing Instructor at that Institution. The reason assigned being dis-satisfaction expressed by the inspector regarding "the quantity and quality of the freehand work done during the year. Before any definite action is taken, might I ask in justice to myself and the students whose work is thus maligned, that I be allowed a personal interview with Mr Monkhouse in order to ascertain the grounds of his complaint, and afford me an opportunity of vindicating my position. I have the honor to remain, respectfully yours Henry J. Hall." Written and circled in red ink "168" ballarat school of mines, henry j. hall, henry hall, andrew anderson, drawing, art -
![Fern Terrace, on the River Watt, near Mount Munday / [by] Nicholas Caire, circa 1876](/media/collectors/550653872162f11fb04854aa/items/57775865d0cdd10a5c19a296/item-media/57775986d0cdd10a5c1a3308/item-fit-380x285.jpg) Kew Historical Society Inc
Kew Historical Society IncPhotograph, Anglo-Australasian Photographic Company, Fern Terrace, on the River Watt, near Mount Munday, c. 1876
Nicholas Caire was born on Guernsey in the Channel Islands in 1837. He arrived in Adelaide with his parents in about 1860. In 1867, following photographic journeys in Gippsland, he opened a studio in Adelaide. From 1870 to 1876 he lived and worked in Talbot in Central Victoria. In 1876 he purchased T. F. Chuck's studios in the Royal Arcade Melbourne. In 1885, following the introduction of dry plate photography, he began a series of landscape series, which were commercially successful. As a photographer, he travelled extensively through Victoria, photographing places few of his contemporaries had previously seen. He died in 1918. Reference: Jack Cato, 'Caire, Nicholas John (1837–1918)', Australian Dictionary of BiographyAn original, rare photograph from the series 'Views of Victoria: General Series' by the photographer, Nicholas Caire (1837-1918). The series of 60 photographs that comprise the series was issued c. 1876 and reinforced a neo-Romantic view of the Australian landscape to which a growing nationalist movement would respond. Nicholas Caire was active as a photographer in Australia from 1858 until his death in 1918. His vision of the Australian bush and pioneer life had a counterpart in the works of Henry Lawson and other nationalist poets, authors and painters.Albumen silver photograph mounted on boardprinted in ink on support l.c.: FERN TERRACE, ON THE RIVER WATT, NEAR MOUNT MUNDAY. / COPYRIGHT REGISTERED. printed in ink on support reverse c.: VIEWS OF VICTORIA. / (GENERAL SERIES.) / No. 17. / FERN TERRACE, ON THE RIVER WATT, NEAR MOUNT MUNDAY. / Of the various Rivers which exist in the Colony of Victoria, the River Watt (though a small one, and to some / extent unimportant) may be said to contain the most charming as well as the greatest variety of romantic scenery. / The scene of the present issue is perhaps the most unique of its character to be found in any of the Colonies. printed in ink on support reverse l.c.l.: J.W. FORBES, Agent, printed in ink on support reverse l.c.: ANGLO-AUSTRALASIAN PHOTOGRAPHIC COMPANY, MELBOURNE. printed in ink on support reverse l.c.r.: 10 Temple Court, Collins Street West.nicholas caire (1837-1918), landscape photography - victoria -
 Federation University Art Collection
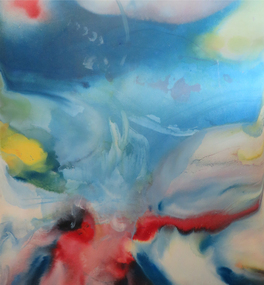
Painting, Norman Hofmaier, 'Promethius 1 from the Mallee Mysteries Series', by Norman Hofmaier
Norman Keith HOFMAIER (12.08.1951- ) Born Beulah, Wimmera, Victoria Norman Hofmaier was a scion of a well-known family, he completed his secondary education at Hopetoun High School and Ballarat College. Later he studied Visual Art at University of Ballarat, including painting, design and sculpture. Hofmaier’s childhood in Beulah was spent on the family property running beside the Yarriambiack Creek. Both he and his father had an intimate knowledge of the flora and fauna of the Mallee. The Wyperfeld National Park, home to the Big Desert, was a favourite place for Norman’s uncle who planted acres of native trees at the family property. Dr Di Bresciani explains: “The colours and vastness of the Mallee are represented in many works which reflect, variously, the relentless quiet and swirling energies found in the ‘dust storm might’ of the Mallee area. Most works may be described as abstract, lyrical abstract or abstract expressionist." From the 1970s until the 1990s he began an outpouring of work, using oil-based paints overlaid manually on large, specially-prepared boards using brushes, cloths, sponges, sprays or rollers. Petrol solvents were used to soften, blur and enhance shapes and edges. His work reflected his exploration of his inner state, sometimes flowing and placid, sometimes tempestuous. After a brief sojourn into city-life Norman returned to working in the country, until finally submitting to mental illness and permanent care in the mid 1990s. Norman Hofmaier's works are represented in major collections including that of the well- known artist Mitch Pearson ( an important influence and lifelong friend). The work 'Pastel of a Nude' was shown in a widely distributed magazine and two works owned by Mark Shannon were planned to be published as record covers in 1993. He won an award during the bicentennial recognising his skill as a Wimmera artist. From the 1970s until the 1990s he began an outpouring of work, using oil-based paints overlaid manually on large, specially-prepared boards using brushes, cloths, sponges, sprays or rollers. Petrol solvents were used to soften, blur and enhance shapes and edges. This work was purchased from the exhibition 'Norman Hofmaier: Mallee Mysteries' at the Lost Ones Gallery in Camp Street, Ballarat. The exhibition explored the legacy of Hofmaier’s work as well as raising money for the Ballarat Art Foundation. The Hofmaier family donated 16 works of the artist to be sold to raise funds for the foundation, to support emerging artists.Original painting in square format, featuring abstract swirls of blue, white, red, yellow and green.On back of work: 1. pools of diluted oil paint covering approximately 8 cm from each edge, 2. in right hand corner in permanent marker "N Hofmaier" 3. middle right hand side, torn exhibition label, with the words, "Belauh", "Local Art", "Prome", "Local Art", "$350", "Collect A", "oin" 4. Bottom right corner, two exhibition labels on card. Cards read: The flowing of movement before any known bodies are formed. Matter and gases bubble forming kaleidoscopic colours and shapes. Promethius 1 Oil based pigment with petrol on prepared board 1320 x 1210 mm On front of work, bottom right hand corner, in white lettering, N Hofmaier. Bottom right hand olive green frame damaged on front of work.painter, mallee, beluah, norman hofmaier, wimmera, abstract, alumni -
 Marysville & District Historical Society
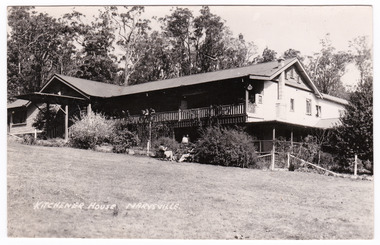
Postcard (item) - Black and white postcard, KITCHENER HOUSE MARYSVILLE, Unknown
A black and white postcard of Kitchener House in Marysville.A black and white postcard of Kitchener House in Marysville.Dear June, we are having a lovely time. Rather cold/ in the mornings, as the house has no central/ heating. The meals are everything to be desired/ and plenty of it. Yesterday lunch time Margaret/ had three servings of sweets and was coming/ up for one more before I stopped her. We played/ in the snow on Lake Mountain and were/ taken to Steavensons Falls. We are saving/ the Eildon Weir trip to do on our way/ home. I took the girls horse riding and/ for an hour I walked behind and had to/ hit the horses on the rump to make them move./ 7/6 an hour each too. We hope children/ are free from any ills and hoping to see/ you all soon will close how Love Myrtle marysville, victoria, australia, kitchener house, mount kitchener house, mt. kitchener house, accommodation, postcard, souvenir -
 Bendigo Military Museum
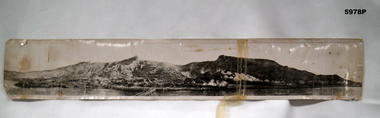
Photograph - PHOTOGRAPH, GALLIPOLI, cWW1
Original owner - Stephen John PARISH Regiment number/ Unit 703, Enlisted 19-08-14 F.COY 8th Battalion Became an officer 2nd Lieutenant in 1st Machine Gun Battalion RTA 17-03-1919 See also Cat No. 5979.6.Original photograph - black and white on photographic paper. Scene depicts landing boats, beach scene, an encampment with tents and small buildings with background of ridges. Handwritten greeting and information on back of photograph. Panorama photograph.Handwritten in faded black ink - back of photograph "Clevedon/ 3/7/18/ Just a picture of Gallipoli/ if you show it to any of/ the boys that have been/ there they will explain it/ better than I can by writing/ best love/ Ste ? xx" Handwritten in mainly uppercase letters, blue ink. Left to Right - " MOST OF OUR/ SUPPLIES WERE/ LANDED HERE" " THE LAST OF/ THE AIF LEFT/ HERE 29-12-1915" " 1ST AIF DIVISION/ LANDID (sic) HERE/ 25-4-1915" " THIS PERE WAS/ RECKED (sic) SEVERAL/ TIMES BY STORMS" " 1ST AIF/ HOSPITAL TENTS " TURKS BEACHIE (sic) / FIRED SCHRAPNIL/ ALONG BEACH/ FROM HEARE (sic)" " 4th INF BGDE/ Faught (sic) have/ on 9-5-1915" . "photographs, ww1, gallipoli, s. j. parish, 8th battalion -
 The Beechworth Burke Museum
Animal specimen - Kookaburra, Trustees of the Australian Museum, 1860-1880
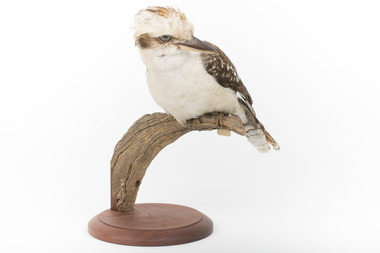
The Kookaburra is a sociable bird commonly seen in small flocks. These flocks mainly consist of family members. If not in flocks, these birds are commonly seen in pairs. They have a distinct appearance with brown wings, back and brown around the eyes, with majority of the plumage being white. This species reside in woodlands and open forests, however they can be seen in parks, wetlands, farms and any other space that is open with grass. This native Australian bird can mainly be found across the eastern Australia, however they have been introduced Tasmania, South-west Western Australia and New Zealand. Although this is a taxidermy mount, it looks exactly like a Kookaburra in real life. This specimen is part of a collection of almost 200 animal specimens that were originally acquired as skins from various institutions across Australia, including the Australian Museum in Sydney and the National Museum of Victoria (known as Museums Victoria since 1983), as well as individuals such as amateur anthropologist Reynell Eveleigh Johns between 1860-1880. These skins were then mounted by members of the Burke Museum Committee and put-on display in the formal space of the Museum’s original exhibition hall where they continue to be on display. This display of taxidermy mounts initially served to instruct visitors to the Burke Museum of the natural world around them, today it serves as an insight into the collecting habits of the 19th century.This specimen is part of a significant and rare taxidermy mount collection in the Burke Museum. This collection is scientifically and culturally important for reminding us of how science continues to shape our understanding of the modern world. They demonstrate a capacity to hold evidence of how Australia’s fauna history existed in the past and are potentially important for future environmental research. This collection continues to be on display in the Museum and has become a key part to interpreting the collecting habits of the 19th century.This Kookaburra has a predominantly white body. The back, wings and tail are a light shade of brown. There is a strip of brown going across the eyes. This specimen stands upon a wooden branch and has an identification tag ties around its leg. This bird is stout in shape and has a medium length tail and a broad bill. This bill is darker on top and lighter in colour on the bottom.W8083 / taxidermy mount, taxidermy, animalia, burke museum, beechworth, australian museum, skin, reynell eveleigh johns, bird, kookaburra, australian birds, laughing kookaburra