Showing 470 items matching " d class"
-
 Eltham District Historical Society Inc
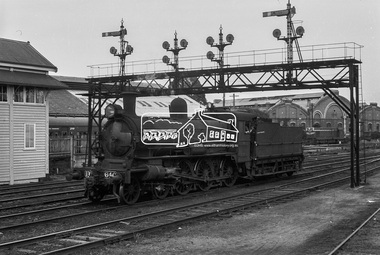
Photograph, Steam locomotive D3-640 at Bendigo Railway Station, c November 1962
"Bendigo pilot D 640 ambles beneath the signal gantry and past B Box at Bendigo Station. The two depot sheds can be seen in the background" - Newsrail October 2020.Digital TIFF file Scan of 35mm Ilford FP3 black and white negative transparencybendigo, bendigo railway station, d3-640, d3-class steam locomotive, george coop collection -
 Eltham District Historical Society Inc
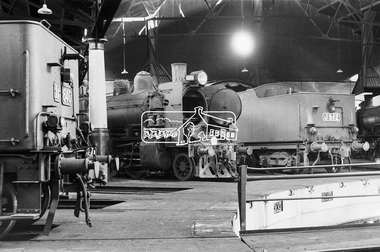
Photograph, Steam locomotives D3-640, K-158 and J-512 in the locomotive shed, Bendigo Railway Station, c November 1962
"A superbly detailed image of D 640, K158, J518 and K168 around the turntable inside the Bendigo Depot. The spark arrestor baffles and blastpipes petticoat of K158 have been removed" - Newsrail October 2020Digital TIFF file Scan of 35mm Ilford FP3 black and white negative transparencybendigo, bendigo railway station, d3-640, george coop collection, j-512, j-class steam locomotive (vulcan foundry), k-158, k-class steam locomotive (vr newport workshops), railway workshop -
 Waverley RSL Sub Branch
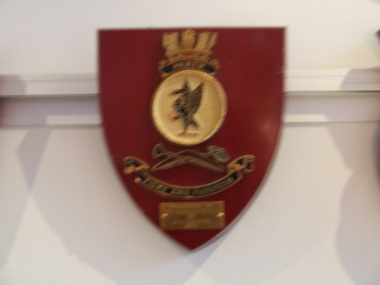
Plaque H.M.A.S. Perth, H.M.A.S. Perth
HMAS Perth (D29), a modified Leander-class light cruiser. Commissioned into the Royal Navy as HMS Amphion in 1936, she was sold to the RAN three years later. The ship served until 1 March 1942, when she was sunk during the Battle of Sunda Strait. HMAS Perth (D 38), the lead ship of the Perth-class guided missile destroyers. Built as a Charles F. Adams-class destroyer derivative for the RAN and commissioned in 1965, the ship served until decommissioning in 1999. She was sunk as a dive wreck off the coast of Albany, Western Australia, in 2001. HMAS Perth (FFH 157), an Anzac-class frigate commissioned in 2006 and active as of 2012Wooden Plaque 15cm x 13cm with insignia of H.M.A.S. Perth H.M.A.S. Perth -
 Federation University Historical Collection
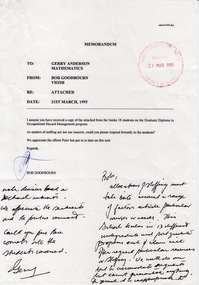
Document - Document - Petition, VIOSH: University of Ballarat, Grad Dip in Occupational Hazard Management Intake 18; Petition for lecturer to teach them again in Semester 2, February 1995
Victorian Institute of Occupational Safety and Health (VIOSH) Australia is the Asia-Pacific centre for teaching and research in occupational health and safety (OHS) and is known as one of Australia's leaders on the field. VIOSH has a global reputation for its innovative approach within the field of OHS management. VIOSH had its first intake of students in 1979. At that time the Institution was known as the Ballarat College of Advanced Education. In 1990 it became known as Ballarat University College, then in 1994 as University of Ballarat. It was 2014 that it became Federation University. VIOSH Australia students are safety managers, senior advisors and experienced OHS professionals. They come from all over Australia and industry. Students are taught active research and enquiry; rather than textbook learning and a one-size fits all approach. VIOSH accepts people into the Graduate Diploma of Occupational Hazard Management who have no undergraduate degree - on the basis of extensive work experience and knowledge. A petition from Intake 18 students of the Graduate Diploma in Occupational Hazard Management was sent to Mr Bob Goodbourn - Course Coordinator of VIOSH, Prof D W James - Vice-Chancellor of University of Ballarat, Prof G Anderson - Head of School, Information Technology and Mathematical Sciences, Mr P Martin - Senior Lecturer, School of Information Technology and Mathematical Sciences, Ms K Whytcross and Mr P Johnson - Student Representatives. The students request that Mr Peter Martin present the lectures for MG473 Statistics and Modelling in Semester 2, 1995. He has lectured the students in MG472 Statistics and Modelling during the first semester and his method teaching to a class with a majority of adults students has been excellent - clear, well paced and caring manner. His adult teaching skills provided students with confidence and encourage discussion in class. List of students and signatures were provided. Hand written note from Gerry Anderson to Bob Goodbourn stated that they do their best to accommodate requests but cannot guarantee anything. In general it is inappropriate to make decisions based on student interests. Students and their positive comments are appreciated. Bob Goodbourn was asked to pass the comments onto the students concerned.Three A4 pages - third mainly handwritten in pen. First page has handwritten commentSignatures of Gerry Anderson, Bob Goodbourn, 34 studentsviosh, victorian institute of occupational safety and health, university of ballarat, intake 18 petition, bob goodbourn, course coordinator of viosh, prof d james, vice chancellor, prof g anderson, head of school, information technology and mathematical sciences, k whytcross, p johnson, student representatives, peter martin, senior lecturer, statistics and mathematical sciences, trevor bailey, james bathgate, janet benstead, kay bowman, craig brissett, keith britton, david byham, hayden cater, earl eddings, kristine gardiner, christopher gibbs, david grant, terry hammond, ken hart, christopher jacobsen, david kiddle, michael lawson, malcolm mcinnes, graeme maddaford, rita ottewill, roger palubinski, lyn pearson, raymond pickett, cheryl price, davis proud, mangalya reddy, john rowan, neil topperwien, gavin welsh, damien woodmansey -
 Federation University Historical Collection
Document - Document - Petition, VIOSH: University of Ballarat, Grad Dip in Occupational Hazard Management Intake 18; Petition for lecturer to teach them again in Semester 2, February 1995
Victorian Institute of Occupational Safety and Health (VIOSH) Australia is the Asia-Pacific centre for teaching and research in occupational health and safety (OHS) and is known as one of Australia's leaders on the field. VIOSH has a global reputation for its innovative approach within the field of OHS management. VIOSH had its first intake of students in 1979. At that time the Institution was known as the Ballarat College of Advanced Education. In 1990 it became known as Ballarat University College, then in 1994 as University of Ballarat. It was 2014 that it became Federation University. VIOSH Australia students are safety managers, senior advisors and experienced OHS professionals. They come from all over Australia and industry. Students are taught active research and enquiry; rather than textbook learning and a one-size fits all approach. VIOSH accepts people into the Graduate Diploma of Occupational Hazard Management who have no undergraduate degree - on the basis of extensive work experience and knowledge. A petition from Intake 18 students of the Graduate Diploma in Occupational Hazard Management was sent to Mr Bob Goodbourn - Course Coordinator of VIOSH, Prof D W James - Vice-Chancellor of University of Ballarat, Prof G Anderson - Head of School, Information Technology and Mathematical Sciences, Mr P Martin - Senior Lecturer, School of Information Technology and Mathematical Sciences, Ms K Whytcross and Mr P Johnson - Student Representatives. The students request that Mr Peter Martin present the lectures for MG473 Statistics and Modelling in Semester 2, 1995. He has lectured the students in MG472 Statistics and Modelling during the first semester and his method teaching to a class with a majority of adults students has been excellent - clear, well paced and caring manner. His adult teaching skills provided students with confidence and encourage discussion in class. List of students and signatures were provided. Hand written note from Gerry Anderson to Bob Goodbourn stated that they do their best to accommodate requests but cannot guarantee anything. In general it is inappropriate to make decisions based on student interests. Students and their positive comments are appreciated. Bob Goodbourn was asked to pass the comments onto the students concerned.Three A4 pages - third mainly handwritten in pen. First page has handwritten commentSignatures of Gerry Anderson, Bob Goodbourn, 34 studentsviosh, victorian institute of occupational safety and health, university of ballarat, intake 18 petition, bob goodbourn, course coordinator of viosh, prof d james, vice chancellor, prof g anderson, head of school, information technology and mathematical sciences, k whytcross, p johnson, student representatives, peter martin, senior lecturer, statistics and mathematical sciences, trevor bailey, james bathgate, janet benstead, kay bowman, craig brissett, keith britton, david byham, hayden cater, earl eddings, kristine gardiner, christopher gibbs, david grant, terry hammond, ken hart, christopher jacobsen -
 Ballarat Clarendon College
Photograph album, 1918
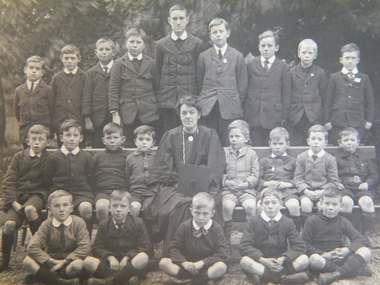
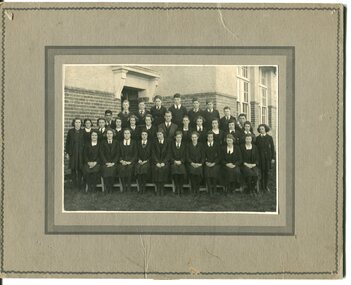
Significant pictorial record of College life at the end of the WW1. Property appearance, uniform/clothing details, furnishings, and named photographs of students. Junior school Forms I, II, III: Top row: T Dowling, Whitfield, W Paterson, R Paterson, R Morris, B Pain, W Coyle, R Thomas, Campbell; Middle row: Creer, pringle, Greenfield, K Baird, Mrs Gilbert, R Thomas, G Jeffrey, G Shaw, E Morton; Front row: H Strong, C Morton, R Carthew, R Pearce, A Greenfield; Middle School Forms IV, VB: Top row: Leslie, Michael, M Gunn, H Jones, W Hicks, L McLennan, K Bradby, Forster, K Joy, C C McMillan; 2nd row from top: Mr Deans, R Paterson, A Carthew, A Mckenzie, N Shaw, G Ross, H Lester, Leishman, Tanner, G E Clark, W Revelman, Mr Morton; Thurd row from top: A Levy, McLeod, J O'Grady, E Davies, W Walker, J Smith, N Boustead, E Abraham, Alkemade, Ronaldson, Crawford, McDougall, Hill; Front row: Klug, J Tonner, H Deeble, Soloman, Beacham, J Bradby, A Coldham, G Clarke, L Murphy, A King. Senior school Forms VIA, VIB & VA Top row: E Pearce, W Williams, A Ramage, D Langsford A Clarke, J Mitchell. Middle row: R Langsford, A Rogers, G Lester, V Cooper, A Thiessen, R Shannon, G Swan, D Robinson, J Coltman, R Jack; Front row: B Jones, L Shannon, R Morrow, Mr A S M Polson BA, R Steveson, R Sloan, M Morris. Social significanceLoose-leaf photograph album featuring photographs of Ballarat College property and classes taken 4th July 1918. Light card cover. 8 inidividual sheets of paper. Front cover: BALLARAT COLLEGE / PHOTOGRAPHS 4th July 1918 C A Ramage / DIFFERENT VIEWS 7 GROUPS / Taken 1918ballarat-college, 1918, uniform, c-a-ramage, boatshed, college-oval, assembly-hall, honour-boards, chemistry-laboratory, a-s-m-polson, mr-deans, mr-morton, miss-gilbert, junior-school, middle-school, senior-school -
 Ballarat Clarendon College
Book, John Murray, A smaller dictionary of Greek and Roman antiquities, 1884
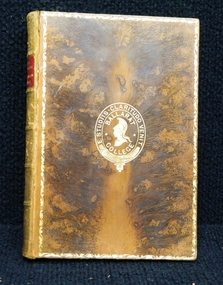
This book was awarded to Ewen Wanliss in 1891 for first prize for Greek in the VI form. Ewen enrolled at Ballarat College in 1888 at the age of 15 along with his brothers David, Cecil, Newton, Sydney and Neville. Ewen's father was Hon. T. D. Wanliss and his previous school was Toorak College IV class. The Wanliss family grew up in Wanliss House Sturt St, which was bought by the school in 1910. The house remained on the property until 1996. "Ewen Wanliss was born on 24th September 1873 and died in 1966. He was educated at Ballarat College, enrolled in1888, and was Captain of the College 1st XI and 1st XVIII in 1892. He served as 327 Pte E Wanliss, 4th (Imperial) Contingent, and as a Lieutenant (20th August 1900) with the 4th Imperial Bushmen in the South African War." (In the Footsteps of Pompey p. 14).Presbyterian educators placed great value on a classical education matched with diligence in study. Book prizes were highly regarded and academic success admired. In the school’s early years prizes were ordered direct from London and had the school crest embossed in gold on the front or back cover. Many of the prizes given in early years were returned to the school to equip the Weatherly Library when it opened in 1936.Bound in brown calf with gilt bordering on front and back cover and the college crest embossed on front cover. Six raised bands on spine with gilt lettering on red calf on the second compartment and gilt decoration on remaining compartments. End papers and page edges marbled. Black and white illustrations throughout, slight foxing on pages and slight detachment of spine. 474 p.Book plate inside front cover: ballarat college crest/ Greek/ VI Form./ First prize./ Awarded to/ E. Wanliss/ Christmas, 1891.ewen-wanliss, 1891, book-prize, ballarat-college, david, cecil, newton, sydney, neville, hon-t-d-wanliss, toorak-college, wanliss-house-sturt-st, south-african-war. -
 Ballarat Clarendon College
Book, Keegan Paul, Trench, & Co, The study of sociology, 1888
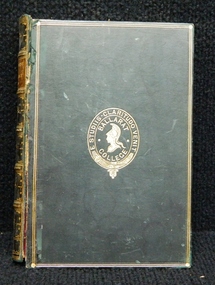
This book was awarded to Ewen Wanliss in 1892 for first prize for Mathematics & Classics in the Upper Sixth form. Ewen enrolled at Ballarat College in 1888 at the age of 15 along with his brothers David, Cecil, Newton, Sydney and Neville. Ewen's father was Hon. T. D. Wanliss and his previous school was Toorak College IV class. The Wanliss family grew up in Wanliss House Sturt St, which was bought by the school in 1910. The house remained on the property until 1996. "Ewen Wanliss was born on 24th September 1873 and died in 1966. He was educated at Ballarat College, enrolled in1888, and was Captain of the College 1st XI and 1st XVIII in 1892. He served as 327 Pte E Wanliss, 4th (Imperial) Contingent, and as a Lieutenant (20th August 1900) with the 4th Imperial Bushmen in the South African War." (In the footsteps of Pompey p. 14).Presbyterian educators placed great value on a classical education matched with diligence in study. Book prizes were highly regarded and academic success admired. In the school’s early years prizes were ordered direct from London and had the school crest embossed in gold on the front or back cover. Many of the prizes given in early years were returned to the school to equip the Weatherly Library when it opened in 1936.Bound in dark green calf with College emblem embossed on front cover and six raised bands on spine. The second band gilt inscribed and the remaining bands with gilt decoration. Marble end papers and edges. Foxing on pages, front cover detached, 446 p.Book plate inside front cover: Ballarat College emblem/ Mathematics & Classics/ Upper Sixth Form./ First Prize./ Awarded to/ E. Wanliss/ Christmas, 1892. ewen-wanliss, 1892, book-prize, ballarat-college, david, cecil, newton, sydney, neville, hon-t-d-wanliss, toorak-college, wanliss-house-sturt-st, south-african-war. -
 Bendigo Military Museum
Pamphlet - 38th BN TRAINING SYLLABUS 1922, Australian Military forces, C. 1922
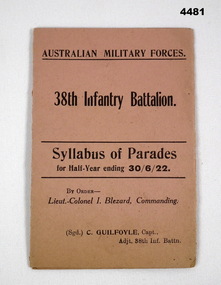
The 38th Battalion was classed as “Bendigo’s own”. The contents cover the Coy’s of the Battalion being; A Coy, HQ, Band, MG Pl, B Coy Golden Square, C Coy Eaglehawk, D Coy, Echuca, Deniliquin, Rochester, Kerang and Swanhill for the parade times half year ending 3.6.1922.Pamphlet, folds out to 3, pink colour, all pages are in black print, front has name of Battalion, Training date ending plus Officer Commanding details, adjutants details, inside has details of “Company” training times and dates, rear page has some.On front, “Lieut Colonel I.Blezard Commanding”. “C. Guilfoyle Capt Adjutant 38th INF Battn”38th inf battn, training syllabus, parades -
 Federation University Historical Collection
Book - Scrapbook, Ballarat School of Mines Scrapbook 1921-1924, 1921-1924
The clippings in this book relate to the Ballarat School of Mines. Hard covered scrapbook with newspaper clippings relating to the Ballarat School of Mines.ballarat school of mines, scrapbook, ballarat technical art school, clay, ceramics, pottery, native clay, maurice copland, h.h. smith, c.h. beanland, technical schools, albert e. dowling, john dulfer, jenkin swimming shield, r.s. dale, j.y. mcdonald, a.f. heseltine, stained glass windows, amalie feild, richard dale, ballarat school of mines museum, ballarat junior secondary school, war criminal trials, j.f. crichton, repatriation department, w.o.f. close, soldiers vocational classes, world war one, alexander peacock, ballarat junior technical school opening, effie holmes, cornell chemist, w.k. moss, ken moss, obituary, j. vickery, w.d. hill, r.w. richards, shackelton, antarctic exploration, t.h. trengrove, samuel mayo, vera lindsay, bessie robertson, victor greenhalgh, repatriation classes closure, repatriation classes termination, university college, vocational training, arbor day, j.b. corbet, ballarat school of mines procession, ballarat junior technical school honour board, harold herbert, albert steane, a.w. steane, francis davis, tree planting, clyde lukeis, trade classes, old boys association, alfred james higgin, blackill color and oxide company, electric supply company, state school exhibition, state education jubilee, scholarships, clay deposits, james coad, t.a. williams, copland memorial, e.j. mcconnon, alfred mica smith, ponsonby carew smyth, d. maxwell, lena rutherford, dorothy whitehead, examination results, geoffrey nicholls, robert dowling, j.b. robinson, percy trompf, j.c. bush, white flat reserve, rubbish tip, sports ground, broken hill excursion, old boy's association, school of mines procession, white flat improvements, empire exhibition, ballarat school of mines literary society, school reunion, john rowell, d.e. mullins, g. renkin, t.m. shattock, new law courts, supreme court building transferred to ballarat school of mines, buildings, ballarat state offices, ballarat school of mines museum closed, ballarat school of mines and industries, k.b. brown, sir r. garran, alf hannah, macrobertson scholarship, simone fraser, violet hambley, alfred bayley, j. heriot, c.r. pittock, i.r. bradshaw, ballarat exhbition, e. parkin, c.m. harris, mica smith bust, william henry nicholls, daniel walker, paul montford, w.h. corbould, j.w. sutherland, technical training for girls, girls education, amalie colquhoun, ken moss obituary, opening of the ballarat junior technical school, j.s. vickery, j.s. vickery obituary, ida v. johnson, john rowell exhibition, max meldrum, w.g. coates, g.f. fitches, walter white, sewerage plumbing, villers brettonneux school -
 Ballarat Clarendon College
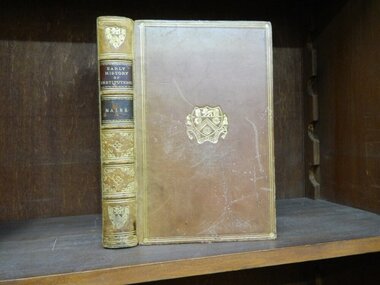
Book, The Early History of Institutions
David Sydney Wanliss entered Ballarat College in 1872, passing his matriculation at the age of thirteen, before studying Law at Trinity College Cambridge. He served in World War One.Light brown calf bound book with gold lettering and embellishments on cover and spine. Crest of Trinity College Cambridge on front cover. Book plate inside front cover: Trinity College, Cambridge / FIRST CLASS IN THE EXAMINIATION OF FRESHMEN / EXAMINATION IN LAW / This prize was adjudged to / D S Wanliss / June 1885 / R W Venall / Head Examiner. -
Federation University Historical Collection
Document - Class Roll, Ballarat School of Mines Class Roll, 1893-1896
.1 1896 [Practical Mining (Williamson, Fleckwood, Food, Bailey, Coombs, Norton, Hillingston) Lecturer John Rowe Practical Mining (Williamson, Phillipson, Fleckwood, Food, Bailey, Coombs, Ultuwatt, Barnard) Lecturer John Rowe Practical Mining (Williamson, Coombs, Barnard, Curry, Walley, Phillipson) Lecturer John Rowe Practical Mining (Williamson, Barnard, Coyte, Curry, Bailey, Walley, Phillipson, Booth, Rogers) Lecturer John Rowe .2 1894 Practical Mining (G. Williams, Paul, E.W. Weston. J.A. Elthwatt)) Lecturer John Rowe 1894 Mathematics (Action, Flegeltaub, Wittkowski, Collinar, H. Murphy, H. Brickhill, J. Uthwatt, C. Remschel, M. Marks, W. Reid, E. Weston, Radcliff, J. Black, J. Richardson) Lecturer E. Bennett .3 . 1893 Practical Physics (H.W. Wright, J. Cardiff, J. Nicol.W. Nicholls, R. Roberts, E. Emery, J. Paisley, H. McKenzie, H. Seiley, W. Jasper, W. Johns, R. Ingles, W. Lambert, E. Munro, J. Ewart, M. Haiwood, M. Bell, A. Deeble, E. Dunstan, H. Seeley, W. Wisherdon, Cardiff)) Lecturer Daniel Walker 1893 Physics (L. Harvey, J. Barr, S. Harrison, H. Hardy, D. Macwilliam, J. Grenfell, Prat, Barker. Wingrave)) Lecturer Daniel Walker 1893 Physics (H. Imrey, W. Hines, H. Sheeran, E. Pillios, H. Franklin, A. Older, H. Franklin, J. Foresight, W. Gilbert, J. Lawson. W. Latimer. P. Williams, R. Inglis, D. Hin, Florence Boylenas, J. Attenborough, Elsie Rail) Lecturer Daniel Walker) 1893 Physics (E. Hudson, Eva Corlett, Emily Slater, A. Dixon, A. Potts, H. Wyatt, Merlin, H. Martill, F. seal, E. Geddise, M. Preston, P. Spielvogel, A. Flegeltaub, Morris, Bradford) Lecturer Daniel Walker) .4 1895 Practical Mining (Solly, Clark, Flegeltaub, Harvey, Cressey) Lecturer John Roweballarat school of mines, mining, physics, practical mining, john rowe, daniel walker, e. bennett, class list, a. flegeltaub, p. spielvogel, eva corlett, florence boyle, emily slater, women, e. hudson, a. dixon, a. potts, h. wyatt, merlin, h. martill, f. seal, e. geddise, m. preston, morris, h. imrey, w. hines, h. sheeran, e. pillios, h. franklin, a. older, j. foresight, w. gilbert, j. lawson. w. latimer. p. williams, r. inglis, d. hin, florence boylenas, j. attenborough, elsie rail, bradford, williamson, fleckwood, food, bailey, coombs, norton, hillingston, solly, clark, flegeltaub, harvey, cressey -
Frankston RSL Sub Branch
Medal
An example of the Liberation Medal, fifth class, issued by the government of Kuwait for service during the Liberation of Kuwait campaign in the Gulf War of 1990 to 1993. This medal was provided to eligible Australian service personnel however is not worn as an official service decoration. This medal is engraved with the following; Hillier D. N. service number 322256. These are made of Bronze with coloured enamel features and have a ribbon with red, white and green vertical stripes. The medal complete with a service ribbon, is in a plastic presentation case which is stored in a protective cardboard sleeve. -
 Geelong RSL Sub Branch
Photograph - HMAS Australia, No makers listed, Late 20th Century
The HMAS Australia (D84) was launched in March 1927, commissioned in April 1928 and de commissioned in August 1954. The HMAS Australia (D84) was a County-class heavy cruiser of the Royal Australian Navy. The HMAS Australia (D84) was Commissioned in 1928 and de Commissioned in 1954. These photographs show the ship during her service in the Leyte Gulf and Lingayen Gulf 1944 - 1945.A colour photograph of HMAS Australia (D84) in a gold colour frame. There are six (6) small photographs of the HMAS Australia during its period at sea at Leyte Gulf and Lingayen 1944-1945. There is a history of the dates/time the ship was attacked and the personnel losses per attack. The photograph has been signed by D E Shinkfield.hmas australia (84), ran, heavy class cruiser -
4th/19th Prince of Wales's Light Horse Regiment Unit History Room
Documents, D & S Precis and Notes, abt 1960
Training material used by the RegimentA collection of precis issued by the driving and servicing wing of the 4th/19th Prince of Wales's Light horse Regiment covering the various classes of vehicles, servicing schedules and CES for vehicles then in service in the Regimentdriver training -
 Kiewa Valley Historical Society
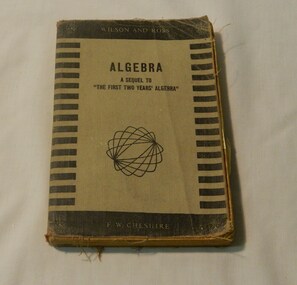
Book - Reference Maths, R. Wilson & A.D. Rose, Algebra A Sequel To
R. Wilson and A D Rose maths books were very popular and formed a basis of education maths classes in the 1950's in Victoria. This is what would have been used in Mt Beauty Secondary School at the time.This has historic significance as it shows what maths was taught in the early - mid 20th century. This book would have been used in the Kiewa Valley schools by a local identity Wilma Davies therefore has social significance and good interpretive capacity. This book is now out of print and is a collectible item. Black cover with strips on side of the front. Light brown centre with brown writing and squiggle pattern below.Publisher inscription - Wilson and Rossbook, school, text book, wilma davies, educational, maths -
Ringwood and District Historical Society
Programme, Ringwood and District Horticultural and Garden Club, Ringwood and District Horticultural and Garden Club Schedule for the Annual Autumn Show, 1971, 1971
Ringwood and District Horticultural and Garden Club Schedule for the Annual Autumn Show, 1971.12 page booklet- typed Schedule.Front Page Ringwood and District Horticultural and Garden Club Schedule for the Annual Autumn Show To be held in the Assembly Hall, Ringwood High School, Bedford Road, Ringwood Saturday, March 6, 1971. (Doors Open at 2 p.m.) Entries close: 9 p.m. Thursday March 4th, 1971. Admission: Adults: 30 centsChildren: 5 cents Next Page OFFICE BEARERS LIFE MEMBERS: Mrs.Lord, Mrs.W.McDowell, Mr.B.J.Hubbard, Messrs.W.Gillespie, E.Bennett, G.W.Burns, E.T.Kearsley, Les.Ingram, W.McDowell. PRESIDENT:Mr.J.Roberts 39 Warrandyte Road Ringwood, Telephone: 870-1483 VICE-PRESIDENTS: Mrs.D.Hutchinson Mr.V.H.Wilson MENS' COMMITTEE: Mr.G.W.Burns, Mr.W.McDowell, Mr.E.Frame, Mr.V.H.Wilson, MR.J.Percival LADIES COMMITTEE: Mesdames: W.McDowell, D.Hutchinson, A.Mabu, D.Wilson, Miss Isbester TREASURER: Mr.D.Puckey Summit Crescent Ringwood North SECRETARY: Mrs.V.H.Wilson 38 William Street Ringwood, Telephone: 870-7458 ENTRIES CLOSE ON THRUSDAY MARCH 4TH 1971 AT 9 P.M. NO LATE ENTRIES WILL BE ACCEPTED AT THIS SHOW. PROGRAMME Staging of Exhibits 8.30 a.m. till 12 Noon Judging Commences 12.30 p.m. Show Opens 2.30 p.m. Removal of Exhibits 9.00 p.m. Admission: Adults: 30 centsChildren: 5 cents Page One EXHIBITORS MAY MAIL OR TELEPHONE ENTRIES TO THE UNDERMENTIONED:- MRS.V.H.WILSON,38 William Street, Ringwood870-7458 MRS.D.HUTCHINSON, 48 Caroline Street, RINGWOOD 870-8577 ENTRIES CLOSE THURSDAY MARCH 4TH AT 9 P.M. RULES FOR COMPETITORS All Exhibits must be stages by 12 Noon and must not be removed before 9 p.m. Exhibitors must apply on moring of Show to the Secretary for Cards which must be placed in front of Exhibit in the allotted space. All Exhibits, except Floral Art, must be grown by the Exhibitor. Awards will be made by the Judges whose decision is final. Prize Money available at 8 p.m. and if not claimed within one month will revert to the Society. Exhibits should be names. In a close finish this counts. No Exhibitor allowed in Hall whilst Judging is in progress. Any Protest shall be in writing accompanied with a 50 cent deposit lodged with the Secretary before 7 p.m. on day of Show. Protest must be limited to non-accordance of an Exhibit within the Schedule. The Committee is empowered to determine and protest to be forfeited if it deems such to be frivolous. BOWL:- The width of the vessel must be greater than its height. VASE:- The height of the vessel must be greater than its width. Page Two Continuation of: RULES FOR COMPETITORS... The Rules of the Royal Horticultural Society of Victoria will apply. Dahlias will be judged under the Rules and Standards laid down by the National and Royal Dahlias Society of Victoria. A VASE consists of 3 to 6 stems (in Cut Flowers) unless otherwise stated. AWARDS: Bronze Medal of the National Dahlia Society for Best Dahlia Exhibit. BLUE RIBBONS MAY BE AWARDD FOR:- BEST VASE OF CUT FLOWERS BEST DAHLIA OVER 6 INCHES BEST VASE DAHLIAS UNDER 6 INCHESBST FLORAL ART EXHIBIT BEST SEEDLING DAHLIA CERTIFICATES OF MERIT:- GIANT DAHLIA OVER 8 INCHESBEST SHRUB MINIATURE CACTUS DAHLIA BETWEEN 4 1/2" TO 6" BEST POT PLANT CHARM DECORATIVE BETWEEN 6' AND 8' BEST VEGETABLE BEST SINGLE ROSE UNLESS OTHERWISE STATED ENTRY FEE PER SCHEDULE CLA CLASS - 5 CENTS PER ENTRY. PLEASE NOTE THAT ENTRY FEE FOR ITEMS NO. 1 AND 2 IS 25 CENTS IN EACH SECTION ENTRIES CLOSE: THURSDAY MARCH 4TH, 1971 AT 9 P.M. Page Three VICTORIANCHAMPIONSHIPSECTION 1 SCH.NO: FIRST 1DAHLIAS UNDER 8 INCHES 12 Vases (3 of each) Distinct Varieties TROPHY VALUED AT $5.00 29 Giant Dahlias, Distinct Varieties (SPONSORED BY AMETCO TRAVEL AGENCY, RINGWOOD) To be won Three Times - Trophy valued at $20-00 DAHLIAS OPEN SECTION 2 39 Dahlias 3 Medium Cactus, 3 Miniature Cactus, 3 Charm Cactus, Distinct Varieties, Shown separately $2-00 44 Giant Decorative, Distinct Varieties 50c. 51 Giant Decorative 30c. 63 Giant Cactus, Distinct Varieties 50c. 71 Giant Cactus 30c. 86 Medium Garden Cactus N.N.D. 50c. 93 Medium Garden Cactus, Distinct Varieties 50c. 10 3 Medium Decorative Distinct Varieties 50c. 11 1 Medium Decorative 30c. 12 6 Vases Miniature Cactus, Distinct Varieties - 3 of each - 75c 13 3 Vases Miniature Cactus, Distinct Varieties - 3 of each - 50c 14 3 Vases Miniature Decorative, Distinct Varieties - 3 of each 50c 15 1 Vase Miniature Dahlias - 3 Blooms Distinct Variety 30c 16 3 Vases Charm Cactus, Distinct Varieties - 3 of each - 50c 17 3 Vases Charm Decorative - Distinct Varieties - 3 of each 50c Page Four Continuation of: SECTION 2 - DAHLIAS OPEN. SCH.NO. FIRST 18 1 Vase Charm, 3 Blooms, Distinct Variety30c 19 Seedling Dahlia Over Six Inches30c 20 Seedling Dahlia Under Six Inches 30c 21 3 Vases Pompones, Distinct Varieties, 3 of each50c 22 1 Vase Pompones, N.N.D, 50c 23 3 Exhibition Cactus Distinct Varieties 50c 24 1 Exhibition Cactus30c 25 1 Miniature Dahlia20c 26 1 Charm Dahlia 20c 27 1 Vase Dahlias Under 8 Inches, 10 Stalks, N.N.D. 75c SECTION 3: RINGWOOD AND DISTRICT AMATEUR CHAMPIONSHIP DAHLIAS - AMATEUR 28 6 Giant Dahlias, Distinct Varieties $1.00 29 9 Dahlias Distinct Varieties (Shown Separately) 3 Medium Cactus; 3 Miniature Cactus, 3 Charm Cactus $2.00 30 3 Giant Decorative Distinct Varieties 50c 31 1 Giant Decorative30c 32 3 Giant Cactus, Distinct Varieties 30c 34 3 Medium Decoratve Distinct Varieties 50c 35 1 Medium Decorative 30c 36 3 Medium Cactus Distinct Varieties50c 37 1 Medium Cactus 30c 38 3 Vases Miniature Cactus Distinct Varieties (3 of each) 50c 39 1 Vase Miniature Cactus 3 Blooms N.N.D. 50c 40 1 Vase Miniature Decorative 3 Blooms N.N.D.50c Page Five Continuation of: SECTION 3 - AMATEUR DAHLEA CLASS SCH.NO: FIRST 413 Vases Charm Cactus, Distinct Varieties - 3 of each -50c. 421 Vase Charm Cactus, Distinct Variety - 3 Blooms - 30c 433 Vases Charm Decorative, Distinct Varieties, 3 of each50c 441 Vase Charm Decorative 5 Blooms N.N.D. 30c 451 Vase Miniature, 3 Blooms, N.N.D.20c 461 Charm 471 Vase Pompones 5 Blooms N.N.D.50c 481 Vase Show or Ball Dahlias 3 Blooms N.N.D. 50c. SECTION 4: DAHLIAS - NOVICE 491 Giant Dahlia 30c 501 Medium Dahlia 30c 511 Vase Miniature Dahlias, 3 Blooms, N.N.D.30c 521 Vase Charm Dahlias, 3 Blooms, N.N.D. 30c 531 Miniature Dahlia20c 541 Charm Dahlia 20c SECTION 5:R O S E S-O P E N 55Roses, 3 Blooms in Separate Containers, (Distinct Varieties)40c 56Roses, 3 Blooms, 1 colour shown separately 30c 57Roses, 3 Blooms, Bud to Full Bloom 30 c 58Roses, 3 Vases, Distinct Varieties 75c 59Roses, 1 Vase Full Bloom showing stamens 30c 60Roses, 1 Vase C.V.A. 20c Page Six Continuation of: SECTION 5 - R O S E S-O P E N SCH.NO:FIRST 611 Rose in Bloom20c 62Rose, 1 Vase of Floribunda or Grandiflora 30c SECTION 6 - R O S E S - A M A T E U R 63Rose, 1 Bloom20c 64Rose, 1 Vase, C.V.A. 30c 65Roses, 3 Blooms, Distinct Varieties35c 66Roses, 3 Blooms, Bud to Full Bloom 35c 67Roses, 1 Vase Floribunda or Grandiflora30c SECTION 7C U T F L O W E R S -O P E N 683 Vases Cut Flowers, Distinct Kinds, C.V.A. 50c 691 Vase Cut Flowers, Distinct Variety, C.V.A. 25c 701 Vase Cut Flowers, Red Shades, Distinct Kind 25c 711 Vase Cut Flowers, Pink Shades, Distinct Kind25c 721 Vase Cut Flowers, White Shades, Distinct Kind 25c 731 Vase Cut Flowers, Cream or Yellow Shades25c 741 Vase Cut Flowers, Blue Shades 25c 751 Head Hydrangeas25c 763 Vases Geranium or Pelargonium, N.N.D. 25c 771 Vase Asters, C.V.A.25c 781 Vase Zinnias, Distinct Variety, Dahlia Flowered25c 793 Vases Zinnias, Distinct Colours, Dahlia Flowered 25c 801 Vase Lilliput Zinnias, C.V.A. 25c 811 Vase Marigolds. C.V.A. 25c 821 Vase Cut Flowers, not shown in this Schedule 25c 831 Vase Decorative Chrysanthemum, C.V.A., A.N.S.25c Page Seven Continuation of: SECTION 7:CUT FLOWERS - OPEN - SCH.NO: FIRST: 841 Container phlox, C.V.A.25c SECTION 8C U TF L O W E R S - AMATEUR 853 Vases Cut Flowers, Distinct Kinds, C.V.A. 40c 861 Vase Cut Flowers, Distinct Variety, C.V.A. 25c 871 Vase Cut Flowers, Red Shades, Distinct Kinds25c 881 Vase Cut Flowers, Red Shades, Distinct Kinds 25c 891 Vase Cut Flowers, Blue Shades, Distinct Kinds 25c 901 Vase Cut Flowers, White Shades, Distinct Kinds 25c 913 Vases Fuchsias, C.V.A.25c 923 Vases Geraniums or Pelargoniums (N.N.D.) 25c 931 Vase Aster, C.V.A.25c. 941 Vase African Marigolds, Distinct Variety 25c 951 Vase Zinnias, Dahlia Flowered, C.V.A. 25c. 961 Vase Cut Flowers not stated in Schedule 25c 971 Flower not stated in Schedule 25c 981 Vase Geranium, Distinct Variety25c 991 Container Phlox25c Page Eight SECTION 9 - C U T F L O W E R S - N O V I C E SCH.NO:FIRST: 1001 Vase Asters 25c 1011 Vase Snap Dragons C.V.A.25c 1021 Vase Marigold C.V.A.25c 1031 Vase Zemias, Dahlia Flowered, C.V.A. 25c 1041 Vase Zemias, Lilliput, C.V.A. 25c 1051 Container Phlox 25c SECTION 10 F L O R A L A R T O P E N FIRST SECOND 106Arrangement of Flowers for the Home50c 20c 107Table Centre Piece of Mixed Flowers 50c 20c 108Bowl of Dahlias 50c 20c 109Arrangement of Autumn Tones (Any Foliage Allowed)50c 20c 110 Arrangement of Flowers (Dahlias to predominate - May include any plant material and accessories)$1-00 50c 111Dry Arrangement 50c 20c 112Church Arrangement 50c 20c 113A Basket of Fruit 50c 20c 114Line Arrangement (May include any Plant Material) 50c 20c 115"AS I LIKE IT" (May include any Plant Material and Accessories) 50c 20c 116Arrangement, Tall and Stately 50c 20c 117Bowl of Floating Flowers (FLOWERS MUST FLOAT)35c 15c Page Nine SECTION 11 F L O R A L A R T - A M A T E U R SCH.NO: FIRST:SECOND: 118Arrangement of Dahlias35c 15c 119Miniature Arrangement 50c 15c 120Harvest Arrangement of Flowers and/or Vegetables 40c20c 121Arrangement of Gladioli 35c 15c 122One Flower Spray30c 15c 123Arrangement of Five Dahlias 35c 15c 124Presentation Basket50c 20c 125Arrangement in Pink and Gray on Silver 40c 20c S P E C I A L N O T I C E PLEASE NOTE THAT SCHEDULE NUMBERS 106, 118 AND 120, TO BE EXHIBITED IN 2FT.6IN. NICHE.. SECTION 12 F L O R A L A R T - INTERMEDIATE SCH.NO: FIRST: SECOND: 126A Dry Arrangement 30c15c 127Presentation Basket40c20c 128Tall Arrangement 30c15c 129Line Arrangement Five Flowers40c20c ENTRIES CLOSE THURSDAY MARCH 4TH, 1971 AT 9 P.M. Page Ten SECTION 13 F L O R A L A R T - N O V I C E SCH.NO:FIRST: SECOND: 130"My Choice" 30c 15c 131Dry Arrangement 30c 15c 132One Flower Spray 30c 15c 133Presentation Basket 40c 20c 134Arrangement, "AS I LIKE IT"30c 15c SECTION 14V E G E T A B L E S SCH.NO:FIRST: 135Collection of not more than 8 Vegetables $1.50 136Brace (2) of Apple Cuccumbers25c. 137Brace (2) of Long Cuccumbers 25c 138Plate of 4 Tomatoes, smooth, (eith Stalks) 25c. 139Plate of 4 Onions25c 140One Vegetable Marrow25c 141One Pumpkin 25c 142One Lettuce25c 143Plate of Peas - 12 Pods - 25c 144Plate of Climbing Beans - 12 Beans25c. 145Plate of Dwarf Beans - 12 Beans - 25c 146Bunch of Three Carrots with Tops25c 147Bunch of Three Parsnips 25c 148One Head Silver Beet25c 149Plate of 4 Potatoes25c 150Bunch of 3 Red Beet with Tops 25c 1513 Sticks of Rhubarb with Leaves25c 152Vegetable not otherwise specified 25c 1533 Cobs Sweet Corn25c. Page Eleven SECTION 14 - F R U I T SCH.NO: FIRST: SECOND: 154A Dish of 4 Culinary Apples 25c 155A Dish of 4 Dessert Apples 25c 156A Dish of 4 Lemons 25c 157A Dish of 6 Passion Fruit 25c 158A Fruit not otherwise stated 25c SECTION 15 - FLORAL ART - CHILDREN 11 TO 14 YEARS 159Floral Mat 12 inches by 9 inches 75c25c 160Arrangement of 3 Flowers (Any Foliage) 20c10c 161Decorated Saucer of Flowers20c 10c 162Flower Arrangement in Egg Cup 20c10c 163Novelty of any Horticultural Material20c 10c 164Boquet of Flowers 20c 10c 165Miniature Arrangement not to Exceed Three Inches 20c 10c. 166Arranged Vase of Flowers 20c 10c 167Arranged Vase of 6 Dahlias20c 10c. SECTION 16SPECIAL FUCHSIAS SECTION 168Single, 3 Distinct Variety 169Single, 6 Distinct Variety 170Single, 3 C.V.A. 171Single, 6 C.V.A. 172Double, 3 Distinct Variety 173Double, 6 Distinct Variety 174Double, 3 Distinct Variety 175Double, 6 C.V.A. Page Twelve Fuchsias Florets to be displayed on collar in a container (Small). Containers and Collars will be supplied by the Club, PRIZE-CARDS - FIRST, SECOND, WILL BE AWARDED ALSO MERIT CARD. A TROPHY WILL BE AWARDED TO THE BEST EXHIBIT IN SPECIAL FUCHSIAS SECTION SPECIAL OPEN CLASS - POT PLANTS.... SCH.NO:FIRST: 1761 Pot Plant, Foliage30c 1771 Pot Plant, Orchid In Bloom 30c 1781 Pot Succulents 30c 1791 Pot Geranium in Bloom 30c 1801 Pot Geranium Foliage 30c 1813 Indoor Plants - Different Varieties 30c 1825 Pots, at least 3 in Bloom 30c 183Container of Mixed Plants 30c 1841 Pot Plant in Bloom 30c Back Page G A R D E N C O M P E T I T I O N G A R D E N C O M P E T I T I O N sponsored by RINGWOOD CITY COUNCIL (Entries close Thursday February18th) (JUDGING SATURDAY FEBRUARY 27TH, 1971) ENTRIES MAY BE LEFT WITH: MRS.D.HUTCHINSON MRS.V.H.WILSON 43 Caroline Streetor38 William Street RINGWOOD RINGWOOD 870-8577870-7458 JOIN THESOCIETY Our MONTHLY MEETINGS are held on the THIRD MONDAY at 8 p.m. on each month in the PUBLIC LIBRARY, Warrandyte Road, RINGWOOD. YEARLY SUBSCRIPTION: ONE DOLLAR ($1-00) C H R Y S A N T H E M U M S H O W SATURDAY, MAY 8TH, 1971 WATCH FOR FURTHER DETAILS Sunrise Secretarial Service, 12 Grey Street, Ringwood East Telephone: 870-6871 -
 Ringwood and District Historical Society
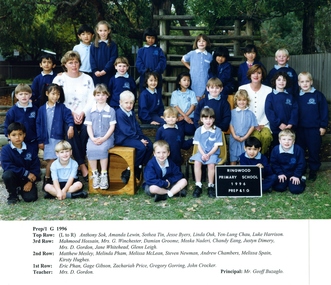
Photograph, Ringwood Primary School 1996 Class Photo Grade Prep /1G, 1996
Prep/IG 1996 Top Row: (L to R) Anthony Sok, Amanda Lewin, Sothea Tin, Jesse Byers, Linda Ouk, Yen-Lung Chau, Luke Harrison. 3rd Row: Mahmood Hossain, Mrs. G. Winchester, Damian Groome, Moska Naderi, Chandy Eang, Justyn Dimery, Mrs. D. Gordon, Jane Whitehead, Glenn Leigh. 2nd Row:Matthew Mesley, Melinda Pham, Melissa McLean, Steven Newman, Andrew Chambers, Melissa Spain, Kirsty Hughes. 1st Row: Eric Phan, Gage Gibson, Zachariah Price, Gregory Gorring, John Crocker. Teacher: Mrs. D. Gordon. Principal: Mr. Geoff Buzaglo. -
 Orbost & District Historical Society
black and white photograph, Neville Huon, 1939
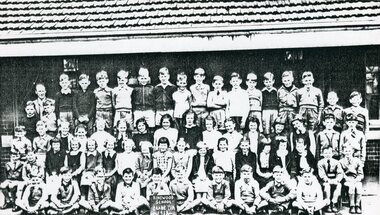
During 1910-11 the first approaches were made to the Department of Education for the establishment of a Higher Elementary School in Orbost and this became a reality in 1912. Orbost Higher Elementary School supplied post-primary education in the district until a high school was built in 1948. Higher Elementary schools took in students whose parents desired a higher level of education than the completion of Grade 6. Higher elementary classes were added to existing primary schools and were the forerunners of high schools. Orbost High School / Orbost Secondary College has played a significant part in the education of senior students in the Orbost district . It is the sole senior educational institution. This photograph is representative of its history.A black / white photograph mounted on grey card. it shows three rows of students and teachers in font of a brick building. They are dressed in uniforms with ties and blazers.on back - 1939 D & C FORMS Nance Gilbert front row 3rd from righteducation-orbost higher-elementary-school-orbost gilbert-nance -
 Ringwood and District Historical Society
Photograph, Ringwood State School -Class photograph - Grade 4A, 1955
Black and white photograph - Grade 4A, 1955"Attached to photograph" Back Row- L to R: M Corin, T Seagren, I Weist, D Sjogren, I Simpson, B Steegstra, B Cain, N Miller, ? Fitzpatrick, P Hill, ?, G Frazer, B Short, T Coutes, B Stevenson, P White, ?. 2nd Row - L to R: M Johnson, R Harris, S Dorman, H Trout, ?, W Marriner, ?, F Hackett, ?, ?, ?, L Corbett, R Thompson, V Pincock, I Wilton, L Sumpter. 3rd Row - L to R: I Marshall, N Maclarty, C Pavey, F Lillywhite, E Dexter, S King, ?, M Milne, ?, H Boyle, ?, B Stewart, J Smalley, K Sterling, Olwyn Hayes, ?, ?, I Clarksen. Front Row - L to R: D Richards, B Bangay, A Byrne, B Cooper, D Bolton, J Forbes, R Jenkins, R Albert, R Galfred, ?. Teacher: Mr Smith -
 Glen Eira Historical Society
Album - Album page, Old Fire Station, 4 Selwyn Street, Circa 1972
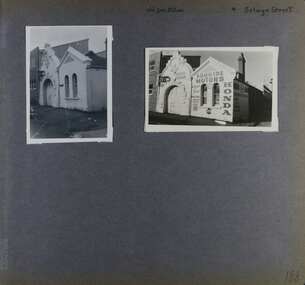
This album was created in approximately 1972 as part of a project by the Caulfield Historical Society to assist in identifying buildings worthy of preservation. The album is related to a Survey the Caulfield Historical Society developed in collaboration with the National Trust of Australia (Victoria) and Caulfield City Council to identify historic buildings within the City of Caulfield that warranted the protection of a National Trust Classification. Principal photographer thought to be Trevor Hart, member of Caulfield Historical Society. Most photographs were taken between 1966-1972 with a small number of photographs being older and from unknown sources. All photographs are black and white except where stated, with 386 photographs over 198 pages. From Victorian Heritage Database citation for H2376 Former Elsternwick Fire Station, 2-4 Selwyn Street Elsternwick - Victorian Heritage Register https://vhd.heritagecouncil.vic.gov.au/places/2645 (as at 21/11/2021) The Former Elsternwick Fire Station was built and commenced operation in 1896. It was one of 32 new fire stations built between 1892 and 1896 by the newly formed Melbourne Metropolitan Fire Brigade ('MFB') to form a comprehensive fire-fighting network across Melbourne. The MFB was established in 1891 as Victoria's government-run fire-fighting service in Melbourne and its growing suburbs. By 1918 motorised fire engine appliances had replaced horse-drawn fire vehicles across the metropolitan area, and the consequently larger areas that fire stations could protect meant the 1896 Elsternwick Fire Station was one of many which was becoming obsolete. The MFB continued to use the Elsternwick Fire Station up until the Station's closure in 1926. From 1927 the former Fire Station was leased by neighbouring timber merchants JJ Webster Pty Ltd who subsequently purchased the property from the MFB in 1934. From 1954 the 'Esquire Motors' car repair business traded at the site, and changes to the former Fire Station building including the complete enclosure of its yard by corrugated steel walls and roofing appear to have been completed in the mid-1950s. In 1990 the Australian Broadcasting Corporation ('ABC') purchased the former Fire Station together with five other adjoining land parcels in Selwyn Street. From that time until 2017 the former Elsternwick Fire Station has been used by the ABC as office and storage space in its Selwyn Street television studio complex.From Victorian Heritage Database citation for H2376 Former Elsternwick Fire Station, 2-4 Selwyn Street Elsternwick - Victorian Heritage Register https://vhd.heritagecouncil.vic.gov.au/places/2645 (as at 21/11/2021) The Former Elsternwick Fire Station is historically significant as one of the 10 remaining fire stations of the original 32 built for the newly established Melbourne Metropolitan Fire Brigade ('MFB') during the four-year period 1892 to 1896. These fire stations were constructed following the establishment in 1891 of the MFB, Victoria's government-run fire-fighting service for metropolitan Melbourne and its growing suburban population. These new stations formed a crucial part of the MFB's fire-fighting network across Melbourne. The Former Elsternwick Fire Station clearly demonstrates the historical development of fire-fighting services in Melbourne, especially the expansion of the newly-formed MFB throughout Melbourne's suburbs during the 1890s. [Criterion A] The Former Elsternwick Fire Station is architecturally significant as a fine example of a late nineteenth century fire station. Constructed shortly after the establishment of the MFB, it displays characteristics of its class of place that remain mostly unchanged from the former Station's historically important period of development and use. A particularly strong element of the Former Elsternwick Fire Station is the large and strikingly-detailed stone horseshoe arch, designed for horse-drawn fire-fighting vehicles, at the street entrance to its fire-engine room. [Criterion D]Page 188 of Photograph Album with two photographs of the old Elsternwick Fire Station.Handwritten: old fire station 4 Selwyn Street [top right] / 188 [bottom right]trevor hart, rendered, 1890's, melbourne metropolitan fire brigade, mfb, fire-fighting, jj webster, timber merchants, esquire motors, car repair, australian broadcasting corporation, abc, selwyn street, brick and stone, asymmetrical facade, anglo-dutch gable, rusticated and smooth-faced limestone, elsternwick fire station, elsternwick, fire station, jj webster pty ltd, motor vehicle repair shops, stone horseshoe arch entrance -
 Federation University Historical Collection
Domestic object - Bottle, Ballarat College of Advanced Education Diploma of Applied Science (Nursing) Graduate Port, c1988
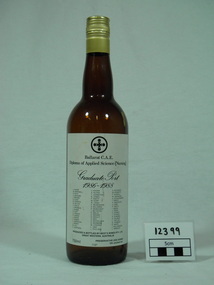
Graduation port bottled for the Diploma of Applied Nursing class 1986-1988Empty brown glass wine bottle Includes original plastic screw top lid and collar (gold colour) with printed labelFeatures printed self adhesive label which reads: 'Ballarat C.A.E. Diploma of Applied Science (Nursing) Graduate Port 1896-1988 J. Avard ; M. Bardwell ; N. Bath ; J. Brown ; G. Coad ; B. Conrick ; M. Devlin ; S. Dohle ; J. Drennan ; J. Dunne ; K. Fort ; H. Fraser ; R. Green ; J. Grose ; L. Hamer ; L. Harrison ; J. Henry ; M. Hill ; C. Hoffman ; J. Hogan ; A. Huynh ; T. Johnston ; B. Jones ; P. Knott ; M. Kopp ; W. Leigh ; C. McGeachin ; S. McLaren ; D. McNaught ; J. McTavish ; K. Melih ; K. Moore ; D. Mould ; S. Neil ; D. Nicholson ; A. Norman ; M. O'Rourke ; L. Orr ; L. Phyland ; S. Richards ; M. Roberts ; F. Russell ; M. Sahajdak ; A Schuurmans ; I. Simcic ; H. Simcocks ; V. Sims ; P. Smith ; I. Snow ; J. Spink ; C. Spinks ; J. Stokes ; A. Symonds ; A. Talwar ; L. Taylor ; g. Tennant ; K. White ; J. Williamson ; L. Windust Produced & Bottled by Best's Wines Pty Ltd Great Western, Australia 750ml Preservative (220) added 18% alcohol/vol' Bottle features embossed details around its lower edge: '14 [?] M 15555-D'ballarat college of advanced education, j williamson, p smith, w, j, ballarat c a e diploma of applied science nursing, graduate port 1896 1988, j avard, m bardwell, n bath, j brown, g coad, b conrick, m devlin, s dohle, j drennan, dunne, k fort, h fraser, r green, j grose, l hamer, l harrison, j henry, m hill, c hoffman, j hogan, a huynh, t johnston, b jones, p knott, m kopp, leigh, c mcgeachin, s mclaren, d mcnaught, j mctavish, k melih, k moore, d mould, s neil, d nicholson, a norman, m o rourke, l orr, l phyland, s richards, m roberts, f russell, m sahajdak, a schuurmans, i simcic, h simcocks, v sims, i snow, j spink, c spinks, j stokes, a symonds, a talwar, l taylor, g tennant, k white, l windust, bcae -
 Federation University Historical Collection
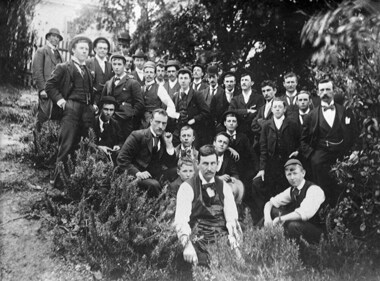
Photograph - Black and White Photograph, Students in the Ballarat School of Mines Botanical Garden, c1897, 1897-1898
A number of names written on the back of the photograph match with names in the Ballarat School of Mines Annual Report 1897 and 1898. These are: Robert Allan; (Thomas E. or William T. ) Atherton; Percy Bailey, James A. Bass; Fred F. Bradford; William Brokenshire; Joseph Bryant; Cecil Eeles; Thomas Evans; William C. Gosman; John Hill; Edward P. Johnson; Duncan W. Kennedy; James Kidd; John W. Martin; Percy Osborne; J.A. Porter; Thomas Phillipson; Frank A. Steward; Robert G. Todd; Thomas A. Uthwatt A number of names are not matched: - Bollin, Curry, Morey, Mann. ThompsonBlack and white photograph mounted on grey card showing a number of students and instructors of the Ballarat School of mines. They are thought to be in the Ballarat School of Mines Materia Medica Garden (System Garden) for either a botany, chemistry or materia medica lesson, or as part of the Ballarat Field Naturalists group. The person at the front wearing an apron is George Porter Day.A number of names are written in ink on the back of the photo " Tom Evans, Osborne, Atherton, Phillipson, Eccles, Allan, Todd, Morey, Bradford, Curry, John Marian, Char Bailey, Uthwatt, John M. Sutherland, Kennedy, Mat Thompson, Hill, Steward, Martin, Kidd, Brokenshire, Gosman, Bollin, William D. Hill, "ballarat school of mines, science, material media, botanical gardens, system garden, ballarat school of mines botanical gardens, bollin, curry, morey, mann, thompson, james a. bass, fred f. bradford, william brokenshire, joseph bryant, cecil eeles, thomas evans, william gosman, john hill, edward johnson, duncan kennedy, james kidd, john martin, percy osborne, j.a. porter, thomas phillipson, frank steward, robert todd, thomas uthwatt, photography, foto, class, george day, george porter day, atherton, percy bailey, parks and gardens -
 Federation University Historical Collection
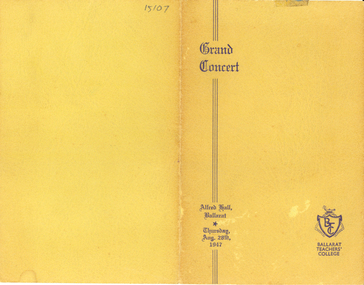
Programme, Ballarat Teachers' College, Ballarat Teachers' College Grand Concert, 1947, 1947
Ellwood was the Principal of the Ballarat Teachers' College. Ballarat Teachers’ College was opened on 04 May 1926, at S.S. 33 Dana Street, with an enrolment of 61 students. Its original staff consisted of the Principal, Mr W.H. Ellwood, M.A., M.Ed. (Chairman of the Teachers’ Tribunal from its inception in 1946 until 1954), Miss A. Bouchier, B.A., and Mr A.B. Jones, BA., (lecturers). In 1927 Miss P.A. Hamano joined the staff. In 1927 the college moved to the old Ballarat East Town Hall (remodelled for their use) in Barkly Street. During 1927 the numbers in the College were augmented by 26 Manual Arts students, who had formerly received their training at Ballarat High School. Manual Art students continued till 1930 when, on grounds of economy, their training was concentrated at Melbourne Teachers’ College. During the four succeeding years, approximately 60 students annually entered the primary course. Inclusive of Manual Arts students, and private fee-paying students, exactly 400 trainees passed through the College in its brief span of life (1926-1931). Five per cent of each year’s students were granted an extension of their studentship to enable them to proceed to Melbourne Teachers’ College, and to take the first year’s course for a University degree. With the advent of the economic depression of the ‘thirties, Ballarat Teachers' College closed its doors in December, 1931. Fourteen years were to pass before the College opened again on February 2nd, 1946. The college re-commenced at SS Dana Street, under the guidance of Mr W.F. Lord, M.C., M.M., B.A., Dip. Ed., (acting, later Principal 1946-1950) and a staff consisting of Miss E.B. Hughes, B.A., Dip. Ed., Mr C.B. Bryan, B.A., B. Com., Dip. Ed., Miss Monica H. Miller, L.Mus.A., and Miss G. Kentish, Dip. Phys. Ed. The opening ceremony was performed by the Minister of Education at that time, the Hon. F. Field, M.L.A., accompanied by the Hon. T.T. Hollway, M.L.A., and the then Director of Education, Mr J.A. Seitz. It was originally intended to cater for women students only but, at the last moment, men resident in Ballarat were also accepted. A co-educational college was thus set up instead, and it has continued as such. 1951 saw the introduction of the two-year course, successful students being presented with the Trained Primary Teacher’s Certificate at the final College Assembly each year. In December 1955, College held its first Graduation Ceremony, with its own Graduation Hymn, the words of which were written by Miss C.M. (Mavis) Canty of the staff. Lord remained as principal until 1951 when he transferred to establish a teachers' college at Toorak. Tom William Turner was Lord's successor. A highlight of his term was the construction of new college buildings at Gillies Street with the students commencing their lessons there in February 1958. Turner retired in 1970, having overseen a period of substantial growth in the institution. In that year alone more than one hundred and forty students completed their primary teaching qualification to meet a severe shortage of teachers. Doug Watson commenced as principal in 1971. In 1973 Ballarat Teachers' College became the State College of Victoria at Ballarat. Three years later Ballarat College of Advanced Education was formed and the teacher education students moved to the Mount Helen Campus. In 1990 Ballarat College of Advanced Education became Ballarat University College, an affiliated college with the University of Melbourne. The University of Ballarat was formed in January 1994.Yellow folded card programme for the Ballarat Teachers' College Grand Concert held at Alfred Hall Ballarat on Thursday 28 August 1947. Student Teachers from the 1947 class performed, including Jessie Batson, Ruth Tozer, Joy Love, N. Kerr, Arthur Lelean, D. Cooper, John Collins, Ann McKinnnon, Peg Purdue, Lindsay Harley.ballarat teachers' college, education, alfred hall -
 Federation University Historical Collection
Book, J.A. Hoskin & Son, Ballarat Teachers' College Extra Muros, 1958, 1958
February 1958 Classes commence at the new Gillies Street location of Ballarat Teachers’. (BTC Handbook 1965; Beggs-Sunter: 84) Contents include: Editorial, Our Principal Speaks, the President S.R.C., 1958 Highlights, Teaching Round, Section Notes, Social Notes, Hostel Life, Sporting World, Insignias and Awards 1958, Club NotesLight blue cover with dark blue and yellow titles. Soft covered magazine of the Ballarat Teachers College. 48 pages. Articles include Victoria Street Hostel, Gilies Street Hostel, Grampians Trip, Beaufort House , Sturt St House , Camp St Hostel, Club Notes btc, ballarat teachers college, n. harvey, t. w. h. turner, monica miller, m. hines, b. rickard, d. eldridge, n. turnbull, b. english, k. o'neil, p. burgess, m. almeida, e. doney, j. rae, p. wise, w. crocker, p. r. burgess, barry withers, j. bourke, a. linton, s. mckaskill, h. pattenden, d. chandler, a. stafford, r. croft, a. cuthbertson, r. reed, a. sonsee, j. lacy, f. ryan, c. rodger, m. egan, j. hill, t. turner, c. m. canty, j. blair, e. walpole, m. miller, michael long, m. blair, j. blackman, n. beacham, d. astbury, m. bergin, a. constable, g. clarke, g. briggs, m. brown, e. beck, j. badger, g. angwin, g. alexander, k. broad, a. costa, e. davidson, p. burbidge, j. clements, s. elder, d. foster, b. fernandes, b. fischer, m. harcoan, j. heenan, b. hudson, e. jardine, k. hayes, g. coffey, r. dennis, w. cartledge, v. delbridge, n. hawker, l. hales, d. farnsworth, l. hallam, r. fencher, g. karstens, f. leach, r. kelly, m. long, g. macdonald, j. mcdermott, a. lehmann, i. hastie, b. haig, m. jones, l. jeffrey, m. kiefel, j. mcalpine, i. jenkins, j. kenworthy, b. lawton, m. livingston, e. mcormick, d. mckimmie, g. mcintosh, m. mckee, b. murphy, f. mitchell, m. mclachlan, r. power, k. mcdougall, s. murphy, b. nash, d. mckenzie, j. madder, j. meadows, n. mchenry, j. mayo, l. missen, e. muir, g. roberts, k. ryrie, d. ritchie, m. scanlon, e. robinson, m. rutter, j. rogers, m. rae, v. reynolds, j. rees, r. sloley, d. sheen, b. nunn, r. nicholas, b. ruwoldt, m. rowe, l. walker, l. wilkinson, n. wright, d. shoebridge, f. stokie, g. stewart, j. teschendorf, n. souter, e. walker, m. spinks, m. wallace, m. stone, s. tucker, r. taylor, j. short, b. tucker, l. castree, w. craig, r. bibby, b. davies, r. bowker, g. cabble, i. clayton, w. coleman, j. bates, m. elder, l. anthony, j. carmichael, e. edwards, l. anderson, b. cannard, b. drake, j. elliott, p. dunn, b. withers, m. stewart, l. wright, d. smith, r. rowe, k. wilson, k. waltrowicz, j. roach, l. schreenan, i. sutherland, d. williams, b. wynne, j. schaefer, s. shepherd, s. wright, b. whiteside, m. oliver, j. quayle, j. waller, j. taylor, v. rogers, s. moller, m. norman, l. thomas, j. wagner, w. j. craig, e. anthony, r. neville, j. noonan, b. lay, k. hammer, g. moncrieff, r. mason, g. howlett, w. knight, j. matthews, b. lumsden, b. phelan, p. hope, v. la franchi, s. henderson, l. hayne, w. keen, b. forbes, m. gray, g. mcilvena, a. horwill, j. mccumber, m. hateley, k. rieniets, e. fletcher, d. johnson, j. miller, i. ross, c. keys, e. jarvis, m. youngs, j. smith, e. davies, g. commons, p. larmour, r. gowan, b. hedley, miss egan, s. blomfield, m. meyer, k. duffy, h. speedie, j. witton, d. magee, a. pope, p. quinlan, h. jones, miss miller, kevin o'neil, lois e. hayne, w. keem, mr croft, geoff cabble, jack noonan, jan carmichael, gwen macdonald, bev. ross -
 Federation University Historical Collection
Book, Victoria Education Gazette and Teachers' Aid, 1921-1930, 1921-1930
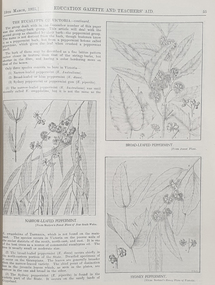
The Victoria Education Gazette and Teachers' Aid was published for Victoria's teachers and was sent to all school on the state. In 1920 The Ballarat School of Mines had donated 136 pounds 14 shillings and 10 pence to the Victorian Education Department's War Relief Account, and the Ballarat Junior Technical School had donated 10 pounds 6 shillings and 10 pence.Ten black hard covered volumes with red tape spine, covering 1921 to 1930. The gazettes include Education Department appointments, transfers, resignations and retirements, vacancies, notices, queries, notices of books, examination papers, original articles, lesson plans, suggestions for lessons, drawing, obituaries, notes on nature study, mathematics, music, sloyd woodwork, English grammar, Victorian State School Swimming Clubs, Geography, penmanship, science, History, Latin, Geography, The School Garden, horticulture, singing, World War One; ANZAC Day, lifesaving, Astronomy, Empire Day, ANZAC Buffet London, Victorian Education Department's War Relief Fund .1) 1928. Articles include: New Caledonia, Swimming and Lifesaving, School forestry, a visit to the pyramids, Exploration of Gippsland, paul de Strezelecki, Angus McMillan, Villers Bretonneux Memorial School, American Black Walnut, Red Gum, Messmate Stringybark, The Great Barrier Reef, retirement of Frank Tate, Stawell High School, Report on Some Aspects of Education in the United States, Jubilee Education Exhibition , New School Readers; measured Drawing Images include: Macarthur Street School's Plantation, Maryborough School Plantation, Pinus Insignis (Radiata) ready for Milling, Creswick State Forest, Metalwork, Daylesford Pine Plantation four years old, Henry Harvey (art Inspector); Omeo School Endowment Plantation; Frank Tate; Stawell High School Drawings From Casts; Lake Tyers School Endowment Plantation, measured drawing, Thomas H. Stuart, GEorge Swinburne. J.R. Tantham-Fryer, Cookery Class, John Edward Thomas. .3) War Savings Stampsm Swimming and Life-saving, Teh Rural School System of Victoria, Imaginative Composition, ANZAC Day, Retardation, Teh Bright Child Hudson Hard Obituary, Leeches, Relief for Distress in Europe, Dental, Teachers' Library, History of Portarlington, J.E. Stevens Obituary, Victorian Teachers in England Images: Swimming and Life-Saving Medallion .3) Swimming and Lifesaving, Bronze medallion, Victoria Leage of Victori, War Savings Stamps, Rural School Sytem of Victoria, .4) War Relief, Talbot Colony for Epileptics Masonmeadows, Discipline New and Old (Percy Samson), Soldier teachers, Preservation of Australian Birds, Arbor Day, Jubilee of Free Education, Teaching Geography, Poery in Schools, School Committees, Shelter Pavilion, Mysia Memorial School, Clovers, Jubilee Exhibition, Domestic Arts, Louis Pasteur, .5) Victoria League of Victoria, An Endowment Scheme (Pine Plantations), School Endowment Plantations, Protecting our trees by Owen Jones,. Victorian State Schools Horticultural Society, Sloyd Woodwork, School Forestry, Thomas Brodribb Obituary and portrait, Imperial Education Conference London, school Management and Method, School plantations, Eucalypt plantations in the Bendix and Heathcote District, Junior Red Cross, Jubilee Education Exhibition, Gould League Competitions, handwriting, The School Magazine, Frank Tate in London, Victorian beetles, Council of Public Education, Villers Bretonneux and its new School, Death of Samuel Summons, Woodwork Summer School, Swimming, Japanese Relief Fund, Retirement of John Cross, reminiscences of the Late Mr Albert Mattingley .6) Thomas H. Trengrove and the Villers Bretonneux School hall and pilaster carvings, forestry, visit of Maryborough teachers to Ballarat Water Reserves, noxious weeds, relief for Distressed Europe, The Dalton Plan, Empire Day, Retirement of Mr Fussell, Centenary of Hume and Hovell Expedition, League of Kindness, Effective Nature Study in a Rural School, Some Facts About Paper and their Bearing Upon School Plantations, Council of the Working Men's College Melbourne, Maria Montessori, University Vacation School, Horticulture in State Schools, An Informal Chat About French Schools (C.R. McRae), The Vacation School, Johann Heinrich Pestalozzi, Inspector's Report on a 5th-class School, Can Children Write Verse, John Adams, Victoria League of Victoria, R.F. Toutcher, Sir James Barbie's Address to High-School Girls, Impressions of a High School Teacher Abroad (R.D. Collman), The Spirit of the School Plantation Scheme, Monument of the Late Mr and Mrs A.T. Sharp at Box Hill Cemetery, The Teaching of Geography, The Treatment of Poetry in Class, Two Difficult Arithmetic Lessons, Location of Principal Australian Timbers, Dr John Smyth, Stammering and its Influence on Education, Wireless Broadcasting as an Educational Medium, Boys School at Villers Brettonneux, The New School at Villers Brettonneux, Bird Day, Messmate or Stringybark, What Every Woman Knows, Director's Report on Denmark .7)1925 . Includes: School Forestry, horticulture, J.H. Betheras retirement, Ivanhoe School, Coburg School, Moorabool Junior Technical School, Villers Bretonneux School hall and pilaster carvings, Francis Ormond, William Charles Kernot, Corsican Pnes at Creswick, Ballarat High School Plantation, Workin Men's College, RMIT, Naorrow LEafed Peppermint, Education and World Peace, Eucalypts of Victoria, John C. Eccles, Blue Gum. Manners, Giving the Poorly Nourished Boy A Chance, Native Ferns, Marybourough Technical School, Memorial School at Villers-Brettonneux .8) Experimental Plots in Country Schools (W.W. Gay), Villers Bretonneaux and its Memorial School. nominated classes for Art Teachers, The Teachers Act 1925, Horsham High School, Richmond Technical School, Farewell to Messrs C.R. Long and Ponsonby Carew-Smyth, Frank Tate, Phyiscal Training, Arbor Day, ANZAC Day, Shakespeare Day,Bendigo Junior Techncial School, Musical Appreciation, Motor Dental Unit, School Camps, Education Act of 1872: Mr Angus McKay's Part (George Mackay), A Bush Fire Experience (Irene Stable), Black Sunday, Californian Red Pine, Women's Education in America, Farewell to Lord and Lady Stradbroke, Grevilia Robusta, Silky Oak, Redwood, John E. Grant, The Need for Research (Donald Clark), Junior Drama, Ida D. Marshall, John Pounds, Australian Books, Fish Creek School, State Boundaries, History in the Curriculum, Ceramic Art in Australia (Percy E. Everett), Choice of School Songs, Tasmanian Beech, Should History be Taught on a National or an International Basis, Hydatid Disease, James Holland Obituary, Florrie Hodges, Queensland Maple, Post Bushfire Ruins at Fumina, Arbor Day at Fumina, Queensland Rosewood, Omeo Endowment Plantation, Bird Day, Junior Red Cross, Pioneers' Day, Edward Henty, Junior Technical Schools, Yellow Pine, History and Progress of Needlework, A.B.C. of Astronomy, Northumberland Mental tests, Queensland Red Cedar, Teh Globe Theatre, .9) 1927 includes The ABC of Astronomy, Atr Theatre, English Beech, Angus McMillan Art Pottery, School Singing, State Schools' Nursery, School endowment plantations, Making a Man, experimental proof of Charles's Law, John Smyth obituary and portrait, Linton Pine Planation, motivation of arithmetic, Women's Classes at Dookie, Swimming and Lifesaving, Pioneers Day, Drawing, Ballarat High School planation, biting fly, Tir-Na-N'og, John Byatt retirement and portrait, Technical Schools Conference at Daylesford, Ethel Osborne and portrait, library. Francis Thompson portrait, Adam Lindsay Gordon, Solar movement, motor transport, Liverpool Cathedral, Teh Story of the Cathedral, Bendigo School of Mines, Omeo School pine plantation, Egypt and the Nile, Self-Criticism Images include Ballarat High School Pine Plantation, Vale Park, Francis Ormond, Woking Men's College (RMIT), W.N. Kernot, A Stand of Corsican Pines at Creswick, Victoria .10) Some Remarks on the Relationship of the technical Schools to the University (Donald Clark) , Present Day Education in England , Memorial to Joseph Cornwall, Spelling, motivation, Singing, State Scholarships, Agriculture, T.W. Bothroyd, The Swimmer - A Summer School Sketch (H.H. Croll), Swimming woodwork, Farewell to Dr Sutton. ,Drowning, War Savings Movement, White Beech. George S. Browne , Example of School Honor Book, Blackwood, Optimistic teacher, Soldier settlement around Shapparton, Oral Hygiene, Cinema Machines, Basketball, Wakter M. Camble obituary, ANZAC day Pilgrimage in England, Froebel's System, Montessori Method, War Relief Fund, New Zealand Kauri Tree, Bat Tenis at a Bush School., Advice to Australian Girls, Chrysanthemums, Royal Visit, National Parks of Victoria, Maurice Copland Obituary, total eclipse of the Moon, School libraries, The teacher and the COmmunity (A.M. Barry), The Reading Lesson, Swimming and Life-saving, MElbourne Teachers' College War Memorial Windows Old Trainees War Memorial, Cultivating a Natinoal Art education gazette, school, education, teaching, teacher, world war one, school plantations, macarthur street pine plantation, school forestry, creswick state forest, anzac day, armistance celebrations, frank tate, frank tate retirement, drawing from cast, education department school readers, lake tyers pine plantation, w.n. kernot, rmit, working men's college, francis ormond, pine plantations, calenbeem park, creswick, villers-brettonneux school hall and carvings, thomas trengrove, corsican pines, creswick, pine endowment plantations, mccarthur st primary school pine plantation, ballarat high school pine plantation, vale park, mount pleasant primary school pine plantation, golden point pine plantation, angus macmillan, paul de strzelecki, gippsland, villers-bretonneaux memorial school, francis thompson, english ash, pestalozzi centenary, shakespeare day, swimming classes, clear pine, cinema in education, american black walnut, red gum, thomas wolliam bothroyd obituary, and portrait, physical training displays, teaching of spelling, ohm's law, blue gum -
 Federation University Historical Collection
Book, Victoria Education Gazette and Teachers' Aid, 1911-1919, 1910-1919
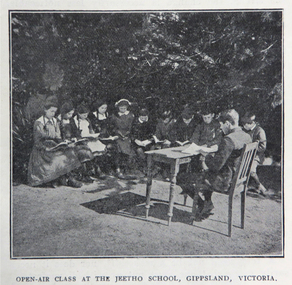
Black hard covered book with red spine, holding Victorian Education Gazettes for one calendar year. .1) 1910 .2) 1912 .3) 1911 .4) 1914 .5) 1918 Images: Open Air Classroom Black Rock; Open Air Classroom, Jeetho, Gippsland; Open Air Nurses bedroom, Mildura; Gym at Canterbury School ; Babies and Nurses at Melbourne Foundling Hospital; Camp at Portland; Alexander Peacock Opens a Melbourne School; Unveiling Major Mitchell Memorial at Mt Arapiles; Agricultural Plot; School Interior; Swimming Drill; Graham Dux Prize Board; Bathing Place; Classroom with blackboard and pictures; Major Mitchell's Map; Melbourne, Derbyshire; Market Place Melbourne; The Blackwood; World War One Send-off at The Athenaeum; Scarsdale Old Boy's logo; Sloyd articles for the Field Hospital; World War One; Gifts for Transport to the Wharf; soldiers; ANZAC Day; ANZAC Day Medalion .5) 1915: Education Department's War Relief Fund, William Park obituary, Closer Settlement Act 1912, Agriculture, needlework, Swimming and Life Saving, explorers, Gregory Blaxland, Matthew Flinders, Composition, Geography, potatoes, onions, gardens, Needlework for Infants, Iona and Staffa, Trained Primary Teacher's Course, Electricity, Electrical Technology, hygiene, Arbour Day, Horticulture, Wattle Day, Bird Day, Technical Schools, Landing at Gaba Tepe, Evils of Alcohol, Old Boys of Scarsdale, Belgium, Teachers' College Images: The British at War, The Sonnet, History and Patriotism, Male Swimming Teachers Summer School at Geelong, Women Swimming Teachers at Port Fairy, Buln Buln State School, Burwood East State School, needlework plans, methods of Rescue and Resucitation. plan of the journey of Gregory Blaxland, Macquarie House, teachers killed (William Ross Hoggart, Stanley Robert Close, William Roy Hodgson, Campbell McDiarmid Peter, William Henry Dawkins, William Hugh Hamilton, Frederick McRae Neal, Vernon Brookes, Frank J. Olle, Alfred J. Collins, Ernest R. Fairlie, William J. McLaren, A.E. Smith, Thomas Patton, Francis W. Kemp, Frederick G. Hall, Rupert O. Hepburn, Woolston J. Govan), Frederick Harold Tubb VC, Botanic Gardens Red Gum, Shelter Pavillions, Head of Wheat, Australian Commonwealth Flag, Iona Cathedral, Drawing exercises, ANZAC Madallion, School Rolls of Honor .6) 1916 - Nature Study, war relief, school gardening, horticulture, singing class, geography of the war, School Rolls of Honour, Ponsonby Carew-Smyth, Astronomy, ANZAC Day, Empire Day, Arbor Day, "Some Suul of Goodness in Things Evil" by Frank Tate, War Relief Gardeners' League, ANZAC Day medallion, Solar System, Abolition of German Schools in Victoria, ANZAC Avenues, avenues of honour, Geography of the War: The West, War relief and handwork, Victorian State Schools Horticultural Society, Patrick Maloney obituary, formalin lamps, Victoria League of Victoria, Wonwondah East Roll of Honor Images - Teachers killed (John Clarke, A.C.H. Jackson, Alexander Robertson, Noel Gambetta, Ralp E. Leyland, Laurance J. Woodruff, Walter E. Cass, Percy D. Moncur, Thomas M. Carmichael, Edward G. Brain, Reginald N.F. Woods, George E. James, William Colvin, David Dobson, Stanley L. Robinson, Charles Allen, G.E. James, H.F. Curnow, Franl L. Cousins, James R. Thompson, Henry H. Campbell, George E. Read, Ernest D. Morshead, Wilfred S. Merlin, Henry R. Wright, George B. Webb, Noel Nicholas, David H. Thomas, Charles A. Levens, Thomas R. Fenner, John M. Daniell, P.J. Larkin, Ralph Smith, Philip Ormsby), school rolls of honour, Swimming Instructors at Queenscliff, The Southern Sky, Map of the North Sea and its Littorals, Easter School of Horticulture at Oakleigh, Map of the Eastern Front, Map of Mesopotamia, Map of the War Area in the Egyptian Campaign, leeches for the Melbourne Hospital .7) 1917 - Swimming and Life-Saving, Childre's FLower Day, Education Department's War Relief Fund, State War Council, Horticulture, Bird Day, Swimming, Growing Chicory at Cowes Images - Teachers killed during World War One (G.M. Nicholas, William C.W. Spencer, J.W.C. Profitt, Ivon C. Bromilow, John Colwell, Robert W. Campbell, Arthur P. Bourchier, Francid G. Houston, Claude N. Harrison, Edgar Williams, Leslie A. Stevens, Charles E. W. Chester, Stanley R. Green, Walter Baker, Arthur G. Scott, Harry L. Swinburne, Horace W. Brown, Arnold Bretherton, Edward W. Jenkins Aubrey Liddelow, Ewen A. Cameron, Edmund R. Lyall, John H. Martin, Harry Bell, Frank L. Nicholls, Melville R. Hughes, Edwin W. Hauser, Walter S. Filmer, Walter G. Barlow, Henry A. Donaldson, Edward H. Jones, Walter W. Raw, Alfred W. Dean, Wiliam Lea, Frederick G. Drury, J.T. Richards, Norman G. Pelton, Lance-Corporal Doran, Kenneth F. McKenzie, William F. Robertson, Wiliam Jarrott, Norman Graham, George G. Paul, Victor Green, Arthur William Rennie, Alfred J. Glendinning, Robert B. Liston, Eward P. Toll, George Jones, Errol E. Rodda, Christian P. Christensen, Charles F. Sydes, H.G. Clements, Norman C. Fricker, J.M. Romeo. Eric N. Lear, Thomas J. Bartley, Norval Birrell, Frederick H. Tubb. J.T. Hamilton Aram, Arthur Wilcock, William M. Conroy, Alex. H. Miller, Patrick J. Cunningham, Charles S. Mitchell, John R. Maddern, James Roadknight, Harry Arundel, Jack C. McKellar, duncan M. McKellar, George S. Manfield, Edgar C. Holmes, George A. Young, Raymond A. Gardiner, William B. Bell, William Opie, George R. Scott, Richard V.B. Vine, Herbery S. Marshall, Hugh St Omer Dentry, George B. Fullerton, Harry Oulton, Iva F. Morieson), School Honor Books, Drawing, Presentation of 30,000 pounds to the British Red Cross at Melbourne Town Hall .8) 1918 .9) 1919 - Photographs of World War One soldiers from the Education Department, Margaret Montgomery Memorial, 1918 Act relating to State School Teachers, State Scolarships, Victorian State Schools' Horticultural Society, Pneumonic Influenza, Spanish Flu, epedemic, swimming and life savinfJunior cadet training, vacancies in Fiji, School Committees, Arbor Day, Arbour Day, Henry Harding of Yinnar, Planting Trees and Shrubs, Juvenile Crime, The use of 'Get', Soldier-Teachers from Overseas in Congress London, Australia's Effort in the War, Military, Working Bees, Tree Planting, fence building, Welcoming Home a Returned Soldier, Avenue of Honour planting, Discipline, Unveiling an Honor Board, School gymnasium, school tennis court, E. E. Crogger grave at Aldershot, The School Honor Book. War Relief Fund, Commonwealth War Record, Caulfield Military Hosptial, ANZAC Day Pilgrimage, Jimmie Panikin, Donald Fraser, Arthur Mee, Card Sun Dial, Balboa Day in Honolulu, William Hamilton, Alfred Jackson, The Backward Child, Flies, Language Teaching and Learning, Spelling, The Education of the Adolescent, victorian education gazette, education gazette and teachers' aid, sloyd, william a. cavanagh, james i froebel, school, education, world war one, memorials, alfred williams, exploration and settlement, cadets, australian naval college, bernard o;dowd, birds, swimming, drawingempire league, eucalypts, paper in history, forestry, arbor day, identification of trees, forestrey museums, fiji, gravel hill school band, horticulture, hygiene, gould league of bird lovers, life saving, la perouse, bandin, j. holland, w. hamilton, charles sturt, principles of archimedes, james holland, william hamilton, scarsdale old boys' reunion, foundling home melbourne, montessori education, open air schools, james hughes, marie corelli, flinders sydney harbour, major mitchell's map, tooth brushing, r.h.s. bailey -
 Federation University Historical Collection
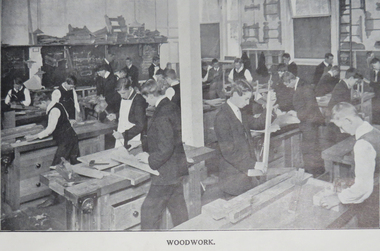
Booklet, Baxter & Stubbs, Ballarat Junior Technical School Prospectus, 1913, 1913
The Ballarat Junior Technical School was a division of the Ballarat School of Mines. It was a school for preparatory technical work in trade, art and science. it opened in 1913 in the bluestone building adjoining Dana Street Primary School. In 1921 in moved into a custom built brick building on the Ballarat School of Mines site. 23 page soft charcoal coloured book. Contents include: Aim of the School, curriculum, compulsory drill, evening school, rules, work programme. Images include: Modelling Class, Sheetmetal Work, Experimental Science, woodworkballarat school of mines, the ballarat junior technical school, alexander peacock, frank tate, donald clarke, d.f. skewes, w. stone, w. fenton, john fraser, p.j. pringle, a.e. cutter, hugh v. mckay, e.c. chamberlain, d. maxwell, f.a. event, frank hassell, clegg, miller, p.s. richards, john white, w.p. davies, m.b. john, jelbart, trahar bros, gower, benoit, stansfield and smith, w.h. chandler, arthur farrer, percival selwyn richards -
 Federation University Historical Collection
Book, Ballarat School of Mines Minute Book , 1876-1881, 1876-1881
The Ballarat School of Mines was established in 1870 and was a predecessor institution of Federation University. The first president of the Ballarat School of Mines was Redmond Barry.Half leather bound ledger containing handwritten minutes of the Ballarat School of Mines. Includes: * Foundation Class in Pharmacy and Botany (17/04/1979) * Female Telegraphy Students (12/06/1917)ballarat school of mines, henry richards caselli, w.h. barnard, flude, usher, august hoelscher, warrington rogers, james oddie, robert m. sergeant, ferdinand krause, curator, w.p. bechervaise, james flude, school of mines exhibition committee, james bickett, hugh grey & son, ballarat juvenile industrial exhibition, charles shoppee, g.o. preshaw, alfred mica smith, rivet henry bland, r.w. newman, noble wilson, william burbidge, marie barbour, george hall, susan cahir, mary troy, pharmacy, botany, f.f. bailliere, richard viccars, mary usher, f. pinkerton, pyrites works, james campbell, telegraphy, william bailey, judge rogers, ballarat school of mines certificates, william f. west, j. bryant, henry obree, w.h. odgers, edward debois, james darby, redmond barry, pharmacy board, w.h. keast, george perry, f.w. niven, fedinand von mueller, benjamin trewhella, d. miliken, charles strachan, william wilson, r.a.f. murray, e.p. figgis, charles flude, laboratory, john richards, eyres brothers, john armstrong, h.b. de la poer wall, c.f. crouch, william h. keast, frank pintkerton, hugh grey -
Federation University Historical Collection
Book - Book - ledger, Ballarat School of Mines Council Minutes, 1946-1949, 1946-1949
SMB Library establishment - P.58 Former Ballarat Supreme Court House - p64 Red Cross Hut - p.69, p. 80 SMB Art Society, p.106 SMB Bicycle Shed - p. 109A larger quarter leather bound ledger with handwritten minutes of the Ballarat School of Mines Council. Pg. 8 - Retirement of Principal pg. 17 - Bicycle Accommodation Pg 24 - Visit of Minister of Public Instruction the Hon, F. Field pg. 32 - Interview with A.A. Robertson pg 46 - Congratulations to Ken Palmer for securing the commission for the execution of a bust for the Avenue Prime Ministers at the Ballarat Botanical Gardens. pg 64 - Former Ballarat Supreme Court pg 69 - Red Cross Hut pf 74 - Radio Mechanics pg 104 - Act of Remembrance for BevanA. John Pg 104 - Cobb & Co Coach pg 105 - Site for new Junior Technical School pg 109 - Dr Sydney Pern's collection to Native Weapons pg 120 - The late Bevan A. John pg 122 - Transfer of the Electrical Department to the former Ballarat Supreme Courthouse pg 129 - Pottery room pg 140 - The late D. Maxwell pg 145 - Dr Pound's Resignation pg 146 - Endowment Plantation pg 168 - Art School LIbrary pg 171 - Appointment of Principal - Richard W. Richards pg 237 - Farewell to Dr. J.R. Pound pg 241 - Architecture Course pg 270 - Appointment of E.J. Barker ballarat school of mines, ballarat school of mines minutes, e.j. tippett, m.g. beanland, k. sutton, a. heseltine, n. callow, m.b. john, d. maxwell, ballarat technical art school, bicycle accommodation, hollway, l. lederman, l.j. wilson, linotype machine, harry brew, dressmaking, reconstruction training, f. field, blacksmithing, gas heaters, d. taylor kellock, neville bunning, moulding class, a.a. robertson, gas fired kiln, d.i. johnston, entrance signboard, r.w. richards, kenpalmer, prime ministers avenue, e.g. savage appointment, r. calder resignation, brick class room, red cross hut, radio mechanics, cobb and co coach, a.m. wilkenson, b. bryan, beven a. john obituary, art society, d. maxwell resignation, pern collection of native weapons, ceramics, pottery, donald i. johnston, donald i johnston resignation